
1. Mirror-slab diya tray with gold bead spill
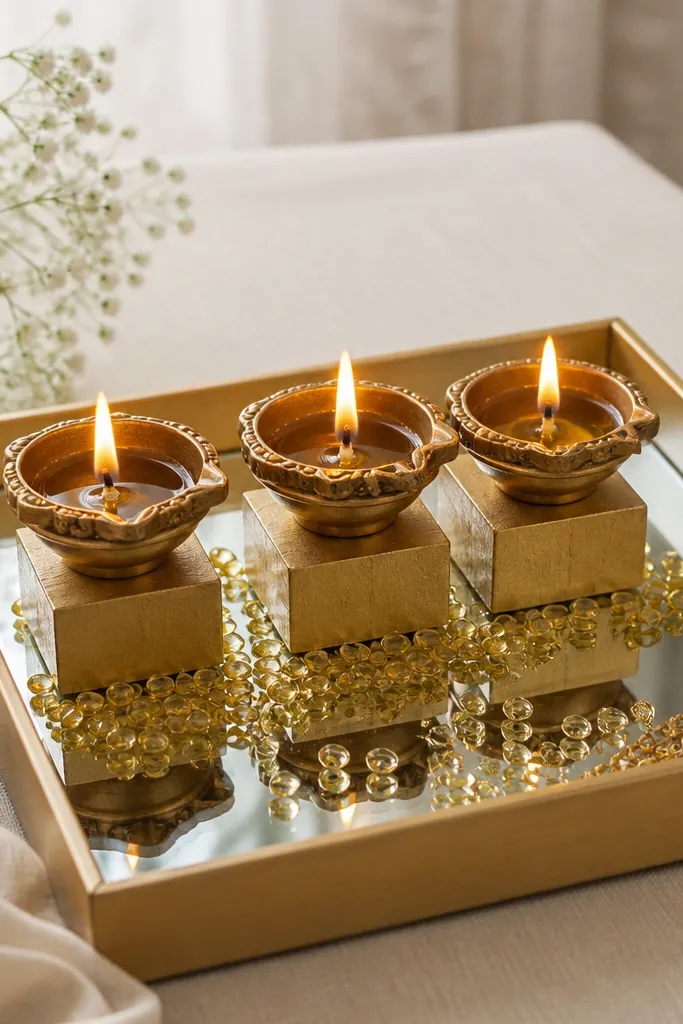
This setup looks expensive because the mirror turns each flame into a crisp glow instead of a weak point. I use a square mirror sheet (about 8x8 inches) inside a shallow tray so the edges catch light like a boutique centerpiece. Place three diyas on small risers so the flames sit higher than the bead spill. The gold beads read like jewelry, and the warm mirror reflection makes the whole thing look richer in photos and in person.
Start by trimming a mirror sheet to fit a shallow tray (about 10 inches wide tray works well). Then paint or wrap two small blocks and one thicker coaster in gold craft paint, and place the diyas on the blocks so the flames rise above the bead level. Add a ring of gold glass beads around the bases — keep the spill uneven so it looks styled, not scattered. Finally, drape a 10-12 inch gold chain on one side of the tray and stop it before the flame area.
Use flameless diyas for testing the layout first; once you like the glow pattern, swap to real diyas carefully.
Don’t glue beads too close to the wick area — heat makes cheap craft glue go cloudy.
2. Terracotta pot cluster with painted rim diyas
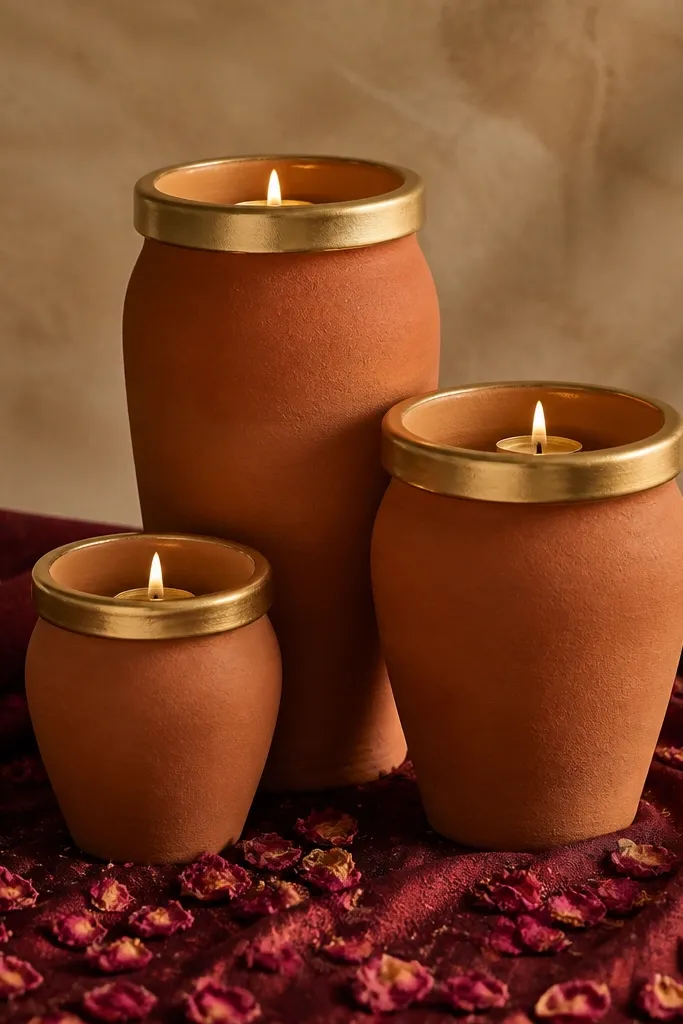
Terracotta already looks “handmade premium,” but the painted rim makes it look finished, like a designer set. I like this for medium to warm skin tones and brownish interiors because the gold rim warms the room without looking loud. The triangle layout hides empty space and makes the cluster feel intentional. Rose petals add a soft color layer so the flame doesn’t look isolated.
Start with three terracotta pots: one 3.5 inches, one 4.5 inches, one 6 inches tall. Paint only the rim and a 1/4 inch band down using metallic gold acrylic; let it dry fully. Cover the tray or floor spot with maroon fabric (plain cotton or matte silk). Place the largest pot at the back, medium on the left, small on the right, then set one diya inside each. Scatter rose petals around the base, staying a few inches away from the flame.
Seal the gold paint with a thin coat of matte varnish so it doesn’t rub off when you move the setup.
Avoid glossy fabric under terracotta — it makes the whole thing look like a craft table.
3. Champagne satin runner with floating diya holders
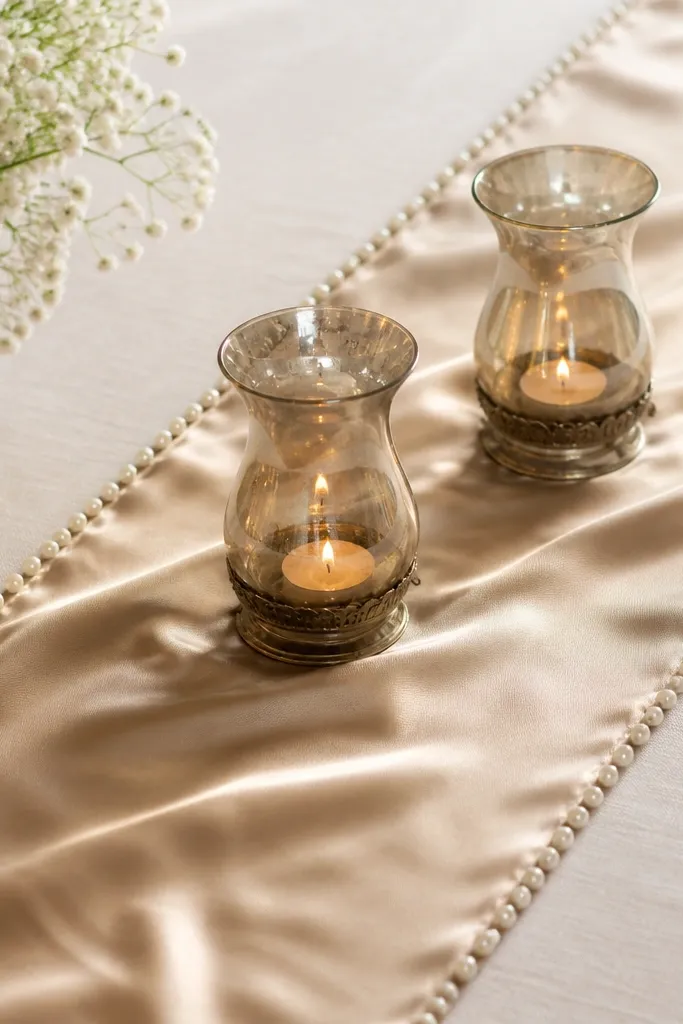
This works because satin reflects light softly, so the flame looks like part of a coordinated centerpiece. I use champagne because it flatters warm lighting and doesn’t clash with most rangoli colors. The “floating” effect comes from placing the holders directly on the fabric with a firm base under them, so nothing sags. Pearls at the edges make it feel bridal-grade, not home-made.
Pro tipFold the runner slightly at one end (a clean 1-inch hem) so it looks styled, not casually laid.
Start by ironing a champagne satin runner (about 10-12 inches wide, 24 inches long) to remove wrinkles. Put a thin, flat sheet of felt or craft foam under where the holders will sit so the fabric stays smooth. Place two hurricane-style holders (silver or champagne metallic) on top, spaced 8-10 inches apart. Add one diya inside each holder. Then line the runner edges with pearl string or loose pearl beads, leaving the center clear for the glow.
AvoidDon’t use shiny red satin — it turns the flame orange and makes the setup look messy.
4. Rangoli border tray with white stone and teal diyas
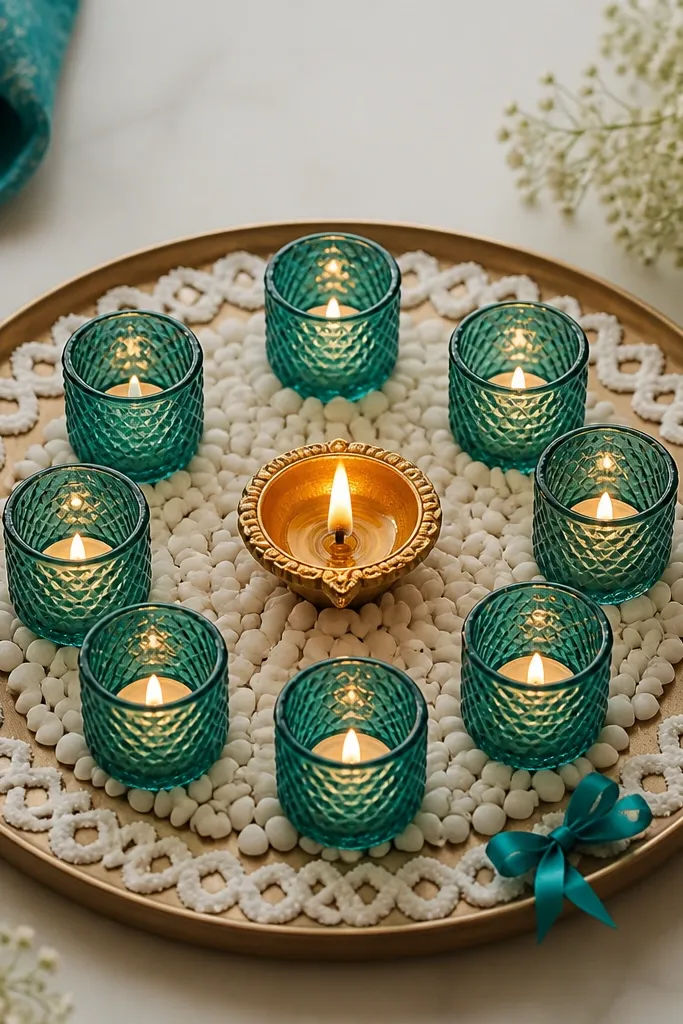
This one looks expensive because the color contrast is sharp and the texture is clean. White stone and white rangoli powder create a premium, spa-like base, while teal votives add a jewel tone that reads high-end under candlelight. It’s especially flattering if your pooja area has warm wood or beige walls — teal pops without looking cheap. The ring border also gives structure, so your eye knows where to land.
Start by choosing a round tray (10-12 inches). Tape a thin circle guide on the tray’s center area and dust a ring of white rangoli powder or fine white sand. Place four teal votive holders inside the ring at equal spacing, then add one central diya. Fill the empty spaces between holders with small white stones (1/2 inch size). Finish by tying a small 6-8 inch teal satin ribbon and letting it touch the tray edge.
Spray the white sand lightly with a mist of water on the underside only, so it stays in place without clumping on top.
Skip bulky stones — large rocks look like garden décor.
5. Black acrylic tray with gold fan cutouts
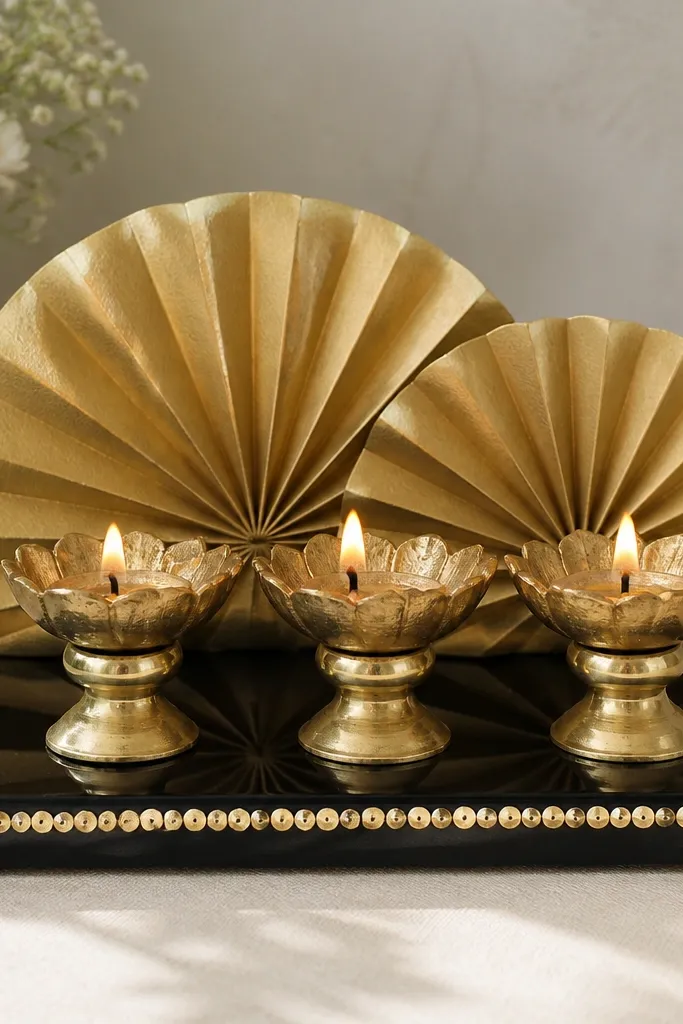
Black glossy surfaces make the flame look crisp and expensive because the contrast is high. I use gold fan cutouts because they create a “backdrop” without needing a bulky frame. This setup suits modern homes with black/grey décor and it looks great in evening photos. The key is to keep the décor behind the diyas, not mixed around them, so the flame stays the hero.
Start with a glossy black acrylic or lacquered tray. Paint three small stands in gold (use candle holder bases or stacked cardboard wrapped in foil). Place two gold fan cutouts behind the diyas at a slight angle, like they’re fanning out from the center. Add three diyas on the stands in a shallow triangle. Sprinkle tiny gold sequins in a straight line across the front edge to finish.
Use matte gold paper for the fans — glossy paper reflects too much and looks harsh.
Don’t use glitter all over the tray — it looks dusty and cheap under flame.
6. Jute-wrapped risers with marigold ribbon edge
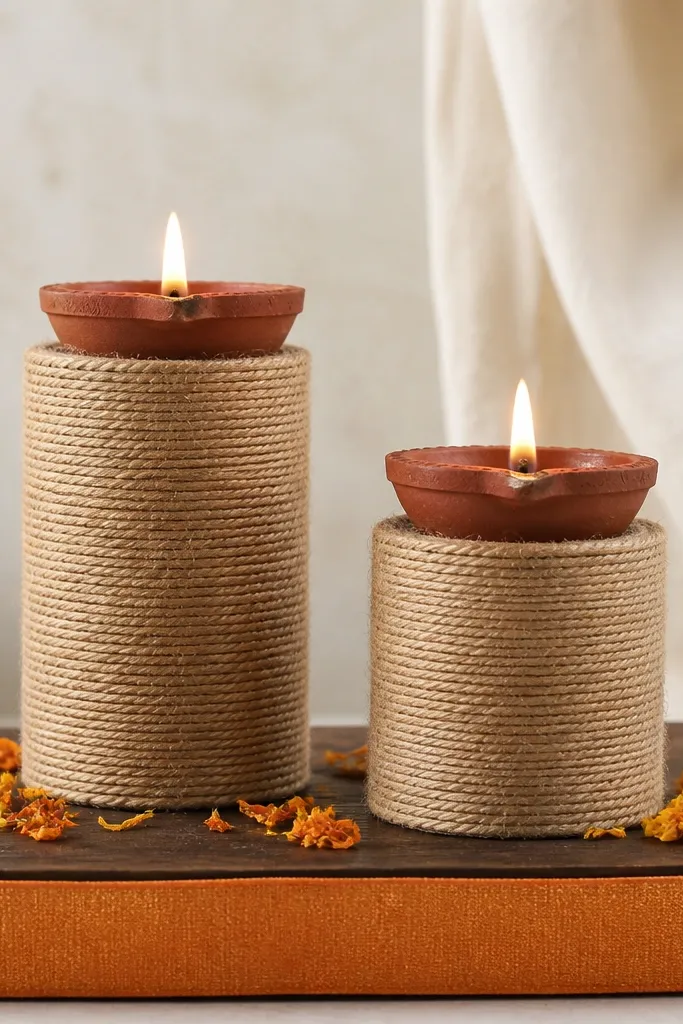
Jute looks rustic, but when you wrap clean, tight layers and finish it with a ribbon edge, it reads expensive. The marigold ribbon adds a Diwali-specific color cue without turning the setup into a costume. This is ideal for entryways where wind might move light décor — jute and wooden boards stay put. It also flatters warm lighting and gives a soft, earthy tone that doesn’t fight your rangoli.
Pro tipCut ribbon ends at a slight angle so they don’t fray quickly during the event.
Start with a wooden board or thick cardboard base. Wrap two or three small cups/blocks in jute twine, pulling tight and securing with hot glue at the bottom. Tie a marigold-orange ribbon strip (1.5-2 inches wide) along the front edge of the board. Place the wrapped risers in a line or triangle and set one diya on each. Scatter dried marigold petals around the base in a half-moon shape.
AvoidAvoid uneven jute gaps — loose wrapping looks like packing twine.
7. Glass vase with floating teal diya ring
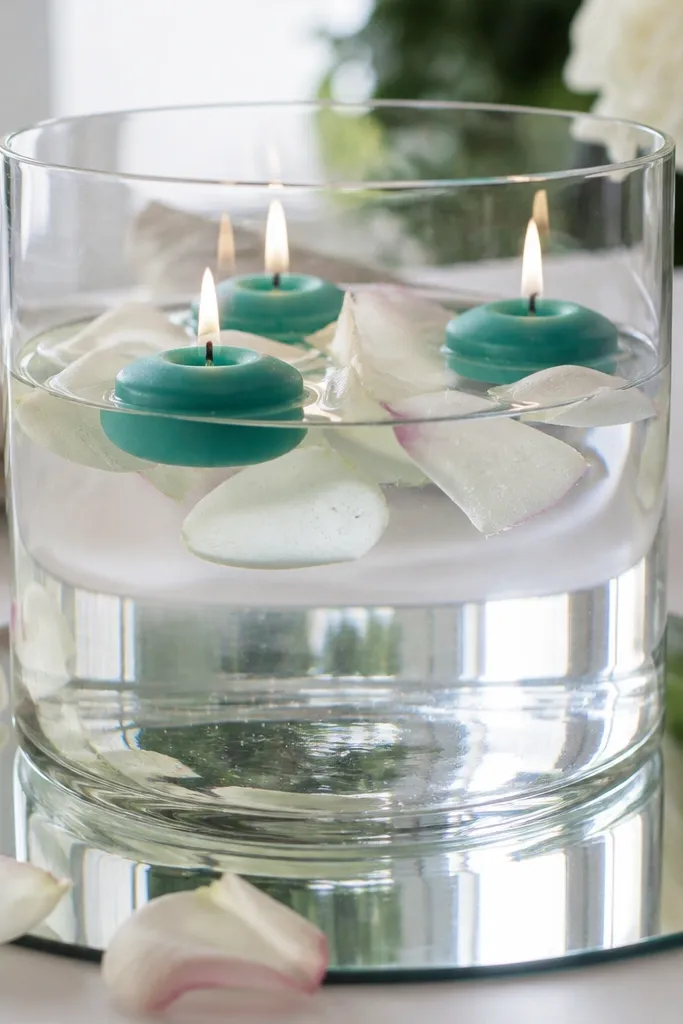
Floating teal candles look instantly upscale because you get a clean ring of light, not random flames on a surface. The mirror plate underneath makes the reflection stronger, so it looks like a salon centerpiece. This setup works best when you can see it from the front, like on a dining table or pooja counter. It also looks flattering with rose gold décor — the petals soften the teal.
Pro tipUse distilled water if you have hard water — it keeps the glass clearer for longer.
Start with a clear glass vase (8-10 inches tall) and a mirror plate base. Add water about 2-3 inches deep so the candles float safely. Place 5-7 teal floating votives around the center, aiming for equal spacing. Add 3-4 rose petals on top and let them drift. Set the vase on the mirror plate and keep the table surface dry around the base.
AvoidDon’t overfill — too much water makes the candles bump and look sloppy.
8. White marble-look platter with gold leaf corners
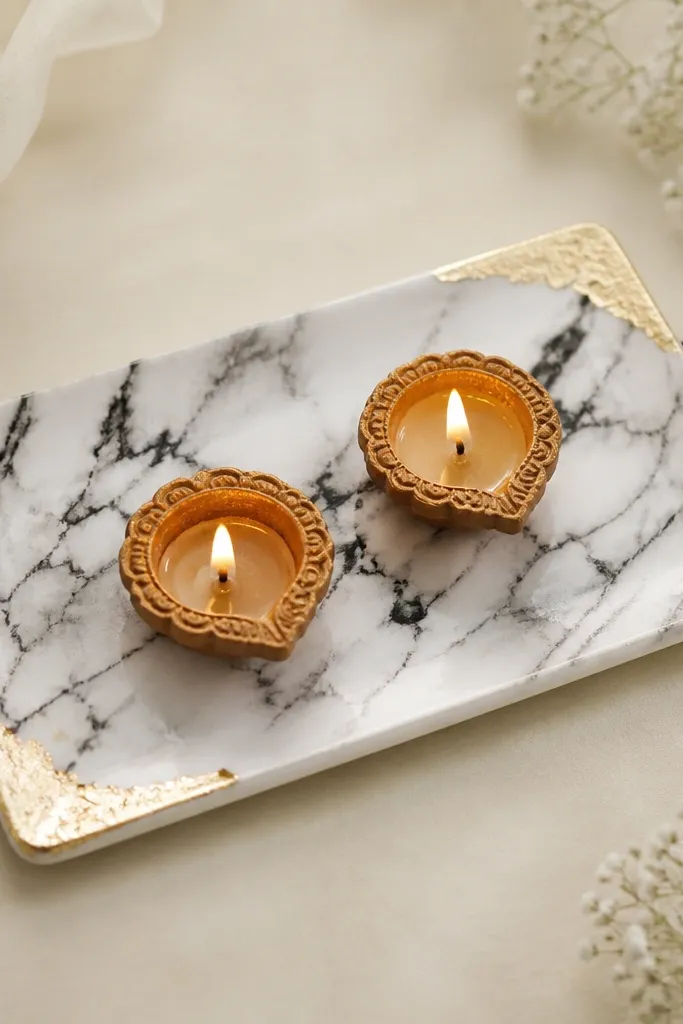
White marble look makes everything feel expensive because it gives a clean, high-contrast background for the flame. Gold leaf at corners adds “art piece” energy without needing a lot of items. I like this when your home has white walls or black-and-white décor because it ties the room together. The two-diya placement is intentional; less stuff reads more premium.
Pro tipPress gold leaf with a dry cotton cloth — it transfers faster and looks cleaner.
Start with a white marble-look platter (you can buy one or use a white tray with black veining vinyl). Place two small diyas on either side of the center. Tear tiny pieces of gold leaf and press them lightly into the top-left and bottom-right corners, not over the diya area. Add a thin black ribbon behind the diyas so it forms a backdrop. Keep ribbon ends tucked so they don’t hang into the flame space.
AvoidAvoid gold leaf covering the full tray — that looks like craft glitter.
9. Book-stack diya stand wrapped in fabric
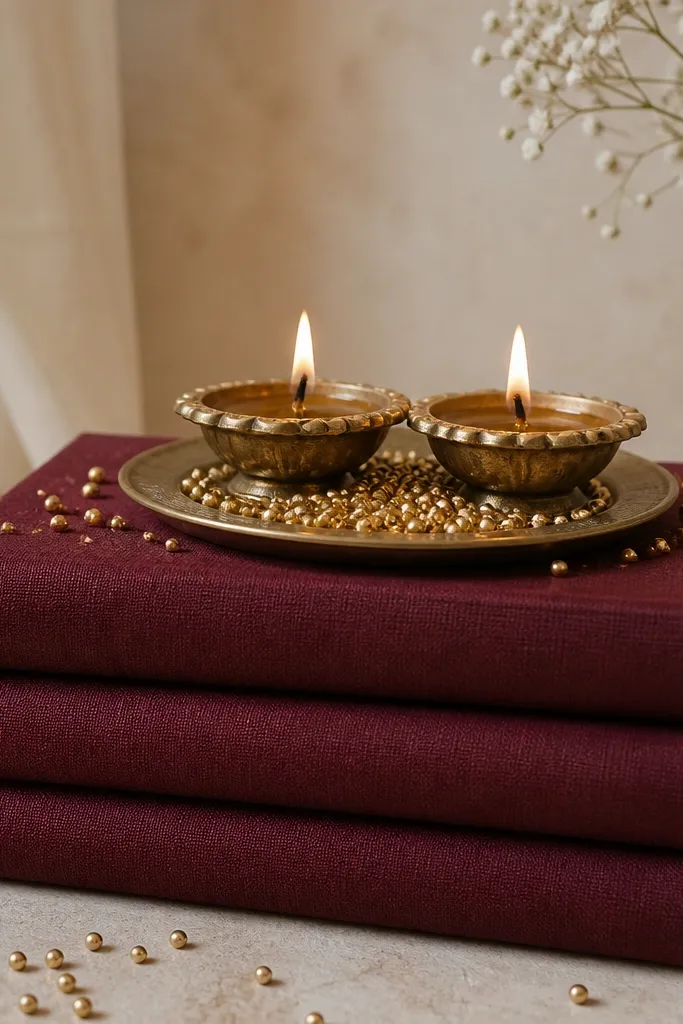
Height is everything, and this is the cheapest way to create it. Wrapped book stacks give you a sturdy platform, and the fabric makes the stack look like a custom pedestal. Wine cloth looks rich under diya light, especially if your home has warm beige tones. It also works for people who want a diya display but don’t want to drill or buy stands.
Start by stacking 3-4 books of the same height, then cover the sides with wine-colored fabric. Use a hot glue gun at the back corners only so the front looks smooth. Place a small round tray on top with a gap between the tray edge and the cloth seam. Set two diyas on the tray, one left and one right, leaving space in the center. Sprinkle gold beads around the tray base in a loose crescent.
Cover the books with plain cotton first, then add one glossy layer on top if you want extra reflection.
Don’t use wrinkled fabric — the stand looks homemade instantly.
10. Gold foil cylinder with mini diya steps
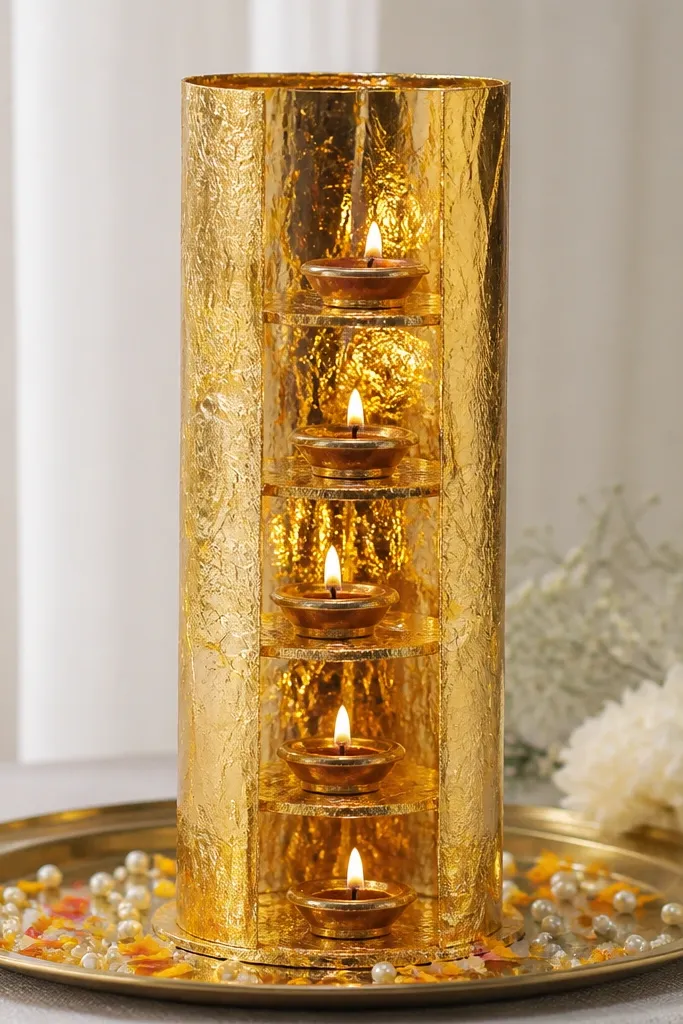
Cylinders read expensive because they look like candle-stands from a store. Gold foil gives a metallic glow that makes the flames look brighter without adding more diyas. The mini tiers create a “staircase” effect, so your eye travels upward like a centerpiece. This is a great choice for small tables because it uses vertical space instead of spreading out.
Pro tipUse mini diyas or tea lights; full-size flames look too tall inside the tube.
Start with a thick cardboard tube (from wrapping paper) and wrap it in gold craft foil, securing with double-sided tape at the back seam. Cut three small circular platforms from foam board and cover them with gold paper, then fit them inside the tube at different heights. Place one mini diya on each tier platform, keeping the wicks centered. Put pearls and a few marigold petals around the base on the tray. Keep the top tier slightly lower than the tube rim so it looks balanced.
AvoidDon’t place tiers too close — overlapping flames make it look chaotic.
11. Rose-gold tray with pink ribbon bow and 5 diyas
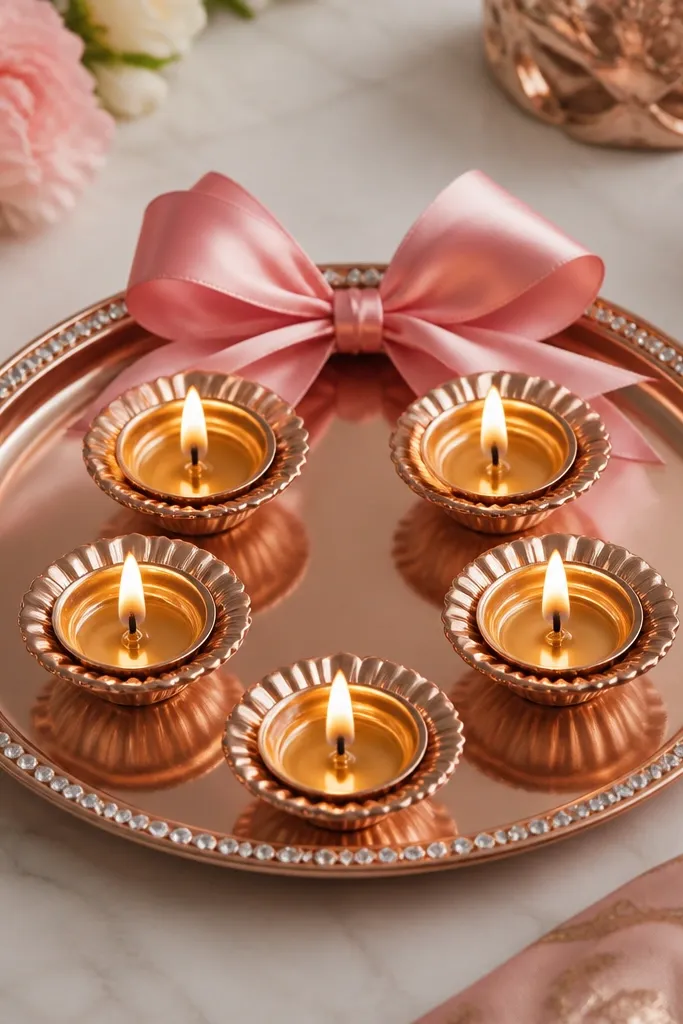
Rose-gold instantly makes a diya display look like party décor, not a simple pooja setup. The pink ribbon bow gives a focal point, and rhinestone edges trick the eye into seeing “jewelry-like” finish. I like this palette for weddings and families who decorate with pink tones — it blends with both warm and cool lighting. Five diyas in a star pattern looks fuller than three without looking crowded.
Start with a rose-gold metallic tray (or paint a tray with rose-gold metallic acrylic). Place five diyas: one in the center and four around it, each about 2 inches from the center. Add a pink satin ribbon bow on the back edge of the tray, not underneath the diyas. Stick a few rhinestones along the tray rim at three points so it doesn’t look tacky. Finish with a light sprinkle of rose petals in the outer ring only.
Make the bow with 1.5 inch wide ribbon and keep tails 3-4 inches long.
Avoid covering the tray completely with rhinestones — it reads costume.
12. Terracotta saucer with cracked white glaze look
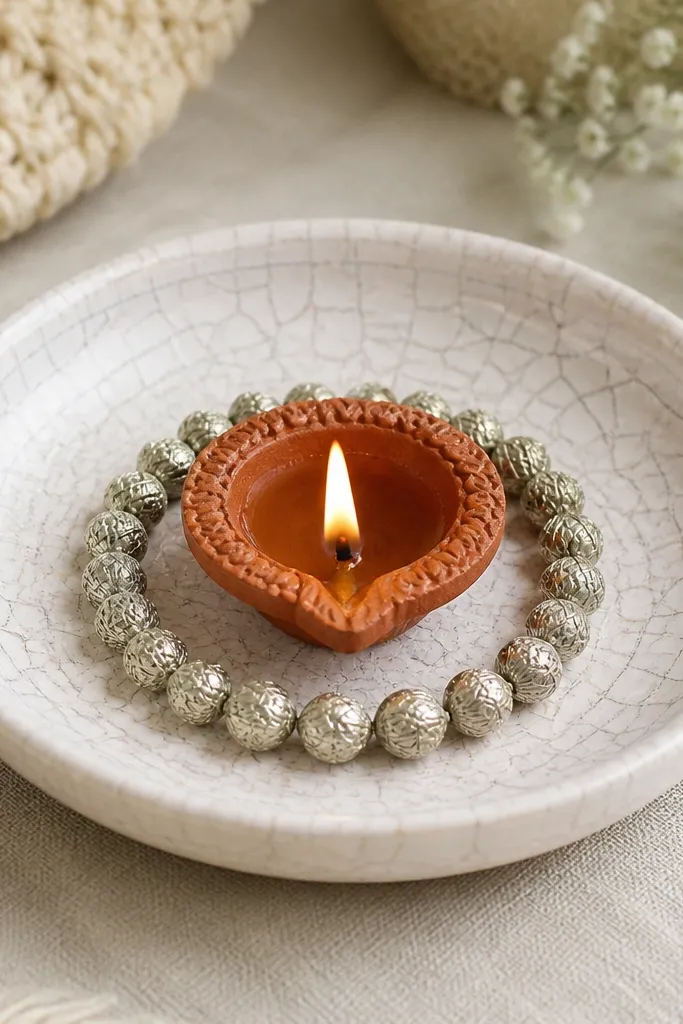
This idea looks expensive because the texture looks like aged ceramic. Crackle paint gives you that high-end pottery surface without actually buying expensive pieces. A single diya on a saucer looks intentional, especially when you add one metallic texture around the edge. It’s flattering in any room because neutral white works with every rangoli color. The silver jute beads add a subtle sparkle that doesn’t overpower the flame.
Pro tipSeal the crackle finish with a clear matte seal so it stays smooth to the touch.
Start by cleaning a shallow terracotta saucer and painting it with white acrylic. Once dry, apply crackle medium (or crackle varnish) and let it crack naturally; don’t speed it with heat. After it dries, add a thin ring of silver jute beads or metallic thread around the rim using hot glue. Place one diya in the exact center on a small metal plate so the flame stays stable. Set the saucer on a bigger neutral base like a plain tray or white cloth.
AvoidDon’t use thick paint layers — they prevent proper cracking.
13. Banana leaf base with gold rim diyas
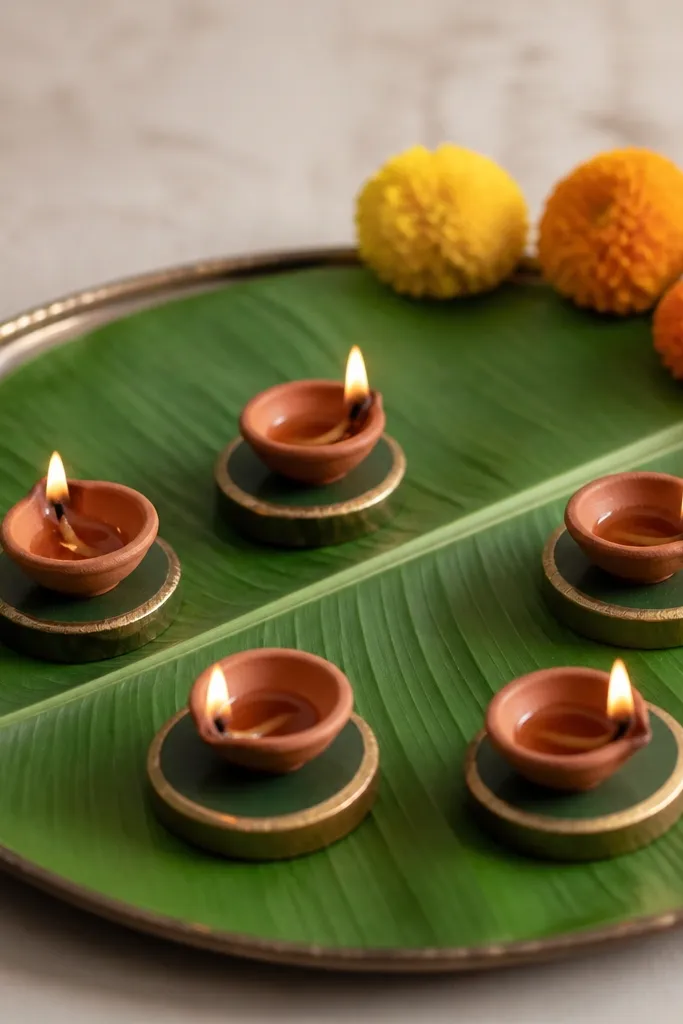
Banana leaf under diyas looks premium because it adds an organic texture and a real Diwali connection. Gold-painted rims make the holders look like custom metalware. This setup looks best when your pooja area uses natural materials like cane or wood. The leaf also frames the flames, so the display looks neatly arranged even with simple items.
Pro tipUse a thin layer of tissue under the leaf to protect your tray from dripping wax.
Start by laying a fresh banana leaf (or cleaned leaf) flat and trimming edges so it fits a tray size. Place small metal diya stands on the leaf and paint the rim area with gold acrylic using a fine brush. Arrange three diyas evenly — one in front center and two slightly behind left and right. Tuck 2-3 marigold flowers behind the diyas on the leaf fold line. Mist the leaf lightly with water to reduce curling before you place it.
AvoidAvoid dirty leaf edges — they make the whole setup look neglected.
14. Matte black tray with white pearls and one tall diya
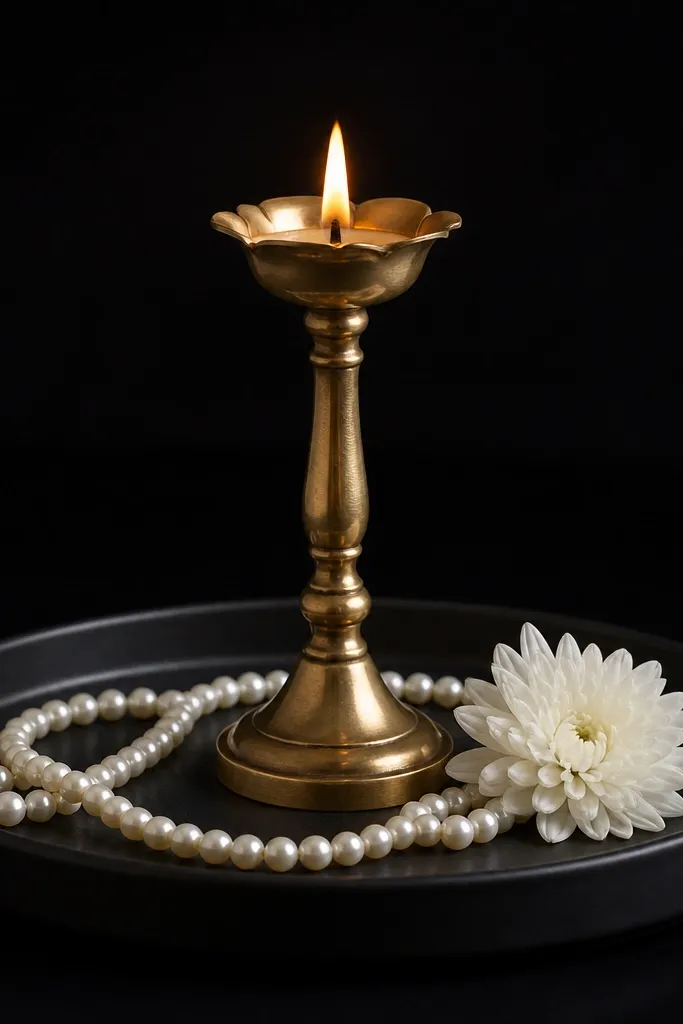
One tall diya looks expensive when the rest is minimal. Matte black hides mess and makes the flame glow look intentional. White pearls give a clean, bridal effect that photographs well because the pearls catch light without looking glittery. This is perfect for small corners where you don’t want a wide spread. It also flatters people who prefer simple décor — your eye stays on the flame and the texture.
Start with a matte black tray or paint a tray with matte black acrylic. Place a single tall diya in the center on a small metal saucer. Curve a strand of white pearls around the base in an S-shape so it feels “designed,” not randomly dropped. Add one small white flower or a tiny cluster of baby’s breath at the side away from the flame. Keep everything else empty so the black tray does the heavy lifting.
Use a pearl strand that’s already threaded; loose beads roll and ruin the shape.
Don’t add more diyas to fill space — it kills the premium minimal look.
15. Silver tray with mirrored coaster ring and 7 mini diyas
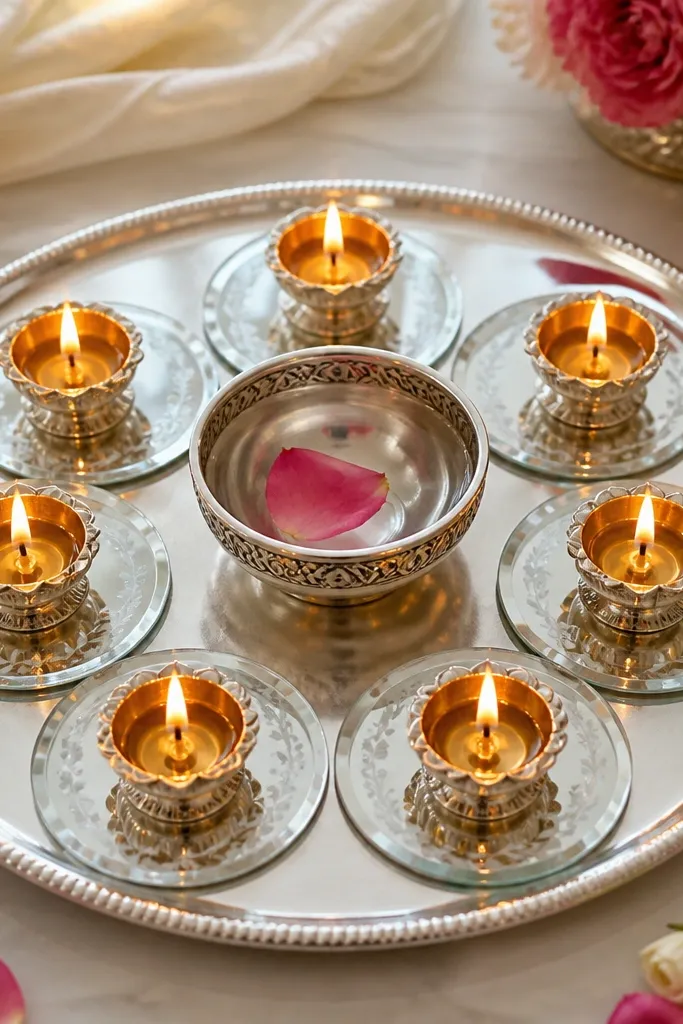
This setup looks costly because it layers reflections: mirrored coasters plus a silver tray. Seven mini diyas make the flame pattern look dense without needing big décor pieces. The mirrored ring acts like a frame, so the center feels like a centerpiece. This works well on dining tables because it stays compact and still looks “full.” Silver and white also flatter cool-toned interiors.
Start by placing a silver tray on your table. Cut or buy 7-8 mirrored coasters and arrange them in a circle shape on the tray. Place one mini diya inside each coaster gap, keeping the spacing equal. Add a small silver bowl in the center with 1-2 tablespoons of water and a rose petal. Light the diyas last so the water doesn’t evaporate in the meantime.
Use unscented ghee for cleaner flame behavior if you’re doing a longer event.
Avoid placing diyas directly on the mirror — wax drips can scratch and stain.
16. Gold-painted bottle cutouts with hanging diya string
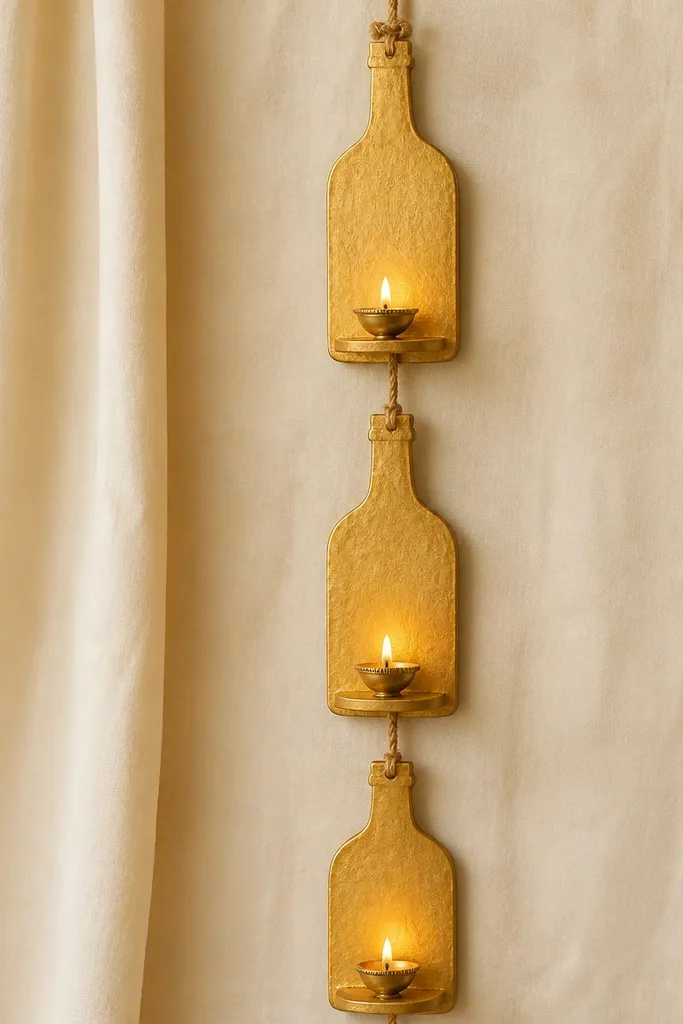
Vertical diya décor looks expensive because it uses space like event planners do. The gold-painted bottle shapes give a structured backdrop, and the hanging mini diyas create movement and sparkle. This is great for balcony railings or behind a pooja mandap where you want height without clutter. The cream background keeps the gold warm and stops the whole thing from looking busy.
Pro tipUse mini diyas with shorter wicks so the flame stays controlled on hanging holders.
Start with three bottle-shaped plywood or thick cardboard cutouts, paint them gold, and let them dry fully. Attach each cutout to a wall or stand using strong twine or jute so they hang evenly. Tie a string across the space and hook small mini diya holders onto it with clips or thin wire. Keep diyas spaced 5-6 inches apart so flames don’t compete. Cover the back area with cream cloth so the gold reads clean.
AvoidSkip long wicks — they stretch the flame and look messy on vertical strings.
17. Pearl-mesh runner with three diyas in a row
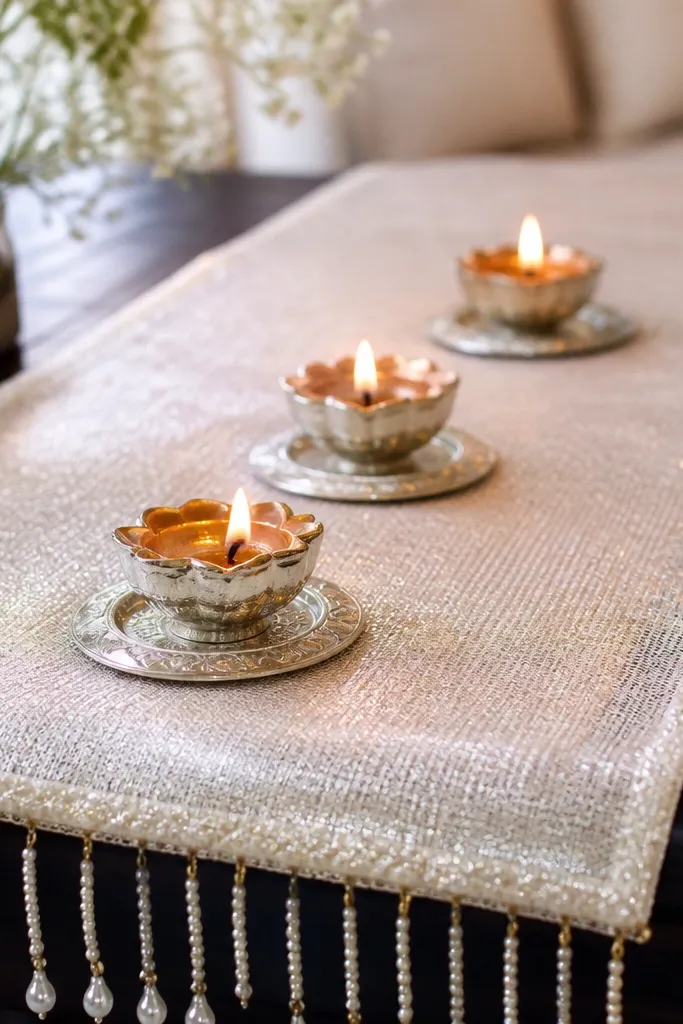
Pearl-mesh makes cheap bases look expensive because it adds a soft shimmer without glitter. Three diyas in a straight line reads neat and “store display” clean, especially when the bases match. This setup suits dining tables and side tables where people look straight down or across. The shimmer catches diya light and turns the whole surface into a coordinated background.
Pro tipCut the mesh with sharp scissors and seal edges with a tiny dab of clear nail polish on the underside.
Start by laying a pearly mesh fabric runner across the table, trimming it so it doesn’t reach the edges. Place three matching silver diya bases (or small candle holders) spaced 6 inches apart. Set one diya on each base and keep the flames equal height by using similar wick lengths. Add a few pearl bead strands at the runner ends, tying them with clear thread so they don’t slip. Tuck any loose mesh under the bases so the top looks smooth.
AvoidDon’t place diyas too close together — the flames merge visually and look crowded.
18. Emerald velvet strip with kundan-style diya holders
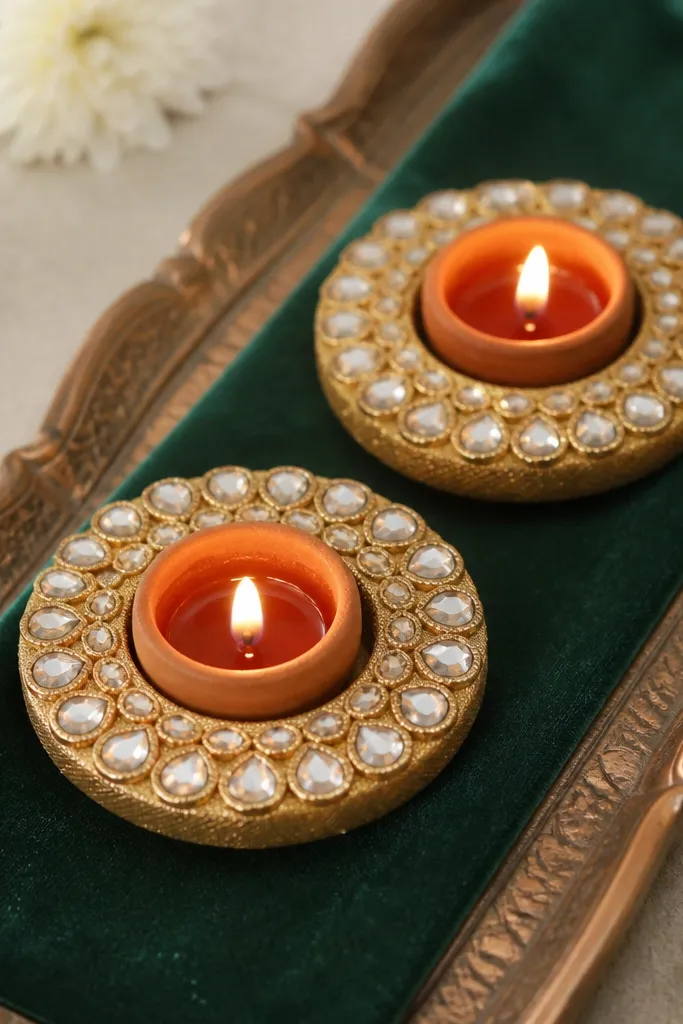
Velvet looks expensive in diya light because it absorbs glare and makes the flame glow feel warmer. Emerald is a strong color that looks rich without needing extra decorations. Kundan-style faux stones make the holders look like jewelry, and placing only two diyas keeps it from turning into a craft mess. This setup looks especially good if your home uses gold accents or if your festive outfit has green tones.
Start with an emerald velvet strip (about 5-6 inches wide) on a flat tray. Make two holders by cutting foam rings, covering them with golden felt, and sticking faux kundan stones around the top edge only. Place the holders on the tray and add one diya inside each. Keep the distance between holders around 8 inches so the velvet space frames the flames. Finish by adding one small pearl or crystal bead near each base.
Use felt under the stones so they sit securely and don’t peel when you move the tray.
Avoid sticking stones all over the velvet — it looks like random glitter.
19. White tea-light cups in pink sand with gold spoon spoon
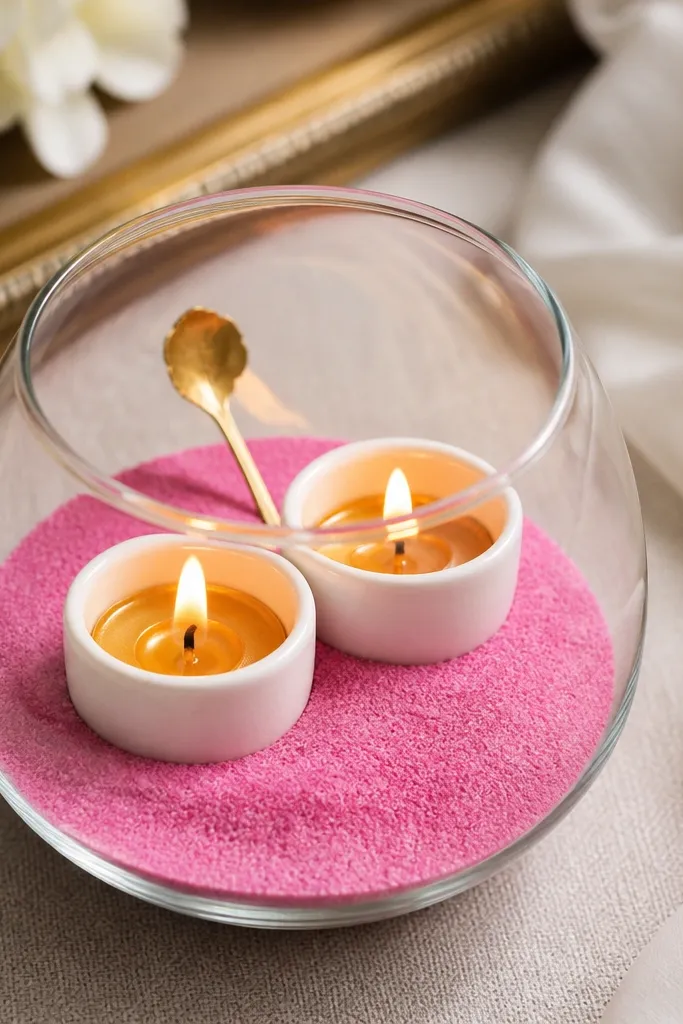
Pink sand looks like a luxury scent candle display, and that association is why it reads expensive. The white cups keep the palette clean, so the pink becomes the decorative element rather than the diyas themselves. This setup is great for small corners and for people who dislike heavy rangoli-style décor. It also flatters warm undertones because pink sand warms the flame glow.
Pro tipMist the sand lightly with water before placing cups so it holds shape while you arrange.
Start with a shallow glass or acrylic tray. Add a layer of fine pink sand (craft store aquarium sand tinted pink works) about 1 inch thick. Place 4-5 white cups in a loose square pattern and nest mini diyas inside each cup. Add a tiny gold spoon or gold-colored leaf cutout behind the cups as a focal point. Leave a small clear circle in the center so the flame area stays visually open.
AvoidDon’t use chunky sand — it looks like driveway grit.
20. Sandalwood stick base with diya candle holders
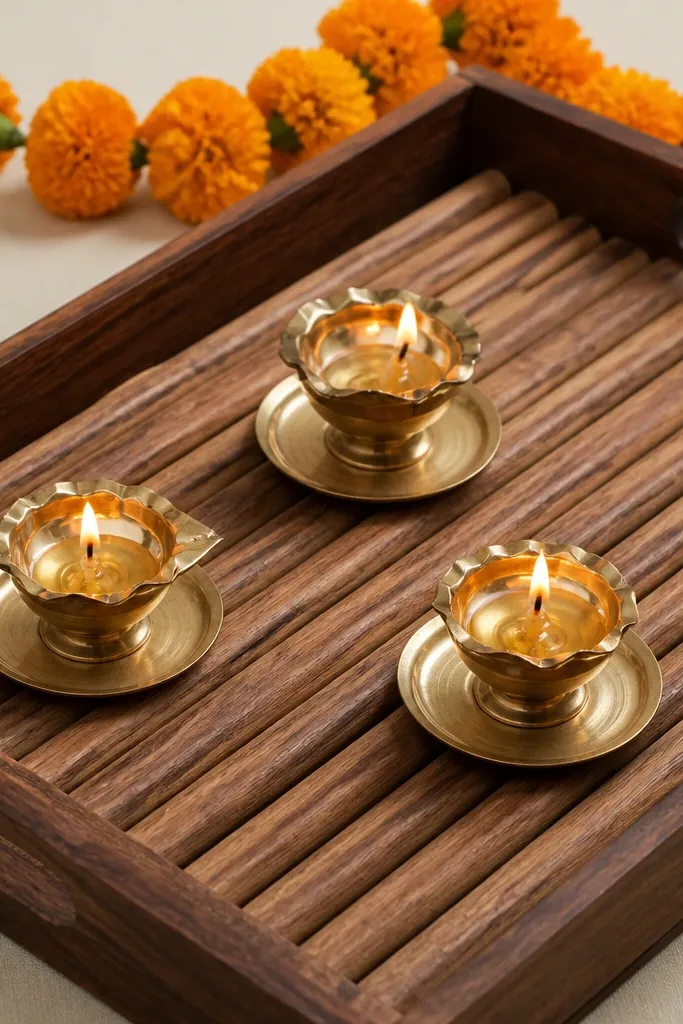
Wood-on-wood looks high-end when the pattern is tidy. Sandalwood stick lining adds fragrance and a clean texture that feels intentional. The marigold garland behind adds color without cluttering the flame area. I like this setup for pooja rooms because it feels traditional but still styled. It also works for guests because it looks presentable even from a distance.
Pro tipUse a thin clear wax paper sheet under the sticks if your tray is porous to prevent oil stains.
Start with a wooden tray and line the bottom with sandalwood sticks in a grid, spacing them evenly. Place three small metal diya holders on top in a triangle pattern. Light the diyas and then drape a thin marigold garland behind the holders, letting it hang 2-3 inches above the tray. Tie the garland ends with jute so it doesn’t slide. Keep loose petals away from the flame area.
AvoidDon’t let the garland touch the flame — keep it behind and higher.
21. Gold-rim terracotta cups with black lace runner
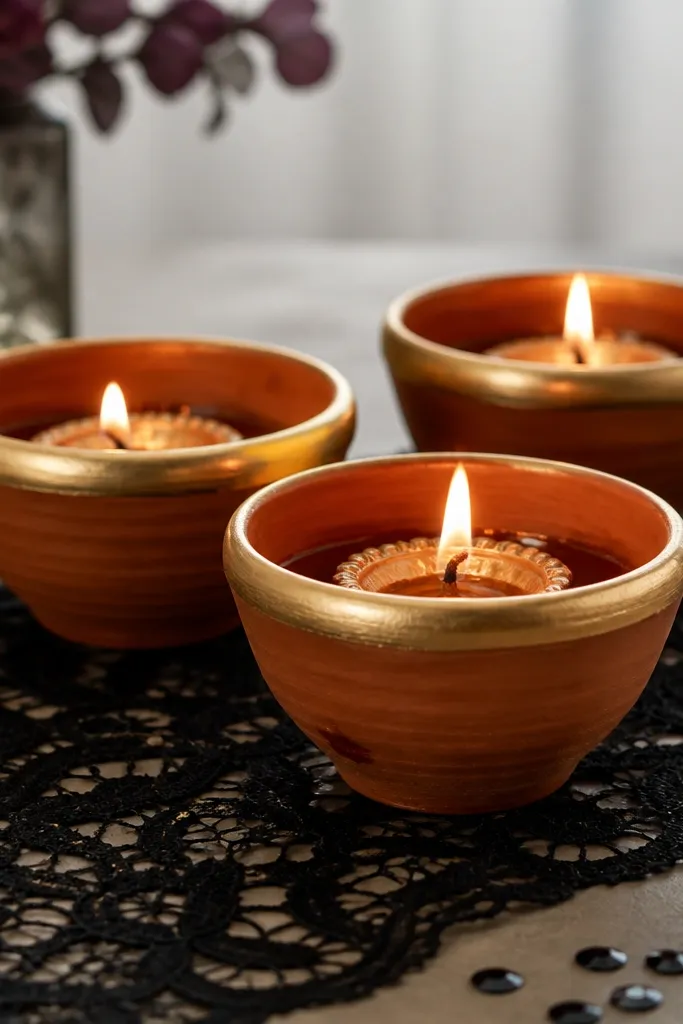
Black lace makes everything look dressed up, and it’s the fastest way to get an expensive vibe without buying new décor. Gold-painted rims tie the terracotta to the lace so it doesn’t look mismatched. This palette looks striking with deep reds, maroons, and even plain white walls. It’s also perfect for evening parties because lace creates a delicate texture that catches diya light.
Pro tipUse a lint roller on lace before placing it — dust shows under flame light.
Start by laying a black lace runner on a tray or table area, trimming it so it doesn’t cover the flame space. Paint gold rims on three terracotta cups (about 4-5 inches tall), leaving the center clay unpainted for contrast. Place the cups in a triangle and insert one diya into each cup. Sprinkle a few black sequins only along the front edge, not around the wicks. Finish by adjusting the lace so it frames the tray edges evenly.
AvoidAvoid painting the whole cup gold — it looks like a cheap craft finish.
22. Chalkboard-style base with white rangoli powder lettering
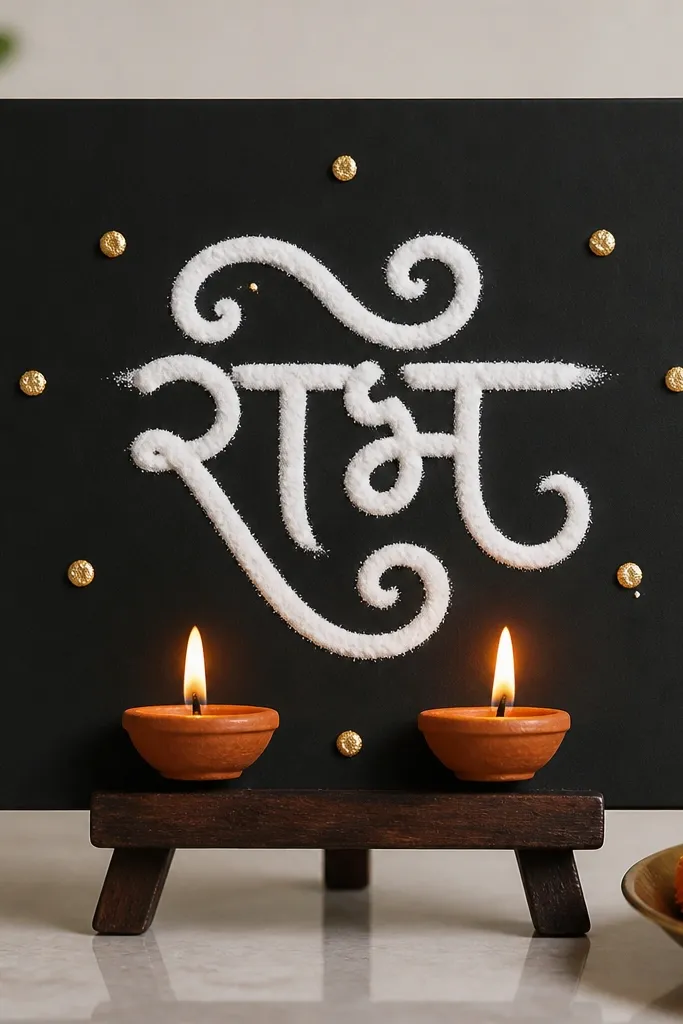
A matte black background plus white powder lettering looks like café décor, not a home craft. The contrast makes the flames pop, and the gold foil dots add a finishing touch that looks intentional. This setup is great for entryways because it reads clearly from across the room. It also helps you keep the diya décor neat while still adding a custom Diwali message.
Pro tipUse a small sieve for powder so letters stay crisp.
Start with a matte black board (or paint a small wood board black and let it dry). Lightly sketch a simple layout with pencil: two small lines of white rangoli powder letters or a short symbol like a diya icon. Place two diyas at the bottom center on small metal holders. Add gold foil dots along the sides of the letters using gold craft paint or tiny foil flakes pressed with a dry brush. Keep all powder away from the wick area so it doesn’t blow into flames.
AvoidDon’t use wet paste for letters — it smears and looks messy.
23. Coconut shell half with mini diya and gold thread wrap
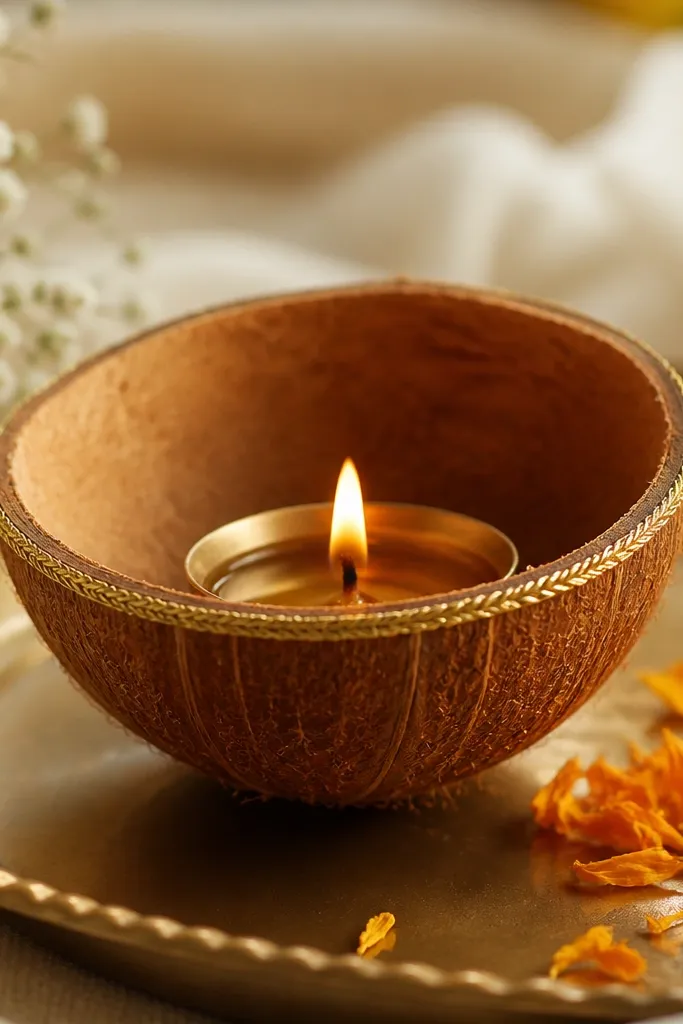
Coconut shell has that natural, artisan look, and gold thread makes it feel like a premium souvenir instead of kitchen scrap. Mini diyas keep proportions neat — shell interiors can be uneven, so smaller flames look better and safer. This works well for budget setups because shells are free or cheap, but the finish is what makes it look expensive. The gold thread catches flame reflection and gives a warm, festive edge.
Pro tipPolish the shell with a dry cloth before wrapping thread so it looks smooth in photos.
Start by cleaning and drying coconut shell halves thoroughly. Wrap the rim with gold thread or metallic jute yarn, securing with hot glue at the back. Place a mini diya inside the shell on a small metal insert so it stays stable. Arrange three shells in a row on a neutral tray with a light layer of sand or jute. Add 2-3 marigold petals around the shells, not directly touching the shell rim where the diya sits.
AvoidAvoid using large diyas in shells — they wobble on uneven surfaces.
24. Pearl and gold paper rosette backdrop with two diyas
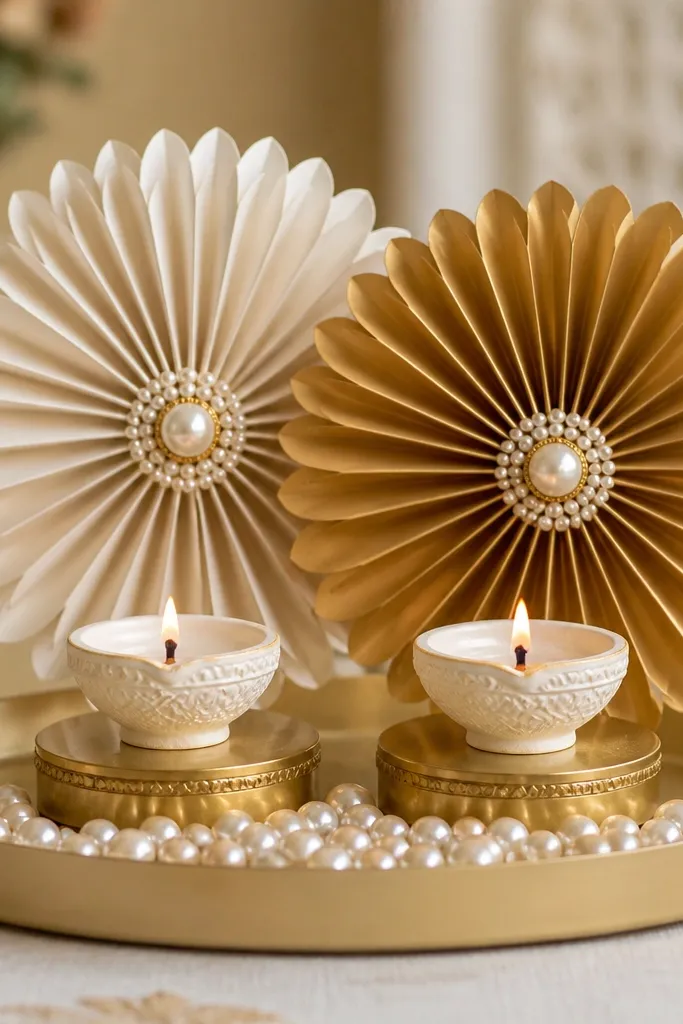
Paper rosettes create a “photo booth” backdrop effect, which is exactly why this looks store-bought. The pearl white and gold combo reads elegant, and two diyas only keeps the styling clean. I use this when I’m decorating a corner for guests because it looks good from the front and doesn’t require a big floor space. The rosettes also hide unsightly tray edges and make the cluster look intentional.
Pro tipAngle the rosettes slightly outward so they catch light and don’t look flat.
Start by making two rosettes from pearl white paper and one gold rosette as an accent behind (you can buy pre-cut rosettes too). Place them upright on the tray using folded cardboard tabs. Put two diyas on small golden stands in front of the rosettes, spacing them 6-8 inches apart. Sprinkle pearls along the front edge as a thin line. Keep the center between the diyas clear so the flame glow stands out against the rosettes.
AvoidDon’t place rosettes too close to the flame — heat can curl paper.
25. Gold-rim glass candle cups with white stones
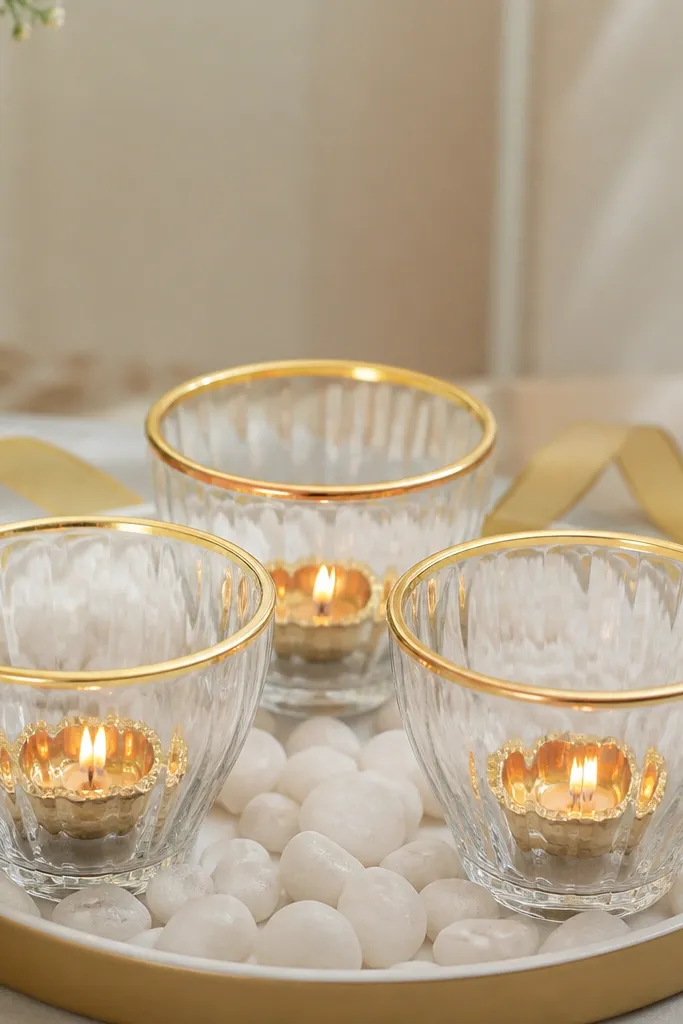
Transparent cups make the diya look like it’s inside a luxury lantern. Gold-rim paint gives a crisp edge, and white stones add a clean, high-end texture. This is flattering in bright rooms because the glass reflects daylight and the flame adds warmth. It also works well for families who want a neat look without a lot of handmade effort.
Pro tipUse a cotton swab to clean gold paint edges before it fully dries for sharp lines.
Start with 4-6 transparent glass cups (juice glass bottoms work). Paint only a thin line around the rim with metallic gold acrylic and let it dry. Place the cups on a tray lined with white stones, then set one diya inside each cup. Arrange cups in a rectangle or a gentle arc so the glow feels balanced. Add a thin gold ribbon behind the cups, letting it peek between the stones and the glass.
AvoidDon’t use too much gold paint — thick rims look messy and chip easily.
26. Red velvet coaster set with diyas in a heart spacing
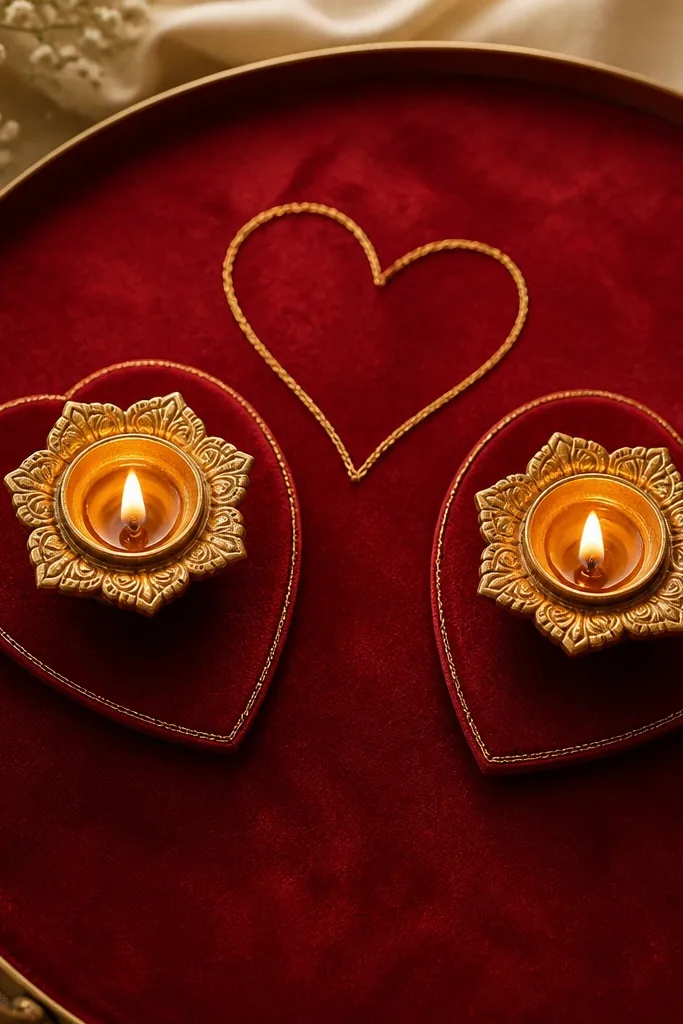
Velvet coasters make the flames look like they belong to a coordinated set. The heart spacing is subtle, not childish, because it’s made with spacing and a simple gold string outline. I use red velvet when I want a rich Diwali look that still stays classy. It flatters warm interiors and looks gorgeous against neutral walls. The key is the negative space — leave room around the coasters.
Pro tipCut the velvet edges neatly so the tray looks like it has a fitted cover.
Start with a tray covered in red velvet (or deep maroon). Place two small coasters close together with a gap at the center, forming a heart shape in spacing. Put one diya on each coaster, centered and level. Create a tiny heart outline using gold string or thin gold wire behind them, about 2 inches above the flames. Add a few gold bead dots near the heart outline ends.
AvoidAvoid adding extra décor around the heart — too many elements kill the clean shape.
27. White wood slice base with cinnamon stick border
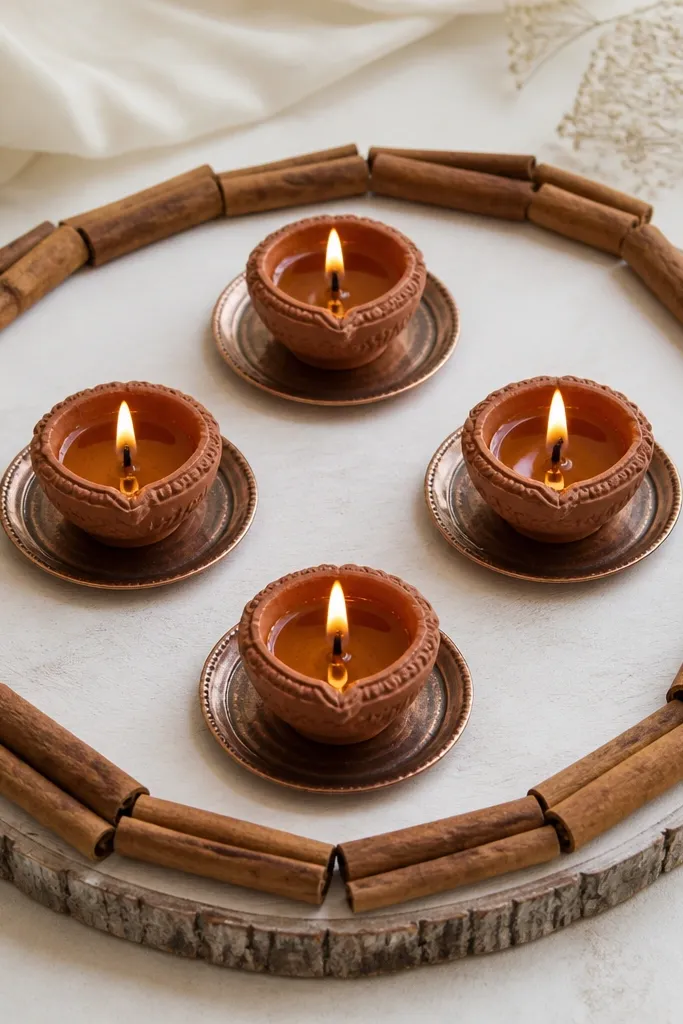
This is one of my favorite “budget luxury” combinations because it smells good and looks styled. Cinnamon sticks create a structured border that makes the whole thing look like it was planned. White wood slice keeps the palette clean, so the cinnamon looks warm instead of messy. Four diyas inside the circle reads balanced and premium, especially for outdoor balconies where you want a cozy vibe.
Start by painting a wood slice base white (or buy one already painted) and letting it dry fully. Arrange cinnamon sticks in a neat circle on top of the slice, leaving an empty center. Place four diyas on small metal saucers inside the circle at equal spacing. Add a few scattered star anise pieces near one side of the border. Keep the star anise away from direct flame contact.
If your cinnamon sticks are uneven, trim the ends with a small saw so the circle looks tight.
Don’t use wet spices — they darken and look sloppy around the flames.
28. Gold chain garland on tray with single diya focal
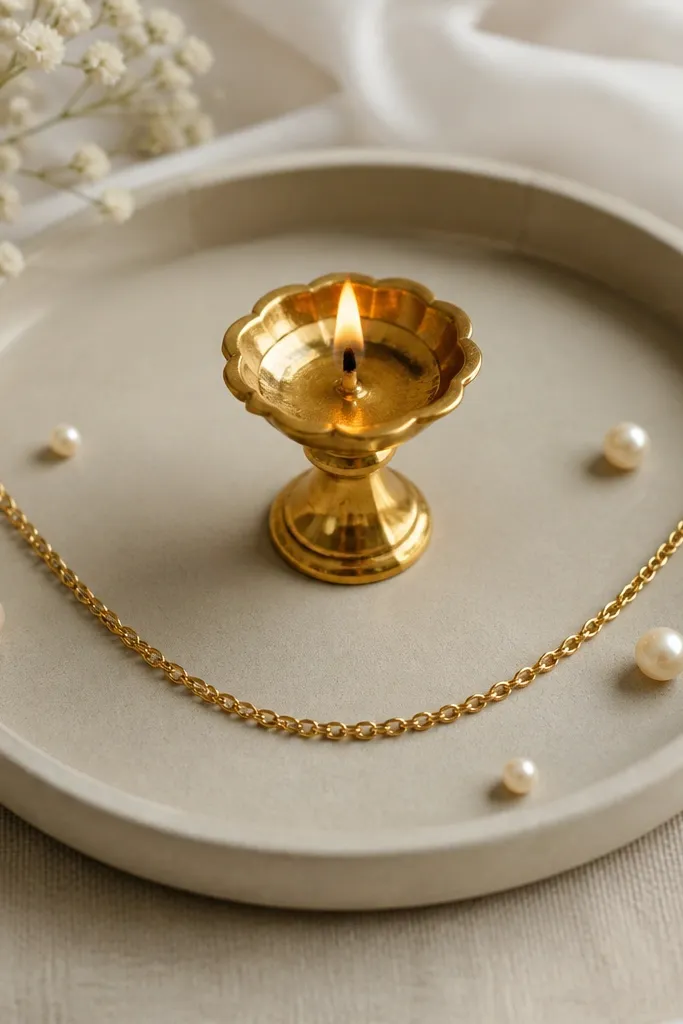
A single focal diya looks expensive when it has a strong frame. Gold chain creates that high-end “jewelry drape” effect, and it draws the eye to the flame instantly. This is ideal for people who dislike clutter and want a clean, modern Diwali look. Neutral base keeps the chain and flame as the main points, so it doesn’t feel like a craft project.
Pro tipUse a chain with smooth links; chunky chain catches light in a rough way.
Start with a small tray in cream, beige, or light gray. Place one diya on a small gold stand in the center. Drape a gold chain across the tray in a U-shape, letting it rest on the edges of the stand area, not over the wick. Add 5-6 faux pearls at random points along the chain curve. Adjust the chain until it looks like it’s framing the flame.
AvoidAvoid thick piles of pearls — it looks like cheap decoration beads.
29. Chic black-and-white striped cloth with silver diyas
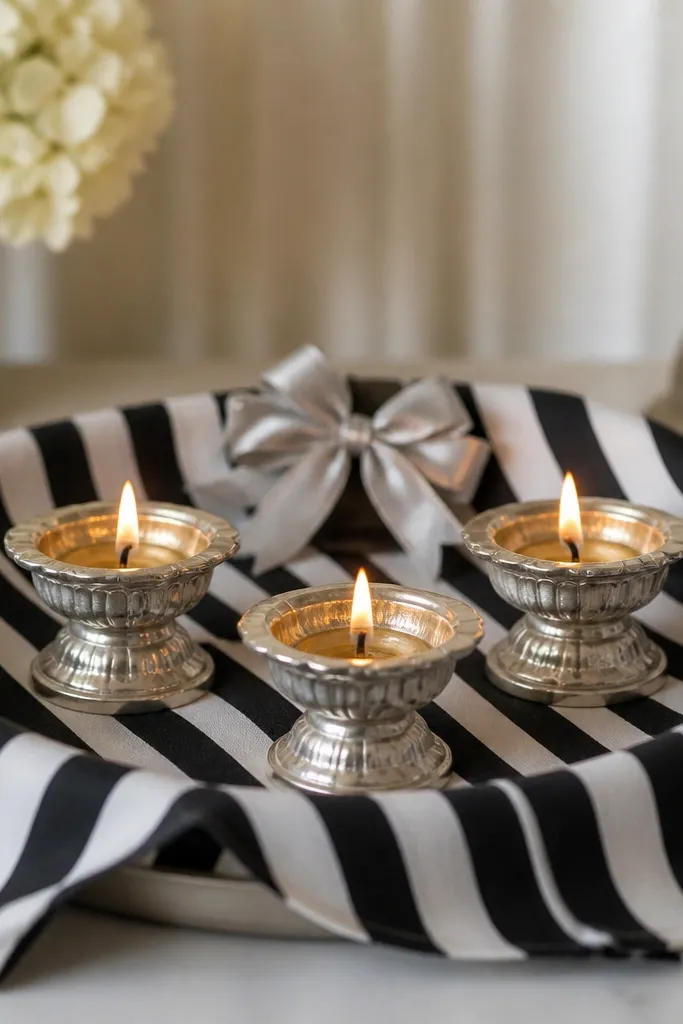
Black-and-white stripes look expensive because they’re graphic and clean under low light. Silver candle holders add a cool metallic tone that makes flames look whiter and sharper. This palette works for anyone who wants a modern Diwali look that still feels festive. The ribbon bow adds symmetry without adding bulk. If your home décor is monochrome, this blends perfectly.
Pro tipIron the cloth hard so the stripes look crisp in photos.
Start by folding a black-and-white striped cloth and placing it on a tray so the stripes run horizontally across the front. Place three silver candle holders in a straight line with equal spacing. Add one diya inside each holder and keep wick lengths similar. Tie a small silver ribbon bow and place it at the back center of the tray, between the holders and the tray edge. Add one small silver bead cluster near one end only so it looks intentional.
AvoidAvoid mixing gold and silver in the same tray — it looks mismatched.
30. Paper lantern mini backdrop with diyas on a stepped base
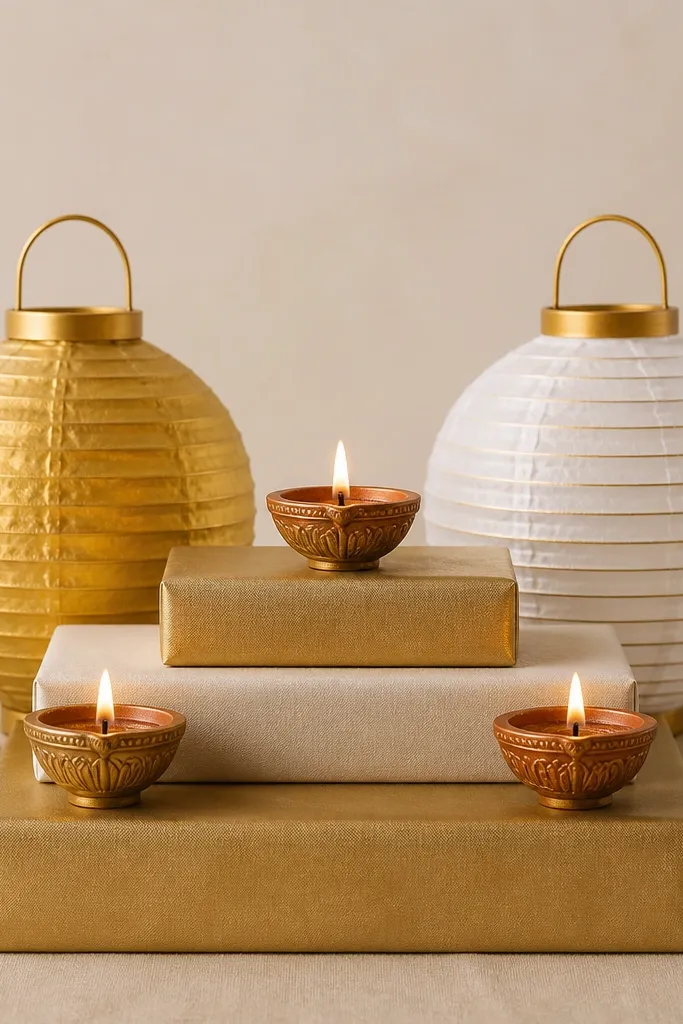
Stepped bases look expensive because they create a stage for the flames. Mini lanterns add festive lighting cues without needing extra electrical setup. I use gold and white because it keeps the look classy and lets the flame do the real work. This is great for a pooja corner where you want height and a clear focal point. The stage-like arrangement also makes it easier to clean wax drips because each step is separate.
Pro tipUse battery-powered mini lanterns if you don’t want real flame near paper.
Start by stacking two or three boxes wrapped in plain gold or white paper, making a small step platform. Place the highest point in the center and keep the steps about 3-4 inches deep. Set three diyas on the steps: one on the top center, two on the lower steps left and right. Put two mini paper lanterns behind the stepped base at a slight angle. Keep lanterns centered so they frame the tallest flame.
AvoidDon’t use flimsy boxes — they wobble and ruin the clean stage shape.



