

1. Felt Flower Keychain with Blanket Stitch Center
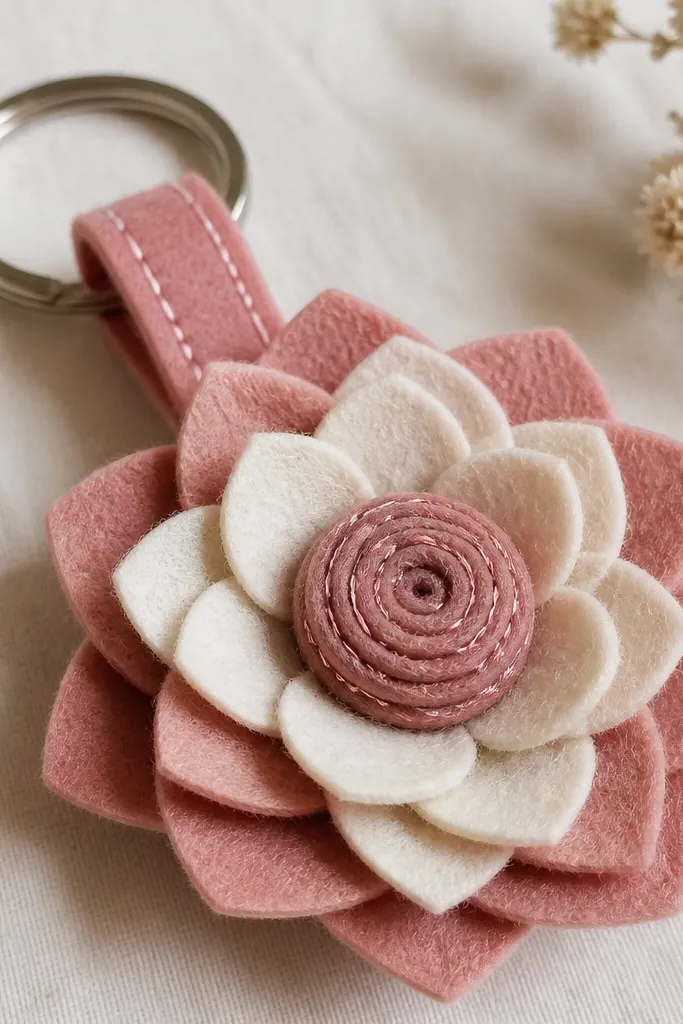
This is the first project I hand to beginners because felt forgives uneven cuts and blanket stitch looks neat even when your tension isn’t perfect. Use two petal colors: one soft main like dusty rose and one lighter like cream, plus a darker center like cocoa brown. The blanket stitch center gives the flower a raised, “stitched” look instead of flat craft-store vibes. It suits friends who carry keys daily — the size lands around 2.5 to 3 inches across, so it doesn’t feel bulky on a bag.
Start by cutting 10 petals from felt: 5 in dusty rose (about 2.5 x 1.3 inches each) and 5 in cream (about 2.3 x 1.2 inches). Cut one center circle 1 inch wide in cocoa felt. Layer the petals around the center so the cream petals peek between rose petals, then pin or glue lightly. Stitch the center with blanket stitch using a single strand of embroidery floss, pulling tight so the center looks domed. Finish by attaching a small loop of felt to the back and securing it to a metal keyring with a few tight knots.
Thread your needle, then practice 3 blanket stitches on scrap felt — it teaches your tension faster than guessing.
Skip hot glue for the petals — it can create stiff lumps that show through and make the flower look uneven.
2. Scrap Fabric Scrunchie in a Two-Tone Color Block
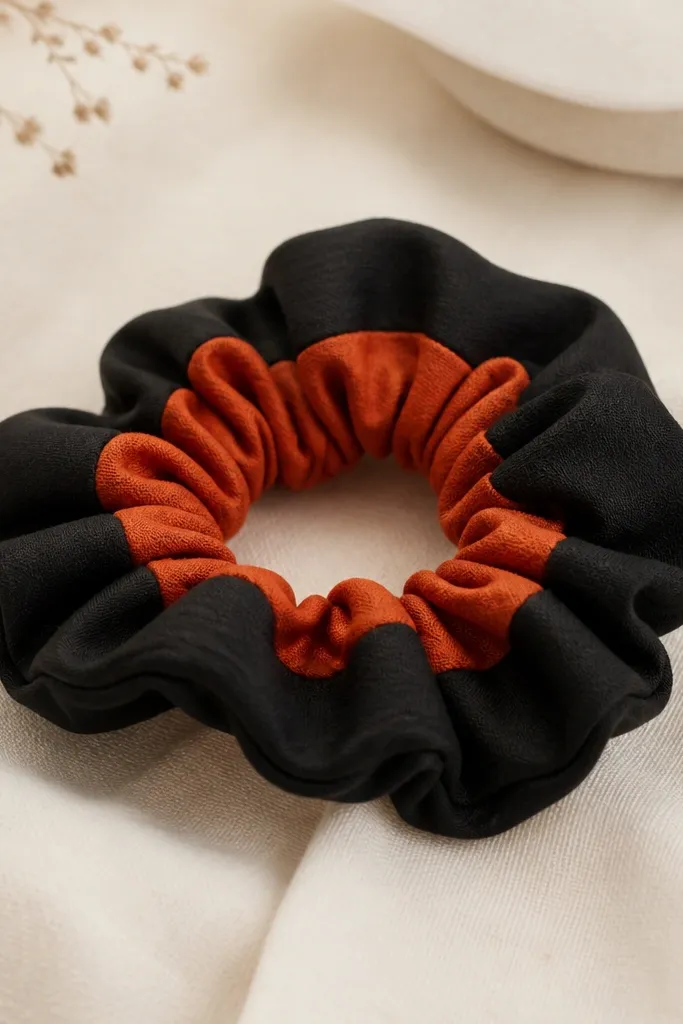
A scrunchie is one of the easiest beginner handmade gift ideas for your best friend because it’s wearable, forgiving, and forgiving on fabric choice. Two-tone color blocking looks intentional: use black for the outside and a warm accent like rust-orange or olive. Cotton quilting fabric holds its shape and won’t fray as badly as stretchy knits. If your friend has thick hair or uses claw clips, this style gives a softer grip without the tightness of cheap elastics.
Pro tipUse a fabric weight you like (quilt cotton or denim) and avoid very thin polyester — it gathers but looks limp.
Start by cutting one rectangle for the casing: 12 inches long by 6 inches wide, then cut a second rectangle the same size in your accent fabric. Sew a 0.25-inch seam along one long edge, right sides together, to make a tube with two fabrics. Turn it right-side out and press the seam flat. Run a 2.5-inch piece of 1/4-inch elastic through using a safety pin, then stitch the ends together and close the opening with a ladder stitch. Fold the seam inward so it sits inside the gather.
AvoidDon’t stretch the elastic while stitching — it creates puckers that make the scrunchie look cheap.
3. Salt-Scent Clay Pendant Tag with Tiny Handprint Stamp
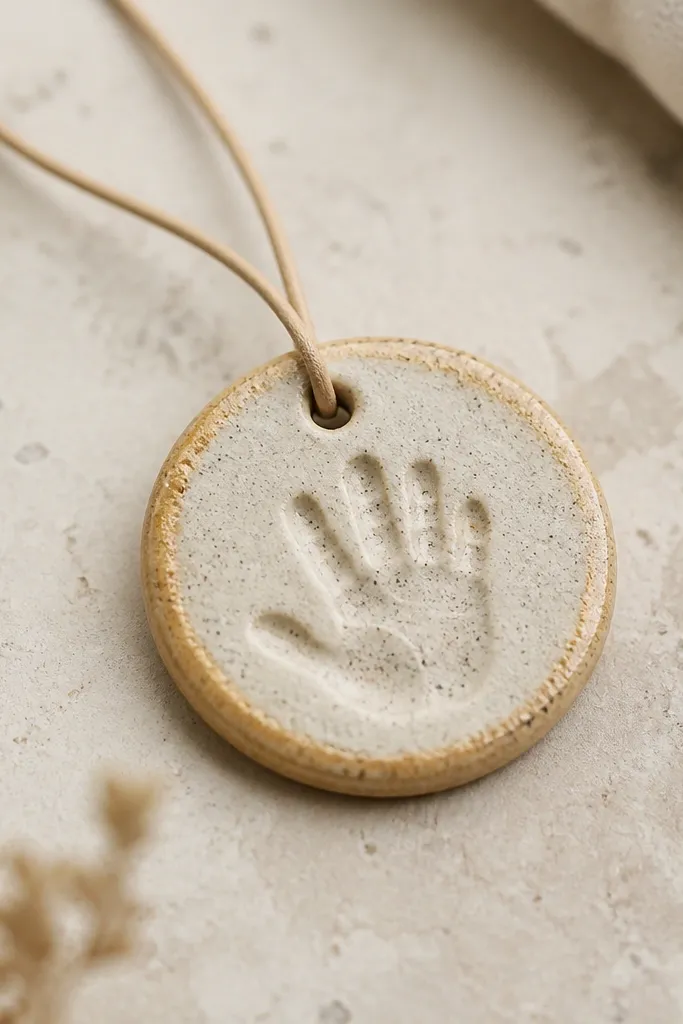
This gift looks handmade in a way you can’t fake with store-bought pieces. Use air-dry clay and add a handprint stamp for a personal touch your friend will understand instantly. I like adding a faint scent with a drop of essential oil on the cord after curing, because the pendant itself should stay mostly neutral. The pendant works for most skin tones and styles because the color is usually warm beige or soft gray. It’s also small enough to live on a bag charm without snagging.
Start by rolling clay to 1/4-inch thickness and cutting circles about 1.25 inches wide. Press a tiny handprint stamp lightly in the center, then poke a hole for the cord. Let it air-dry 24-48 hours until fully hard. Lightly sand the rim with fine sandpaper, then wipe dust away with a dry cloth. Seal with a matte acrylic sealer, string it on a 10-12 inch cotton cord, and add one drop of lavender or cedar oil to the cord end once it’s dry.
Seal in thin coats — one thick coat can bubble and ruin the matte finish.
Skip heavy oil directly on the clay — it can soak in and create dark spots.
4. Photo Pocket Organizer from an Old Cardigan Sleeve
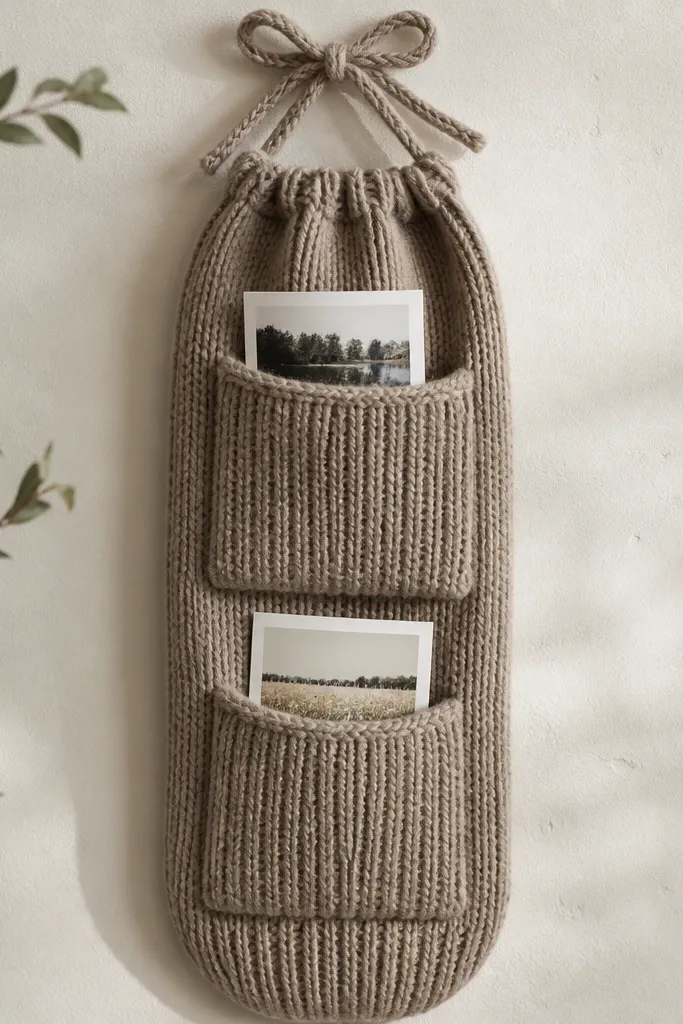
This is a sentimental gift that still looks clean on a desk or shelf. Using a cardigan sleeve means you get soft knit texture plus built-in stretch, so pockets fit different photo sizes. Choose a sleeve color that matches your friend’s vibe: charcoal, dusty blue, or a warm oatmeal. The knit also hides minor sewing mistakes. It flatters anyone’s space because it looks like a small fabric accessory, not a craft project.
Start by cutting the sleeve length to about 10 inches, then trim the cuff to leave a neat top edge. Fold the bottom up 1 inch and sew across to close the base. Mark two pocket panels: one about 4.5 inches tall and another about 3.5 inches tall, then stitch side seams to form pockets. Add a top tie by sewing a small loop from scrap fabric at the top, then run a ribbon or thin cord through it. Insert printed photos on cardstock backers so they slide in smoothly and don’t sag.
Use double-sided fabric tape at the pocket edges before sewing if you struggle to keep knit from shifting.
Don’t use stiff interfacing — it makes the knit buckle and shows puckers.
5. Embroidery Hoop Mini Wall Art with One Line of Words
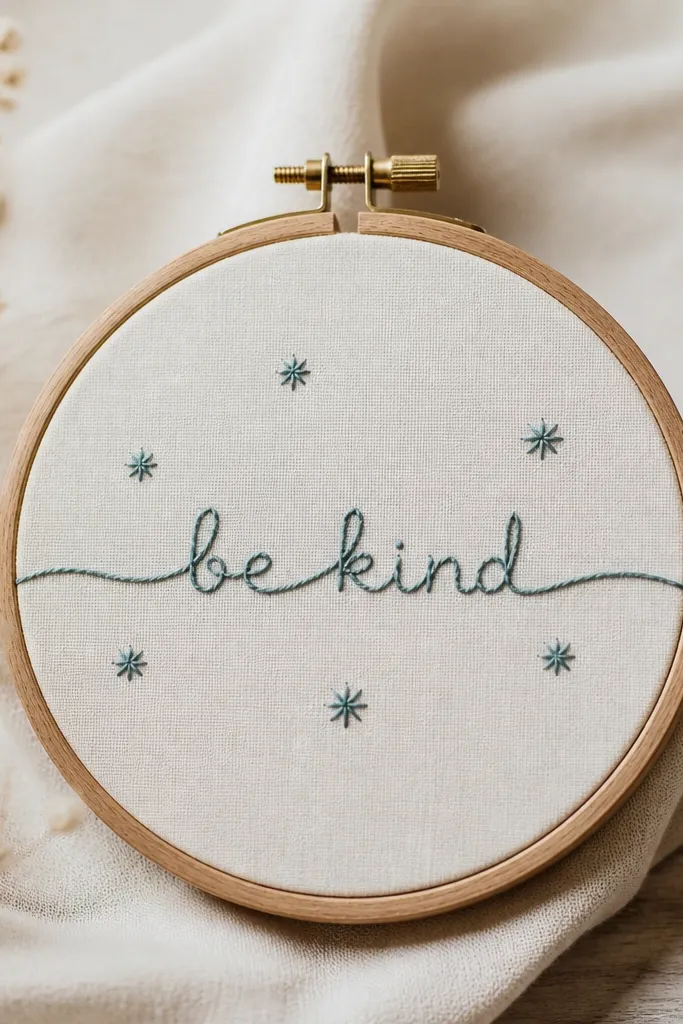
Embroidery hoop art looks high-end because the fabric is stretched tight and the stitching reads clearly from across a room. Keep it simple: one line of text or a short name with a few tiny stars. Use a 6-inch hoop so it’s fast and doesn’t overwhelm you. For color, choose muted teal or rust thread on cream — it looks warm and doesn’t fight with most home decor. This is a great gift for friends who love wall space but don’t want clutter.
Start by tightening fabric in a 6-inch hoop until it feels like a drum. Sketch your one-line phrase lightly with a water-soluble fabric marker. Thread a hand needle with 2 strands of embroidery floss and practice a backstitch line on scrap first. Stitch the words, then add 6-8 tiny star stitches around the line for balance. Finally, trim excess fabric, fold it under the hoop rim, and tighten the screw.
Press the finished hoop gently with a warm iron through a thin towel to remove marker marks.
Skip thick lettering fonts — they force you into ugly knotty stitches.
6. Beaded Bracelet with a Sliding Knot Closure
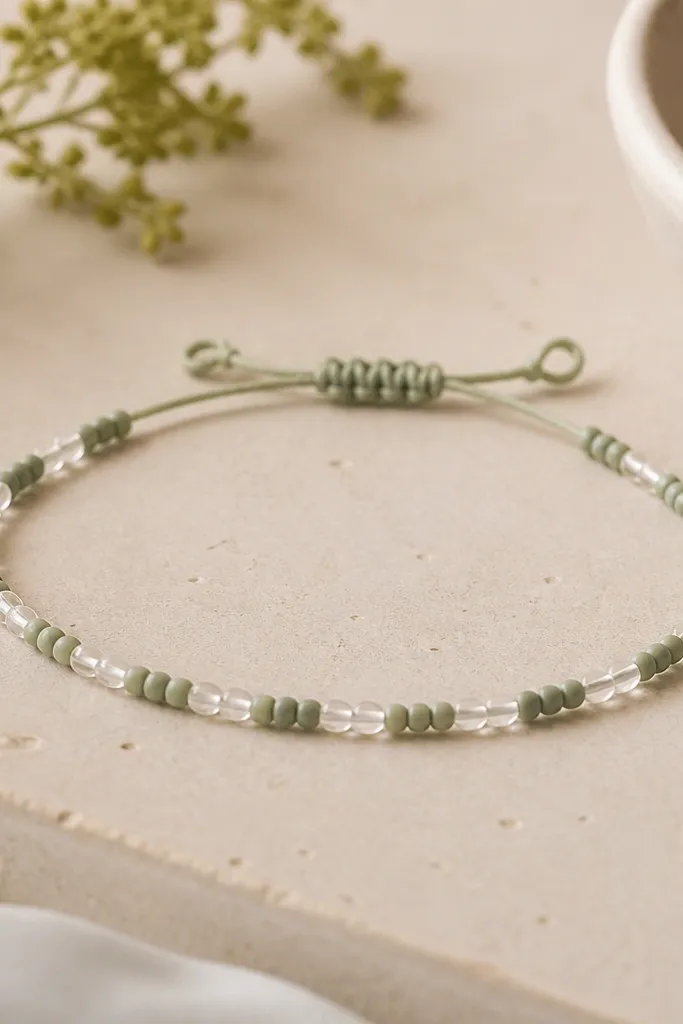
This bracelet is beginner-friendly because you don’t need a clasp. Sliding knot closures are forgiving and look intentional when the knot is tight and centered. Use small seed beads so the bracelet feels delicate, not chunky. Sage green + clear glass catches light without looking loud. It fits most wrists and works for friends who wear stacks because it sits flat and doesn’t snag on sleeves.
Pro tipCount your bead repeats as you go — one skipped bead shows up in the pattern fast.
Start with 1.5 yards of 0.5mm nylon cord and thread beads in a pattern: 5 sage beads, 1 clear bead, repeat. Leave a 3-inch tail at both ends. Tie a double overhand knot on one end, then slide the beads to the knot and trim the tail to 1 inch. For the sliding closure, overlap cord ends and tie a second knot around both tails, then pull until it snugly sits at the desired spot. Trim extra tails and seal with a tiny dab of clear nail polish on the knots.
AvoidDon’t use stretchy elastic — it snaps or stretches out and the bracelet turns sloppy.
7. Wood Slice Coaster Set with Burned Initials
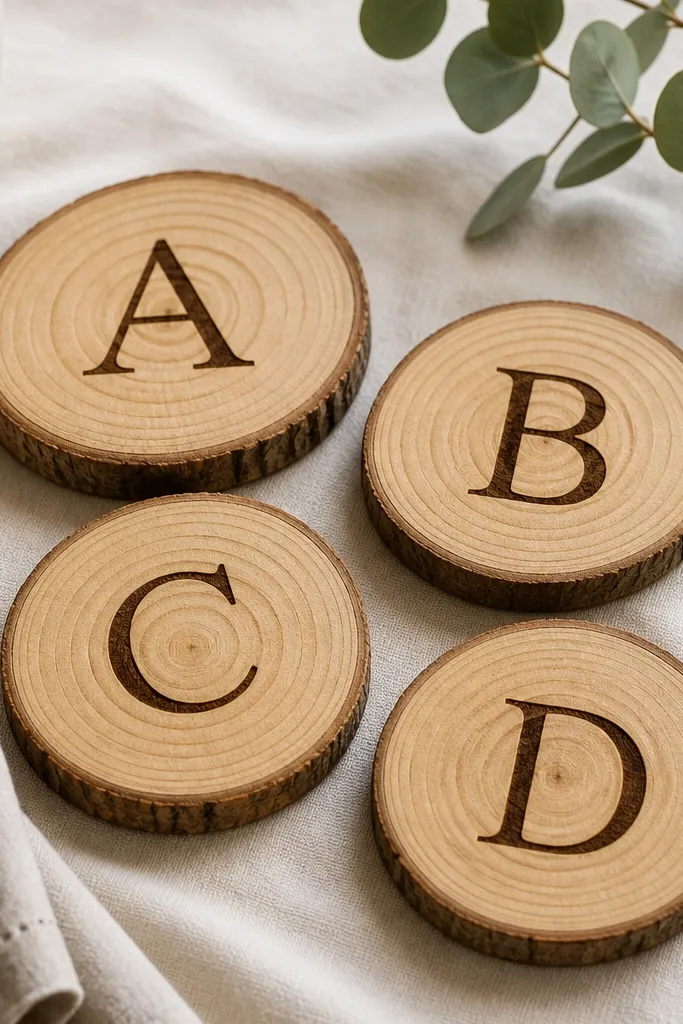
Coasters are useful, and burned initials look personal without needing fancy painting skills. Wood slices give texture your friend will notice immediately, especially if you keep the initials small and centered. Use a medium warm wood tone like birch or a light pine slice. If your friend’s home has modern or farmhouse touches, this fits because the burn line looks classic. It’s also forgiving if your slices aren’t identical — the set still looks cohesive when initials match.
Pro tipTest your wood-burn heat on a scrap slice — some woods burn fast and turn black quickly.
Start by sanding each wood slice lightly with 220-grit until smooth to the touch. Use a pencil to lightly mark initials in the center, about 1 inch wide. Burn with a wood-burning tool on medium heat, moving steadily so the line stays dark but not charred. Let it cool, then wipe off dust. Seal with food-safe clear varnish or a countertop sealer in 2 thin coats, letting it dry fully between coats.
AvoidSkip thick varnish — it can pool and create cloudy spots.
8. Tin Can Pencil Holder with Paint Splatter and Polka Dots
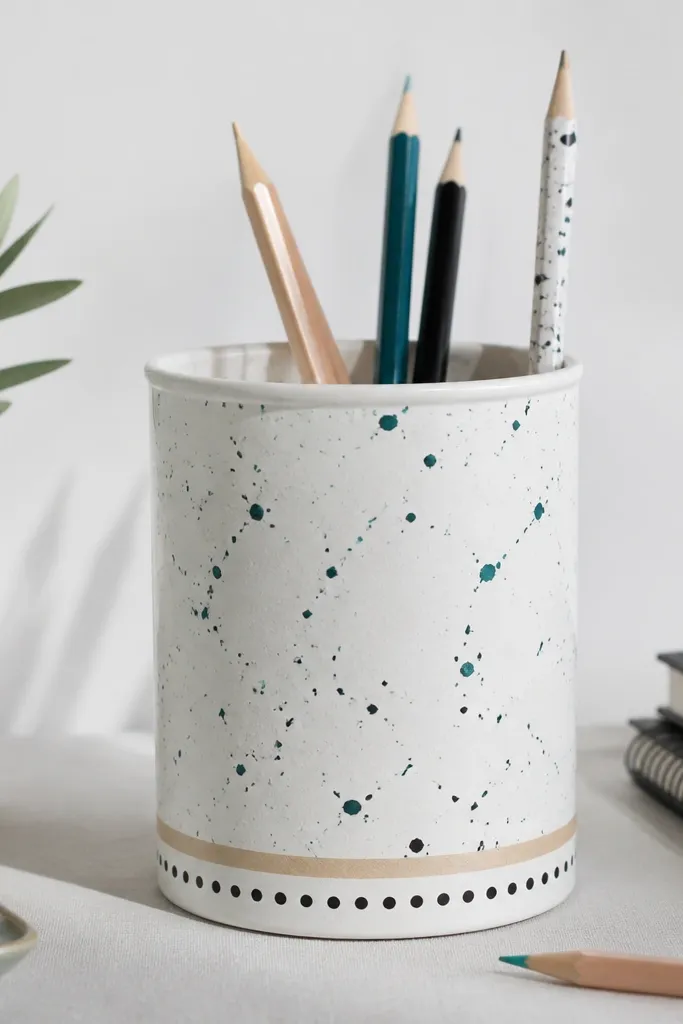
A pencil holder gift is a practical win for a friend who uses a desk, planner, or art supplies. The splatter + polka dot combo looks playful but still controlled if you use masking tape. White base paint makes colors pop without looking messy. This style fits most skin-tone-adjacent color vibes in the room because it reads neutral + accent. I’ve made these for students and coworkers; they always get used, not shoved in a drawer.
Pro tipTape the band, then remove the tape while paint is still slightly tacky for crisp edges.
Start by cleaning the tin thoroughly and sanding lightly so paint sticks. Paint the whole can matte white, then let it dry. Use masking tape to create a clean band near the bottom, then paint teal polka dots with a small round brush. For splatter, dip a toothbrush into black paint watered slightly, then flick over the can while holding it steady. Seal with a clear matte spray after everything dries.
AvoidDon’t skip sanding — glossy tin paint flakes and ruins the finish fast.
9. Ribbon Bookmark with Heat-Set Frayed Edge Look
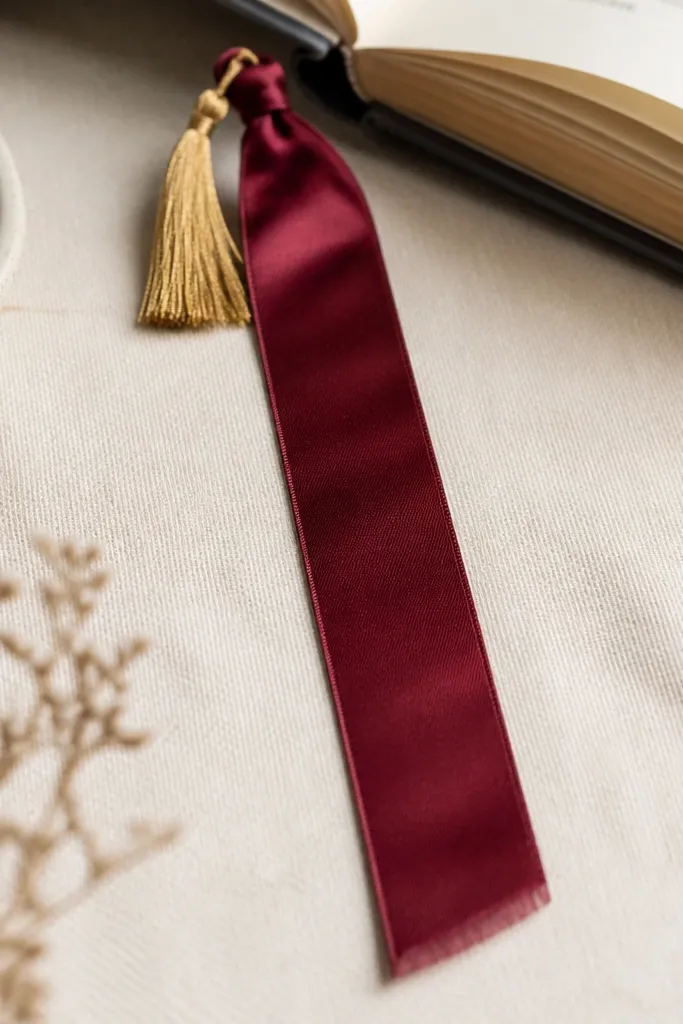
Bookmarks are the fastest handmade gifts that still feel thoughtful. This one uses satin ribbon with a controlled frayed edge effect that looks fancy. Pick burgundy, navy, or forest green so it feels grown-up. The gold thread tassel makes it look intentional, not like a random ribbon scrap. It fits friends who read romance, nonfiction, or manga because it slips easily between pages.
Start with 12-14 inches of satin ribbon, about 1 inch wide. Fold the top end over 1/2 inch and stitch across so it won’t unravel. Make a small tassel by wrapping gold embroidery thread around a finger 20 times, then tying it off and trimming. Attach the tassel to the ribbon’s stitched top with a couple stitches. For the frayed look, gently heat the bottom edge with a lighter in short touches so it melts slightly without burning the ribbon.
Practice the heat on scrap first — satin melts fast and can scorch if you linger.
Don’t use flimsy ribbon that won’t hold a stitch — it twists and looks sloppy.
10. No-Sew T-Shirt Yarn Basket from Fabric Strips
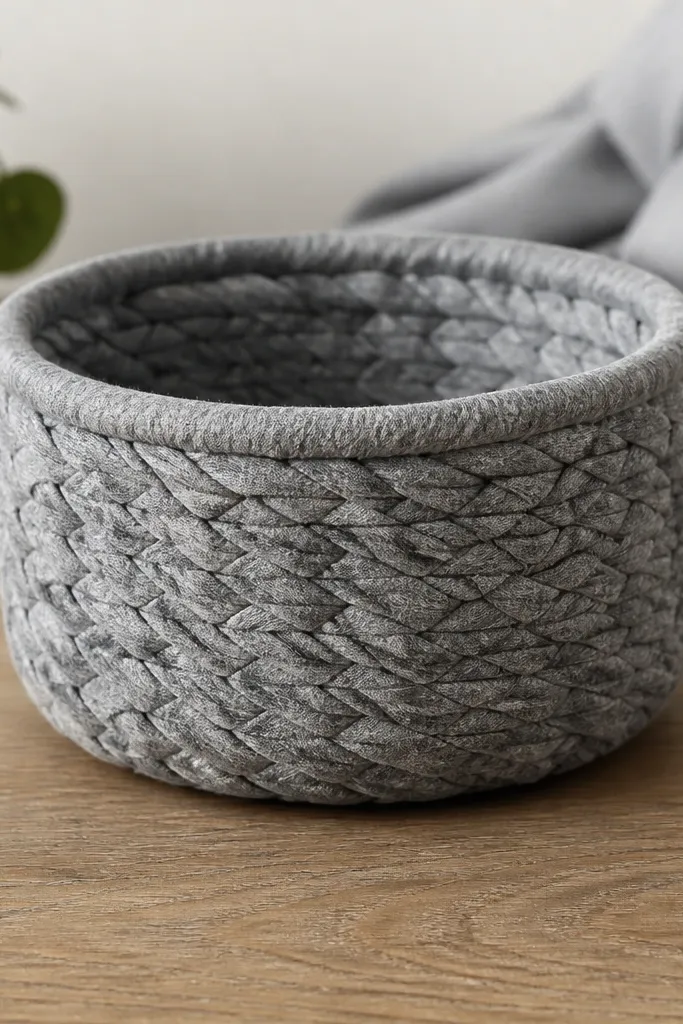
This basket is one of the best easy beginner handmade gift ideas for your best friend because it’s forgiving and uses what you already have. The fabric strips create a soft texture that hides uneven weaving better than rope baskets. Use a grey or black t-shirt for a modern look, and keep the rim thicker so it stands up. It works for makeup brushes, hair ties, or small desk items. The gift feels useful on day one, not a “someday” project.
Pro tipKeep tension even — if one strip is looser, you’ll see a ripple around the rim.
Start by cutting a t-shirt into strips 3/4 inch wide, then stretch each strip slightly so it curls into yarn. Make a tight base by coiling 10-12 loops in a circle and sewing them together with a simple whip stitch at the center. Then weave upward: loop fabric yarn around the coil and tuck the end through, stitching at intervals so it stays firm. Build the walls until the basket is 3.5-4 inches tall. Finish by folding the last strip inward and stitching under the rim for a clean edge.
AvoidDon’t leave the base too loose — it collapses and makes the whole basket look uneven.
11. Stamped Leatherette Key Tag with Color-Block Edge Paint
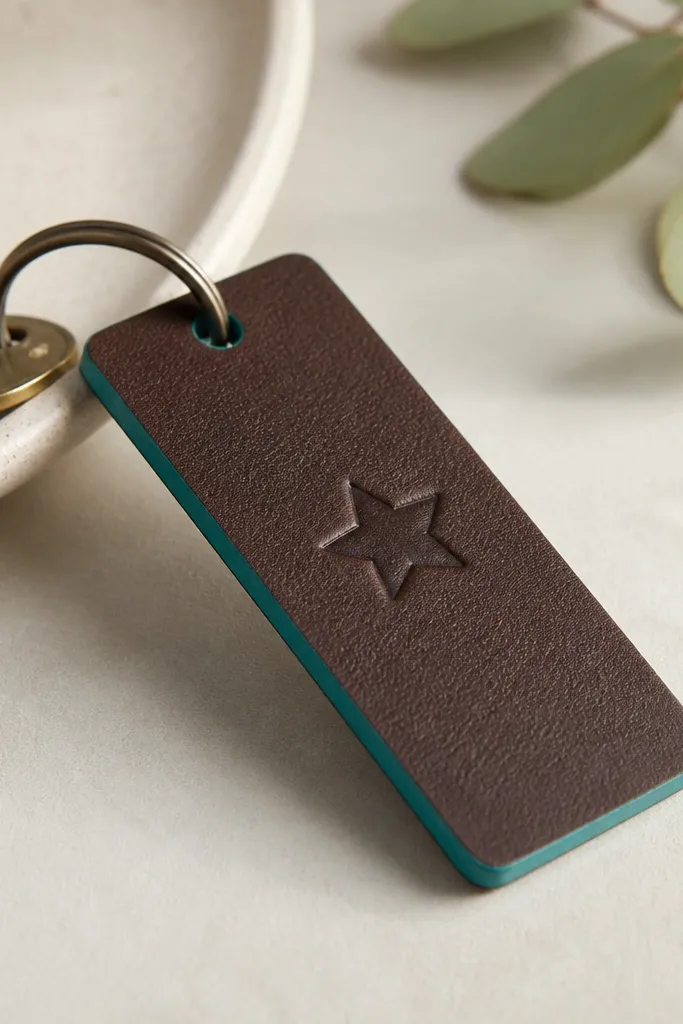
If your friend uses keys and likes simple accessories, this key tag looks sharp without needing real leather. Leatherette takes stamps well, and the edge paint gives it that finished craft-store look. Choose a dark base like espresso brown and a contrast color like teal or mustard. This works for most styles because it’s minimal and the stamp is the focal point. It also holds up better than fabric tags because it’s structured.
Pro tipWipe the leatherette with a dry cloth before painting so edge paint sticks cleanly.
Start with a leatherette sheet about 2mm thick and cut a tag size of 2.25 x 1.25 inches. Punch a hole 1/4 inch from the top corner and round the corners with scissors. Stamp the icon using a metal stamp or even a small star punch — press firmly on a cutting mat. Paint the edges with acrylic edge paint or craft paint thinned slightly, using a foam brush to avoid streaks. Seal with a clear matte sealer and attach to a keyring with a jump ring.
AvoidSkip thick paint layers — they crack at the edges when you flex the tag.
12. Candle Jar Label Set with Washi Tape Layers
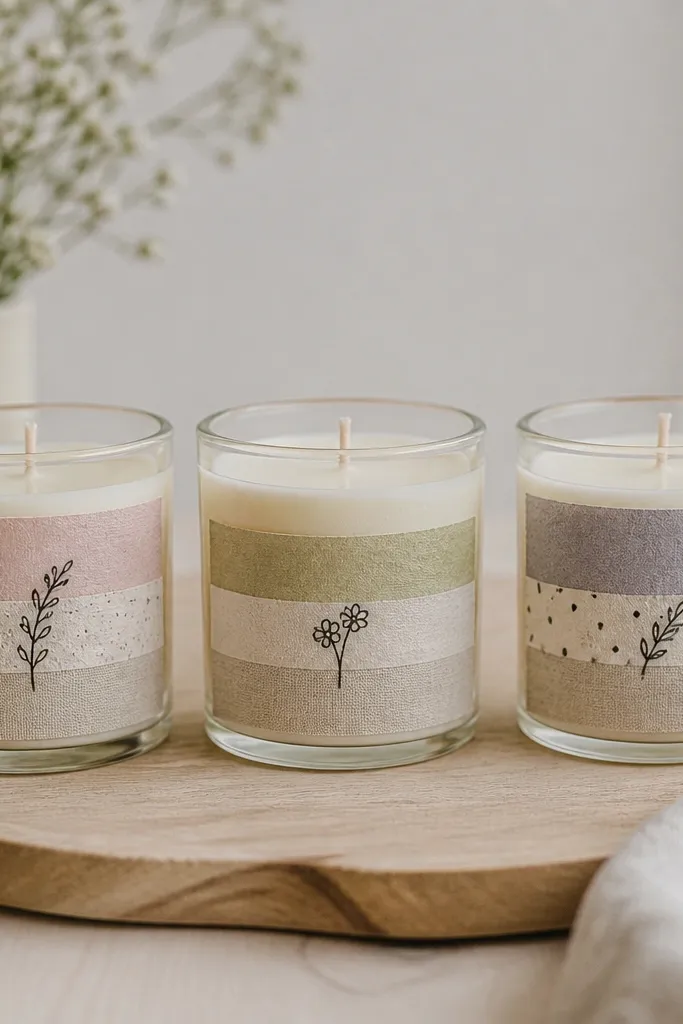
This is a gift for the friend who lights candles, even if you don’t know their exact scent preferences. Instead of making a whole candle, you upgrade a plain jar with handmade labels that look cohesive. Washi tape layers create depth without needing graphic design skills. Pick two tape patterns max: one solid band and one small dot or stripe. It looks good on most jar sizes and gives a “set” feel when you make 2-3 labels.
Start by cleaning jar glass and drying it so tape sticks without lifting. Cut washi tape strips: 1.5-inch solid band across the middle and a thinner patterned strip above it. Press tape down firmly with your fingernail, then write your friend’s name or a short message on a small piece of white cardstock. Trim the cardstock to fit inside the tape frame and glue it at the corners only. Finish by adding a tiny doodle in black marker and seal with clear tape over the edges if the jar will travel.
Write on cardstock first, then apply tape around it — it keeps ink from bleeding under tape.
Don’t use more than two tape patterns — too many prints make it look messy.
13. Macrame-Inspired Cord Coaster with Two Knots Only
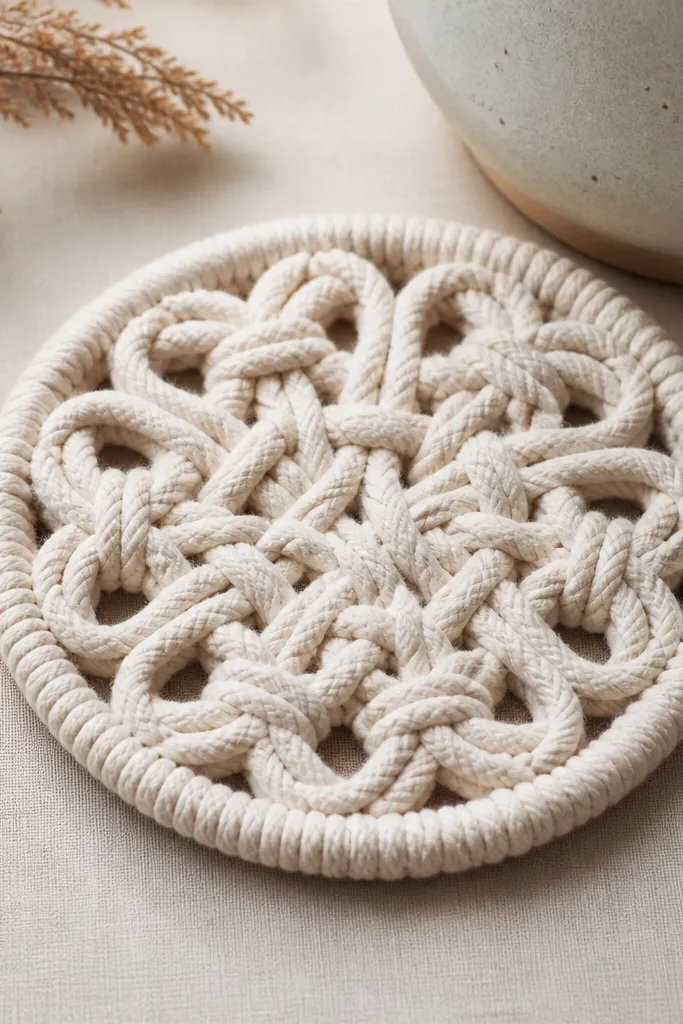
Cord coasters look like macrame but they’re simpler than you think when you stick to two knots. Thick cotton cord holds shape, and the texture hides uneven spacing from beginners. Choose natural beige cord for a warm look, or black cord for a modern vibe. This gift is great for friends who host or who drink coffee at home. It also flatters different table styles because the color stays neutral.
Start with a 10-inch round template drawn on paper. Cut 16 cord strands, each 18 inches long. Fold them in half and tie them to the template using a simple lark’s head knot around a small ring or dowel. Then work two knots: half square knots for the main pattern and a repeating half hitch to tighten the outer edge. Build until the coaster is about 4 inches across, then trim and tie off at the back. Glue the knot ends to keep them from slipping.
Keep your knots tight by pulling evenly from both sides, not just one cord.
Don’t use thin synthetic cord — it flattens and loses the “coaster texture” look.
14. Painted Terracotta Planter with Handwritten Tiny Quote
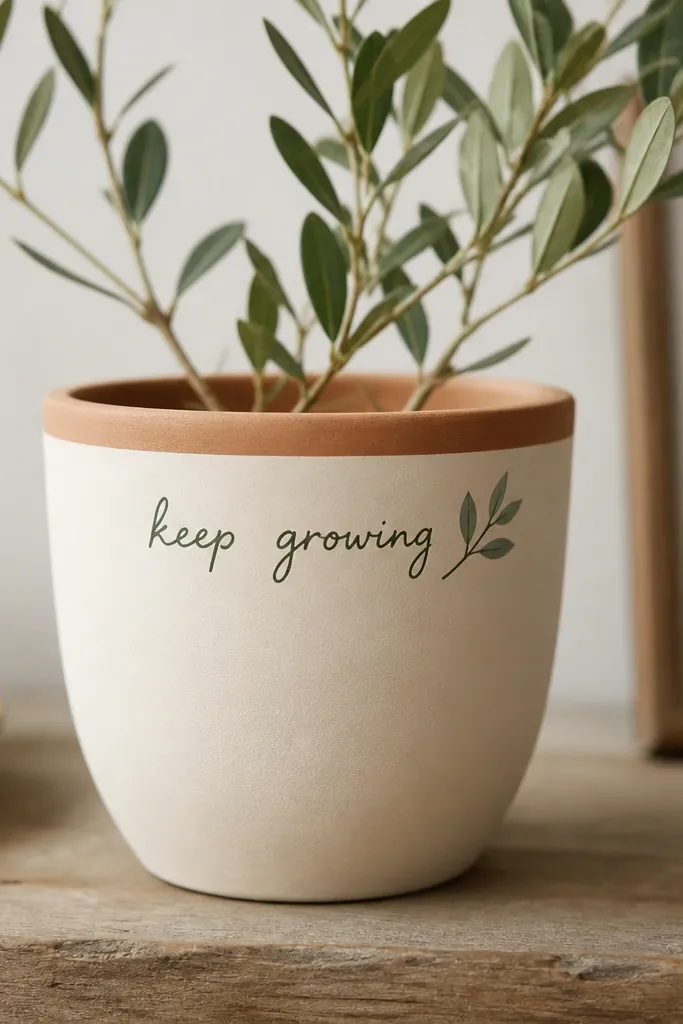
A mini planter is a gift that grows, but the real win is the look: painted terracotta + handwriting. Terracotta is porous, so the paint needs the right prep or it chips. Keep the design small: one short quote or one name, not a full paragraph. Matte cream with dark green writing looks classy and doesn’t overpower plants. It’s perfect for friends who love houseplants or who want something low-effort that still feels personal.
Start by cleaning the planter and letting it dry completely. Sand lightly around the painted area so paint grips, then wipe dust off. Apply a terracotta primer or a thin base coat of acrylic paint made for porous surfaces, letting it dry. Paint your quote near the top with a fine liner brush; keep letters about 1/2 inch tall so it reads clearly. Finish with a clear outdoor seal if the plant will sit near windows or get occasional water splash.
Practice the handwriting on paper first and mark the placement with a pencil dot guide.
Skip painting the inside — it doesn’t help and it can mess with drainage.
15. Origami Heart Garland with Threaded Needle Finish
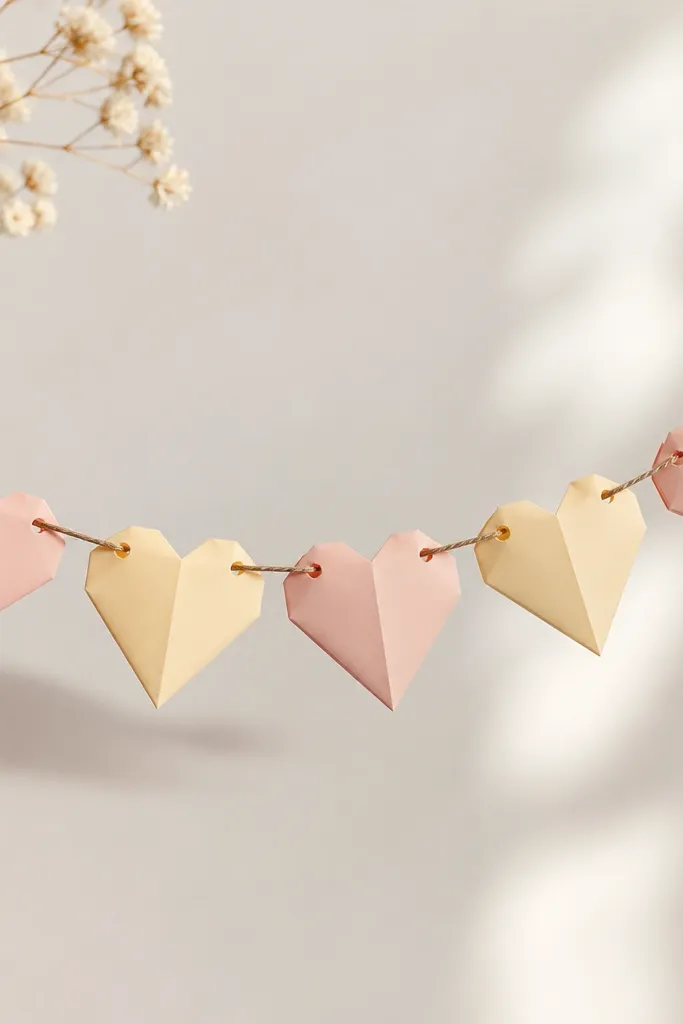
A heart garland looks cute without needing fancy supplies, and it’s one of the easiest beginner handmade gift ideas for best friend when you choose paper that folds well. Use origami paper in two colors like blush and pale yellow so the garland feels soft, not childish. Threading the hearts on twine gives it a clean finish and lets you hang it on a wall, mirror, or bookshelf. This fits friends who decorate seasonally or love a cozy corner. The hearts also photograph well, which matters if your friend shares their life online.
Pro tipIf your hearts open up, add a tiny dab of glue to the last fold only — one dot fixes it.
Start with 2-inch square origami paper pieces, 20 hearts total for a short garland. Fold each heart and press creases firmly with a fingernail. Poke a small hole at the top point of each finished heart with an awl or sharp needle. Thread a 6-8 foot length of twine through the hearts, spaced about 1 inch apart. Tie both ends with a loop so it hangs evenly, then trim any stray paper fibers.
AvoidDon’t use thick printer paper — it fights the folds and makes lumpy hearts.
16. Satin Ribbon Rose Clip for a Bag or Hair
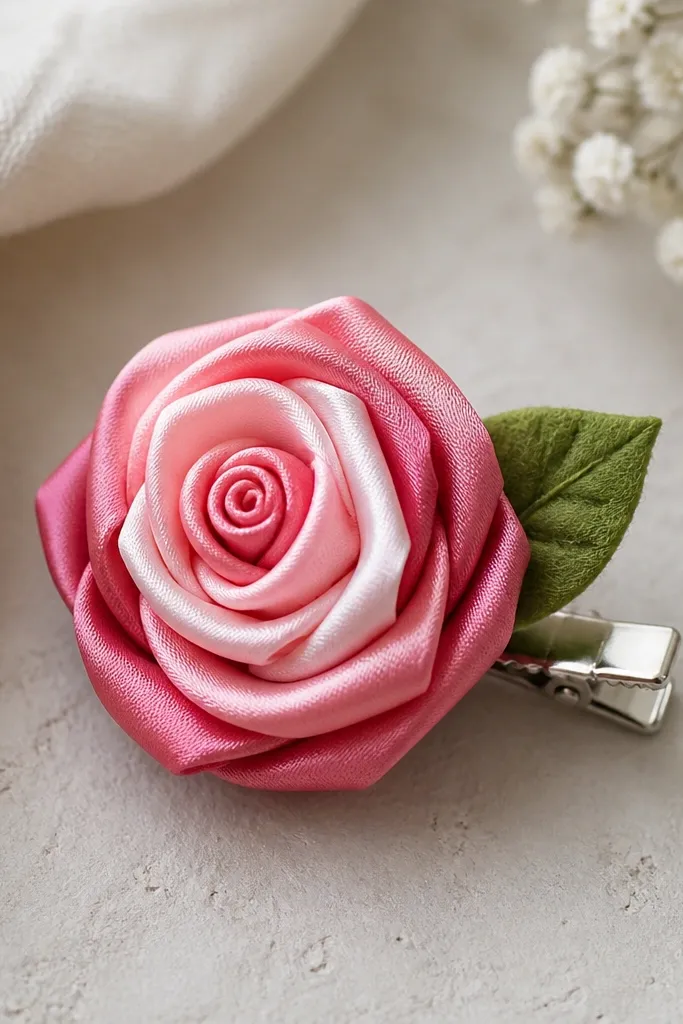
Ribbon roses look complicated but you can make them quickly when you use satin ribbon and a hot glue gun with restraint. This one is made for either hair or a bag because the alligator clip holds firmly. Choose deep pink for the outer petals and pale pink for inner petals so it looks dimensional. The green felt leaf breaks up the pink and makes it feel balanced. It suits friends with any hair color because the rose is the focal point, not the background.
Pro tipUse satin with a smooth edge — it melts less and folds cleaner than rough ribbon.
Start by cutting ribbon strips: 10 strips at 2 inches wide by 3 inches long for outer petals, and 6 strips at 1.5 inches wide by 2.5 inches long for inner petals. Fold each strip in half and gather one edge with a few stitches, then twist into a petal shape and glue the base. Layer outer petals first, then tuck inner petals into the center coil. Add a small felt circle behind the petals for stability, then glue a felt leaf underneath. Attach to a metal clip using glue at the back only so the front stays clean.
AvoidDon’t overfill with glue — it turns the petals shiny and messy.
17. Hand-Poured Soy Wax Letter "Charm" in a Mini Tin
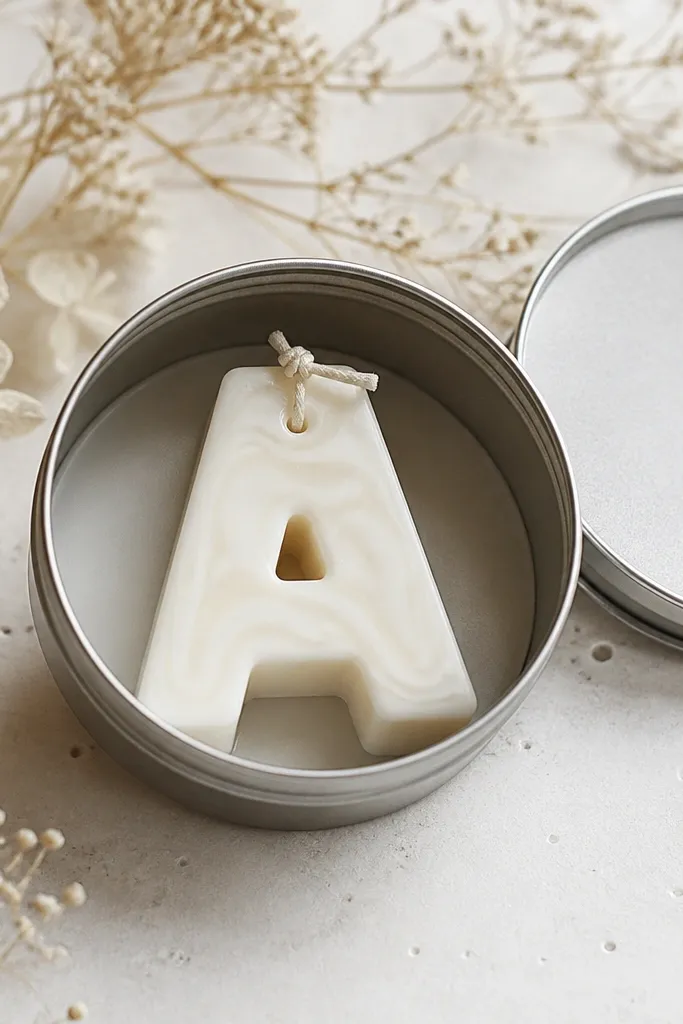
This is a gift for your friend who likes cozy scents but doesn’t need a full candle. Pouring a soy wax letter charm looks artsy because the shape is simple and the surface is smooth. I like using a mini tin so the charm is easy to carry and doesn’t crumble. Pick a letter that matches their initial — it feels personal without adding extra wording. The white wax with a subtle swirl looks good with most decor and doesn’t stain fabric.
Pro tipUse a thermometer if you have one — pouring too hot creates bubbles.
Start by melting soy wax in a double boiler until fully liquid, then stir in a small amount of fragrance oil made for candles. Choose a letter mold size about 2 inches tall and place it inside a mini tin for support. Pour wax to fill the mold, then add a short wick or embedded cotton thread for the look. Let it cool at room temperature for 3-4 hours until firm, then unmold carefully. If you want a swirl, stir fragrance colorant lightly in the wax before pouring — just 2-3 turns, not full mixing.
AvoidSkip water to cool the wax — it cracks the surface.
18. Tea Bag String Banner with Folded Paper Labels
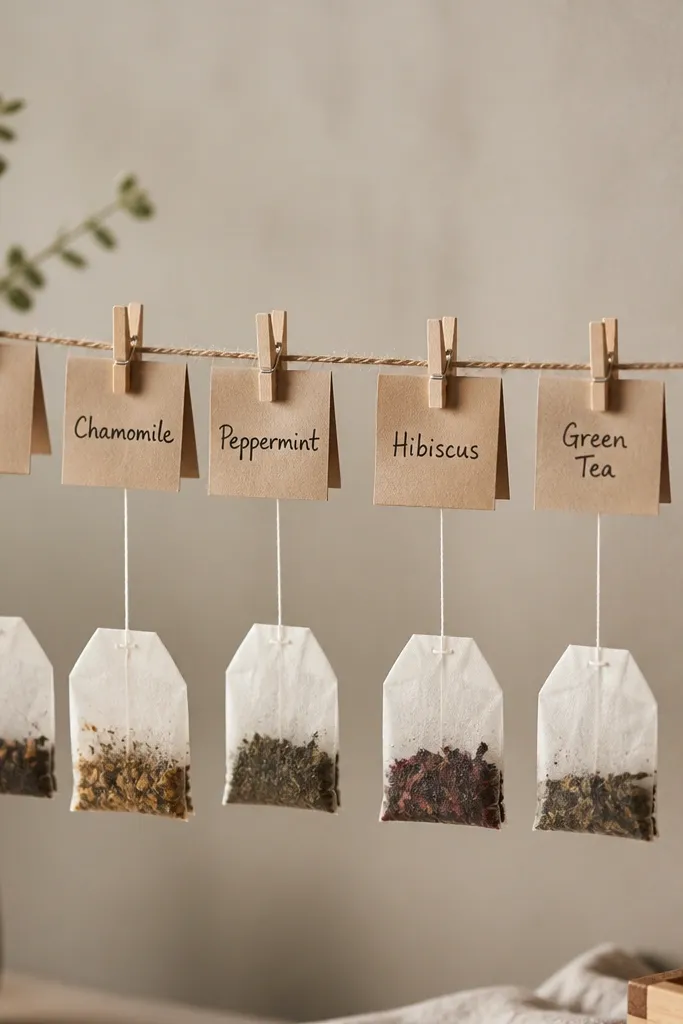
This gift feels thoughtful because it matches a friend’s daily routine instead of being decorative only. It’s also easy because you don’t need to bake anything. Use a string line with clothespins to hang 6-8 tea bags, and add folded paper labels so it looks coordinated. Choose paper in warm cream, then use a black marker and one accent color like teal dots. This works great for friends who love tea, but it also works for coffee if you swap tea bags for mini coffee packets.
Pro tipWrite the flavor name lightly on the back too — if the front gets smudged, you still know what it is.
Start by cutting 6-8 labels from cardstock, about 2 x 3 inches each. Fold each label in half and write a flavor name on the front, plus a tiny icon like a lemon slice. Punch a small hole at the top fold and thread each label onto twine. Clip each label to a tea bag with a mini clothespin, spacing them 1.5-2 inches apart. Tie the twine ends into loops so it hangs neatly on a wall hook or inside a pantry shelf.
AvoidDon’t use marker on glossy tape — it smears when it meets condensation.
19. Paper Clay Coasters with Leaf Vein Imprint
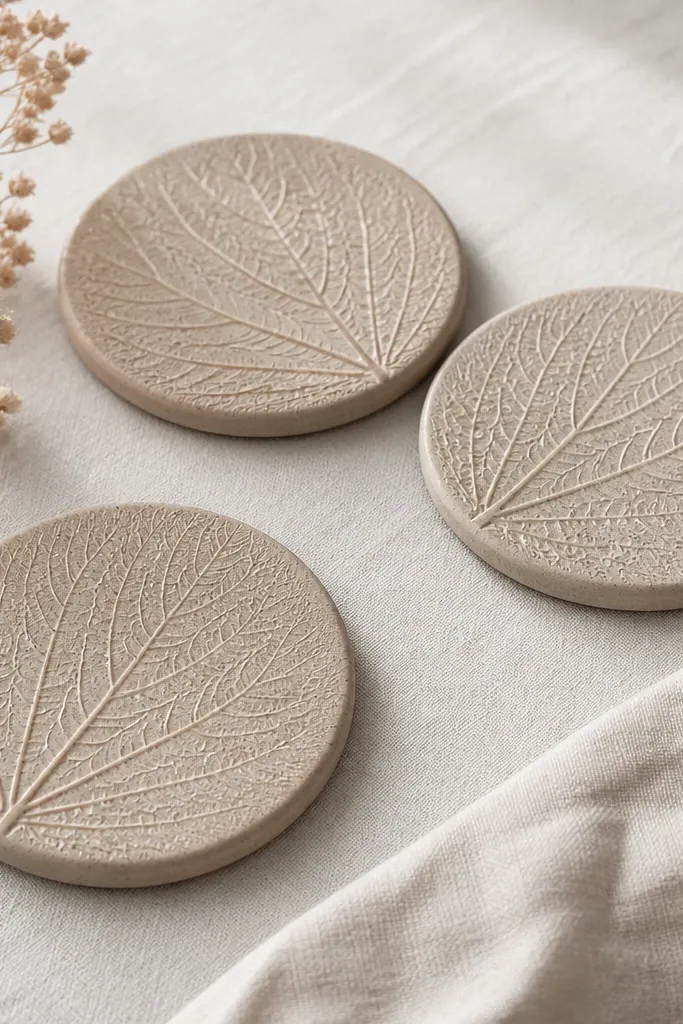
Paper clay coasters look artful because the leaf veins create texture you can feel. They also dry fast enough for a weekend project and they don’t require pottery skills. Use a neutral base like light grey or warm beige, then press real leaves like eucalyptus or small ivy for vein detail. The texture hides minor imperfections and makes the coaster look intentional even if your shapes aren’t perfectly round. It’s a great gift for friends who like nature-inspired decor.
Start by mixing or buying paper clay and rolling it to about 1/4 inch thick. Cut circles using a cup or ring template, around 3.5 inches wide. Press a leaf firmly into the clay, then lift straight up so the vein pattern stays crisp. Smooth the rim lightly with wet fingertips, then let them dry 24 hours. Seal with a matte clear coat so drinks don’t stain the surface, and buff the top with a dry cloth once cured.
Choose leaves with fine veins — big thick veins look muddy in the clay imprint.
Skip sealing — unsealed clay stains and gets rough with use.
20. Upcycled Jigsaw Puzzle Frame with Fabric Backing
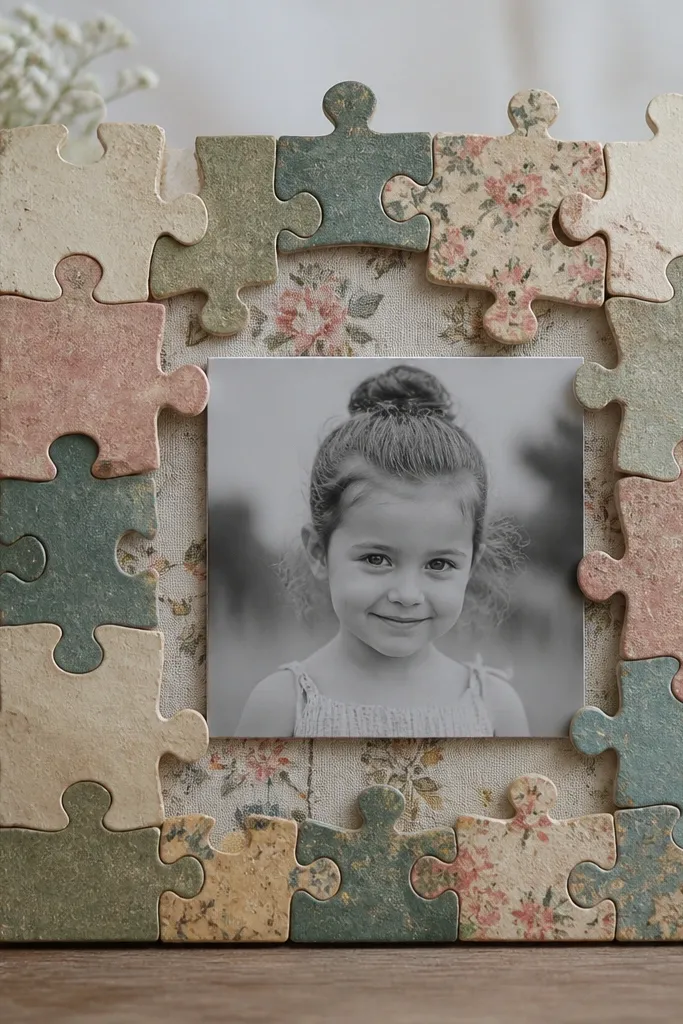
This looks like a custom frame without needing carpentry. The puzzle piece edges create a fun, hand-assembled border, and fabric backing gives it a soft, cozy feel. Use a single color puzzle set for the border so it stays cohesive, like cream pieces with light brown outlines. Fabric backing also hides raw edges and makes it neat behind the photo. It’s ideal for friends who like photos but don’t want a standard store frame.
Pro tipSpray the puzzle pieces with one light coat of matte seal before gluing if they’re glossy.
Start with a backing board from a scrap photo frame or a piece of cardboard cut to 8 x 10 inches. Arrange puzzle pieces around the photo opening, leaving a 1/4 inch gap between pieces if you want a clean border. Glue pieces in place with a strong craft glue, working from corners inward. Cut fabric to cover the back, then glue fabric edges to the board so nothing frays. Add a small photo mat by trimming cardstock and centering it behind the puzzle border.
AvoidDon’t glue the pieces directly onto fabric — it warps the frame when it dries.
21. Knotted Towel Heart from a Hand Towel
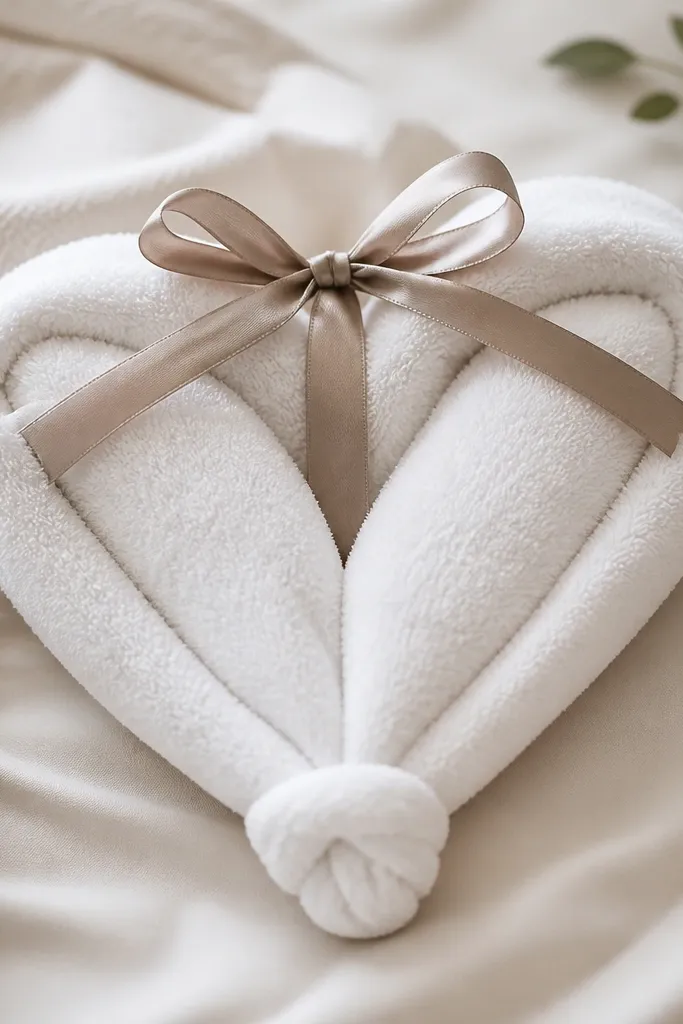
This gift is silly-cute and still looks neat, which is why it works even if you’re not a “crafty” person. A towel heart is perfect for a friend who hosts, stays in hotels, or loves spa vibes. Use a small hand towel in a color like lilac, sage, or classic white so it looks fresh. The knot at the bottom makes the heart hold its shape without any sewing. It’s also a great add-on gift with a candle or bath salts.
Pro tipUse a thicker towel — thin towels collapse and the heart loses its shape.
Start by laying the towel flat and folding it in half lengthwise so you have a long strip. Fold the strip into a wider U shape, then twist the middle slightly and bring the two ends up to form the heart lobes. Tuck the ends under the lobes and adjust so the top looks symmetrical. Tie a ribbon or hair tie around the base knot to lock the shape. Fluff the edges with your fingers so the heart has soft curves.
AvoidSkip loose knots — a sloppy knot makes the heart look like it fell apart.
22. Mini Soap Bar Wrapped in Cotton Muslin with Label Tag
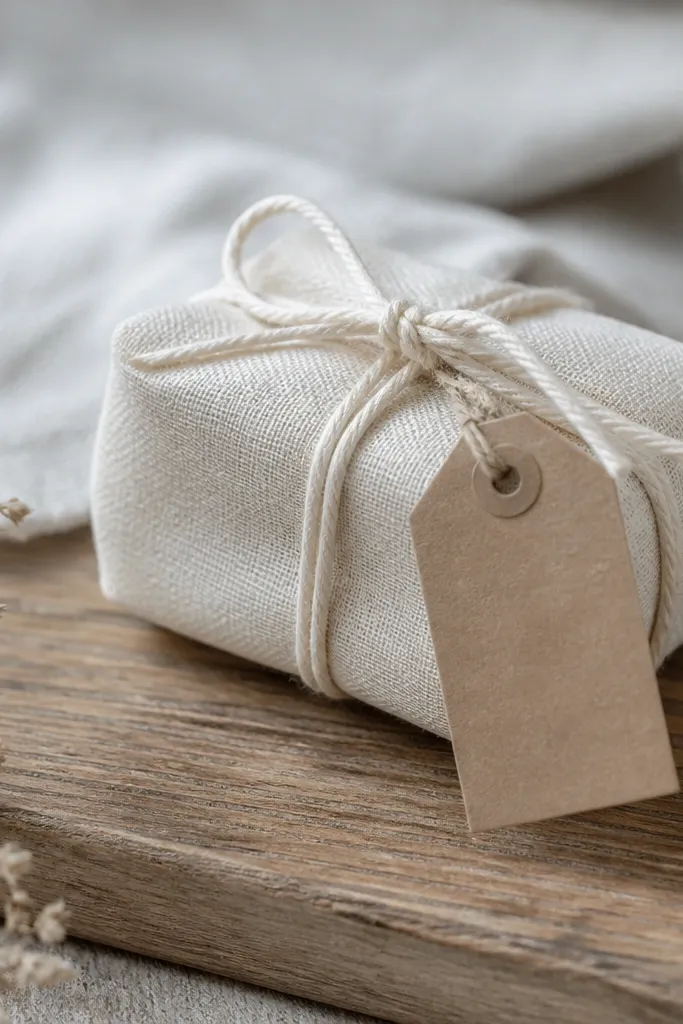
Handmade soap is one of those gifts that feels special, but the wrapping makes it look like a boutique item. Cotton muslin is breathable, so it looks natural and it doesn’t trap moisture like plastic. Use a kraft tag with a short message or initials, and tie everything with thin cotton string. This works for friends with sensitive skin because you can choose mild scents or unscented soap. The neutral wrapping looks good in any bathroom.
Start by wrapping your soap bar in cotton muslin sized so it overlaps by about 1 inch on each side. Gather the muslin at the top and tie with a 10-inch piece of cotton string. Thread the string through a small kraft tag with a punched hole and tie it so the tag faces out. If the muslin wants to slip, add one small stitch at the back seam with matching thread. Trim excess muslin so the knot looks clean.
Use a marker on kraft tag for sharp lettering — pencil smears under humidity.
Don’t use shiny wrapping paper — it looks cheap and can trap moisture.
23. Fabric Bookmark with Corner Pocket and Button Detail
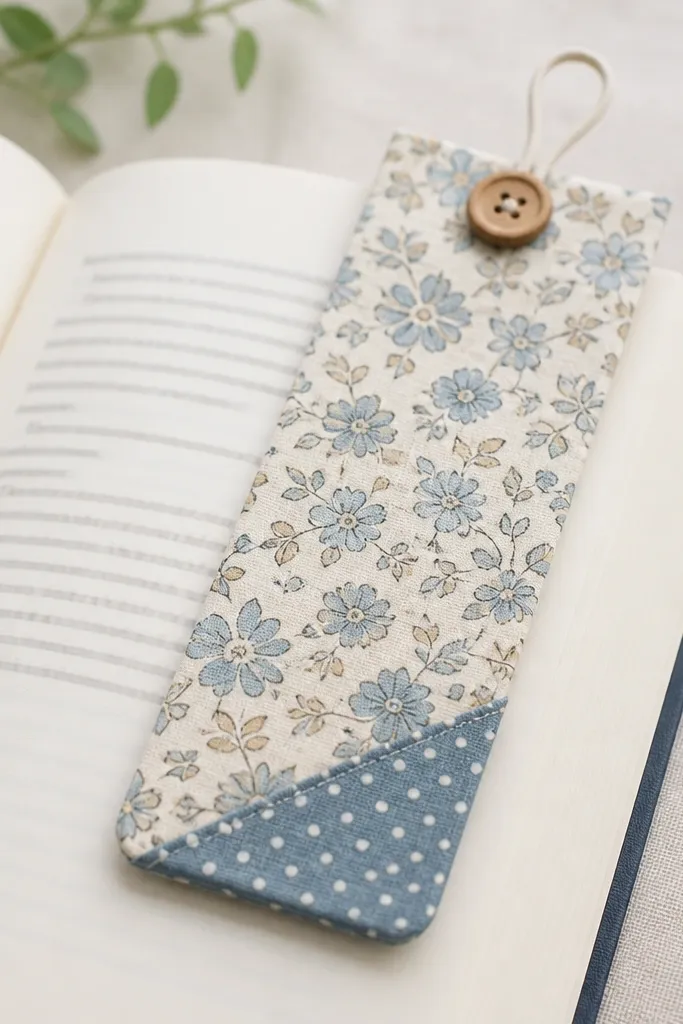
A fabric bookmark is practical and it feels personal because it matches your friend’s taste in patterns. The corner pocket style is secure, so the bookmark doesn’t slide out mid-read. Choose a cotton print with one dominant color — like navy with tiny white dots — so it pairs with most books. Add a small button detail for a handmade touch that stands out close-up. This suits friends who read paper books and hate bookmarks that fall out.
Start by cutting two fabric rectangles 3 inches wide by 8 inches tall. Sew them right sides together along both long edges, leaving the top open, then turn right-side out and press flat. Create the corner pocket by folding 1.5 inches of fabric at one end into a triangle and stitching along the base to form a pocket. Sew a button near the top on the outside and add a small loop made from thread or thin ribbon on the back. Finally, stitch the top opening closed with a neat ladder stitch.
Press with steam for 10 seconds — it makes corners crisp and keeps the pocket shape.
Skip loose top stitching — a gap near the opening makes the bookmark look unfinished.
24. Painted Mason Jar Organizer for Hair Ties and Clips
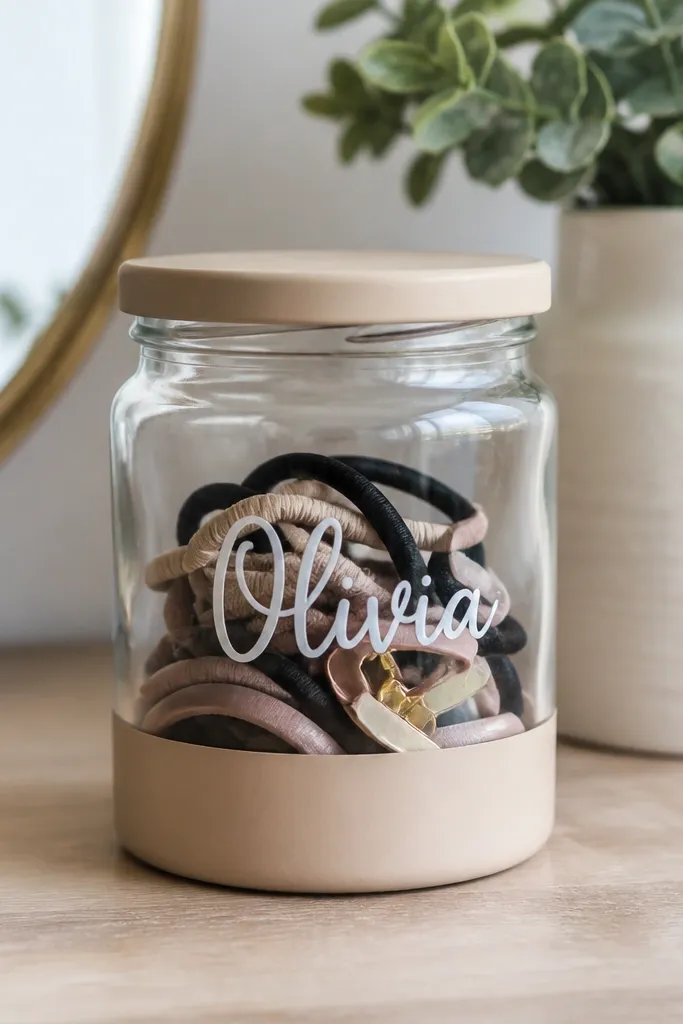
This is a gift that looks decorative on a shelf but still solves a real problem: tiny accessories disappearing. Mason jars have a clean silhouette, and a matte paint band keeps it from looking like random craft paint. Use a single matte color like sage green or blush pink, then write your friend’s name in dark ink. It works for most bathrooms and bedrooms because the jar stays neutral and the label is the accent. If your friend keeps clips in a drawer, this makes their morning faster.
Pro tipDo two thin coats instead of one thick coat — thick paint drips and looks amateur.
Start by cleaning the jar and removing any residue from the glass. Paint a band around the lower third using painter’s tape for a straight line, then let it dry fully. Paint the lid rim with the same color and set aside. Write the name with acrylic paint and a fine brush, keeping letters about 1/2 inch tall. Once dry, seal the painted parts with a clear matte sealer so it wipes clean.
AvoidDon’t paint over dust — it makes a bumpy finish that catches light.
25. Cinch-Tie Fabric Gift Bag with Drawstring Channel
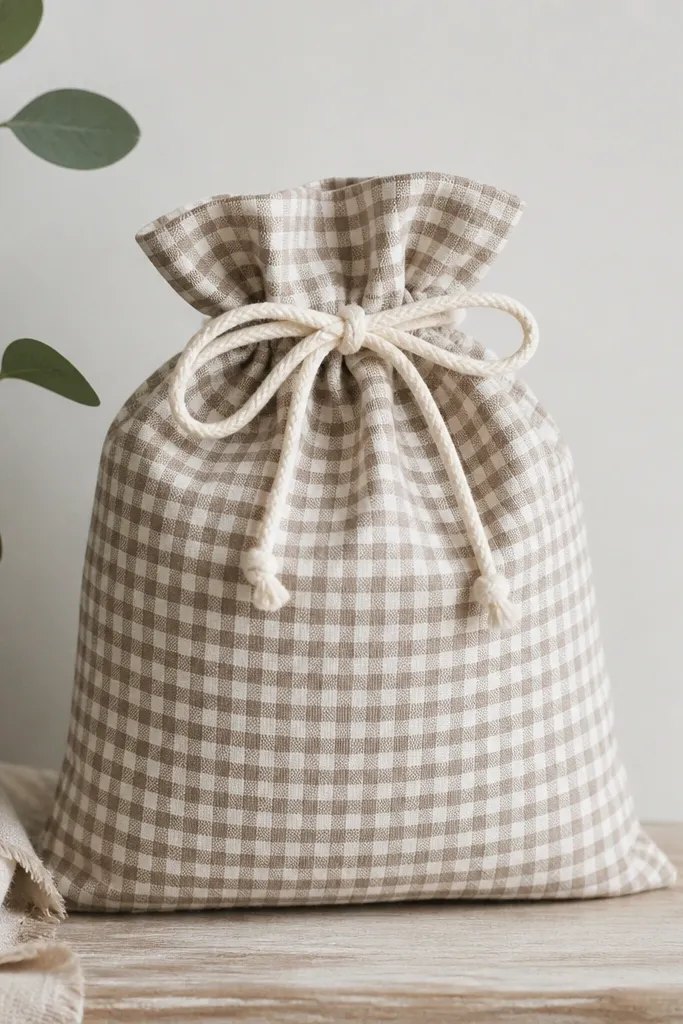
If you want your handmade gift to look like it came from a small shop, a reusable fabric bag does it instantly. The cinch-tie style looks neat because the top gathers evenly and hides raw edges. Choose cotton that matches your friend’s style, like small checks or subtle stripes. This works for any body type of gift — bottle, candles, or folded items — because the bag adjusts. It also flatters the recipient because they’ll reuse it.
Pro tipUse a thicker cord like cotton drawstring — thin cord twists and looks messy.
Start by cutting fabric to 14 inches tall by 12 inches wide. Sew the side seams with a 1/2-inch seam allowance, right sides together. Fold the top edge down 1 inch and press, then sew a line 3/4 inch from the fold to create the channel. Thread a 24-inch drawstring cord through using a safety pin. Gather the top evenly and tie off. If you want extra structure, add a second top seam so the channel stays flat.
AvoidSkip skipping the press step — unpressed fabric makes the channel uneven.



