
1. Cinnamon Star with Faux "Gold" Edges
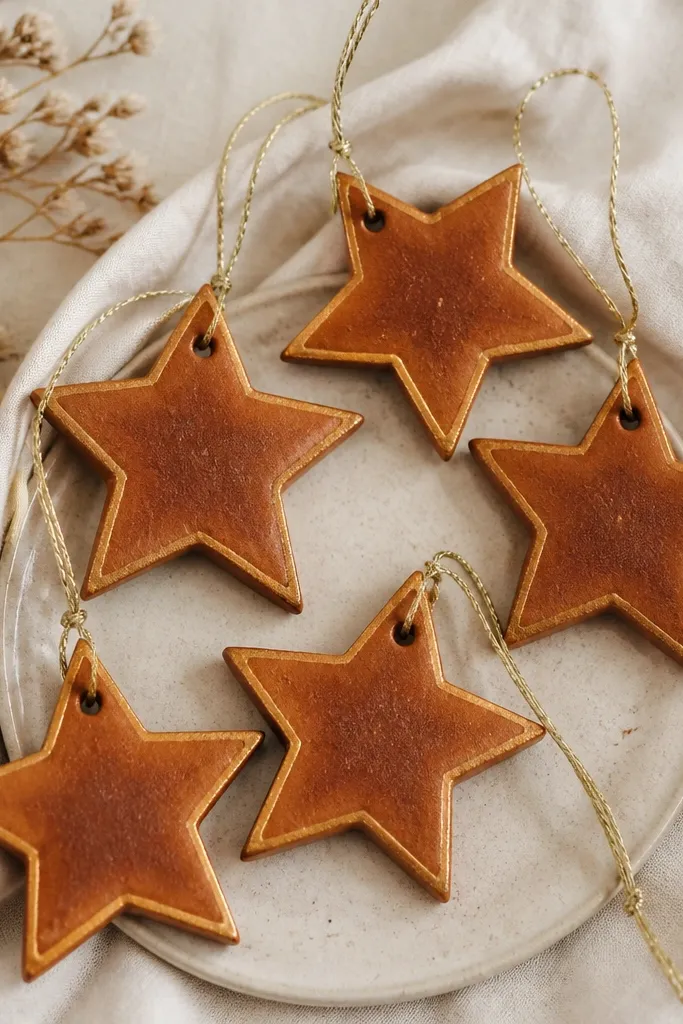
This one looks like a boutique holiday ornament because the shape is simple and the finish is controlled. Mix acrylic paint in warm cinnamon brown (think light cocoa) and paint the face in thin coats so brush marks stay visible. Then dry-brush a tiny band of metallic gold along the star points — you want it to catch light, not cover everything. It looks best on pale or neutral spaces, and on people who like warm-toned decor, because the brown reads cozy and the gold reads clean. If you’re new to painting, stars are forgiving because the geometry hides small unevenness.
Roll your dough to about 6 mm, cut stars with a metal cookie cutter, and press a few gentle dots with the back of a paintbrush for subtle texture. Make the hanging hole with a drinking straw right at the top point before baking. Bake at 275°F / 135°C until the edges feel dry and the underside no longer looks shiny, then cool completely. Paint the whole star with cinnamon brown, let it dry, and dry-brush metallic gold just on the outer edges and tips. Finish by sealing with satin clear coat and tie gold twine through the hole.
When dry-brushing, wipe most gold paint off on a paper towel first so you get thin highlights instead of thick patches.
Don’t bake until the center is still cool and damp — that’s when gold lines crack later.
2. Speckled Snow Globe Ornaments
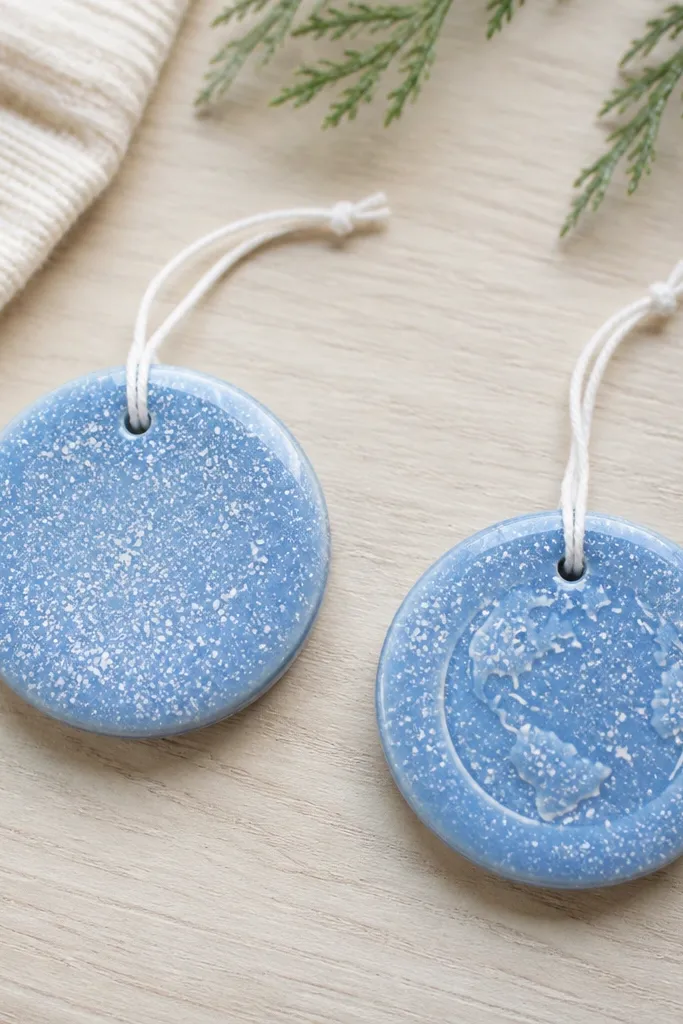
These look like mini snow globes because the speckles create instant depth. Start with a pale sky blue or icy teal base, then add white speckles in layers so some dots are larger and some are tiny. I like this for bedrooms and nurseries because the colors stay soft and calm, not loud. The round shape reads classic and works with both silver and gold hanging hardware. If you want something that looks detailed without carving, speckling is the easiest win.
Roll dough to 6 mm and cut circles using a bottle cap or a small round cutter. Use a toothpick to lightly score a shallow circle near the center to suggest a “globe” boundary. Bake until dry and cool. Paint the whole piece with watered-down pale blue acrylic, then while it’s still slightly tacky, flick white paint using a stiff toothbrush to create speckles. Add a second speckle pass once the first dries for a denser snow effect, then seal with a satin clear coat.
For more “snow,” thin your white paint to milk consistency so it flicks instead of smearing.
Skip heavy carving for the globe line — deep grooves crack as the ornament dries.
3. Leafy Pinecone Cutouts
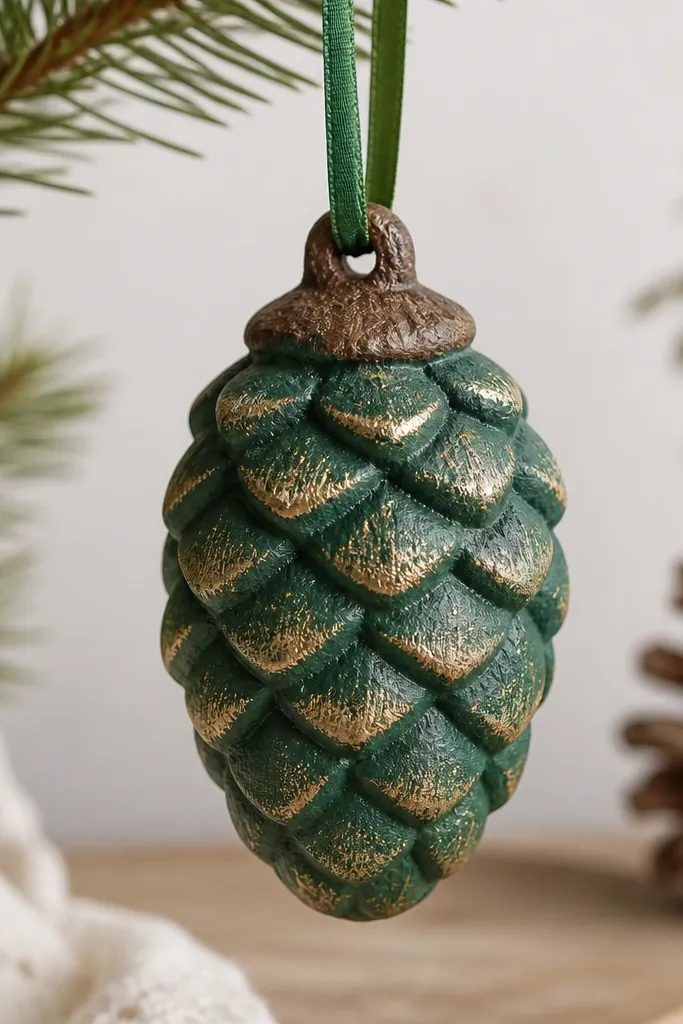
Pinecone shapes look impressive because the ridges catch light even if your painting isn’t perfect. Choose a pinecone cutter or press a pinecone pattern using a real textured pinecone as a stamp. Paint the base in forest green, then dry-brush a lighter olive or warm beige along the raised ridges so it looks dimensional. This style looks great with earthy wreaths and warm wood shelves. It also flatters the “natural” decorating vibe without needing any extra supplies beyond paint and a brush.
Roll dough to 7 mm so ridges don’t break, then press or cut pinecone shapes. Press the ridges firmly, but don’t overwork the dough — thin spots tear when baked. Add a hanging hole with a straw near the top cap right after cutting. Bake at 275°F / 135°C until fully dry, cool, then paint the entire pinecone forest green. Once dry, dry-brush lighter olive on the ridge tops only, then seal with matte clear coat to keep it looking earthy.
Rub a tiny amount of brown paint into the deepest creases with a damp brush for instant realism.
Don’t paint before the ornament is cool — warm dough pulls paint into blotches.
4. Mini Snowman Faces with Carrot Nose
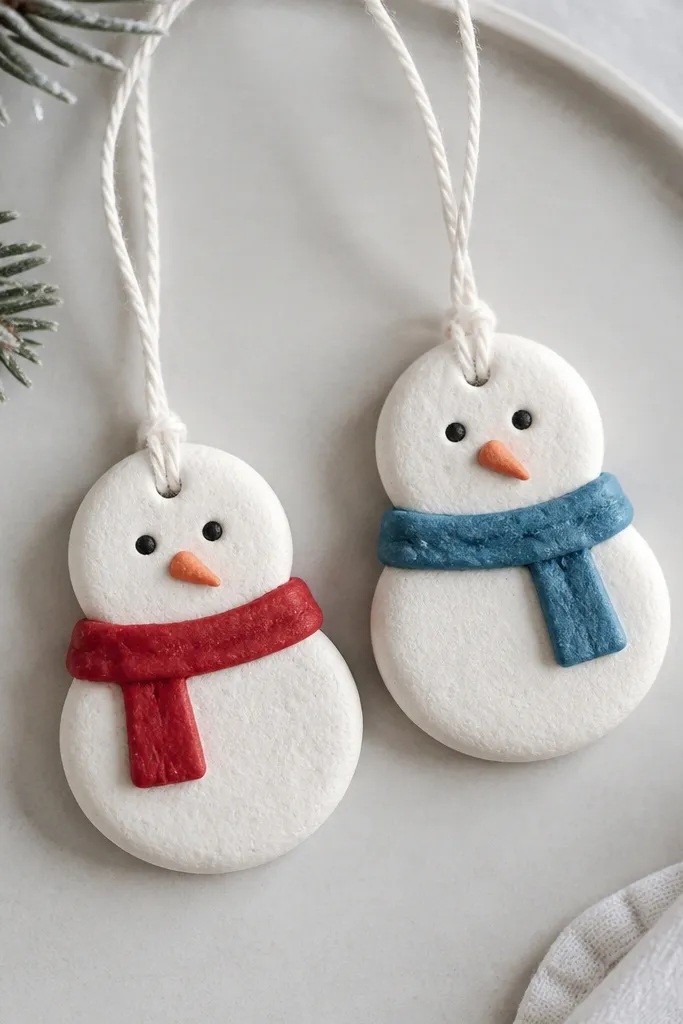
Snowmen look adorable on a tree because people read faces instantly. Keep the size small — around 3 inches tall — so the features sit neatly and don’t smear. Use a white base, then paint simple black eyes and a tiny mouth with a fine brush or a toothpick. The carrot nose is a small orange triangle that makes the whole ornament feel “complete.” This style works for any skin tone or decor preference because it’s high-contrast and cheerful. It also makes a good first project because you’re not relying on complicated textures.
Roll dough to 6 mm and cut two circles for each snowman: one larger, one slightly smaller. Bake both pieces separately, then cool. Glue them together with a thin layer of white craft glue or a tiny dab of warm glue gun (use sparingly) once baked. Paint the larger circle white, then paint the smaller circle as the head. Add black eyes, a small mouth, and a carrot nose with orange paint; paint a red scarf band across the neck area and seal with satin clear coat. Punch or use the straw hole placement so twine sits centered on top.
Pro tipUse a toothpick for eyes and mouth; it gives you crisp dots without brush streaks.
AvoidDon’t use watery paint for facial details — it bleeds into the dough grain.
5. Rosebud Heart Ornaments
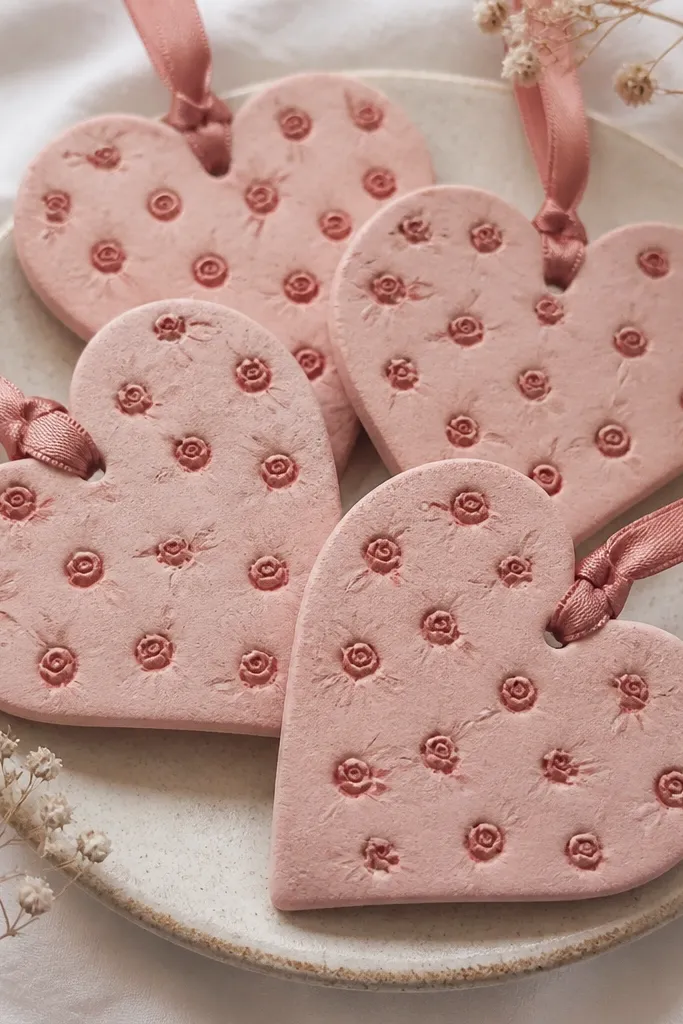
Hearts with rosebuds look romantic but still handmade, because the raised petals catch light. I like making the roses from small rolled coils and pressing them into a heart base — it reads like tiny clay work without needing sculpting tools. Choose a base color that matches your decor: dusty pink, blush, or even muted terracotta. The rosebuds should be one shade darker so they show up in photos. This is a great option for Valentine’s, weddings, or gift tags that double as ornaments.
Roll dough to 6-7 mm and cut hearts with a heart cutter. Make small rosebuds by rolling tiny balls, then flattening each into a petal shape with your thumb; stack 4-6 petals around a center. Press rosebuds into the center area of the heart and leave the edges mostly smooth so the shape stays clean. Add a hanging hole at the top point with a straw. Bake until dry, cool, then paint the entire heart dusty pink. Paint the rosebuds a slightly deeper shade and lightly dry-brush highlights on the raised edges. Seal with satin clear coat and thread ribbon through the hole.
Press the petals with a gentle rocking motion so they look layered instead of squished.
Avoid putting rosebuds right up to the heart edge — thin edges crack and lose detail.
6. Marbled Clay-Style Rounds
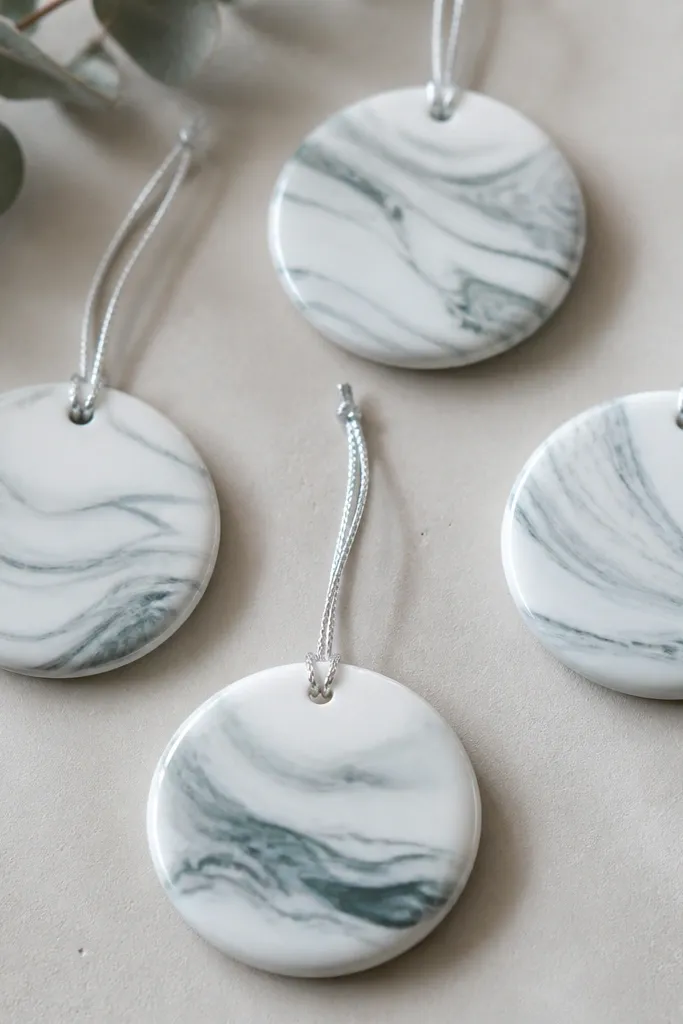
Marble looks fancy because it’s visual complexity without fragile details. You’ll get the effect by layering small streaks of colored dough on top of a white base, then swirling lightly. Use soft colors — gray plus a touch of teal or mint — so it stays elegant rather than cartoonish. These look great in modern homes and on trees with neutral ornaments. If you want a look that feels “designer,” marbling is the easiest path because the pattern hides tiny tool marks.
Roll a white dough slab to 6 mm. Make thin ropes of gray and teal dough, lay them on top, then fold the slab gently once and roll again without fully mixing. Cut circles and punch the hanging hole right away. Bake at 275°F / 135°C until dry and cool. If you want extra pop, lightly brush a diluted gray wash into the swirls after baking, then seal with satin clear coat for a stone-like finish.
Pro tipSwirl less than you think — too much mixing turns marble into muddy gray.
AvoidDon’t add too much colored dough or your edges will look thick and uneven.
7. Ribbed Band Baubles
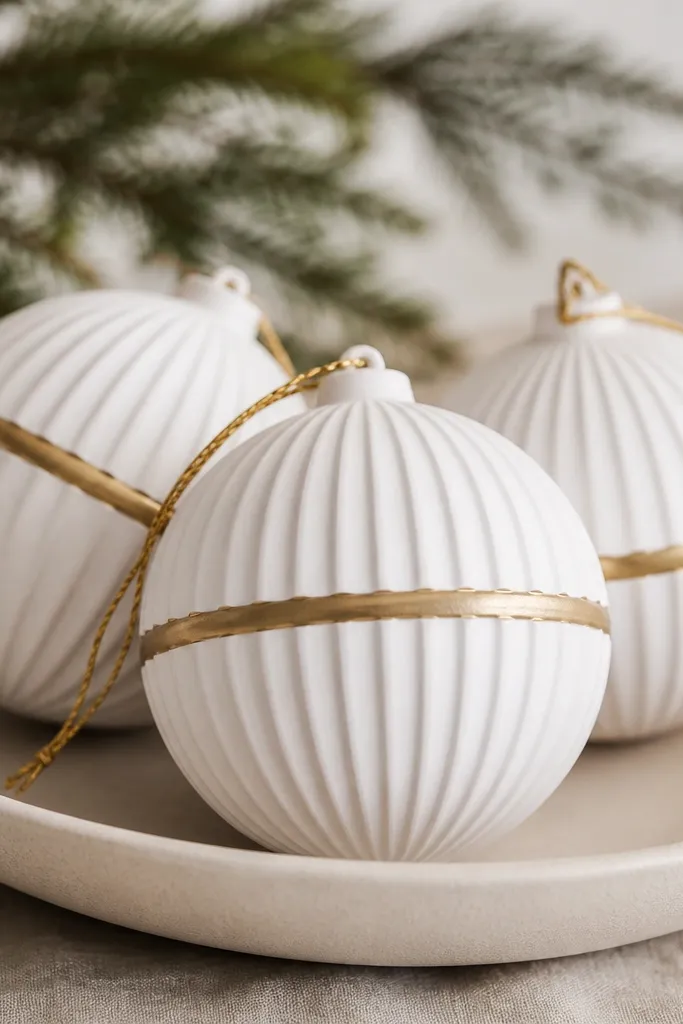
Ribbed baubles look expensive because the pattern creates natural shadows. You don’t need texture stamps — you can create ribs with a butter knife by lightly pressing straight lines into the dough. Paint the whole ornament matte white, then add one clean gold band across the middle for a “jewelry” feel. This style looks sharp with black, white, and metallic decor, and it reads elegant on both dark and light trees. It’s also friendly for beginners because the design is controlled and symmetrical.
Roll dough to 6 mm and cut bauble shapes using a rounded cutter or a circle with a teardrop top detail. Use the butter knife edge to press 8-10 shallow vertical ribs evenly around the sides. Punch a hanging hole near the top. Bake until fully dry, cool, then paint matte white. Once dry, tape a straight line band around the middle using painter’s tape, paint it metallic gold, remove tape while paint is still slightly tacky, then seal with matte clear coat so gold doesn’t look plastic.
Pro tipPress ribs with light pressure — deep ribs break when the ornament flexes during drying.
AvoidDon’t freehand the gold band — it looks messy fast; use tape.
8. Fabric-Embossed Snowflakes
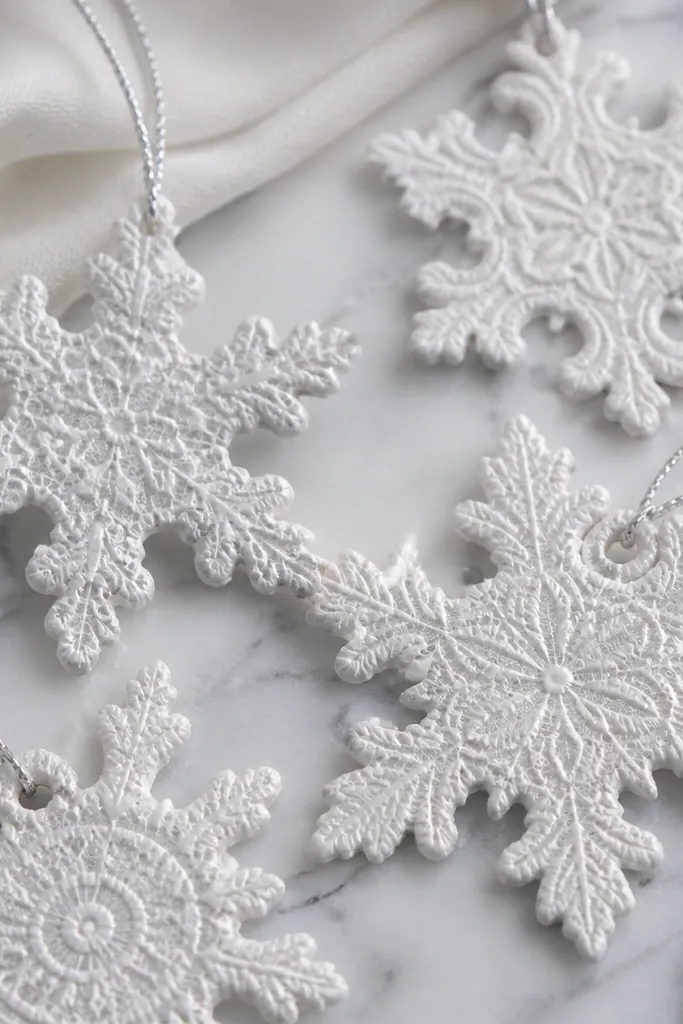
This is one of my favorite tricks because it gives you delicate texture without buying stamps. The embossing reads like lace when you paint lightly, and the raised pattern looks crisp in photos. Keep the color simple — white, cream, or pale icy blue — so the texture is the star. It looks best on trees with lots of white lights because the texture catches sparkle. If you want an ornament that feels special but is still quick, fabric embossing is the method.
Roll dough to 5-6 mm and cut snowflakes with a cutter. Lay a small piece of lace or textured cotton on top and press firmly with your palm so the pattern transfers. Use a straw to punch the hanging hole before baking. Bake at 275°F / 135°C until dry and cool. Paint the surface with watered-down acrylic in cream or icy blue, then let it dry and seal with satin clear coat so the raised lace texture stays visible.
Pro tipUse lace with a tight pattern — wide, loose lace makes blurry texture.
AvoidDon’t skip sealing; unsealed embossed paint flakes when you handle ornaments.
9. "Wreath" Mini Circles with Pine Texture
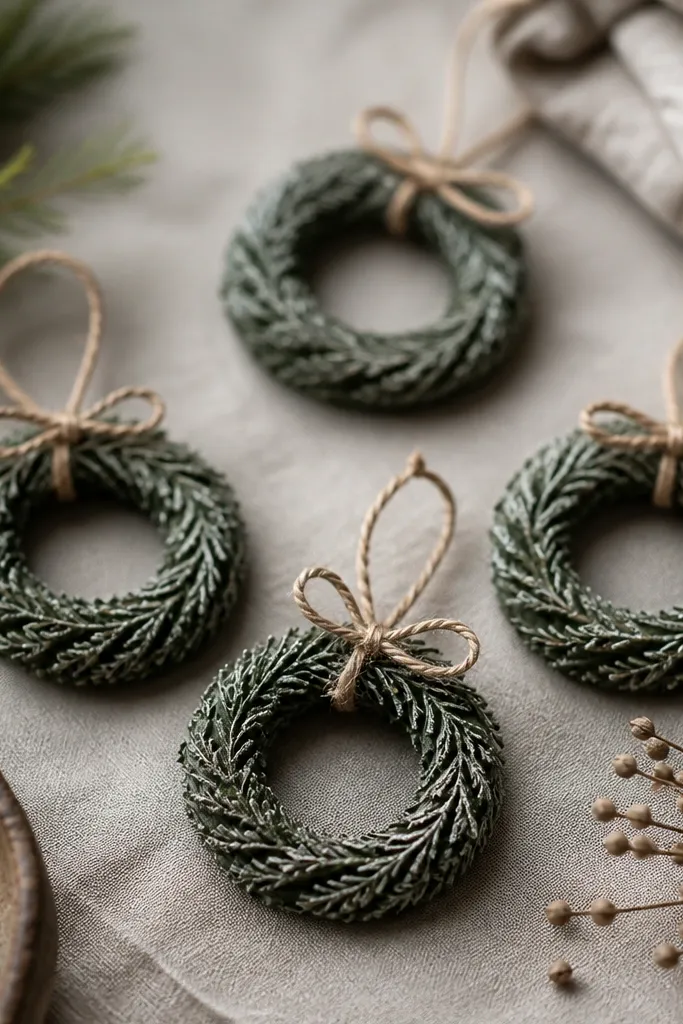
Ring ornaments read like wreaths even when they’re tiny, and pine-needle texture makes them feel real. You’re basically creating a miniature landscape: deep green base with lighter tips that look like needles catching light. This style works for both farmhouse and modern rustic decor because it has clear shapes and earthy tones. It also hangs nicely in clusters since the circles line up visually. The texture does most of the heavy lifting.
Roll dough to 7 mm and cut rings using a circle cutter and a smaller center cutter. Press pine-needle texture using the back of a pine branch or a piney-textured stamp, focusing on the outer ring area. Punch a hanging hole with a straw through the top edge of the ring. Bake until dry and cool. Paint the ring dark green, then dry-brush lighter olive tips on the raised needle areas only. Seal with matte clear coat and tie tan twine or a small bow through the hole.
Pro tipIf you don’t have pine texture, use a fork lightly pressed in short strokes to mimic needle ridges.
AvoidDon’t press too hard — thick dents crack during drying.
10. Turquoise Aztec-Style Triangles
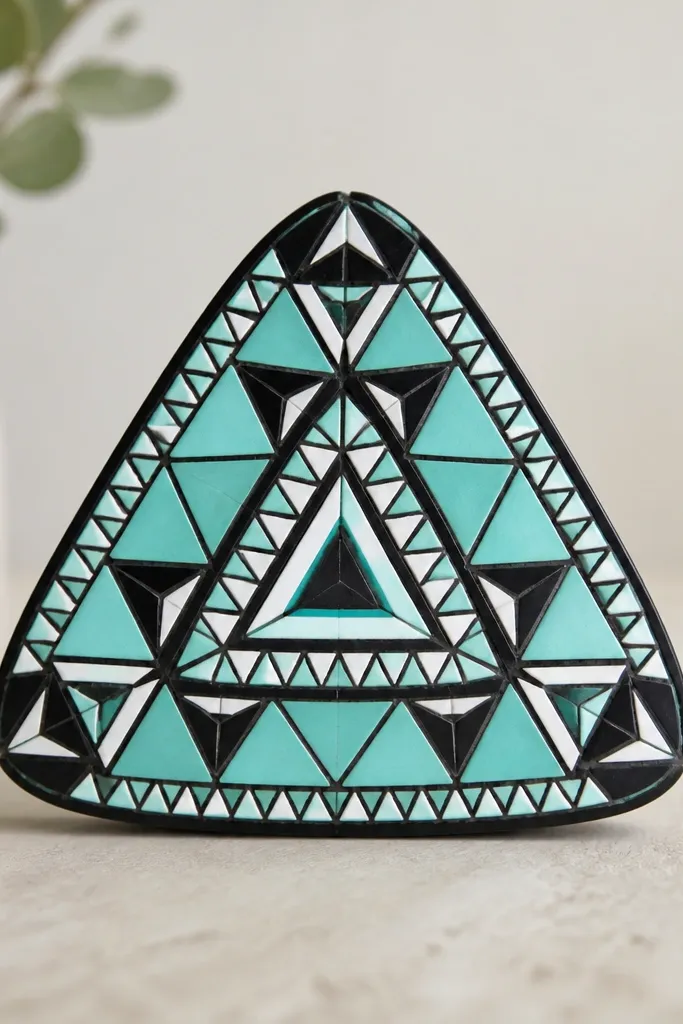
Geometric patterns photograph like printed ceramics, especially when the lines are crisp. For this look, you’re using triangle repetition and clean outlines, so you need steady hands and a fine paint marker or liner brush. Turquoise plus black is bold and modern, and the white highlights keep it from looking flat. This works great if your tree has monochrome ornaments and you want one statement color. It also makes a fun gift because the pattern feels intentional, not random.
Roll dough to 6 mm and cut rounded triangles using a template or a triangular cutter with rounded corners. Bake until dry and cool. Paint the entire piece turquoise, then let it dry fully. Use a fine liner brush to draw a border line and then add repeating small triangles in rows across the center. Add tiny white dots or short dashes at the triangle points for contrast. Seal with matte clear coat to keep the black lines from smearing.
Practice one row on paper first — once your spacing is right, copy it across the ornament.
Don’t use thick paint for outlines; thick lines look like blobs on small ornaments.
11. Gold Foil Speckle Moons
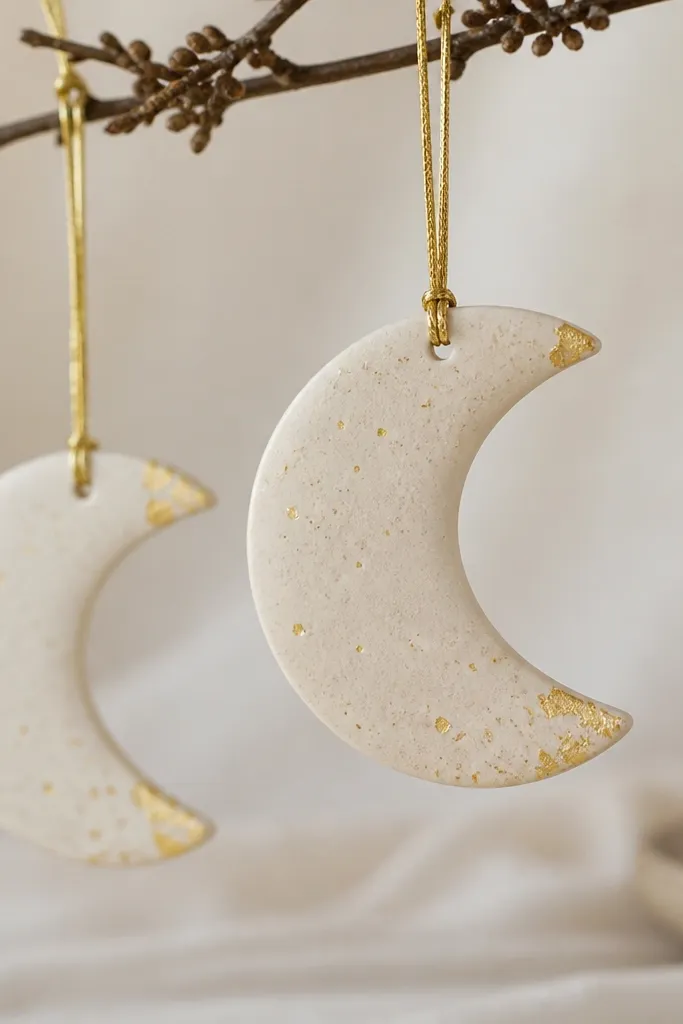
Crescent moons look calm and modern, and the gold speckles make them feel magical without looking childish. Start with a cream or soft ivory base so the gold reads warm. Then add a few clusters of gold foil flakes — less is more, because foil has shine that can overpower if you go heavy. This style looks great in minimalist decor and on trees with warm white lights. It flatters the whole “soft neutral” palette.
Roll dough to 6 mm and cut crescent moons with a moon cutter. Punch a small hanging hole near the top center of the crescent. Bake until fully dry, then cool. Paint with ivory acrylic in thin coats. For speckles, dab watered-down metallic gold paint with a toothbrush, then press tiny gold foil flakes in two or three spots using a craft glue dot underneath. Seal with satin clear coat so foil doesn’t catch dust and dull over time.
If you want foil to stick cleanly, use a tiny dab of clear-drying glue where you place each flake.
Avoid sealing too early — metallic paint and foil need time to set or they smear.
12. Rainbow Swirl Lollipops (Mini Candy)
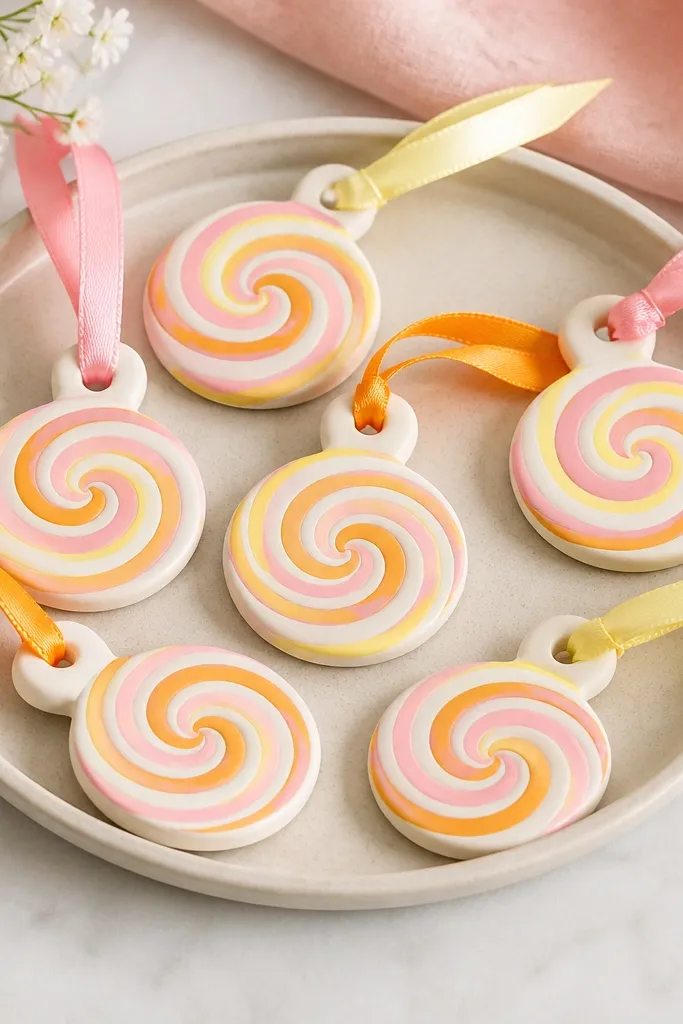
These are playful but still neat because the stripes are controlled. The secret is rolling colored dough strips and twisting them before you shape the lollipop, so the swirl looks like candy rather than paint. Pick 3 colors max so it stays crisp. This looks fun on kids' trees and also works as a hanging accent on gifts. It flatters anyone who likes bright color, because the base stays light and the swirl reads clean.
Roll white dough to 6 mm and cut a long strip for the lollipop body plus a thinner strip for the stick. Create 3 thin colored ropes, lay them side-by-side on the white strip, then roll the strip up so colors wrap inside. Gently twist the rolled piece once, form it into a lollipop curve, and pinch ends to seal. Add a hanging hole near the top of the stick using a straw. Bake until dry, cool, then lightly seal with satin clear coat. If you want extra candy shine, add a second thin clear coat after the first dries.
Keep your colored ropes thin (about 3 mm) so the swirl has fine stripes.
Don’t make the dough too thick under the stripes or the ornament bakes unevenly.
13. Monochrome Marble Tree Rings
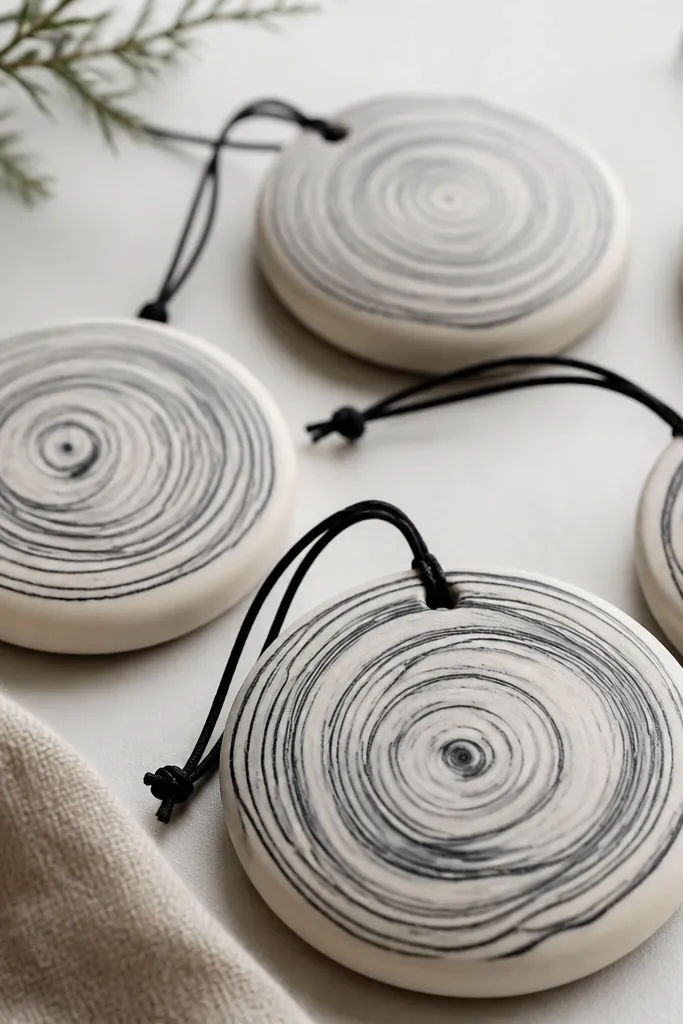
If you like Scandinavian vibes, this is the ornament for you. Concentric rings look like wood grain or stone, and the monochrome palette stays chic. You’re not painting a design — you’re creating it in the dough, which is why it looks so clean and cohesive. It matches almost any decor because it uses neutral tones. The pattern also hides small rolling imperfections, which is a relief when you’re making a batch.
Roll an off-white dough slab to 6 mm. Lay thin charcoal-gray ropes along the surface in 4-5 parallel lines, then fold and roll gently once so the gray forms streaks. Cut circles and, with your thumb, lightly swirl the surface into concentric rings (don’t overdo it). Punch the hanging hole and bake until dry. After baking, you can do a very light dry-brush of charcoal in the deepest swirls, then seal with matte clear coat.
Pro tipSwirl with your thumb in small circles while the dough is still cool, not after baking.
AvoidAvoid sanding or scraping hard — you’ll remove the ring texture.
14. Starburst with Tiny Button Imprints
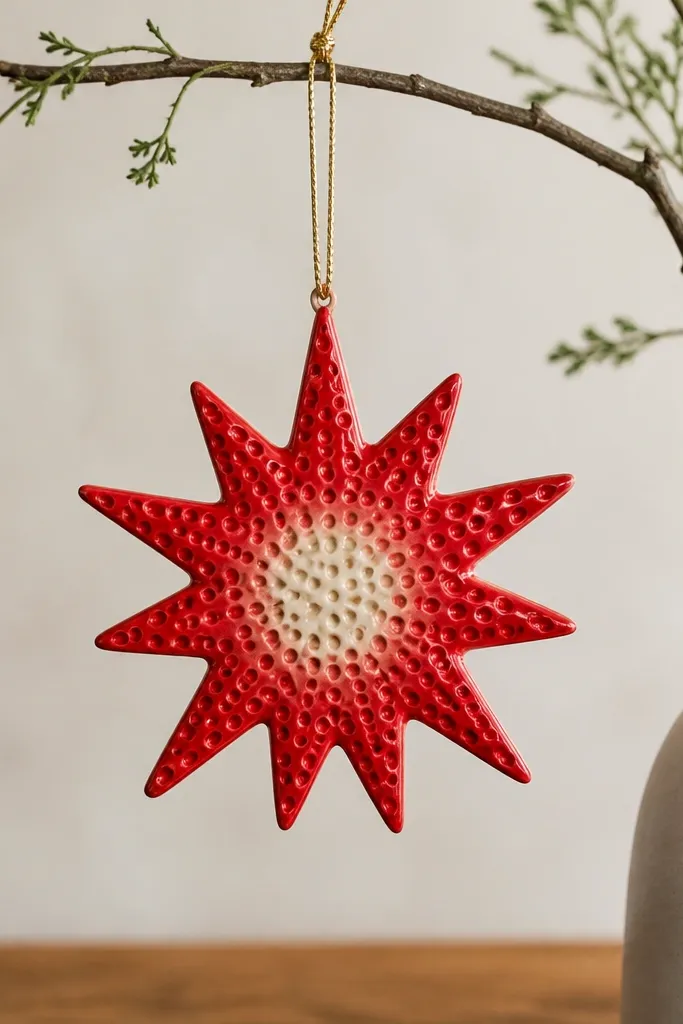
Button imprints make a starburst feel tactile, like fabric-covered buttons you’d find at a craft fair. The raised dots catch light and add texture even if you keep the colors bold. I love red with a cream center for a classic holiday look that pops on dark trees. It also works for party decor because it reads instantly from across the room. If you want something that looks “designed” without painting complicated lines, this is a strong pick.
Roll dough to 6 mm and cut starburst shapes. Use the tip of a small bottle cap or the back of a tiny button to press dot patterns across the rays. Leave the very center smoother so you have a clean focal point. Punch a hanging hole at the top ray. Bake until dry and cool. Paint the entire ornament red, then paint the center circle cream. Seal with satin clear coat and add gold twine through the hole.
Press dots in a grid so the texture looks intentional, not random.
Don’t press dots too deep — deep dents crack as the ornament dries.
15. Matte Sage Botanicals (Leaf Vein Prints)
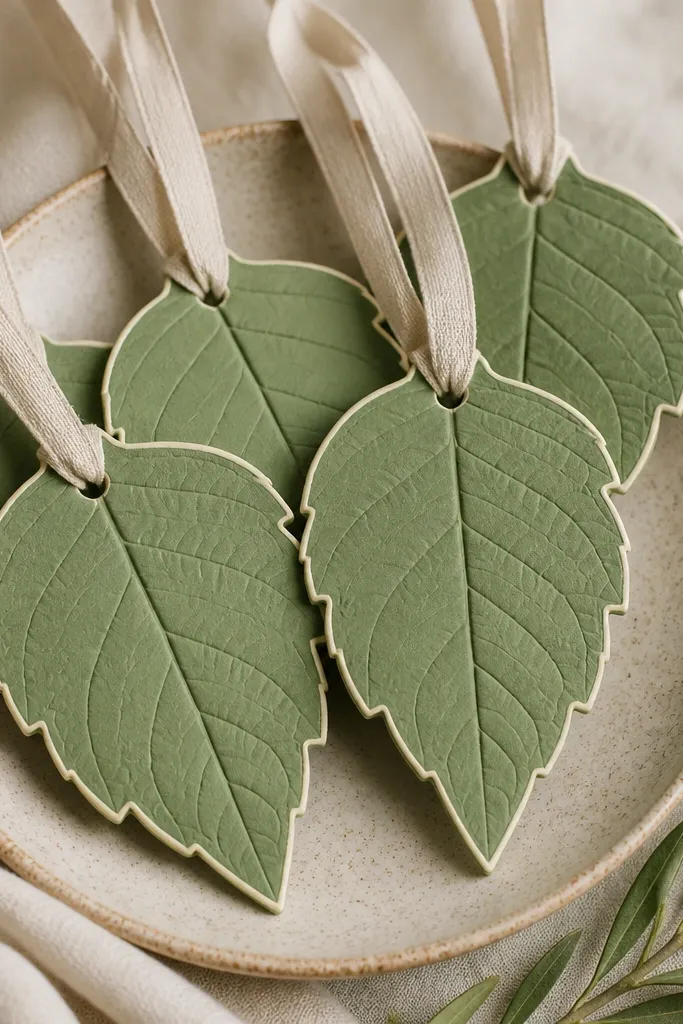
Leaf vein prints look like pressed botanicals, and you get that effect with real leaves. The sage color stays calm and modern, and the cream outline makes the shape read clearly against the background. This is the ornament I reach for when I want something that doesn’t scream holiday — it looks good on a year-round branch display. It also flatters people who like neutral palettes and minimal decoration. The veins create depth without needing extra tools.
Roll dough to 6 mm and cut leaf silhouettes using a leaf template. Lay a fresh or dried leaf on top of the dough and press firmly so the veins transfer. Use a straw to punch a hanging hole near the top of the leaf. Bake until fully dry, then cool. Paint the piece matte sage green, let it dry, then dry-brush a thin cream line along the edges with a small angled brush. Seal with matte clear coat and tie linen ribbon through the hole.
Pick leaves with crisp veins (like certain herb leaves) so the imprint shows up sharply.
Skip wet leaves; they leave moisture that can cause bubbling in the oven.
16. Maroon Lace-Trim Angels
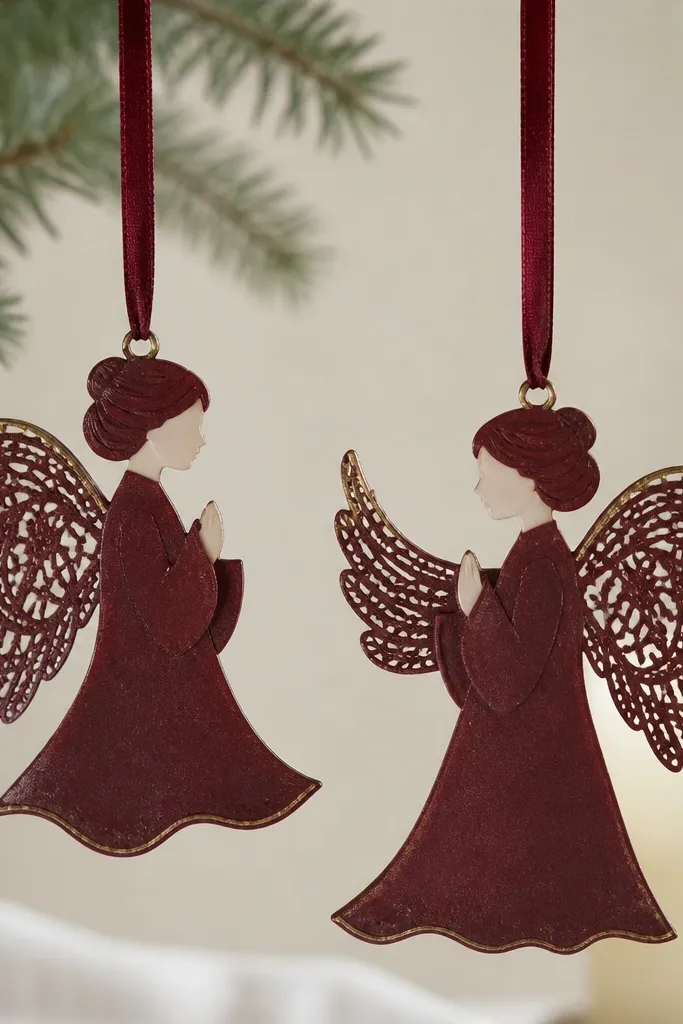
Angels look sweet, but the wings are where the magic is. Using lace embossing on the wings makes them look detailed without you having to paint tiny feathers. Maroon and cream is dramatic, and gold highlights keep it from looking too heavy. This style looks great on darker trees and in entryway decor where you want something with contrast. It also suits gift sets because it feels special even when you make it in bulk.
Roll dough to 6 mm and cut angel shapes using a simple angel cutter. Press lace onto the wing area only so the texture stays concentrated. Punch a hanging hole at the top around the head. Bake until dry and cool. Paint the wings and body maroon, then paint the face and hands cream. Add tiny gold dry-brushed lines along the lace raised edges and seal with satin clear coat.
Use lace as a stencil — press once firmly and lift straight up so you don’t smear the pattern.
Don’t emboss the whole ornament; lace texture everywhere makes it look cluttered.
17. Monogram Initial Ornaments in Soft Pastel
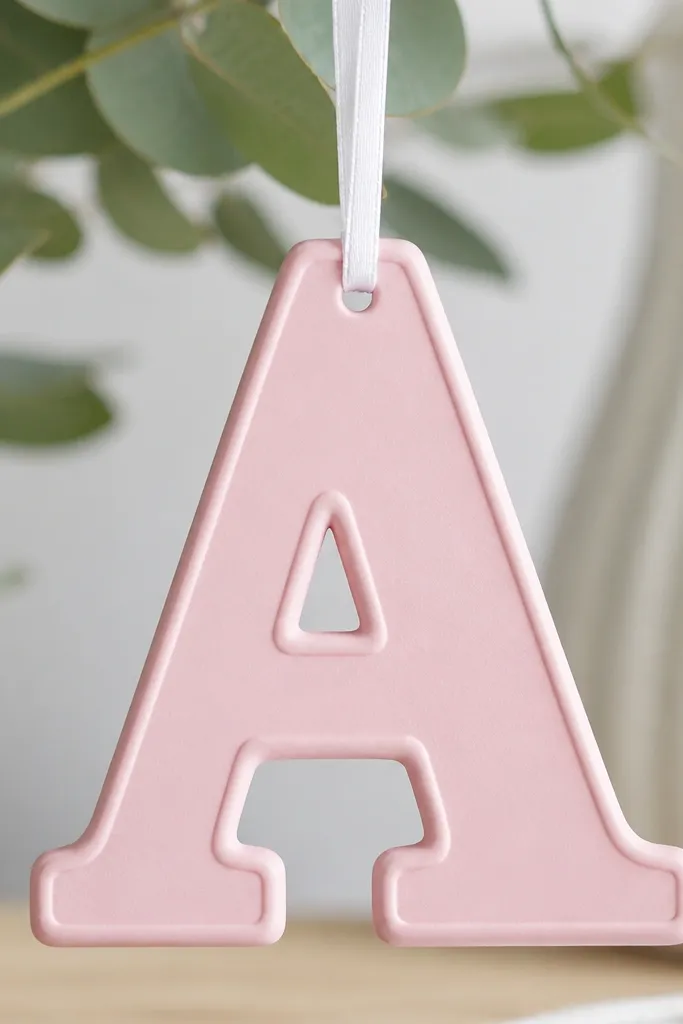
Monogram ornaments look personal fast, and the pastel palette makes them feel modern instead of old-fashioned. The trick is using raised borders so the letter reads clearly even if your dough edges aren’t perfect. I’ve done these for birthdays and they look like custom keepsakes. Pastels also photograph well because they don’t glare under warm lights. This is the best option when you want one ornament that feels tailored without painting lots of details.
Roll dough to 7 mm for sturdiness since letters have thin strokes. Cut a simple rectangle or circle base, then carve a letter lightly on top with a craft knife — keep the cuts shallow. Add a raised border by rolling a thin dough rope and pressing it around the edge of the base. Punch a hanging hole before baking, then bake until dry and cool. Paint the base pastel pink or pale blue, let dry, then seal with matte clear coat. If you want the letter to stand out, brush the letter in a slightly darker pastel and seal again after it dries.
If the letter is thin, thicken it by adding a second layer of dough on top before baking.
Don’t carve deep letters; deep grooves crack while cooling.
18. Citrus Slice Ornaments with Tiny Seeds
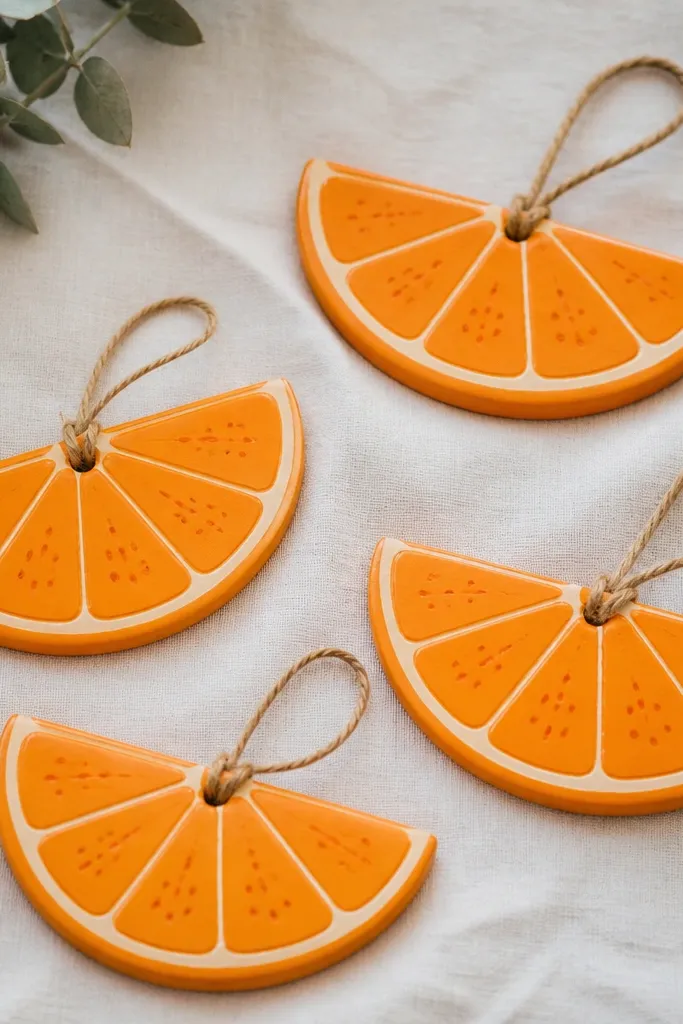
Orange slice ornaments look cheerful and bright, and they’re surprisingly easy because you’re repeating a simple pattern: segments and seeds. The look works best with strong color separation — orange base, pale pith ring, and darker seed dots. It also pairs well with rustic decor because jute twine and matte sealant make it feel like dried fruit. If you like decor that smells like summer even when it’s winter, citrus slices hit that vibe. Your audience will think you bought them somewhere.
Roll dough to 6 mm and cut orange slice shapes using a citrus template. Use a butter knife to lightly score segment lines from the center outward — shallow enough that you don’t create deep channels. Add a pith ring by pressing a thin dough circle near the edge of the center. Add seed dots with a toothpick tip, pressing gently so you create small raised bumps. Punch a hanging hole near the top, bake until dry, then paint: orange base, pale pith ring, darker orange seed dots, and a faint white dry-brush on the outer rim. Seal with matte clear coat.
Make seed dots slightly irregular — perfect dots look like a sticker, not fruit.
Don’t flood paint into the scored lines; it can pool and look messy.
19. Black-and-White Striped Baubles
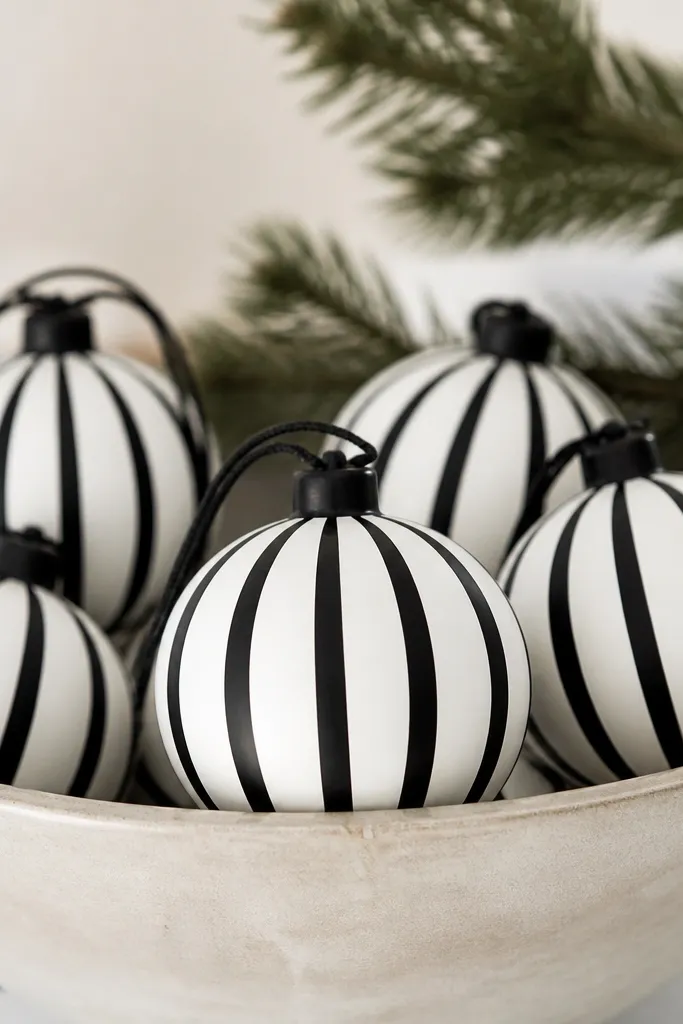
Stripes look clean and graphic, and that’s why they’re so flattering on a tree. This design reads modern because the contrast is high and the lines are straight. You don’t need fancy stencils; you need tape and patience. Black-and-white also works if your decor is minimal and you don’t want glitter or loud colors. It’s a great option for adults because it feels more like decor than craft-shop novelty.
Roll dough to 6 mm and cut circles or bauble shapes. Bake and cool fully. Paint the entire ornament white first, then let it dry completely. Wrap painter’s tape around the ornament to create stripe boundaries, spacing the tape evenly. Paint black over exposed areas, let dry, then remove tape while paint is still slightly tacky to avoid peeling edges. Seal with satin clear coat so the stripes stay crisp and don’t look chalky.
Pro tipUse a small craft brush for stripe edges so paint doesn’t bleed under tape.
AvoidAvoid removing tape after paint fully cures — it can tear the edge of the ornament.
20. Lavender Bud Buddies
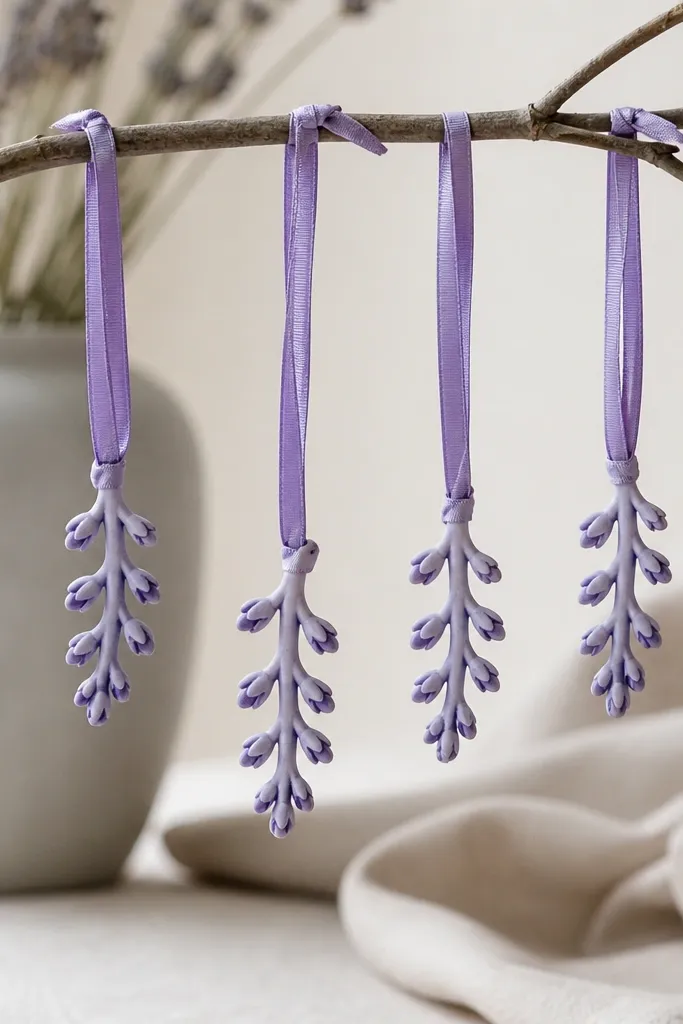
Lavender buds look delicate because the buds are raised and the color is soft. This style is sweet without being childish, and it matches both farmhouse and modern shabby decor. The key is using two lavender shades — a base lavender and a slightly deeper purple for the bud centers. When the raised buds catch light, they look like real dried flowers. If you’re making a set for a friend, these feel thoughtful because the color is calm and specific.
Roll dough to 6-7 mm and cut small sprig shapes with a leaf/sprig cutter or by hand cutting thin curves. Press tiny bud bumps along one side using the eraser end of a pencil or a small rounded tool. Punch a hanging hole at the top of the sprig. Bake until dry and cool. Paint the whole sprig lavender, then paint each bud center a deeper purple. Seal with matte clear coat so the lavender looks like dried botanicals rather than shiny candy.
Keep bud bumps consistent in size — the sprig looks intentional instead of lumpy.
Don’t make sprigs too thin; thin dough snaps when you tie ribbon.
21. Antique Gold Starbursts with Wash
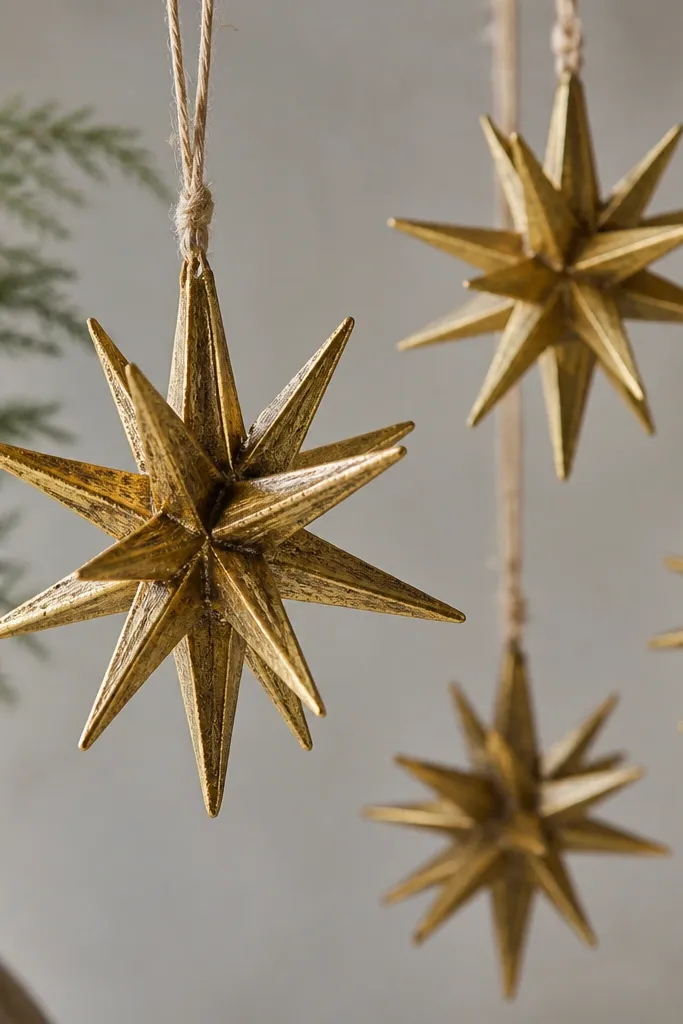
Antique gold looks like it came from an old ornament box, and the effect is easy if you use a wash. Paint the entire starburst metallic gold first, then brush a thin brown wash into creases and raised textures. Once it dries, you wipe highlights with a dry cloth or dry brush so the points look bright again. This style looks amazing on trees with warm white lights. It also works for anyone who wants something “seasonal” without loud colors.
Roll dough to 6 mm and cut starbursts. Press small texture lines into the rays using a fork or a texture comb. Punch a hanging hole and bake until dry and cool. Paint the entire ornament metallic gold and let it dry. Mix a brown acrylic wash (brown + water + a tiny bit of black) and brush it over the whole piece, then wipe the surface lightly with a dry paper towel so wash settles in texture. Seal with satin clear coat and tie tan twine.
Do the wash in thin layers; one heavy coat makes everything look muddy.
Skip wiping highlights — without that step the ornament looks flat and dirty.
22. Soft Blush Snowflakes with Pink Specks
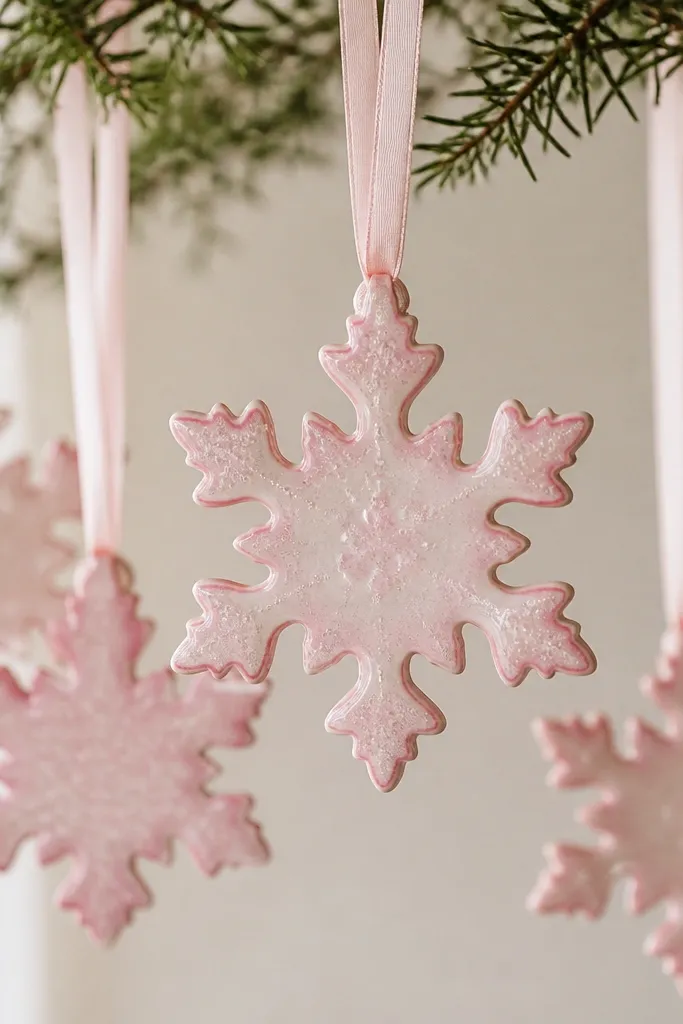
If your decor is neutral but you still want a hint of color, blush snowflakes are perfect. The base blush gives you a gentle, cozy tone, and the pink specks add movement like falling snow. I keep the speckles lighter than you think so the design stays airy. This looks great on white trees or in a window display with daylight, because the satin finish catches light without glare. It also flatters people who like pastel crafts and gentle palettes.
Roll dough to 5-6 mm and cut snowflakes. Punch a hanging hole with a straw near the top arm. Bake until dry and cool. Paint the snowflake blush pink in thin coats. For speckles, load a toothbrush with watered-down lighter pink or white and flick lightly across the surface. Add a slightly darker pink dry-brush along edges for definition, then seal with satin clear coat.
Pro tipFlick speckles from farther away — it keeps them tiny and even.
AvoidDon’t over-saturate the speckles; wet paint spreads and kills the snowflake pattern.
23. Terracotta Geode Squares
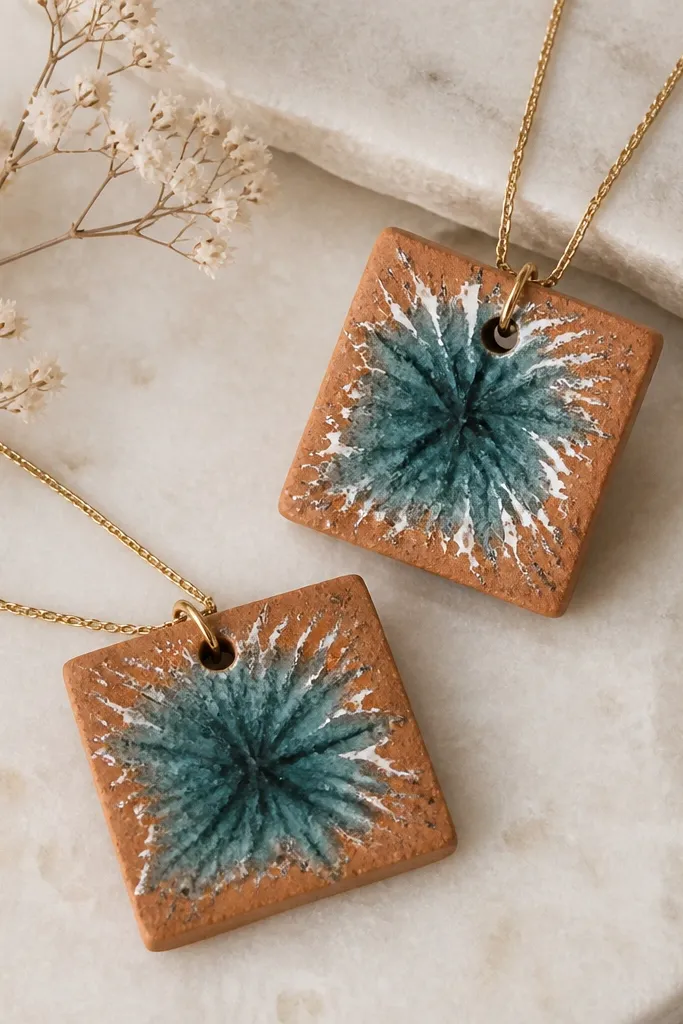
Geode-style ornaments look like polished stones, and squares make them feel modern. You’re creating a faux crystal center by painting a dark teal burst in the middle, then outlining it with lighter teal and tiny white lines. Terracotta around the outside keeps the stone warm and earthy. This one looks striking in a grouping because the shapes line up. It also suits anyone who wants a decor piece that isn’t purely holiday-red or holiday-green.
Roll dough to 7 mm and cut squares, then round the corners slightly with your fingers. Bake until dry and cool. Paint the edges and background terracotta. Mix a dark teal and paint a center burst shape — like a jagged oval or irregular circle with pointed edges. Add lighter teal inside the dark shape, then draw thin white lines radiating from the center like crystal seams. Seal with satin clear coat and thread gold chain through the hole.
Pro tipUse a cotton swab to soften the center edges between dark and light teal so it looks stone-like.
AvoidAvoid thin, fragile corners — they chip if you round too aggressively.
24. Monochrome "Rope" Twine Wrapped Hearts
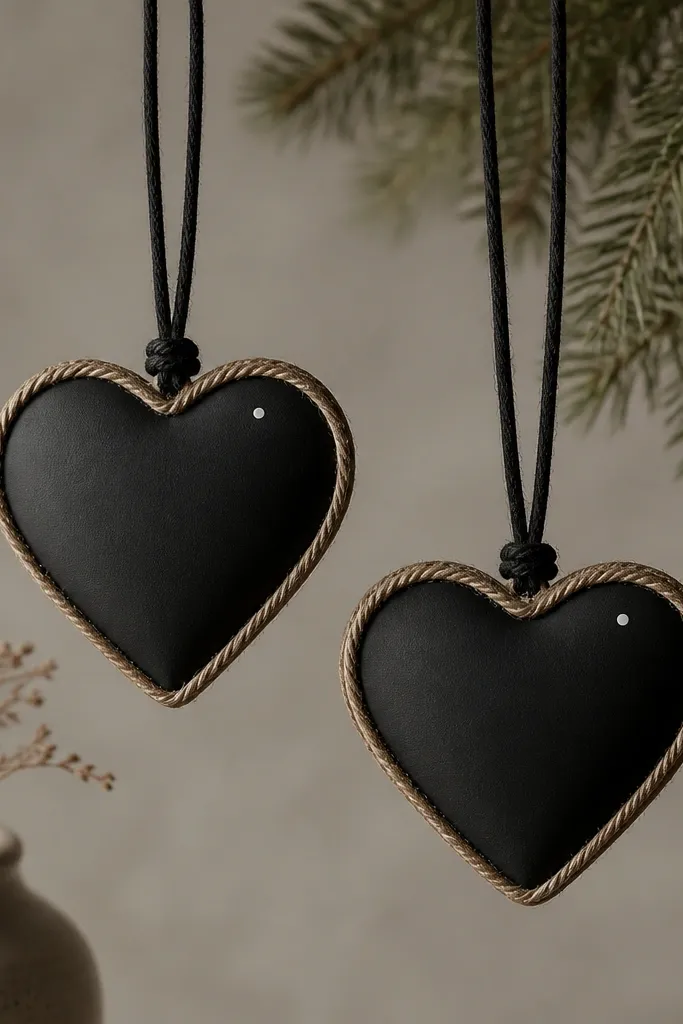
This looks handmade in a way paint alone can’t: the rope trim creates real dimension. I use matte black for the base and keep the twine natural or black so it reads clean. The heart shape is classic, but the twine wrap makes it look like something you’d find in a boutique. It also hides minor edge imperfections because the twine covers them. If you like farmhouse style but want it to look intentional, this is a strong pick.
Roll dough to 7 mm and cut hearts. Bake and cool completely. Paint the entire heart matte black and let dry. Glue twine around the heart edges using a thin bead of craft glue; press it down and follow the heart curve tightly. Leave the center mostly unwrapped so the heart still reads clearly. Add one small white dot or tiny dash in the center for a simple highlight. Seal with matte clear coat over the twine lightly so it doesn’t turn shiny, then thread additional twine through the hanging hole.
Pro tipCut the twine ends at an angle so the overlaps look cleaner.
AvoidDon’t soak the twine with glue — it darkens unevenly and takes forever to dry.
25. Sea Glass Drop Ornaments
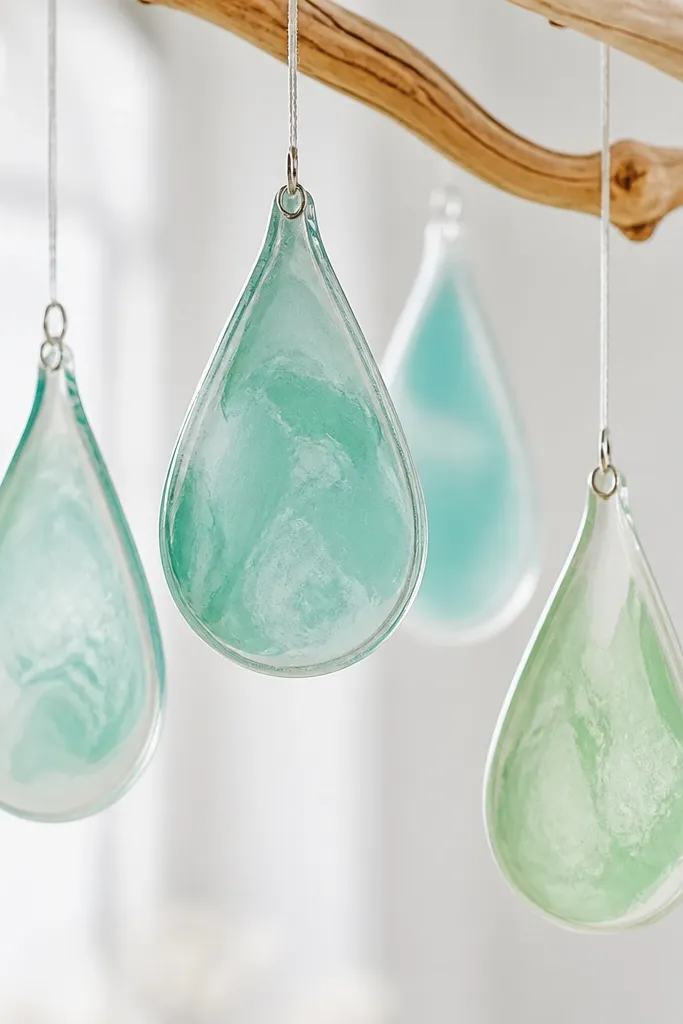
Sea glass drops look calm and expensive because the colors look layered and slightly translucent. The teardrop shape is important — it catches light at the curve and makes the color shift as you move it. I paint in mint + pale aqua layers, then add a thin white edge wash so it looks like polished shoreline glass. This style looks beautiful on windows because daylight makes the colors glow. It’s also a great option for people who want decor that doesn’t scream holiday.
Roll dough to 6-7 mm and cut teardrops using a teardrop cutter or by hand. Punch a hanging hole near the top point. Bake until dry and cool. Paint a base of pale aqua, then add mint paint in a few translucent patches by watering it down heavily. Let dry and then dry-brush a thin white line around the edges for that sea-polished look. Seal with satin clear coat, then hang with clear string or a small silver hook.
Pro tipWater down your paint more than you think for sea-glass — it should look like stained glass, not solid coverage.
AvoidDon’t paint thick layers — thick paint cracks when the ornament flexes.



