
1. Matte White Stars with Gold Dot Corners
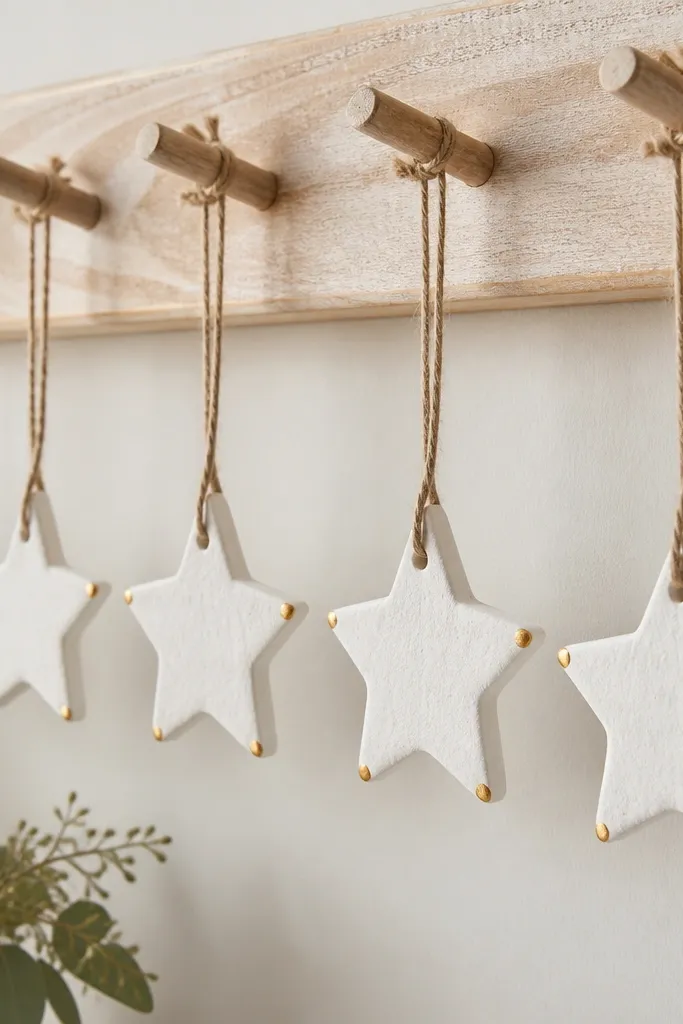
These stars look crisp because the shape is simple and the finish is controlled. I paint the dough with matte white acrylic craft paint so the texture of the salt dough disappears under a soft, chalky surface. Then I add four to five gold dots near the points using a toothpick, so the sparkle stays minimal instead of looking messy. This style flatters any space because white reads clean against warm lights and darker trees. It also looks great on light skin tones in photos because the gold accents pull attention without adding harsh color.
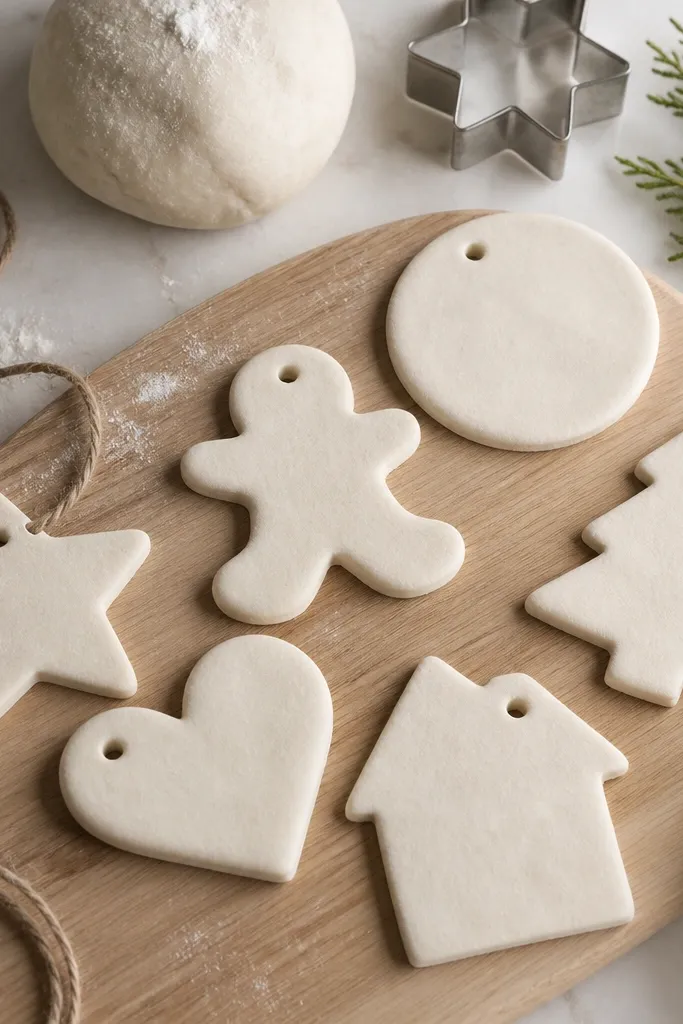
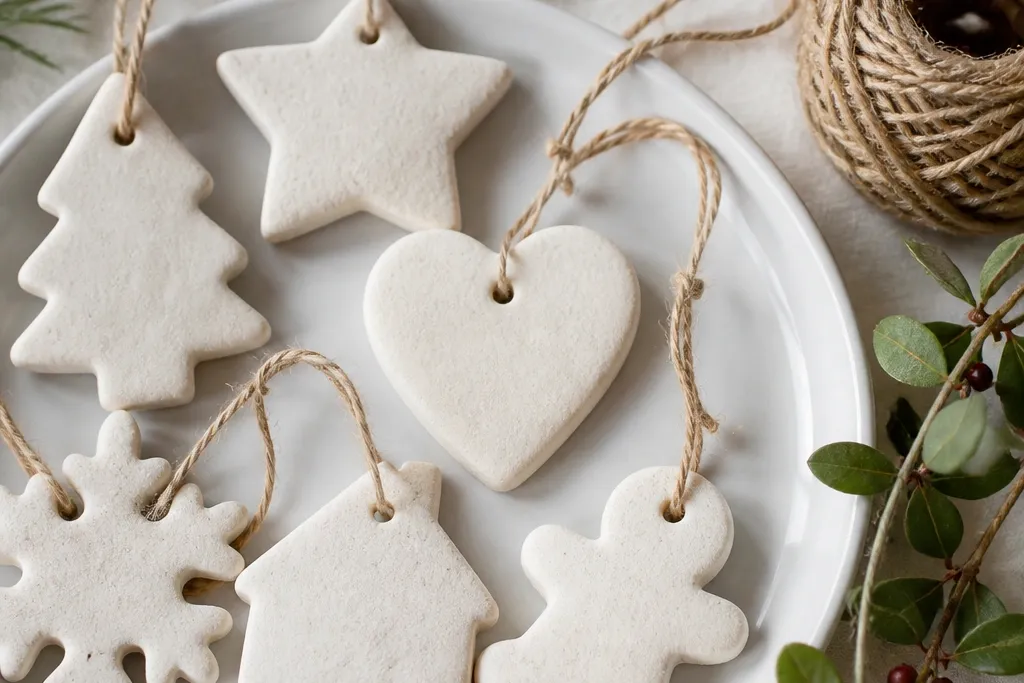
Roll your dough to 1/4 inch and cut stars with a 2.5 inch cutter. Bake at 225°F for about 45 minutes, then turn the tray and bake another 15 minutes if the centers still feel cool. Let them cool completely, then sand only the roughest spots with 220-grit and wipe dust off with a barely damp paper towel. Paint two thin coats of matte white, letting the first dry 30 minutes. After the second coat dries, dot gold paint at each star point using the toothpick tip, then seal with matte varnish once everything is dry.
Pro tipUse a toothpick for the dots — brush tips are too wide and the gold bleeds into the dough pores.
AvoidDon’t paint thickly in one coat; it pools in the star points and looks uneven.
2. Cinnamon-Glaze Ornaments with Twine Wrapping
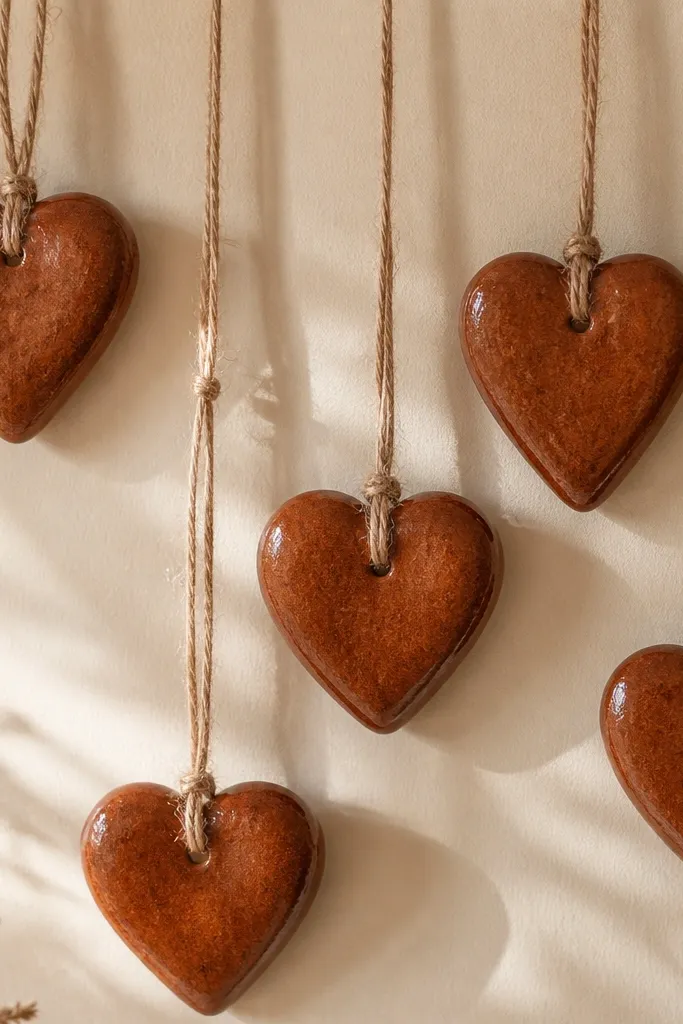
Cinnamon-glaze hearts look like “baked goods” without actually being edible. I make the glaze from brown acrylic paint mixed with a little water and a touch of glossy medium, so it dries with a soft sheen instead of looking flat. The warm brown reads cozy next to cream stockings and tan ribbons. This is the easiest set to match with any holiday palette because it lives in the same family as cinnamon, caramel, and wood tones. In photos, the glaze gives depth to the dough texture so the ornaments look more expensive than they are.
Cut hearts (about 3 inches wide) and roll to 1/4 inch thickness. Bake at 250°F for 50-60 minutes, then cool fully before glazing. Mix brown acrylic paint with water until it flows like thin yogurt, then stir in a small splash of glossy medium. Dip or brush a thin coat over each heart, then immediately wipe the edges with a damp paper towel so drips don’t build up. Press a small bow of twine around the top loop area after the glaze sets for 10 minutes, then finish with one more thin glaze coat after it dries to the touch.
If you want darker edges, paint the center first, then do a second pass only along the perimeter.
Skip heavy glaze layers; thick coats crack as the dough continues to dry.
3. Pressed Pinecone Texture with Sage Paint
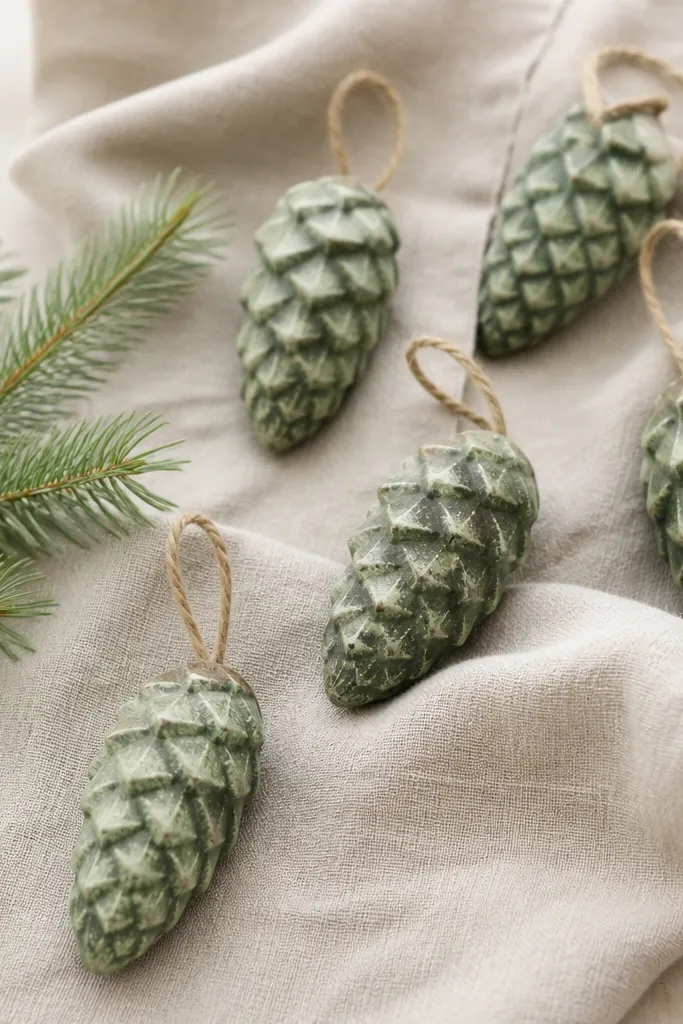
Textured pinecones look fancy because the ridges catch light even with cheap paint. I press the pinecone details into the dough before baking, then paint with sage green so the raised areas stay lighter and the grooves get darker. The effect mimics real pinecones — the color sits deeper in the creases and the tops look sunlit. This style works especially well if your tree has lots of matte ornaments because the ridges add their own shine. It also pairs nicely with warm metal garlands and wood bead garlands.
Roll to 1/4 inch and press pinecone cutters or a silicone pinecone mold into the dough. Cut around the mold edges, then poke a small hole at the top for hanging before baking. Bake at 240°F for about 55 minutes, cool, and let them sit out another hour so the texture fully dries. Paint the whole pinecone sage green, then dab a darker green wash (sage mixed with a tiny amount of black) into the grooves using a makeup sponge. Once dry, dry-brush a lighter sage on only the ridges to make them pop.
Pro tipUse a sponge, not a brush, when you’re washing the grooves — it deposits color where it belongs.
AvoidDon’t skip the dry-brush step; without it, the ridges disappear and the ornament looks flat.
4. Red Berry Ornaments with Speckled Center Dots
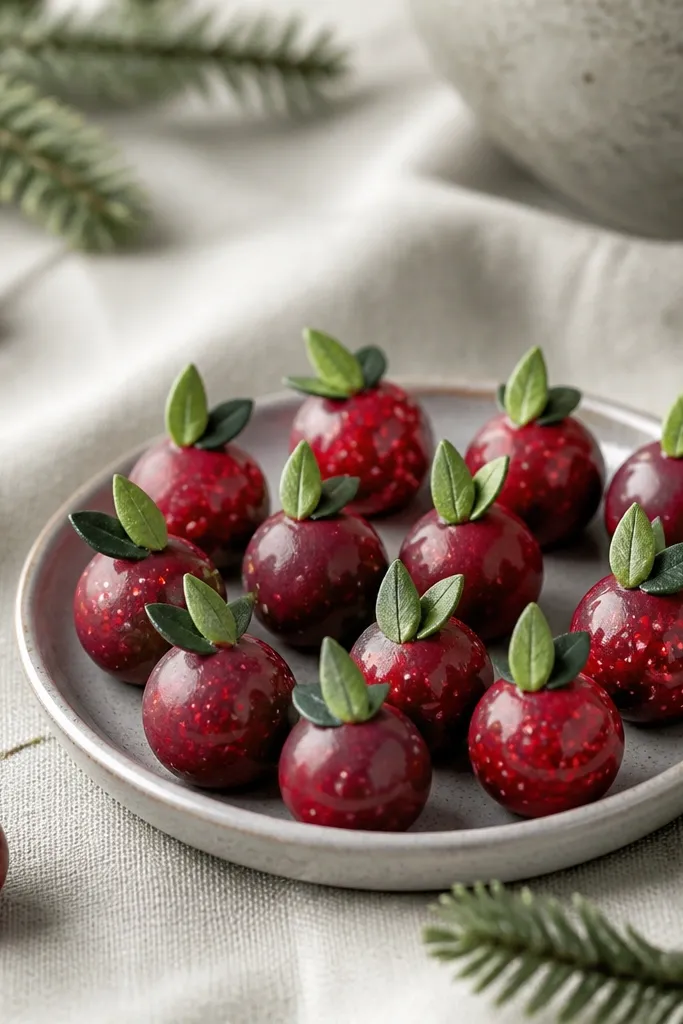
These berries look like they belong on a store-bought wreath because the pattern is controlled. I paint a base deep red, then add small lighter red speckles in the center to imitate fruit skin texture. A tiny green leaf on top gives the illusion of a stem without adding complicated sculpting. This style flatters winter decor that leans traditional — red reads warm, and the leaf color keeps it from looking like plain dots. In photos, the speckles catch light and make the ornament look dimensional even when it’s only 2 inches wide.
Roll to 1/4 inch and cut circles with a 2 inch cutter. Bake at 230°F for 45 minutes, cool fully, and sand lightly if needed. Paint the circles with deep red acrylic in two thin coats. For speckles, dip a stiff brush or toothbrush in lighter red and flick gently over the center area only. Paint a small leaf shape (or cut from extra dough and bake separately) in green, then glue it at the top with white craft glue after both pieces are dry.
Pro tipFlick over cardboard first to practice — you want a few tight speckles, not a full dusting.
AvoidDon’t paint the whole berry with speckles; keep them concentrated so it looks intentional.
5. Snowman Faces with Charcoal Buttons

This is the ornament style that makes people smile fast because the face reads from across the room. I build snowmen from two circles and one small base wedge, then paint with bright white so the features pop. The buttons are charcoal gray, not pure black, because it looks softer and less harsh in winter light. For the nose, I use a tiny triangle of orange painted on after drying, which keeps it from looking too thick. It also flatters kids' parties and family gatherings since the faces feel friendly, not too “adult craft.”
Cut two circles per snowman: one 2.25 inches and one 1.6 inches, plus a tiny nose piece if you want it separate. Bake at 235°F for 50-60 minutes. Assemble with white craft glue after everything cools; hold for 10 seconds so it sets. Paint the whole body white, then add eyes and a simple smile with a fine black marker or paint. Add three charcoal button dots across the lower belly, then paint a small orange nose triangle.
Pro tipUse a fine-tip paint pen for the eyes; it keeps them symmetrical.
AvoidSkip thick glue on the seams; it squeezes out and creates bumps that show through paint.
6. Gold Leaf Touch Ornaments with White Base
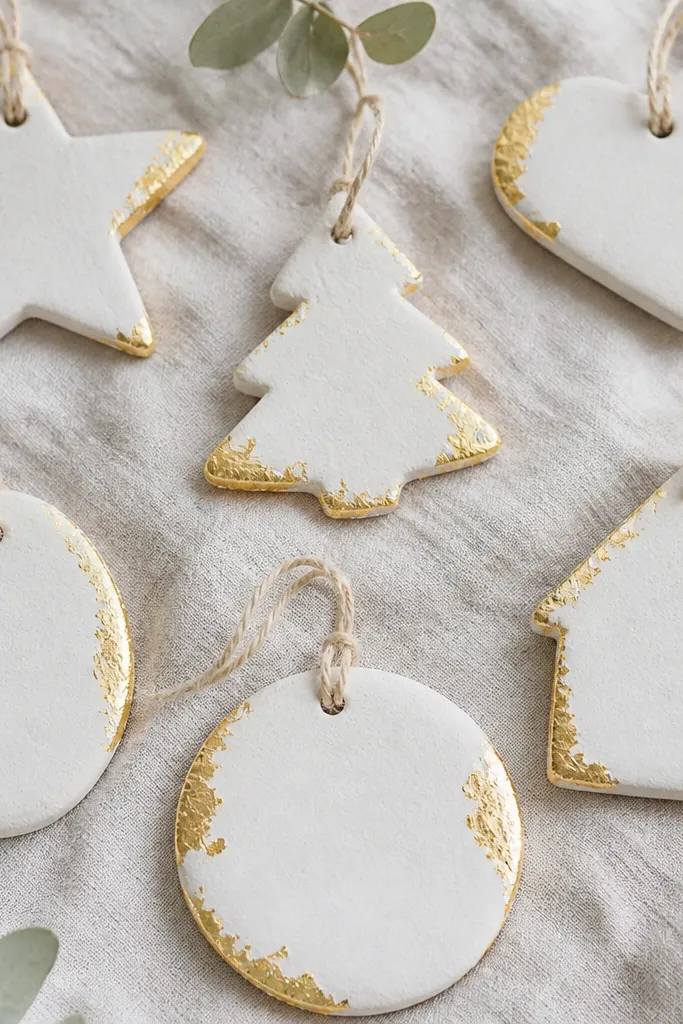
Gold-leaf touch ornaments look expensive because gold leaf reacts with light in a way paint can’t. I keep the base soft white so the gold stays the star, and I only press leaf onto the edges or a single stripe. The irregular shapes add authenticity; they don’t look like a sticker. This style looks great on trees with warm white lights and also hangs beautifully on garlands because the edges shimmer when they sway. It’s flattering with neutral clothing in photos because gold pulls warm tones without overpowering the background.
Cut your preferred shape (I like circles 3 inches wide) and bake at 230°F for about 50 minutes. Paint two coats of soft white acrylic, letting each coat dry 30 minutes. Apply a thin layer of gold-leaf adhesive medium on the edge area only, then wait until it turns tacky (usually 10-15 minutes). Press torn gold leaf onto the tacky area, burnish gently with a dry cotton pad, and brush off loose pieces. Seal lightly with matte varnish over the whole ornament once the gold is secure.
Pro tipTear the gold leaf by hand for uneven edges; it looks more natural than cutting strips.
AvoidDon’t varnish too soon — it smears the leaf while the adhesive is still wet.
7. Marbled Dough Ornaments with White + Teal Swirls
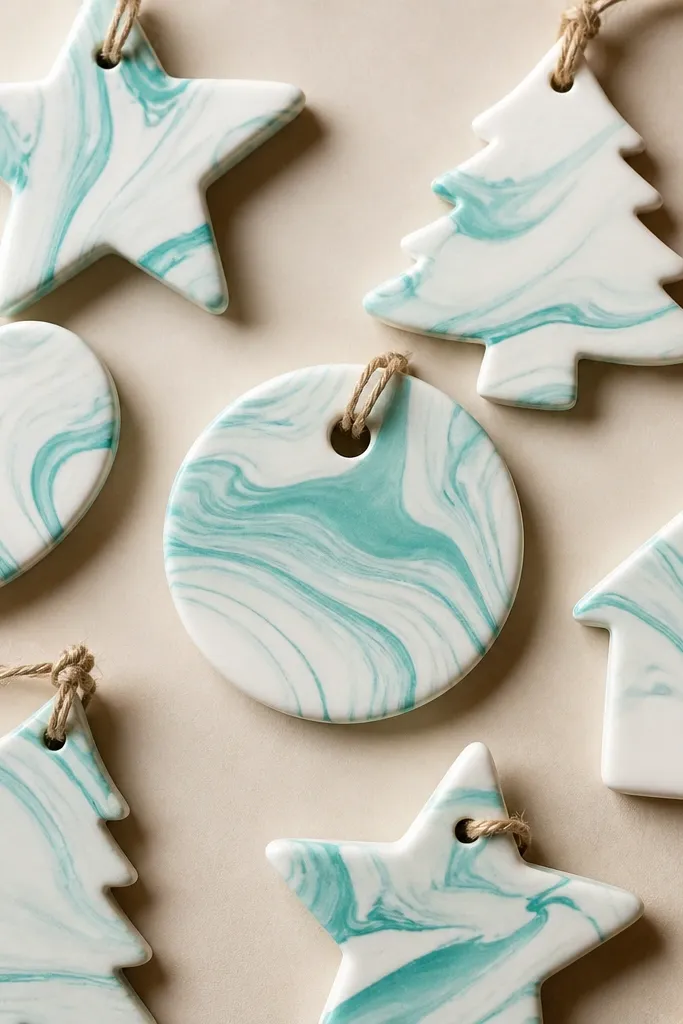
Marbling looks high-end because it reads like stone, even when it’s made with paint. I marble by tinting a thin layer of dough with teal acrylic mixed into a tiny amount of water, then rolling it with white dough so the swirls stay soft. The result gives each ornament a unique pattern, which means your set doesn’t look like cookie-cutter repeats. This works best for simple shapes like circles or tags because the pattern stays visible. It also photographs well against both dark and light backgrounds.
Make two small dough batches: one plain, one tinted by kneading in teal acrylic paint until the color is even. Roll both to 1/4 inch and lay the teal sheet on top of the white sheet, then fold and roll once to create swirls. Cut shapes quickly so you don’t overmix the marbling. Bake at 225°F for about 55 minutes, cool, and check edges for dryness. If you want it smoother, sand lightly and wipe dust away before sealing with a satin varnish.
Pro tipCut right after rolling — the longer you handle it, the more the swirls blend together.
AvoidDon’t sand aggressively; marbling disappears when you remove the top layer.
8. Chalkboard-Style Ornaments with White Lettering

Chalkboard-style ornaments are a cheap way to personalize a set without spending on stamps. The black matte paint hides tiny imperfections, and white lettering reads sharp even from a distance. I keep the lettering short — one word like “JOY” or “MERRY” — because big scripts start to look wobbly on small ornaments. This style looks best on trees with simpler decor because the text becomes the focal point. It also suits gift tags and ornaments for teachers because you can write names or dates.
Cut circles or tags, roll to 1/4 inch, and bake at 230°F for 50 minutes. Paint two thin coats of black matte acrylic, letting each coat dry 30 minutes. Once dry, use a white paint marker or a small brush with white acrylic to write your word. If you want a cleaner look, lightly sketch with a pencil first, then paint over. Seal with matte varnish once the lettering is dry, so it doesn’t smear when handled.
Pro tipWrite with a paint marker then go back with a thin brush for the last 10% of crisp edges.
AvoidDon’t use glossy black; it catches light and makes the lettering harder to read.
9. Pastel Rainbow Tags with Stacked Color Bands
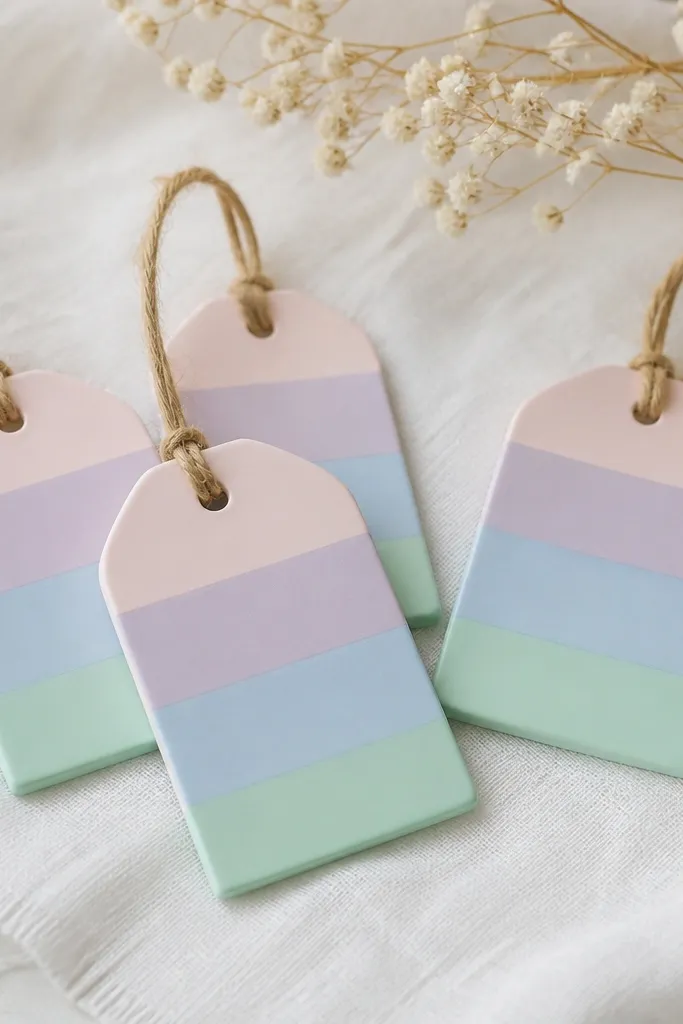
These tags look cheerful without looking childish because the bands are stacked neatly and the colors are soft. I use pastel shades — pale pink, lavender, baby blue, and mint — with thin paint coats so the dough texture still shows through. It flatters people who like minimal decor because there’s no glitter chaos. The result also works on a small tree or on a garland because tags are easy to space evenly. In photos, pastel colors stay readable under warm lighting.
Roll to 1/4 inch and cut tag shapes using a tag cutter or a rectangle with rounded corners. Bake at 230°F for 45-55 minutes. Sand lightly and wipe dust with a damp paper towel. Paint a base coat of pale cream or leave the dough lightly colored if you prefer. Then paint horizontal bands, starting with the top band and working down, keeping each band about 1/2 inch tall. Let each band dry 20 minutes before adding the next so edges stay crisp.
Pro tipUse painter’s tape as a guide for straight band edges on the first ornament — then match by eye.
AvoidDon’t rush the drying between bands; wet paint bleeds and kills the clean stripes.
10. Mini Photo Frame Ornaments with Painted Borders
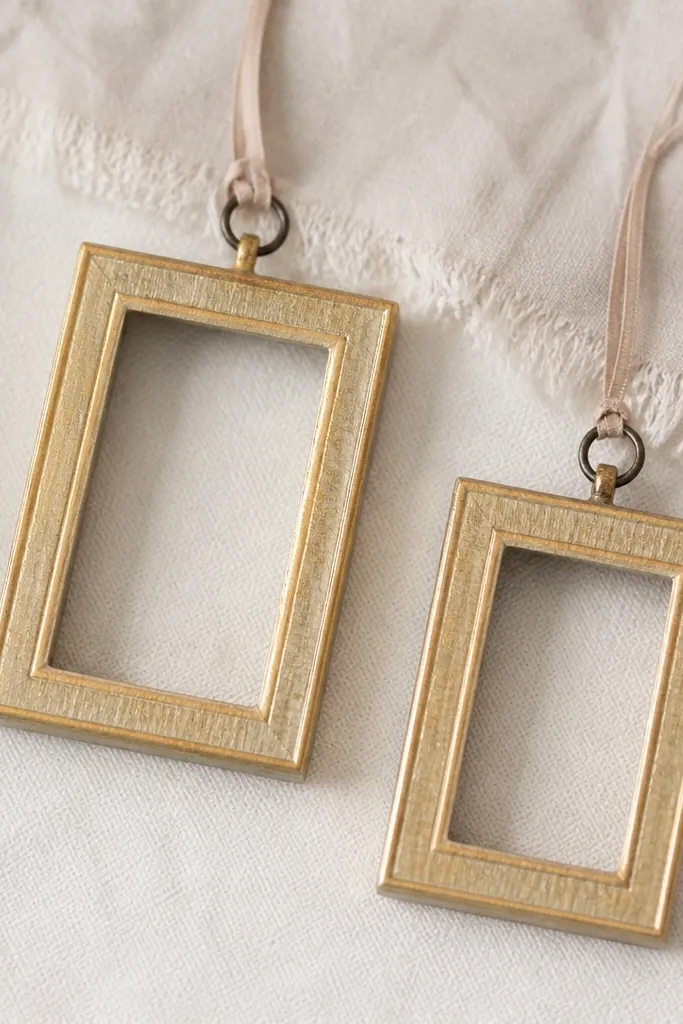
Photo-frame ornaments look thoughtful because they create a little “window” for a memory. I make a simple frame shape by carving a rectangle recess so it reads like a picture frame. The border gets muted gold paint, while the inner panel stays the dough color or is painted a soft ivory. This style flatters families and couples because you can add tiny printed photos or notes on paper behind a layer of clear tape. It also looks great on a tree because the frame shape adds structure.
Roll to 1/4 inch and cut rectangles 3 x 2 inches. Bake at 235°F for about 55 minutes. Use a craft knife to lightly carve a shallow inner rectangle recess after baking if you want it crisp, or carve before baking if you’re confident with the tool. Paint the outer border with muted gold acrylic in two thin coats. Leave the inner panel plain or paint it ivory. Add a hole at the top before baking, or punch after baking and seal the edges with a tiny dab of glue.
Print photos slightly smaller than the inner recess, then back them with clear tape so they don’t curl.
Don’t make the inner recess too deep; it makes the ornament fragile at the corners.
11. Lemon Slice Ornaments with White Pith Lines
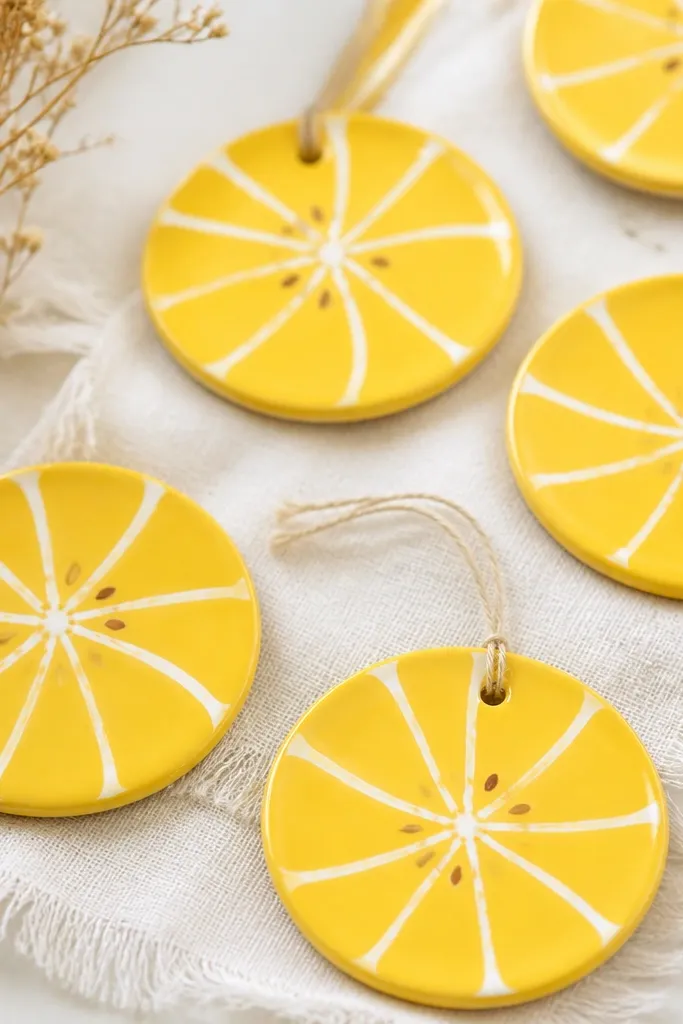
Lemon slices look bright and clean, and they’re a fun break from the usual red and green. The secret is painting a slightly darker yellow ring near the edge, then adding thin white pith lines that curve outward. I also add a few brown dot “seeds” near the center so the slice looks real. This style is great for spring trees, summer gift wraps, and kitchens that lean warm. It also looks good on warm-toned skin in photos because the yellow reads cheerful instead of harsh.
Roll dough to 1/4 inch and cut circles (about 3 inches). Bake at 230°F for 50 minutes, cool, then sand lightly. Paint the whole circle with medium lemon yellow, two thin coats. Mix a slightly darker yellow (add a tiny touch of orange) and paint a ring near the edge. Use a fine brush to add curved white pith lines radiating from the center. Add 3-6 tiny brown seed dots with the brush tip, then seal with satin varnish.
Pro tipLet the base yellow dry fully before pith lines — white paint sticks better to dry paint.
AvoidDon’t overdo the seeds; too many makes it look like a polka dot pattern.
12. Knot Bow Ornaments with Burgundy Stain
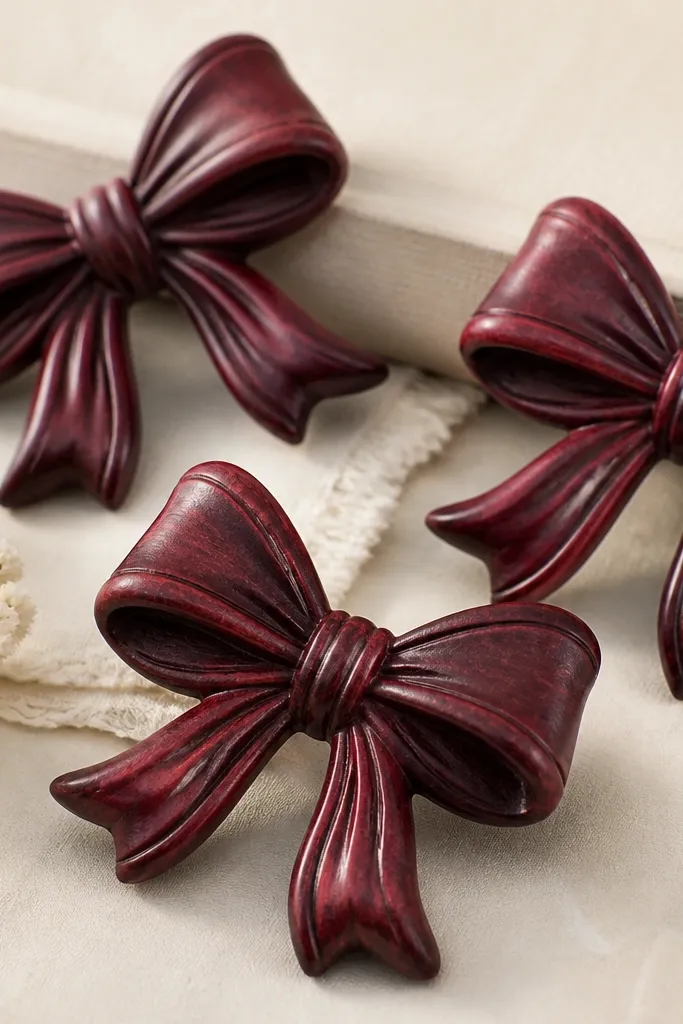
Burgundy stained bow ornaments look like fancy ribbon even though they’re made from dough. I press a bow shape into the dough and bake it, then stain the surface so the folds get darker while the raised parts stay lighter. The stained look hides small tool marks and makes the texture feel intentional. This style works for people who like moody holiday color — it looks great with cream, black, and brass. In photos, burgundy gives depth and doesn’t wash out under warm string lights.
Roll to 1/4 inch and shape a bow using a silicone bow mold or by cutting with a bow stencil. Bake at 240°F for about 60 minutes. Cool fully and wipe with a dry cloth to remove dust. Mix burgundy acrylic or craft paint with water to make a stain-like wash. Brush it on, then wipe the surface with a paper towel so only grooves keep color. Let it dry 1 hour, then do one more quick wipe coat if you want deeper folds. Seal with matte varnish so it doesn’t look glossy and plastic.
Pro tipWipe in one direction so you keep a consistent highlight on the raised folds.
AvoidDon’t seal before the stain dries; it turns gummy and smears into the highlights.
13. Tiny Wreath Ornaments with Green Dry-Brush
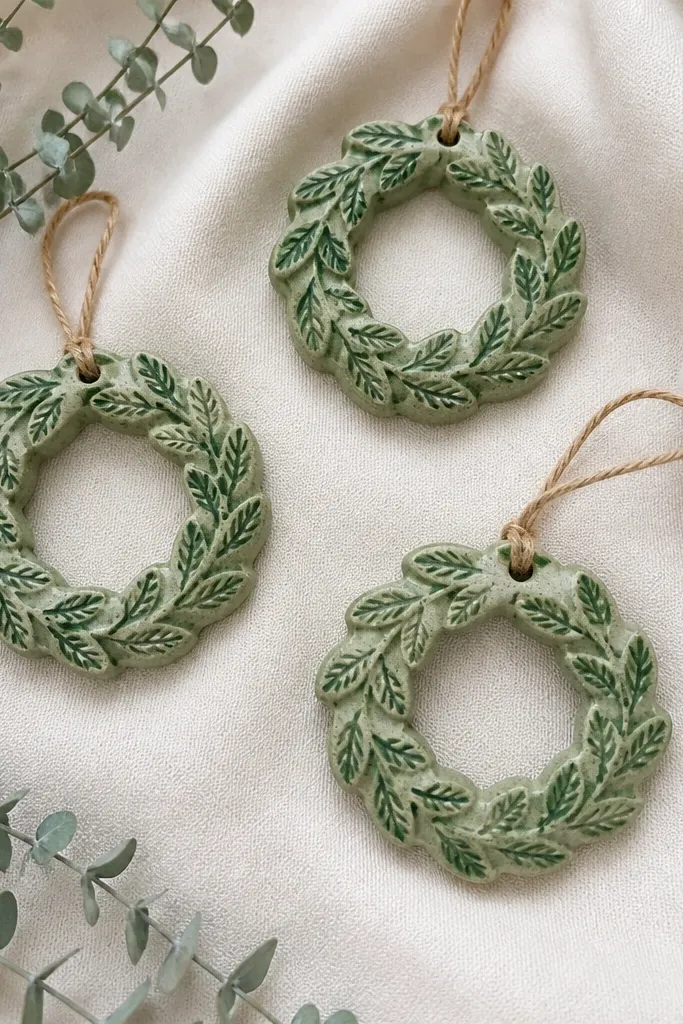
Mini wreaths look adorable because the shape reads instantly, even when small. I build the wreath from a ring and add leaf texture, then paint light green first and dry-brush darker green on top. Dry-brushing is what makes the leaves look like they’re catching light. This works best for wreaths around 2.5 inches because you get detail without making the ornament too thick. It also looks great on front doors where you need something that reads from a distance.
Roll dough to 1/4 inch and cut rings using a circle cutter and a smaller center cutter. Press leaf texture using a textured stamp or small silicone leaf pieces, then bake at 235°F for about 55 minutes. After cooling, paint the entire wreath light green in two coats. Once dry, load a dry brush with darker green paint, then wipe most off on a paper towel. Lightly sweep the brush over the raised leaves so only the tops get color. Seal with matte varnish and add a small loop of twine.
Pro tipPractice the dry-brush on a scrap dough circle — you want light speckling, not full coverage.
AvoidDon’t soak the wreath with paint; thick layers fill in the leaf texture.
14. Starburst Ornaments with Metallic Stripe Rays
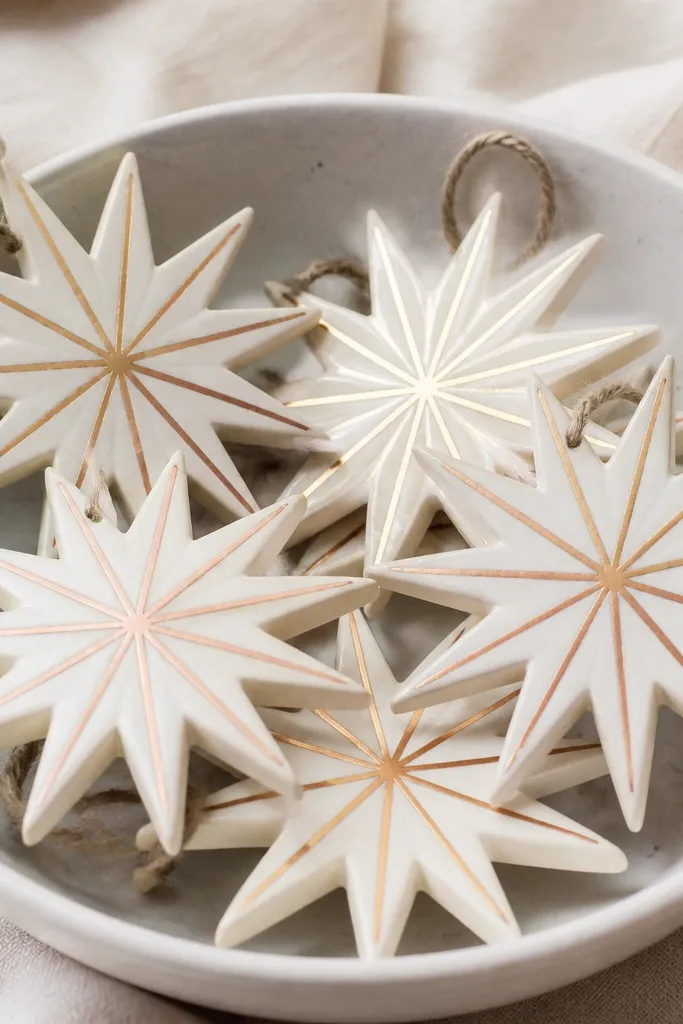
Starbursts look like party decor, and metallic stripes make them feel celebratory without glitter. I paint an off-white base so the metallic rays look clean and bright. Then I add thin stripes radiating outward using painter’s tape or a ruler to keep spacing even. The metallic mix — gold and a touch of copper — keeps it from feeling like one flat color. This style is flattering for people who like modern decor because it’s graphic and tidy. It also photographs well because the rays create lines that the camera picks up fast.
Roll to 1/4 inch and cut starburst shapes using a cutter, or trace a starburst template. Bake at 225°F for 50-60 minutes, cool fully, and sand rough edges. Paint off-white in two coats. Once dry, mark stripe lines lightly with a pencil, then use painter’s tape to mask the stripes. Paint alternating metallic colors: gold on even rays and copper on odd rays. Peel tape after the metallic paint is slightly tacky, then seal with satin varnish.
Pro tipPeel tape when it’s tacky, not fully dry, to prevent chipped edges.
AvoidDon’t use thick metallic paint; it clumps at the strip edges and looks uneven.
15. Button Snowflake Ornaments with Felt Center
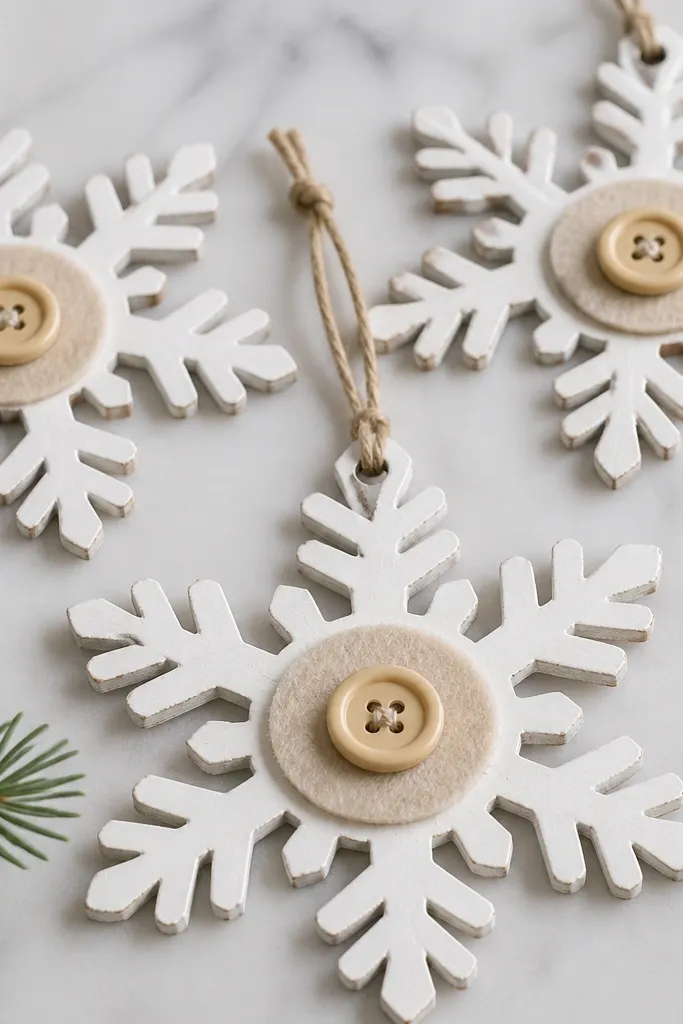
This one looks like a handmade sewing project, not a craft-aisle ornament. I paint the snowflake white, then add a small felt circle in a coordinating color and top it with a button. The button gives real dimension, and the felt hides any glue mess. I use a single button per ornament because too many small pieces look cluttered on a tiny shape. This style is great for gifting because it feels personal and tactile. In photos, the felt center adds soft texture that stands out from the smooth paint.
Roll to 1/4 inch and cut snowflakes with a 3 inch cutter. Bake at 230°F for about 55 minutes and cool. Paint two thin coats of white acrylic and let it dry fully. Cut felt circles about 3/4 inch wide and glue them to the center with a dot of white craft glue. Press a button on top and secure with a small dab of glue around the edges. Punch or drill a hanging hole if you didn’t add one before baking, then thread twine.
Pro tipChoose felt in a deep red or muted green so it reads clearly against the white paint.
AvoidSkip hot glue on felt; it can warp the dough surface when it seeps into pores.
16. Salt Dough Baubles with Brush-On Glitter Fade
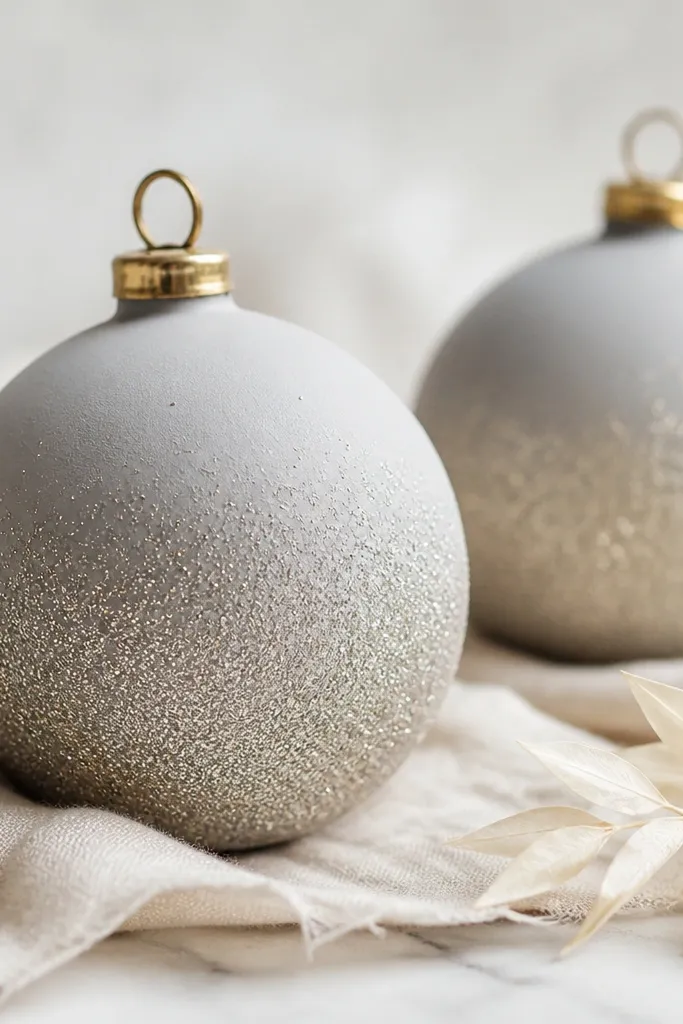
Glitter fade looks expensive because it looks intentional and gradient-like instead of scattered. I paint baubles matte gray or dusty blue, then brush glitter only on the bottom half so the top stays clean. The gold cap line at the top adds the “hanging” detail without needing a metal cap. This style works with modern trees because it’s subdued until the glitter hits. It also flatters people who like cool tones — gray and blue don’t fight with silver ornaments.
Roll to 1/4 inch and cut circles or use a bauble cutter shape. Bake at 225°F for 50-60 minutes, cool, then sand lightly. Paint two coats of matte gray (or dusty blue) and let dry. Mix glitter with a clear craft glue or glitter gel so it spreads smoothly. Brush glitter gel on the bottom half and feather it upward with a dry brush to create a fade. Paint a thin gold line around the top edge and seal after glitter dries.
Pro tipUse a stiff foam brush for the fade — it makes the feathering smoother than bristle brushes.
AvoidDon’t shake glitter directly onto wet glue; it clumps and ruins the gradient.
17. Monogram Tag Ornaments in One Color Outline
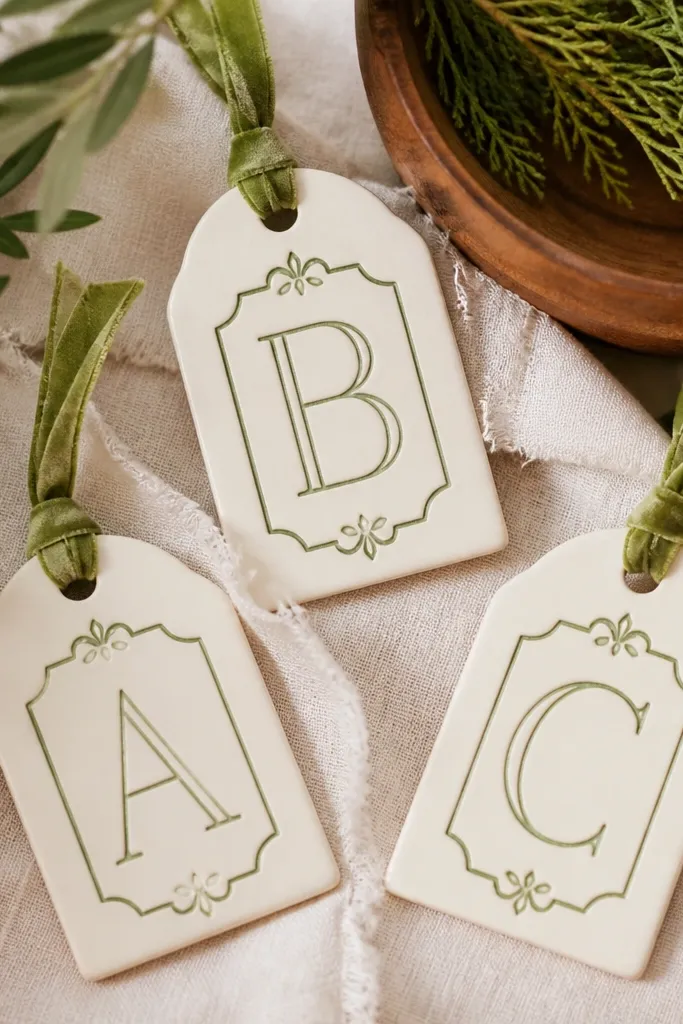
One-color monogram tags look like personal stationery, not a random craft. I keep the tag base ivory and paint only an outline-style monogram in dark green or deep red. The outline approach hides shaky lettering better than filling in solid letters, and it keeps the ornament from looking crowded. This is a great option for budget sets because you can repeat the same tag base and swap letters. It also flatters gift recipients of any age because it doesn’t rely on tiny details like faces.
Roll to 1/4 inch and cut tags about 3 inches long. Bake at 230°F for 45-55 minutes. Paint with ivory acrylic in two thin coats, then dry completely. Use a pencil to lightly sketch the monogram placement near the center. Paint the outline using a fine liner brush with dark green acrylic. If you want a sharper look, trace the outline again after the first pass dries. Seal with matte varnish and tie with twine.
Pro tipPractice your monogram on paper first, then match the spacing on the tag using the pencil guide.
AvoidDon’t fill the letters solid; solid monograms show every uneven stroke on small surfaces.
18. Rainbow Candy Cane Ornaments with White Twirl
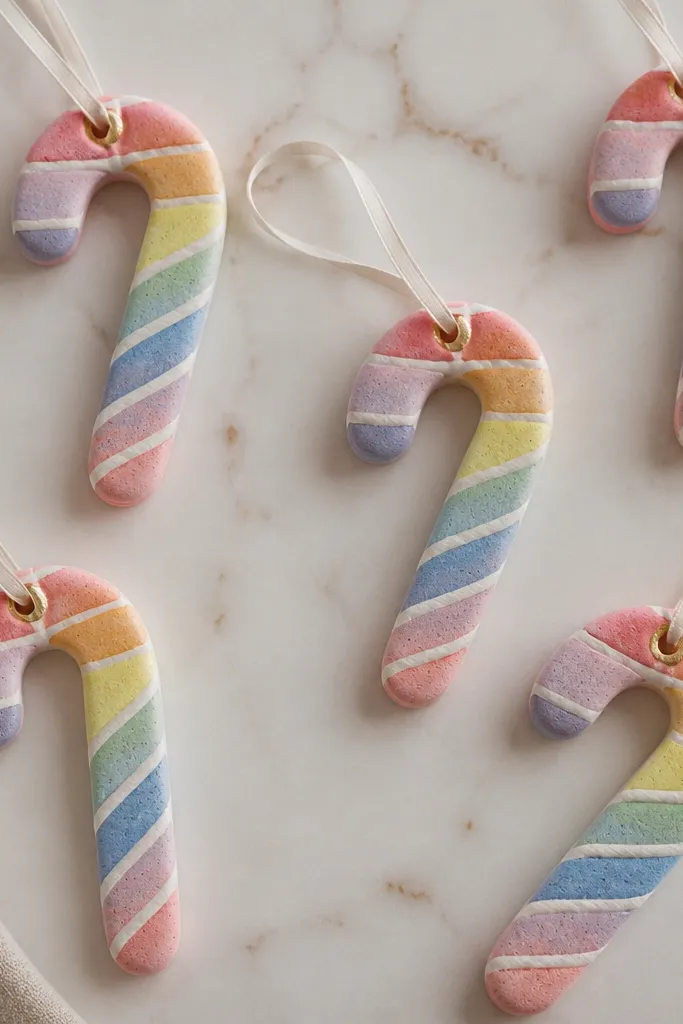
Candy canes are a reliable shape because they hang well and read instantly. I paint thin rainbow stripes across the candy cane, then add a white twirl line so the stripes look like they’re spiraling, not just layered. The white line gives a clean highlight that makes the whole ornament look lighter. I like using 4-5 stripe colors so it stays readable and not messy. This style looks great with holiday decor that has colorful lights or a rainbow theme. It also photographs well because the candy cane silhouette is strong even when the ornament is small.
Roll dough to 1/4 inch and cut candy cane shapes. Bake at 225°F for 50-60 minutes, cool, and sand edges lightly. Paint a base coat of white or ivory so the colors pop. Tape off thin stripe sections with painter’s tape, then paint stripes in red, orange, yellow, teal, and purple. Remove tape when paint is slightly tacky. Finally, paint a thin white twirl line down the center using a fine brush, then add a tiny gold dot at the top hook.
Keep stripe width around 1/8 inch for a neat look on small ornaments.
Don’t freehand stripes without planning; crooked stripes make candy canes look homemade in a bad way.
19. Doodle-Pattern Ornaments with Black Ink Lines
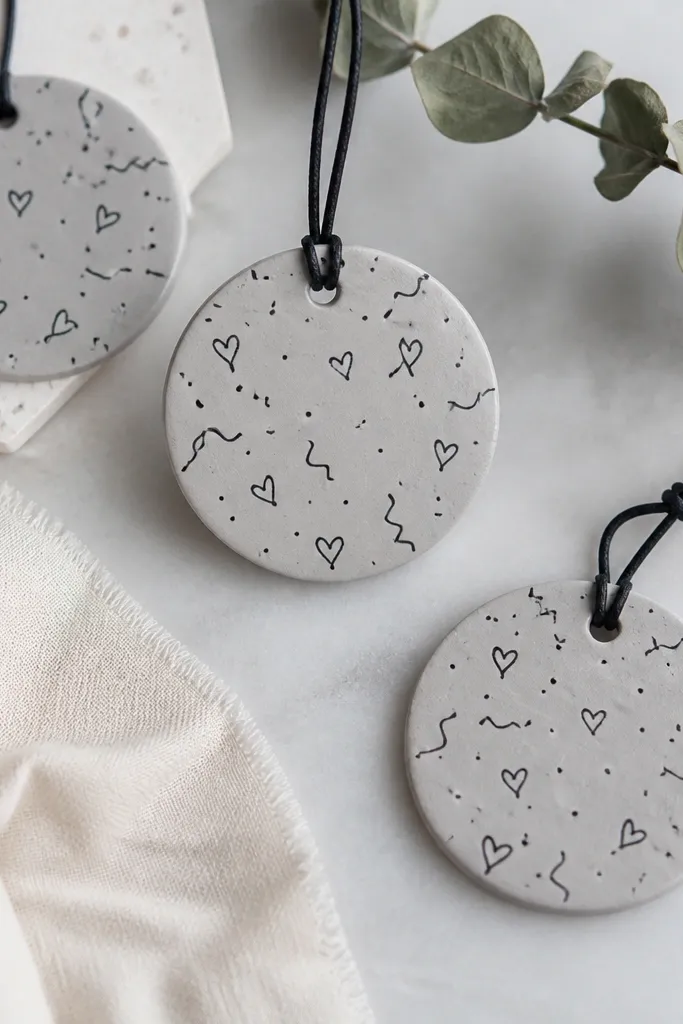
Doodle ornaments look artsy and forgiving because the design hides minor imperfections in the dough. I paint a light base like pale gray or cream, then add black ink-style lines with a fine pen or paint marker. The black lines make the ornament readable against both dark and bright trees. This style is perfect for budget sets because you can repeat the same base and vary the doodles quickly. It also feels personal — like a quick sketch you’d actually want to keep.
Roll to 1/4 inch and cut assorted shapes (circles and tags work best). Bake at 230°F for 50 minutes, cool, then wipe dust off. Paint a thin base coat of pale gray or cream. Let it dry fully. Use a fine black paint marker to draw doodles — dots, tiny hearts, short lines, and small squiggles. Keep the doodles spread out, leaving some empty space so it doesn’t look crowded. Seal with matte varnish after the ink dries.
Draw small clusters instead of covering the entire surface; it keeps the ornament from looking busy.
Don’t use thick black paint — it dries raised and catches light in a messy way.
20. Two-Tone Trees with Dark Green Bottom Half
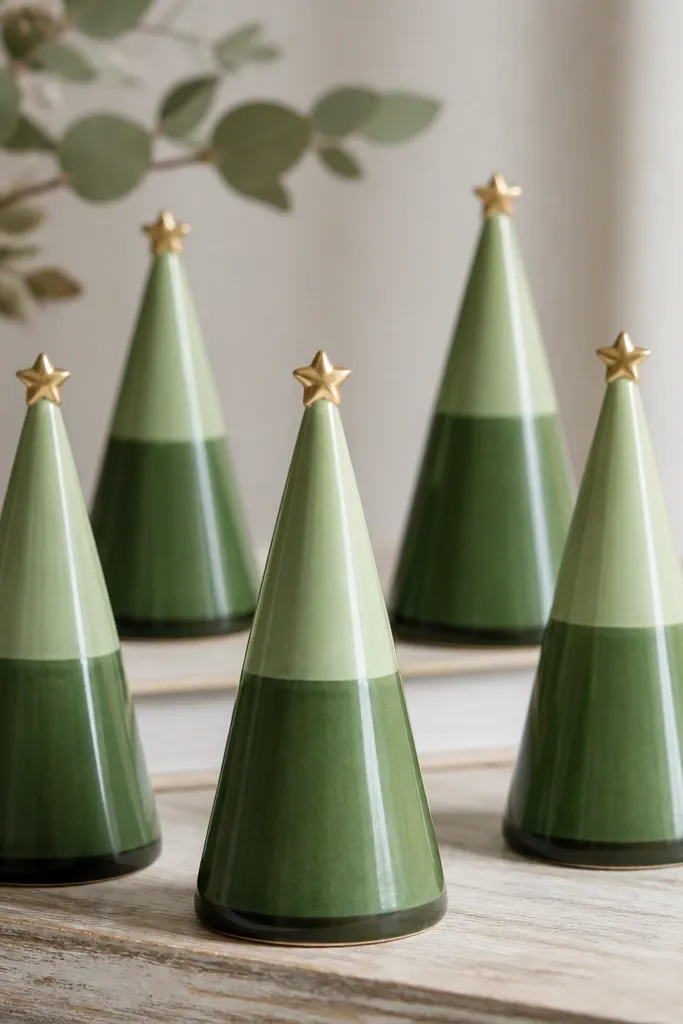
Two-tone trees look clean and modern because the shape is simple and the color split is deliberate. I paint the top half a light green and the bottom half a darker green, so the tree silhouette has depth even without glitter. A tiny star dot at the top finishes it without adding a separate piece. This style works for people who want holiday decor that looks neat and not overly cutesy. It also looks great on trees with silver or white ornaments because greens don’t compete.
Roll to 1/4 inch and cut simple tree shapes. Bake at 235°F for about 55 minutes, cool, and sand lightly. Paint the entire tree light green first and let dry. Then mask a horizontal line about 60% down the tree and paint the bottom half dark green. Add a tiny star dot near the top using yellow or pale gold paint. Seal with matte varnish so the finish stays soft.
Use painter’s tape for the color split line — it makes the tree look store-made.
Don’t let the dark paint bleed into the light area; wipe the tape edge before it fully dries.