1. Rosey Cheek Baby Face Tag
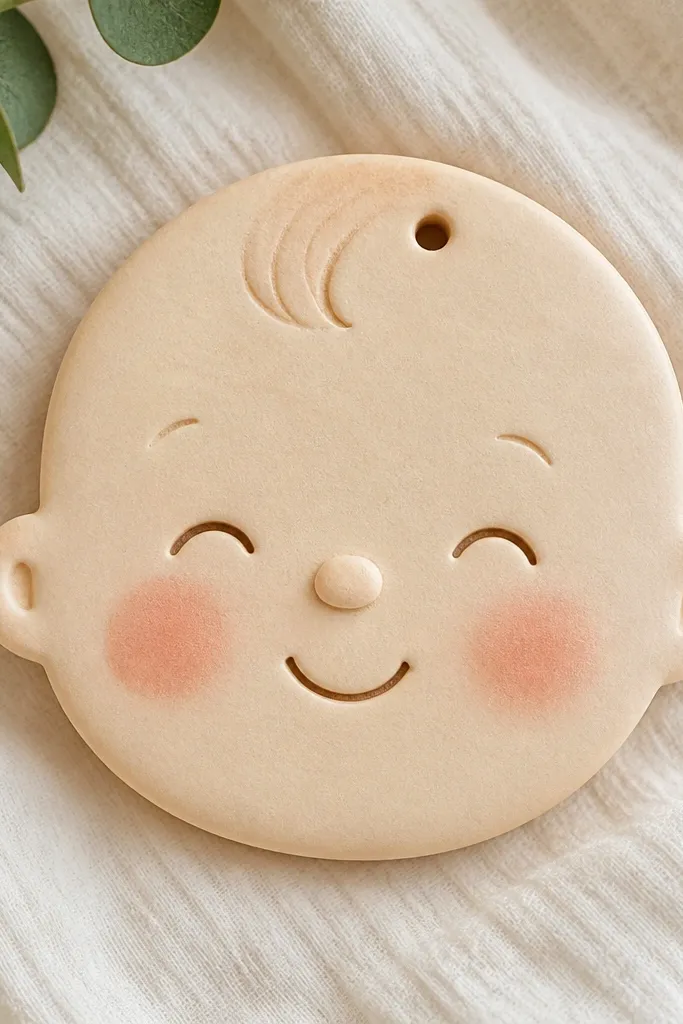
This one looks good on a flocked or plain green tree because the cream base reads warm, not yellow. Paint the face in a pale warm ivory, then add blush with a small sponge using diluted pink (think light strawberry, not hot fuchsia). The cheeks should be round and slightly higher than you think — it pulls the face upward and looks like a baby, not a cartoon. I’ve hung this on ornaments for kids of all skin tones by adjusting the blush shade and the shadow under the chin.
Roll dough to 5mm, then cut a baby-face shape using a simple circle-plus-cheeks template you can freehand. Use a toothpick to lightly score the mouth line and add shallow nostril dots so they don’t crumble. Before baking, poke a hanging hole with a 2-3mm skewer centered 1cm down from the top. Bake at 275F (135C) until the surface feels dry and the edges lighten, then cool fully. Paint with foam brush — ivory base first, blush second, then a tiny line mouth, and seal with one thin matte coat after paint dries.
Pro tipTint your pink blush with a touch of white so it stays soft in photos.
AvoidDon’t paint thick layers on the blush — it can crack when the sealer dries.
2. Tiny Swaddle Blanket Rectangle
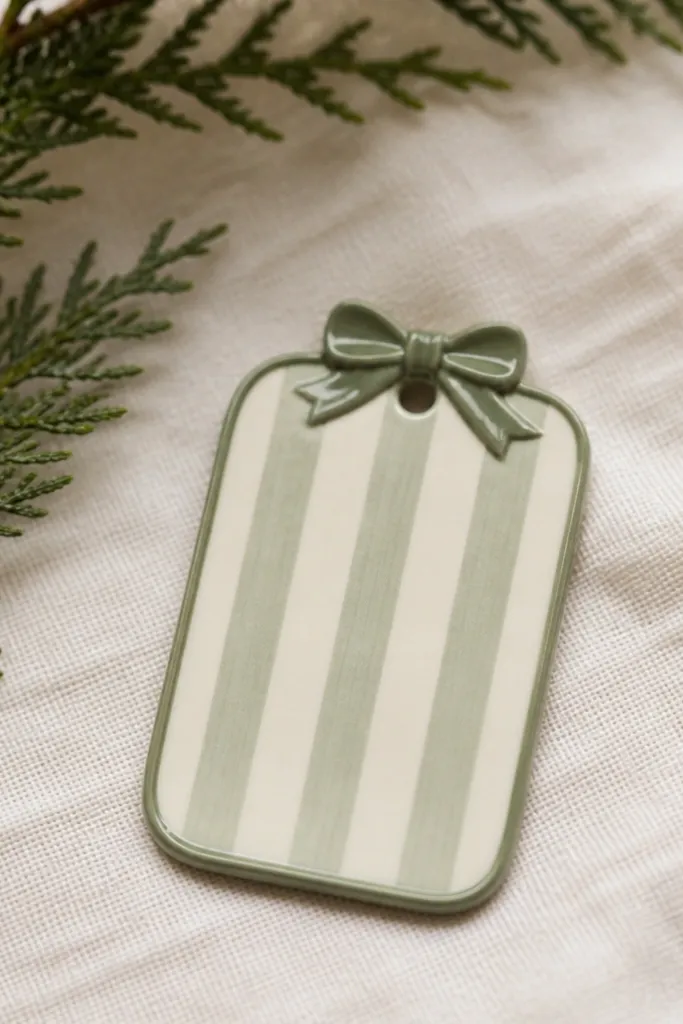
Rectangles like this make your tree look styled because the stripes align with the ornament’s shape. I like sage and cream because it reads “new baby” without being overly pink or overly gendered. Add a border in a slightly deeper green to frame the piece — it makes the stripe edges look crisp even if your brush work isn’t perfect. This works especially well for baby rooms with neutral walls and light wood tones.
Roll dough to 5mm and cut a rectangle about 2.5 x 3.5 inches, then round the corners with your fingertip. Score a faint inner border 5mm from the edge, then use the back of a spoon to press two light stripe grooves across the center. Poke a hanging hole at the top center before baking. Bake until dry, then paint the base cream, sponge on sage stripes, and trace the border with a thin brush. Finish with one satin acrylic sealer coat for a gentle glow.
Pro tipUse a damp foam brush to soften stripe edges so they look painted by hand, not sticker-like.
AvoidSkip super-dark green — it can overpower the cream and make the ornament look heavy.
3. Bootie with Laces Oval
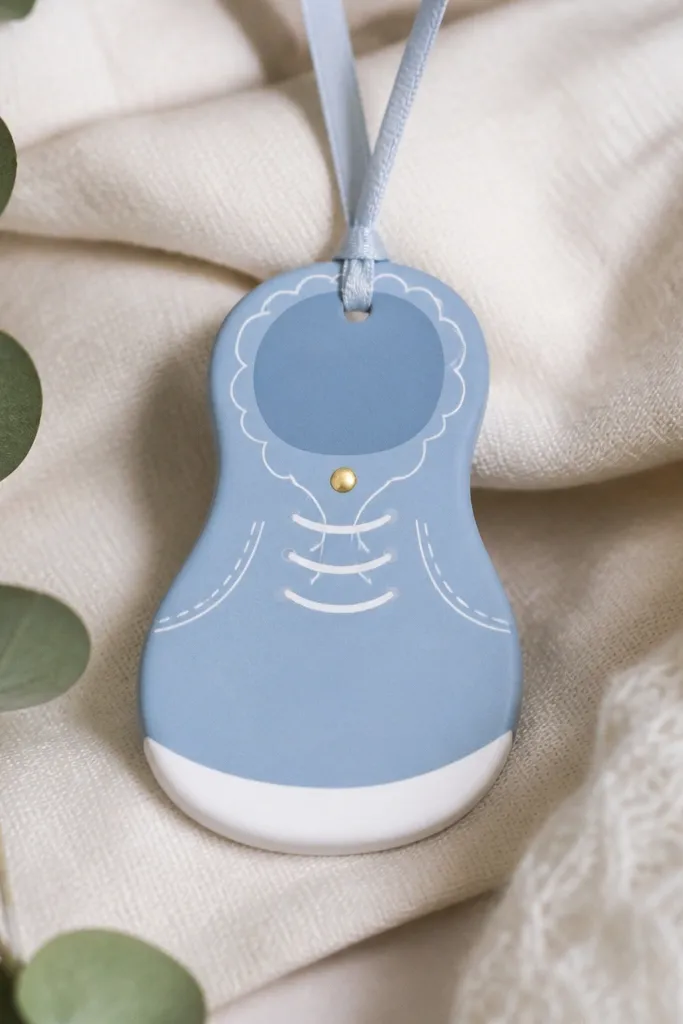
Booties are cute from every angle, which matters because you’ll bump them on the tree while adding lights. Dusty blue and white feels soft and “baby blanket” to me, and the white sole makes it readable even from across the room. Draw the laces lightly — the ornament should look like it has texture, not like you filled grooves with paint. I’ve used this color combo on both light- and medium-toned baby-themed trees and it still looks cohesive.
Roll dough to 4mm for cleaner lace lines and cut an oval bootie using a bootie cookie cutter or a hand-cut template. Press shallow lace grooves with a toothpick, then paint the whole bootie dusty blue. Add the sole by masking the bottom with a strip of paper and painting white. Poke the hanging hole through the top center before baking. Bake until fully dry, then outline the lace lines with a fine brush or paint pen and seal with a thin satin coat.
Pro tipIf your lace lines smear, wait for the base paint to cure overnight before outlining.
AvoidDon’t make the laces too deep — deep grooves can break at the edges after baking.
4. Pacifier Circle with Star
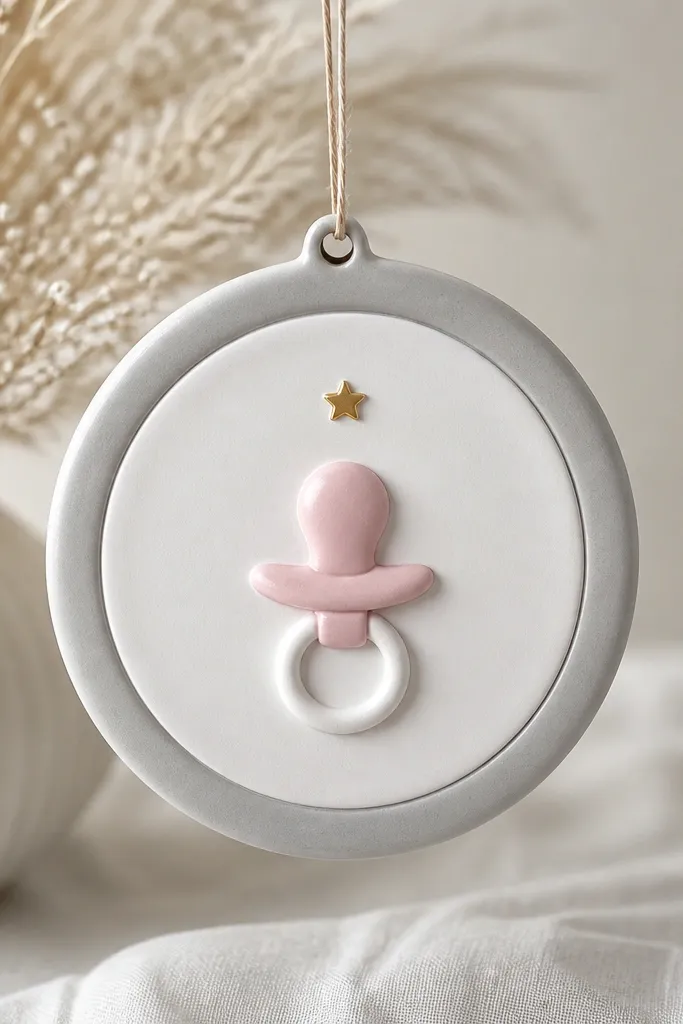
A pacifier in the center reads instantly, and the circle frames it so the ornament looks balanced on the tree. I paint the outer ring in pale gray-blue because it makes the pink pop without looking neon. The gold star is small — just one — so the piece doesn’t turn into a glitter bomb. This is a good choice if you’re doing a mixed set of animals and baby items and want one “icon” ornament.
Roll dough to 5mm and cut circles about 3 inches wide. Cut or press a simple pacifier shape onto the center and smooth the edges with a damp fingertip. Add a shallow star impression above the pacifier using a small stamp, then poke a hanging hole near the top edge. Bake until dry. Paint outer ring pale gray-blue, pacifier light pink with white highlights, star with gold acrylic, then seal with matte clear so the star stays subtle.
Pro tipUse a hole punch to test your hanging hole size on a scrap — 2-3mm works best for ribbon loops.
AvoidDon’t add glitter directly to sealer — it can clump and look gritty.
5. Name Tag with Thread Bow
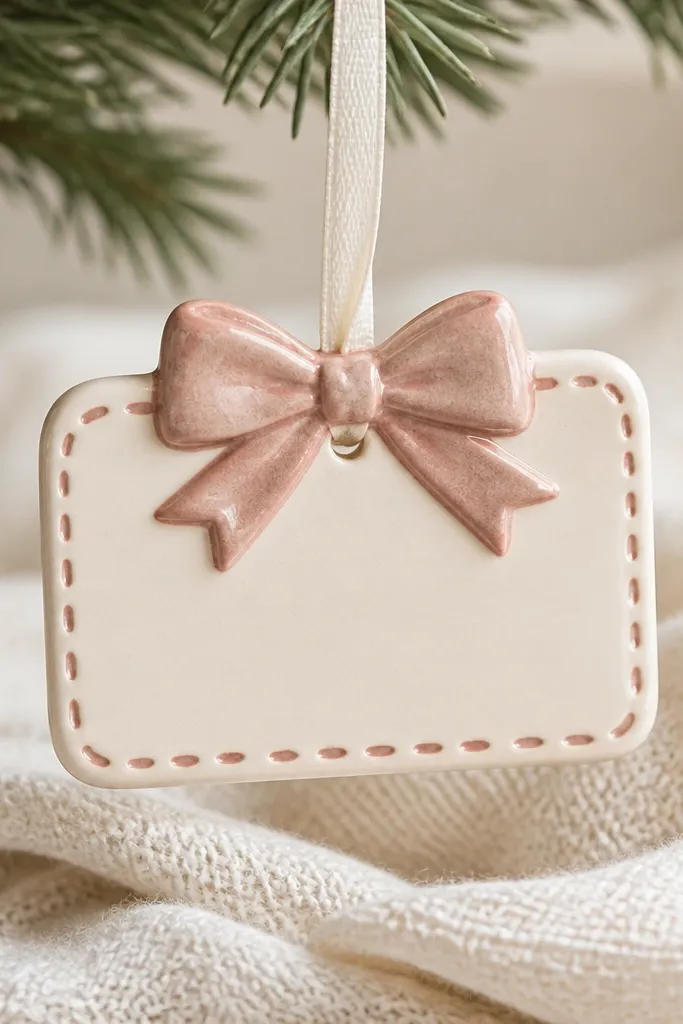
Name tags make your tree feel personal fast, and the raised bow keeps it from looking flat. I like cream with dusty rose because it pairs with almost any tree color and looks good in winter daylight. The dotted thread lines on the sides are what make it look handmade, not store-bought — keep the dots small and evenly spaced. This works for any baby name, and it’s especially pretty when you hang it with thin satin ribbon.
Roll dough to 4.5mm and cut a rectangle about 2 x 3 inches. Press a bow shape from a small dough strip or cut a pre-made bow outline and attach it with a tiny smear of water. Use a toothpick to dot a line on each side like stitching. Poke the hanging hole through the top bow area before baking. Bake until dry, then paint the tag cream, bow dusty rose, and add a fine line outline around the edges. Seal with satin so the raised bow catches light.
Pro tipWrite the name with a pencil after baking, then paint over it — pencil lines guide you without bleeding.
AvoidAvoid carving deep letters — they can chip along the edges.
6. Baby Bottle with Milk Drips
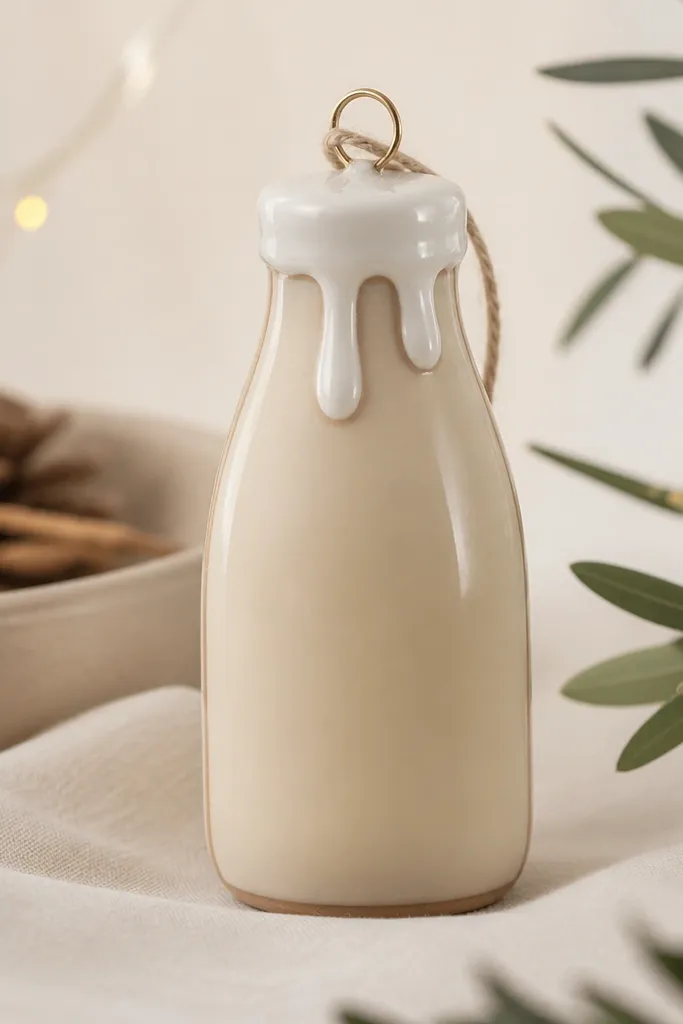
Bottle shapes look great because the silhouette is clear even if the ornament spins on the branch. I paint the bottle pale beige and the cap white, then use muted brown for outlines so it looks gentle, not harsh. The milk drips add movement without fragile details — keep them thick enough to survive drying. This style looks especially good on trees with white lights because the sealer gives a soft reflection.
Roll dough to 5mm and shape a bottle by hand or use a bottle cutter. Add drips by rolling three small ropes, flattening slightly, and attaching them at the top — smooth the join with a damp fingertip. Poke a hanging hole through the top cap area before baking. Bake until fully dry. Paint bottle pale beige, cap white, then outline with a thin muted brown line. Seal with a thin satin coat for a soft shine.
Pro tipMake drips the same thickness as a pencil eraser — thin drips snap after baking.
AvoidDon’t leave the top cap too thin — it warps and cracks first.
7. Little Heart with Hospital Bracelet Stripe
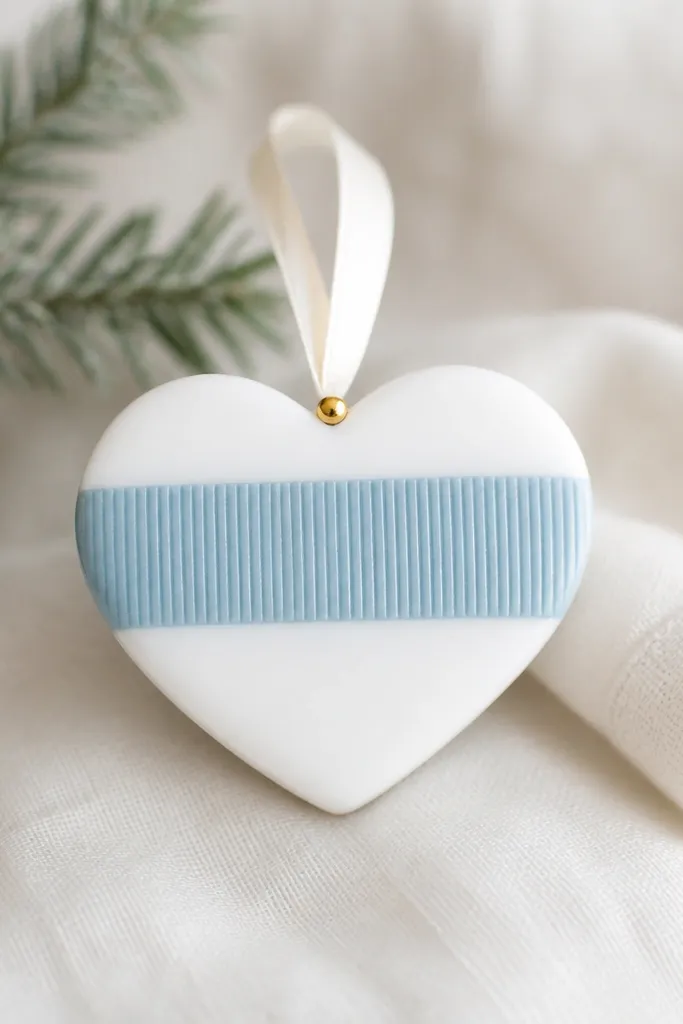
This is the ornament I make when I want something sentimental but still clean-looking. The heart shape gives it that classic baby feel, and the bracelet stripe pattern makes it feel specific and real. I paint the stripe light blue and add a tiny gold dot, not full gold — it reads “special” without looking like a craft store sticker. It looks great with silver or white ribbon and feels thoughtful for a first Christmas.
Roll dough to 5mm and cut a heart shape. Press two shallow parallel stripe grooves across the heart with a toothpick handle. Poke the hanging hole at the top center before baking. Bake until dry, then paint the heart white. Paint the stripe grooves light blue, let dry, then add a tiny gold dot near the top edge. Seal with matte clear so the stripe texture stays visible.
Pro tipUse a paper towel to wipe excess paint off the stripe surface so only the grooves hold color.
AvoidDon’t flood the grooves — thick paint can peel after sealer.
8. Baby Rattle Circle with Handle Lines
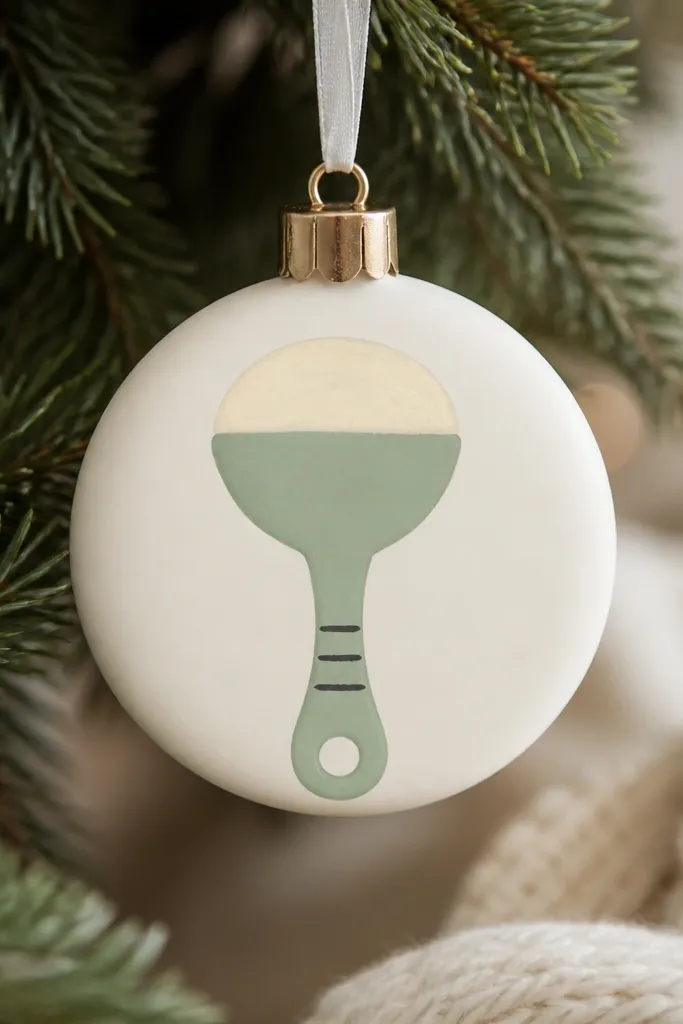
A rattle icon is instantly readable and looks playful without being messy. I use mint green because it stays fresh against evergreen branches and it doesn’t fight pink ornaments on the same tree. The handle lines are the detail that makes it feel like a rattle, and black lines keep it crisp. If your baby’s room has mint or green tones, this ties in naturally.
Roll dough to 5mm and cut a circle about 3 inches. Sculpt a small rattle handle by rolling a short thick strip, pressing it into the center, and smoothing edges. Add three shallow handle lines with a toothpick. Poke a hanging hole near the top before baking. Bake until dry, then paint the circle cream and the rattle mint, keeping the handle lines black. Seal with matte so the mint stays soft.
Paint the rattle after the circle base dries fully so the colors don’t bleed.
Skip super-skinny handles — they crack when you hang the ornament.
9. Tiny Crown for New Baby
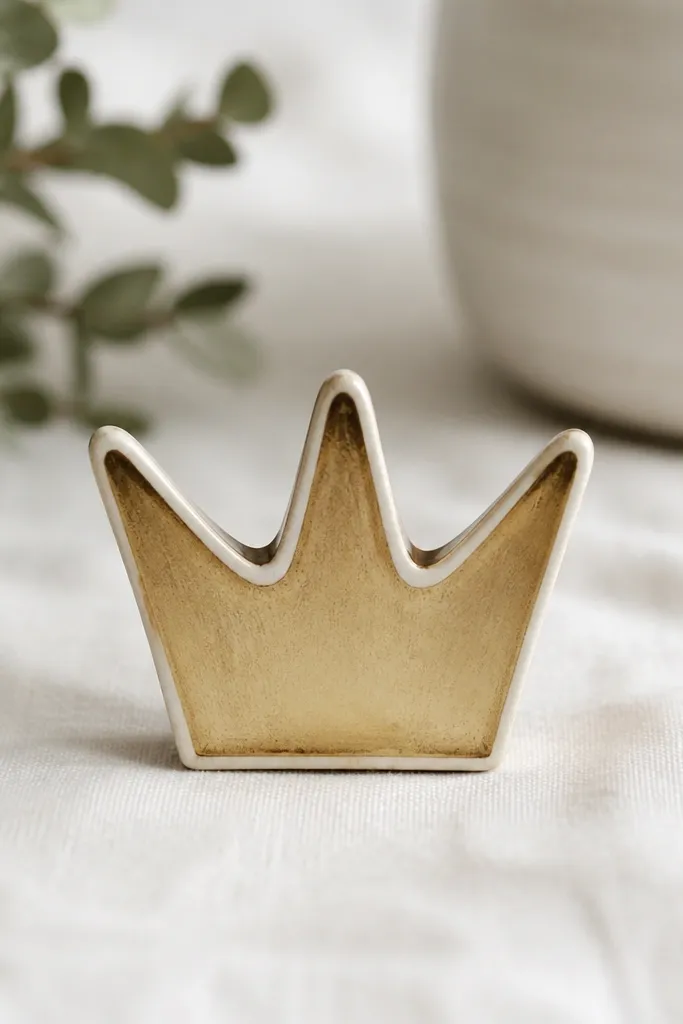
A crown reads “new baby” in a clean, graphic way, and it hangs nicely because the points don’t wobble. I paint it pale gold and add a cream outline to keep it from looking flat. Then I wash a light brown into the grooves so the crown edges look defined. This works well for families who want baby ornaments that don’t lean babyish pastel all the time.
Roll dough to 4.5mm and cut a crown shape. If your crown has sharp points, round the very tips slightly so they don’t chip. Press shallow lines to separate the crown sections. Poke the hanging hole at the center top before baking. Bake until dry, then paint pale gold. Add a cream outline, then dab a tiny amount of diluted brown wash into the section lines, wipe off excess, and seal with satin for a gentle glow.
If you use metallic paint, seal with satin, not high-gloss, so it looks like painted gold, not foil.
Don’t skip rounding the tips — sharp points are where salt dough fails.
10. Sun and Moon Baby Duo
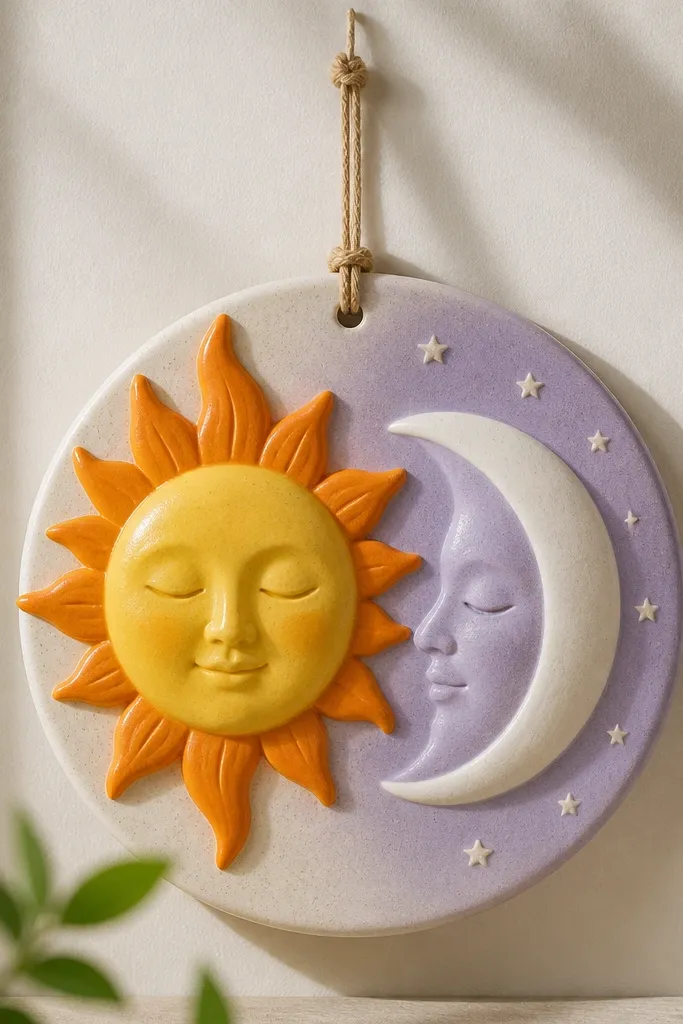
This one is playful and also practical — it looks cute even if you hang it slightly sideways because both parts frame the center. I like a bright yellow sun with orange rays because it pops against dark branches, and a lavender moon because it keeps the set from feeling too holiday-red. You get a baby feeling without using only pink and blue. This is especially pretty for a tree with a lot of neutrals and silver.
Roll dough to 5mm and cut a backing circle. Sculpt a sun disk with rays by pressing small dots around its edge, and sculpt a moon crescent on the other side of the circle. Attach both pieces with water, then smooth joins. Poke a hanging hole at the top of the backing circle before baking. Bake until dry, then paint sun yellow with orange rays, moon lavender with white crescent. Seal with satin so the colors look smooth and even.
Pro tipPaint the backing circle last — it helps you hide any tiny uneven edges where parts meet.
AvoidAvoid tiny ray shapes — they break off during drying.
11. Baby Booties in Mini Frame
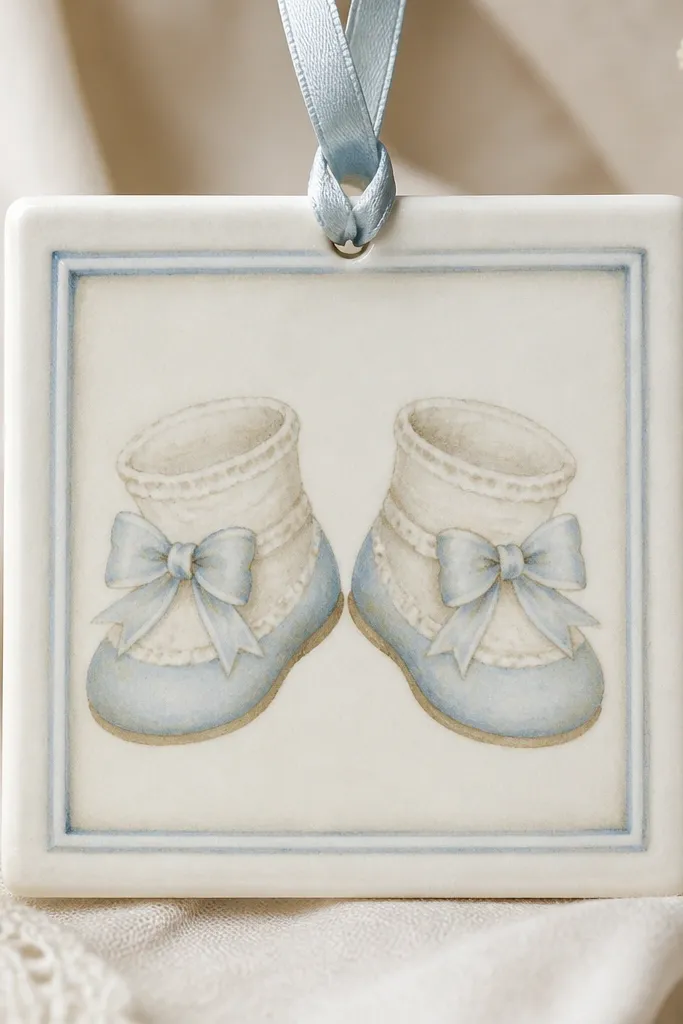
A framed look makes salt dough ornaments feel more intentional. The square outer frame gives structure, while the mirrored booties make it look like a set even when you’re only hanging one piece. I paint the frame in cream and the booties in pale blue and soft taupe, which works for any baby gender theme. It also photographs well because the inner shapes sit cleanly inside the border.
Roll dough to 5mm and cut a square. Press an inner border using a bottle cap ring so you get a consistent frame thickness. Sculpt two tiny booties from small oval shapes, attach them on the inner area, and smooth the edges. Poke a hanging hole near the top center before baking. Bake until dry, then paint outer frame cream, booties pale blue and taupe, and add a thin outline around the inner border. Seal with matte so the frame doesn’t glare in daylight.
Use the bottle cap ring to press the border instead of freehanding — it makes the ornament look straight even if your hands are tired.
Don’t make the booties too tall — tall pieces warp and lean in the tree.
12. Baby Bear Hug Heart
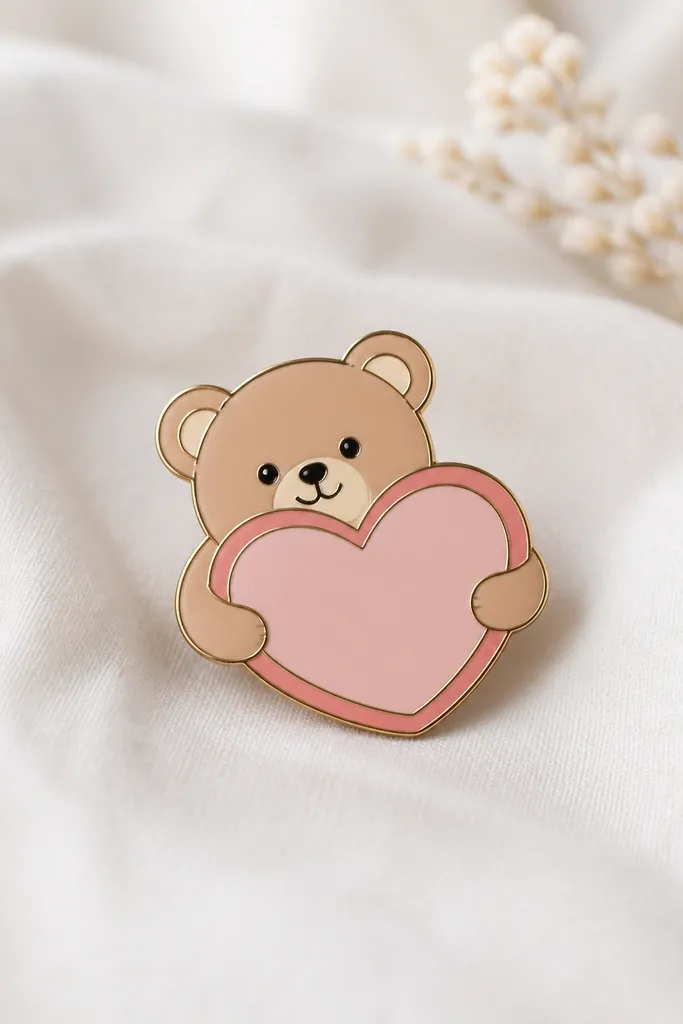
Bear + heart reads cozy, and it’s still baby-appropriate when you keep the colors soft. I use light brown for the bear and pale pink for the heart outline, then add a cream muzzle so the face looks cute instead of muddy. Keep the bear features simple — two dot eyes and a small nose — so they don’t crack at the edges. This ornament looks great on a tree with woodland accents or anywhere you’re mixing neutral browns and pinks.
Roll dough to 5mm and cut a heart outline. Sculpt a small bear face that fits inside the heart — keep it rounded so it bakes evenly. Press shallow dot eyes and a nose using the end of a paintbrush handle. Poke a hanging hole through the top point of the heart before baking. Bake until dry, paint heart pale pink with darker pink outline, bear light brown with cream muzzle. Seal with satin for a warm finish.
Paint the bear first, then outline the heart — outlining after prevents accidental brown smudges.
Skip heavy black outlines — they can look harsh on a soft baby design.
13. Teething Ring with Speckles
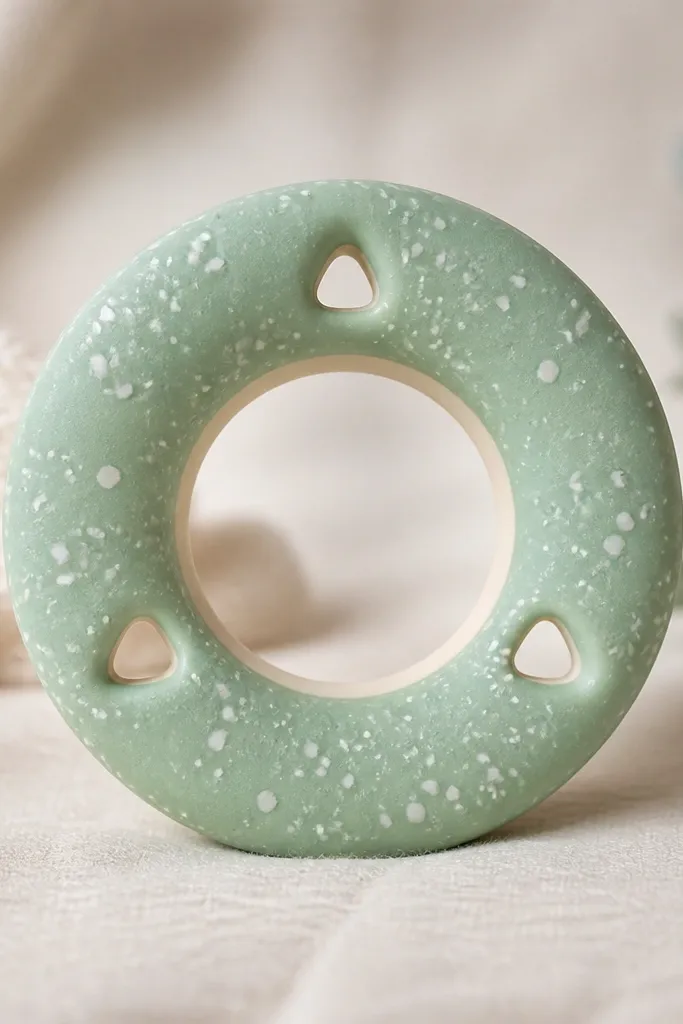
Teething ring designs feel timely and also look modern because the shape is graphic. Seafoam green is my go-to because it reads clean and neutral, and the white speckles add texture without glitter. You get a fun visual even from close up, which matters if people hang it near the top where you can see it. This is one of the better low maintenance salt dough ornaments because the speckles hide tiny imperfections.
Roll dough to 6mm and cut a ring shape using a thick circle cutter or cut two circles and remove the center. Add three small gaps by cutting small semicircles from the ring edge. Poke a hanging hole near the top of the ring before baking. Bake until dry and slightly lighter around the edges. Paint the ring seafoam green, then dab white speckles with a stippling sponge. Add a light cream highlight on the inner edge and seal with matte.
Pro tipPractice speckles on a scrap first so dot size stays consistent.
AvoidDon’t make the ring center too thin — it can collapse during baking.
14. Little Handprint with Star Outline
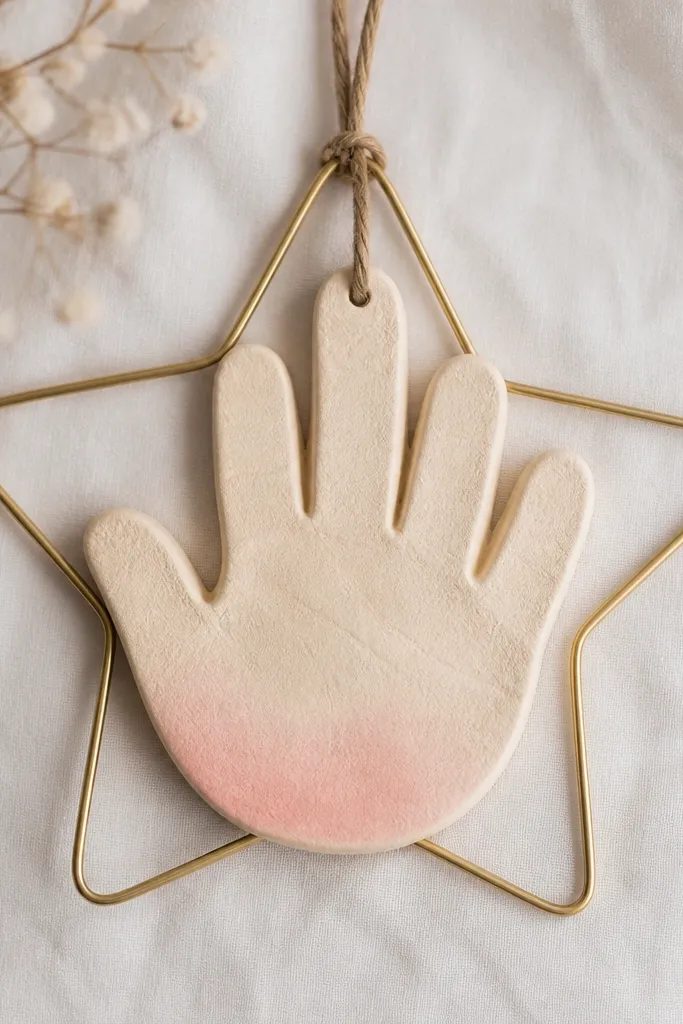
Handprint ornaments have a special look, but they can go wrong if the details are too deep. This design stays cute because the handprint is shallow and the star outline gives a frame so it reads clearly on the tree. I paint the handprint pale cream and add a faint blush wash at the wrist, then outline stars in muted gold. It looks sweet for baby gifts and also works as a keepsake ornament when you’re making a set for family members.
Roll dough to 4mm and cut a handprint shape using a stencil, then press the handprint lightly with your fingers or a mold. Keep the palm and fingers shallow so edges don’t crack. Press a thin star outline around the outside edge using a small star stamp. Poke a hanging hole near the wrist end before baking. Bake until fully dry, paint cream, add blush wash lightly at the wrist, outline stars in muted gold. Seal with satin so it doesn’t turn too flat.
Pro tipUse a damp cotton swab to soften the blush wash so it looks like natural warmth.
AvoidSkip deep finger grooves — they chip first after baking.
15. Baby Bottle Brush Strokes Ornament
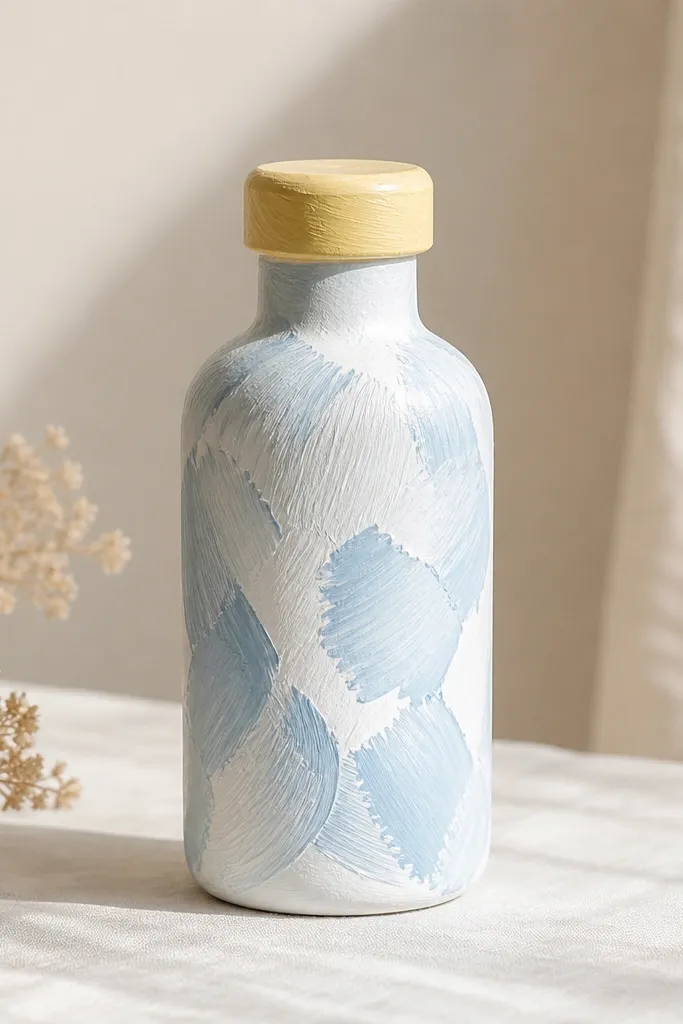
This one is for people who want the “handmade texture” look without extra tools. The visible brush strokes add dimension, and the bottle silhouette keeps it readable. I use white base with baby blue swipes, then a pale yellow cap so it feels cheerful. The brush-stroke style also hides small unevenness in your dough surface after baking, so it’s forgiving for first-timers.
Roll dough to 5mm and cut a bottle shape. Lightly score a few vertical lines to suggest bottle ridges, but don’t go deep. Poke a hanging hole through the top before baking. Bake until dry, then paint a white base. Paint baby blue swipes with a flat brush, letting some white peek through, and paint cap pale yellow. Seal with matte clear to lock in the brush texture.
Pro tipUse a dry brush technique — load the brush with paint, wipe most off on a paper towel, then swipe.
AvoidDon’t use watery paint — it can soak into dough pores and look streaky after sealer.
16. Crying Baby Tears Drop
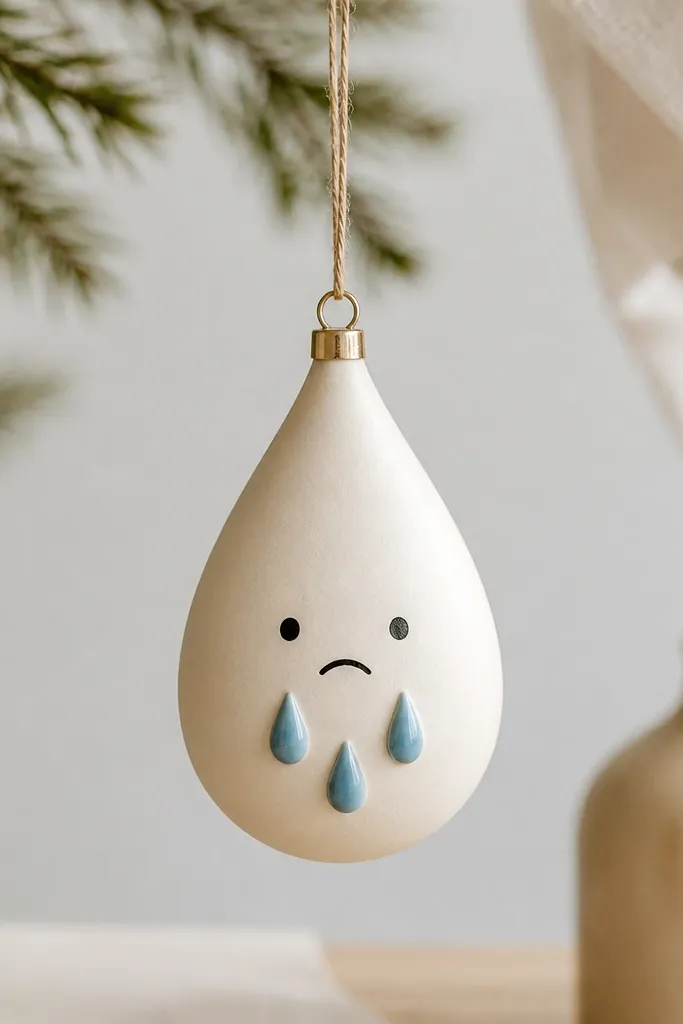
This is a funny baby ornament that still looks sweet because the tears are soft and the base is pale. Teardrop shape frames the face, and the tears create a gentle vertical motion that catches light when the ornament sways. I paint tears in light blue gradients (just two tones), not bright royal blue. It’s a good pick when you’re making ornaments for a baby shower where humor is welcome and you still want the set to look cohesive.
Roll dough to 5mm and cut a teardrop outline. Sculpt a small face in the top half using shallow cuts for eyes and mouth. Attach three small tear drops below the mouth with a little water, then smooth edges. Poke a hanging hole at the top before baking. Bake until dry, paint base pale cream, tears light blue (two shades), and add tiny outline details. Seal with satin so it doesn’t look chalky.
Add one tiny highlight line on each tear with a white paint pen for extra charm.
Skip tiny tear drops — they crack at the thinnest point.
17. Baby Hat with Pom Pom
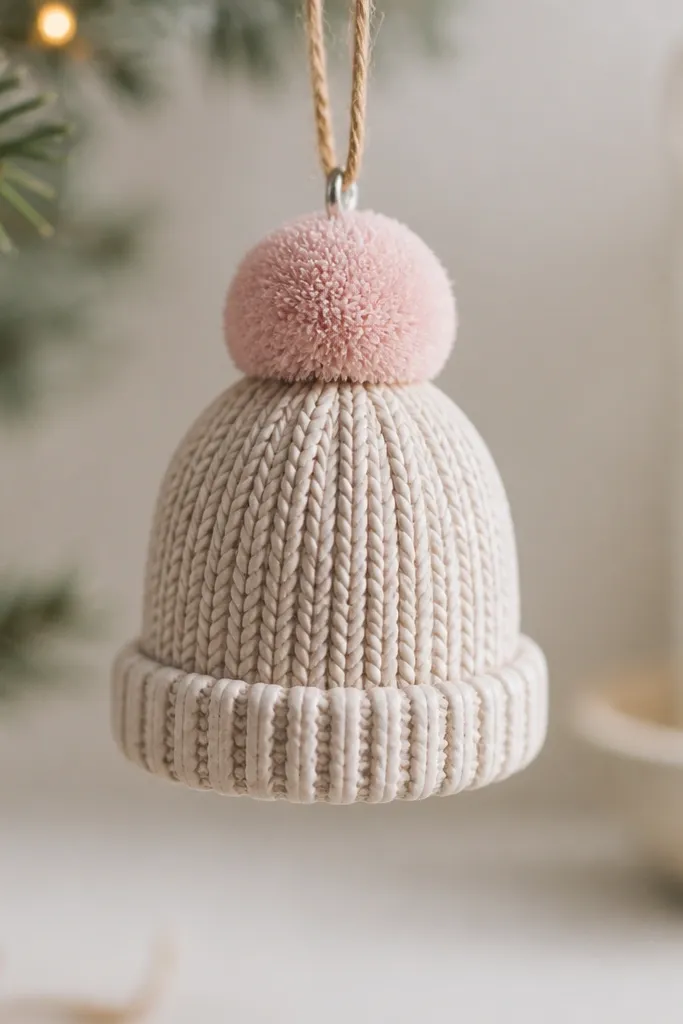
A baby hat reads cozy fast, and it looks great when you keep it in neutral knit colors. Oatmeal and pale pink feel soft and modern, and the ribbing lines on the brim add texture without needing glitter. The pom pom looks best when it’s slightly raised — it catches a highlight and gives the ornament depth. This is a good match if your tree theme is neutral, cream, and a single accent color.
Roll dough to 4.5mm and cut or sculpt a simple hat shape with a rolled brim. Press shallow ribbing lines around the brim with a fork tine, then attach a small round pom pom on top. Poke a hanging hole at the top side before baking so the hat hangs slightly angled. Bake until dry, then paint oatmeal base, pale pink pom pom, and add a slightly darker brown wash into the ribbing. Seal with matte clear for a knit-like finish.
Pro tipLet the sealer dry fully before hanging — matte can look streaky if you rush it.
AvoidDon’t make the brim too thick — it can warp and pull the hat shape.
18. Star Baby Blanket Corner
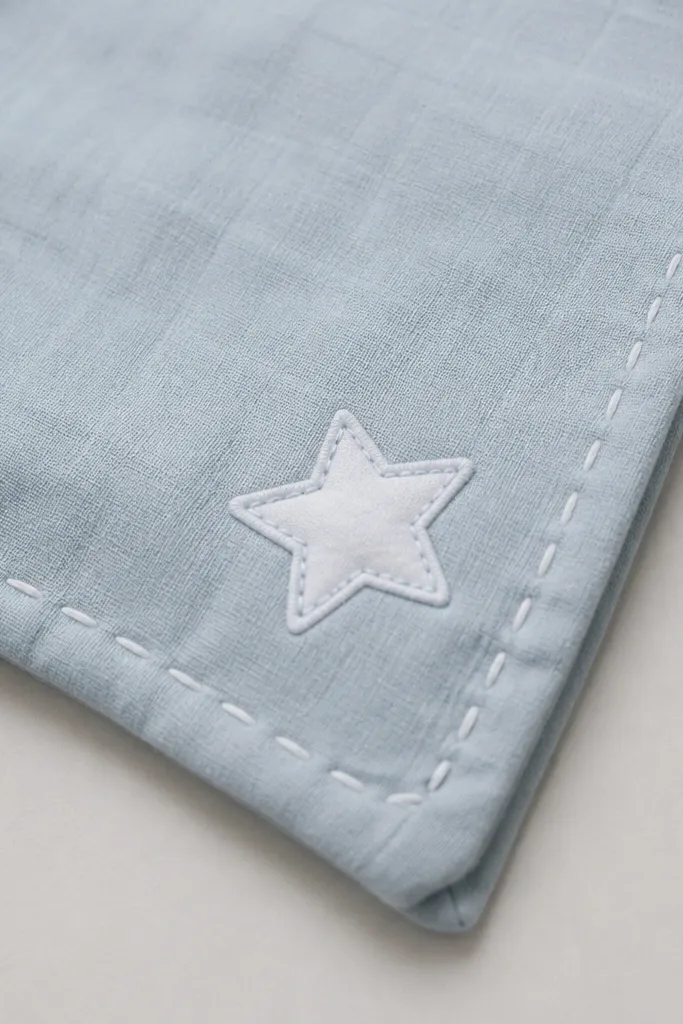
This design looks like a real blanket fold, and the star corner makes it baby-themed without relying on faces. I paint the blanket in white with light blue accents, then draw a stitched border in pale gray. The stitched border is what makes it feel finished — it frames the shape and makes edges look intentional. It looks especially good on a tree where you have other stars or where you want less pink and more winter-soft colors.
Roll dough to 5mm and cut a large right-angle corner piece, like a square with one corner missing. Press a small star shape into one corner. Use a toothpick to draw stitch bumps along the outer edges, then poke a hanging hole near the top edge of the fold before baking. Bake until dry, paint white base, star light blue, and stitch border pale gray. Seal with satin so it catches light like fabric.
Draw stitch bumps with light pressure so they don’t break off after baking.
Avoid super-smooth edges — sharp corners chip when you hang the ornament.
19. Baby Footprint in Snowflake Frame
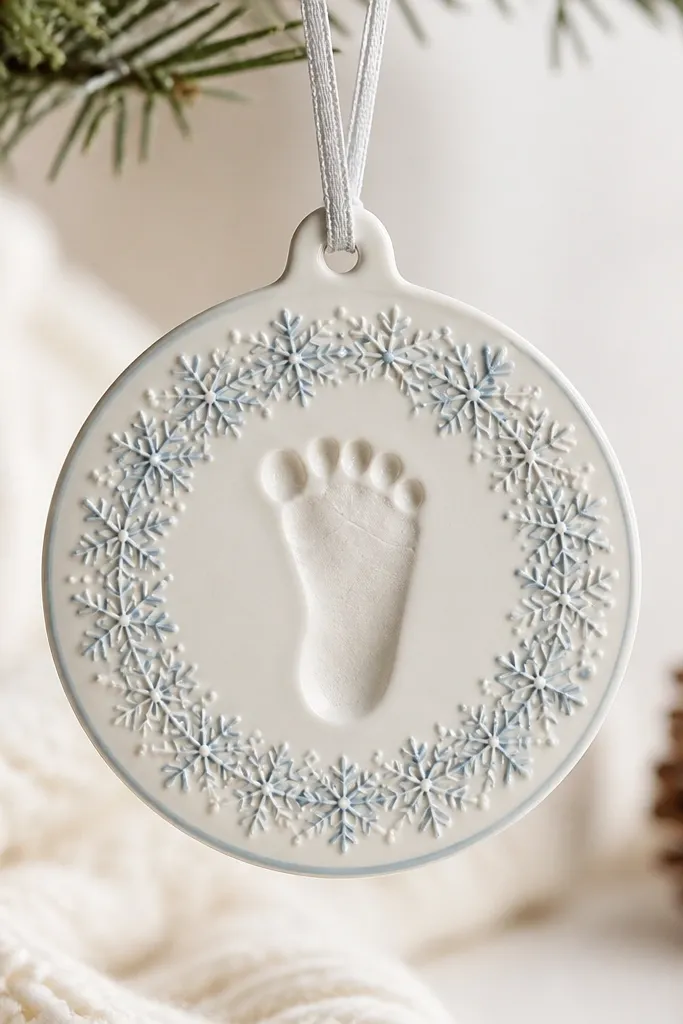
Footprints are personal, but the snowflake frame stops the ornament from looking plain or uneven. I keep the footprint shallow and paint it cream, then outline with light gray so it looks clean. The snowflake ring in light blue adds winter energy without going full icy-blue everywhere. This works for families who want something sentimental that still fits a traditional Christmas tree.
Roll dough to 4mm and press a footprint using a stencil or by tracing a small foot outline, then lightly emboss the toes and heel. Cut a circle backing and place the footprint in the center. Add a raised snowflake ring by stamping a snowflake pattern around the edge. Poke a hanging hole near the top before baking. Bake until dry, paint footprint cream, snowflake ring light blue, and add gray outline around the footprint edges. Seal with matte for a soft, paper-like look.
If the footprint edges look rough, sand lightly after baking with fine grit, then repaint before sealing.
Don’t make the snowflake ring too raised — it can snap when ornaments get bumped.
20. Baby Bottle Cap Heart
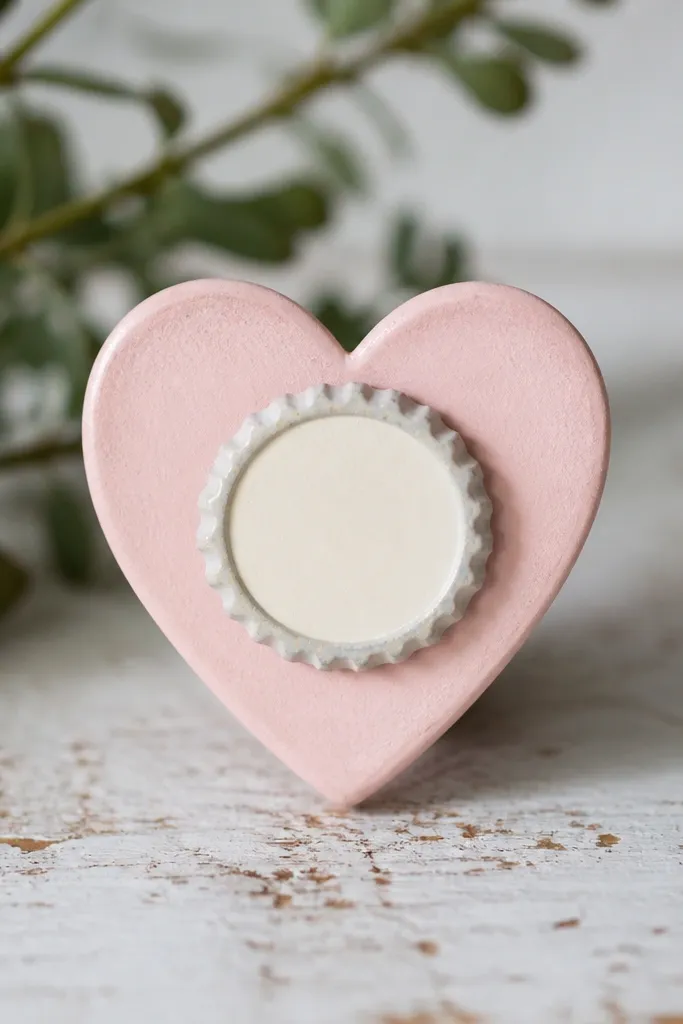
This is a clever, graphic baby ornament that stays simple and sturdy. The heart shape looks classic, and the raised circle center gives it that “bottle cap” idea without tiny parts that break. I paint the heart pale pink and keep the center neutral cream with gray lines, so it reads like a design, not a random craft. It looks great mixed with other flat ornaments because it’s bold but not busy.
Roll dough to 5mm and cut a heart. Press a small raised circle in the center using a bottle cap imprint, then gently smooth the edges around it. Lightly score a few lines on the raised circle to mimic cap ridges. Poke a hanging hole at the top center before baking. Bake until dry, paint heart pale pink, center cream, then add gray lines on the circle. Seal with satin so the raised circle catches light.
Pro tipUse a cotton swab to clean paint off the raised circle edges so the imprint stays crisp.
AvoidAvoid thick gray paint on the cap ridges — it fills the texture and looks messy.
21. Mini Bunny Ears Baby Headband
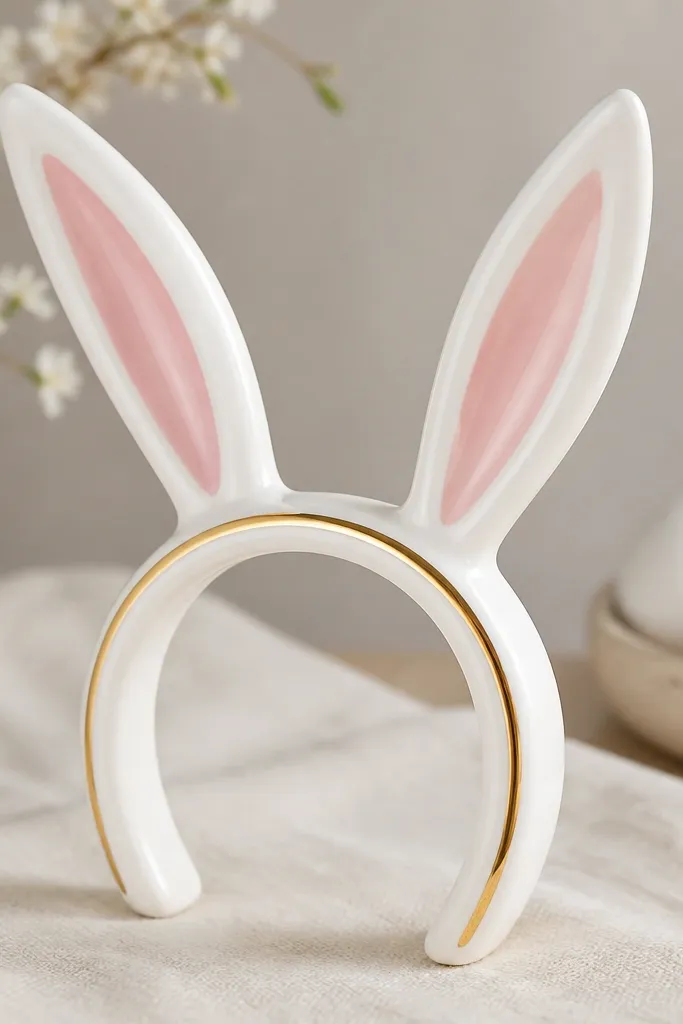
Bunny ears give a baby photo vibe without needing a full character scene. The headband shape hangs flat and looks tidy, and the pale pink inner ears keep it soft. I paint it mostly white and add one thin gold line across the band so it looks like a little accessory. This one is great for spring-themed first Christmas photos or if you have pastel ornaments.
Roll dough to 5mm and shape a headband arc. Sculpt two bunny ears by rolling small ovals, flattening slightly, and attaching on top. Add a shallow notch where the ears meet the headband for a clean look. Poke a hanging hole at the center of the headband before baking. Bake until dry, paint white base, inner ears pale pink, and draw a thin gold line across the top of the headband. Seal with matte to keep it soft and not shiny.
Paint the gold line with a liner brush — thick gold makes it look like marker ink.
Don’t make the ears too thin — they snap at the base first.
22. Baby Bib with Dotted Tie
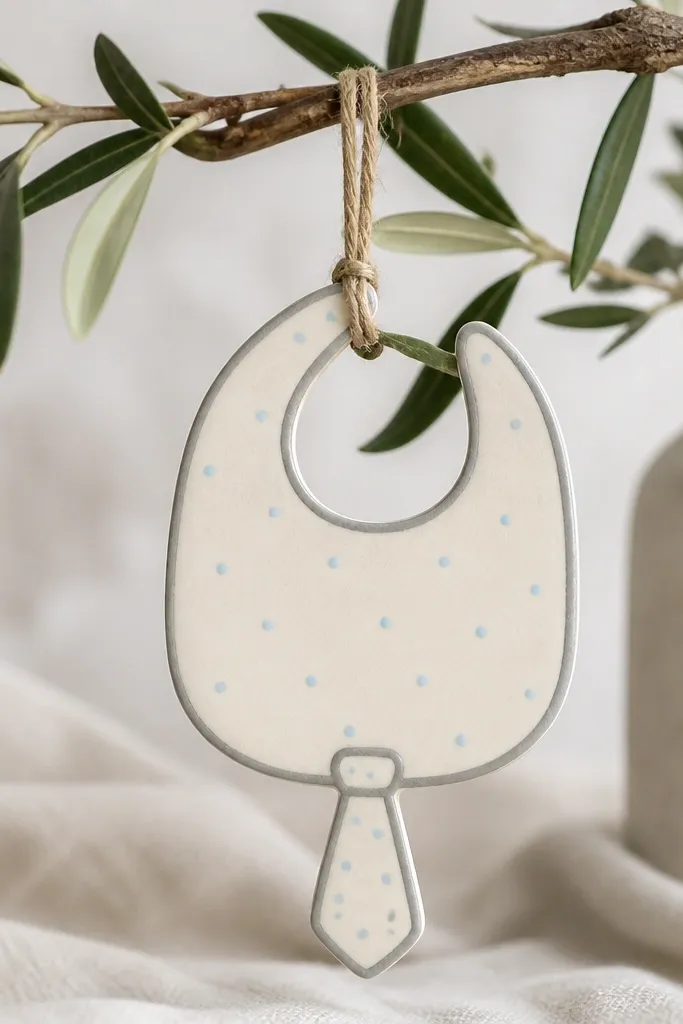
A bib shape reads baby quickly, and the dotted tie adds charm without fragile details. I like cream with sky blue dots because it feels classic and stays clean against green tree branches. Keep the outline muted gray so it doesn’t look like a thick cartoon border. If you’re building a set for a baby shower gift, this is one of the pieces people notice right away because it looks like an actual item.
Roll dough to 5mm and cut a bib outline with a slightly curved top. Press two shallow lines for the neck curve and keep the bottom edge rounded. Use a toothpick to make a dotted tie pattern on the bottom flap. Poke a hanging hole near the top center before baking. Bake until dry, paint bib cream, dots sky blue, outline muted gray, then seal with satin so it looks smooth.
Use a stencil for dot spacing if you want the dots to look perfectly even.
Avoid bright royal blue — it can look too harsh next to cream.
23. Baby Carriage Mini Silhouette
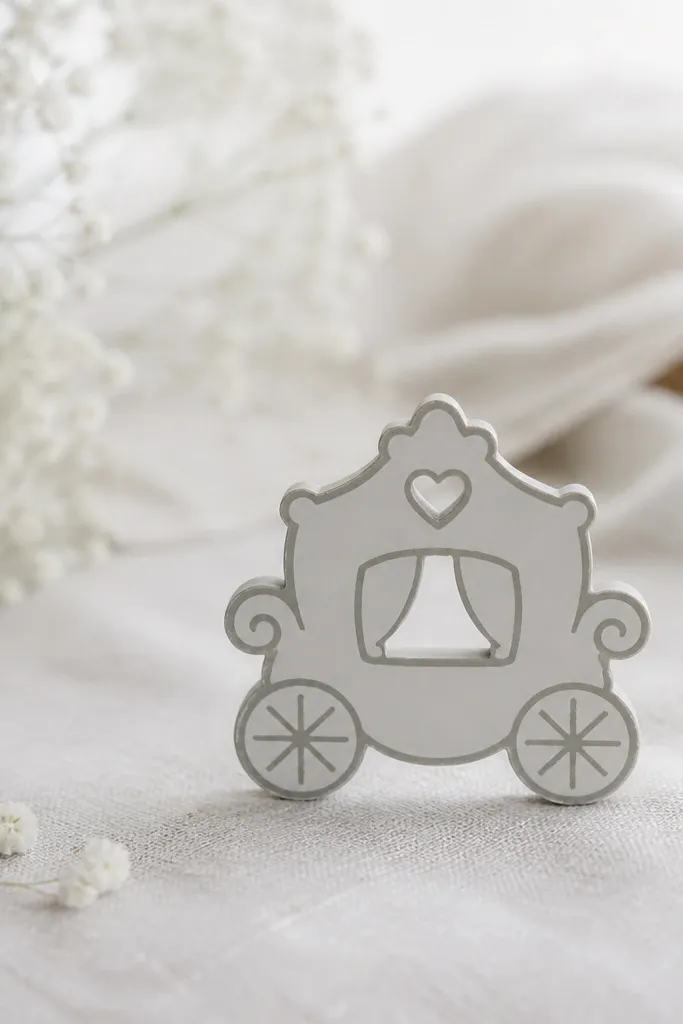
Carriage silhouettes look classy on a tree because they’re simple and readable at a distance. I paint mine light gray with a darker gray outline, then add a tiny heart cutout near the top for baby sweetness. The heart is small enough to stay sturdy but visible enough to feel intentional. This style is great if you want baby-themed ornaments that don’t rely on pink or blue.
Roll dough to 5mm and cut a carriage silhouette using a simple outline cutter or stencil. Add wheels by pressing two shallow circles near the bottom and drawing lines with a toothpick for spokes. Cut a small heart cutout at the top using a heart punch, then smooth edges. Poke a hanging hole at the top before baking. Bake until fully dry, paint light gray, outline with darker gray, and seal with matte clear.
If your heart cutout edges look rough after baking, sand lightly and repaint before sealing.
Don’t add too many tiny windows — small cutouts crack during drying.
24. Baby Star Tag with Two-Tone Wash
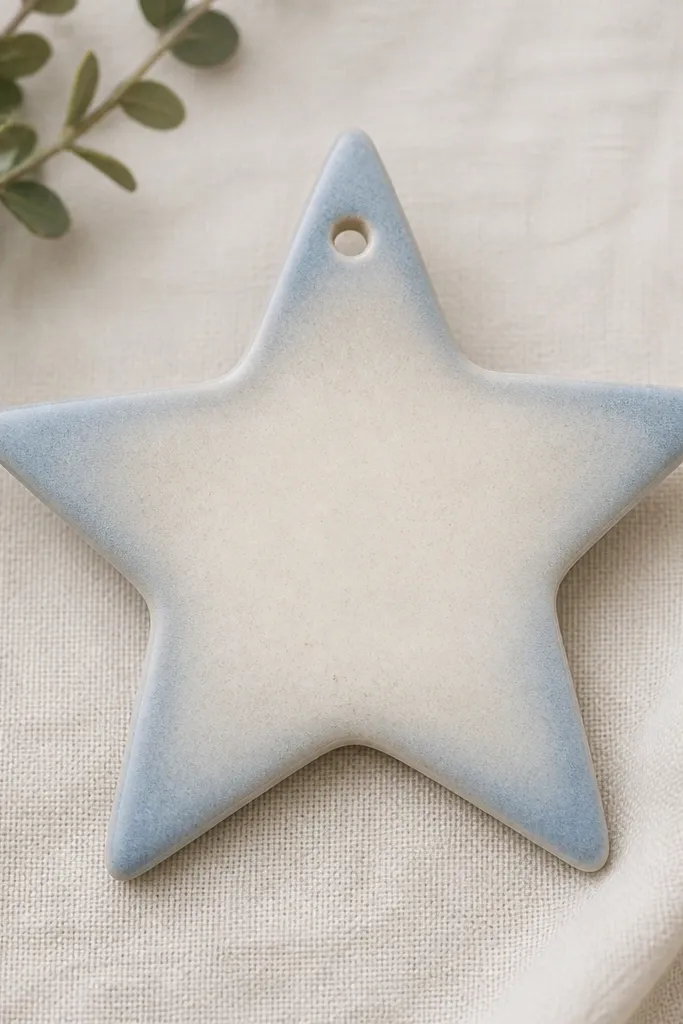
Two-tone wash stars look airy and gentle, and they hide small dough imperfections. I keep the center cream and let light blue wash into the tips, then add a faint gray shadow along the edges so it looks dimensional. This makes a star feel baby-soft instead of shiny and glittery. It’s also one of the best low maintenance salt dough ornaments because the wash forgivingly covers uneven paint coverage.
Roll dough to 5mm and cut stars using a cookie cutter. Poke a hanging hole at the top point before baking. Bake until dry and cool fully. Mix light blue acrylic with a little water so it’s translucent, then paint the center cream first and let it dry. Apply blue wash lightly at the tips and pull it inward with a damp brush for a soft gradient. Add a thin gray wash around the edges, let dry, then seal with matte.
Pro tipUse two coats of wash instead of one heavy coat — it looks smoother and dries faster.
AvoidAvoid soaking the star — too much water makes salt dough feel chalky under paint.
25. Baby Bowtie in Soft Plaid
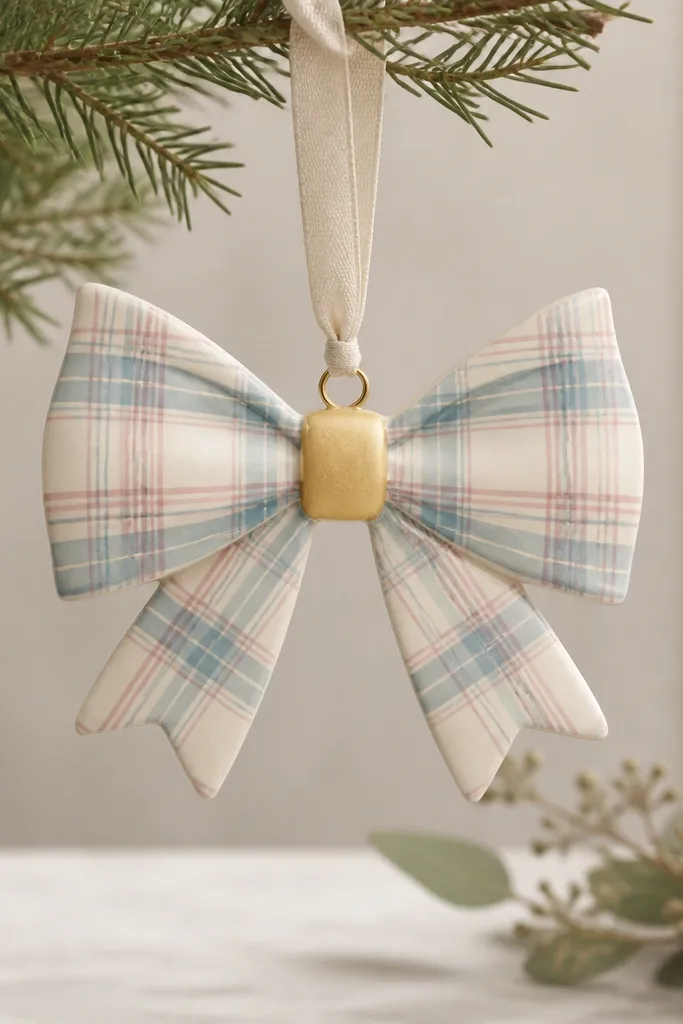
A bowtie ornament makes a baby theme feel grown-up in a cute way, and it stands out when you mix it with softer shapes. The plaid pattern looks complicated, but you can do it with simple lines and a steady hand. I use cream base, light blue and muted pink lines, then paint the knot pale gold. The gold center keeps the bow from looking flat on the tree.
Roll dough to 4.5mm and cut a bowtie outline. Create plaid by drawing horizontal lines on each wing and then adding vertical lines across, keeping them evenly spaced. Keep the lines shallow so they survive baking. Poke a hanging hole at the top center of the bowtie before baking. Bake until dry, paint cream base, then paint plaid lines light blue and muted pink with a fine brush. Paint the knot pale gold, and seal with satin for a clean finish.
Pro tipUse masking tape strips to block straight line sections if your hands shake.
AvoidDon’t let paint puddle in the plaid lines — it can dry raised and crack.