
1. Strawberry Cream Cup Squishy
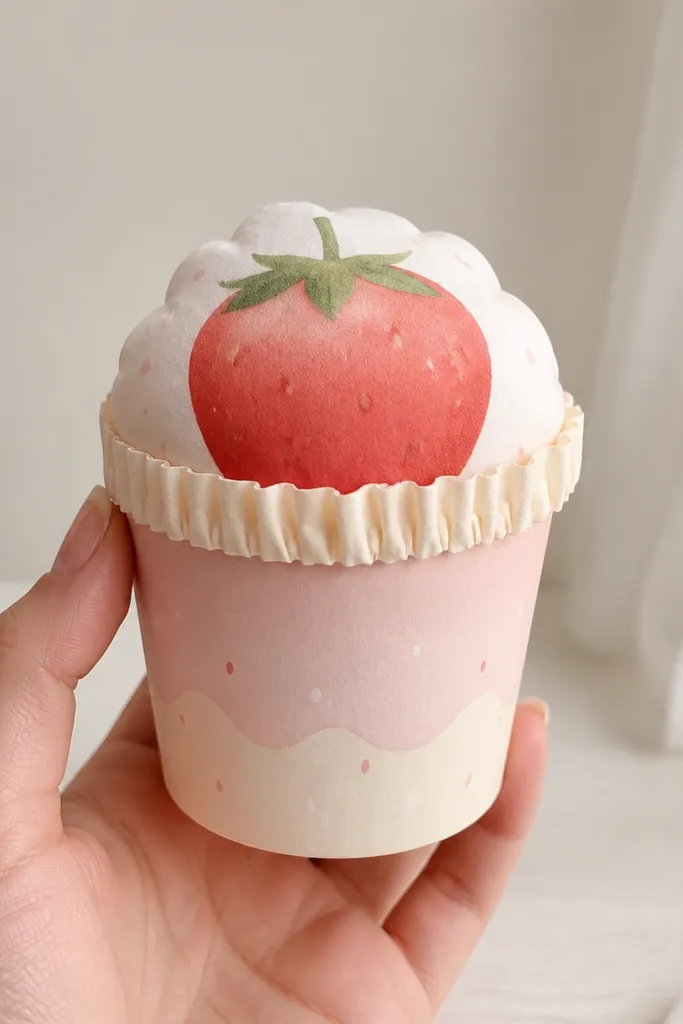
This one looks cute because it’s shaped like a dessert, not a flat icon. I build the cup from light pink and cream cardstock so the “container” looks sturdy while the top stays soft. The strawberry part reads best in warm lighting, so I use two reds: a darker red for the lower curves and a lighter red for the upper dome. It flatters desk styling because it matches almost every neutral setup — beige, white, and pale wood tones. If you like pastel accessories, this is the easiest win because the colors do the heavy lifting.
Step 1: Cut a rounded rectangle base for the cup (about 10 cm wide by 7 cm tall). Fold the sides up to form walls, then glue the seam inside. Step 2: Make a dome top from a circle (about 9 cm diameter) and score lightly around the edge so it stays rounded when pressed. Step 3: Add strawberry ridges by gluing three thin strips of red paper radiating from the center, then dot “seeds” with a white gel pen and tiny dark red dots. Finally, glue a wavy cream rim on top using off-white paper strips.
For extra squish, tuck a thin foam sheet between the dome top and the cup wall before sealing the last edge.
Don’t use glossy craft paper for the strawberry dome — it shows creases and looks shiny in a cheap way instead of soft.
2. Matcha Mochi Cloud
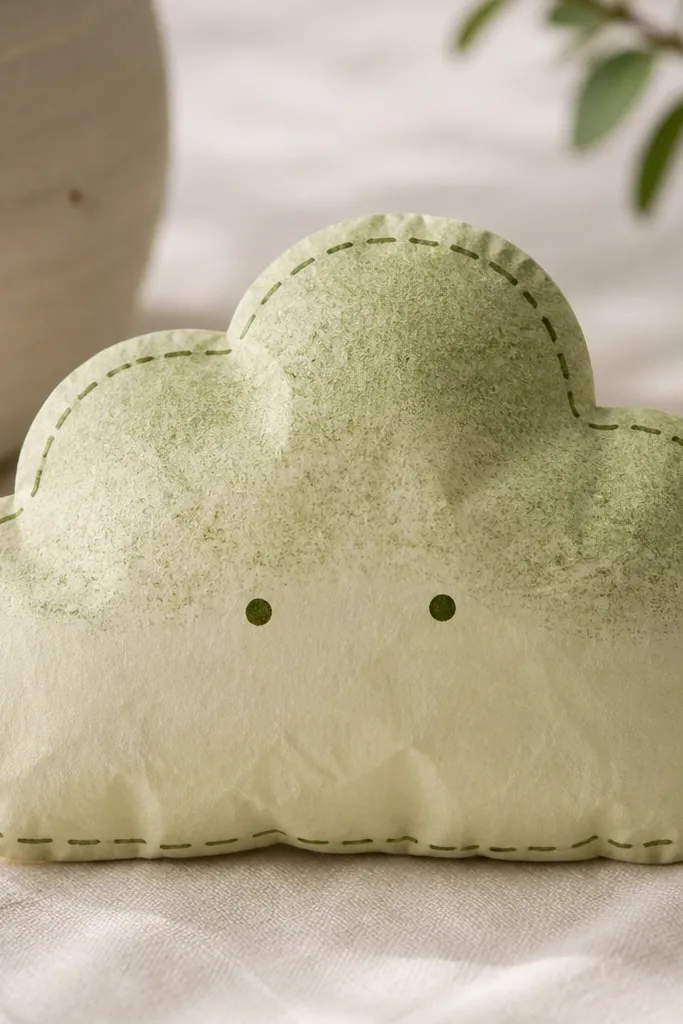
Step 1: Draw a cloud template on pale green cardstock (about 11 cm wide). Cut two identical clouds. Step 2: On the front cloud, add darker green “powder” specks using a sponge dabber or torn paper edge with paint. Step 3: Glue the two clouds together with a thin filler in the center — I use a folded piece of foam or thick tissue wrapped in parchment. Finally, outline the edges with a dark green marker and add two small eye dots.
This squishy works because clouds hide imperfect cuts. The mochi look comes from a rounded outline and a subtle two-tone finish. I use pale matcha green cardstock for the main piece and a slightly darker green for the dusting, so it looks like powder on soft dough. It looks good in any skin-tone color palette because green sits nicely with warm beige and cool white. If you want something calm and not overly bright, this is the one I reach for.
AvoidSkip thick liquid glue at the edges; it makes the outline buckle and ruins the soft cloud shape.
Pro tipPress gently for 10 seconds after gluing so the filler spreads evenly and the cloud stays puffy.
3. Ramen Noodle Bowl Charm
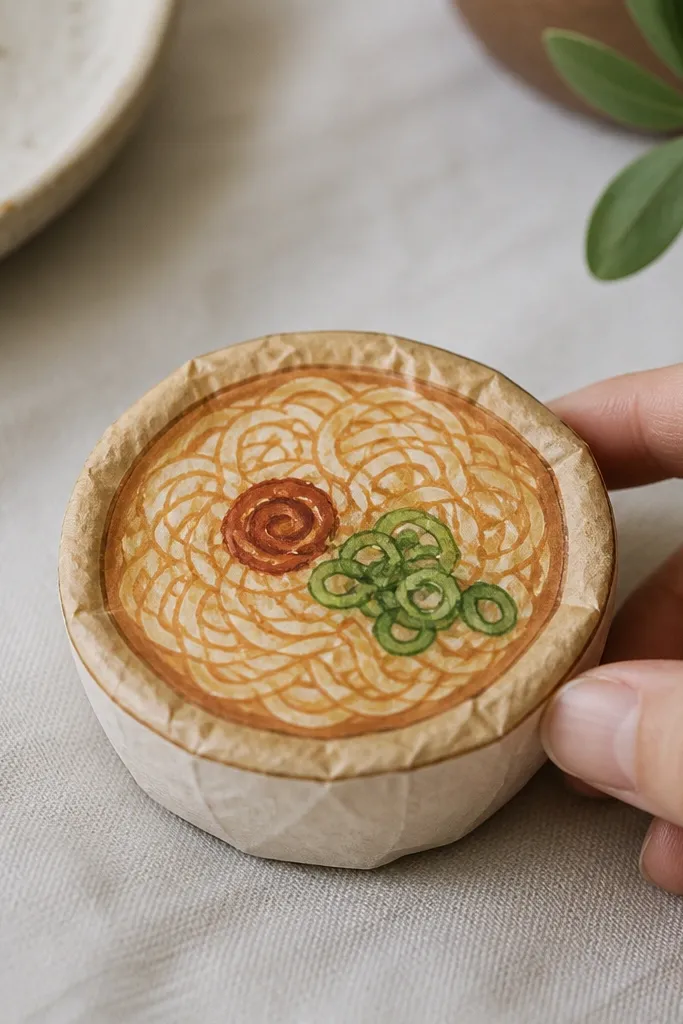
Ramen squishies look great because the details are simple but expressive. I use a bowl silhouette with a flat front and a slightly puffed center so it reads as a bowl you can tap. The broth base is light tan or pale orange, and the noodles are cream with thin brown lines. This design flatters warm color schemes and looks especially good next to brown notebooks and gold pens. If you want a squishy that feels fun, not cute-kid-only, this one nails that vibe.
Step 1: Cut a front bowl panel (about 9 cm wide) from tan cardstock and a back panel from white or light beige cardstock. Step 2: Add noodles by drawing 6-8 noodle arcs with a fine brown marker, then add a red chili swirl in one corner. Step 3: Create a soft center by cutting a small foam pad (about 4 cm across) and placing it under the noodle area. Step 4: Glue the front to the back, leaving the edges clean, then glue a single scallion strip on top.
Add a glossy broth highlight by brushing a tiny strip of clear tape over the center and trimming the edges.
Don’t add too many toppings; if you stack more than 3 elements, the bowl stops looking like a bowl and turns into a paper blob.
4. Mini Peach Pie Slice
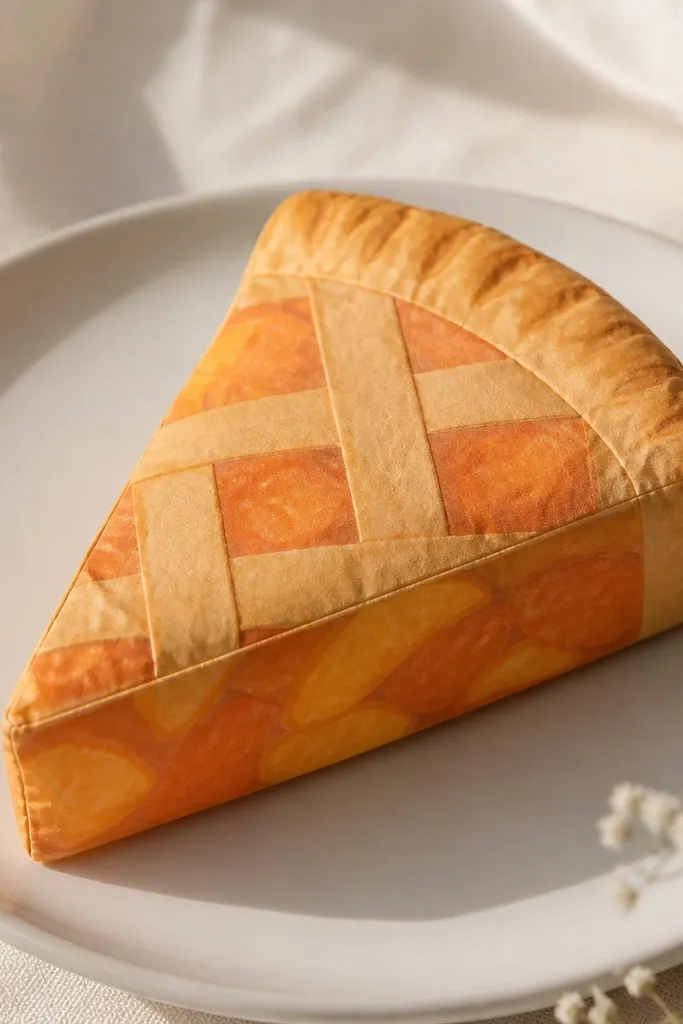
Pie slices are forgiving because their triangular shape hides uneven thickness. I build this with a golden crust outline and a peach filling layer so it looks like real dessert even when it’s paper. The filling looks best with two peach shades — one light for the base and one darker for “chunks.” This is a great desk charm for anyone who likes warm aesthetics without going full pastel. It also looks good on darker backgrounds because the peach pops.
Step 1: Cut two identical pie wedges, about 10 cm long and 6 cm wide at the base. Use golden brown cardstock for the outer crust on the front panel and plain white for the back panel. Step 2: On the front, color the filling area peach orange and add small darker peach blobs with a marker. Step 3: Layer a thin foam insert behind the filling so the top domes slightly. Step 4: Add a simple lattice effect with 3-4 thin strips of light brown paper across the top edge.
Crimp the crust edge by making tiny snips with scissors every 2-3 mm, then fold the tabs outward slightly.
Avoid cheap construction paper — it tears at the crimped edge and looks rough instead of “baked.”
5. Blueberry Pancake Stack
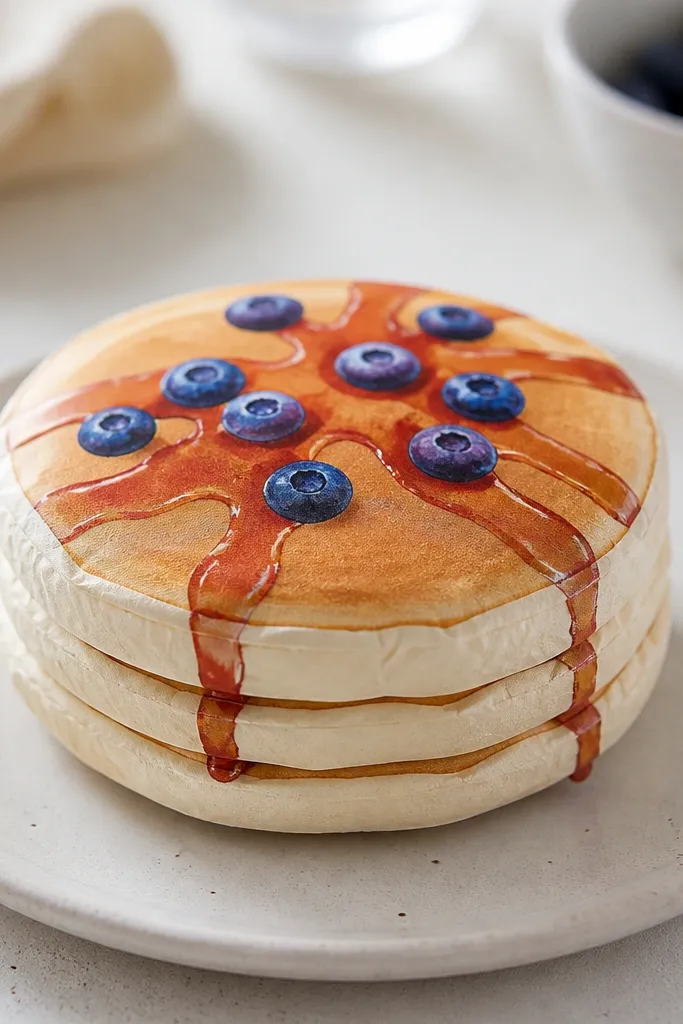
Step 1: Cut three pancake circles using a lid or coin template: 9 cm, 8 cm, and 7 cm. Cut matching back circles for each layer. Step 2: Glue layers from largest to smallest, but leave the top pancake slightly unsealed until the foam insert goes in. Step 3: Add blueberries by gluing 8-10 small cut circles in deep blue, then draw a small white dot on each. Step 4: Add syrup lines with a brown marker and a tiny drip strip on the side.
Stacks always look satisfying because you get instant depth. I make this with two or three pancake layers, each slightly smaller than the one below, then add a squishy center so pressing it feels bouncy. The pancakes are golden yellow cardstock, and I use a darker brown for syrup lines. Blueberries are drawn as filled circles with a tiny white highlight dot so they read as glossy fruit. This fits people who like playful food decor and it matches both cool and warm room colors.
AvoidDon’t glue all layers at once with wet glue; it warps circles and makes the stack look lopsided.
Pro tipIf you want more squish, use a thicker foam square for the top layer only — it keeps the stack from feeling flat.
6. Croissant with Butter Shine
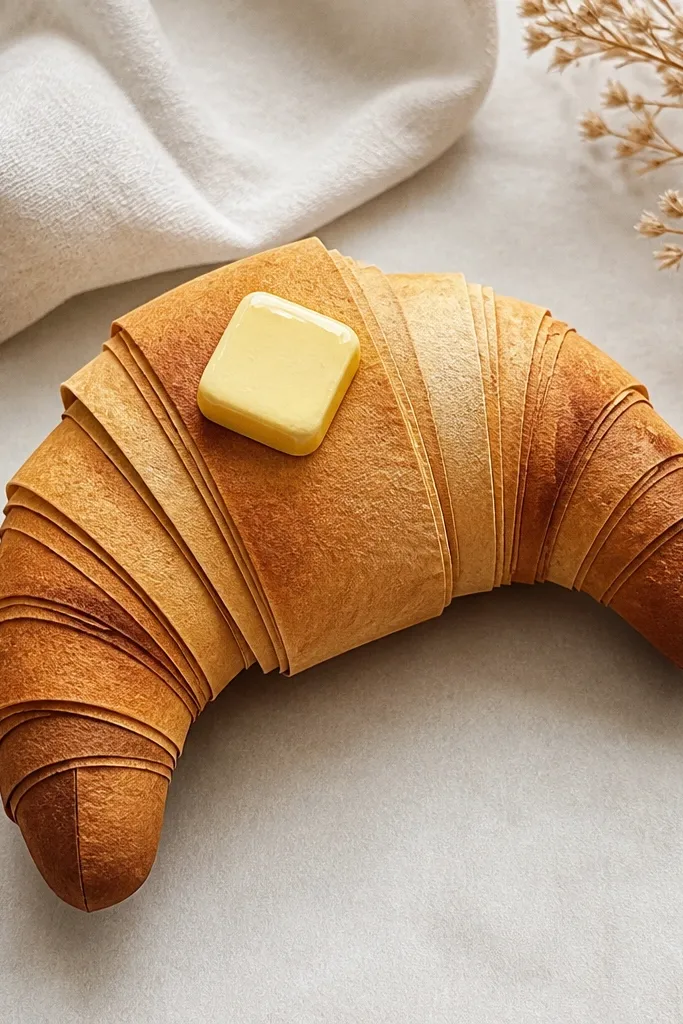
Step 1: Cut a crescent base from tan cardstock and a back from plain white. Step 2: Cut 8 thin strip “layers” (about 1 cm wide) and glue them on the front starting from the outer edge toward the center. Step 3: Color the strip edges with a brown marker for a baked look. Step 4: Add a butter patch by cutting a small oval in pale yellow and gluing it near the curve, then run a short clear tape strip as a shine line. Step 5: Insert a thin foam pad and glue front to back, keeping the edges neat.
Croissants look real when the layers are visible. This squishy uses a crescent silhouette and paper strips folded into repeating layers along the top edge. I color the crust with tan and darker brown edges so it looks baked, not flat. The butter patch is pale yellow and I add a highlight using clear tape so it looks soft and slick. This design flatters warm-toned outfits and looks great on cream or beige backgrounds. If you want a squishy that feels grown-up cute, this is it.
AvoidDon’t overfill with foam — too much makes the crescent bulge and the layers lose their curved shape.
Pro tipUse a craft knife to trim the strips so their ends line up; messy ends look like paper scraps instead of croissant layers.
7. Chibi Cat Paw Pad
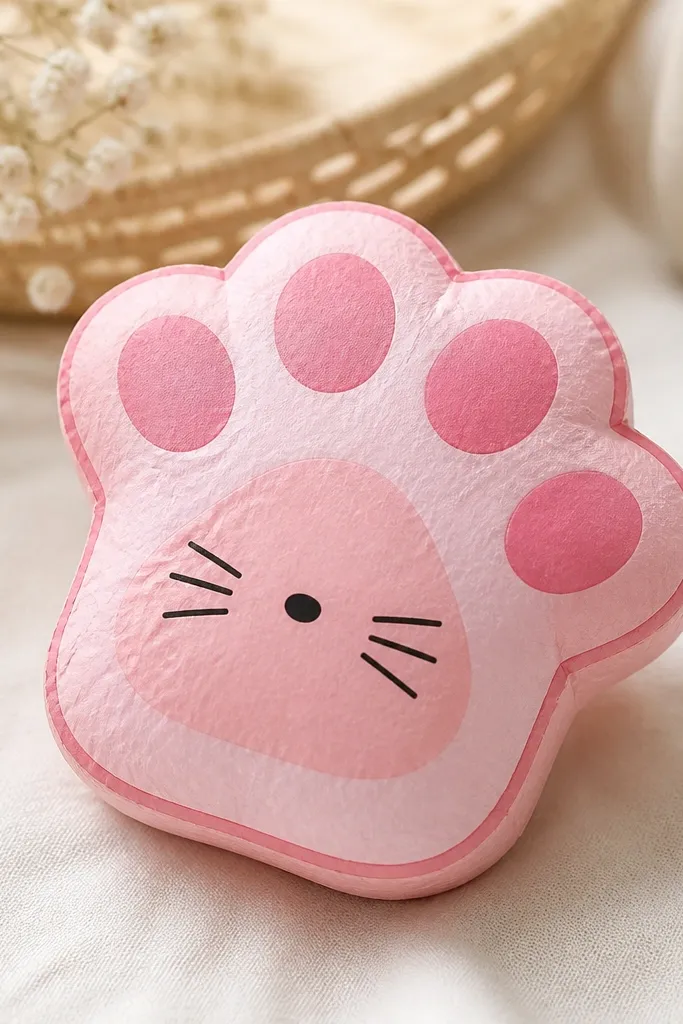
Step 1: Draw a paw template about 8 cm wide with a central pad and four toe pads. Cut two paw shapes: one blush front, one white back. Step 2: Add a darker pink outline by tracing and cutting a thin border layer, then glue it behind the blush piece. Step 3: Glue foam only under the center pad area (cut a foam circle about 3.5 cm wide) and cover with a parchment barrier. Step 4: Glue front to back, then add face details with a black marker and a tiny pink nose dot.
This paw design is adorable because it reads as one clear shape from far away. I use blush pink cardstock for the main pad and a slightly darker pink for the outline so it pops without looking loud. The face details are minimal — two tiny dots and a small nose — which keeps it from looking messy. It also flatters people who like cute stationery charms and it looks good clipped to bags or pencil cases. The squish comes from a foam insert under the center pad, not from bulking up the toes.
AvoidAvoid big eyes — they make the paw look like a sticker and kill the squishy softness.
Pro tipIf your foam shows through, cover it with a scrap of thin pink paper before sealing.
8. Cookie with Chocolate Chip Burst
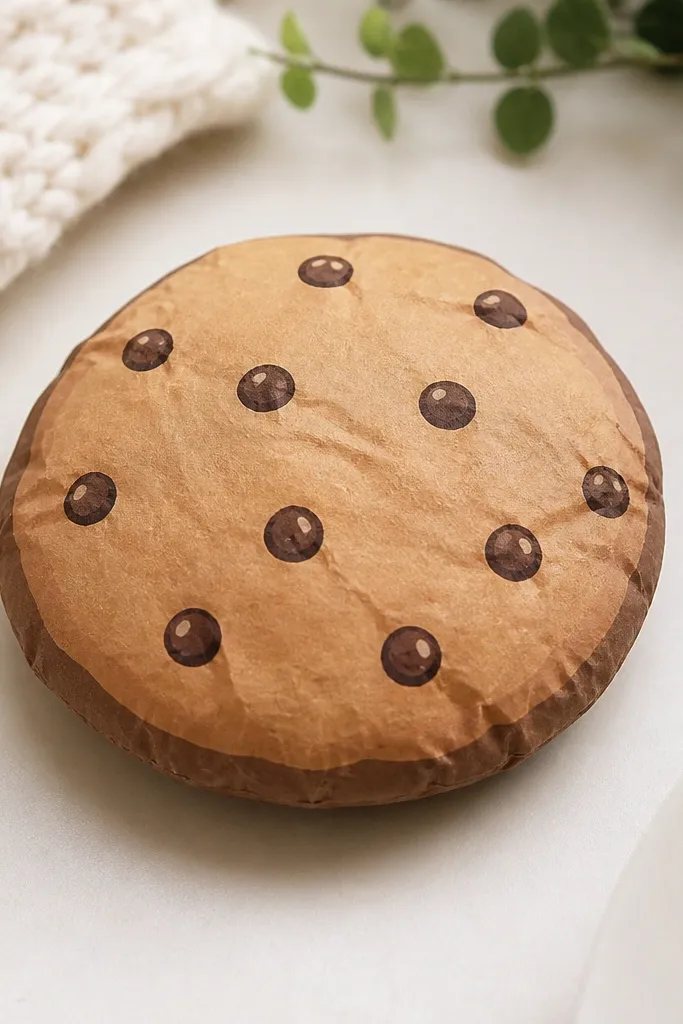
Step 1: Cut two circles about 9 cm wide from light brown cardstock and white back. Step 2: Add a darker brown ring outline on the front by coloring around the edge with a marker, then draw 12-15 chips as small circles. Step 3: Put a foam circle about 4 cm wide in the center between the layers, with parchment as a barrier. Step 4: Glue front to back, then add two micro highlight dots on 3 chips using white gel pen.
Cookies are the easiest squishy to make look real because the silhouette is simple and the pattern tells the story. I cut a circle and give it a slight dome using a foam puck in the center. The color scheme is light brown base with darker brown edge, and the chips are deep chocolate with tiny highlight dots. This looks good on warm desks and it pairs nicely with mugs, notebooks, and gold binder clips. It also photographs well because the dome creates a highlight under overhead lights.
AvoidDon’t use watery paint — it soaks the paper and makes chips bleed into the base.
Pro tipPress the glue seam under a heavy book for 5 minutes so the cookie edge stays flat and clean.
9. Taco with Crunchy Paper Filling
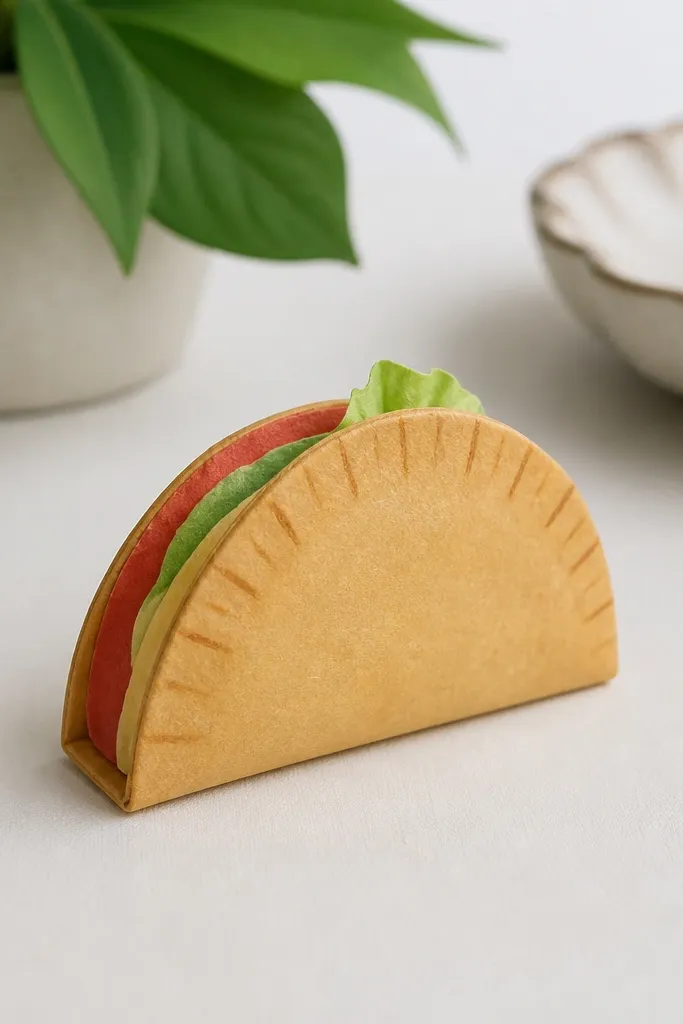
Step 1: Cut a semi-circle shell pattern (about 12 cm across) and roll it into a cone, then glue the seam. Step 2: Cut a back piece that matches the shell shape and glue it on after the foam insert is placed. Step 3: Make filling strips: red strip about 10 cm by 1.2 cm, pale yellow strip, and green strip, then glue them inside so they peek out the top. Step 4: Add a lettuce curl by cutting a thin green strip and curling it with a pencil. Finish by crimping shell edges with small marker dots.
A taco squishy looks fun because it has clear layers. The shell is a curved cone, and the inside filling is flat paper strips that still read as “stuffed.” I make the shell with tan cardstock and add crimp lines with a brown marker along the edge so it looks toasted. The filling colors are straightforward: red for tomato, pale yellow for cheese, and green for lettuce — and I keep them in tidy bands so it doesn’t look chaotic. This is great for bright rooms and it sits nicely next to colorful stationery.
AvoidDon’t make the cone too tight — if it’s too narrow, the filling won’t show and it looks like a paper tube.
Pro tipUse double-sided tape along the seam if you want a cleaner cone without glue squeeze-out.
10. Watermelon Slice with Seed Texture
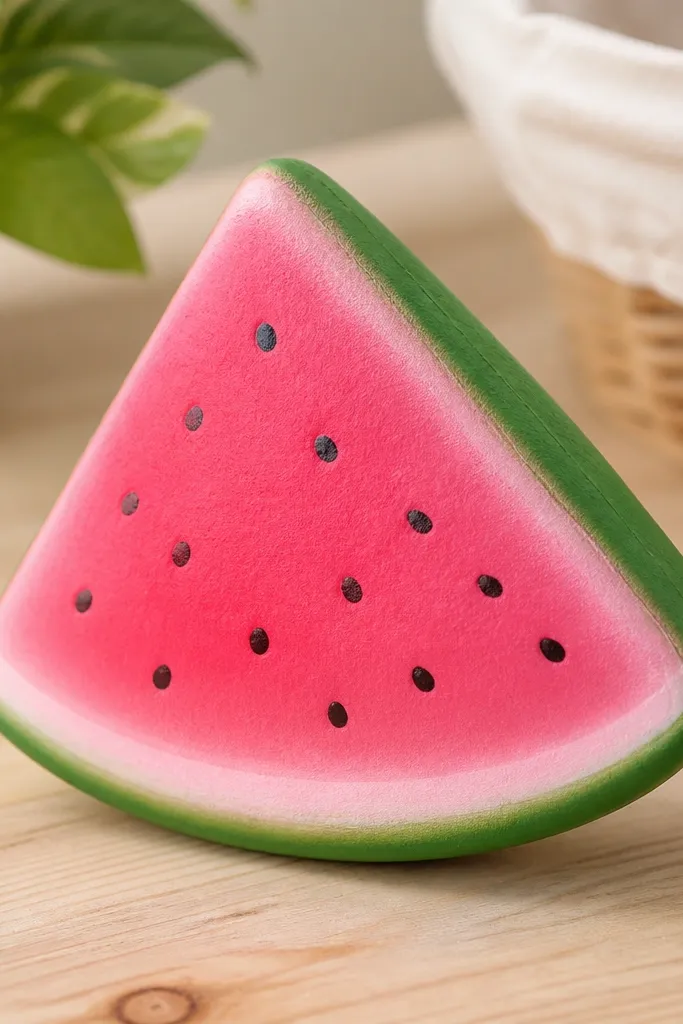
Watermelon is instantly recognizable, and seeds add texture without needing complicated tools. I use three color zones: deep green rind, bright pink middle, and lighter pink inner ring. The squish comes from a thin foam layer under the front panel so the wedge presses in the middle. This looks best on white desks and light walls because the pink pops and the green looks fresh. It also flatters people who like summer themes but want something that doesn’t feel childish.
Step 1: Cut two identical wedges about 11 cm long. Use bright pink for the front wedge and plain white for the back. Step 2: Color the rind edge with green marker or green cardstock strip and add the lighter inner ring. Step 3: Add seeds by drawing small teardrops with a black marker and dotting a tiny white highlight on 6 of them. Step 4: Insert a foam pad about 5 cm across in the center and glue front to back, keeping the rind edge smooth.
If you want more realism, add a tiny darker pink shadow line around the inner ring edge.
Avoid thick outlines; they make it look like a cartoon sticker instead of a squishy food slice.
11. Donut with Sprinkles and Soft Hole
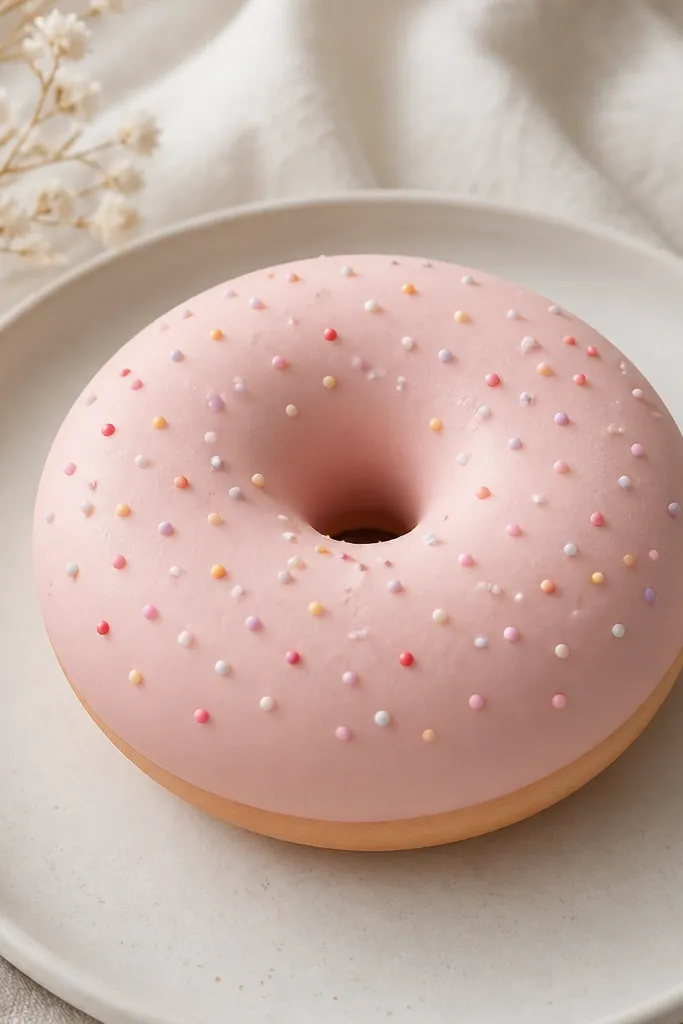
Step 1: Cut a donut ring from cardstock: outer circle about 10 cm, inner hole about 3 cm. Cut two rings. Step 2: On the front ring, color the glaze pale pink and add sprinkles as tiny circles with markers. Step 3: Place a foam ring or foam donut cutout in the center between the two layers. Step 4: Glue front to back, then trace the inner hole edge with a darker pink marker for definition.
Donuts look great because the hole gives you a natural place for the foam to sit and compress. I use a matte glaze color so it doesn’t look plasticky. Sprinkles are the easiest way to add “cuteness density” — I use 6-8 colors but keep them small so the donut stays readable. The ring thickness makes it feel squishy in the hand, and the foam under the glaze makes the top push back when you press it. This is a nice pick for anyone who wants a simple shape that still looks detailed.
AvoidDon’t glue sprinkles with thick dots of glue — they lift and catch on fingers.
Pro tipUse a white gel pen to add 3 tiny highlight dots on the glaze so it looks slightly glossy under light.
12. Rainbow Heart Gift Tag Squishy
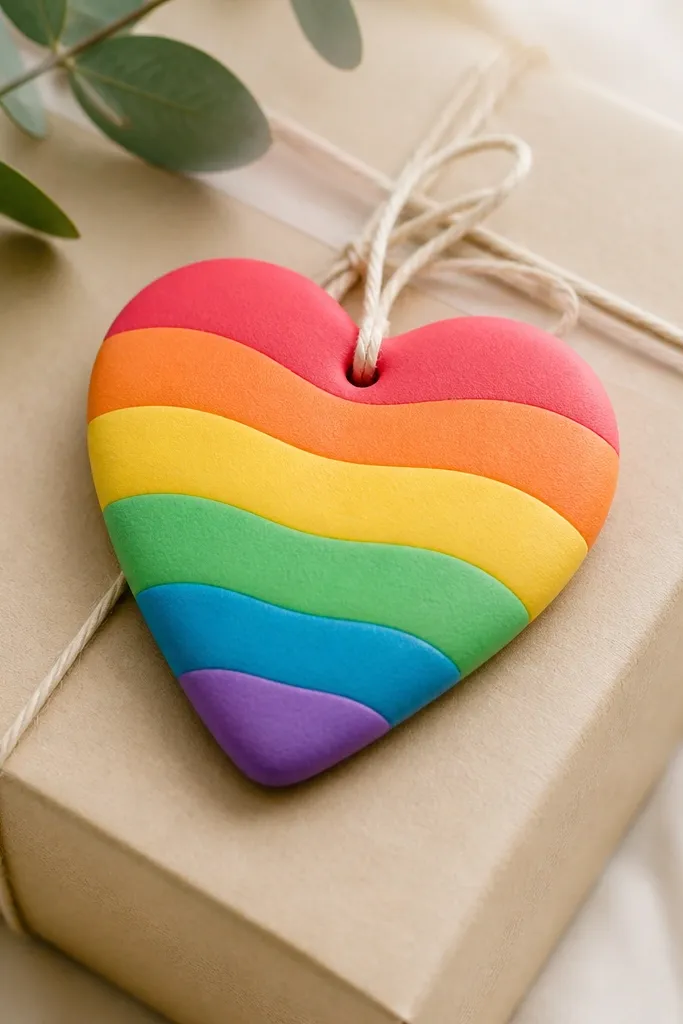
Step 1: Cut a heart template about 9 cm tall from white cardstock (front) and white cardstock (back). Step 2: Cut 6 thin strips of colored paper about 9 cm by 1.2 cm and glue them in horizontal stripes across the front heart. Step 3: Add a foam heart insert about 7 cm tall behind the stripe area, with parchment barrier. Step 4: Glue a small loop strip of paper at the top between front and back. Finally, round the edges by lightly sanding or trimming tiny corners.
This one is practical because it’s a squishy you can hang on a bag or gift. The heart shape reads cute immediately, and the rainbow stripes look clean when they’re evenly spaced. I make it from layered cardstock so the stripes don’t warp, and I add a foam insert to make the heart press in the middle. It flatters almost every color outfit because rainbow reads bright without clashing. If you’re making a set for birthdays or holiday swaps, this is the easiest to mass-produce.
Pro tipMake the stripe ends meet exactly at the bottom point — it’s the detail that makes it look designed, not chopped.
13. Ghost with Puffy Tail
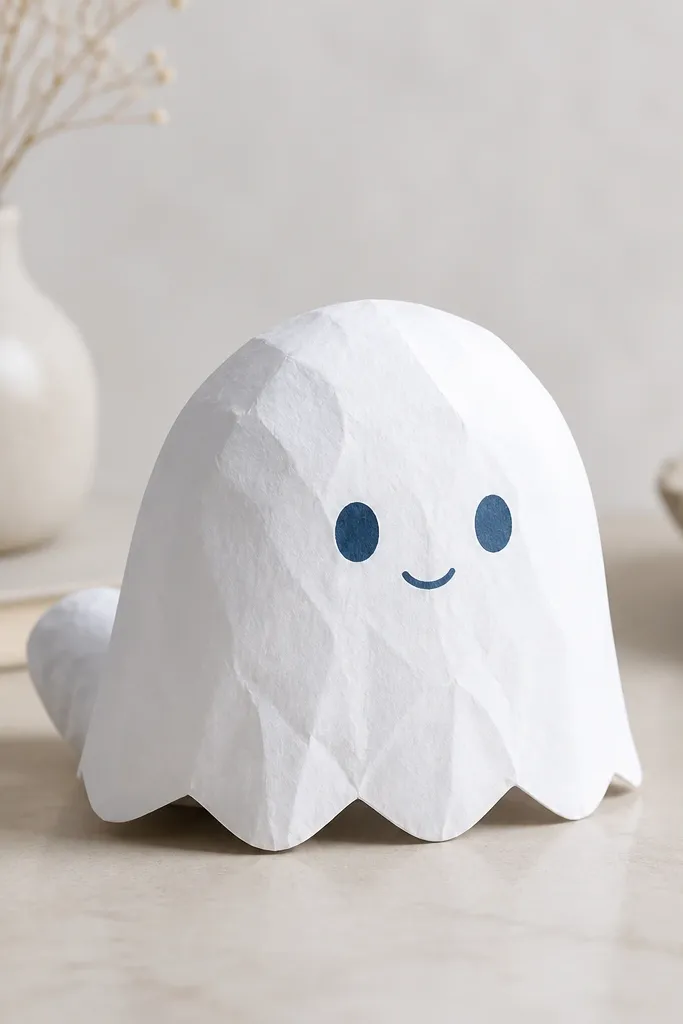
Step 1: Cut two ghost shapes with the same scallop pattern, about 10 cm tall. Step 2: On the front, draw two blue eyes and a small smile, then lightly shade under the face with gray pencil. Step 3: Cut a foam strip about 2 cm wide and 6 cm long and place it under the center area with parchment. Step 4: Glue front to back, then gently curve the tail edge by curling the paper with your fingers before it sets.
Ghost squishies look best when the bottom scallops are consistent. I use white cardstock and add a soft shadow line around the face so it pops without heavy outlines. The eyes are blue marker dots, and the mouth is a simple curved line. The squish comes from a foam strip that sits under the middle so pressing makes the ghost bounce. This fits Halloween decor and also works for everyday cute — it’s just a friendly ghost. It looks great against dark bags and black notebooks.
AvoidSkip glitter glue; it makes the edges scratchy and it catches lint.
Pro tipUse a kneaded eraser to soften pencil shading so it looks like a gentle shadow, not a harsh line.
14. Puff Cloud Keychain
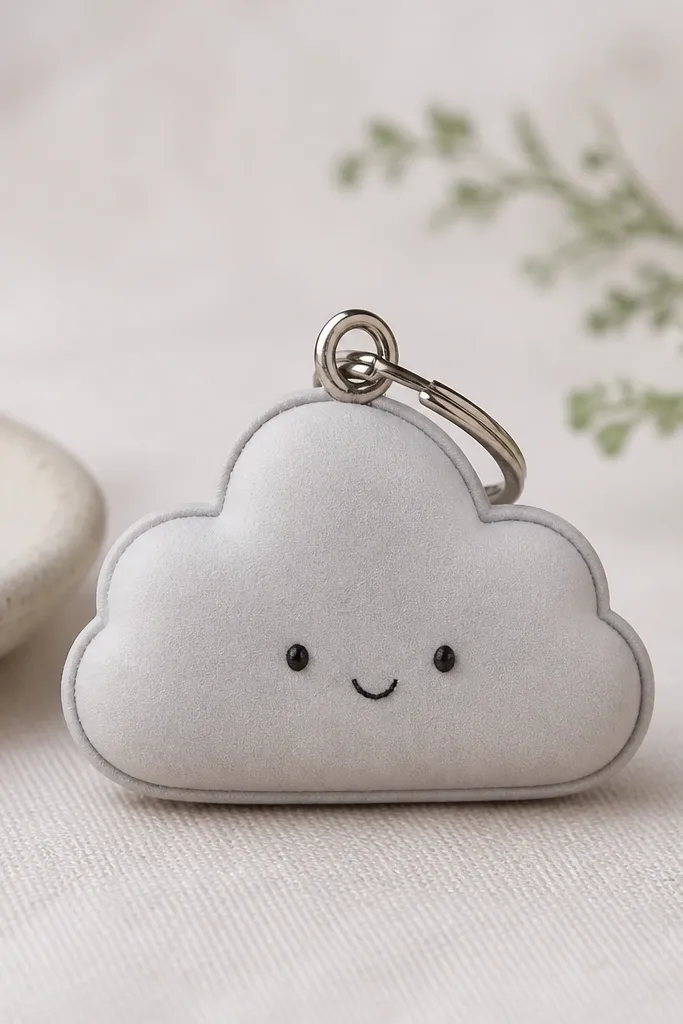
Step 1: Cut cloud front and back from 200 gsm cardstock, about 8 cm wide. Step 2: Glue a foam pad about 3 cm across in the center with a parchment barrier on top. Step 3: Attach a keyring loop by sandwiching a folded paper strip at the top between the front and back. Step 4: Seal the outer surface with a thin layer of clear tape, then add a tiny stitched mouth with a fine marker.
Keychain squishies need sturdier edges and simple faces. I use thicker gray cardstock and seal the surface with a thin clear tape layer so it survives bag rubbing. The cloud shape is made with generous curves so it looks puffy. The squish comes from a foam pad in the center, and it feels springy instead of floppy. This is perfect for people who want a cute item that doesn’t fall apart after a week in a pocket. It also looks clean on black keys because the gray pops.
AvoidDon’t use thin glue sticks on the loop area; it loosens and the keyring pulls it apart.
Pro tipTrim the tape slightly smaller than the edges so it doesn’t peel at corners.
15. Pearl Bubble Tea Cup
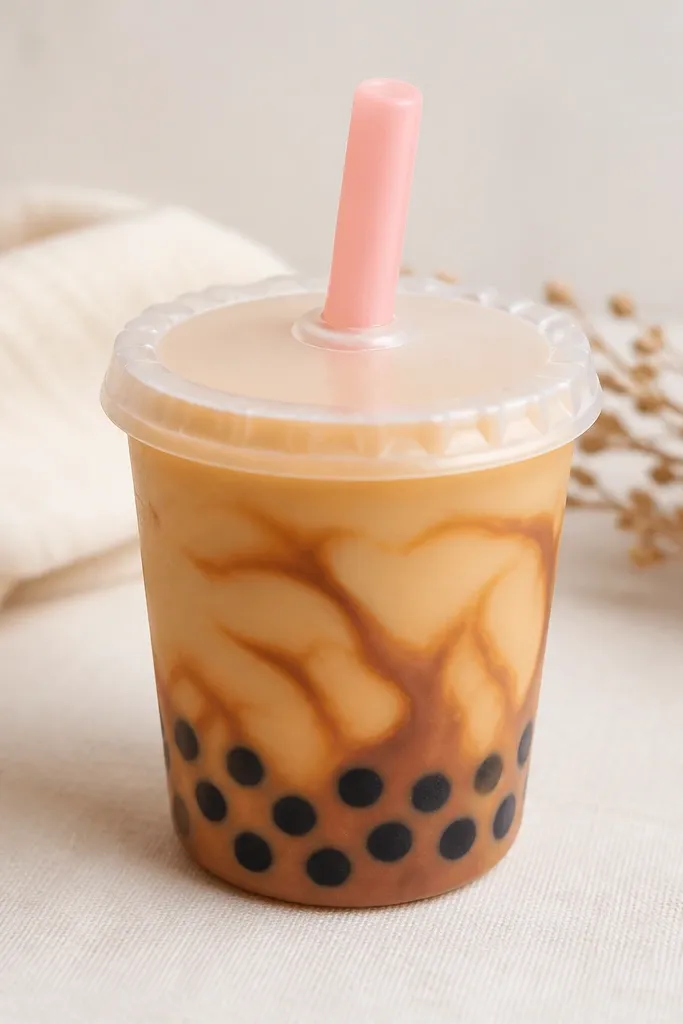
Step 1: Cut a cup front panel (about 9 cm tall by 6 cm wide) and wrap it into a tube shape, gluing the seam inside. Step 2: Cut a back panel and glue it on after placing a foam insert in the center bottom area. Step 3: Add pearls by gluing 10-12 small black circles at the bottom inside. Step 4: Draw a darker brown swirl on the cup front and add a lid circle on top, then draw a straw line with a light pink marker.
Bubble tea is one of the best “camera squishies” because the cup shape gives instant depth. I build it like a small cylinder with a lid, then add pearls that sit at the bottom so it looks like liquid with bubbles. The color palette is coffee brown plus pale cream, and the straw is light pink for a soft pop. This flatters warm rooms and it looks great next to beige tote bags. If you like trendy aesthetics without complicated cutting, this is your pick.
AvoidDon’t glue pearls all the way to the edges; keep them centered so the cup wall stays smooth.
Pro tipAdd a “liquid highlight” by placing a narrow clear tape strip vertically on the cup front.
16. Cherry Blossom Mini Fan
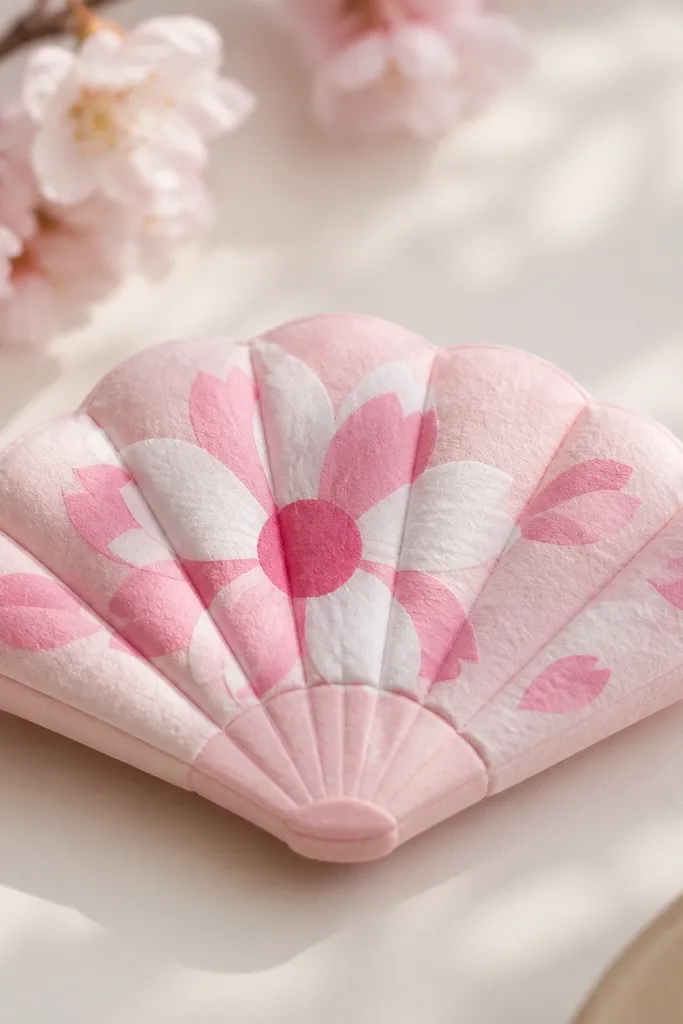
Step 1: Cut a fan base from pale pink cardstock in a rectangle about 12 cm by 7 cm. Score it into 7-8 accordion folds. Step 2: Cut petal shapes from lighter pink paper and glue them on the top side of the folded fan, clustering them at one end. Step 3: Add a foam strip behind the petal cluster so the top feels puffy. Step 4: Glue the folded fan front to back at the base edge only, leaving the folds free.
This squishy looks special because it folds like a mini prop, not a flat charm. The fan shape creates natural creases that compress nicely when you press it, so you get squish without thick foam. I use pale pink paper for petals and a darker pink circle in the center, then add tiny white highlights to mimic blossom shading. It flatters spring color palettes and looks adorable in hair clips or on small gift bundles. If you want a squishy that feels interactive, this is the one.
AvoidAvoid adding too many petals across the whole fan; keep them concentrated to maintain crisp folds.
Pro tipIf your folds crack, rub a pencil along the score lines to soften the paper fibers.
17. Cinnamon Roll with Sugar Swirl
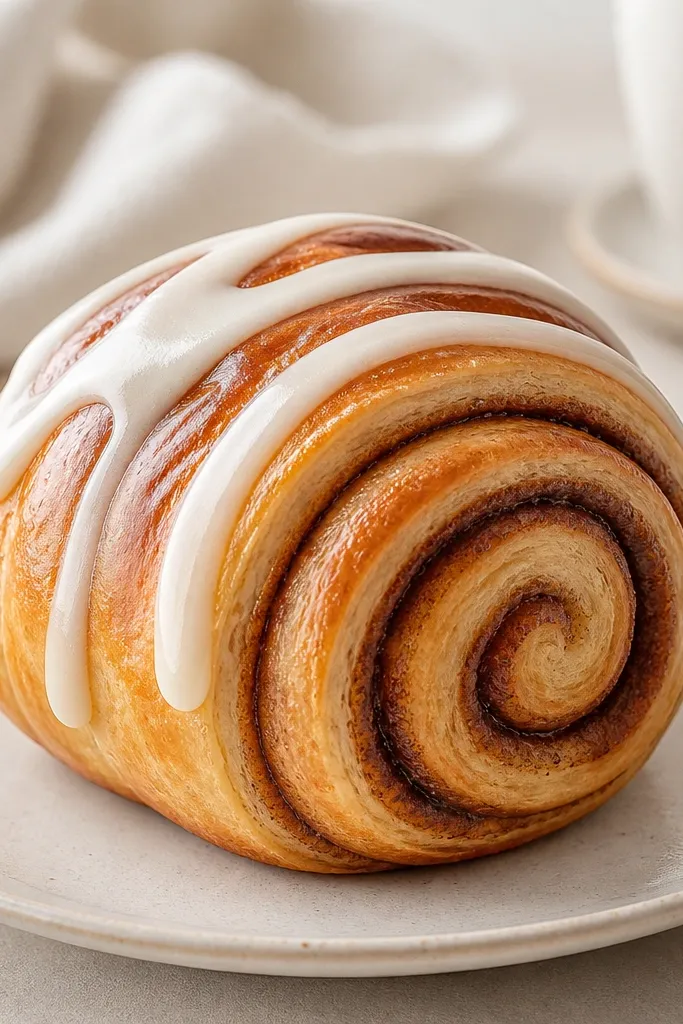
Rolled spirals look amazing because your brain reads them as soft layers instantly. I make the roll from a spiral strip pattern, then add a foam core that sits under the center so the spiral top domes slightly. The sugar glaze is white paper or light cream strip glued in a loose S-curve. This design looks great on warm desks and pairs nicely with tan and black accessories. It also flatters people who like cozy aesthetics more than bright food characters.
Step 1: Cut a long strip of golden brown cardstock, about 2.5 cm wide, and draw a darker brown spiral line down it. Step 2: Roll the strip into a spiral coil and glue the end. Step 3: Cut a front and back spiral circle template and glue them around the coil, sandwiching a foam pad in the center. Step 4: Add sugar glaze by cutting a thin cream strip and gluing it across the top in a curved pattern.
Use a toothpick to press the glue into tight spiral gaps so the roll stays round.
Don’t make the spiral too loose; it collapses and the bun looks flat.
18. Orange Slice Stack with Peel Texture
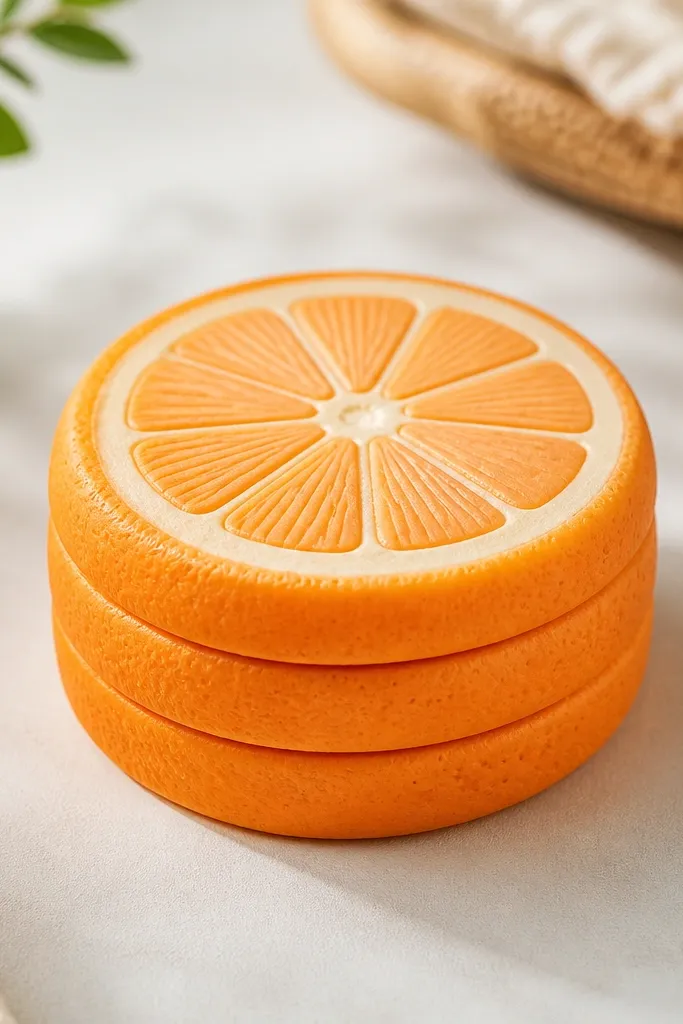
Step 1: Cut two orange slice outlines about 10 cm wide. For the front, layer an outer rind ring from bright orange cardstock. Step 2: Cut 6 inner wedge segments from pale orange paper and glue them inside the rind ring, leaving slight gaps for realism. Step 3: Add peel texture dots using a fine marker on the rind ring edge. Step 4: Insert a foam pad behind the inner segments and glue front to back.
Layered citrus looks good because you get segment definition without complicated shading. I build a slice with an outer rind ring and inner wedge segments, then add a foam layer so the stack presses in the middle. The peel texture is just tiny dots — easy but it makes the whole thing feel less like plain paper. This looks great on sunny color palettes and it adds a pop of brightness without going neon. If you want a fruit squishy that’s not a watermelon clone, this is a smart switch.
Pro tipTrim the inner wedge edges slightly uneven so the segments look “hand-cut” like real fruit.
19. Kawaii Sushi Roll with Foam Core
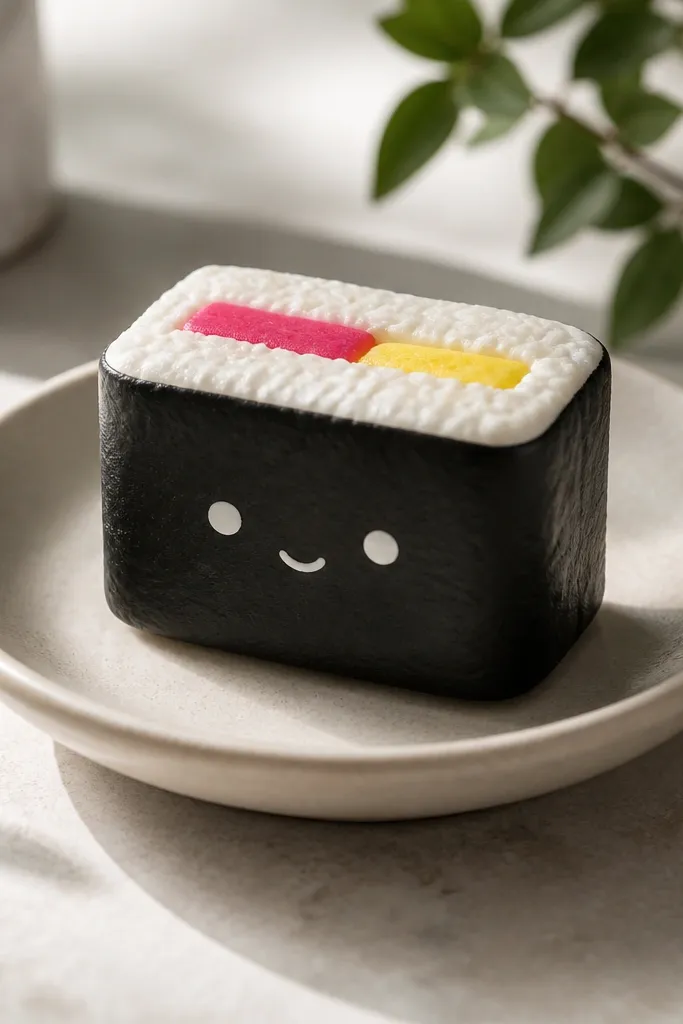
Step 1: Cut a front rectangle about 10 cm by 4 cm and a matching back rectangle. Step 2: For the front, glue a cream “rice” panel on top and add tiny dot texture with a marker. Step 3: Add a pink filling strip across the middle, then a thin yellow strip under it. Step 4: Place a foam rectangle about 8 cm by 2.5 cm in the center and glue front to back. Step 5: Draw a tiny face on one end using a fine marker.
Sushi squishies look clean because the shape is simple and the texture does the work. I use dark green-black cardstock for the seaweed and a cream top with tiny dot texture for rice. The filling stripe is one bright color band (pink) plus a thin yellow line so it reads as fish and egg. The squish is a foam core that sits in the center, giving a soft press when you hold it. This design flatters minimalist desks because it doesn’t need a ton of toppings.
AvoidDon’t leave the rice panel too thin; it tears when you press the foam core.
Pro tipUse a ruler and lightly score the seaweed edge so the roll looks crisp instead of floppy.
20. Lavender Macaron Duo
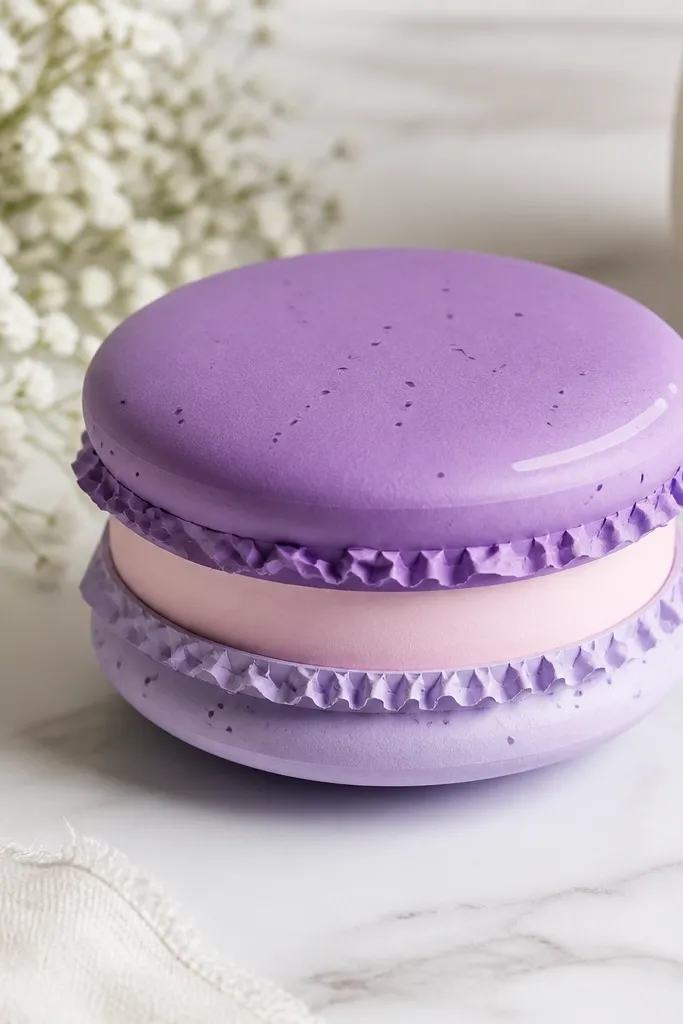
Step 1: Cut two circles for the top shell (about 6 cm diameter) and two circles for the bottom shell. Step 2: Layer the shells so the bottom is slightly larger than the top. Step 3: Glue a thin foam circle under the top shell and keep the bottom flat. Step 4: Add speckled texture by dabbing tiny dots with a slightly darker purple marker. Step 5: Glue a pale pink filling band between the shells and add one highlight streak.
Macarons look expensive because of the sandwich shape. This duo uses two shells with a slightly domed look created by a foam insert under the top shell only. I use lavender for the shell and pale pink for the filling, then add tiny speckle dots to mimic that delicate shell texture. The highlight line is key — a thin white gel pen or clear tape streak makes it look like the shell catches light. This flatters pastel lovers and looks great in a small ring dish or on a vanity tray.
AvoidSkip glitter — it makes the shells look cheap and catches on skin.
Pro tipPress the macaron under a flat book for 10 minutes so the layers bond without sliding.
21. Soft Heart Strawberry Jam
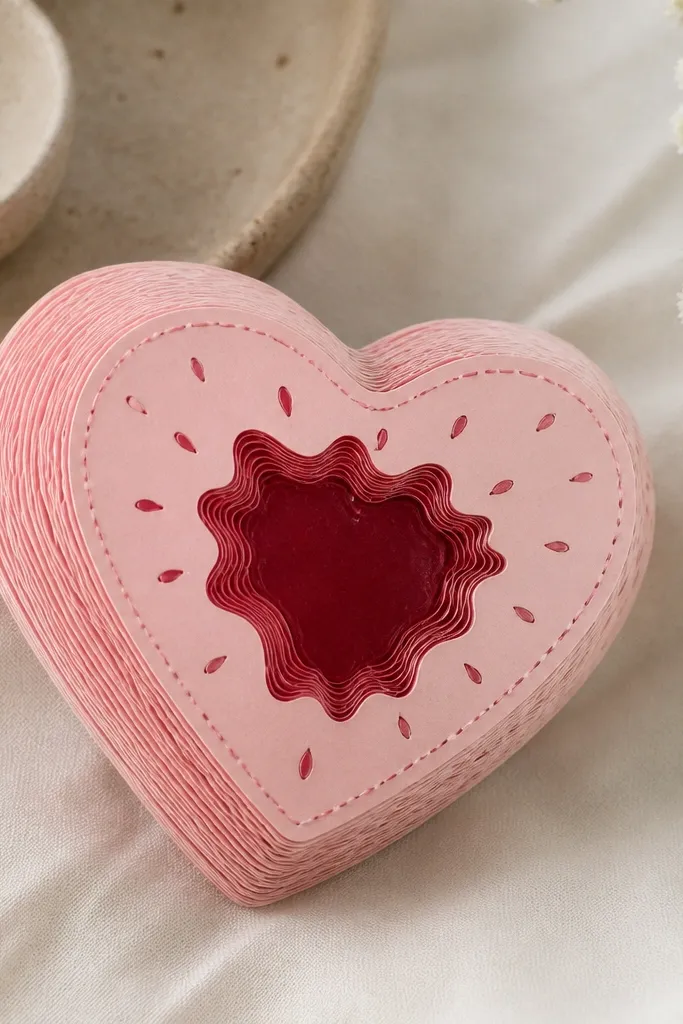
This is a heart that looks like it has jam inside, which is why it feels more interesting than a plain heart squishy. I use a two-layer heart so the center area domes slightly over the filler. The jam patch is deep red with lighter red blending at the edges so it looks spread, not painted. It flatters warm skin tones because red and blush stay soft rather than harsh. If you’re making a Valentine set, this one looks “designed” without being hard.
Step 1: Cut two hearts, about 9 cm tall, from blush cardstock front and white back. Step 2: Cut a smaller jam patch heart and color it deep red, then soften the edges with a lighter red marker. Step 3: Place a small foam pad behind the jam patch area and glue the jam patch on top of the front layer. Step 4: Add jam seeds by drawing tiny yellow dots and a few white gel pen highlights. Step 5: Glue front to back, then stitch outline with a dark pink marker.
Use a paper punch to make seed dots quickly — it keeps them consistent.
Don’t over-stuff the heart; too much foam makes the jam patch peel away.
22. Seafoam Shell with Pearly Edge
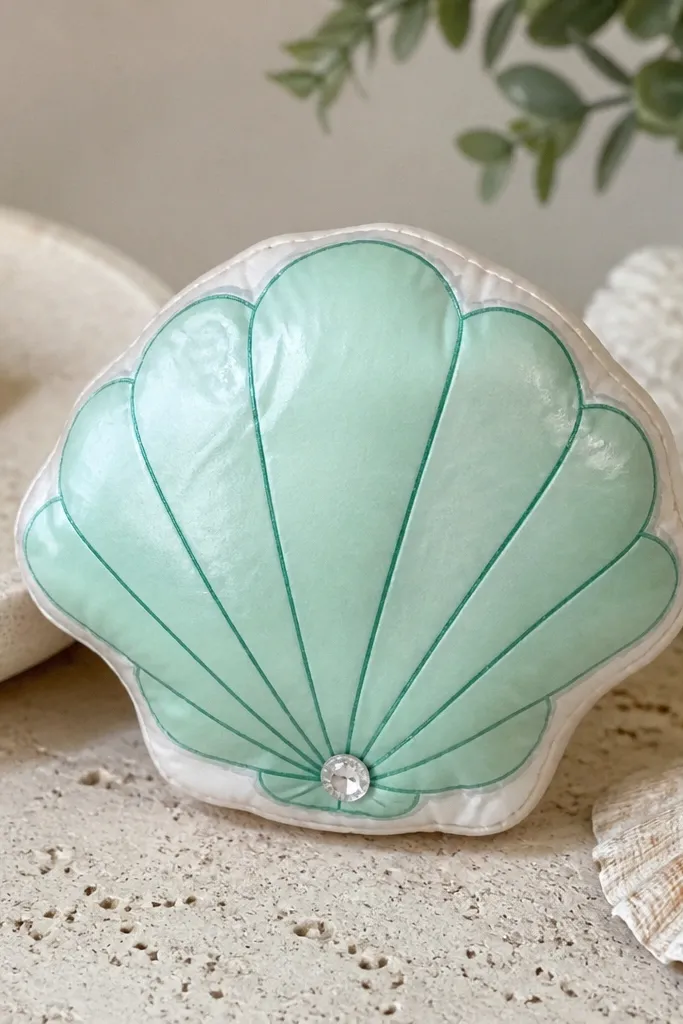
Step 1: Draw and cut a shell outline template about 10 cm long, and cut two copies. Step 2: On the front, outline with off-white paper strip or marker, then draw 6-8 curved ridges using darker seafoam green. Step 3: Place a thin foam pad behind the center area and add a parchment barrier. Step 4: Glue front to back and add a tiny center gem dot with white gel pen and a small dot of silver marker. Step 5: Lightly shade under the ridges with pencil for depth.
Shell shapes are pretty because ridges guide your eye. I make the body seafoam green and outline the edge in off-white so it looks like a real shell with a pearly rim. The ridges are drawn with a slightly darker green marker, kept thin so the shell stays delicate. A tiny gem dot in the center adds a focal point without clutter. This looks great on desks with coastal colors and it also pairs well with silver accessories. It’s calm cute, not loud cute.
AvoidAvoid thick marker ridges; they look like cartoon outlines instead of shell texture.
Pro tipUse a thin black pencil to map ridge positions first, then trace with marker so spacing stays even.
23. Chocolate Truffle Bite
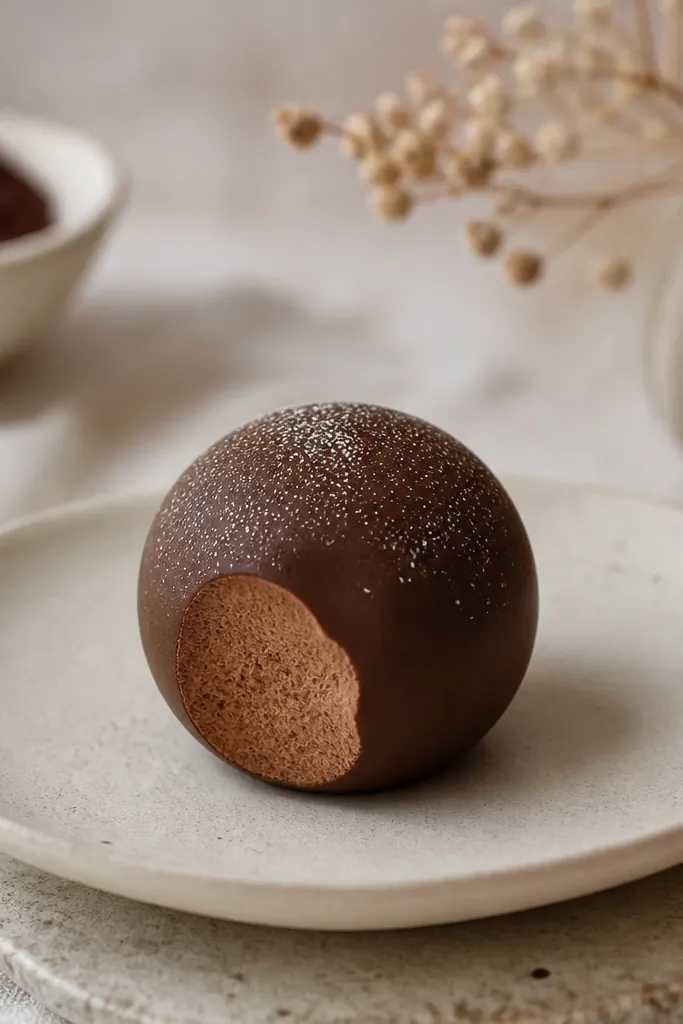
Step 1: Cut two circles about 7 cm wide from chocolate brown cardstock. Step 2: On the front, draw a bite mark on one side and fill it with lighter cocoa brown. Step 3: Add dusting by tapping a slightly lighter brown or beige marker with a sponge across the top. Step 4: Insert a foam circle about 3 cm across with parchment barrier, then glue front to back. Step 5: Add 3-4 tiny white specks with gel pen on the dusting area.
Truffles look extra cute because they’re small and slightly imperfect. This bite design uses a matte brown color for the main shell and a lighter cocoa shade for the bite interior so it looks creamy. The speckle dusting is the secret — it makes the truffle look textured and not flat. The squish comes from a foam puck under the top so the surface presses and springs back. This looks great next to coffee mugs and dark planners because the brown pops without turning neon.
AvoidDon’t use glossy tape over the whole truffle — it turns the texture into plastic.
Pro tipShade the bite interior with a soft pencil gradient so it looks creamy, not just colored in.
24. Panda Bun with Blush Cheeks
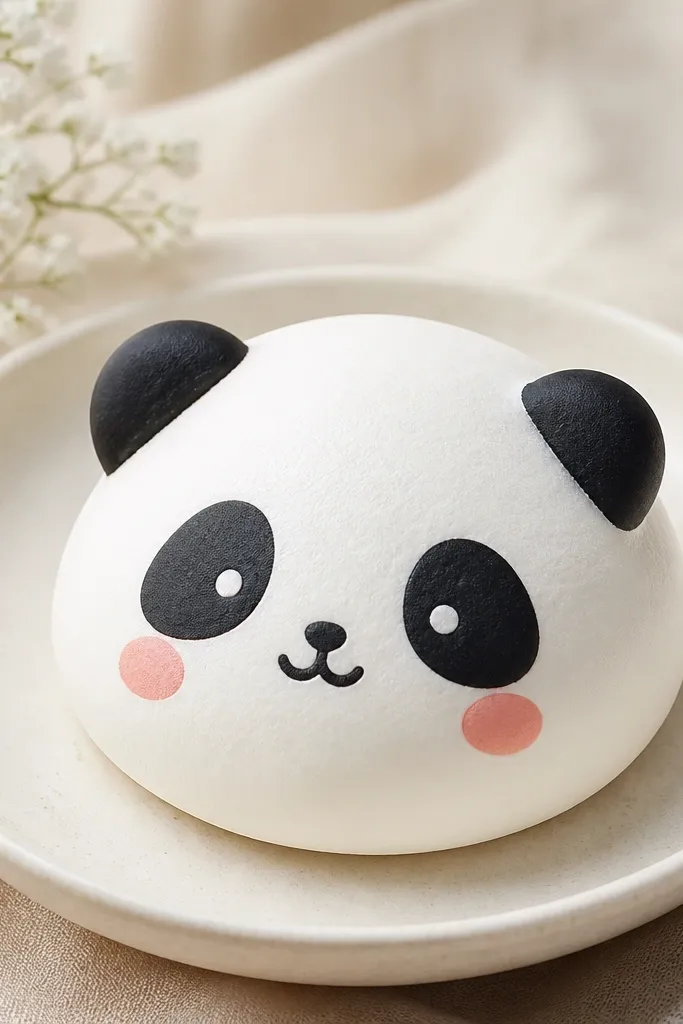
Step 1: Cut two bun circles about 8 cm wide. Make the front white and the back white. Step 2: Cut black ear shapes and black eye patches, then glue them onto the front. Step 3: Add blush cheeks using a light pink marker circle and a tiny smile with a fine black pen. Step 4: Insert a foam pad under the center area with parchment barrier and glue front to back. Step 5: Add 2 small highlight dots on the cheeks with white gel pen.
This squishy works because pandas have built-in focal points: ears, eye patches, cheeks. I keep the face simple and place the blush cheeks low so the panda reads as cute, not creepy. The body is white paper, and the black patches are matte so they don’t shine under light. The squish is a foam core under the center so it compresses evenly when you tap it. It flatters cool-toned rooms and it looks adorable clipped to a binder clip or tucked in a pen cup.
AvoidAvoid thick glue under the face pieces; it creates bumps that make the panda look lumpy.
Pro tipWarm up your marker tip on scrap paper first so the black patches look even and not blotchy.
25. Gummy Bear Stack
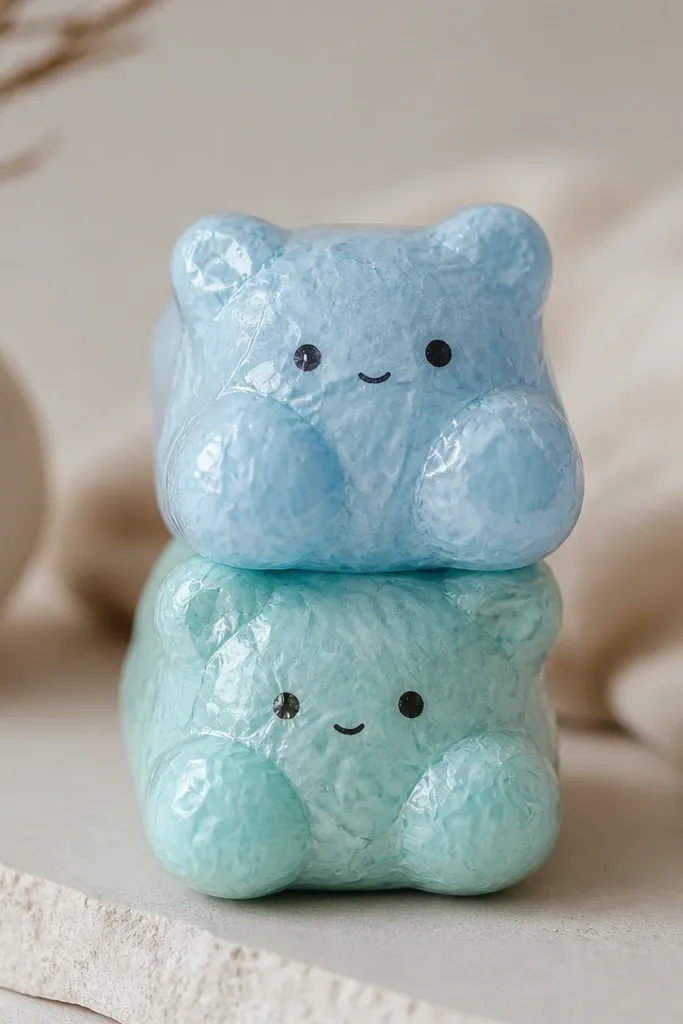
Step 1: Draw a gummy bear body shape (about 8 cm tall) and cut two of each color layer. Step 2: Stack two bears by gluing the bottom bear base first, then place the top bear with a foam pad under its center. Step 3: Seal only the top bear surface with clear tape strips laid smoothly, then trim around the edges. Step 4: Draw eyes and smile with a fine marker and add a tiny highlight line on the tape area. Step 5: Glue the stack together at the sides only so it still feels squishy.
Gummy shapes look fun because they’re glossy and soft. I mimic that by using light blue and pale teal paper and sealing only the top surface with a thin clear tape sheen. The bear face is simple — two dots and a smile — so the color stays the star. This design flatters bright shelves and it looks great in a sunny window because the clear tape catches light. It’s also a good choice if you want a squishy that looks “jelly-like,” even though it’s paper.
AvoidDon’t tape the whole bear; only the top reads glossy and the sides stay soft.
Pro tipIf clear tape wrinkles, skip it and use a thin layer of matte clear spray on scrap — it looks less cheap than wrinkles.