

1. Rose-gold linework vinyl frame with micro butterflies
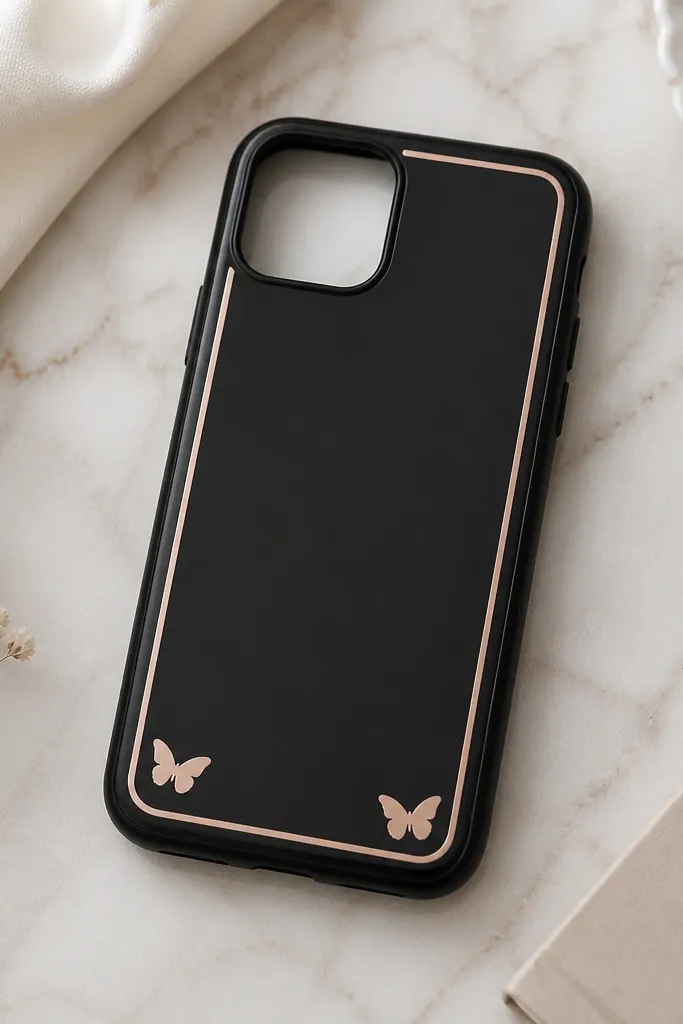
This one looks clean because the entire design uses thin, consistent lines. I use rose-gold vinyl on a dark base so the edges stay sharp and the metal tone looks like jewelry instead of craft foil. The frame gives structure, so even if your butterfly placement is slightly off, the case still reads “intentional.” It works especially well for light to medium skin tones in photos because the rose-gold pops without looking harsh.
Start by wiping your blank TPU case with isopropyl alcohol, then let it fully dry. Measure the case opening and apply a vinyl rectangle border with even margins — I aim for about 3-4 mm of space from the edges. Add 2-3 small micro butterfly vinyl pieces on the lower left and lower right, keeping them symmetrical. Finally, seal with two thin layers of clear gloss acrylic (or a vinyl-safe clear coat), letting each layer dry 20-30 minutes before the next.
Use a craft knife and a light grip ruler guide for the border, not freehand — the straight lines are what make it look store-bought.
Don’t apply vinyl to a dusty case — you’ll see lifting along the edges within days.
2. Pressed flower corner with matte clear coat
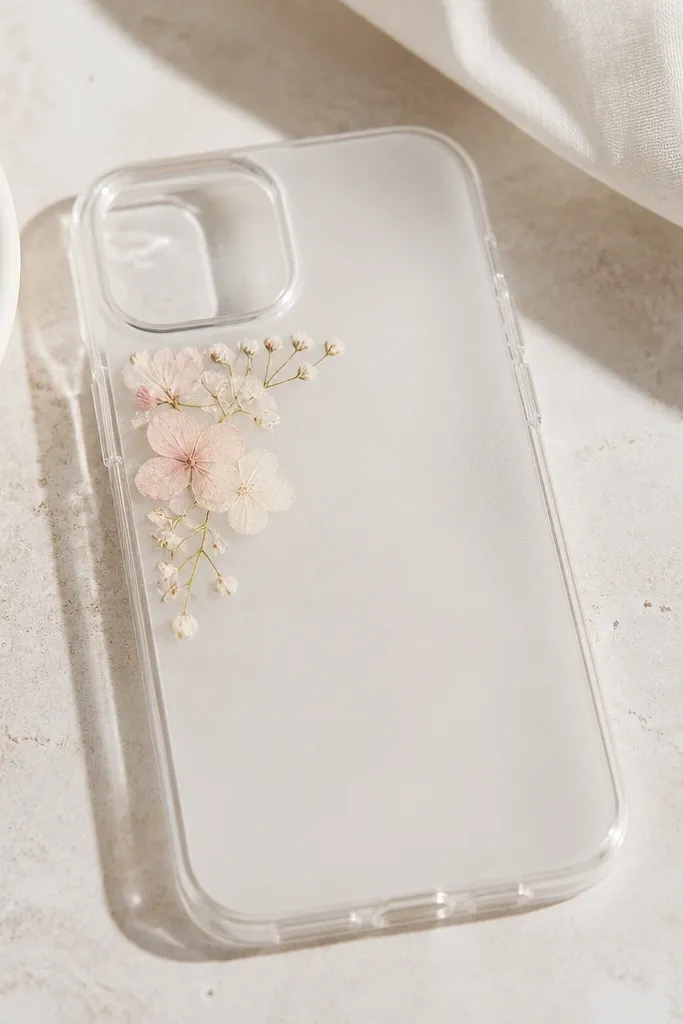
Pressed flowers look stunning because they add real texture and soft color variation. I pick small flowers with thin petals — like baby’s breath style pieces — because thick blooms distort under resin. A matte clear coat keeps the flower colors gentle and prevents glare in daylight. This looks especially good on neutral outfits and suits people who like a calm, understated aesthetic rather than high shine.
Start by pressing your flowers for at least 1-2 weeks so they don’t spring back. Place them dry on the corner of a clear TPU case and take a photo to confirm size. Mix a thin layer of clear epoxy or clear casting resin only enough to cover the placement area, then brush a light coat under the flowers. Lay the flowers in, then add a second thin resin layer so the petals are sealed but not flooded beyond the corner.
Trim the stems to almost nothing — stems create a ridge you’ll feel through the case.
Avoid glossy top coats if you hate glare — resin shine can reflect light and wash out delicate petals.
3. Color-blocked stripes with washi tape and heat-set edges
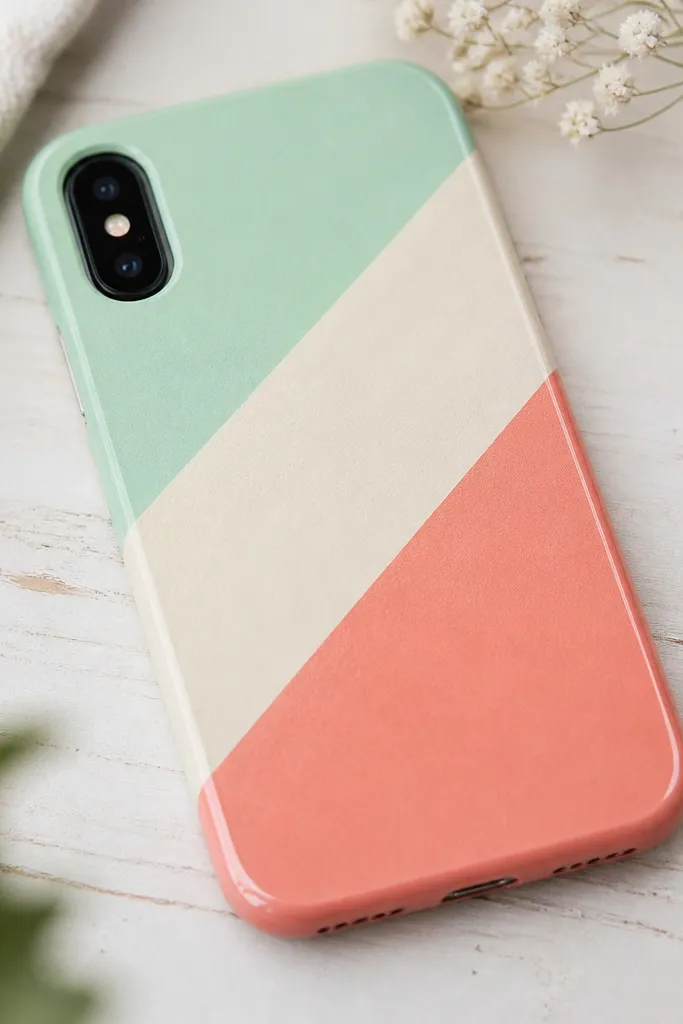
Clean the case with alcohol, then plan your stripe angles — I use about a 30-degree slant. Apply the first tape strip, then overlap slightly with the next colors for clean borders. Use a low heat setting on a hair dryer for 10-15 seconds at a time while you gently press the tape down with your fingertip. Finally, brush one thin coat of clear acrylic over the entire tape area and let it dry fully before a second coat.
Washi tape is easy for beginners because it forgives mistakes and it’s removable if you hate the layout. I like color-block stripes because they hide small alignment errors — your eyes read blocks, not tiny gaps. The trick is sealing the tape edges so they don’t peel from hand oils. This style looks great on fair, medium, and deep skin tones because the palette is bright but soft.
AvoidDon’t skip the clear coat — washi tape alone gets gummy and lifts fast.
Pro tipStick tape to your jeans once before you apply it to the case — it reduces tack and prevents bubbles.
4. Felt daisies with a stitched-looking outline
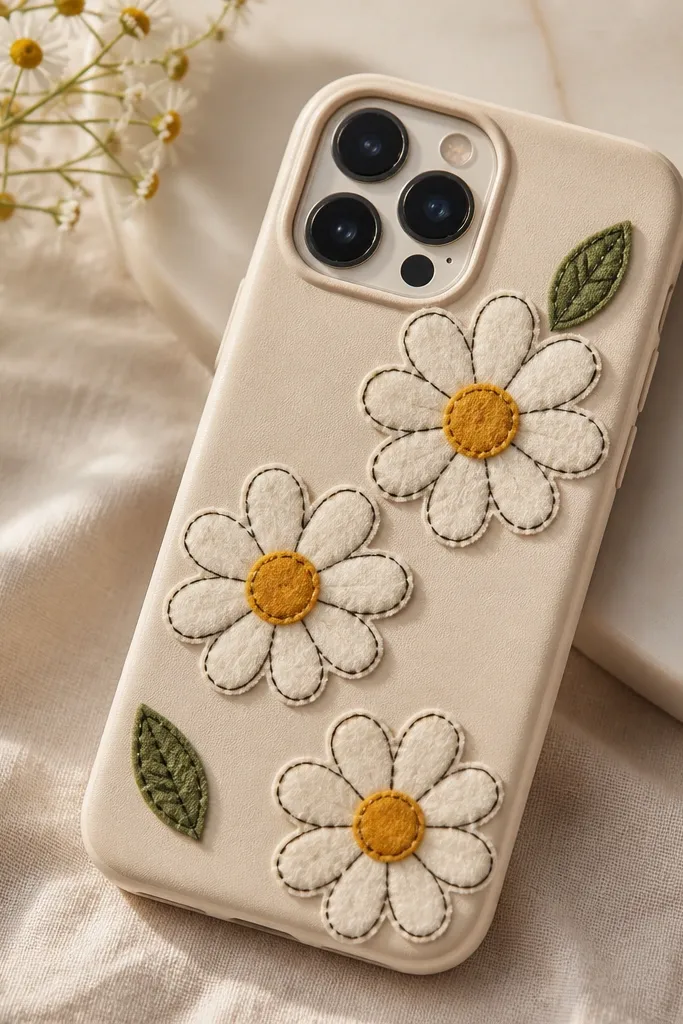
Cut felt circles for the daisy petals, then layer them on a base felt circle. Glue petals with fabric glue using tiny dots, not big blobs, so the center stays flat. Add a yellow felt center circle, then outline each petal edge with a black fine-tip marker in short strokes. Seal the felt with a thin layer of clear matte Mod Podge or a fabric-safe clear coat, brushing lightly so you don’t soak the felt.
Felt is my go-to when someone wants a cute case that survives daily use. The fibers hide uneven edges, and the texture keeps the design from looking flat or cheap. I add a stitched-looking outline using a black fabric marker or a fine permanent marker to make the daisies pop. This style looks adorable on warm-toned outfits and hands because the beige base makes the white flowers feel clean.
AvoidDon’t use thick glue puddles — they create bumps you’ll feel when you grip the phone.
Pro tipUse a craft tweezers tip to place petals so you keep consistent spacing.
5. Galaxy swirl with alcohol ink and a clear top layer
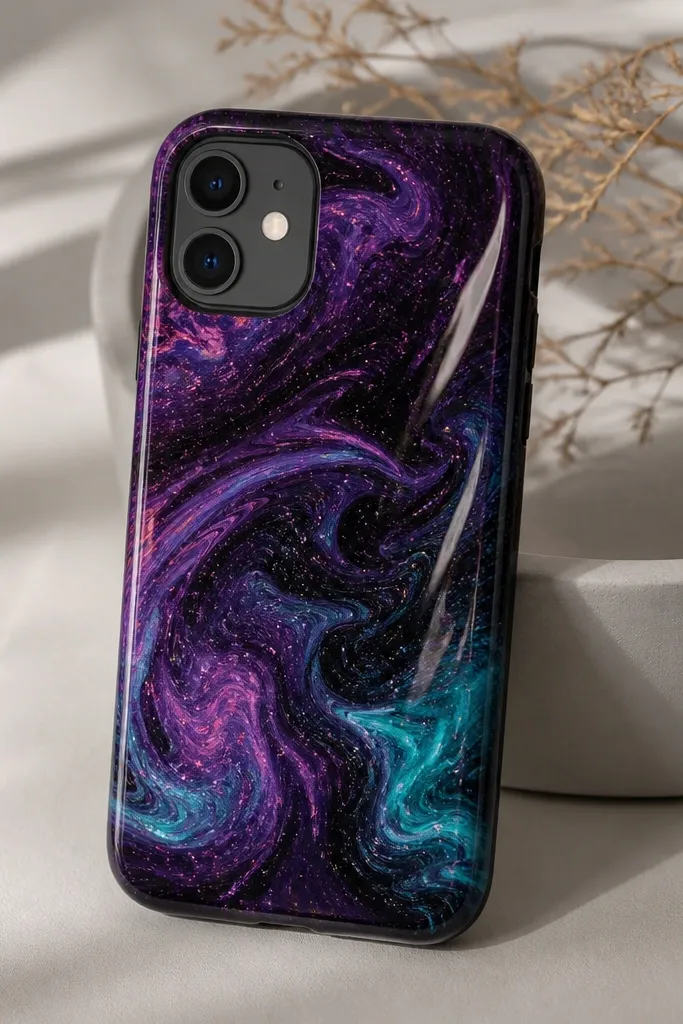
Start with a black or deep navy case and wipe it with alcohol so the ink grabs. Place a few drops of alcohol ink in teal, magenta, and purple, then swirl gently with a cotton swab. Add a touch of silver ink for star-like specks, using a toothbrush flick over a scrap paper shield. Let it dry 10-15 minutes, then spray a clear gloss sealant or brush two thin clear coats for protection.
Alcohol ink makes a case look like art because it creates natural movement you can’t get from paint alone. You get soft blooms, tiny speckles, and smooth blends when you work on a non-porous base. This looks best on darker cases — black or deep navy — because the colors glow instead of disappearing. It’s a flattering look for almost any outfit color because the teal and magenta add contrast.
AvoidDon’t seal before it’s fully dry — trapped alcohol makes the finish cloudy.
Pro tipWork in light layers — one heavy pour makes blotches instead of smooth swirls.
6. Monogram corner with metallic gel pen + clear coat
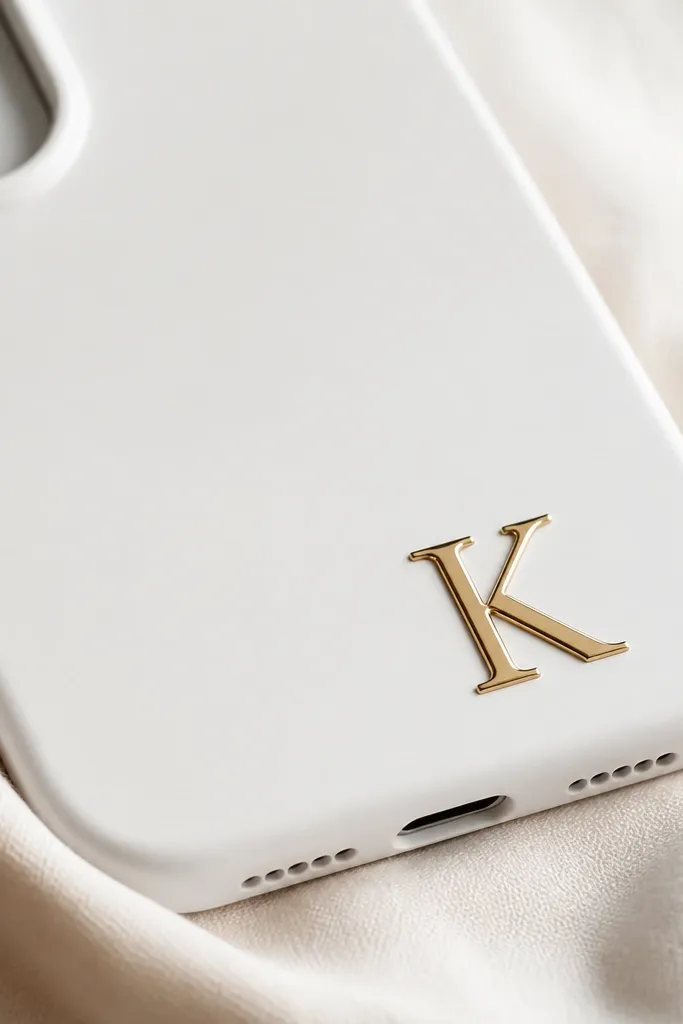
A monogram looks expensive because it’s simple and it reads like stationery. I use metallic gel pens because they lay down a dense line that doesn’t fade as fast as cheap markers. A corner placement is easier than centering — you can keep it within a natural “safe zone” and it still looks intentional. This is great for anyone who wants a case that doesn’t fight with jewelry or nails.
Clean the case thoroughly with alcohol, then choose one corner and mark it lightly with a pencil dot. Practice the monogram on paper first so you know the stroke flow. Write the letter with a metallic gel pen, then go over any thin spots with a second pass once the ink sets. Let it dry fully, then apply two thin clear coats with a foam brush to lock the ink in without smearing.
Use a ruler edge for the straight strokes of letters like A, K, or R.
Don’t press hard with the pen — it scratches the surface and makes the metal line look uneven.
7. Marbled resin-look using nail polish swirl
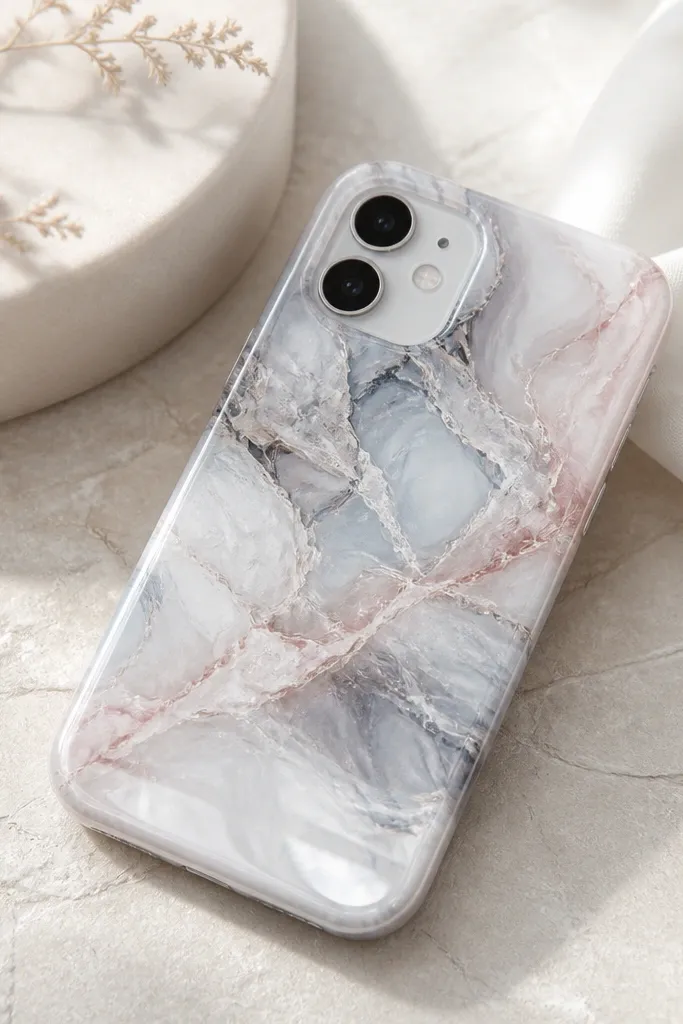
Pick a light base (white or pale nude) so the marbling shows. Drop small dots of nail polish across the case — I use 3 colors max: gray, baby blue, and one accent like rose. Swirl gently with a toothpick, dragging through the dots just a few times to create veins. Let it dry completely, then seal with a glossy clear top coat in two thin layers.
This is the fastest way to get that “designer marble” look without buying art resin. Nail polish swirls create veining when you drop colors in and swirl them with a toothpick. It looks best on a light base so the veining reads clearly. It also looks good on deeper skin tones because the cool grays and soft blues photograph beautifully against hands.
AvoidAvoid thick layers of nail polish — they take forever to dry and can crack under your grip.
Pro tipUse a toothpick, not a brush — toothpicks keep the swirls sharp and controlled.
8. Photo strip collage with 2mm spacing and glossy seal
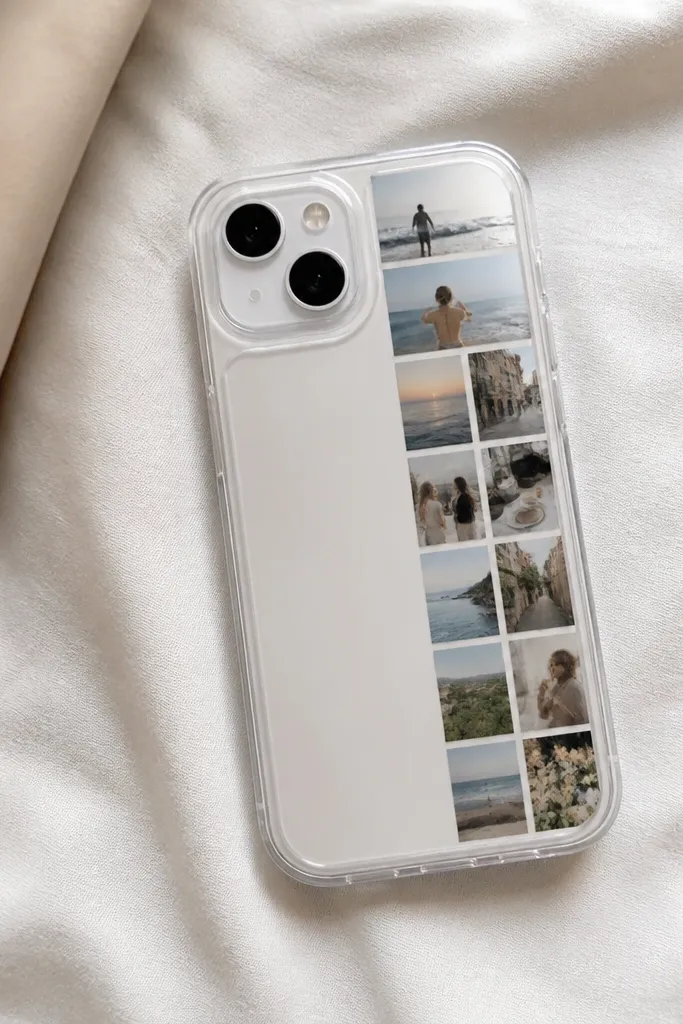
Print your photos small, then trim them to consistent sizes with a craft knife. Dry-fit them on the case and keep about a 2mm gap between each strip. Use thin double-sided tape or photo glue to attach, then press flat with a clean cloth for 30 seconds. Seal with two glossy clear coats, letting the first coat dry fully so the edges don’t lift.
A photo strip collage looks stunning because it turns your phone into a mini memory board without looking cluttered. The trick is spacing — leaving a small gap between images makes the layout feel designed, not messy. I use small matte-printed photos or magazine clippings because glossy prints can smear under sealant. This style is flattering on all skin tones and looks great for everyday wear because it’s personal without being loud.
AvoidDon’t use thick glue — it seeps under photos and creates a cloudy halo.
Pro tipPrint on thicker paper (at least 180gsm) so the ink doesn’t bleed into the clear coat.
9. Comic pop halftone with black-and-white dot pattern
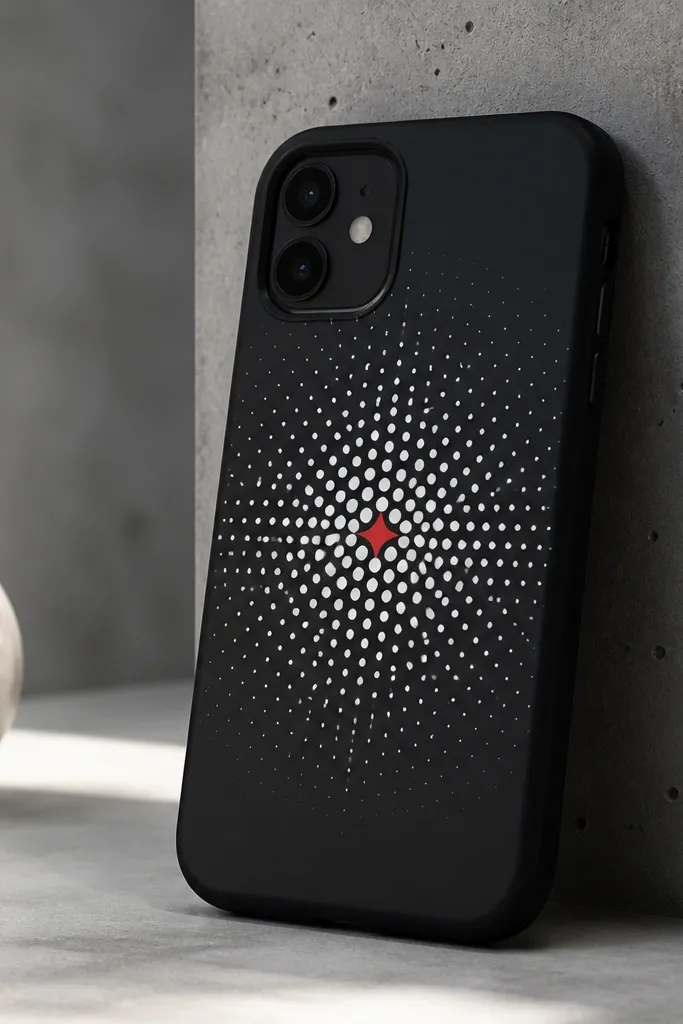
Halftone dots make a phone case look like a comic panel, and they’re surprisingly easy. I keep it black, white, and one punchy color like red because too many colors makes it look like a craft fail. This style hides tiny alignment issues because the dot pattern is forgiving. It also looks great with bold nail polish and silver rings since the contrast is high.
Start by applying a black matte base case. Create a halftone dot pattern using a stencil or print-and-cut paper dots, then place it where you want the burst. Secure with vinyl or craft glue in small sections so it doesn’t wrinkle. Seal with matte clear coat, then add a small red accent shape on top for pop — keep it under 1 cm wide for a balanced look.
Use a stencil sheet with a thick edge — thin stencils bleed and blur the dots.
Skip cheap glitter as an accent — it looks scratchy and can catch lint fast.
10. Tattoo-style line art with transparent transfer paper
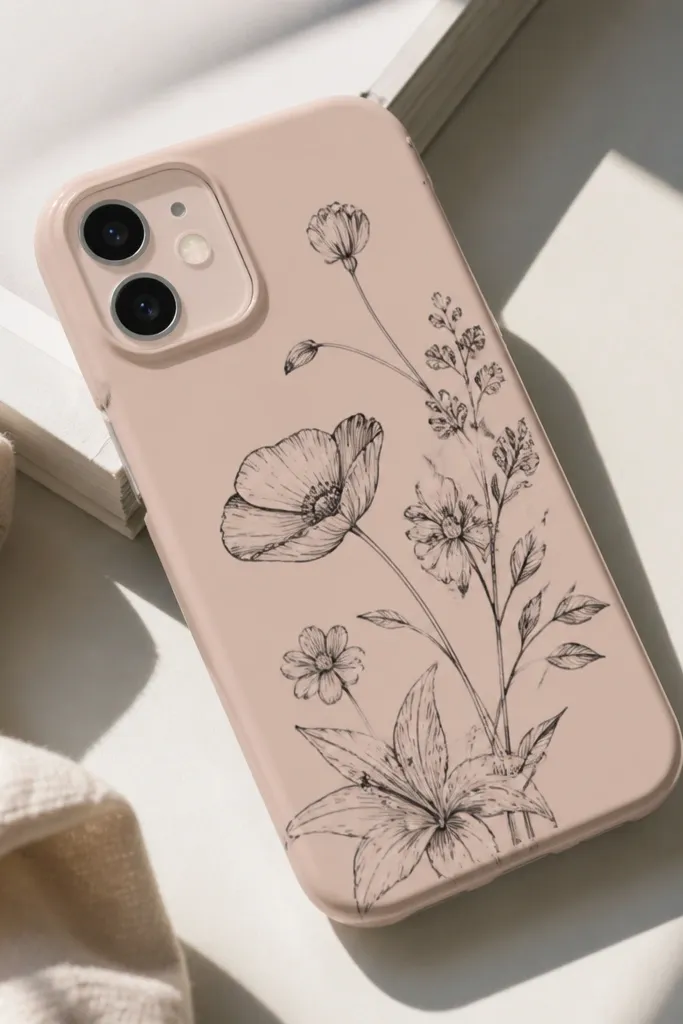
Tattoo-style line art looks real because it’s thin and high contrast. I use transparent transfer paper so the lines land where I place them, which is the difference between “cute” and “messy.” This looks best on light pink, nude, or white cases so the black ink reads crisp. It flatters people who like minimalist accessories because it doesn’t compete with jewelry.
Choose a light case and clean it with alcohol. Print your line art in reverse (mirror image) on transfer paper and cut around the design. Place the transfer paper on the case, rub firmly with a burnishing tool or the back of a spoon, then lift to reveal the lines. Seal with a glossy clear coat in two thin layers so the ink doesn’t smudge from hand contact.
Use one design per case — overcrowding kills the tattoo illusion.
Don’t skip mirroring — if you forget, your text will be backward and you’ll only notice after it’s sealed.
11. Beaded edge charm using tiny seed beads and clear thread
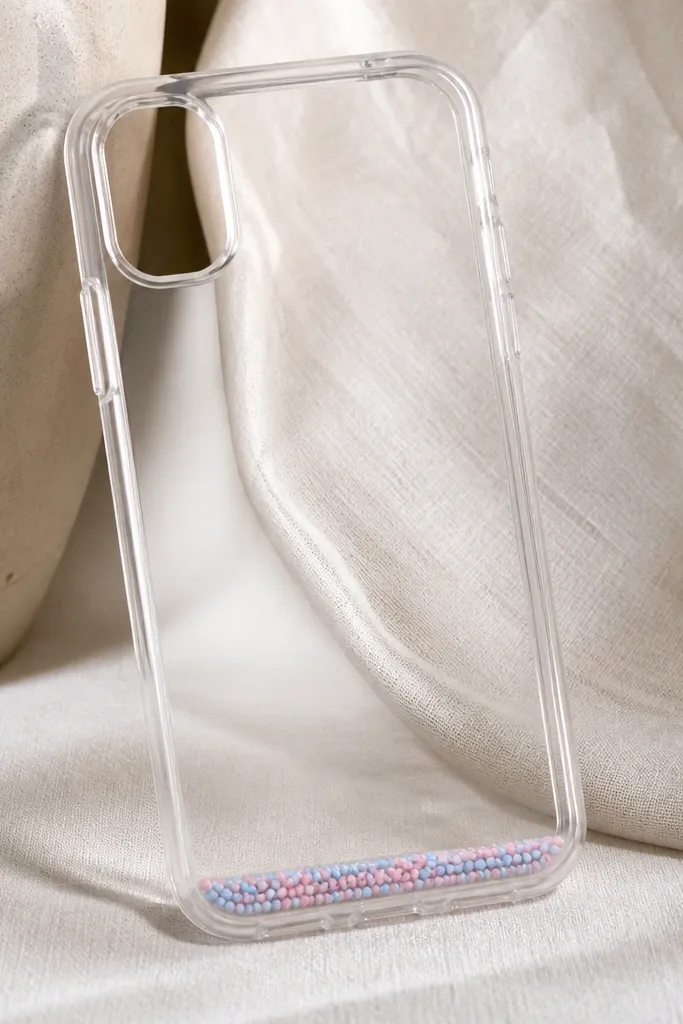
A beaded edge feels special because it frames the phone like jewelry. I like seed beads for the clean look since they’re small enough to follow a straight line. A clear thread keeps the focus on the beads, not the string. This style looks best on clear or light base cases so the colors stay airy and don’t feel heavy.
Use a clear TPU case and mark a line about 5mm above the bottom edge. Thread a needle with clear nylon thread and tie a knot underneath the case edge so it’s hidden. Stitch through the case material at small intervals, keeping beads spaced tightly — I aim for 1 bead per 2-3mm. When you finish, secure with a tiny dot of clear glue on the underside and seal the bead line with a thin clear coat.
Keep beads sorted by color before you start so your line doesn’t drift.
Don’t over-glue the top — thick glue turns glossy beads into a flat blob.
12. Scrapbook paper window with a glassy dome effect
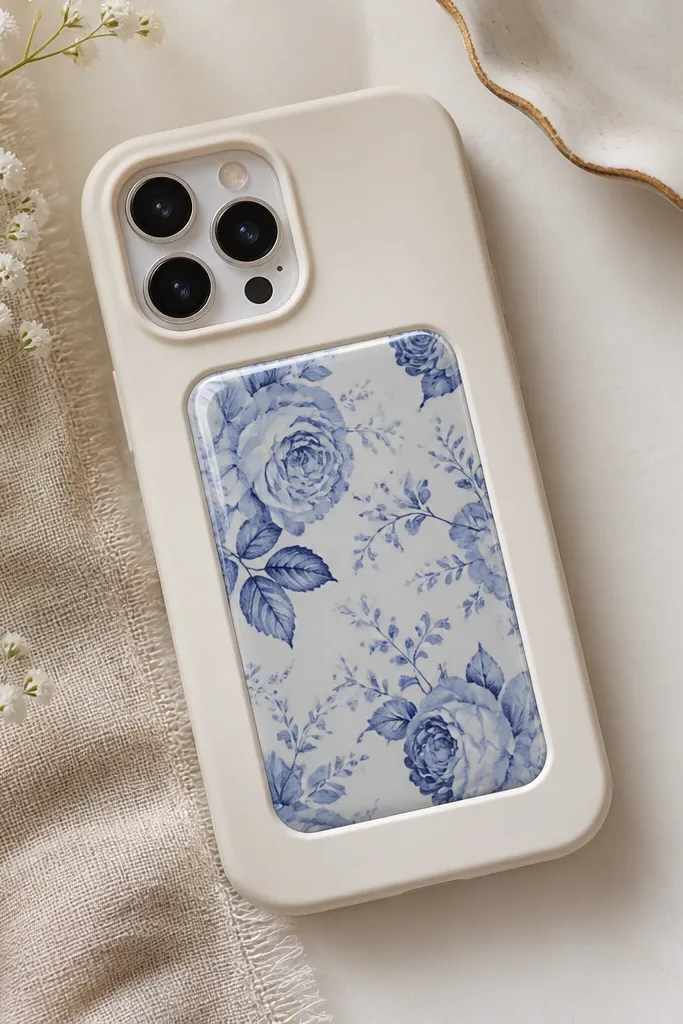
Pick one paper pattern and trim a rectangle slightly smaller than your case window area. Clean the case, then apply double-sided tape or thin glue to the back of the paper. Press the paper flat and let it set. Build a dome with resin in a shallow layer: put painter’s tape around the paper as a dam, pour a small amount, and pop bubbles with a toothpick before curing.
This is the easiest way to make a case look like a collectible enamel badge. The paper gives you a full design without needing to paint, and the dome makes it look deep and dimensional. I use patterned scrapbook paper with bold prints because the edges under the dome stay crisp. It looks great on almost any phone color because the dome catches light and makes the pattern feel intentional.
AvoidDon’t skip the tape dam — resin will run and spill beyond your clean rectangle.
Pro tipChoose paper that’s not too thick — thick paper can cause a raised rim you’ll feel.
13. Neon paint splatter with black matte base
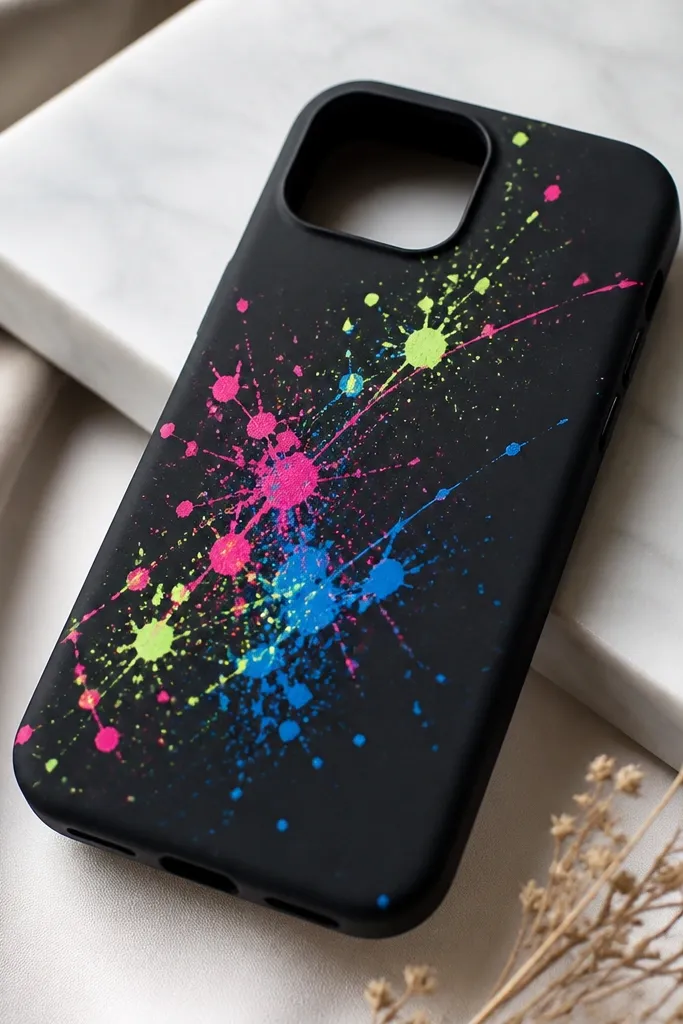
Start with a matte black case or paint a blank case with matte black acrylic. Thin neon acrylic paint with a little water so it splatters fine. Dip a stiff toothbrush, then flick over the case while holding it 8-10 inches away. Let it dry fully, then seal with matte clear coat so the splatters don’t smear when you wipe the case.
Splatter looks cool because it’s chaotic in a controlled way. I keep the base matte so the neon drops look like color bursts instead of glossy blobs. This style is especially flattering if you wear bright sneakers or nail polish because the colors match your vibe. It also hides tiny scuffs on the case because the pattern distracts from wear spots.
AvoidDon’t use thick paint — it lands as blobs that look messy and take forever to dry.
Pro tipCover the camera area with tape before splattering — it keeps the lens area clean.
14. Leather-look wrap with punch holes and a tiny buckle
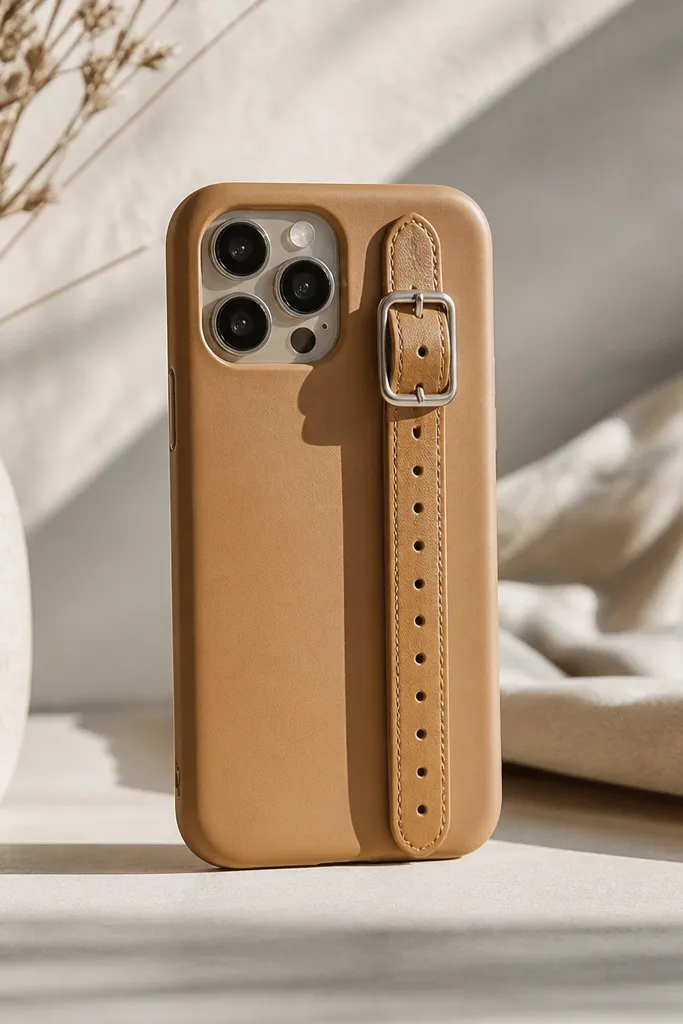
Cut faux leather or vegan leather into a strip wide enough to wrap the back and touch the sides. Mark a row of hole positions, then punch 6-8 holes with a small craft hole punch. Wrap the strip around the case and glue the ends with strong fabric or leather glue. Add a tiny buckle by gluing it in place, then seal the strap edges with a thin clear coat so they don’t fray.
A leather-look wrap makes a phone case feel like a wallet without adding bulk. I like tan and cocoa because they go with denim, black leggings, and work outfits. The punch holes add structure and make the wrap look intentional instead of like fabric glue. This works for most people because it’s neutral and the strap texture hides minor edge gaps.
AvoidDon’t glue the strap flat with thick glue — it creates a visible ridge under the leather texture.
Pro tipUse a ruler and a scrap of paper as a guide so the holes line up in a straight row.
15. Satin ribbon bow with corner placement
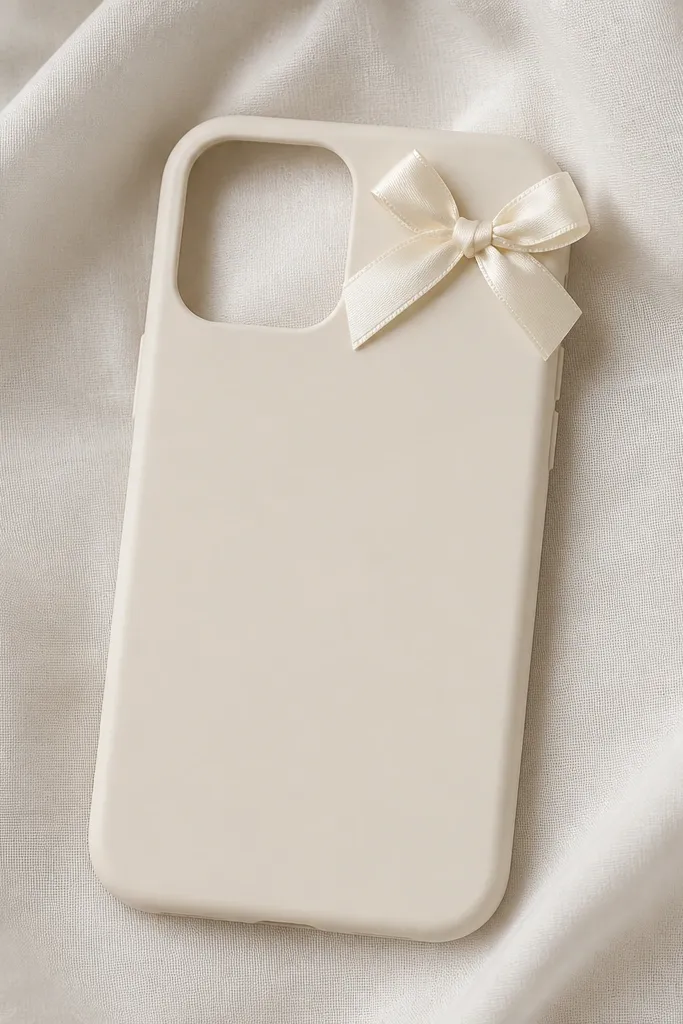
Ribbon bows look sweet and feminine, and they’re also beginner-friendly because you can keep the design small. I use satin ribbon because it catches light and looks smooth, not fuzzy like cheap craft ribbon. Corner placement keeps the bow from covering buttons and it makes the case feel playful without being bulky. This style looks great with warm outfits and looks especially good on phones with gold hardware or cases.
Cut a ribbon piece about 9-10 cm long for the bow loops. Tie a tight bow on a flat surface and trim tails at a slight angle. Glue the bow base to the corner of the case using a small amount of clear-drying fabric glue. Once the glue sets, seal around the bow edges with a thin clear coat so the satin doesn’t absorb oils and loosen over time.
If you want crisp loops, lightly singe the ribbon ends with a lighter from a distance to stop fraying.
Avoid oversized bows — they catch pockets and start lifting at the edges.
16. Sticker layering with transparent tape borders
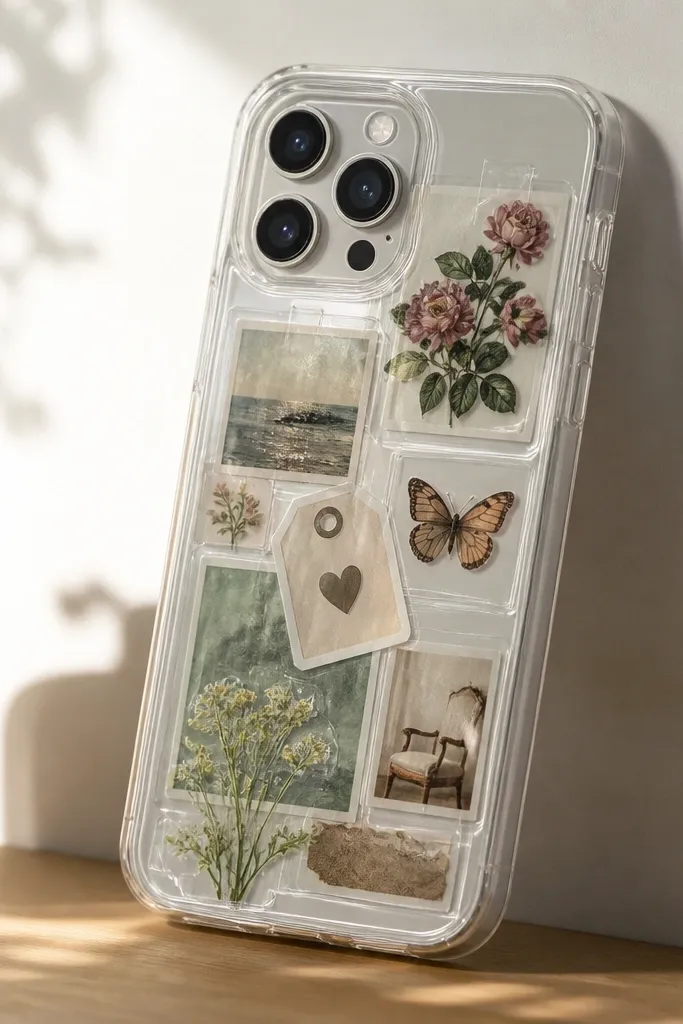
Start with a clean clear TPU case. Place your main sticker first, then trace around it lightly and add a strip of clear tape to form a border. Layer smaller stickers inside the border areas, keeping the biggest sticker near the center and smaller ones near corners. Seal the entire sticker layout with two glossy clear coats, letting each coat dry before the next so tape edges don’t lift.
Sticker layering looks expensive when you add borders. Transparent tape borders keep sticker edges from looking messy and stop the “collage” effect from turning into a sticker bomb. I like this for beginners because you can build slowly and adjust placement without ruining the whole case. It looks great on clear cases and makes colors pop without needing paint skills.
AvoidDon’t seal with matte first — matte can grab sticker edges and make them curl.
Pro tipUse a craft knife to trim tape borders for razor-clean corners.
17. Coordinate dots pattern using a hole punch stencil
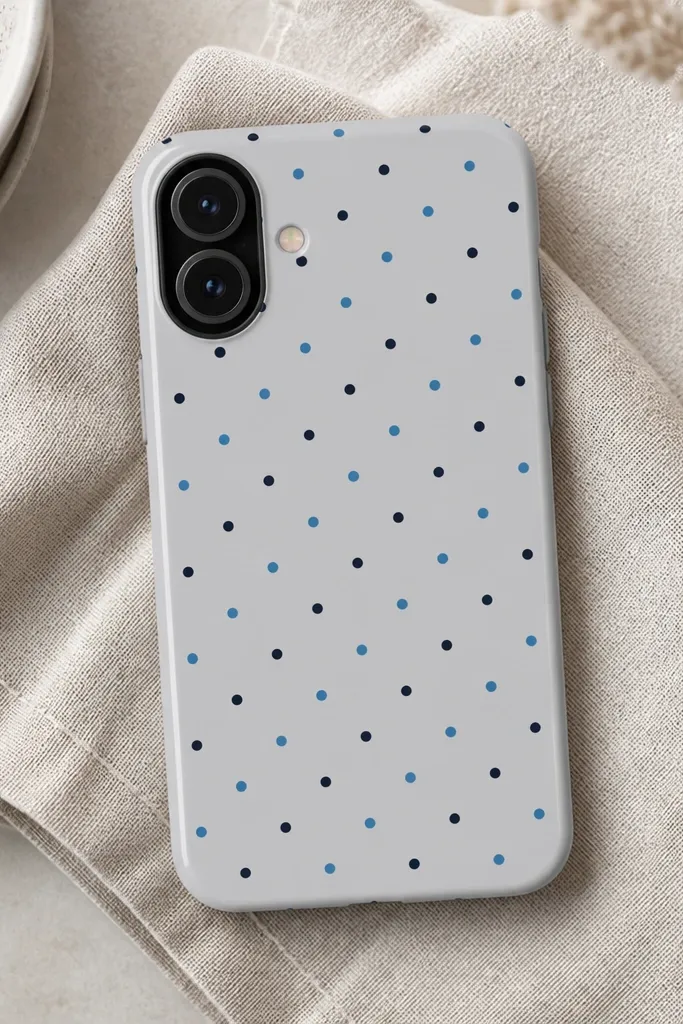
Dot patterns look polished because the spacing is consistent. I use a small hole punch stencil so every dot is the same size, which is what makes it look “designed” instead of handmade. This style works on light cases because you can see the contrast clearly. It also looks good on anyone’s hands because the pattern stays calm and doesn’t overpower the screen.
Make a stencil by punching 6-10 holes in a scrap plastic sheet or cardstock. Tape the stencil to the phone case where you want the pattern. Dip a foam dabber in acrylic paint, then press over each hole — don’t drag or you’ll smear. Remove the stencil carefully after 5 minutes, then seal with a glossy clear coat in two thin layers.
Use a foam dabber instead of a brush — it keeps dots round.
Don’t rush removing the stencil — fresh paint smears if you pull it too soon.
18. Pressed leaf silhouette with black ink wash
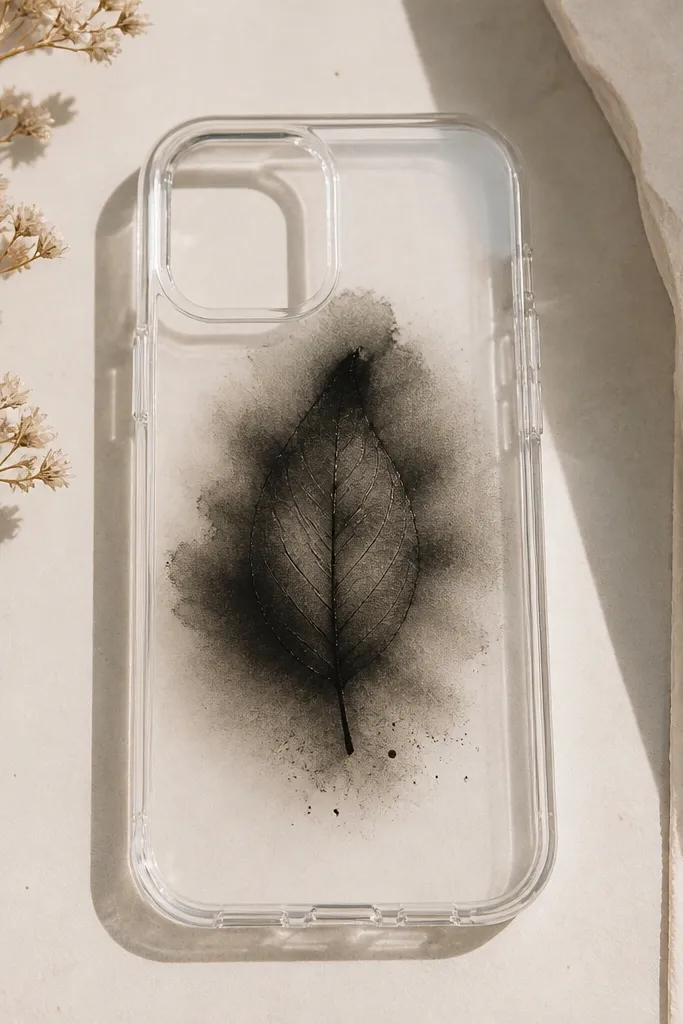
Clean a clear TPU case and place a pressed leaf in the center. Brush a tiny amount of clear glue under the leaf, then press it flat. Dilute black ink or black acrylic with a little water, then dab around the leaf edge with a cotton swab to create a soft fade. Let it dry completely, then seal with two clear gloss coats for protection against smudging.
Leaf silhouettes look dramatic because the shape is naturally detailed, even when you keep the color palette simple. I use black ink wash around the leaf to create a “stamp” effect without needing complex painting. This style is striking for night-out outfits because the contrast is high. It also works for fair and deep skin tones equally since black and green-brown leaf tones show clearly in photos.
AvoidDon’t soak the leaf — too much moisture makes edges curl and the ink bleeds under the petals.
Pro tipChoose one leaf, not three — one silhouette looks intentional and cleaner in close-up.
19. Chalky cloud gradient using sponge + setting spray seal
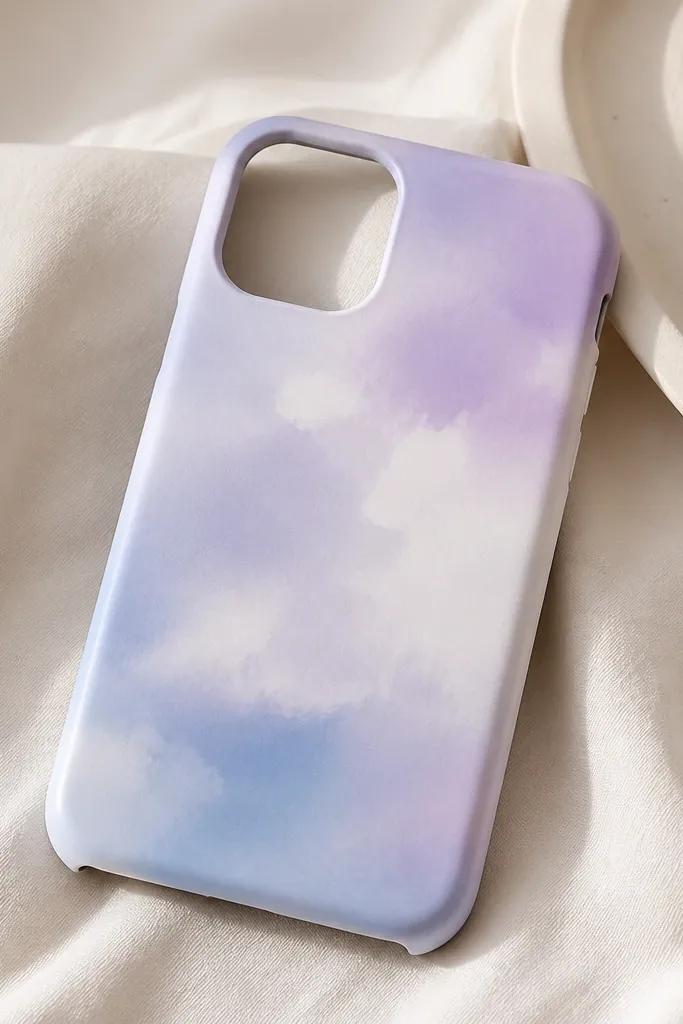
Clean the case, then sponge on lavender and white in large, soft circles. Add light blue in the lower area and blend by dabbing, not swiping. Let the paint set 20-30 minutes, then mist a clear acrylic setting spray over the painted area from 10 inches away. After it dries, add one more clear coat layer with a foam brush to smooth the finish.
Cloud gradients look dreamy but they can still be beginner-friendly if you use sponges and keep the edges soft. I like chalky pastel acrylic because it blends nicely without streaks. The final look depends on sealing — you need a clear finish that stops the pastel from rubbing off. This style looks great with neutral clothes and also matches pastel hair accessories.
AvoidDon’t overwork the paint — repeated blending can make it muddy.
Pro tipUse makeup sponges you can cut — the sharp edge helps you control where the gradient starts.
20. 3D acrylic charm dots using dimensional paint
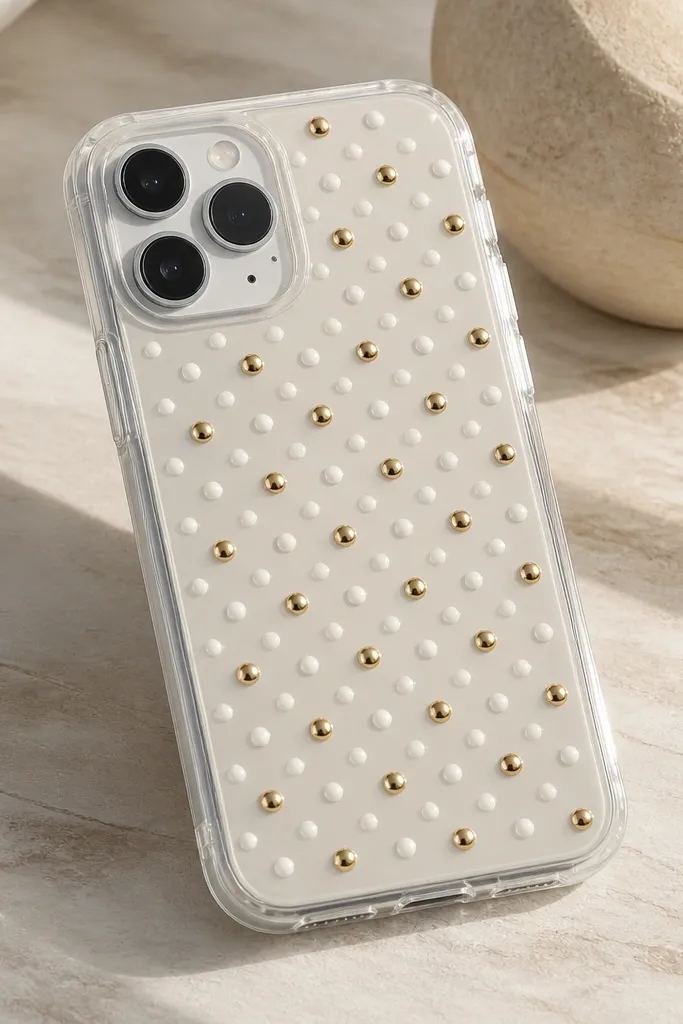
Start with a clean clear TPU case. Plan a pattern — I do 10-14 dots in a loose cluster around one corner. Squeeze dimensional paint dots onto the case using a nozzle or toothpick to shape them. Let them cure fully according to the product instructions, then seal around the outside edges with a thin clear coat so the dots don’t pick up dust.
Dimensional paint gives you that “tiny candies” look without resin. I like it because it dries raised and you can shape it as you go. White and gold dots look clean and premium on clear cases, and they don’t hide the phone shape. This is a great choice if you want something fun but still minimal.
AvoidAvoid touching the dots while drying — fingerprints turn shiny spots into dull smears.
Pro tipMake dots slightly different sizes — the variation looks more natural and less sticker-like.
21. Painted checkerboard with one color pop stripe
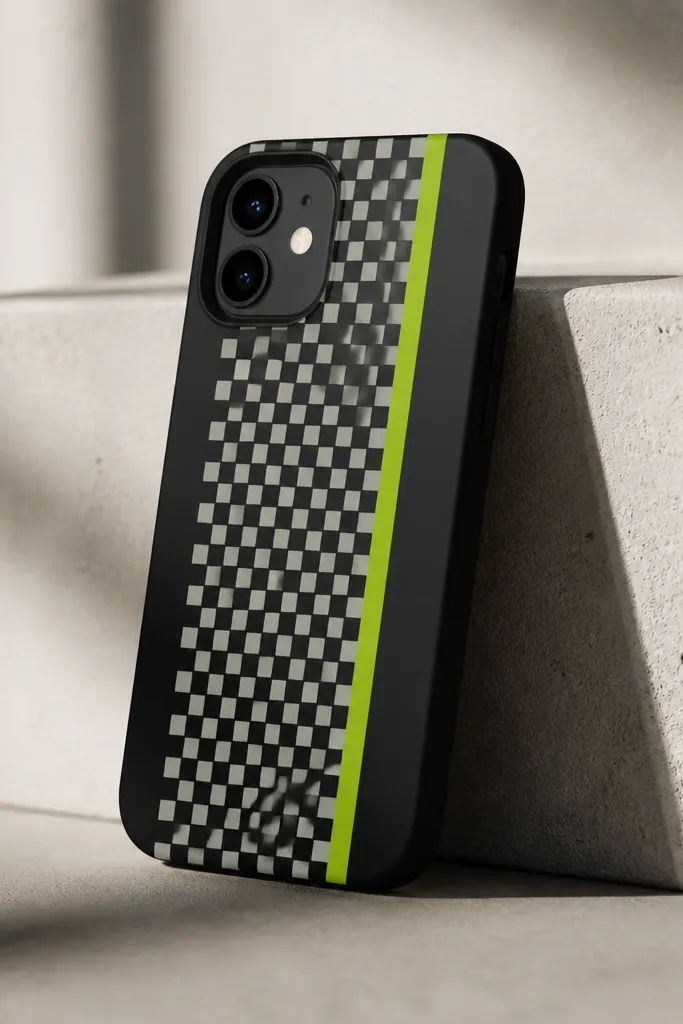
Start with a matte black base. Use painter’s tape to mark a grid of squares — I do 8-10 mm squares depending on case size. Paint the squares white with a small sponge brush, remove tape after 5-10 minutes while paint is still slightly soft, then let it dry fully. Add one vertical lime stripe using tape and paint, then seal with matte clear coat.
Checkerboards look sharp because the pattern is structured. I keep the main pattern black-and-white so it stays crisp, then add one lime stripe to keep it fun. It’s a good project for beginners because you can use painter’s tape to create clean squares. This style works well with casual wear and looks bold in photos.
AvoidDon’t paint over fully dried tape edges — the paint can lift and peel when you remove it.
Pro tipRemove tape at a slight angle — it helps prevent paint tearing on edges.
22. Gold foil leaf accents with alcohol adhesive and seal
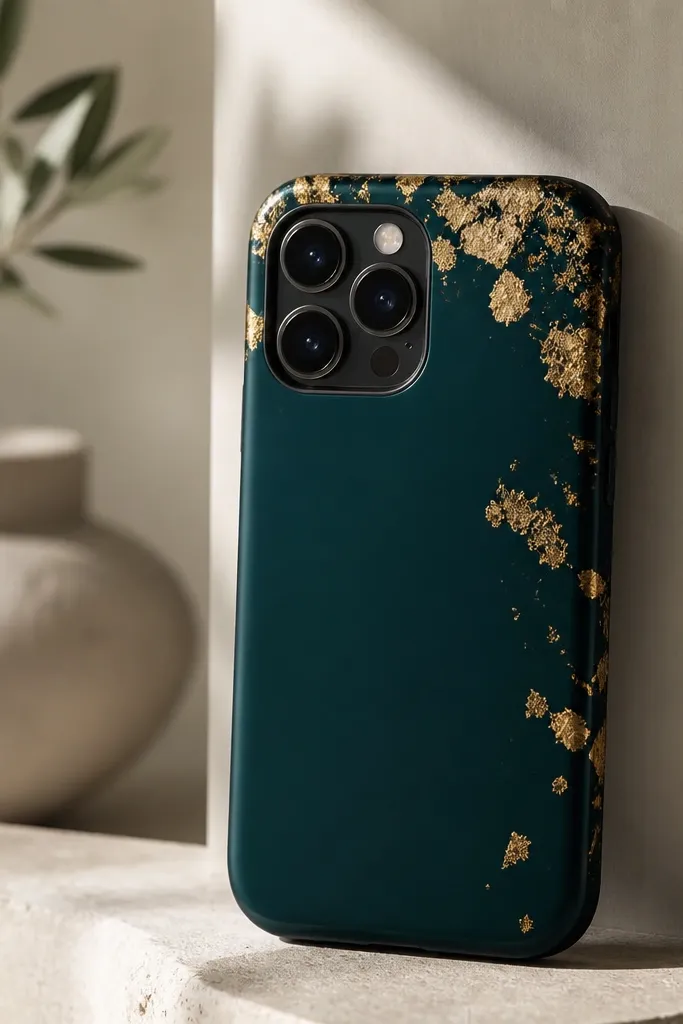
Gold foil leaf looks luxe because it’s thin and catches light in tiny flashes. I use it in small accents rather than covering the whole case, because foil can look messy if it’s too spread out. Dark teal is my favorite base since the gold feels warm next to cool blue-green. This style flatters most outfit colors and looks especially good with gold jewelry.
Clean the case and apply a thin layer of foil adhesive to the exact spots you want gold. Wait until it turns tacky (not wet), then press torn foil leaf pieces onto the sticky areas. Burnish gently with a soft brush so the foil grips and edges blend. Seal with a clear top coat in two thin layers so the foil doesn’t scratch off.
Tear foil with your fingers for irregular edges — it looks more natural than cut shapes.
Avoid pressing too hard — it can tear foil into ugly clumps.
23. Photo + vinyl combo portrait frame
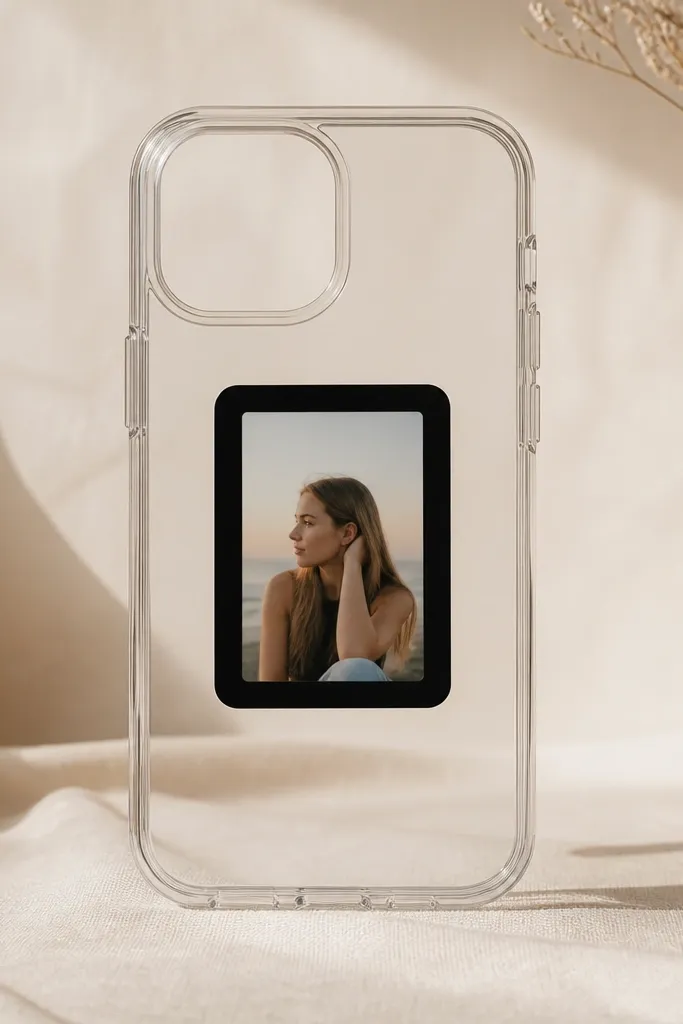
Trim your photo to fit inside the frame window and round the corners slightly with scissors for a softer look. Apply matte black vinyl frame strips around the edges of the photo area on the clear case. Secure the photo with thin double-sided tape so it stays flat. Seal the whole piece with two clear gloss coats, keeping the first coat thin so the vinyl edges don’t lift.
This looks like a mini art print because the vinyl frame gives crisp boundaries. I like combining a small photo with vinyl because you get personalization without losing structure. Matte black vinyl keeps the photo from looking shiny or washed out. It flatters warm undertones in photos and also looks good in both indoor and outdoor light.
AvoidDon’t let the photo overlap the camera bump — it will peel at the edges.
Pro tipUse a photo with strong contrast — bright highlights and deep shadows look best under clear sealant.
24. Fabric patch with zigzag edge and matching nail color vibe
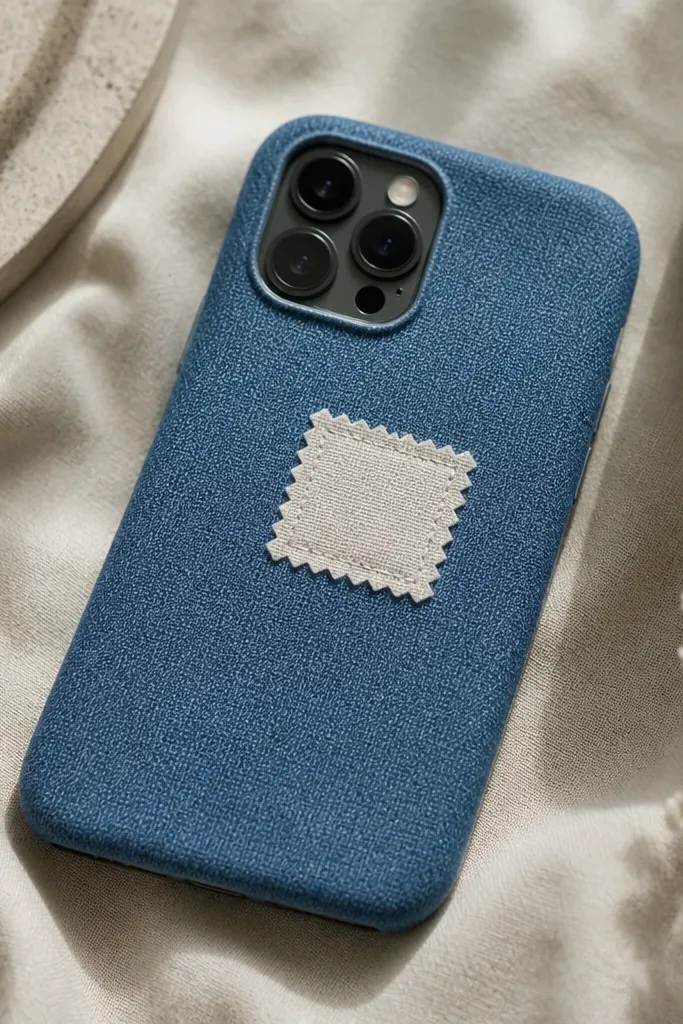
Fabric patches look cozy and real, not like printed designs. I use a patch shape with zigzag edges because it hides fraying and looks like hand-sewn detail. Denim-blue or olive cases make the patch feel intentional. This style is great for anyone who likes tactile things and it photographs well against wood desks and denim sleeves.
Cut fabric into a patch shape and lightly fray or trim for a clean zigzag edge. Apply fabric glue to the case where the patch goes, then press the fabric down and hold for 30-60 seconds. Use a fabric marker to draw a zigzag outline around the edges like stitches. Seal the patch with a matte fabric-safe clear coat in one thin layer, then add a second layer only if the edges look dry.
Pick fabric with a tight weave — loosely woven fabric frays too much under sealant.
Avoid shiny sealers — glossy glue makes fabric look waxy.
25. Sunburst foil strips from the center
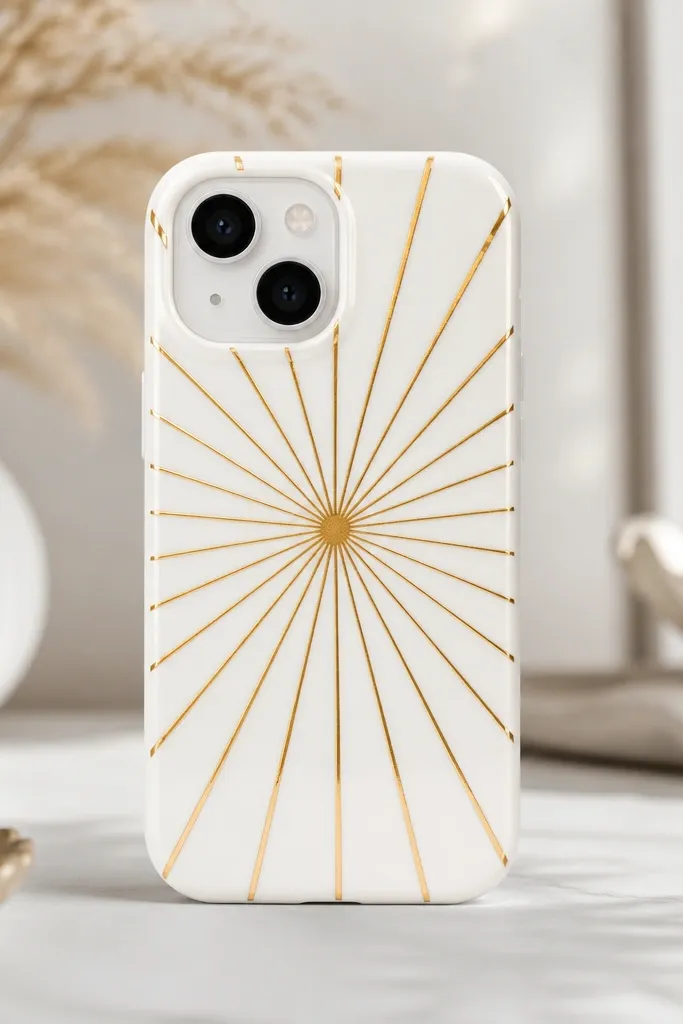
Start with a white or cream case and mark a center point on the back. Cut metallic tape into thin strips — about 2-3 mm wide — and press them down radiating outward. Keep spacing consistent by laying strips with a small paper guide strip between them. Seal with clear gloss coat in two thin layers, focusing on edges so tape doesn’t lift.
Sunburst patterns look stunning because they pull attention toward the center and create instant symmetry. I use gold foil strips or thin metallic tape because the light reflects in thin lines instead of big blocks. A white base keeps the contrast clean and makes the foil feel brighter. This looks great on people who like bold accessories but still want a neat, graphic layout.
AvoidDon’t use thick foil sheets — they wrinkle and create uneven bumps.
Pro tipIf strips bend, warm them slightly with a hair dryer before placing.



