
1. Glitter vinyl galaxy with a sealed border
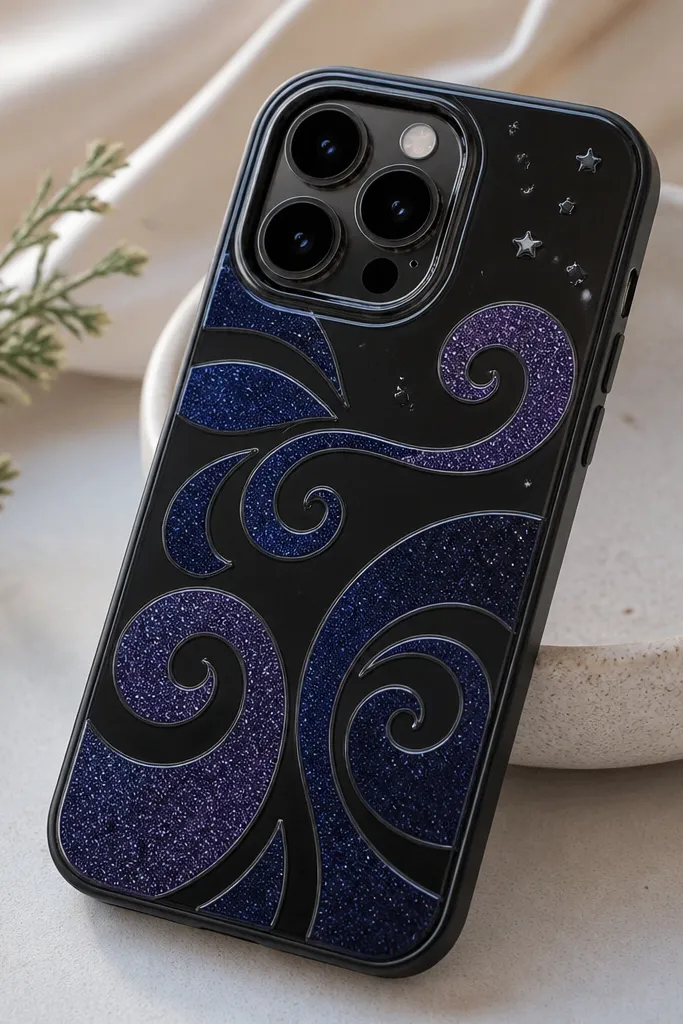
This look is the one I go back to when I want sparkle that doesn’t shed everywhere. Use black or deep navy glitter vinyl for the main swirls, then add a few small white star dots cut from adhesive vinyl so the pattern looks planned. Seal the edges with a thin clear top coat so the glitter stays put and the vinyl doesn’t curl at corners. It looks best on medium to deep skin tones because the navy/purple reads cool and bright, and it also flatters anyone who likes a “night sky” style without neon screaming.
Start by washing your TPU case with dish soap and water, then dry it completely and wipe with rubbing alcohol on a lint-free cloth. Cut your galaxy swirls from glitter vinyl and place them dry first, then press from the center outward. Use painter’s tape to mask the camera cutout and button area so you don’t get top coat where you need grip. Apply a thin layer of clear top coat or clear gel medium along the edges of each vinyl piece, then let it cure fully before you peel tape.
Pro tipIf your vinyl edges lift, add a second super-thin coat only on the lifted spots with a toothpick.
AvoidAvoid skipping the edge-seal step — glitter vinyl edges lift fastest and make the whole case look messy.
2. Pressed flower under clear resin, camera ring protected
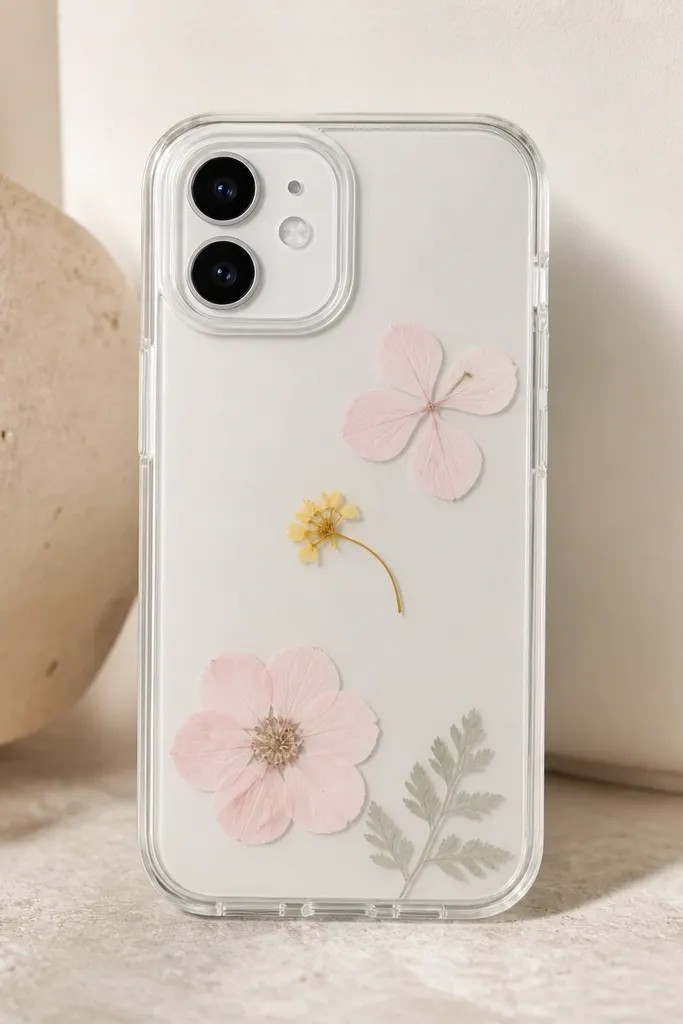
Pressed flowers look expensive when they’re protected from fingerprints and fully sealed. Choose flat, fully dried flowers — tiny daisies or baby’s breath work better than thick roses because they don’t create big bumps under resin. I like a pale pink and soft yellow palette because it looks gentle and wearable with almost any outfit. This style looks especially flattering on fair to medium skin tones because the case glow is soft, not harsh. It also reads “spring” without being childish, since the flowers stay delicate and controlled.
Start by placing your dried flowers on top of the case in a dry layout, then snap a quick photo so you can repeat the placement. Mask the camera lens area and speaker/mic holes with painter’s tape and a thin strip of tape around the edges of the openings. Mix clear resin slowly, pour a thin base layer (about 1-2 mm), place flowers with tweezers, then pour the second layer until they’re fully covered. Pop any surface bubbles with a toothpick and torch lightly if you have a resin torch, then let cure for the full time on your resin bottle before removing tape.
Pro tipUse clear tape to protect the phone itself while you work — resin drips happen and cleanup is easier before it cures.
AvoidAvoid rushing cure time — uncured resin looks cloudy and feels sticky for weeks.
3. Faux leather wrap with stitched-looking edge paint
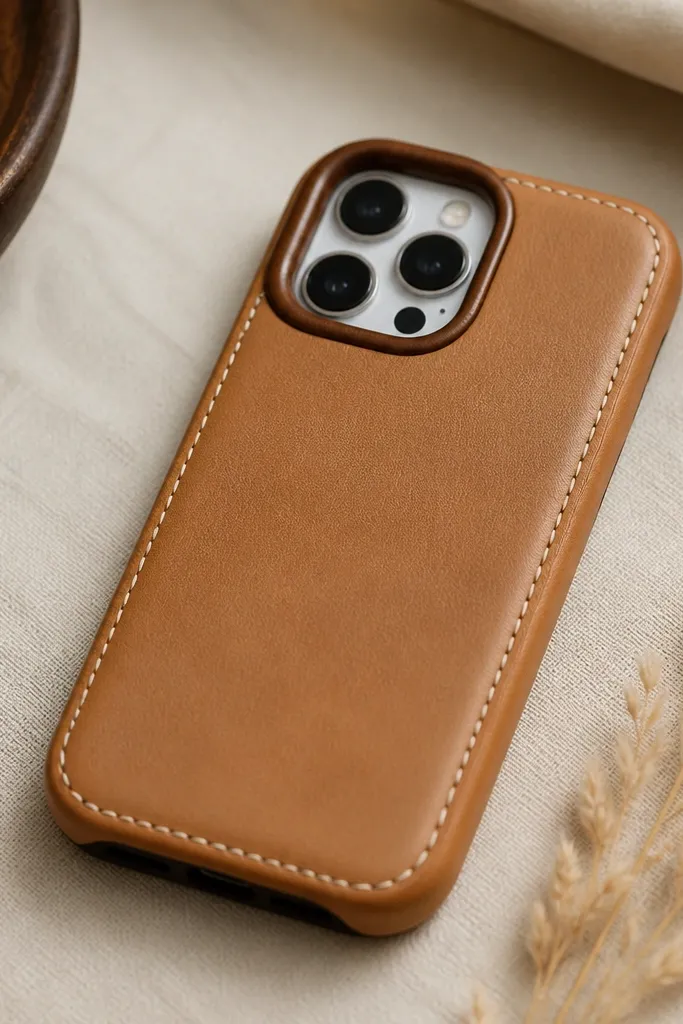
This is the “I bought it from a boutique” look that actually holds up well. Faux leather in tan, caramel, or cocoa hides minor scuffs, and the texture makes the case feel grippier than smooth TPU. For the stitched effect, use a fine white paint pen or acrylic paint to dot along the seam — it looks like real hand stitching from a few feet away. This style flatters warm undertones and works with gold jewelry because the tan-brown palette reads warm. It also suits everyday outfits — denim, sweaters, and office wear — without looking like a costume.
Start by cutting faux leather strips to match the case height, then test-fit around the back first before gluing. Use contact cement or strong fabric glue — apply a thin coat to both surfaces, wait for it to get tacky, then press firmly. For the seam, leave a narrow gap (about 1-2 mm) where you want the “stitching” line, then trace it with a pencil. Dot with a paint pen in a straight line, alternating small dots and tiny dashes, and seal the whole surface with a matte clear spray so it doesn’t feel sticky.
Pro tipBurnish the glued edges with a clean plastic card so the seam sits flat and doesn’t lift.
AvoidAvoid using too much glue — it soaks into faux leather and leaves darker blobs.
4. Photo strip collage with matte lamination
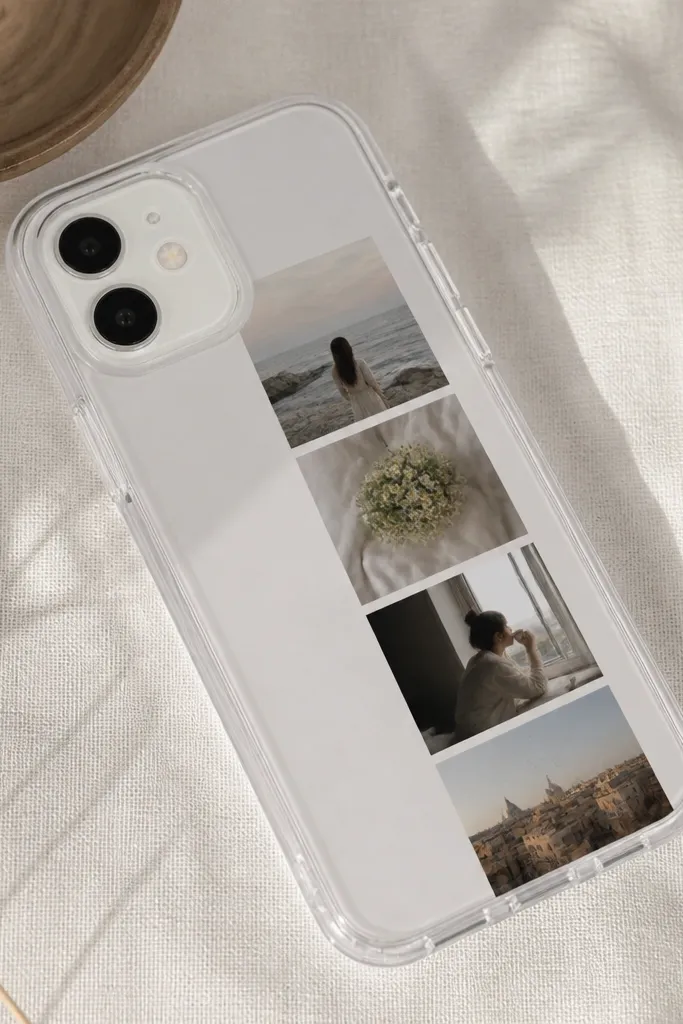
Collage cases look best when the photos are consistent in tone and size. Print four to six photos in the same border style, then arrange them in a diagonal strip so the composition feels intentional. I like matte lamination over glossy because it hides tiny fingerprints and makes the photos look like they belong together. This style flatters people who like journaling aesthetics and works well with light to medium skin tones because the colors are bright without reflecting harsh light. It’s also forgiving if you’re still learning — matte hides small alignment issues.
Start by cleaning the clear case with alcohol and letting it dry completely. Print your photos to fit the back area, then cut with a craft knife so the corners are clean. Lay the photos where you want them, then cover with a matte adhesive film or matte clear contact paper cut to case size. Smooth the film from the center outward with a rubber squeegee, then trim around the camera opening with a fresh blade so you don’t get ragged edges.
If you see dust under the film, lift only that corner and lay it down again — don’t try to drag it across the surface.
Avoid glossy lamination on a smudgy phone case — it shows every fingerprint and makes misalignment obvious.
5. Button-and-chain charm case with shock-safe mounts
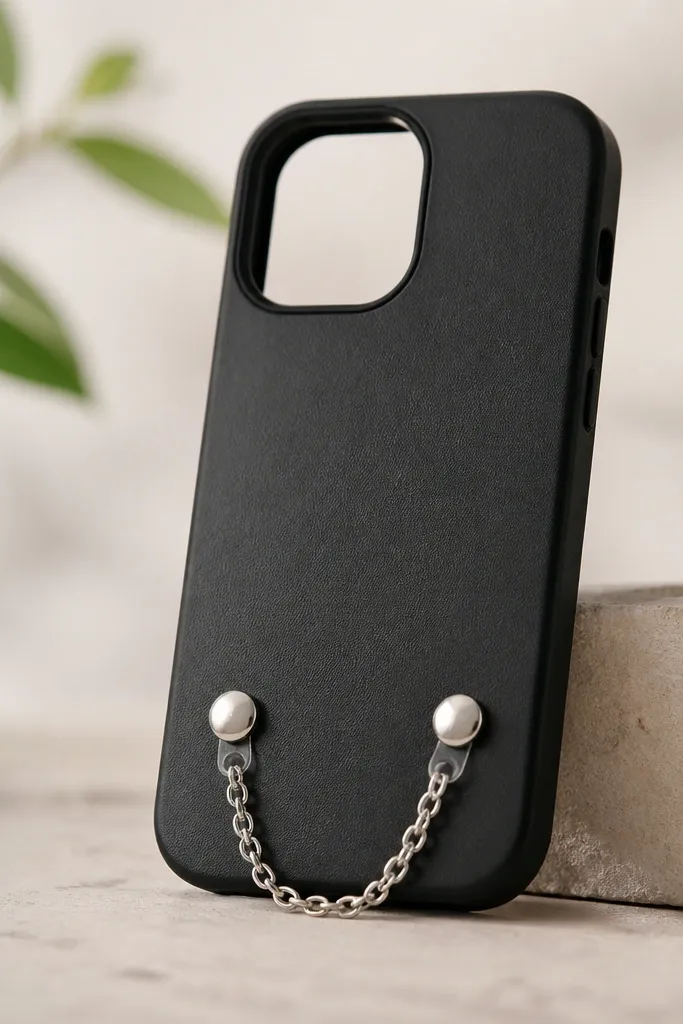
Charm cases are fun, but the expensive look comes from how you attach the hardware. Use small metal buttons and a short chain, then mount them with clear epoxy dots so they sit flat and don’t wobble. Keep the chain short — around 1 to 1.5 inches — so it doesn’t snag bags and doesn’t get pulled off by drops. This looks great on cooler undertones because silver hardware pops against black, and it also looks good with both casual and dressed-up outfits. The charm adds personality while still feeling controlled.
Start by marking two anchor spots on the back with a pencil dot, then clean with alcohol. Mix a small amount of clear epoxy and apply tiny dots where each button/chain end will sit. Press the button into the epoxy and hold for the first set time, then check it’s level. For the chain, tack the chain ends into epoxy dots and let cure fully before using the phone. After curing, wipe any excess epoxy with a damp cloth and a fine sanding pad if needed for smoothness.
Pro tipTest the chain pull gently before daily use — if it flexes, add one more epoxy dot at the anchor.
AvoidAvoid hot glue — it peels off TPU after a couple of temperature swings.
6. 3D nail art flowers on a clear TPU base
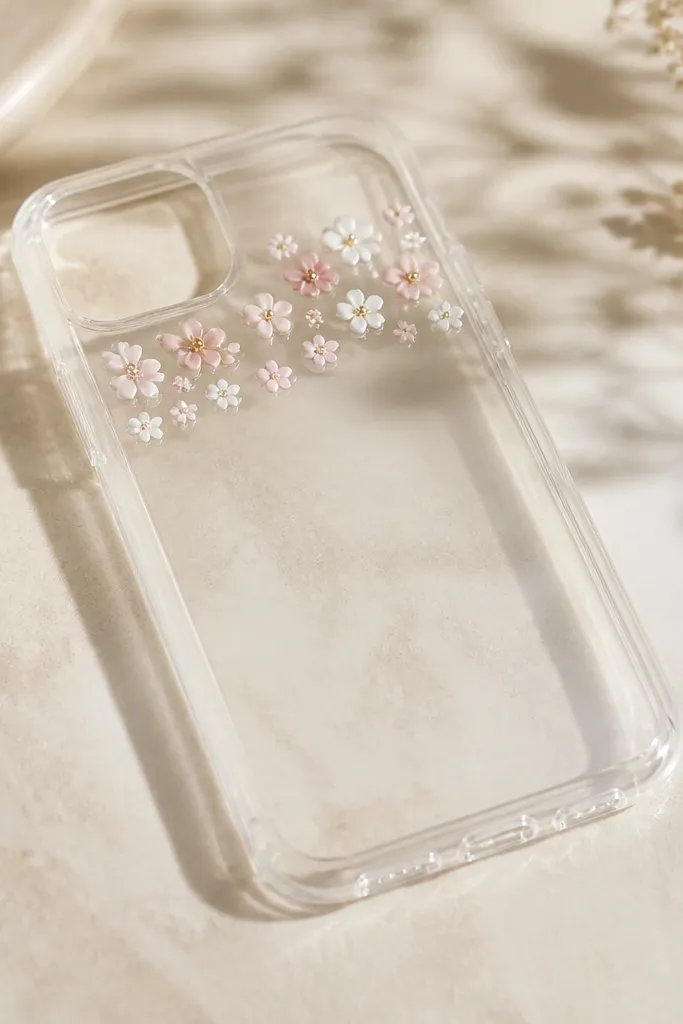
If you like cute but not childish, 3D nail art flowers are the way to go. You get that “sticker but better” look because the shapes are layered and slightly raised. Use white and blush flowers with tiny gold dot centers, then keep the layout spaced so the case still feels smooth in your pocket. This style flatters all skin tones because the palette is neutral, and it also looks best on phones with a clear case back so the color reads through. It works for daily wear and also looks good for events because it has dimension.
Start with a clear TPU case and clean it with alcohol, then let it fully dry. Arrange pre-made nail art flowers in a light scatter pattern on the back, away from the camera so you don’t block flash. Fix each piece with a small dot of clear gel or nail glue and press lightly for a few seconds. Seal the whole design with a thin clear gel top coat in one smooth layer, then cure under a UV/LED lamp if your gel requires it. Keep the seal layer thin so it doesn’t blur the flower edges.
Use a toothpick to apply glue exactly to the flower base so it doesn’t ooze out.
Avoid placing 3D pieces near the camera lens — you’ll block flash and it looks uneven in photos.
7. Marbled resin swirl with alcohol ink accents
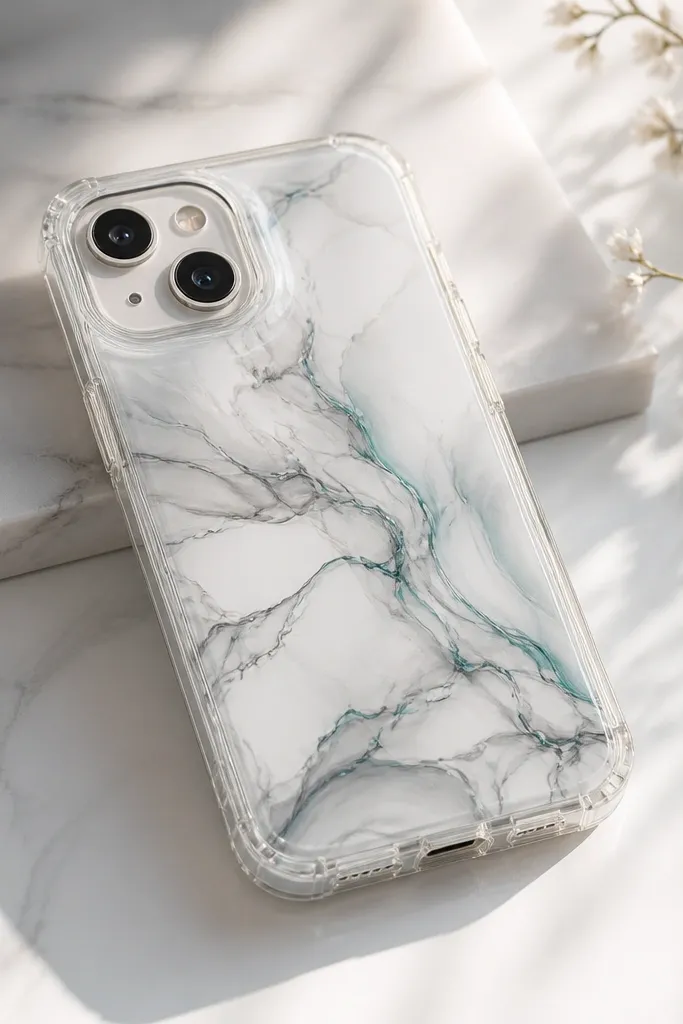
Marbled cases look high-end when the swirls stay thin and layered instead of one big puddle. Use clear resin as the base and alcohol ink in white, gray, and a small touch of teal to create the veins. The trick is to keep the ink amounts small so the colors don’t muddy together. This style looks great on people who wear lots of neutrals because the teal accent adds interest without screaming. It also photographs beautifully because the swirls catch light across the surface.
Start by taping around the camera and port openings with painter’s tape. Pour a thin base layer of clear resin, about 1 mm, and let it level. Drop alcohol ink using a toothpick — one or two tiny drops per area — then swirl gently with a pin or skewer without overmixing. Add a second resin layer after the ink spreads to lock the pattern. Let the case cure untouched, then pop any dust specks with a needle tip if they’re on the surface.
Do a test swipe on scrap plastic first to learn how your ink spreads in resin.
Avoid heavy ink pouring — it turns marbling into muddy streaks.
8. Heat-transfer vinyl stripes with clean alignment marks
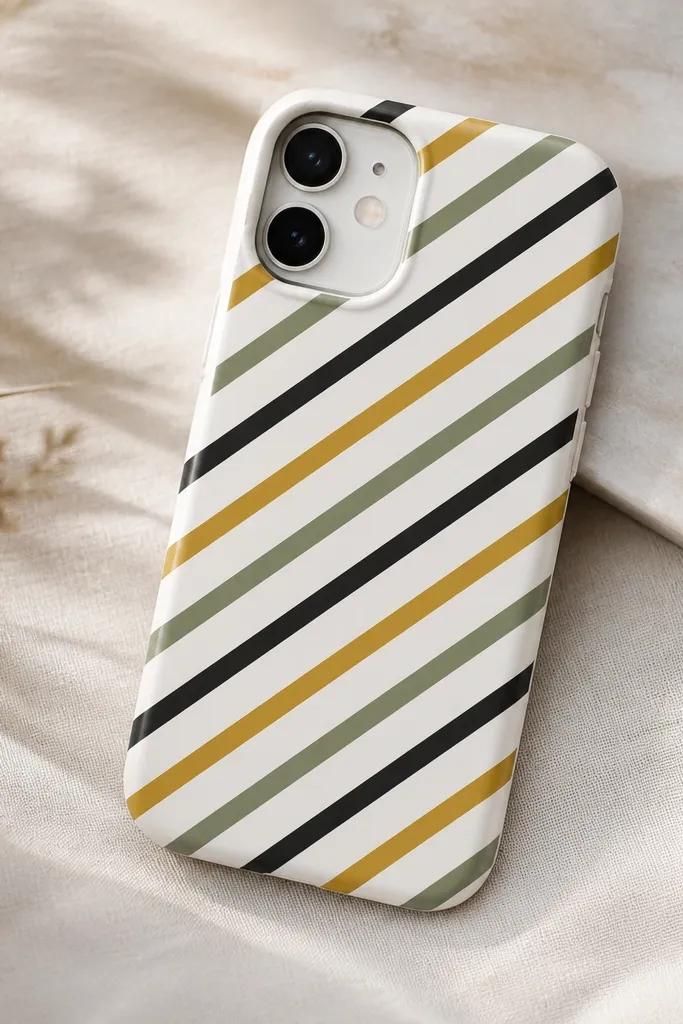
Straight stripes look sharp when you align them before you press. Heat-transfer vinyl gives you that clean, store-like finish because the edges are crisp and the surface stays smooth. I like diagonal stripes in three colors: black for contrast, mustard for warmth, and sage for a softer tone. This style flatters people who like a modern look and it pairs well with both casual and work outfits. It also looks great on lighter phone cases because the vinyl pops without needing extra shine.
Start by measuring the case back width and marking a center line with a pencil on paper, then tape that paper behind the case as a reference. Cut your stripes to match the height and leave a tiny gap from edges and camera opening. Press the vinyl using a heat press or a household iron with parchment paper on top, applying firm pressure for the exact time your vinyl brand recommends. Let cool, then peel the carrier film slowly at the correct temperature. Finally, press again for a short second pass on any edges that lift.
Use a quilting ruler or straight edge for stripe width — uneven stripes show up in every photo.
Avoid freehand placement — crooked stripes make the whole case look rushed.
9. Satin ribbon wrap with double-knot bow near the bottom
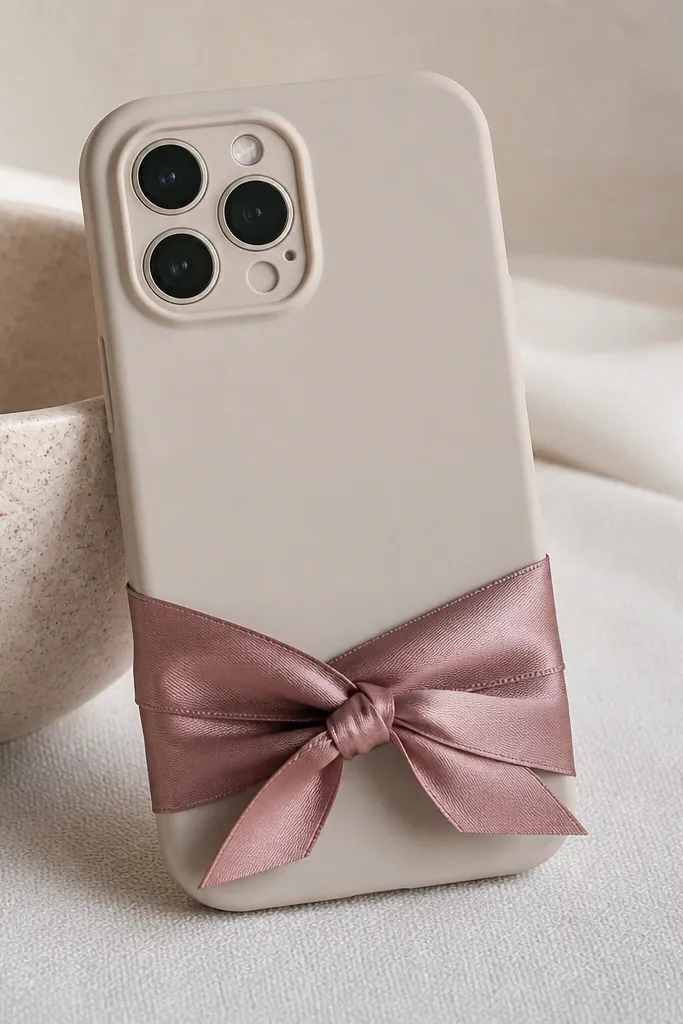
Ribbon cases look sweet without looking like a kid craft when the ribbon is properly sealed and the bow is small. Choose satin ribbon in dusty rose or deep burgundy, then wrap it so the seam sits on the side you don’t usually touch. A double-knot bow stays flatter than a big loop, especially if you keep it under 1 inch wide. This style flatters warm undertones and looks especially good with gold accessories. It also reads romantic for dates and holidays while still looking neat in everyday use.
Start by cutting ribbon lengths that wrap the back with a 1-2 cm overlap. Lightly sand the case surface with a fine buffer (optional but helps grip), then clean with alcohol. Apply a thin line of clear-drying fabric glue to the overlap and press the ribbon down, holding for the glue’s set time. Seal ribbon ends with a tiny dab of clear glue or fray-stop product. For the bow, tie it separately, then tack the knot to the ribbon wrap with a small glue dot so it doesn’t slide.
If your satin frays at the cut ends, run the cut edge over a flame briefly and stop before it darkens.
Avoid bulky bows — thick knots catch on pockets and the case feels awkward.
10. Comic pop art halftone with black outline stickers
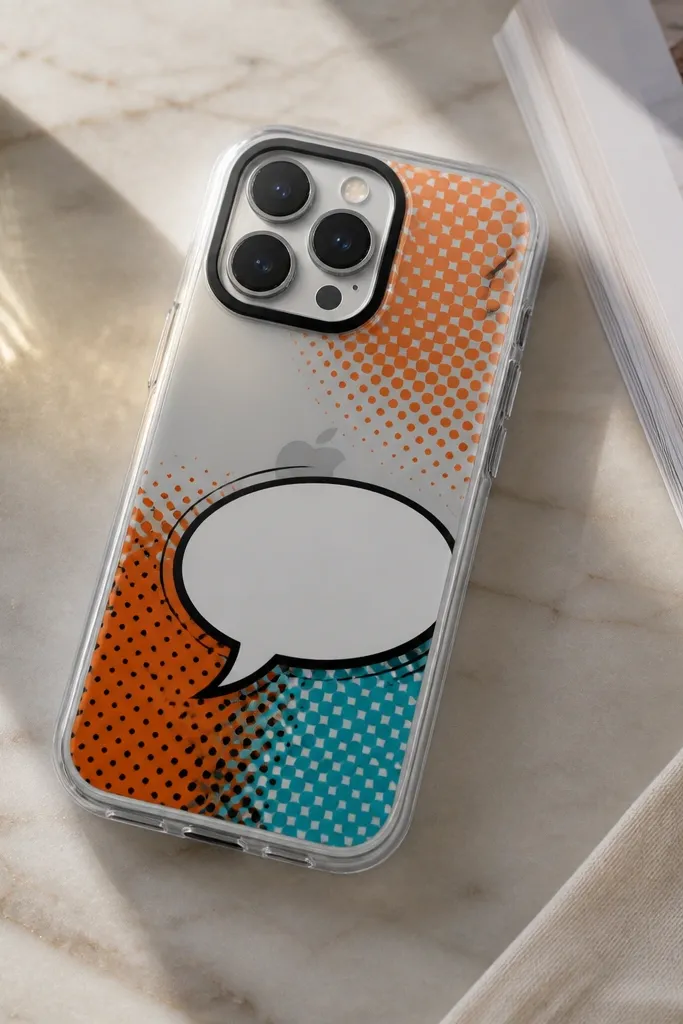
Pop art looks loud in the best way when you keep the palette tight and the outlines crisp. Halftone dots in orange and teal plus a white speech bubble give you that comic energy without needing tons of text. Use black outline stickers or vinyl so the edges stay sharp and don’t blur. This style flatters people who like statement accessories and works well with both warm and cool wardrobes because the colors are balanced. It also photographs well because halftone patterns create texture under flash.
Start with a clear or translucent case and clean it carefully with alcohol. Apply black outline vinyl to map your speech bubble and any frames first, then layer halftone vinyl dots inside. Press each piece firmly and use a craft knife to trim around the camera opening. Seal the whole design with a thin clear top coat to stop vinyl edges from lifting. If you want extra pop, add a small strip of glossy clear tape on top of the speech bubble to mimic comic shine.
Make your speech bubble bigger than you think — small bubbles look cramped on phone backs.
Avoid using multiple fonts and tiny text — it turns into unreadable clutter.
11. Pearl bead corner cluster with anti-snag placement
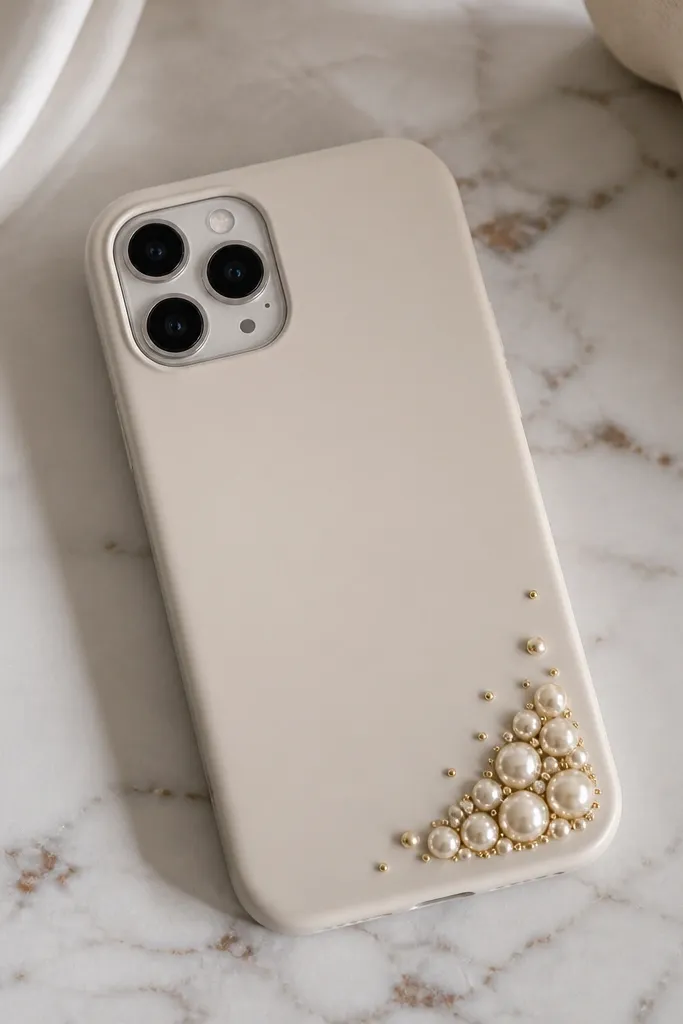
Bead clusters look classy when they’re placed where your hand doesn’t constantly rub. I stick to one corner cluster because it keeps the design from snagging on pockets and it looks intentional from the front. Use small faux pearls (4-6 mm) and seed beads in gold to make the cluster look dimensional. This style looks great with warm-toned jewelry and it flatters all skin tones because the cream base is neutral. It also works for weddings and events because it reads delicate without being flimsy.
Start by marking your corner placement with pencil dots, then test-fit a dry cluster arrangement. Clean the case and lightly roughen the corner with a fine sanding pad. Use clear epoxy or strong jewelry glue to attach pearls one at a time, starting with the biggest pearl and filling gaps with smaller ones. Add seed beads around the perimeter to hide glue edges. Let cure fully, then run your finger across to check for snag points and sand any sharp bits lightly.
Keep the cluster low-profile by using less glue per bead — thick glue makes a lumpy edge.
Avoid placing beads near the middle — they chip and catch on fabric faster.
12. Chalk marker doodles on matte case + clear spray fix
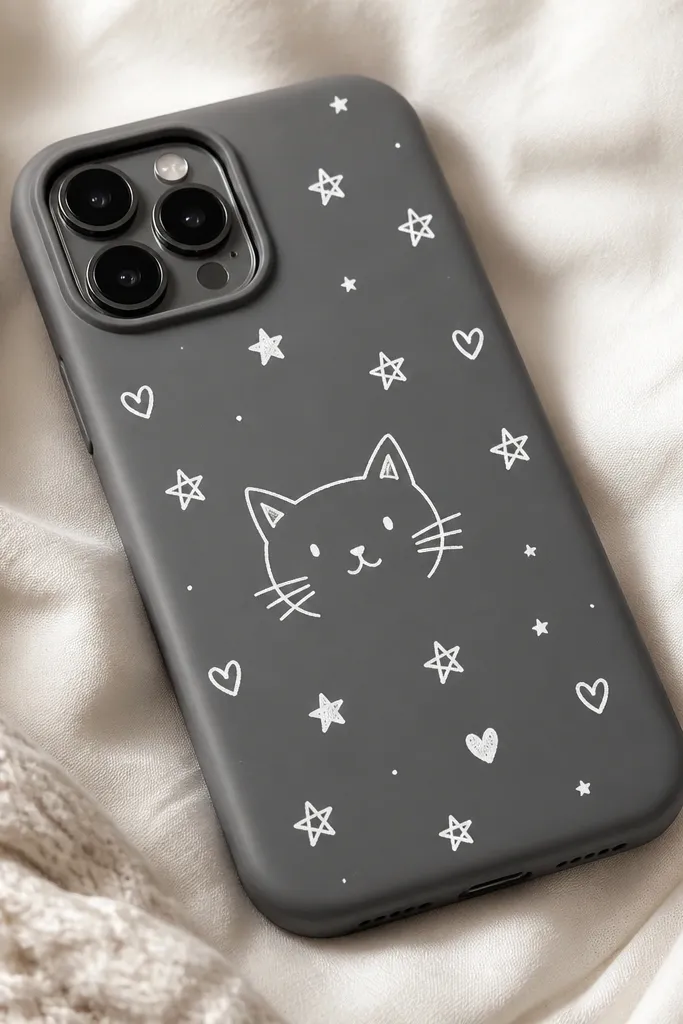
Chalk marker doodles are perfect when you want personal, casual art that you can change later. Matte cases give the best grip for the marker, and the doodles look clean instead of smudged. I use white chalk marker on gray, or black chalk marker on cream, because the contrast stays readable. This style flatters anyone who likes minimal accessories with a personal twist. It also works for gifts because you can do a name or date without needing fancy tools.
Start with a matte TPU or matte-finish case — glossy surfaces smear chalk marker. Draw your doodles lightly first, then go over the lines once you like the placement. Let the marker dry for a full 10-15 minutes. Spray a clear matte fixative in thin passes from about 8-10 inches away, letting each layer dry before the next. If you want a slightly glossy doodle look, use a clear gloss top coat instead, but keep it thin so it doesn’t blur the chalk texture.
Do test marks on a spare piece of plastic from the case packaging — chalk markers behave differently by surface.
Avoid thick spray — it turns chalk lines gray and makes them look washed out.
13. Neon edge glow using paint pen and vinyl stencil
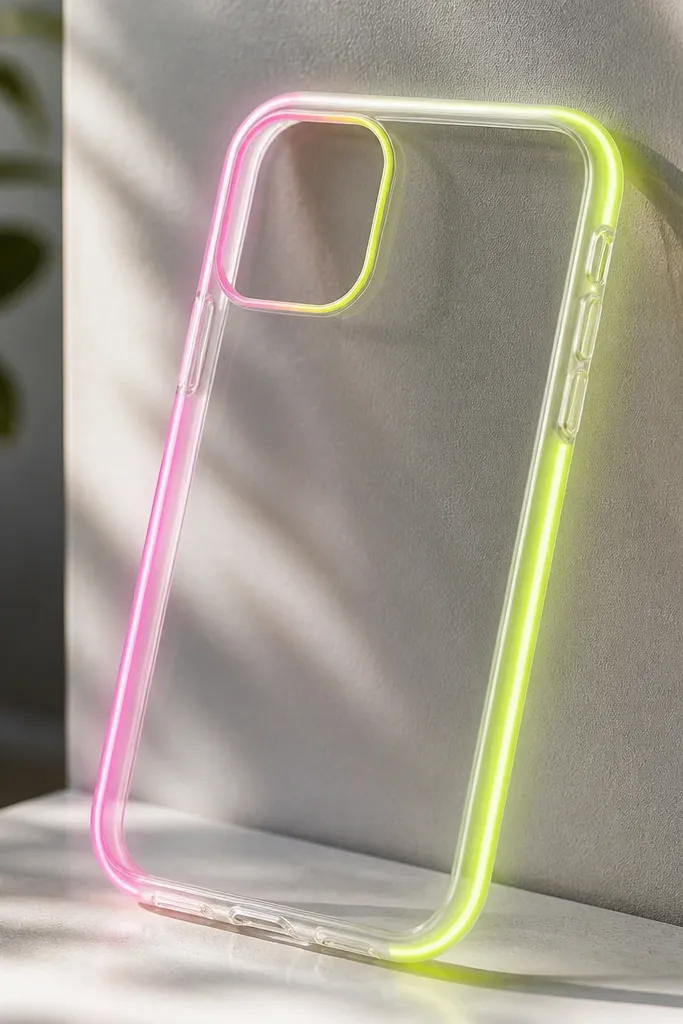
Neon edges look clean when they are outlined with a stencil, not freehand. Use a vinyl stencil strip around the back edge so your line stays even, and then fill with a paint pen made for plastic or a model paint mixed with a tiny bit of clear medium. Hot pink plus lime green reads bold without turning chaotic because it stays on the perimeter. This style flatters people who wear black, denim, and neutral tops because the neon pops. It also looks great under phone flash since the outline catches light.
Start by cleaning the clear TPU case with alcohol and drying it fully. Cut a stencil strip from removable vinyl so it follows the outer edge shape; press it down firmly and burnish with a plastic card. Use a neon paint pen to fill the exposed strip area in one steady pass, then let it dry for the pen’s recommended time. Remove the stencil slowly at a low angle to avoid pulling paint. Seal with a clear top coat in two thin layers, keeping it away from the camera opening so the lens stays unobstructed.
If the neon line looks streaky, add a second thin coat instead of trying to cover in one heavy pass.
Avoid painting directly without masking — wobbly neon edges scream “first attempt.”
14. Fabric patch panel with iron-on stabilizer and top coat seal
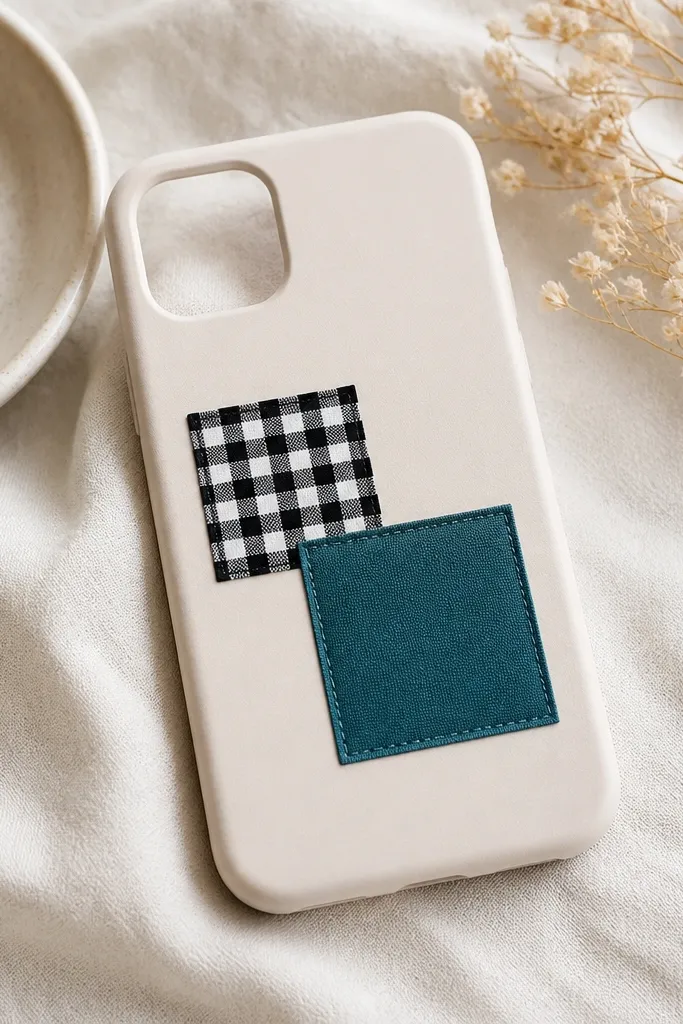
Fabric patches look best when the fabric lies flat and doesn’t fray. I use iron-on stabilizer behind the fabric so it stays smooth, then I seal the front edges with clear medium so threads don’t creep out. Choose one patterned fabric and one solid fabric so the case looks designed rather than accidental. This style flatters people who like texture — it feels like a mini jacket on your phone. It also works with a wide range of skin tones because the fabrics are doing the color work, not your phone case color.
Start by ironing iron-on stabilizer onto your fabric squares, using the fabric’s heat setting and letting it cool. Cut patches to fit the case back, leaving a tiny margin from the camera opening. Clean the case and apply a thin layer of clear fabric glue where each patch will sit, then press the patch down and hold. Once set, brush clear medium along the patch edges like you’re painting a seal, not covering the whole patch. After it dries, apply a final thin clear top coat over the patches so the surface feels smooth for pockets.
Pro tipUse a small foam brush for edge sealing — it stops glue ridges that catch lint.
AvoidAvoid fabric with loose weave — it frays under top coat and looks fuzzy at the edges.
15. Laminated faux marble paper wrap with corner trimming
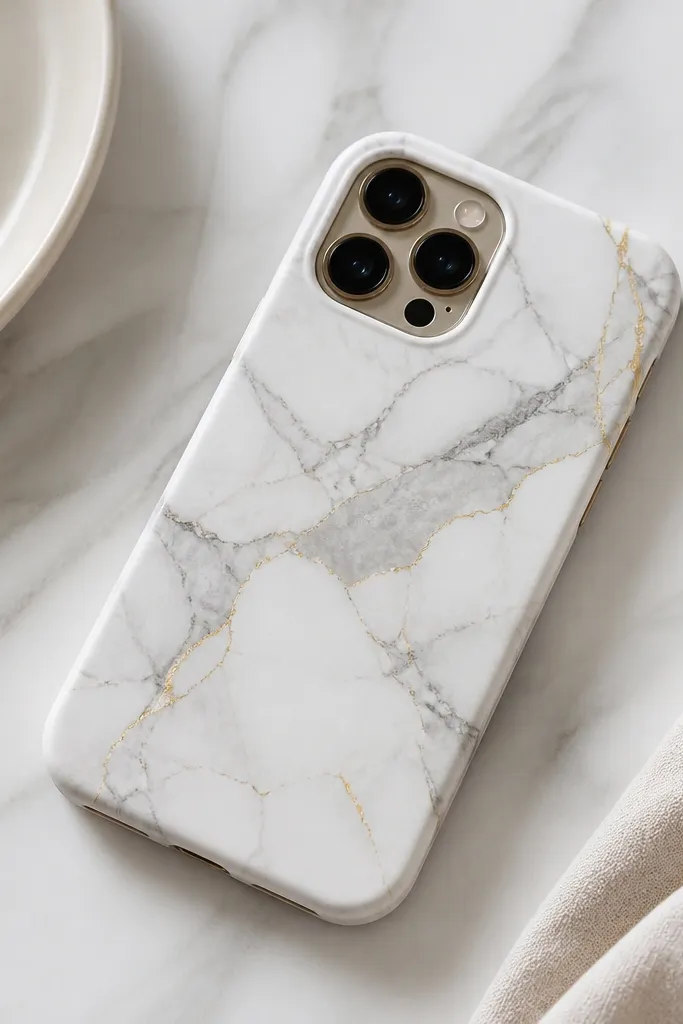
Paper wraps can look really clean when you laminate and trim properly. Faux marble paper in white/gray with gold veins looks luxe without the weight of resin. The laminate prevents the paper from absorbing oils and keeps it smooth in pockets. This style flatters anyone who likes a calm, expensive look, especially with silver jewelry. It also photographs well because marble patterns reflect light in a soft way instead of glittering.
Start with a matte TPU case so paper grips better, then clean with alcohol. Cut faux marble paper to cover the back and slightly wrap toward the sides, leaving openings for the camera and buttons. Apply a thin layer of Mod Podge or clear adhesive medium to the paper back, press it onto the case, and smooth with a plastic card. Laminate on top with clear self-adhesive film, then use a craft knife to trim around the camera opening and button cutouts. Finish by sealing the edges with a tiny brush of clear medium so paper never lifts.
Trim in two passes: cut around the opening first, then do a second micro-trim after the adhesive fully sets.
Avoid one-time thick trimming — paper tears around corners and leaves jagged edges.



