1. Vanilla Bean Snowflakes (Matte White + Gold Thread)
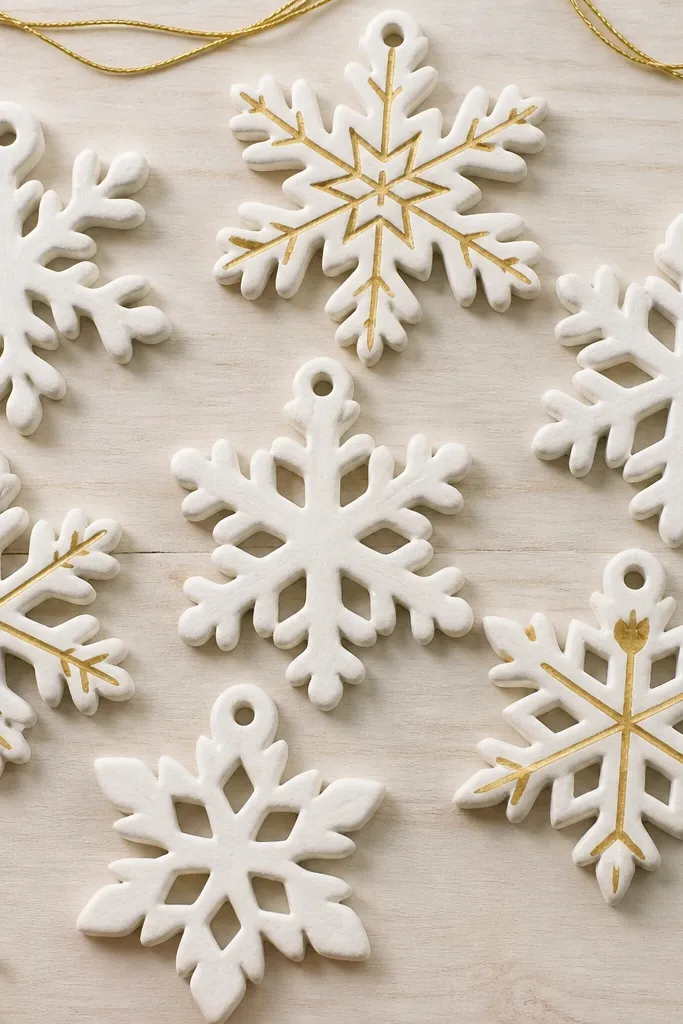
These are the ornaments I reach for when the room needs a calm, wintery look. The dough stays white, the surface dries smooth, and the gold lines catch light without looking metallic-plastic. I’ve used this for people who hate “shiny glitter everywhere” — the matte finish looks more like ceramic. They look best with cool-toned palettes like navy, silver, and icy gray, and they sit nicely on a mantel because the edges stay crisp.
Start by mixing 2 cups flour, 1 cup fine salt, 3/4 cup warm water, and 1 tablespoon cornstarch for extra smoothness. Roll to 1/4 inch, cut snowflakes, and poke a 1/8 inch hole at the top before baking. Air-dry 45 minutes until matte, then bake at 200°F (95°C) for 2 hours, turning the tray once halfway. Cool in the turned-off oven with the door cracked 20 minutes. Paint the raised “veins” with acrylic craft paint thinned slightly with water, then seal with matte acrylic medium; thread with gold embroidery floss through the hole.
If your gold paint looks streaky, add one drop of flow improver to your palette and keep strokes light.
Don’t bake at 300°F to speed it up — these will crack even if they look done on the outside.
2. Cocoa Speckle Reindeer Faces (Warm Brown + Cream Eyes)
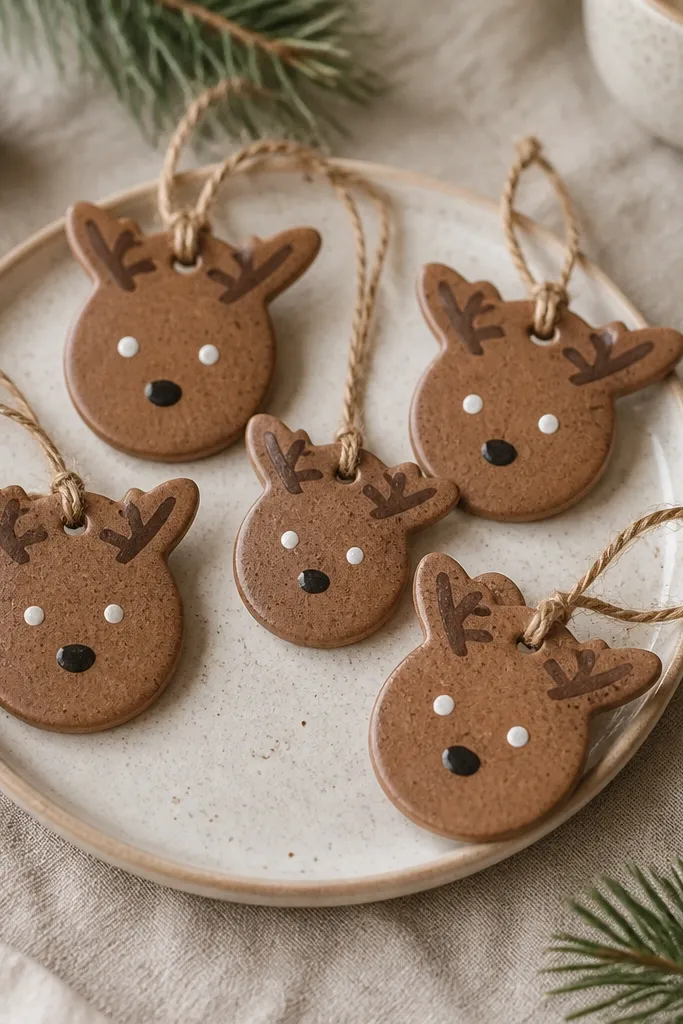
This look gives you that cozy, bakery vibe without fake “farmhouse” fluff. Cocoa in the dough makes tiny specks that hide minor surface bumps, so even if your cuts aren’t perfect, it still looks intentional. I’ve hung these on a tree with burlap ribbon and they look great against green needles and warm lights. They flatter warmer undertones and look especially good with cream, camel, and forest green décor.
Mix 2 cups flour, 1 cup salt, 1/2 cup cocoa powder, and 1 cup warm water (add water slowly until it forms a soft dough). Roll to 1/4 inch and cut simple reindeer face shapes; press in small antler details with a sculpting tool or the back of a paintbrush. Air-dry 30-60 minutes, then bake at 200°F for 2 to 2.5 hours. Cool fully, then paint eyes and nose using a small round brush with cream acrylic for the eyes and black for the nose. Seal with matte clear acrylic spray in two light coats.
Pro tipDry-brush the antlers with a flat brush using very little paint — it makes the speckled surface look like fur.
AvoidSkip thick cocoa layers on top; heavy cocoa makes the dough chalky and it powders during sanding.
3. Cinnamon Star Ornaments (Spice-Dipped Look, No Cracks)
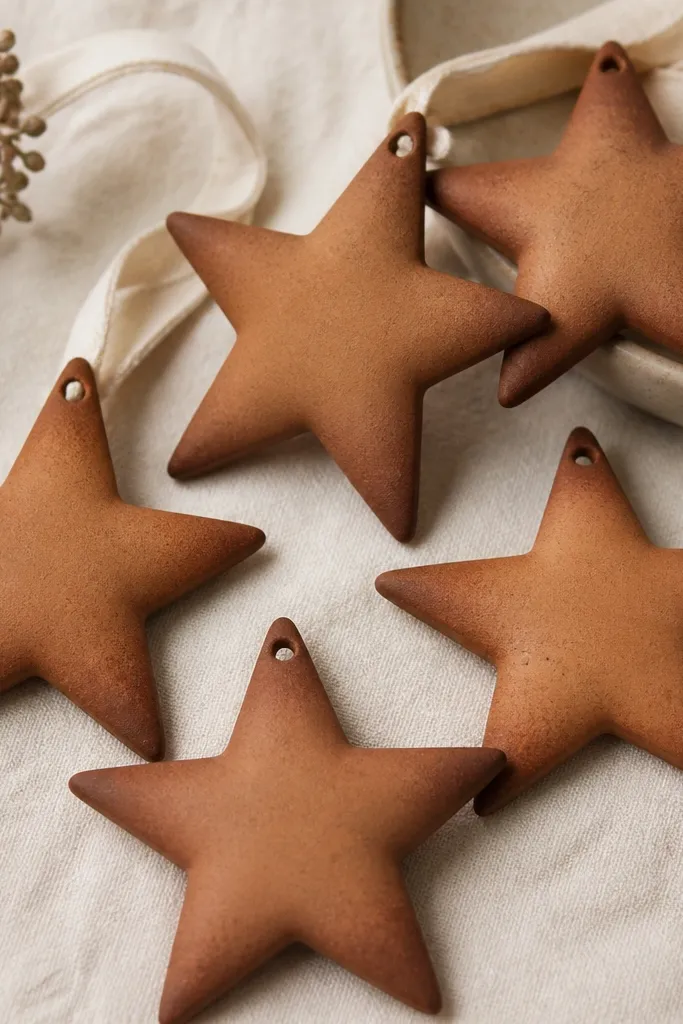
Stars are the easiest shape to make look styled, and cinnamon gives you a natural gradient that looks handmade. I like this when I’m building a coordinated set: they match everything from farmhouse to minimalist because the color sits in the warm middle. The matte surface also hides micro hairline marks that sometimes happen after baking. They look best with tan, rust, and off-white ribbons, especially when you hang them close together so the spice tone reads as one family.
Make the base dough with 2 cups flour, 1 cup salt, and 3/4 cup warm water. Roll to 1/4 inch, cut stars, and poke holes before baking. Air-dry 45 minutes until matte, then bake at 200°F for about 2 hours. Mix cinnamon with a little water to make a thick paste, then brush a thin coat onto the tips only while the stars are completely cool. Let dry overnight, then seal with matte acrylic medium so the spice stays put.
Use a fan brush for the gradient — it deposits less paste and keeps the edges clean.
Don’t mix cinnamon into the whole dough — it makes the dough fragile and easier to chip at the points.
4. Rosemary Pine Trees (Green Wash + Woodgrain Lines)
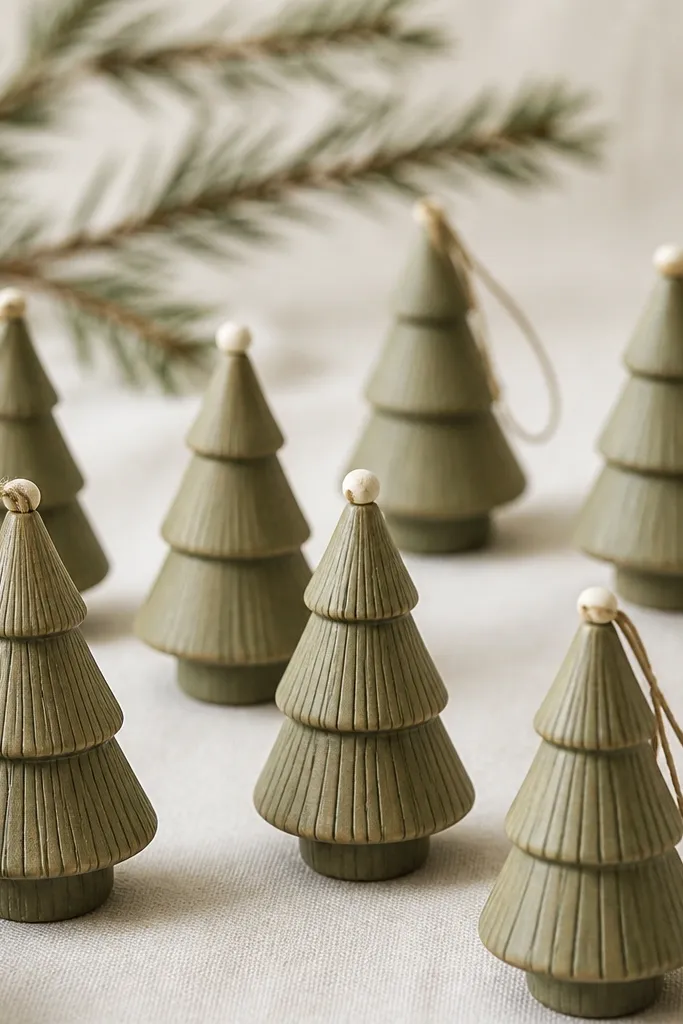
This is the ornament I make when I want “outdoor cabin” vibes without going full rustic. The green wash looks like stained wood once you add the line work, and the pine tree silhouette gives you instant holiday shape. I’ve used it for people who want color but not bright neon — it reads soft under warm lights. These look great on white or beige trees and pair nicely with twine, dark green, or plaid ribbon.
Mix 2 cups flour, 1 cup salt, 1 cup warm water, and add 1 teaspoon olive oil to reduce surface cracking. Roll to 1/4 inch, cut pine trees, and add a tiny hole with a skewer. Air-dry 45-60 minutes, then bake at 200°F for 2 to 2.5 hours. Paint with diluted olive acrylic (about 1 part paint to 2 parts water), then use a fine liner brush to pull vertical woodgrain lines. Seal with satin clear acrylic so the wash doesn’t flatten completely.
Let the green wash dry 20 minutes before line work — lines stay crisp instead of bleeding.
Don’t skip the olive oil — the surface dries too fast and hairline cracks show on the flat faces.
5. Marbled Ornament Spheres (Two-Tone Float Paint, Clean Edges)
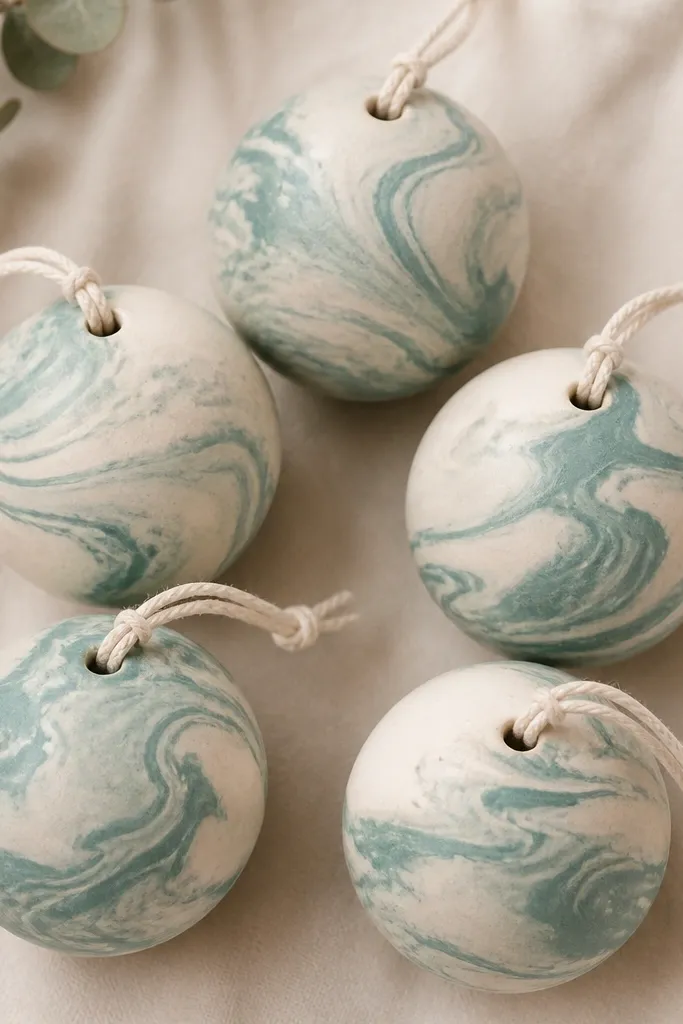
Marble looks fancy, but it’s surprisingly forgiving when you do it on spheres. The dough’s natural matte surface grabs paint in a way that creates swirls without needing expensive tools. I like muted teal and cream because it looks modern on white trees and doesn’t clash with silver tinsel. These flatter just about any décor style, but they look especially good against dark ornaments where the marbling reads clearly.
Roll dough to 1/4 inch and use a 1.5-inch cutter or a bottle cap to cut circles. Stack two circles and press lightly only if you want a thicker sphere look; otherwise use single. Air-dry 45 minutes, then bake at 200°F for 2 hours. Cool fully. Paint one coat of cream, dry 15 minutes, then drop diluted teal paint on top and swirl with a toothpick in small circles. Seal with matte acrylic medium so the swirls stay soft, not glossy.
Pro tipUse toothpick swirls that stay in the top half so the bottom looks grounded instead of chaotic.
AvoidDon’t flood the paint — thick paint pools and makes the sphere look uneven.
6. Black Licorice Buttons (Glossy Mini Ornaments)
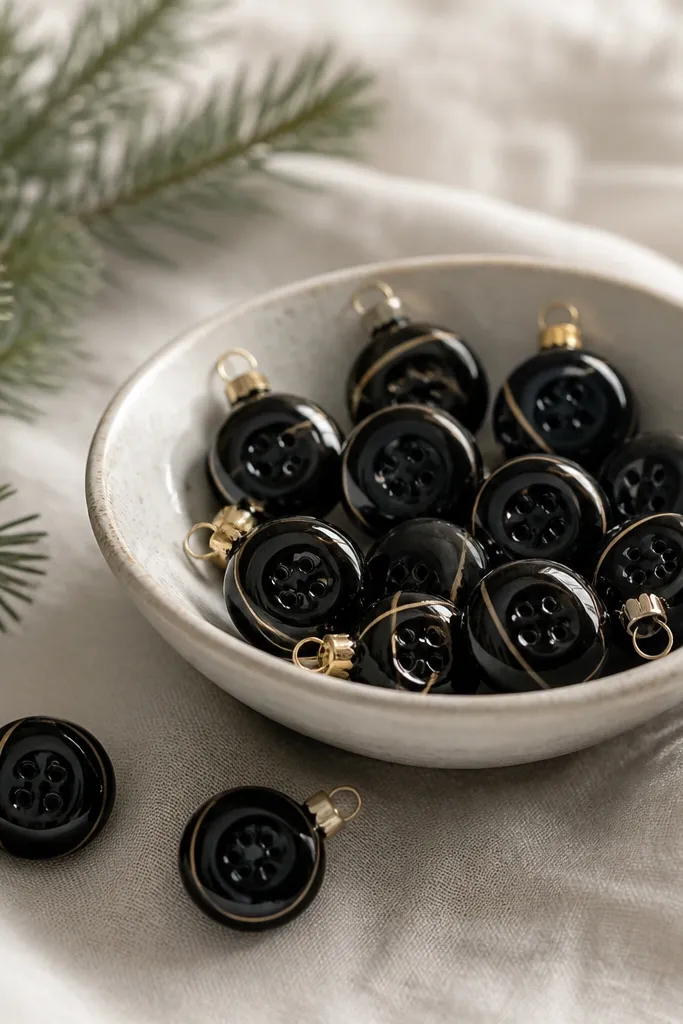
These are playful and graphic, and they photograph well because the gloss catches light. I made a batch for a friend’s studio party and they looked like tiny store-bought décor. The trick is using a dark dough or a dark paint base plus a true gloss topcoat. They look best with metallics — silver, chrome, and warm gold — and they stand out against white or light gray trees.
Mix 2 cups flour, 1 cup salt, and 1 cup warm water. Add 2 tablespoons activated charcoal powder for a deep black (mix until fully dark). Roll to 1/4 inch, cut 1.25-inch circles, and poke a hole at the top edge for hanging. Air-dry 45-60 minutes, then bake at 200°F for 2 hours. Paint a thin black acrylic coat if needed, let dry, then apply a gloss clear acrylic spray in two coats. Add a tiny cream stripe with a toothpick and seal again with gloss.
If charcoal leaves a dusty film, wipe the surface with a dry cloth before the first clear coat.
Don’t use matte sealer on black; it turns the color flat and hides the button shine.
7. Lavender Heart Tags (Pastel Hearts + Twine)
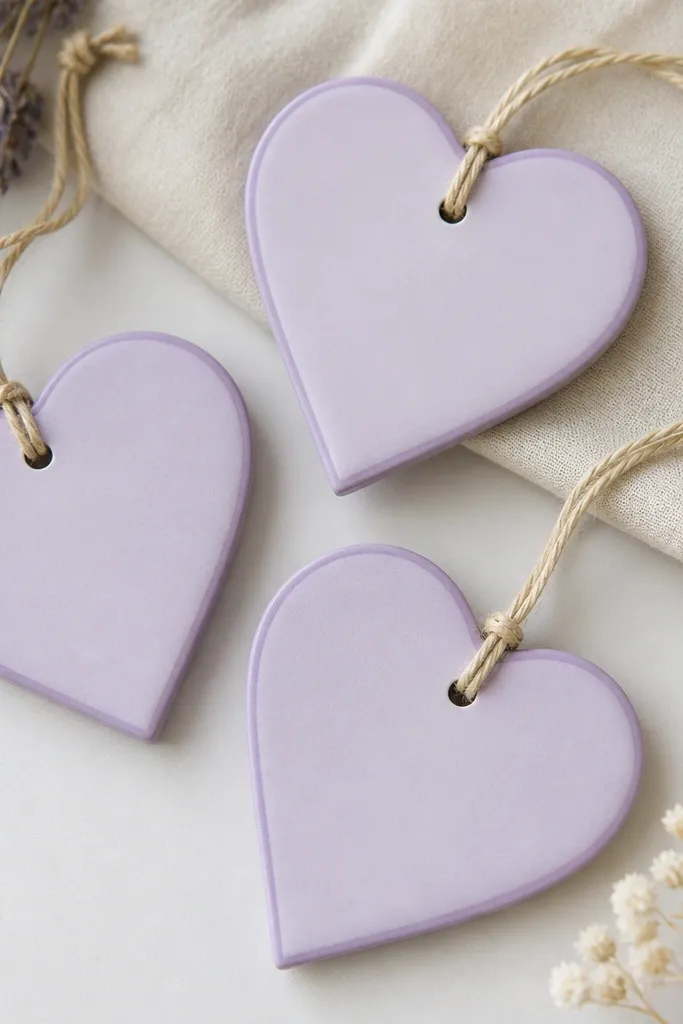
Heart tags look sweet without needing glitter. Lavender is a color that flatters cool skin tones and makes your photos look soft and clean. I like this set on a tree with natural wood beads and cream ribbon because it reads like stationery. The matte finish keeps it from looking like a toy, and the twine makes it feel grounded.
Make dough with 2 cups flour, 1 cup salt, and 3/4 cup warm water. Roll to 1/4 inch, cut hearts, and poke a hole at the top center. Air-dry 45 minutes until matte, then bake at 200°F for 2 hours. Cool fully. Paint with pale lavender acrylic in two thin coats, then add a slightly darker lavender edge using a sponge (tap lightly). Seal with matte acrylic medium; thread beige twine through the hole and tie a tight knot.
Use a makeup sponge for the edge; it creates a soft fade instead of hard brush lines.
Don’t paint while the dough is warm — the paint cracks along the pores.
8. Sunburst Starbursts (Gold Leaf Tape + White Base)
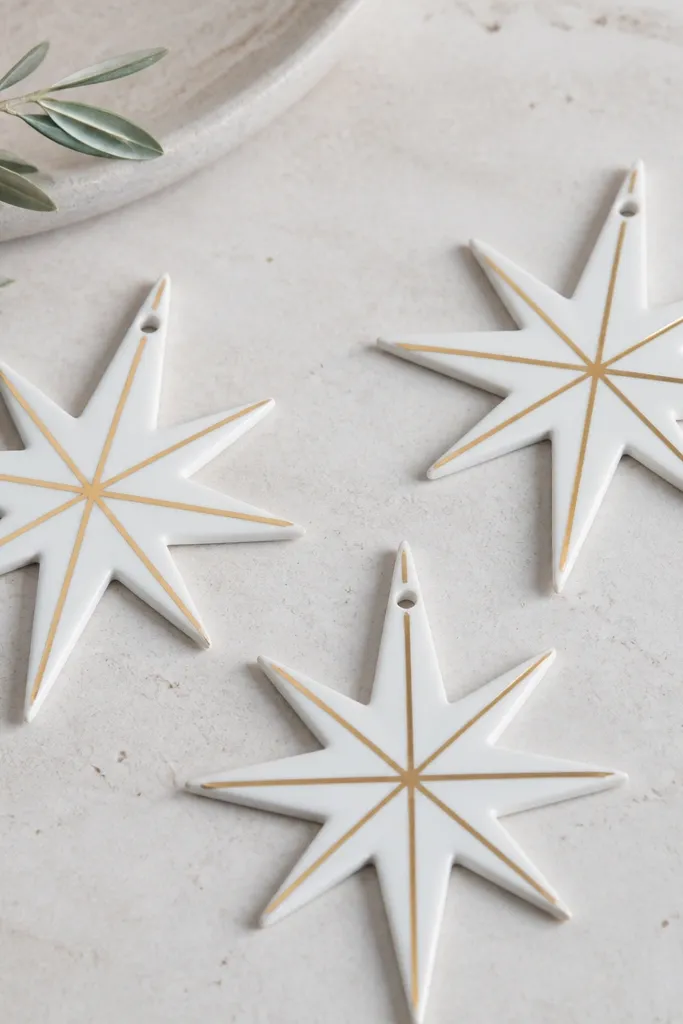
Gold leaf tape is the cheat code for “expensive” without actual gold leaf chaos. The white base keeps the look bright, while the gold radiating lines make the ornament feel like it belongs in a boutique gift wrap. I use this when I want a modern holiday palette that works with black and white décor too. These suit people who like graphic shapes and clean lines.
Roll dough to 1/4 inch and cut starburst shapes. Air-dry 30-45 minutes, then bake at 200°F for 2 hours. Cool completely. Paint the entire ornament with white acrylic and let dry 1 hour. Cut thin strips of gold leaf tape and place them from the center out along the rays; press with a plastic tool so edges stick. Seal with matte acrylic medium over the tape so it doesn’t snag on fingers.
Press tape with a credit card edge — it follows the angles and keeps strips straight.
Don’t apply tape before the paint cures; it lifts and leaves gaps.
9. Candy Cane Stripes (Red Dough + White Gloss)
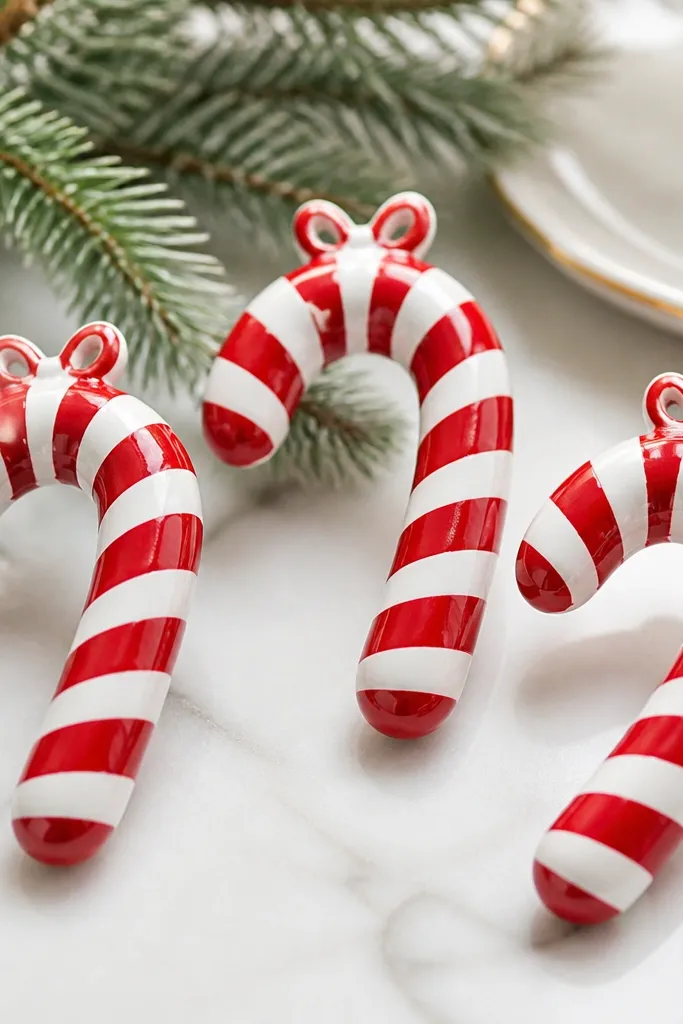
Candy canes look instantly recognizable, but they crack easily if you handle them like thick cookies. This version keeps the dough at 1/4 inch and uses a white gloss topcoat so it looks like candy. I’ve hung these on a small tree in a kitchen window and they glow under morning light. Red and white also look sharp on darker walls and work with black-and-red décor.
Mix 2 cups flour, 1 cup salt, 3/4 cup warm water, and add red food coloring gel until the dough turns a deep candy red. Roll to 1/4 inch and cut candy cane shapes using a candy cane cookie cutter or template. Air-dry 45 minutes until matte. Bake at 200°F for 2 hours, then cool in oven with door cracked for 20 minutes. Paint the white stripes with acrylic white using a thin brush, then seal with gloss clear acrylic spray in two coats.
Paint stripes after baking and cooling; it keeps the red from bleeding into white areas.
Don’t bend fresh dough around a form; it creates stress lines that split after drying.
10. Blue Ice Drops (Icy Blue Wash + Crystal Glitter)
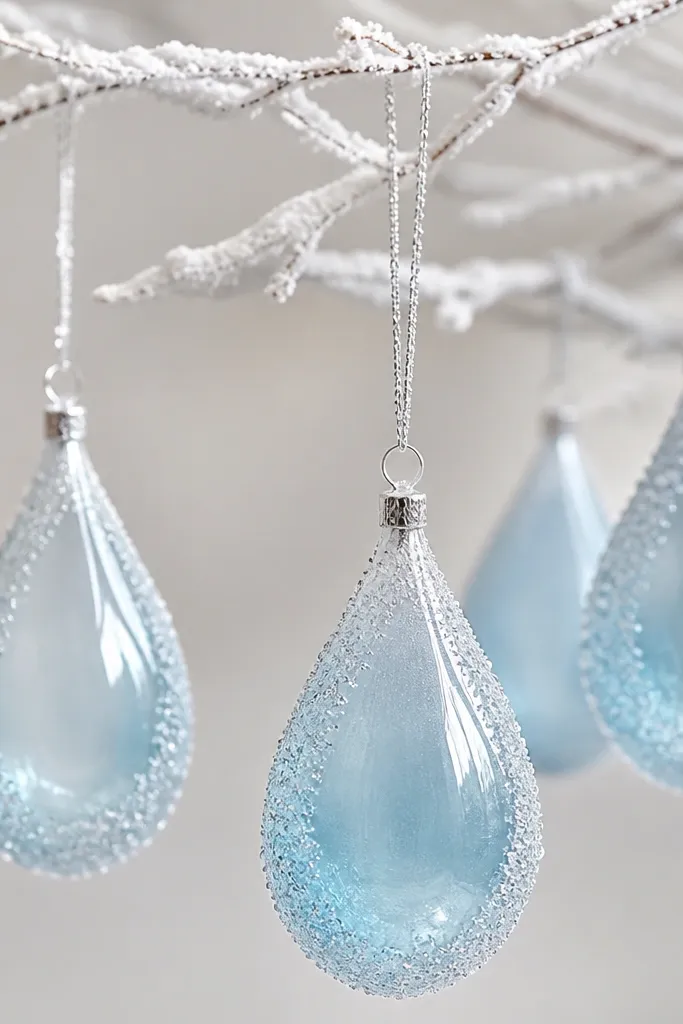
These read like ice and look great on silver hooks. The crystal glitter is fine, so it doesn’t chew up the surface like chunky glitter does. I like pale blue because it makes warm indoor lights feel cooler and cleaner. These work well if your décor is silver, light gray, or white with blue accents.
Roll dough to 1/4 inch and cut teardrops. Air-dry 45 minutes until matte, then bake at 200°F for 2 hours. Cool fully. Mix pale blue acrylic with a little water and brush on in two thin layers, pulling the darker color toward the top. Let dry 15 minutes, then paint a small amount of clear tacky medium around the edge only and sprinkle fine crystal glitter. Seal with clear acrylic spray once the glitter is set.
Pro tipUse a small paintbrush to tap glitter into corners so it doesn’t leave bald spots.
AvoidDon’t use craft glitter; it’s too chunky and makes the surface feel rough.
11. Terra Cotta Pot Men (Terracotta + Tiny Green Moss)
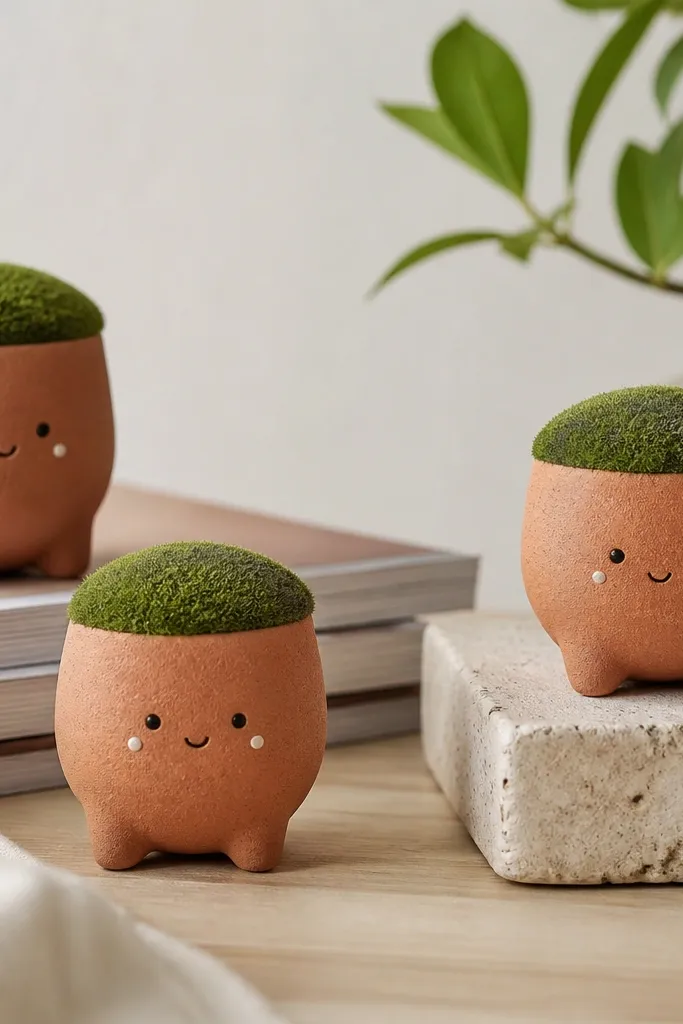
These are fun for kids' parties and also look cute as “mini house” décor on a desk. Terra cotta is forgiving because it hides small tool marks, and the moss top gives texture that reads from across the room. I’ve made these for friends who like earthy colors and they always get compliments because the faces are simple but expressive. They look best with warm lights and natural materials like jute and wood beads.
Make base dough with 2 cups flour, 1 cup salt, 1 cup warm water, and add 1 tablespoon cocoa or cinnamon for a warm undertone. Roll to 3/8 inch if you want a sturdier pot shape, then cut pot outlines and add a small face with a toothpick. Air-dry 60 minutes, bake at 200°F for 2.5 hours, and cool slowly in the oven. Paint terra cotta acrylic on the pot body, then stipple green craft paint on the top rim. Sprinkle a tiny pinch of model moss on the wet paint, then seal with matte clear spray.
Pro tipUse a stippling sponge for moss so it looks like texture, not a flat blob.
AvoidDon’t make the pot walls too thin; thin walls chip at the rim after sealing.
12. Cream Lace Cutouts (White Base + Silver Outline)
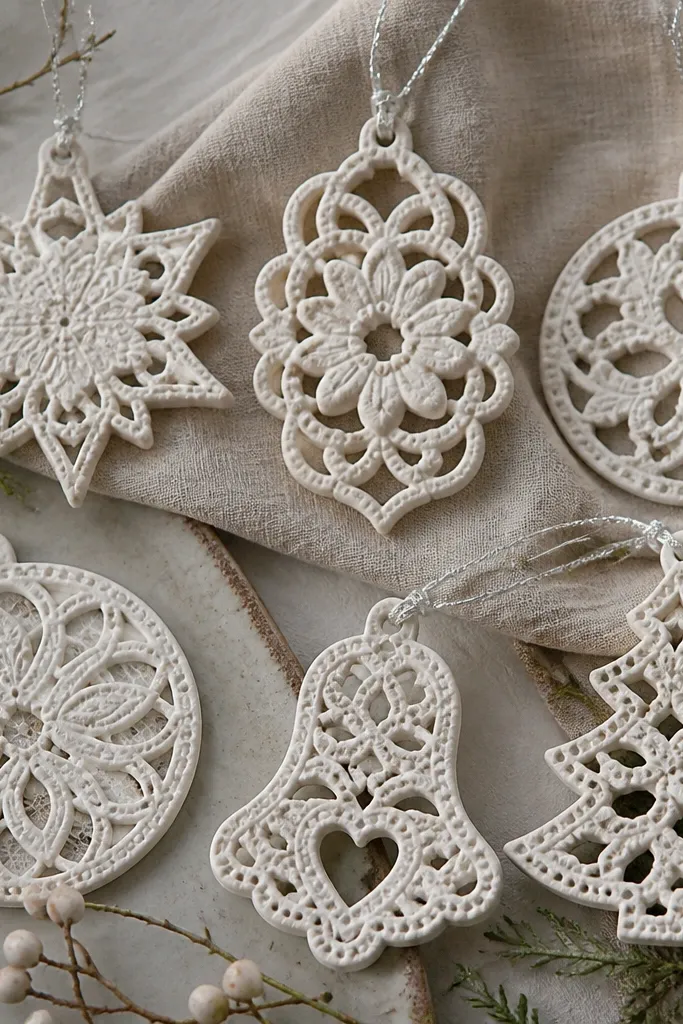
Lace cutouts look delicate, but you can still keep them crack-free by sticking to flat designs and careful drying. The cream base keeps it soft, and the silver outline makes the pattern pop without using heavy metallic fill. I made these for a friend’s baby shower and they looked like little ornaments from a high-end stationery shop. They flatter minimal décor and look great when you hang them on sheer ribbon.
Roll dough to 1/4 inch, cut lace-style doily ornaments using a lace cookie cutter or silicone lace mold. Air-dry 30-45 minutes so the surface goes matte. Bake at 200°F for 2 hours, then cool in the oven with the door cracked 20 minutes. Paint with cream acrylic in one thin coat, dry, then outline the raised edges with silver paint using a fine liner brush. Seal with matte acrylic medium.
If the lace edges look fuzzy, lightly sand after the first seal coat dries — it smooths without losing the pattern.
Don’t sand before sealing; you’ll smear the dough and create weak spots.
13. Forest Pine Cones (Brown Dough + Dry-Brushed Highlights)
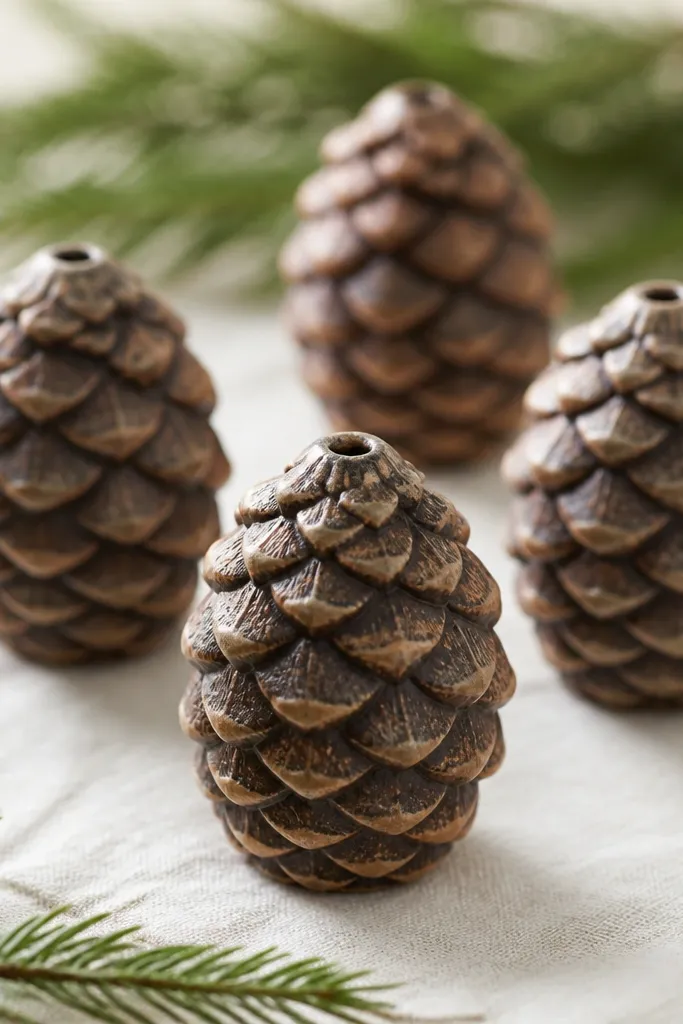
Pine cones are the ornament shape that hides flaws the best because the texture does the camouflage work. Dry-brushing gives you that “real thing” look even on homemade dough. I like these when I’m decorating with green garlands and warm white lights because the brown tones look natural. They also look good on wreaths because they’re small and don’t fight with other textures.
Roll dough to 3/8 inch for pine cones so the scale details don’t snap. Mix 2 cups flour, 1 cup salt, and 1 cup warm water, then press into pine cone molds or hand-shape with a sculpting tool. Air-dry 60 minutes until matte. Bake at 200°F for 2.5 hours. Cool fully, then paint base brown acrylic. Dry-brush lighter tan on the scale tips and add a tiny dot of white in a few spots for highlight. Seal with satin clear acrylic spray.
Dry-brush with almost no paint on the brush — wipe most off on a paper towel first.
Don’t keep the pine cones too wet during painting; wet paint fills the grooves and looks flat.
14. Rainbow Confetti Rounds (Pastel Dots + Clear Gloss)
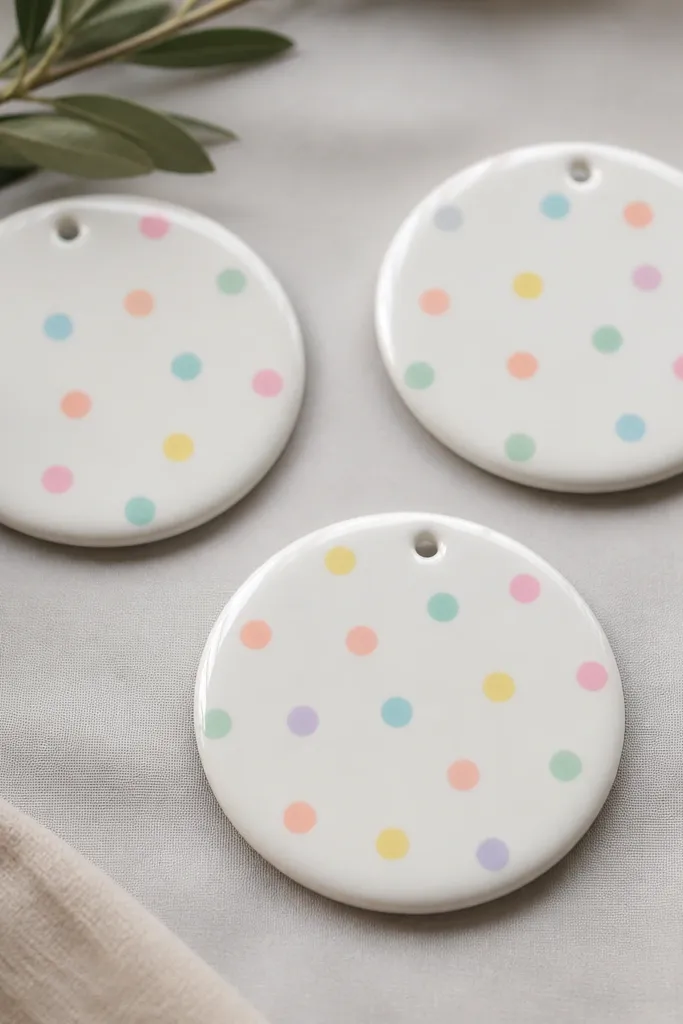
These are the ornaments I make when I want a cheerful look that still feels handmade. White base keeps the dots bright, and a gloss topcoat makes the dots look like candy sprinkles. They look great for year-round parties, not just winter, because the colors stay happy. They flatter bright décor and look especially good on dark green or black tree branches.
Roll dough to 1/4 inch and cut 2-inch circles. Air-dry 45 minutes, bake at 200°F for 2 hours, cool fully. Paint the whole circle with white acrylic, let dry 30 minutes. Use a dotting tool or toothpick to place pastel dots (pink, yellow, mint, lavender, peach). Let dry fully, then seal with gloss clear acrylic spray in two coats.
Pro tipFor crisp dots, load very little paint and press straight down — no dragging.
AvoidDon’t seal before the dots dry; gloss over wet paint smears and dulls the colors.
15. Monogram Initial Tags (One Color + Threaded Bow)
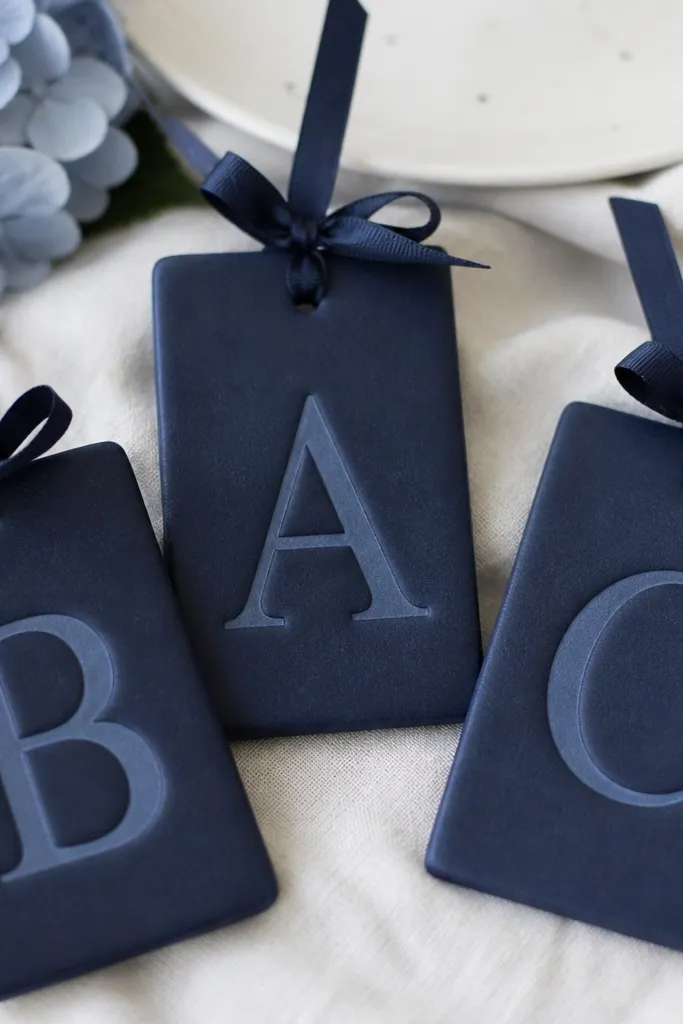
Monograms make ornaments feel personal fast, and the look is clean if you keep it to one color family. I’ve used navy and cream for years because it reads classy and it doesn’t show every tiny flaw. Embossing gives you a raised letter that looks good even without glitter. These work well for adults and for gift sets where you want each person’s piece to feel intentional.
Roll dough to 1/4 inch and cut rectangles or rounded rectangles. Press a cookie cutter letter into the dough or use a letter stamp to emboss; poke a hole at the top center. Air-dry 45-60 minutes until matte, then bake at 200°F for 2 hours. Paint the base navy, then paint the embossed letter slightly lighter navy or cream for contrast. Seal with satin clear acrylic and attach a bow made from 1/4 inch ribbon through the hole.
Pro tipIf embossing tears the edge, smooth with a damp fingertip before air-drying.
AvoidDon’t add multiple colors into the same letter — it looks messy on dough.
16. Pearlized Star Ornaments (White Pearly Paint + Thread Loop)
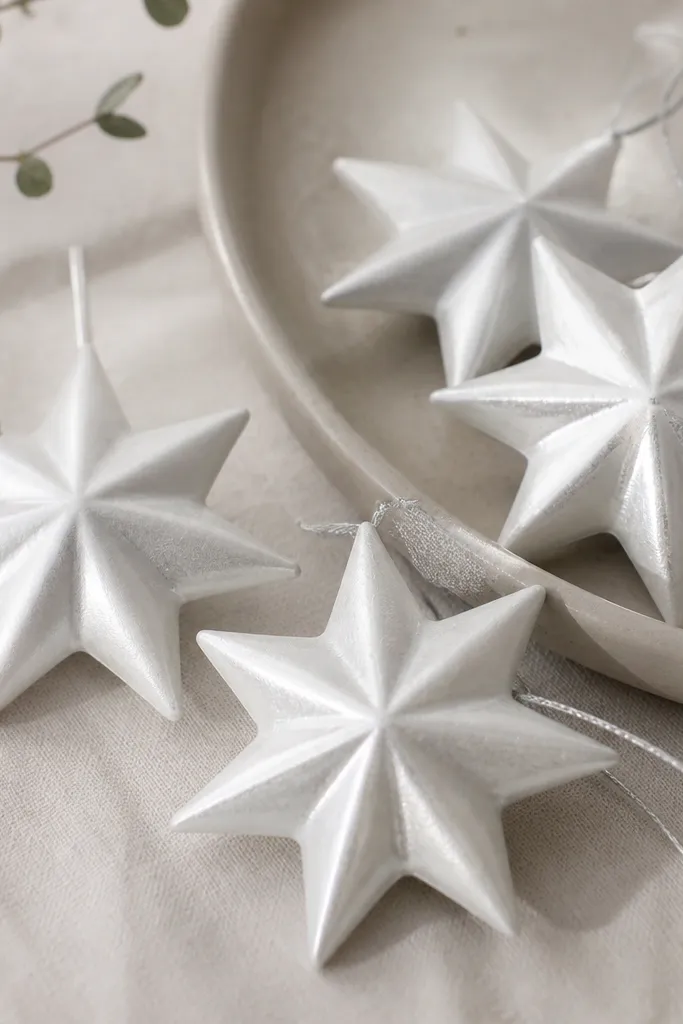
Pearlized paint makes simple stars look like they came from a department store. The shimmer is soft, not flashy, and that’s why it works so well on white trees. I’ve used it for weddings where people want “neutral but special” décor. Pearl white also looks great on warm skin tones because it stays flattering and doesn’t turn gray under lights.
Roll dough to 1/4 inch and cut stars, then poke the hanging hole. Air-dry 45 minutes until matte, bake at 200°F for 2 hours, cool fully. Paint with a pearly white acrylic paint in one thin coat, then a second thin coat for coverage. Let dry, then seal with matte acrylic medium if you want a soft shimmer or satin clear if you want more glow. Thread with light gray embroidery floss and tie a simple knot.
Pearl paint looks better with thin coats; thick coats hide the sparkle pattern.
Don’t use high-gloss sealer on pearly paint — the shimmer turns flat and greasy.
17. Earthy Plaid Ornaments (Brown Base + Green Check Pattern)
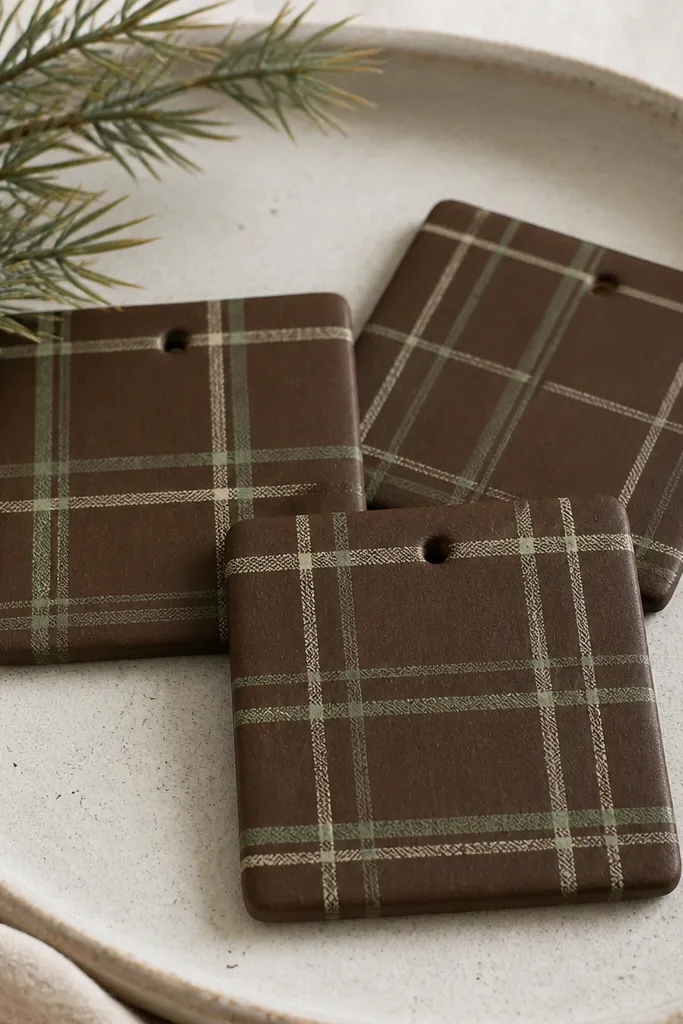
Plaid is one of the easiest patterns to make look intentional if you keep your lines consistent. The earth palette works with just about any holiday décor, especially if you have wood beads, burlap, or neutral stockings. I like brown base because it makes green checks look crisp instead of neon. These are great for gift tags too because they read clearly from a distance.
Roll dough to 1/4 inch and cut squares. Air-dry 45 minutes, bake at 200°F for 2 hours, cool fully. Paint the entire square warm brown. Mark a grid lightly with pencil using 1/4 inch squares, then paint intersecting lines: green for the verticals and cream for the horizontals (or swap if you want). Let dry completely, then seal with satin clear acrylic spray.
Use painter’s tape to mask one set of lines if your hand shakes; press lightly and remove while paint is still tacky.
Don’t freehand tiny plaid lines — wobbles make it look like a child’s craft.
18. Pastel Bunny Ornaments (Soft Pink + Nose Dot)

Bunnies look adorable and they’re forgiving if you keep the ears thicker. Soft pink and cream are the safest color combo when you want “cute” without going childish. I’ve made these for spring swaps and they hang just as well on a Christmas tree if you match the rest of your palette. The matte finish keeps the faces looking like handcrafted porcelain.
Roll dough to 3/8 inch for bunnies so the ears don’t crack at the tips. Cut bunny shapes, then add a small hole at the top of the head. Air-dry 60 minutes, then bake at 200°F for 2.5 hours. Cool slowly in the oven. Paint the body soft pink, belly cream, and add black whiskers with a liner brush; add a tiny nose dot with a toothpick. Seal with matte clear acrylic medium.
Pro tipIf ears look thin, pinch them slightly thicker before baking — it prevents the tip from drying faster than the body.
AvoidDon’t make the ears the same thickness as a flat ornament; thin tips split.
19. Silver Snowball Circles (Two-Coat Metallic + Gloss)
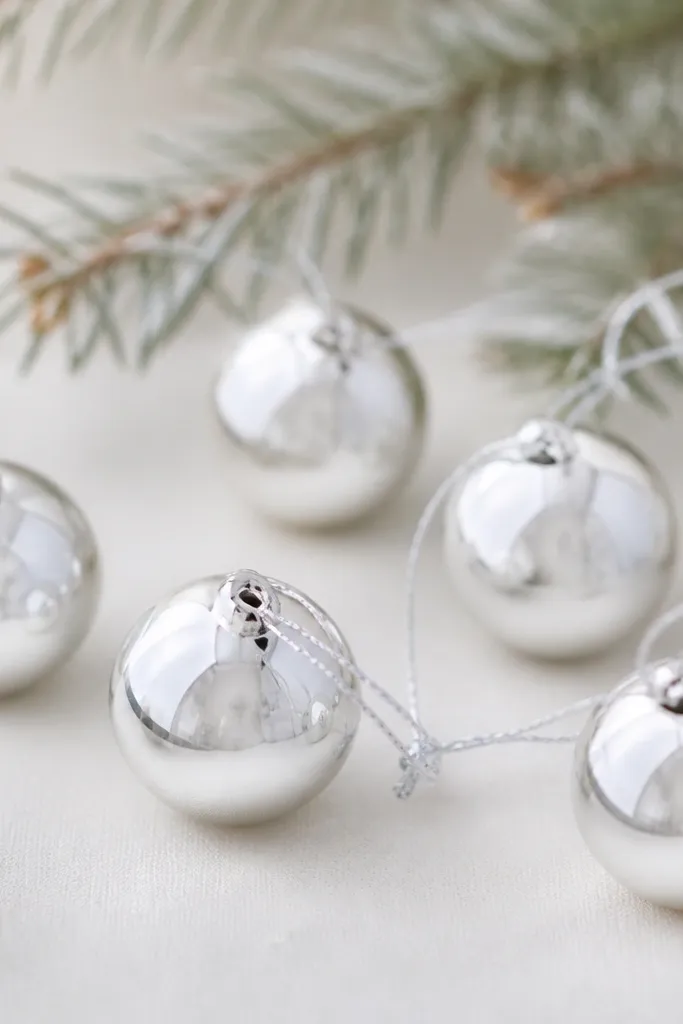
Metallic snowballs look great with warm string lights because the shine makes the whole tree glow. The key is using metallic acrylic properly — it needs thin coats so it doesn’t look patchy. I like adding a darker edge ring for depth, which makes even simple circles look more “designed.” These flatter silver, gray, and icy blue décor and look especially good for people who want a clean, monochrome look.
Roll dough to 1/4 inch and cut circles. Air-dry 45 minutes, bake at 200°F for 2 hours, cool fully. Paint with metallic silver acrylic in two thin coats, letting each coat dry 20-30 minutes. Mix a tiny amount of gray into the silver and paint a thin ring near the edges. Apply gloss clear acrylic spray in one or two coats to lock it in and make it look like glass. Thread silver string through the hole and tie a small loop.
Stir metallic paint thoroughly; it separates fast and causes uneven sparkle.
Don’t use thick metallic paint — it dries bumpy and can crack at the edges.
20. Glazed Pumpkin Minis (Orange Base + Cream Drip)
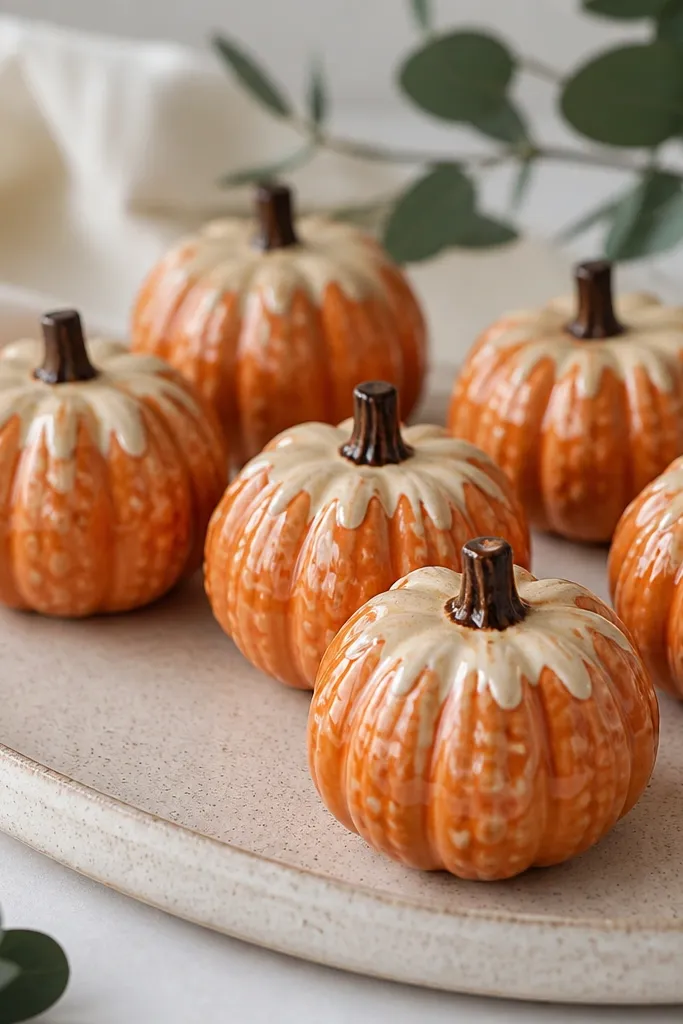
Pumpkin minis look like little glazed candies, and the glossy finish makes them feel more “real” than matte pumpkins. Orange dough plus a cream drip gives you a playful look that still feels polished. I’ve used these for fall, then kept them up for early winter because they don’t scream one season. They look best with cream, black, and deep green décor, especially on wreaths where the shine catches the eye.
Roll dough to 3/8 inch and shape small pumpkins using a silicone mold or by pinching dough into ridges. Add a stem shape on top and poke a hole at the top side. Air-dry 60 minutes, bake at 200°F for 2.5 hours, cool in oven. Paint orange acrylic base, then paint a cream drip using a toothpick — touch the drip at the top and pull down slightly. Finish with gloss clear acrylic spray in two coats.
Pro tipFor cleaner ridges, use the back of a butter knife to press grooves before baking.
AvoidDon’t skip the ridges — flat pumpkins look cheap once painted.