
1. Magnetic diya line on a metal shelf strip
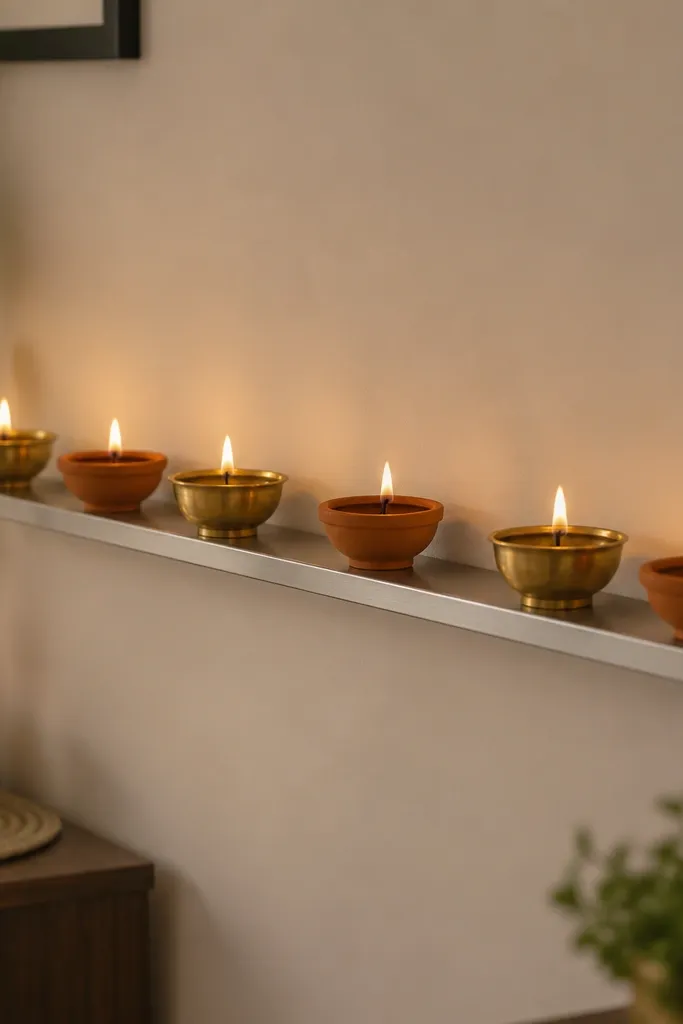
If your wall has any metal surface nearby — a fridge, a thin metal shelf, or even a removable steel strip — this looks crisp and stays perfectly aligned. I like using small brass diya cups with embedded magnets because they don’t wobble when you touch the setup. The warm brass against terracotta gives that old-school festive feel, and the straight line reads clean in photos. This method flatters compact spaces because it uses vertical real estate without cluttering the floor.
Start by buying a thin removable steel strip or a magnetic rail kit made for decor (the kind sold for organizing small items). Clean the metal strip surface with rubbing alcohol and let it fully dry. Place two magnets under each diya holder so the weight sits centered — I use one magnet per side for small holders, two for heavier metal cups. Then build a row: alternate terracotta and brass, keep the gaps about 5 cm apart, and finish with a tiny LED fairy light loop tucked at each end.
Use LED diyas for this look if kids or pets bump the row — the magnets will hold, but you still want zero flame risk near the strip.
Avoid using weak craft magnets — if a holder slides when you nudge it, the whole line looks cheap.
2. Peel-and-stick hook halo behind a diya cluster
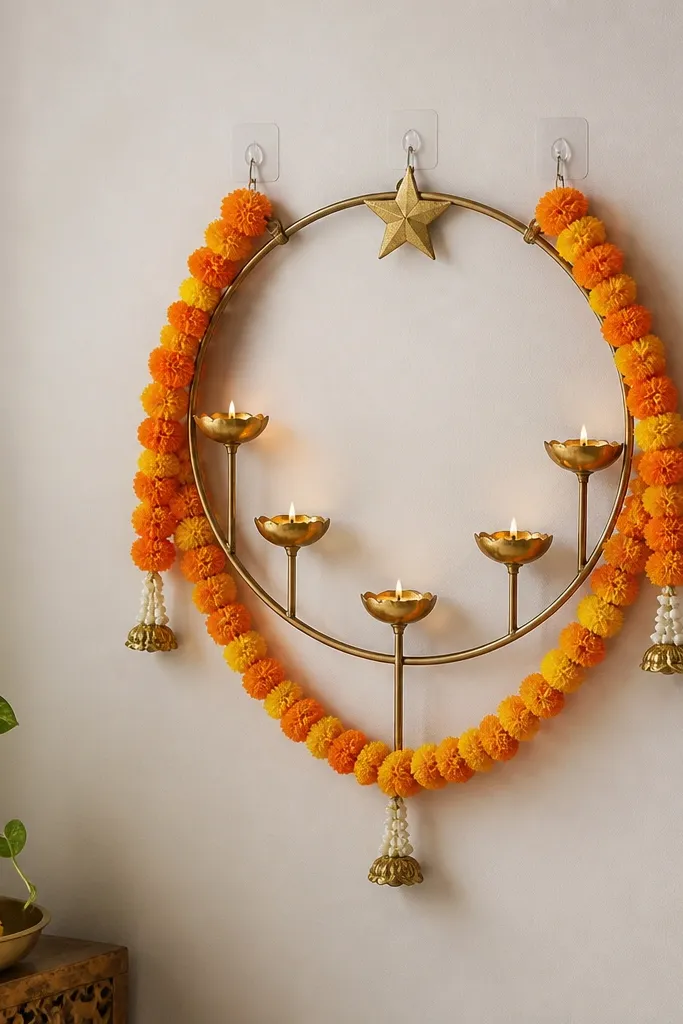
This one is for corners and blank wall space. The halo shape creates a framed look, and the diyas inside feel intentional instead of “just placed.” I’ve used it with 5 diyas — three in front and two slightly back — so the cluster has depth. Warm marigold-orange accents against cream or light gray walls look especially good, and the gold star adds a photo-ready focal point.
Start by marking a small circle on the wall with painter’s tape to guide placement, then attach three peel-and-stick hooks evenly spaced around the circle. Bend a thin wire hoop to match your circle size (about 25-30 cm diameter for 5 diyas) and hang it from the hooks. Add a base layer: place a small tray or round cardboard disc behind the front diyas so the background doesn’t show through. Finally, set the diyas on top of the tray: space them so the front three are evenly spaced and the other two sit slightly behind, then drape faux marigold strands along the inner edge of the halo.
Pro tipCut marigold garland into short 6-8 cm pieces and stagger them around the ring — full-length strands sag and look messy.
AvoidSkip thick foam pads behind the hooks — they make the halo sit uneven and the diyas look off-center.
3. Removable frame tray for a stacked diya centerpiece
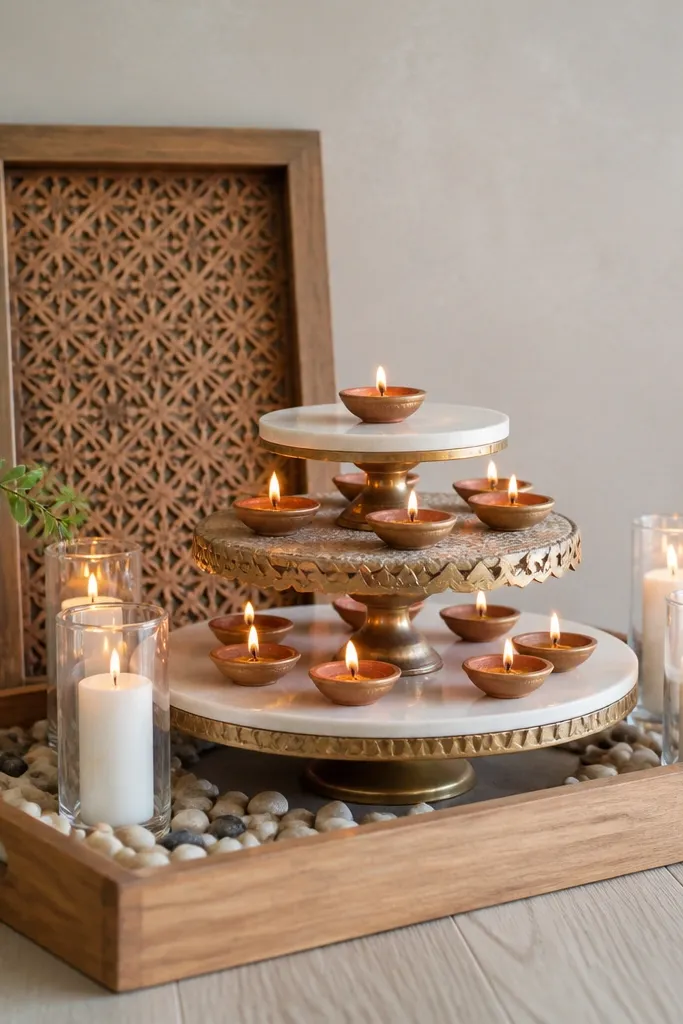
If you want a centerpiece look without drilling, a removable frame tray gives you a stable stage. I use this when I’m setting up for guests because it looks styled from every angle, not just straight-on. The tiered heights make your diyas look “designed,” and the glass sleeves catch light so the whole arrangement glows. This setup flatters a dining table or living room console, and it works great for medium to large spaces where you want something that reads as a focal point.
Start by choosing a tray frame with a flat back — wood or thick acrylic — that can lean against the wall. Build height on the tray using two cake stands: one small (about 18 cm) and one medium (about 22-24 cm). Place the medium stand slightly back from the tray edge, then set the small stand on top for a stacked look. Set 3 diyas on the top stand and 4 on the bottom tier, keeping the spacing about 4-5 cm between holders. Finish with a ring of small white stones or clear glass beads around the lowest tier so it looks clean and intentional.
Wrap the tray frame edges with jute or thin satin ribbon before placing diyas — it hides the “plain” back and makes the whole thing feel finished.
Don’t mix more than two diya holder metals in one centerpiece; when you add brass, silver, and black all together, it looks random.
4. Removable window-mesh diya net for a soft glow
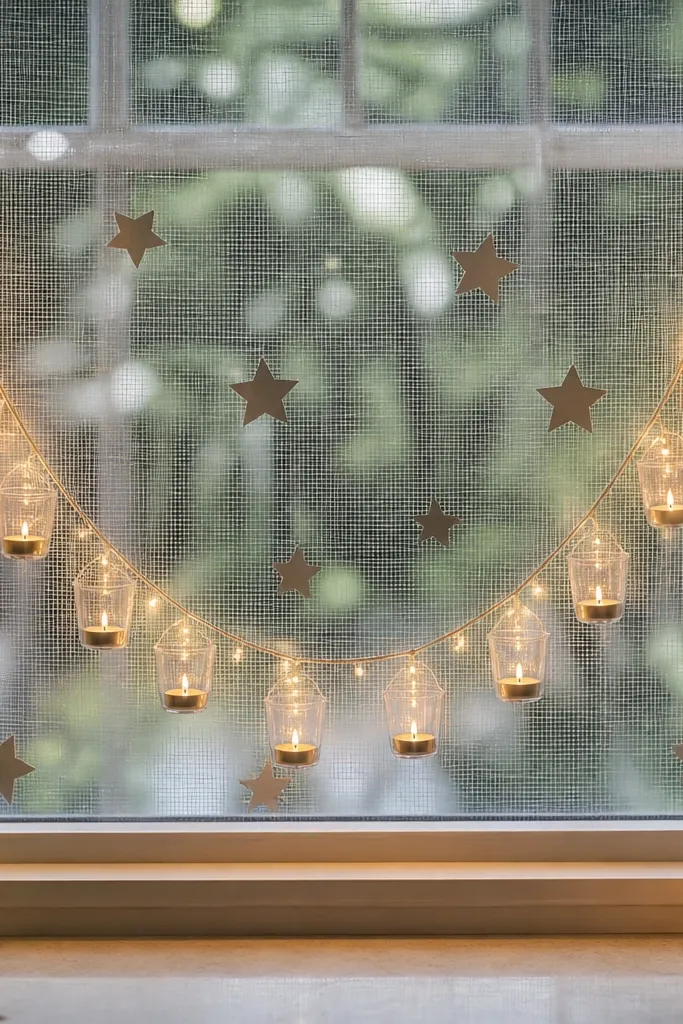
This is the one I use when I want the glow to show from inside to outside. The mesh net spreads the light and makes the display look fuller without adding more diyas. I like clear cups with warm white LED flames because they create a candle-like shimmer through the mesh. On bright days it still looks decorative because the star cutouts and mesh pattern show even when the lights are off.
Start by measuring your window and cutting a lightweight mesh sheet so it covers about 60-70% of the glass area. Attach the mesh edges using removable mounting tape at four corners only, so it comes down cleanly. Place two vertical guidelines using painter’s tape on the window glass to keep your arc centered. Hang 6-8 diya cups from the mesh using small zip ties or clothespin-style clips, keeping the top two cups higher by about 6-8 cm. Wrap a thin strand of warm LED lights behind the cups, then add a few star cutouts on the back side of the mesh so the glow catches them.
Pro tipUse warm white LEDs around 2700K so the light matches real diya color — cool LEDs make it look like a craft project.
AvoidDon’t pull the mesh tight like a drum; slight sag looks cozy, stretched mesh looks like a temporary fix.
5. Table runner plus adhesive-backed mirror tiles for diya sparkle
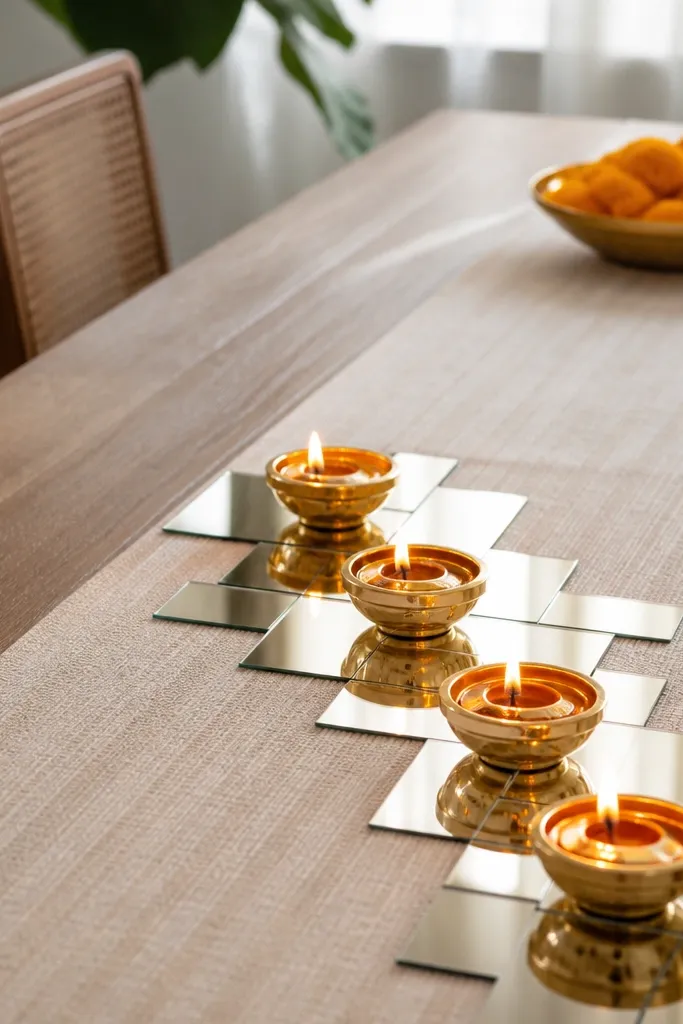
This method turns a simple diya setup into something that looks expensive because the light reflects. Mirror tiles near the diyas multiply the sparkle, and it’s all removable since the tiles are adhesive-backed and designed for decor. I use it when the room lighting is dim or when I’m styling for evening photos. The best look is gold-rim diyas on a cream or beige runner, with marigold-orange accents so the reflections feel warm instead of icy.
Start by laying a table runner in a solid color — cream, oatmeal, or deep olive — and keep it centered. Stick small adhesive mirror tiles (about 5x5 cm each) in a staggered line along the runner edge, leaving 2-3 cm clearance from where people will place plates. Place 4 diyas on the mirror line: two near the front edge and two slightly back, so reflections don’t overlap into a messy glare. Add one grounding element at the far end — a small bowl of marigolds or a cluster of faux leaves — so the display doesn’t look like it’s floating. Finish by checking from the side angle; adjust diya spacing until the reflections form a neat pattern rather than a bright blob.
Wipe diyas and mirror tiles with a dry microfiber cloth right before guests arrive — fingerprints show as dull patches.
Skip colored mirror films; they tint the light and often make terracotta diyas look muddy.
6. Removable no-drill diya wall sconce using command-style strips
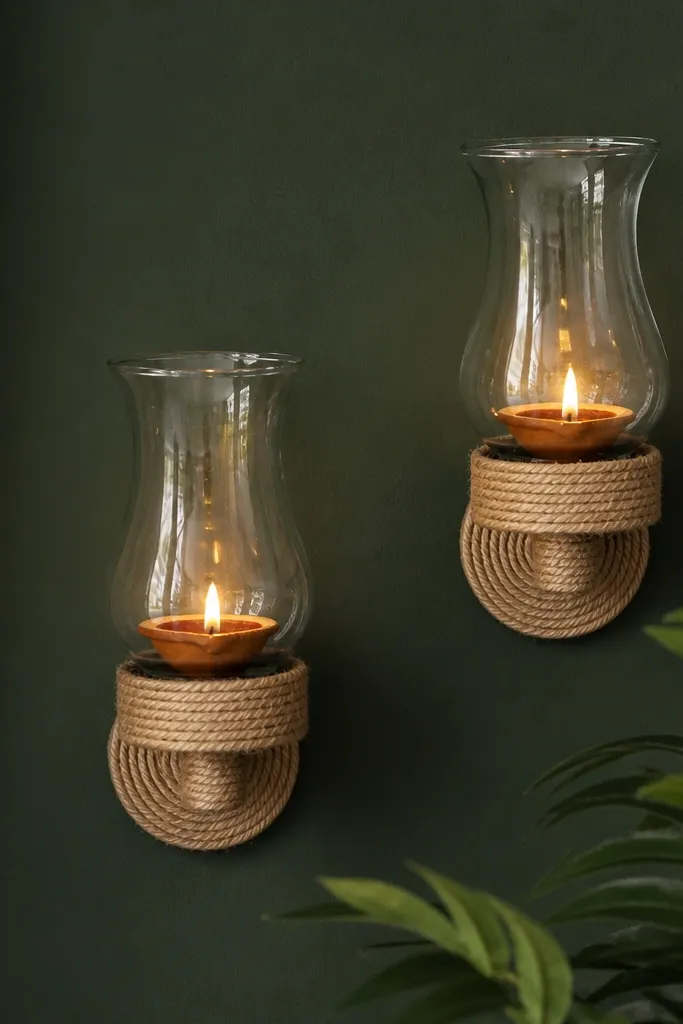
Wall sconces make diyas look architectural. I’ve done this on rental walls by using removable adhesive strips that are rated for decorative items, then attaching a small hurricane-glass holder so the flame sits safely inside. The glass makes the diya feel protected and the wall display looks intentional, not like a random candle taped to a surface. Dark green or charcoal walls make the warm flame glow pop, and the symmetry flatters most room layouts.
Start by choosing two identical sconce holders with mounting points designed for small screws, then ignore the screws and use removable adhesive strips instead. Clean the wall with rubbing alcohol, let it dry, then press the strips to the back of the holder according to the strip instructions. Mount the holders at eye level — about 145-155 cm from the floor to the center of the holder — and press firmly for the recommended time. Put a small diya inside a clear glass hurricane or lantern cup so the flame is contained. Style the pair with one color of glass or metal finish, then add a thin jute wrap around the holder base so it looks handmade rather than purely store-bought.
Pro tipIf you use real flames, place the hurricane glass on top of a small heat-resistant coaster inside the holder so the diya doesn’t stain the base.
AvoidDon’t hang heavy metal sconces with only one strip each; the wobble shows up fast and looks sloppy.



