
1. Mirror tile diya tray with gold foil ring
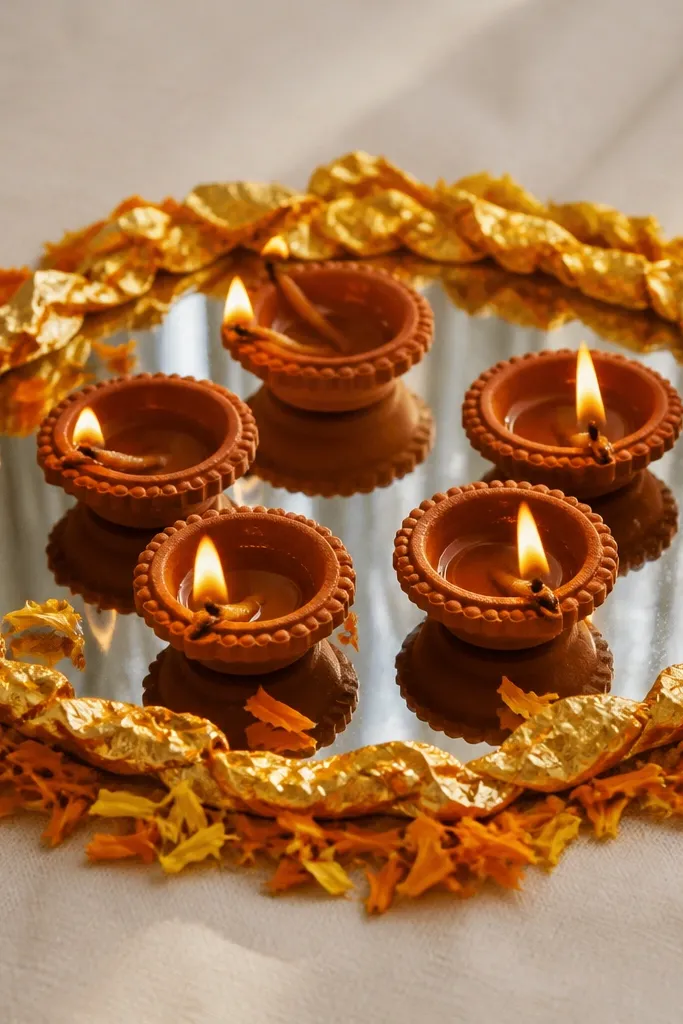
I love this because the flame instantly looks warmer and brighter — mirror tile makes the glow bounce back toward the camera. Use a round mirror tray or a cheap mirror sheet cut to size, then keep the diyas in the center so the ring frames the light. The gold foil ring gives you that festive “finished” edge even if the diyas are plain. It looks best with brass or clay diyas because the gold echoes the metal tone, and it photographs cleanly on dark tablecloths.
Start by placing a mirror tile on a flat surface and wipe it dry so glue sticks. Cut a strip of craft foam or thick cardboard into a ring about 2-3 cm wide, then glue it on top of the mirror in a circle. Wrap the ring with crumpled gold foil, pressing it down so it fills gaps. Arrange 5 diyas inside the ring, then tuck a few marigold petals at two opposite points for color balance.
Pro tipLight one diya first and check that the flame doesn’t hit foil edges directly — trim any sharp foil bits with scissors.
AvoidDon’t skip the ring — placing diyas directly on the mirror without a barrier makes them look like they’re floating.
2. Upcycled mason jar glow cluster
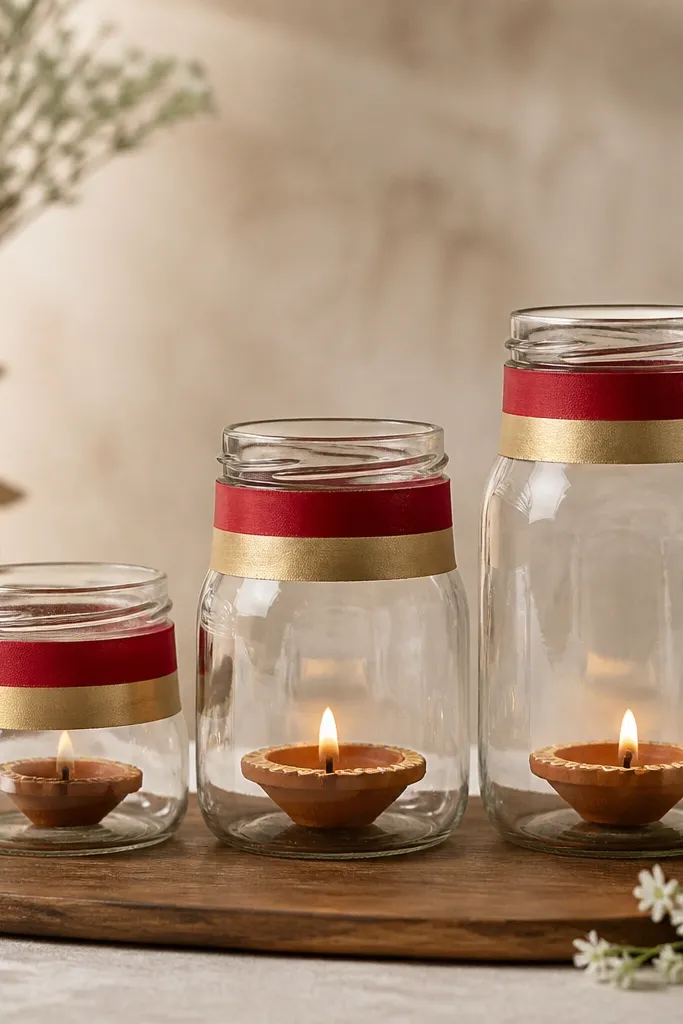
This is my go-to when you want height without complicated stands. The jars act like light wells, so the diya glow looks steady and concentrated instead of flickering all over. Use jars in three heights — small, medium, tall — so your eye climbs upward. The red-and-gold bands make the setup feel Diwali-specific, and the clear glass looks good on both warm and cool skin tones in photos because it keeps the color honest.
Start with 3 clean jars and remove labels. Wrap a 3-4 cm wide strip of red craft paper around each jar neck, then glue it and add a thin gold strip on top for separation. Place a small tea light or diya inside each jar and set the jars on a wooden board. Tie a short jute bow at the base of the tallest jar and scatter a few rice grains or dried petals around the board edges.
Pro tipIf your jars wobble, add a thin felt pad under the jar base — it stops the flame from looking shaky.
AvoidAvoid using glittery paper on the inside — it sheds and can catch on the flame.
3. Coconut-shell diya holders with rangoli sand base
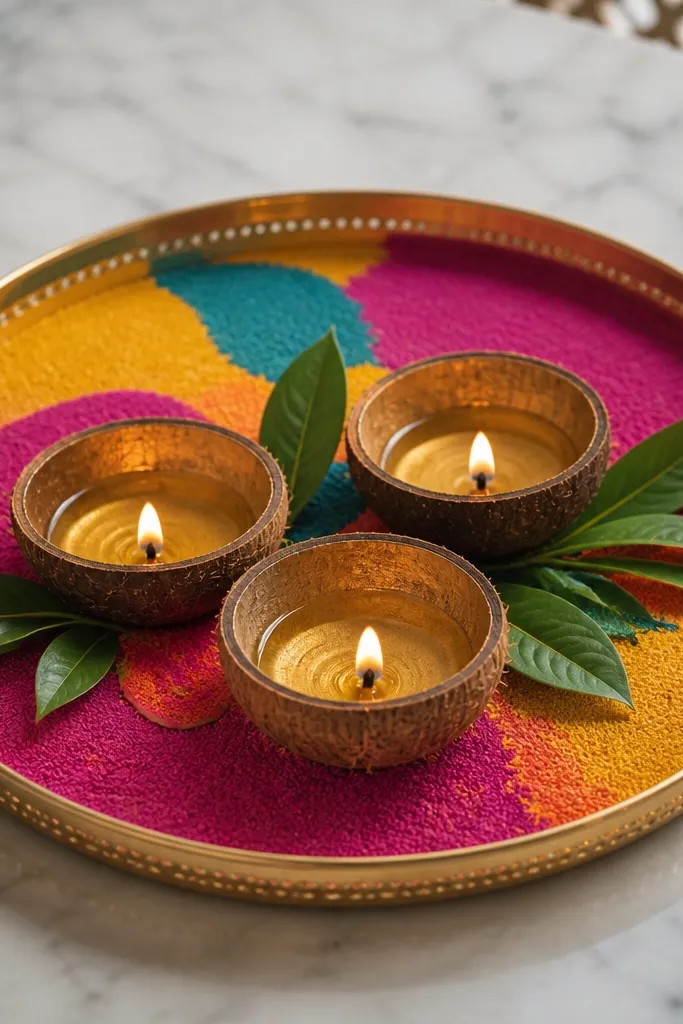
This one looks earthy and expensive because the coconut shells add texture and shadow. The rangoli sand base makes the flame look grounded, not floating, and the green leaf pieces bring in a crisp accent. I use it for daytime Diwali photos because the texture reads even in bright light. It suits almost any color scheme — terracotta shells match gold, marigold, and even modern black-and-gold decor.
Start with a shallow tray and fill it with rangoli powder or colored sand in a smooth layer about 1-2 cm deep. Arrange 3-5 half coconut shells on top, leaving equal gaps between them. Place a diya in each shell and press the shell slightly into the sand so it stays stable. Tuck small leaf cutouts or fresh curry leaves around the shells and add a thin line of white rangoli sand between shells for separation.
Let the sand settle for 10 minutes before lighting — it stops the shells from shifting when heat hits nearby air.
Don’t overfill sand right up to the rim — keep a small gap so flame heat doesn’t scorch the tray.
4. Tea light floating tray with floating marigold petals
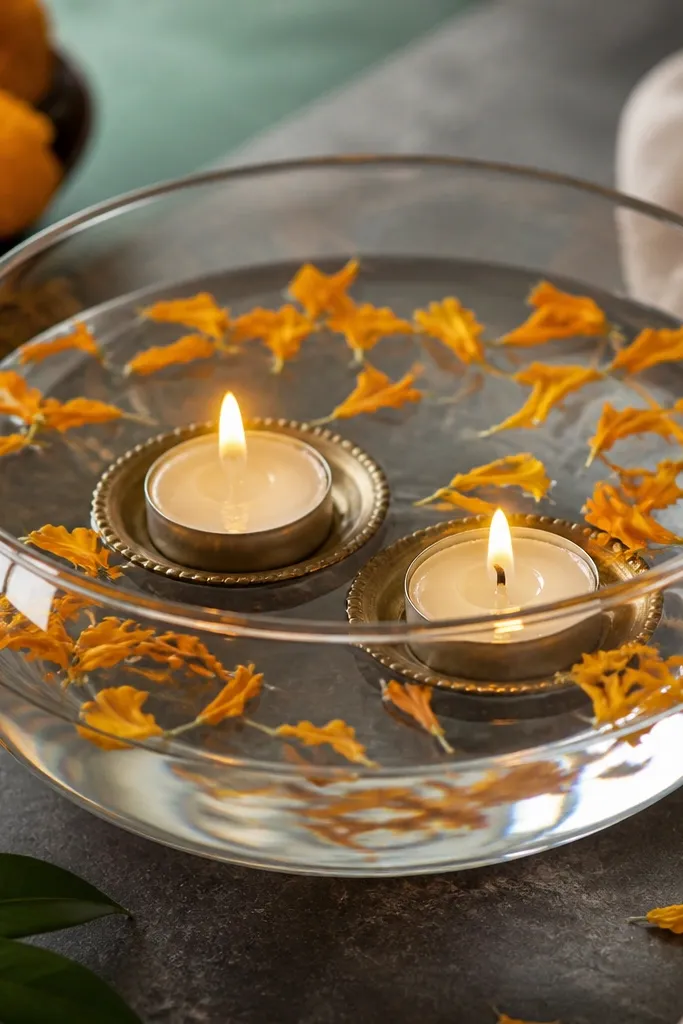
If your budget is tight but you want “wow” photos, this setup delivers. The water surface turns each flame into a soft reflection, so even two tea lights look like a full scene. Marigold petals add color without needing extra decor pieces. This works best for tabletops and entryways where people can stand close and see the reflections.
Start with a shallow glass bowl and add clean water until it’s about 2-3 cm deep. Place small tea light saucers or waterproof holders in the water so the flame sits stable above the surface. Float a handful of marigold petals around the lights, keeping them mostly to one side for a cleaner composition. Add a thin ring of green leaf strips at the bowl edge so the petals don’t look scattered.
Pro tipUse unscented tea lights — strong fragrance can overpower the warm candle smell and makes the setup feel “perfume-y.”
AvoidDon’t light diyas with open wicks directly in water — tea lights with proper holders keep the setup safe.
5. Cardboard step risers with fabric-draped top edge
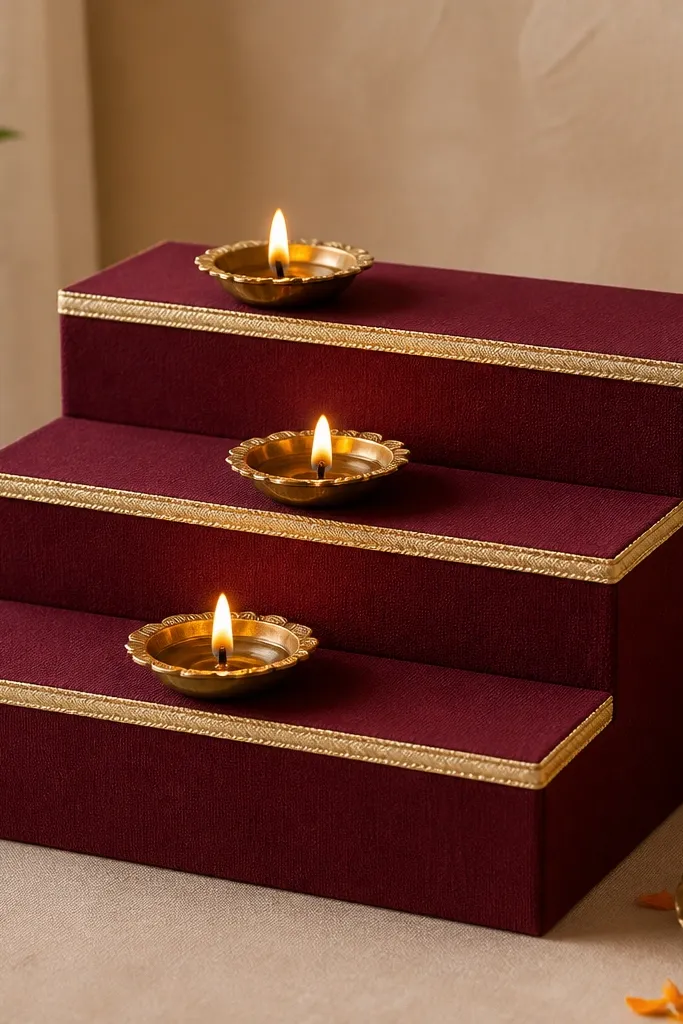
This is how you get vertical drama without buying a stand. Cardboard risers are cheap, and fabric covering makes it look intentional instead of DIY. Maroon fabric plus gold trim makes the warm flame look richer. I like this for family living rooms because the setup looks neat and “decorated” even before the diyas are lit.
Start by cutting thick cardboard into three rectangles for steps — for example, 30x20 cm, 20x14 cm, 14x10 cm. Build a stepped frame with hot glue, then cover each step with maroon fabric, pulling tight at the corners. Add a gold ribbon trim along the front top edge of each step. Place 3 diyas on the top step, 4 on the middle, and 5 on the bottom, then tie a small bow at the side for one focal point.
Test-fit your diyas first — if they lean, add a small glue dot on the step to anchor the base.
Don’t use thin wrapping paper for the steps — it crinkles under heat and looks cheap.
6. String-ribbon arch with diyas on a narrow base
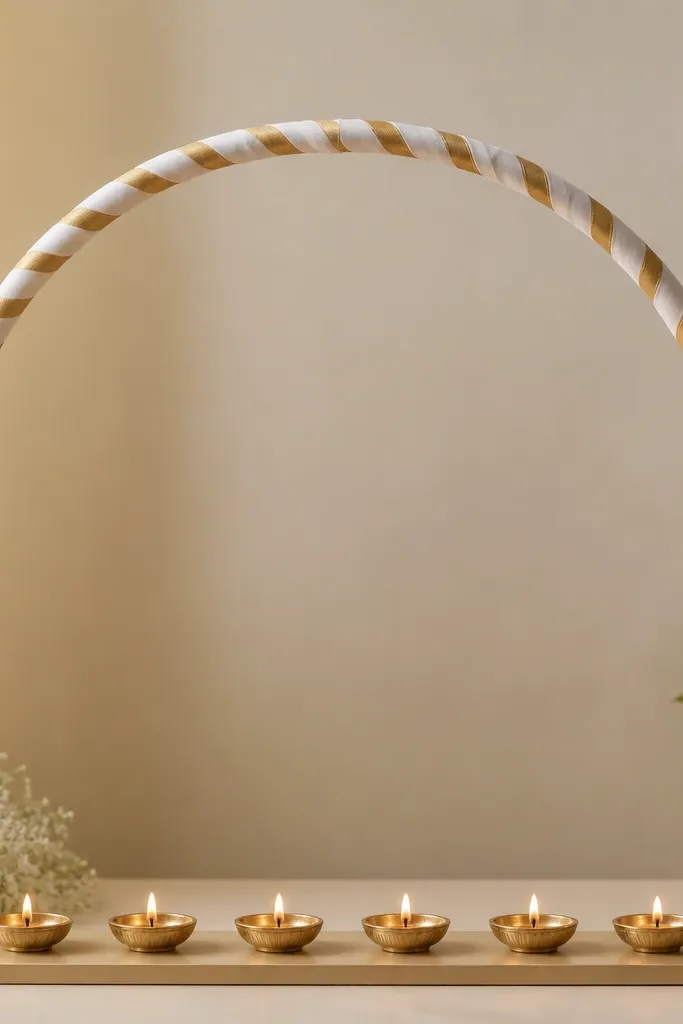
This looks like a salon-level decor piece because the arch creates a clear frame for the flames. The ribbon strings catch light and create a soft sparkle effect, especially if you use satin or organza. It flatters small spaces like a side table because the arch holds attention upward while diyas stay in a neat line. I use it when I want the scene to look “curated” without adding many items.
Start by making an arch from thin PVC pipe or a wire frame, then wrap it with white ribbon strips. Tie 2-3 gold ribbon strands across the arch at different heights so you get a layered effect. Create a narrow base with a wooden plank or thick cardboard strip about 20 cm long and cover it with a gold cloth. Mark six equal spots on the base and place diyas in a straight line, then hang a few ribbon ends to fall between the diyas.
Use ribbon lengths that fall 5-7 cm below the base so they don’t block the flame.
Avoid messy ribbon knots near the center — they shadow the diyas and make the setup look crowded.
7. Broken bangles candle ring for diya glow
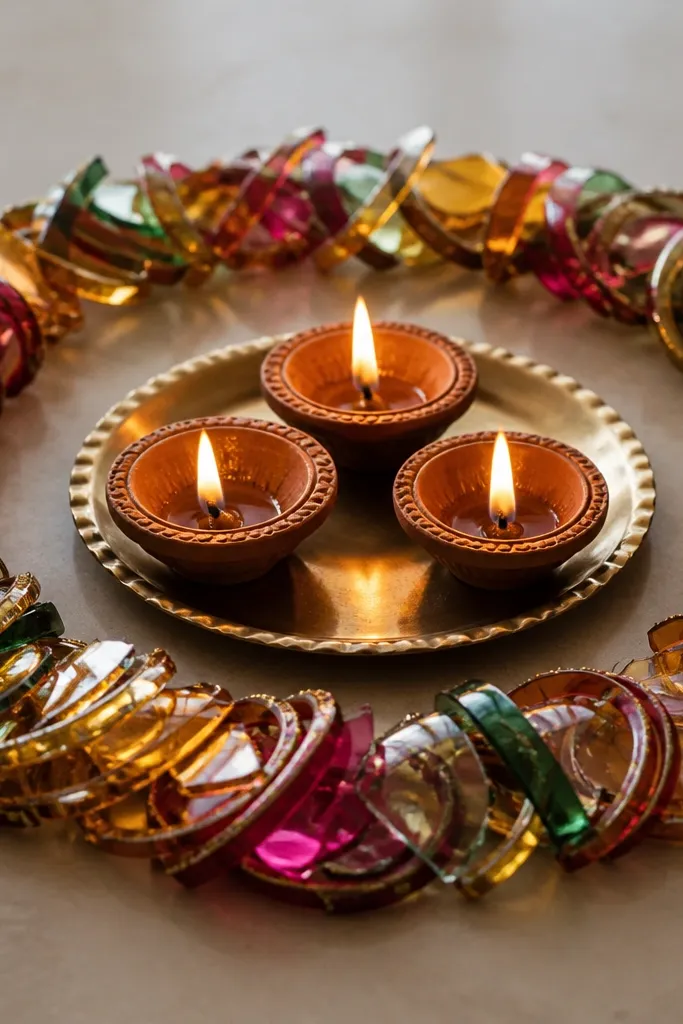
This is one of those budget tricks that looks like you spent more than you did. The glass bangles create micro-reflections, so the diya light turns into glittery sparks around the flame. It looks best with three diyas spaced evenly, not a big crowd, because the ring does the visual heavy lifting. The colors in bangles — especially green, red, and gold — make the glow feel festive without needing extra flowers.
Start by cleaning a small tray and placing a shallow circular base made from thick cardboard or foam. Glue the outer ring material: use broken bangles pieces, pressing them into glue so they sit snugly. Arrange 3 diyas at equal distances inside the ring and check that the flame is centered and not too close to the glass edges. Finish by adding a thin circle of loose rice or colored rangoli at the inner edge to hide any glue line.
Wear gloves while handling bangles — one sharp edge is enough to ruin your day.
Don’t use metal bangles with rough cuts — they reflect harshly and can look jagged next to warm diya light.
8. Net fabric diya canopy with paper tassels
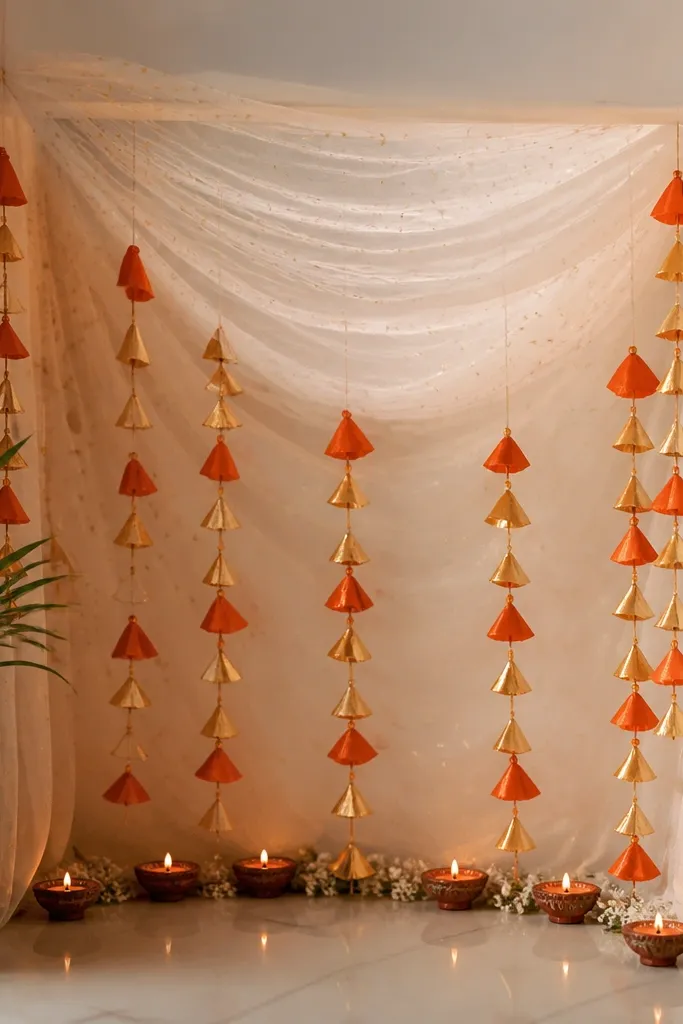
A canopy makes your diya display look like a “photo set” even if you’re using plain diyas. Net fabric softens harsh shadows and gives the flame a dreamy glow, especially at night. Paper tassels add motion and height, and orange-gold matches the traditional palette without feeling old-school. I like this for entryway corners because it hides clutter behind the display.
Start with a small frame made from two sticks and a crossbar, or use an embroidery hoop as the top. Stretch white net fabric across it and tie it tight, then secure with hot glue. Make paper tassels from 2-3 cm wide strips of orange and gold paper, then hang them at 6-8 points across the front. Create a base tray and place 6 diyas in a line under the canopy, leaving a little gap between each for air movement.
Keep the net at least 10-12 cm above the flame line so it doesn’t singe.
Don’t use thin tissue paper tassels — they catch on air drafts and end up messy.
9. Lemon and marigold diya line on a jute runner
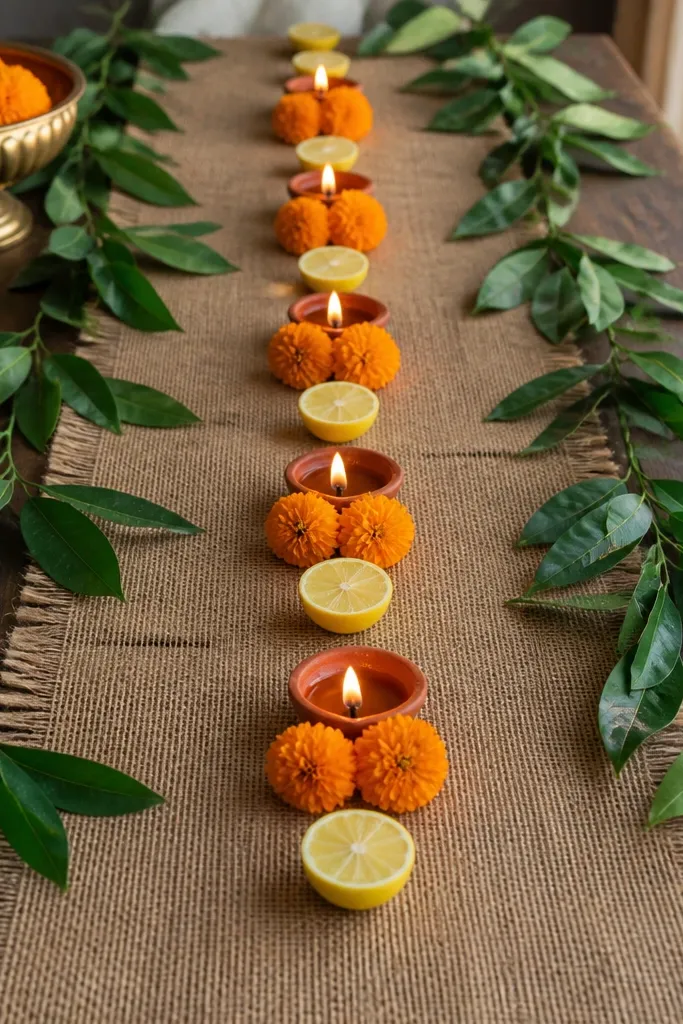
This is the cleanest way I know to get a fresh, bright look with cheap items. Lemon halves add a sunny color that works in daylight and at night, and jute keeps the whole scene grounded. The marigold clusters give you the Diwali signal without needing garlands everywhere. It flatters warm-toned decor and makes your table look styled even before guests arrive.
Start by laying a jute runner on your table or floor. Halve 4-6 lemons and place them in pairs along the runner so they frame the diya line. Arrange 7-9 diyas in a straight row between the lemons, keeping wicks facing the same direction. Tuck marigold clusters and small green leaves at both ends and one middle point so the arrangement feels balanced.
Pro tipWipe lemon surfaces dry right before lighting — wet juice makes the flame area slick.
AvoidDon’t overcrowd the lemons right against the wick area; leave space so heat doesn’t affect the rind.
10. Painted terracotta saucer with rangoli dot border
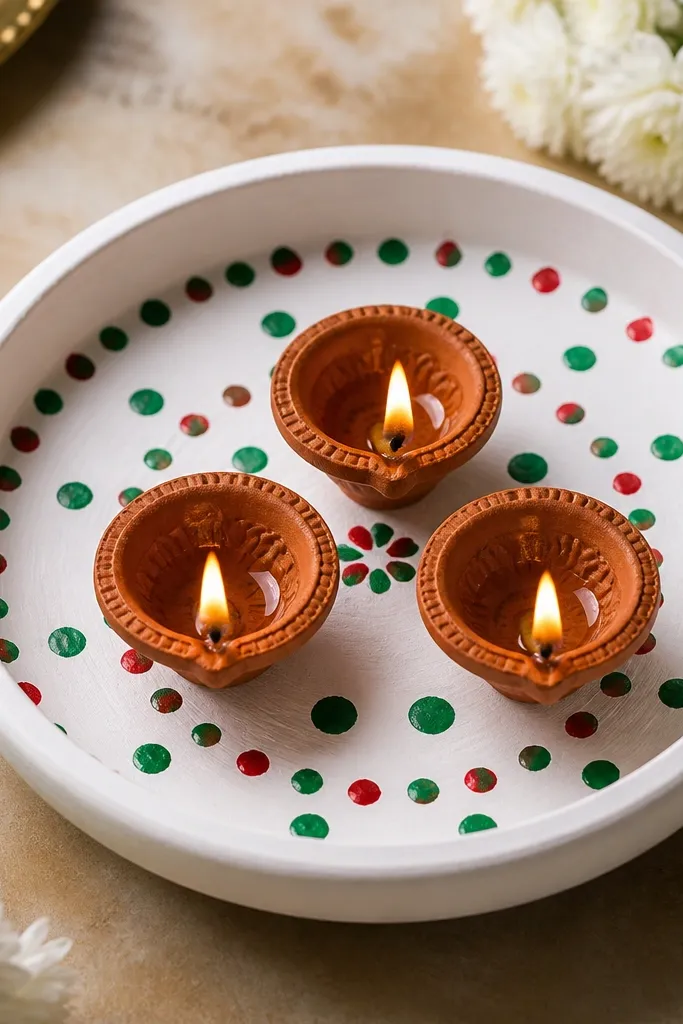
Terracotta already looks festive, but painting it turns it into a centerpiece. The white base makes the diya flames pop, and the dot border adds a traditional touch that reads clearly in photos. This is great for small spaces because you get impact from a single saucer instead of building a big frame. It suits earthy interiors and also looks good against darker walls.
Start with a clean terracotta saucer and paint the inside with matte white acrylic. Let it dry fully, then use a small paintbrush or dotting tool to add red and green rangoli dots around the inner rim. Place 3 diyas inside, spaced so each flame is visible. Add one tiny gold dot between color groups for a finished look.
Pro tipSeal the paint with a clear matte varnish once dry so it wipes clean after use.
AvoidAvoid glossy paint — it reflects the flame too harshly and can look like plastic.
11. Floating diya in flower-shaped paper cups
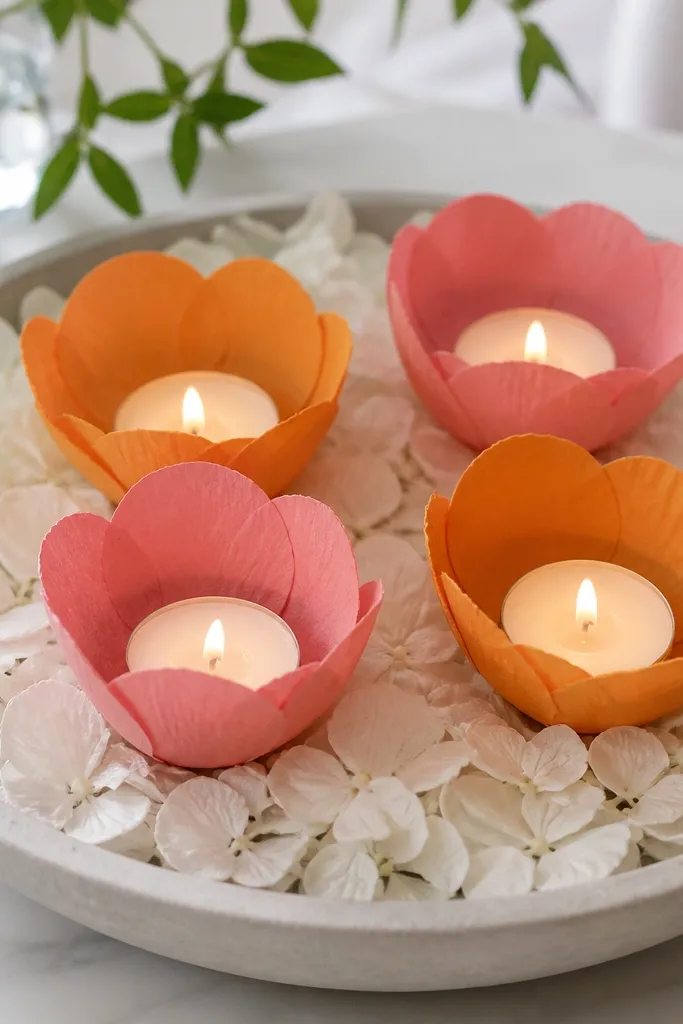
Paper cups are cheap, and when you shape them like flowers, the diya looks like part of the decor, not an afterthought. The tea light sits inside the cup, so the flame looks framed and soft. White petals underneath make the colors read brighter and clean up the tray visually. This works especially well for apartment balconies where you want something pretty without hanging garlands.
Start by cutting flower shapes from thick craft paper — 6 petals per cup, about 8 cm wide. Fold and glue the base so it stands like a little bowl. Place a tea light in each cup and set them on a tray lined with white petals or shredded paper. Arrange 6 cups in a hexagon pattern, then add one small marigold at the center to anchor the layout.
Pro tipUse LED tea lights if you’re placing this near curtains — the look stays the same.
AvoidDon’t use flimsy paper — it warps near heat and makes the cups collapse.
12. Cinnamon sticks and jute wrap diya holders
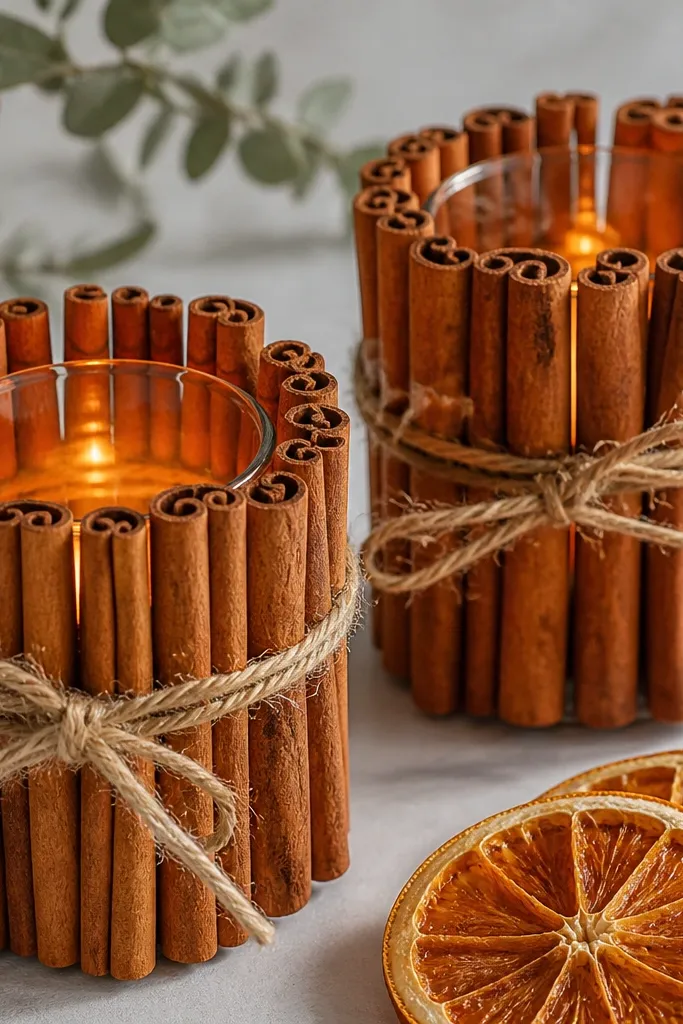
This setup smells like Diwali before anyone even lights it. The cinnamon sticks create a warm, vertical texture, while the jute wrap keeps it rustic and not overly decorative. I like it on windowsills because the sticks catch light and make the glow look layered. It also works with plain diyas, since the holder does the styling.
Start with small glass tumblers or empty jar bottoms and wrap jute twine around the outside in 2-3 vertical sections. Glue cinnamon sticks in a tight bundle around the glass, leaving a small gap at the top. Place one diya inside each holder and set them on a tray. Add dried orange slices at the tray corners and a pinch of cloves for extra texture.
Keep cinnamon sticks dry and away from the flame — heat makes them crack and shed.
Avoid using liquid glue near the top rim; it makes a shiny mess.
13. Rangoli stencil path with diyas on top
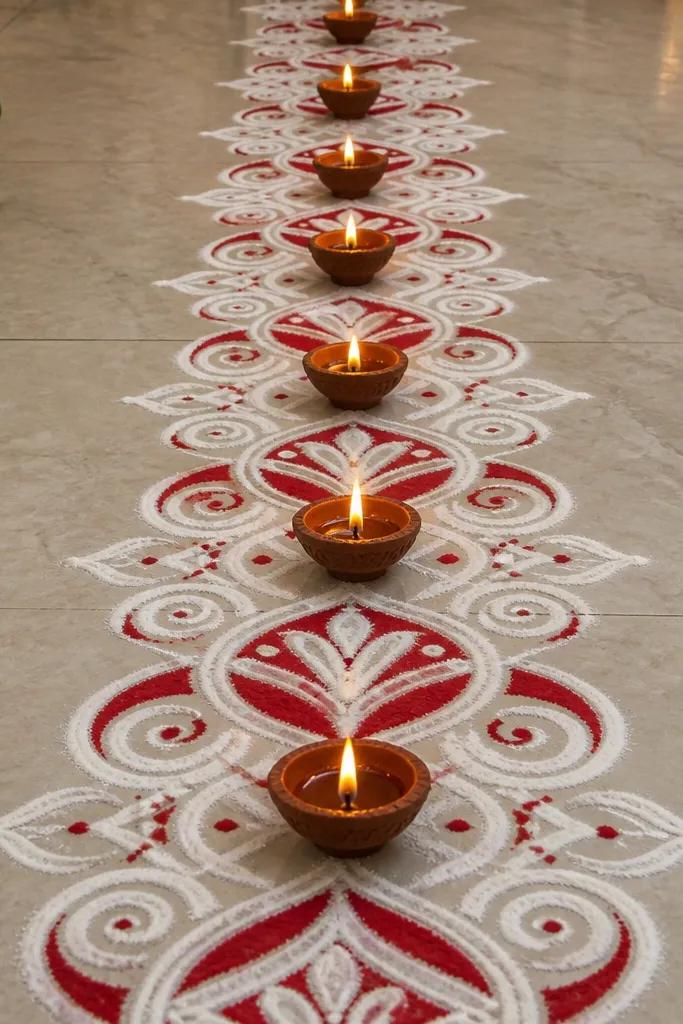
This is the fastest way to look “planned” without drawing freehand rangoli. A stencil path gives you crisp symmetry, and the diyas placed along the line create a glowing route effect. It’s great for entrances and hallways where people walk past and notice the pattern. The contrast of white powder and red accents looks sharp under night lighting.
Start by taping a stencil path on the floor with masking tape, then dust white rangoli powder through the stencil. Remove the stencil carefully and fill the red sections with a second color powder. Mark spots along the center line every 8-10 cm and place diyas so the flame centers on the pattern. Finish by adding a small border of marigold petals at both ends of the path.
Use a small sieve for powder — it gives even coverage and cleaner edges.
Don’t place diyas too close to the powder edge; wind can blow powder into wicks.
14. Plastic bottle cutout tealight lanterns
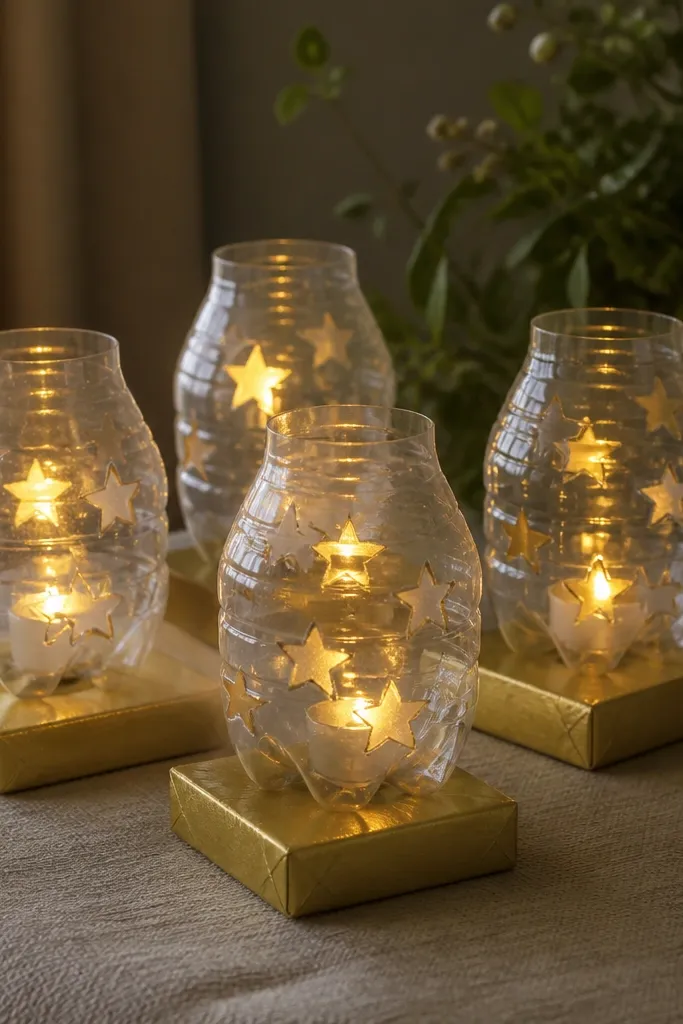
These look like expensive lanterns because the cutouts throw star-shaped light patterns. Plastic bottles are cheap, and you can make different sizes quickly. I like doing this when I want a night scene that looks magical even with few diyas. Keep the colors simple — gold wrapping on the base and neutral bottle cutouts make the pattern stand out.
Start by cutting clean shapes from plastic bottles: cut the bottom part, then trim the rim. Use a craft knife to punch star cutouts around the sides, leaving at least 1 cm between cuts and the bottom. Paint the lantern outside with a thin layer of black or leave it clear, then wrap the base with gold paper. Place a tea light inside each lantern and group 4-6 lanterns on the cardboard base, spacing them so the star patterns don’t overlap too much.
Pro tipIf you use clear bottles, add a strip of colored cellophane at the bottom for a warm tint.
AvoidAvoid using thick paint inside the lantern — it blocks the star light.
15. Bamboo skewer diya line with leaf fans
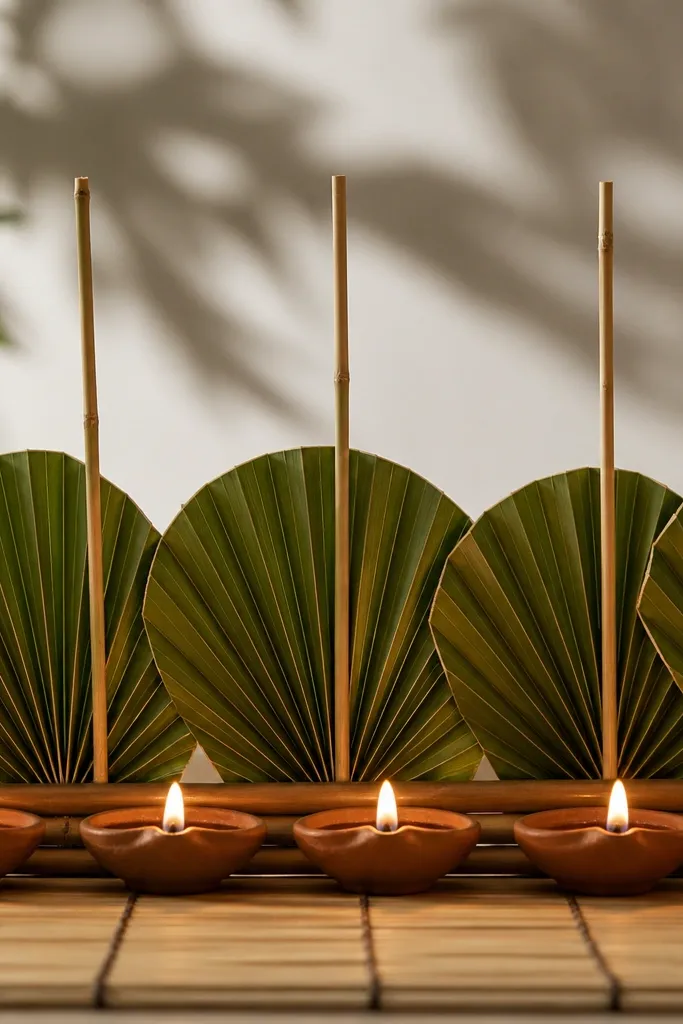
This one gives you height using only sticks, and it looks airy instead of heavy. The leaf fans create a layered backdrop, so the flame doesn’t look like it’s sitting alone on the table. I use it for outdoor Diwali setups because it feels natural and doesn’t look overly “room decor.” It also works if you have a lot of plain diyas — the backdrop does the heavy lifting.
Start with a bamboo mat or jute mat as the base and lay it flat. Stick bamboo skewers upright behind where the diyas will sit, spacing them 6-8 cm apart. Fold long leaves (banana or similar) into fans, then tie them with thread and slip them between the skewers. Place diyas in a straight line at the front of the mat, aligning each diya with a space between skewers.
Soak leaves for 10 minutes before folding so they don’t crack.
Don’t use dry leaf fans — they look brittle and can tear when you move the setup.
16. Egg carton diya row with paper flower corners
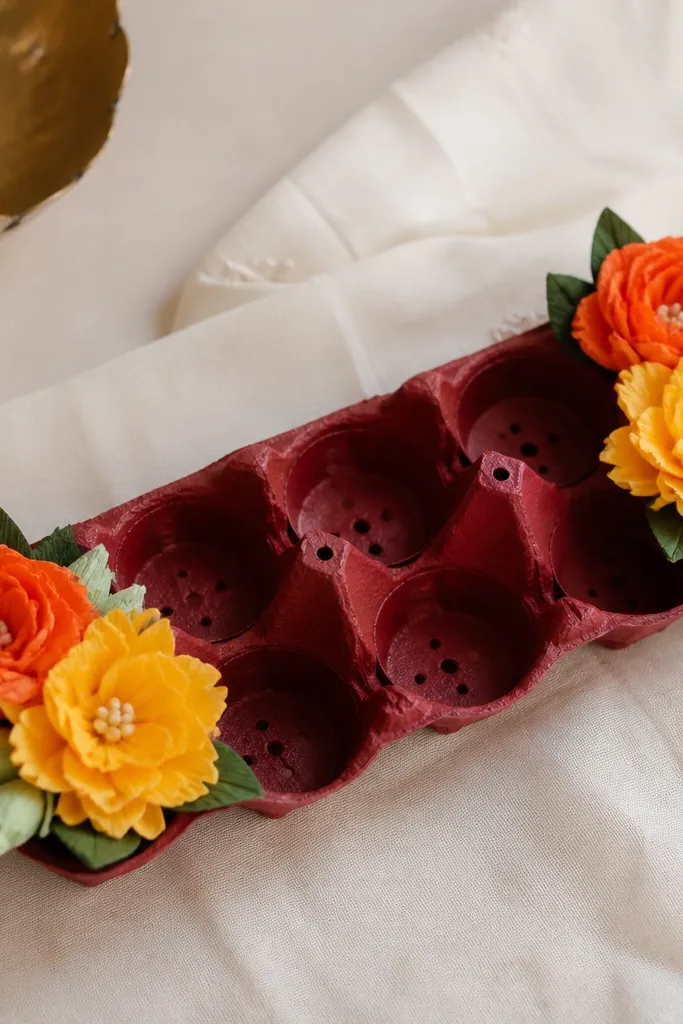
Egg cartons are the easiest way to hold diyas at fixed angles and distances, which makes the display look neat. Painting the carton gives it a solid background, and paper flowers on the ends act like bookends. I like this for kids' Diwali parties because it’s stable and you can prep the whole thing in one sitting. The maroon background makes the flames look richer.
Start by cutting one egg carton section and painting it maroon. Let it dry, then poke small holes for diyas so each sits upright. Place the carton on a tray and set 6-8 diyas across the top line. Make two paper flowers — one orange, one yellow — and glue them at the two ends so the corners look finished.
Use tea lights with longer stems if your carton holes are shallow — it keeps the flame height visible.
Don’t leave egg carton unpainted; the grey color makes it look like leftover packaging.
17. Aluminum foil pleated fan backdrop
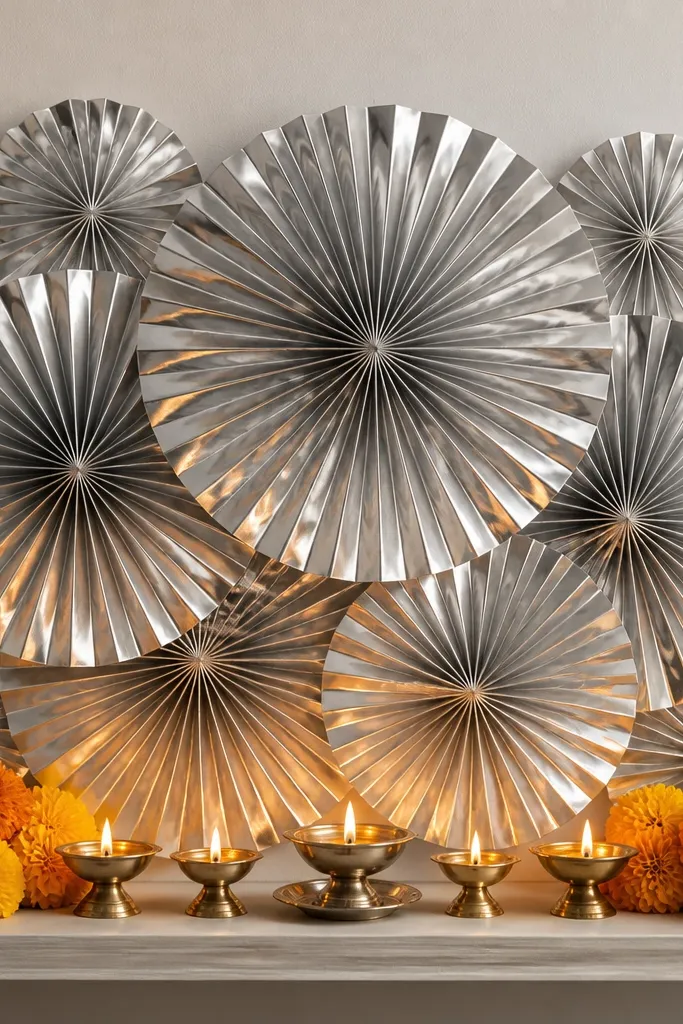
A pleated foil fan makes a dramatic background without spending on wall decor. The pleats reflect light in stripes, so the diya flames look bigger and more directional. This works best when you have a narrow shelf or ledge and want the wall behind it to look intentional. I’ve used it in living rooms where people walk in from a hallway — the shimmer is the first thing they notice.
Start by cutting foil sheets into long rectangles and pleat them like an accordion. Tape the pleated foil onto a cardboard backing in 2-3 fan shapes, then trim edges so they’re clean. Paint the cardboard backing with black or deep brown so reflections look sharp. Place a ledge or tray in front and set 5-7 diyas in a line, then add marigold clusters at the base corners.
Pro tipHang the foil so it’s slightly angled — straight-on flat reflections look dull in photos.
AvoidAvoid using loose foil directly near the flame; keep foil at least 20 cm away from diyas.
18. Rope-wrapped terracotta pot diya stand
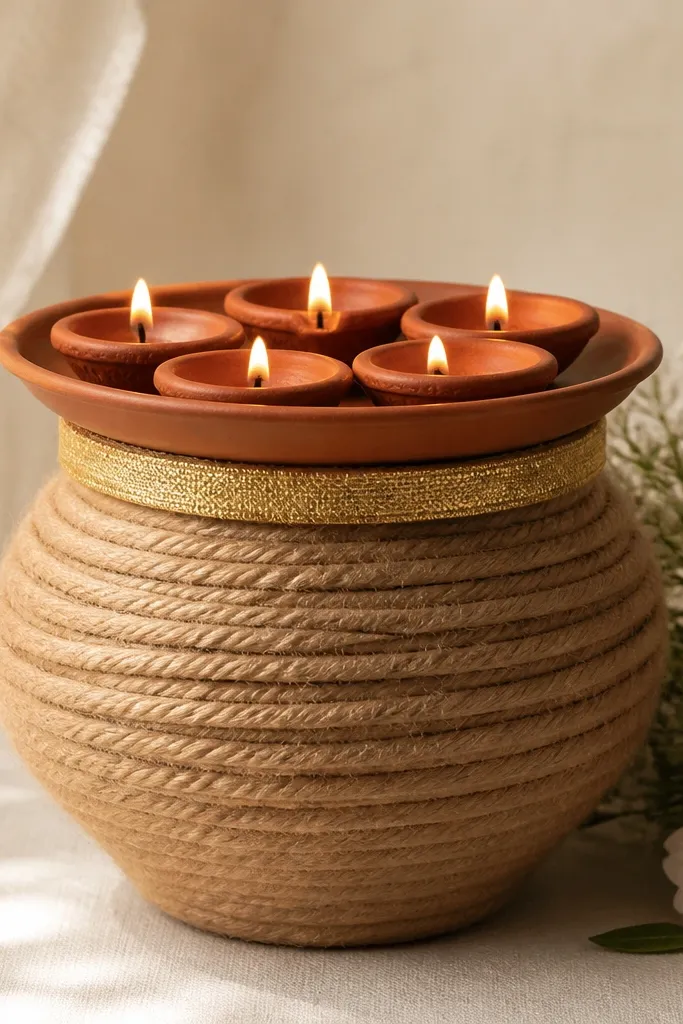
Rope-wrapped pots look expensive because the texture reads even in low light. The terracotta base keeps the warm theme consistent, and the rope spiral gives you pattern behind the flames. I use this when I want one central “anchor” piece instead of multiple tiny diyas. It suits rustic interiors and looks great with gold accents.
Start by wrapping the terracotta pot with jute rope from the bottom up, using hot glue in small sections. Keep the rope tight so there are no big gaps. Add a gold ribbon around the rim and tie a small bow at the front. Place a shallow tray on top of the pot or glue a small ring to support it, then set 5 diyas on the tray in a tight circle with equal spacing.
Press the rope down for 20 seconds per section so it bonds firmly and doesn’t lift later.
Don’t wrap over dusty terracotta; the glue won’t grip and the rope will loosen.
19. Plastic spoon marigold diya fringe
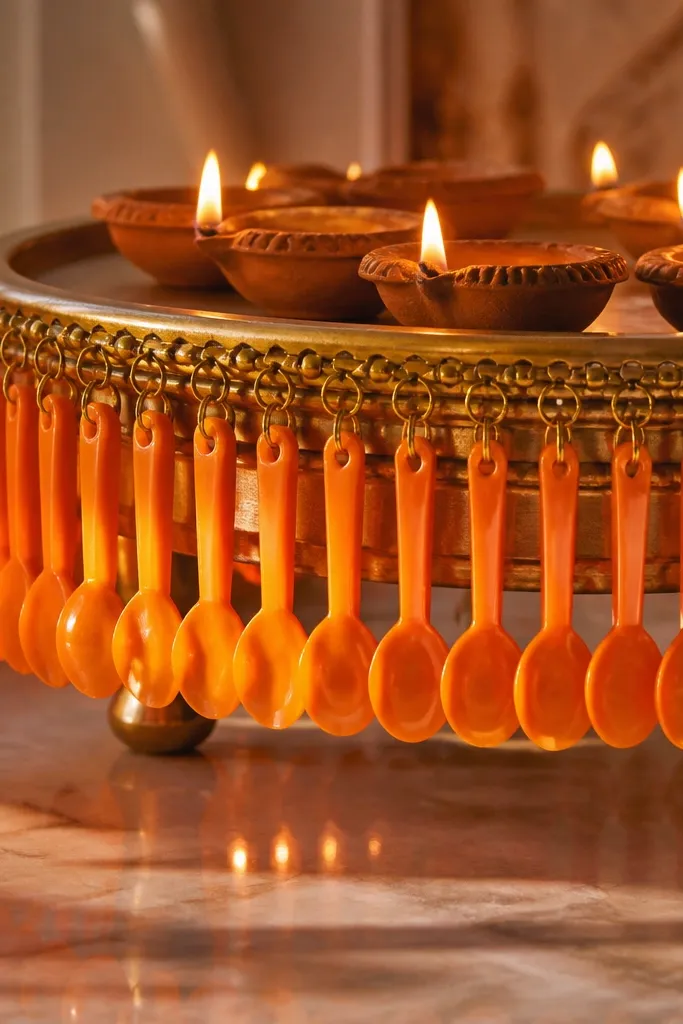
This is a weird one, and it works. Spoon heads create a scalloped fringe that catches flame light and makes the display look fuller without adding bulk. It’s also cheap if you have a leftover pack of plastic spoons — the orange paint ties it to marigold colors. I like this for smaller diya trays on side tables because it frames the diyas like a curtain.
Start by cutting or separating spoon heads and painting them orange and a few gold for contrast. Let paint dry completely. Create a tray base and stick spoon heads around the tray rim using hot glue, overlapping slightly like shingles. Place 5-7 diyas under the fringe, centered so the flame glows through the scallops. Finish by adding a tiny line of white rangoli powder around the tray edge to clean up the base.
Pro tipPaint outdoors or in a ventilated area — spoon plastic can smell strong while drying.
AvoidAvoid putting the spoon fringe too close to the flame; keep it separated so it won’t warp.
20. Color-blocked paper lantern squares with diyas inside
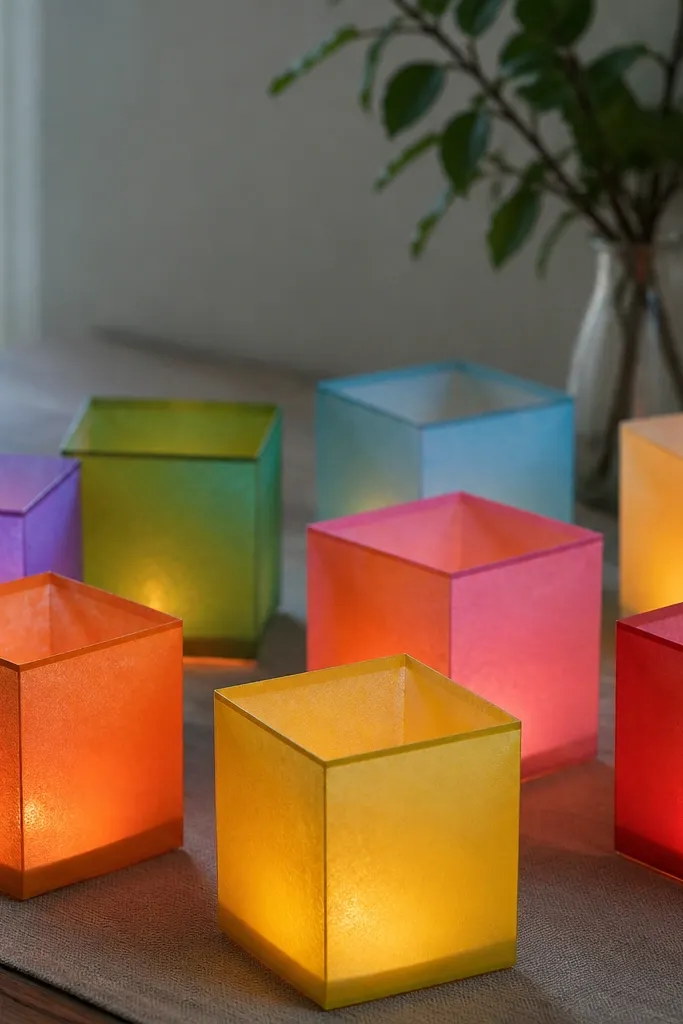
Square lantern boxes make diyas look like part of a modern decor set. Solid color blocks — like teal, maroon, and gold — give you a clean look that doesn’t rely on expensive flowers. The tea light inside turns each lantern into a little warm window. This looks great for younger households and for apartments where you want a sharper aesthetic than traditional rangoli.
Start with thick chart paper and cut it into square panels about 12x12 cm. Fold into a box and glue the edges, leaving the top open. Create two color blocks per lantern by painting or using colored paper panels so each side has a different shade. Place one tea light inside each lantern and set lanterns in a grid of 2x3 on a tray. Add a thin gold ribbon around the tray edge so the grid looks intentional.
Pro tipUse LED tea lights inside if you want to move them around — the paper stays cleaner.
AvoidAvoid using super thin paper; it buckles when the tea light warms the air.



