
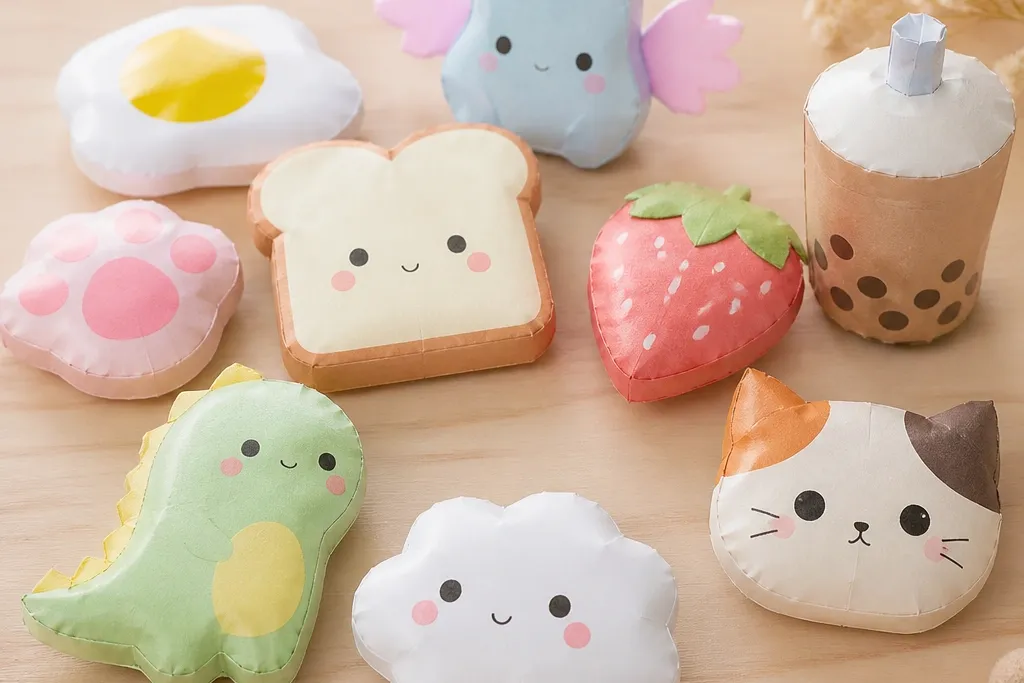
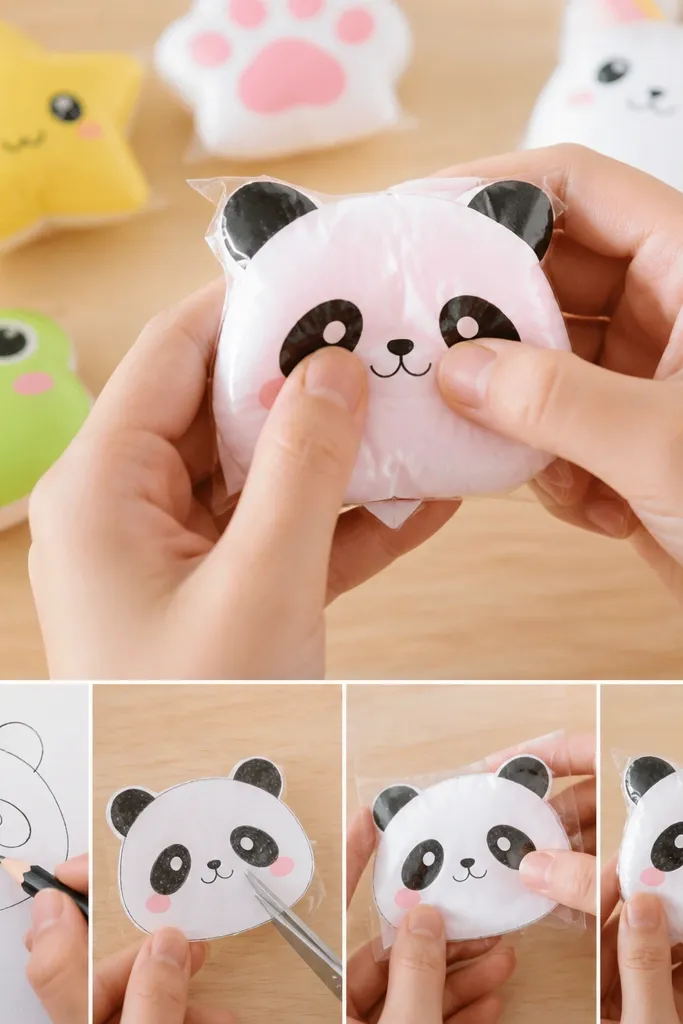
1. Strawberry Shortcake Slice with Foam Filling
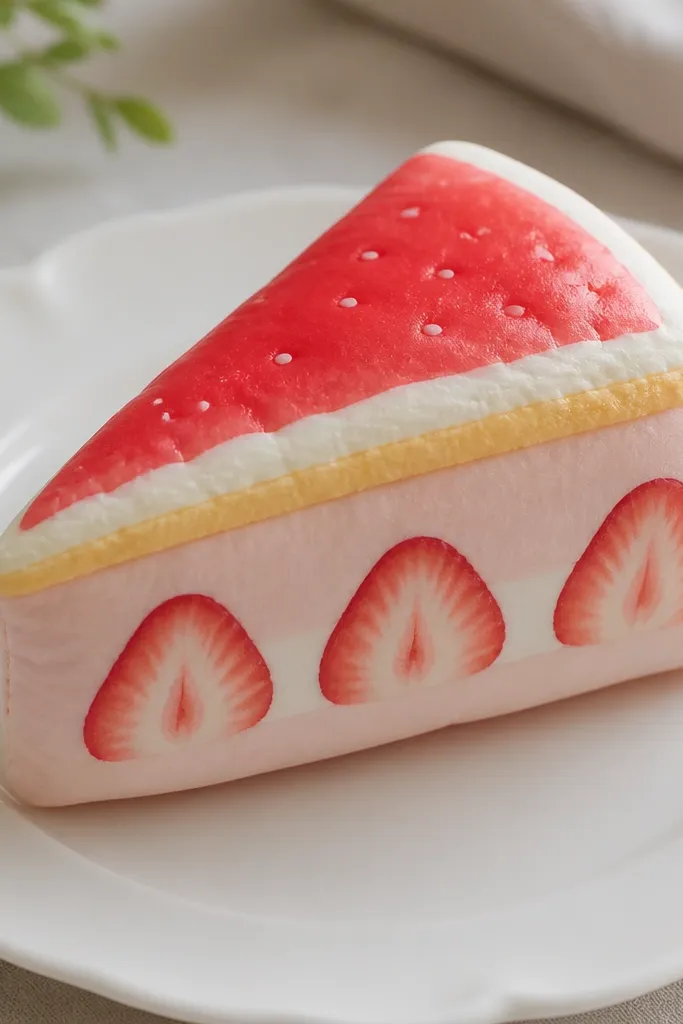
Make a “cake slice” that looks like it has a soft bite. I like pale cream cardstock for the base layers, then I add a thin blush-pink strip for the frosting edge so it reads as dessert, not plain paper. For the strawberry top, I color red cardstock with a darker red marker around the edges and leave small lighter patches for shine. The fill is a small rectangle of EVA foam inside, which gives you that slow squeeze and spring back. This one flatters light skin tones when you hold it near your fingers because the cream and blush contrast makes your hands look warm and clean on camera.
Cut two identical slice outlines from cream cardstock, about 6 cm long and 3.5 cm wide. Cut a third backing layer from thin foam that matches the outline but is 3-4 mm smaller so it won’t push out at the edges. Glue the foam to one paper piece, then line up the second piece on top and seal the perimeter with a glue stick, leaving the bottom edge for a quick insert if you need it. Add red strawberry “glaze” by coloring the top layer first, then glue and seal everything. Finally, press-test it: squeeze gently at the center; if it feels too firm, add a slightly thinner foam sheet next time.
Dry-brush tiny white dots with a gel pen on the red top to fake syrup shine.
Don’t use thick foam — it makes the slice feel like a stress ball and the edges look bulky.
2. Mini Mochi with Sea Salt Speckles
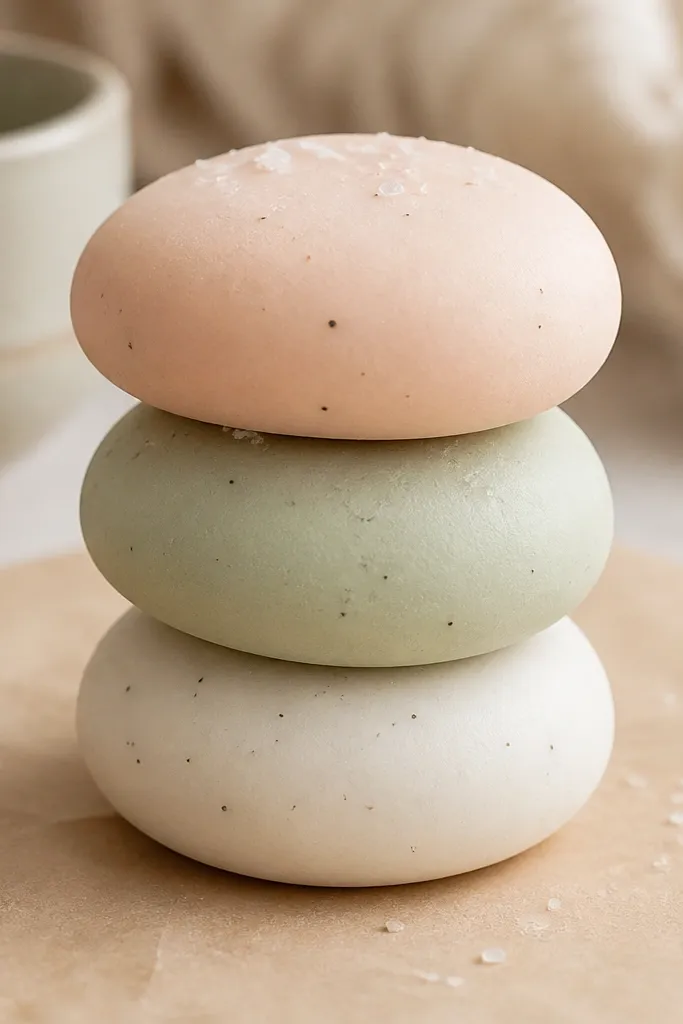
Cut circles about 4 cm wide from pastel cardstock. Cut matching circles from thin foam or batting, and cut them slightly smaller so the fill doesn’t show. Glue two cardstock circles together with a thin glue stick ring around the edge, then press to seal. Add speckles by tapping a marker tip lightly or flicking a diluted ink brush at an angle. Let it dry, then squeeze at the center to test the bounce.
Mochi is the easiest food to make look cute because it’s forgiving. I use pastel cardstock (peach, mint green, and off-white), then I add speckles with a fine black or dark brown marker. Inside, I use thin batting because it dents evenly and doesn’t create hard seams. When you squeeze mochi, the shape should flatten a little and bounce back within a second. This looks great on warm-toned hands and it photographs well because the pastel colors don’t fight the lighting.
AvoidSkip heavy outlines — thick marker borders make it look like a kids' craft instead of a food prop.
Pro tipIf you want a shinier mochi, rub a tiny bit of clear gloss gel on the top after coloring.
3. Sushi Nigiri Set with Printed Rice Texture
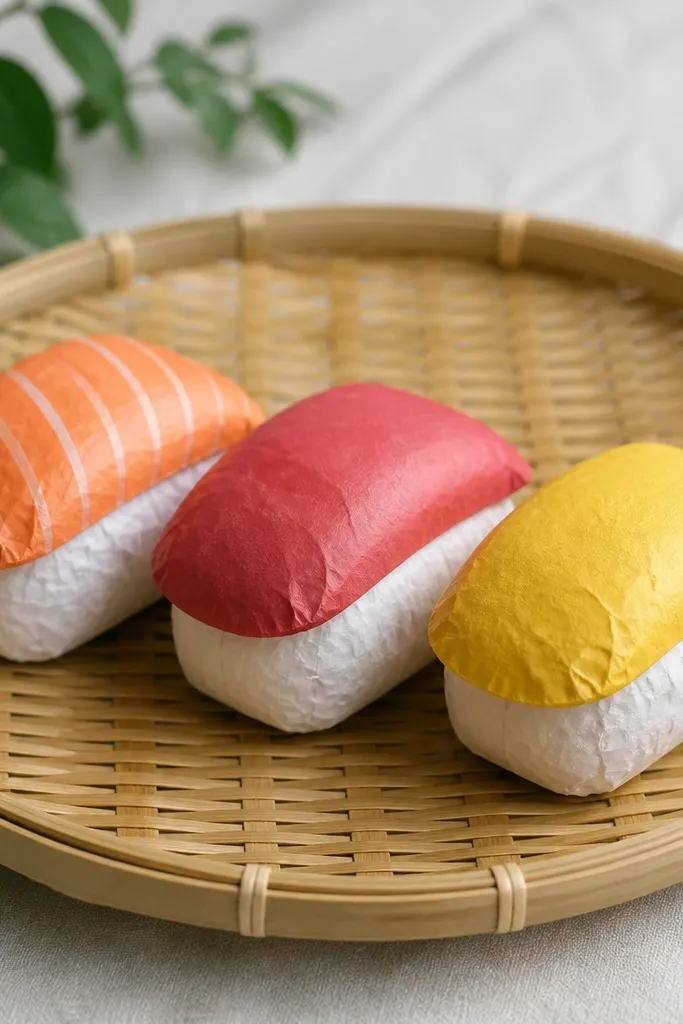
Cut 3 rice rectangles, each about 6 cm long and 2.2 cm wide, and round the corners. Cut 3 fish tops from colored cardstock: salmon (orange-red), tuna (deep red), and tamago (mustard yellow), sized slightly smaller than the rice. Add rice texture by lightly dotting with a gray pencil and blending with a fingertip. Glue fish tops to the rice, then insert a small foam pad under the rice and seal with the bottom layer of rice cardstock. Finish by pressing along the edges so the layers bond.
Nigiri looks fancy without being complicated. The trick is giving the rice a texture so the whole piece reads as food even when it’s paper. I use off-white cardstock for rice and add grain by dotting with a light gray pencil. The fish tops are colored cardstock strips with a darker edge for depth. The fill is thin foam shaped into a rounded rectangle under the rice so it squeezes but doesn’t collapse. This style flatters most lighting because the rice color reflects light nicely, making your squishy set look clean in photos.
AvoidDon’t use bright white — it looks artificial and makes the fish colors look flat.
Pro tipFold the rice ends slightly upward with your fingernail so it looks like it’s shaped by a hand.
4. Eclair with Chocolate Drip and Creamy Middle
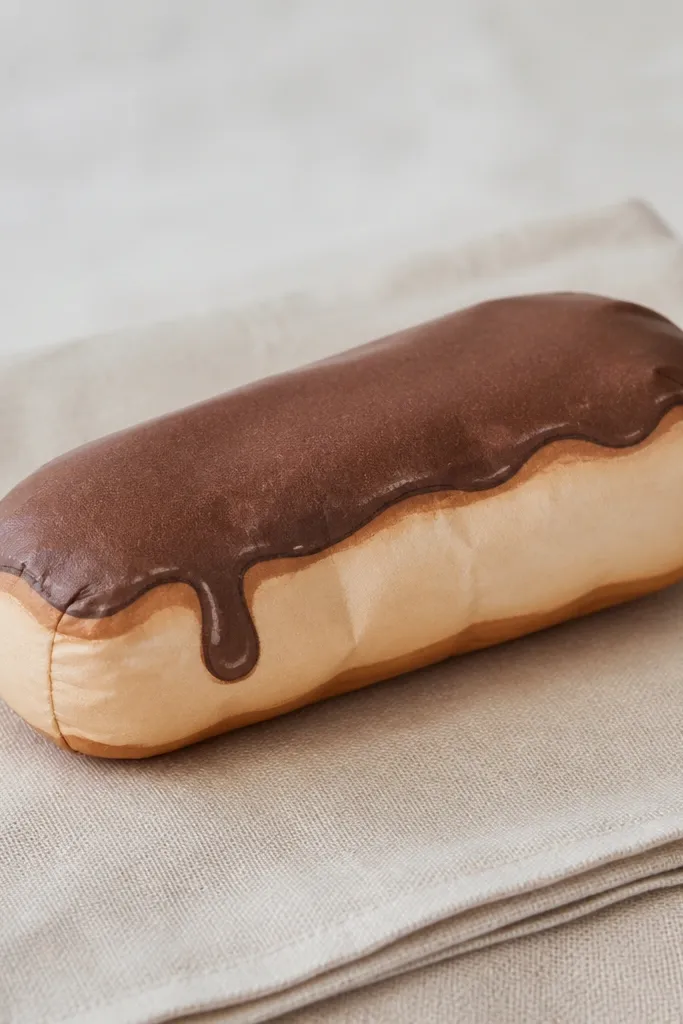
Eclairs look like they took effort, and they do, but the materials stay cheap. I build the shell from light tan cardstock, then add a thick chocolate “cap” by coloring dark brown and drawing a glossy drip line. For the inside, batting gives you that soft, slow squish that feels like pastry. The cream middle is a slightly lighter tan layer visible at the sides where you leave a thin gap. This works especially well for warm or neutral lighting because tan and chocolate look appetizing next to skin.
Cut two long rounded rectangles for the eclair body, about 9 cm by 2.2 cm. Cut a thin foam strip the same length but only 1.6 cm wide so it sits in the center. Glue the foam in the middle of one body piece, then place the second body piece on top and seal the perimeter. Color the shell with light tan and shade edges darker with a brown pencil. Add the chocolate cap by gluing a dark brown strip across the top and drawing a drip with a pen, then let it dry before you press.
Use a white gel pen to add one thin highlight line on the chocolate drip.
Avoid soaking the chocolate with too much marker — it warps the paper and the drip looks messy.
5. Donut Ring with Sprinkles and a Soft Hole
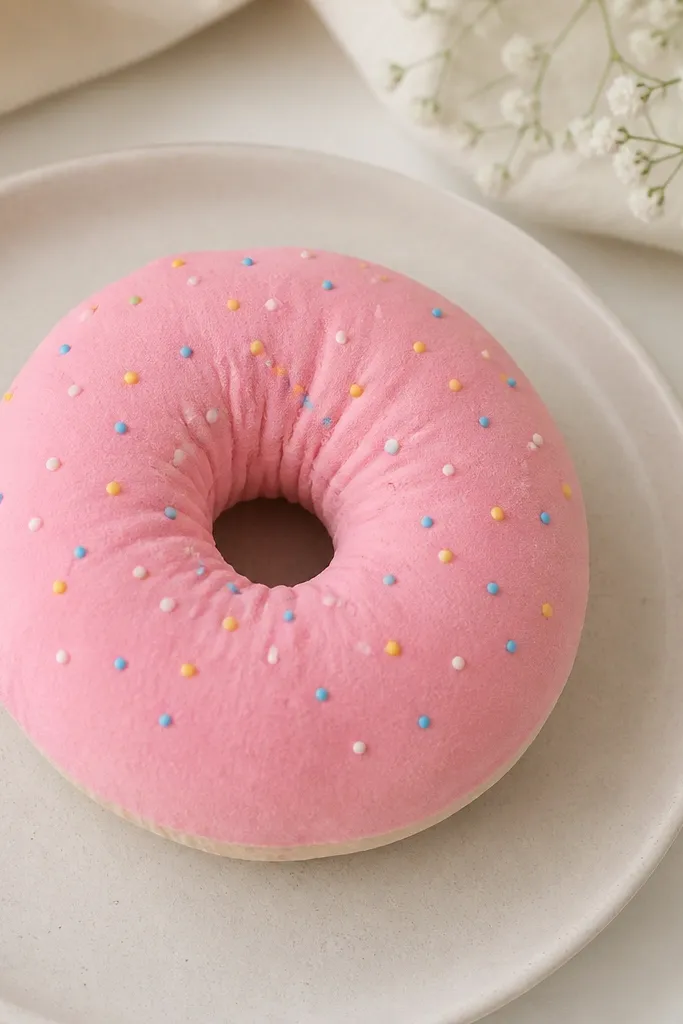
Donuts are satisfying because you can squeeze the hole area without flattening the whole thing. I make the outer ring from kraft-colored or pastel cardstock, then I add sprinkles using colored gel pens. For the soft center, I cut a foam ring so the hole still feels like a hole when you press. The best look comes from a matte base with glossy sprinkles — you get texture without shine overload. This one looks great on cooler skin tones because the pastel pink donut and bright sprinkles pop.
Trace a donut template: about 6.5 cm outer diameter with a 2.2 cm inner hole. Cut two outer rings from cardstock and one ring from thin EVA foam. Glue the foam ring to one cardstock ring, then sandwich with the second ring and seal edges. Add sprinkles by drawing small lines or dots all around the top, then shade the ring edges lightly with a darker pink pencil. Press gently around the hole to make sure the foam doesn’t push out.
Add a tiny shadow under the sprinkle clusters using a light purple pencil to make them look raised.
Don’t make the hole too tight — if it’s small, the foam compresses and the donut squishes into a blob.
6. Hamburger with Folded Lettuce Layers
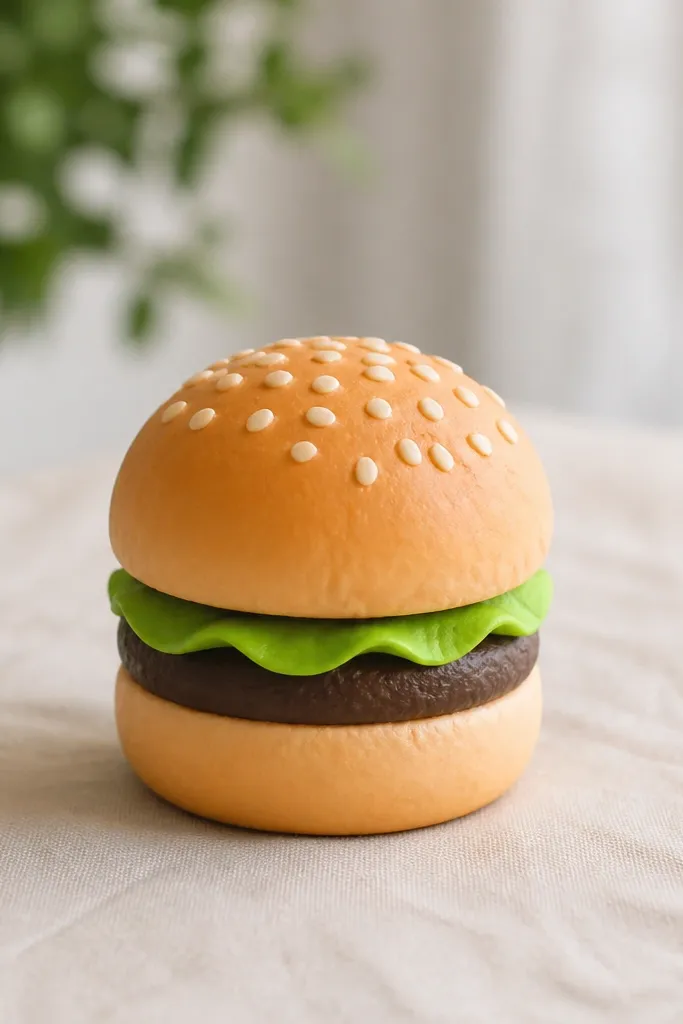
Cut bun top and bun bottom layers as two ovals, about 6.5 cm long and 4.5 cm wide. Cut an oval patty and two lettuce ruffle pieces from green cardstock, each slightly narrower than the buns. Add sesame seeds by dabbing a black marker dot pattern on the bun top. Glue lettuce ruffles to the bun bottom, add the patty, then insert a foam pad under the top layer before sealing. Seal the bun top to the bottom, leaving the underside clean so it stands.
A burger is a confidence-builder because you can hide seams in the fold lines. I use light brown cardstock for buns and color the bottom edge darker so it looks toasted. The patty is a darker brown oval with a tiny lighter highlight spot. For lettuce, I cut thin green cardstock strips and fold them into ruffles, then glue them between bun layers. The fill is thin foam shaped to the burger footprint, so squeezing feels like pressing a soft sandwich. This looks good on hands with any undertone because the warm bun color reads like real food.
AvoidSkip flat lettuce — it makes the burger look like a paper cutout instead of a squishy prop.
Pro tipUse a craft knife to score tiny “toasted lines” on the bun for realism.
7. Cat Paw Ramen Bowl with Wiggly Noodle Lines
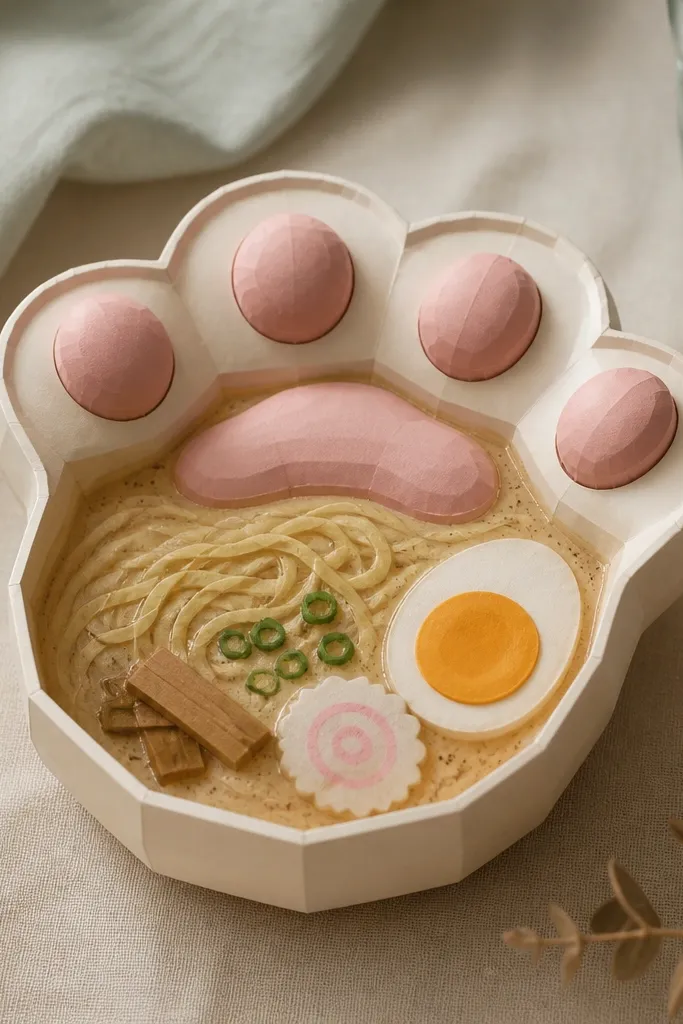
This one is playful and still looks food-real. I shape the bowl as a paw silhouette so the “squish” goes where you press — on the paw pads. The broth is beige cardstock with small speckles made using a tan pencil. Noodles are drawn with a fine yellow marker in curved loops, and I add a few darker noodle shadows for depth. Inside, I use a small batting pad so the whole paw compresses evenly. It’s flattering for photos because the beige and yellow create a warm, cozy palette.
Draw a paw outline about 9 cm wide with four rounded toes. Cut two identical paw shapes from beige cardstock. Cut a batting pad slightly smaller and glue it in the center of one paw piece. Glue the second paw on top and seal the edges with a thin glue stick line. Draw noodles by sketching thin loops across the top, then add noodle shadows with a light brown pencil. Press-test each toe so it doesn’t feel stiff in one spot.
Add two tiny black dots for “cat eyes” on the broth for extra charm.
Don’t outline every noodle thick — it looks cartoon-flat and cheap.
8. Bento Strawberry Rice Box with Side Compartment
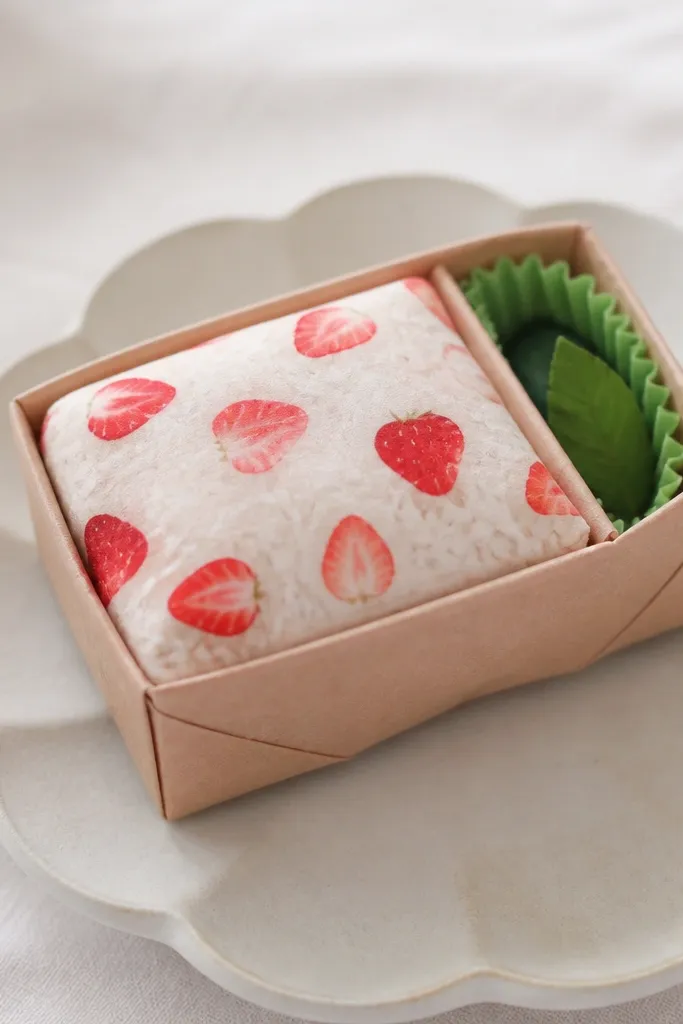
Bento boxes look organized, which makes your squishy feel intentional. I make a rectangular “lid” from cardstock and add a strawberry rice pattern on the top — red dots with a little darker base. The side compartment is a separate piece so you get that bento look without needing real mini foods. The squish comes from a foam sheet under just the lid area, so the box edges stay crisp while the center dents. This works well for desk décor because it sits flat and doesn’t roll.
Cut a box lid piece about 10 cm by 7 cm, rounded at corners, and score fold lines if you’re making sides. Make two lid layers and one thin foam layer that matches the top but is 5 mm smaller. Glue foam to one lid layer, then seal with the second lid layer. Draw strawberry rice by coloring small red ovals and adding tiny darker seeds. Add the side compartment garnish with green dots in a small rectangle on the right side.
Use a ruler to keep the bento grid lines straight — it changes the whole look.
Avoid messy glue at the edges — it makes the lid look swollen.
9. Pancake Stack with Maple Drip Lines
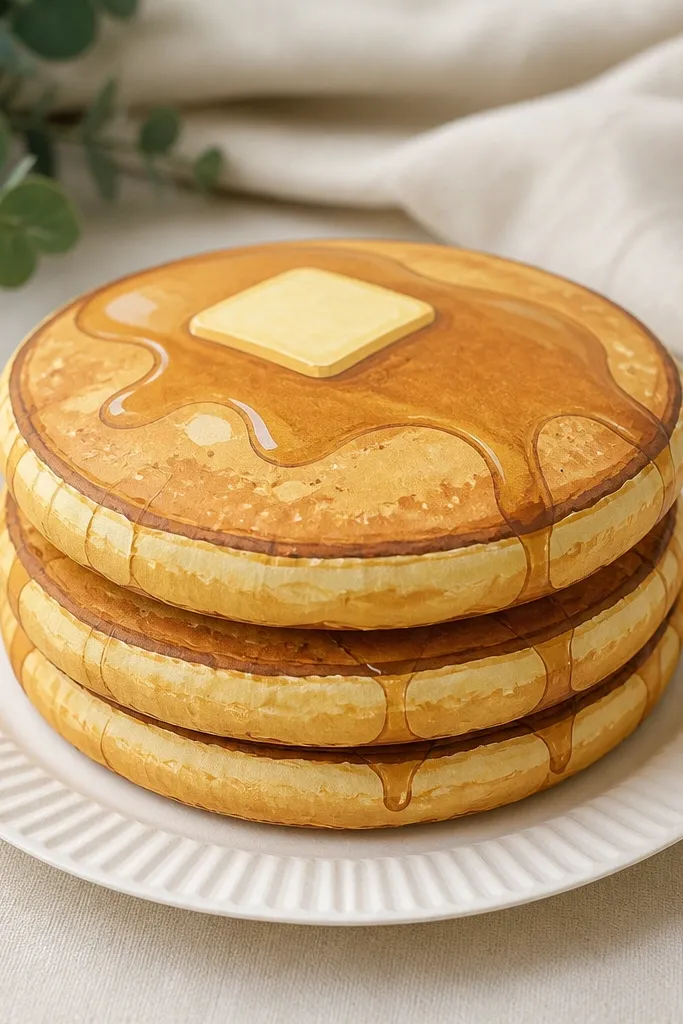
Cut three circles, about 6 cm, 5.2 cm, and 4.4 cm wide, from golden cardstock. Cut two thin foam circles the size of the middle pancake and glue them between layers. Seal each pancake layer with a second matching circle so the foam stays hidden. Add bubble texture by dotting with a darker brown pencil and lightly smudging. Draw maple drips across the top layer, then press gently to set the shape.
Pancakes are easy because you can stack and scale. I use layered cardstock circles and shade the edges with a darker brown pencil so the stack has real depth. Maple is drawn with a thick brown marker line and then I add a few “drip” streaks downward. Inside, I place thin foam between layers so the whole stack squishes together. The look is cozy and soft, and it’s flattering because golden tones match a lot of skin colors and indoor lighting.
AvoidDon’t over-darken the entire pancake — keep highlights lighter so it still looks edible.
Pro tipAdd one tiny “butter” rectangle on the side using yellow cardstock and a small shadow line.
10. Sliced Watermelon Wedge with Glossy Seeds
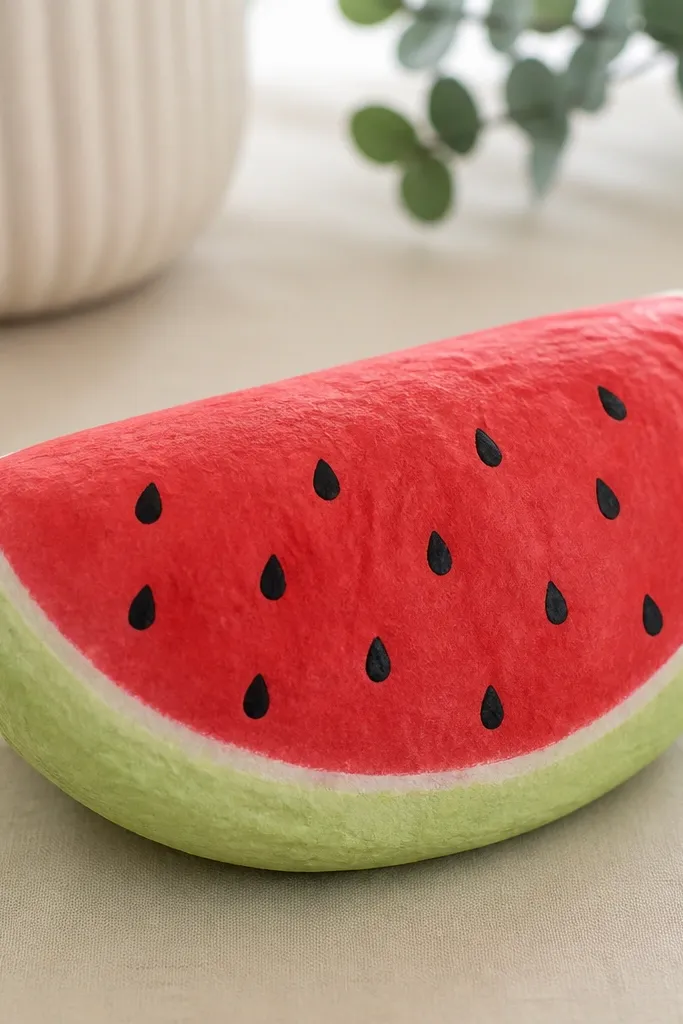
Watermelon wedges look like real fruit because of color blocking. I layer green rind and pale white cardstock strips, then fill the red interior with a gentle shading toward the edges. Seeds are black marker dots with one curved highlight line made using a white gel pen. The squish comes from a thin foam wedge inside, so the wedge dents at the center and bounces back without folding. This one looks great against dark backgrounds because the red pops hard on camera.
Cut a wedge template: about 8 cm long and 5 cm wide at the base. Cut two identical wedge outlines from red cardstock for the interior and two from green cardstock for the rind, plus two thin white strips. Build a layered top by gluing white strip under the rind and red interior on top. Insert a foam wedge slightly smaller than the full outline, then seal with the second full exterior layer. Add seeds by placing tiny black dots and drawing a short white highlight on each.
If your seeds look flat, add a second tiny black dot next to each highlight for depth.
Skip using only one black dot per seed — it looks like confetti, not seeds.
11. Cookie Sandwich with Chocolate Cracks
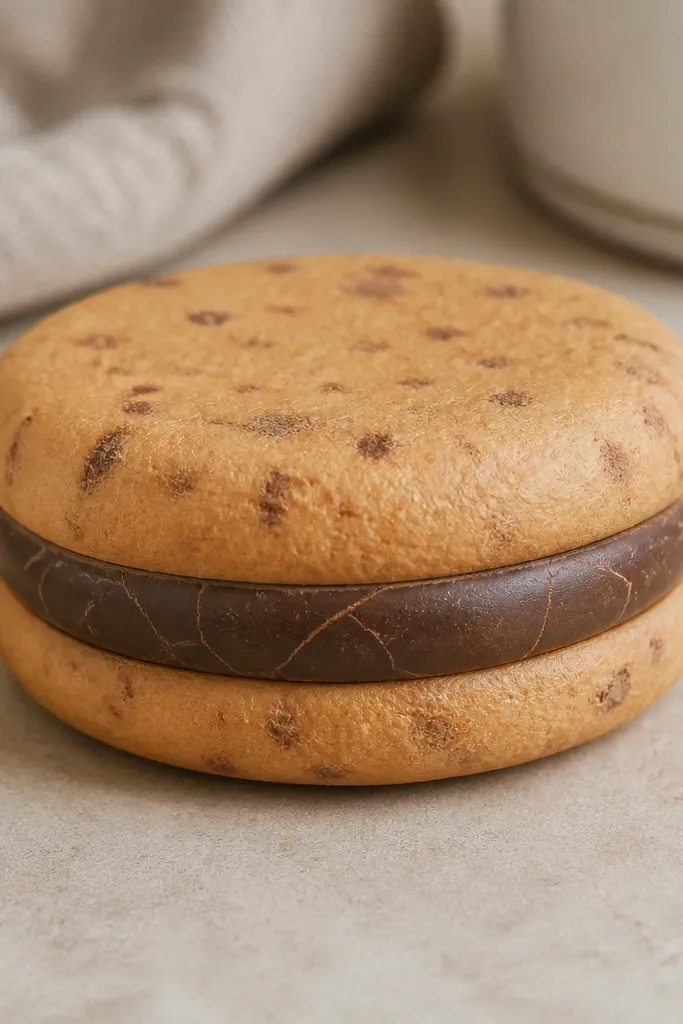
Cookie sandwiches look good even when they’re small, and they’re fun to squeeze because the center compresses. I use two round cookie layers made from tan cardstock and add speckles with a brown pencil. The chocolate filling is a darker brown oval with crack lines drawn in a lighter brown gel pen. Inside, batting makes the filling feel soft instead of hard. The contrast between tan and dark brown looks warm and real under most lights, especially daylight.
Cut two cookie rounds about 5.5 cm wide and one filling oval about 4.5 cm wide. Cut a thin batting pad slightly smaller than the filling oval and glue it behind the chocolate layer. Color the cookie rounds with speckles and a darker outer ring. Glue chocolate to one cookie, then sandwich the batting-backed chocolate between the top and bottom cookie layers and seal the edges. Press the center a few times so the filling settles.
Add one tiny highlight stroke on the chocolate using a white pencil for a slightly glossy look.
Don’t use black for the cracks — it makes it look like ink marks.
12. Sausage Roll with Puff Pastry Edge
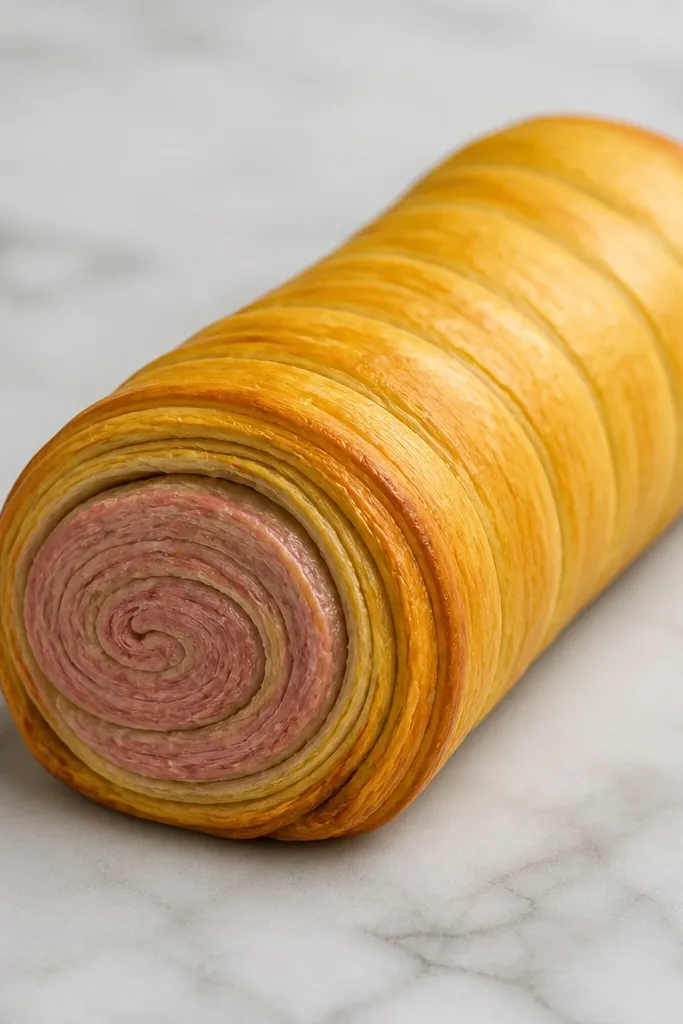
Cut two long rounded rectangles about 10 cm by 2.5 cm for the pastry shell. Cut a narrow foam strip about 8.5 cm long and 1.2 cm wide, and glue it to one shell piece. Create the crimped edge by scoring tiny lines along the sides before sealing. Add sausage swirl by drawing a spiral pattern on the inside top layer using pink and tan markers. Seal both pastry layers together and trim the edges clean. Press-test along the center strip to confirm the foam gives the squish.
Sausage rolls look detailed because pastry edges give you texture without needing extra materials. I crimp the pastry edge by scoring tiny lines with a dull butter knife or the back of a pen. The sausage swirl is colored pink and tan with a darker spiral so it looks like meat inside pastry. For squish, I use a narrow foam strip along the center so squeezing feels like pressing a soft roll. This works best for holding in one hand because it’s longer and doesn’t tip.
AvoidSkip thick foam — long shapes get lumpy and the pastry edge stops looking crisp.
Pro tipUse a brown pencil to shade the crimp valleys so the edge looks baked.
13. Avocado Toast with Seed Spot and Paper Crouton Base
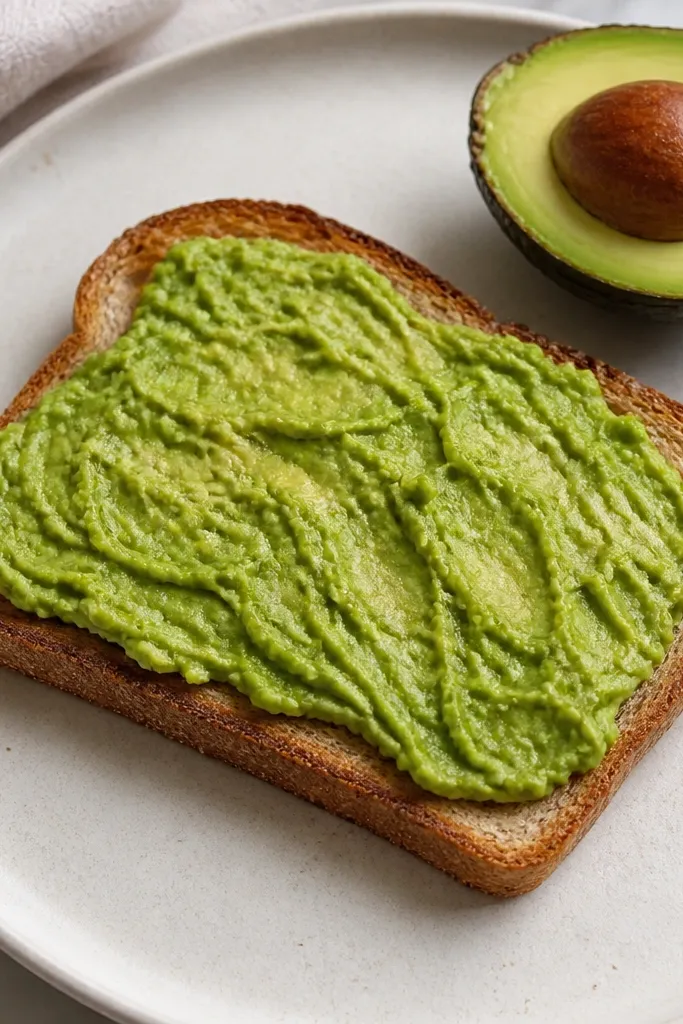
Cut one toast base from tan cardstock and one matching top layer from slightly lighter tan. Cut a thin batting rectangle the same size but smaller by 5 mm on each side. Glue batting to the underside of the top layer, then sandwich the toast layers and seal edges. Draw avocado bumps using short lines, then color the seed oval dark brown and add two highlight streaks with a white gel pen. Press lightly to set the batting and keep the toast flat.
Avocado toast looks classy fast because you get to combine two textures: smooth toast and bumpy avocado. I cut toast from tan cardstock and darken the edges with a brown pencil, then I draw avocado bumps with a light green marker in short curved lines. The seed is a dark brown oval with a few lighter streaks. The squish is subtle here — I use a thin batting layer under the toast so it dents just enough to feel satisfying, but stays stable on a desk. This is great for people who want “aesthetic” squish without giant bouncy foam.
AvoidDon’t cover the whole toast evenly — leaving a thin toast border makes it look real.
Pro tipMake the avocado edge slightly uneven by trimming with small nicks — it looks hand-smashed.
14. Cherry Tomato Pair with Leafy Green Tops
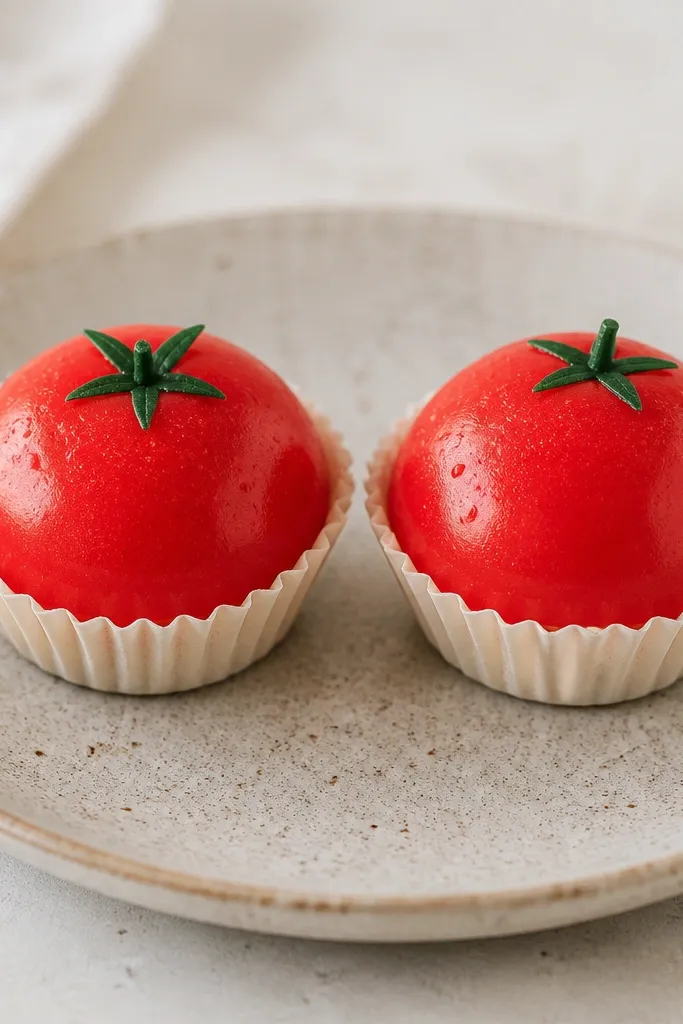
Two tomatoes together looks like a set and makes your display look intentional. I use red cardstock with darker red blotches and a few tiny yellow highlights so they look glossy. The leaf tops are small green triangles curled slightly with your fingers for a realistic stem. Inside, I use small foam circles so each tomato squishes independently. This looks great on warm skin tones because the red reads bright without turning orange on camera.
Cut two tomato circles about 4 cm wide, plus two slightly smaller foam circles. Cut two tiny leaf shapes and curl them by bending gently. Glue leaf pieces to the top side of one cardstock circle. Place foam circles on the inside of the tomatoes, then seal with the second cardstock circle around the edge. Add darker red spots and one tiny yellow highlight on each tomato. Press the tomatoes gently so the foam settles.
Use a green pencil to shade under the leaf where it meets the tomato.
Avoid flat leaves — they should lift off the tomato a bit.
15. Burrito Wrap with Folded Paper Seam
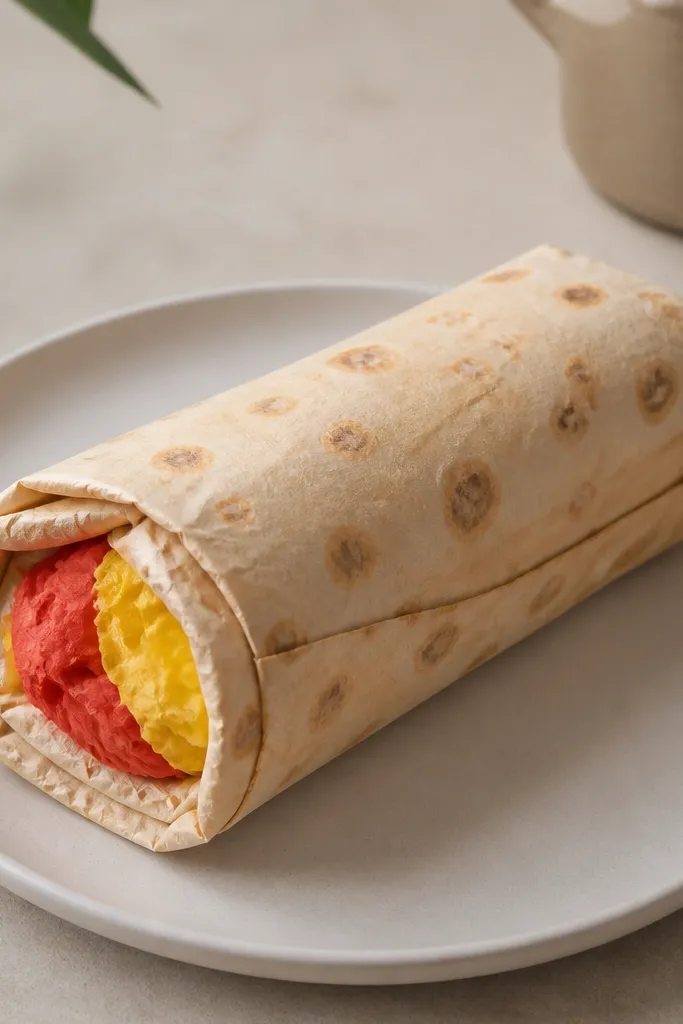
Cut two burrito outlines shaped like a rounded rectangle with tapered ends, about 12 cm long. Cut a foam insert about 10 cm long and 2.2 cm wide, then glue it to the center of one tortilla layer. Add a filling band on the inside layer by coloring three stripes and blending edges lightly. Seal the burrito by placing the second layer on top and gluing along the seam line. Reinforce the end folds by folding small 5 mm flaps and gluing them down. Press-test at the center so the foam compresses evenly.
Burritos look real because the fold lines tell your brain what it is. I draw the tortilla texture using a tan pencil with darker spots, then I color the filling band: red for salsa, yellow for cheese, and green for lettuce. The squish comes from a thin foam cylinder inside, so squeezing makes the wrap feel soft and wrapped. I like this for beginners because the shape is forgiving — as long as your seam lines are clean, it reads as a burrito. It looks best in neutral lighting because tan and red don’t glare.
AvoidDon’t overfill the band — if it bulges, the tortilla creases look messy.
Pro tipDraw a thin darker outline along the seam with a brown pencil — it makes the fold look intentional.
16. Kawaii Ice Cream Scoop in a Waffle Cone
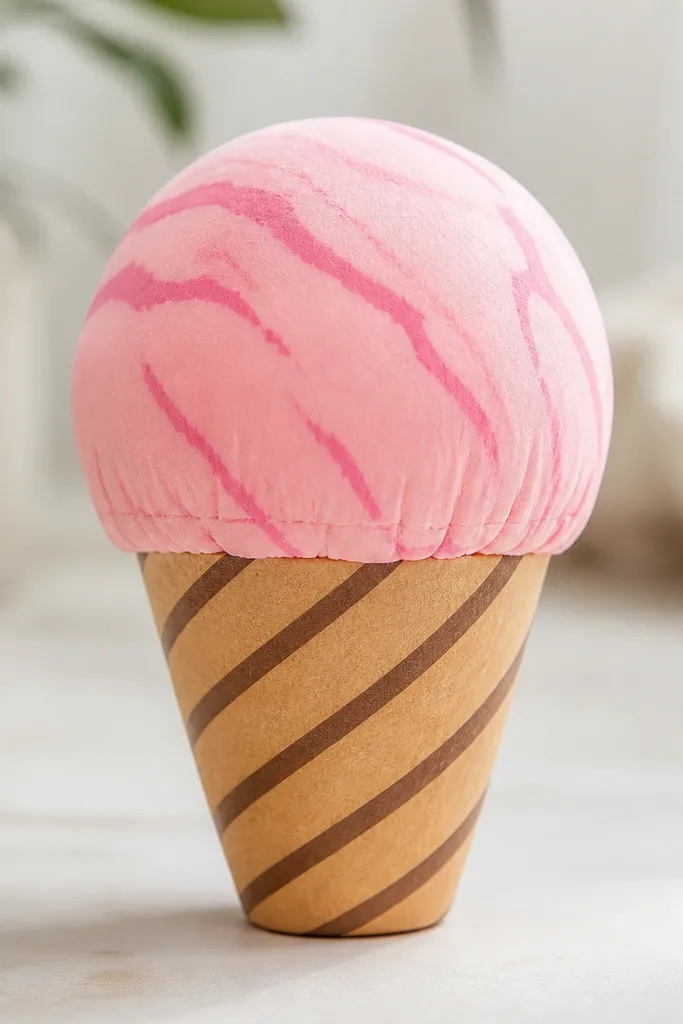
Cut two cone pieces and score along the fold line so it wraps into a triangle. Glue the cone seam and keep it upright on a scrap while it dries. Cut two identical scoop circles about 5 cm wide and one foam circle slightly smaller. Glue foam between the scoop layers and seal edges. Color the scoop with pastel pink and add darker swirl lines using a fine marker. Attach the scoop to the cone top with a small glue dot and let it set before pressing.
Ice cream looks cute because the cone lines guide the eye. I make the cone from tan cardstock and draw diagonal waffle lines with a dark brown pencil. The scoop is pastel colored and I add swirl lines with a darker shade so it looks creamy, not flat. For squish, I use a foam circle for the scoop so it compresses and returns, while the cone stays more rigid. This works great for photos because the cone texture creates a nice pattern.
AvoidSkip thick hot glue at the attachment point — it hardens and can crack the paper.
Pro tipAdd one tiny highlight curve on the scoop using a white gel pen.
17. Gyoza Dumplings with Pleated Fold Lines
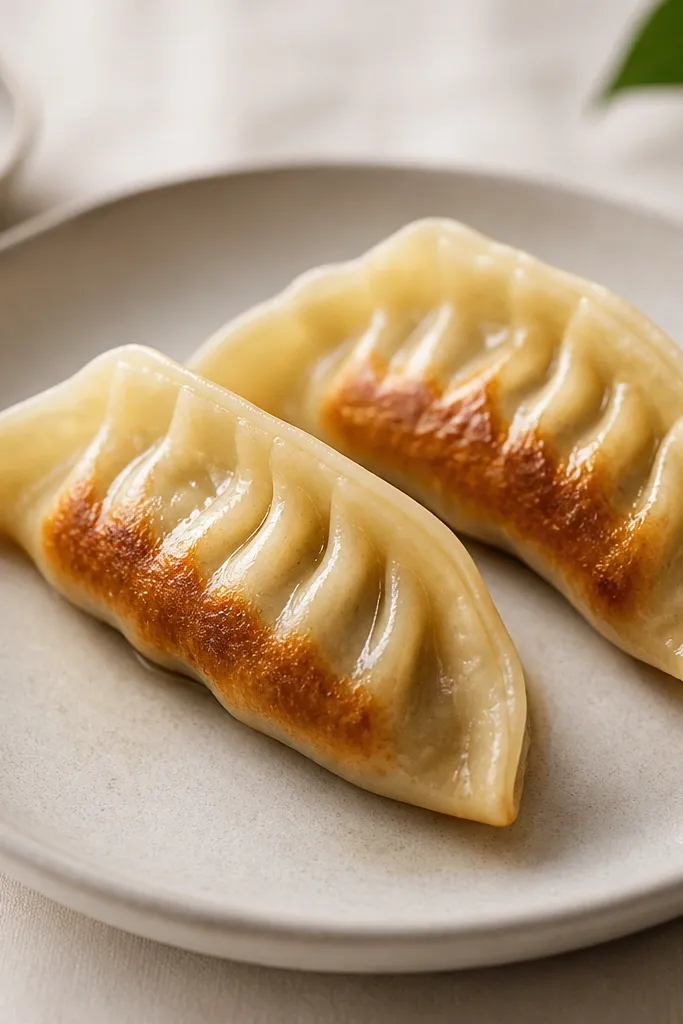
Gyoza looks like it took time because pleats create detail. I draw pleated lines around the dumpling edge using a light brown pencil, and I shade the pan side darker so it looks seared. The fill is a thin foam half-moon insert that keeps the dumpling from collapsing when you squeeze. I like this for people who want a “realistic” look without tiny parts. It also fits nicely in a small display tray, and the warm browns look good against most desk setups.
Trace a half-moon template about 5 cm long and 3 cm wide. Cut two identical half-moons from light tan cardstock and one foam half-moon slightly smaller. Glue foam to one half-moon, then seal with the second piece. Draw pleated fold lines along the outer edge with a pencil, spacing about 2-3 mm apart. Shade the bottom flat edge darker brown and add a light gray pencil smudge to suggest oil sheen. Press gently so the pleats don’t warp.
Make the pleat lines slightly thicker near the bottom edge — it looks like cooking browning.
Don’t use marker for pleats — it bleeds and makes edges look cheap.
18. Rainbow Macaron Pair with Layered Shells
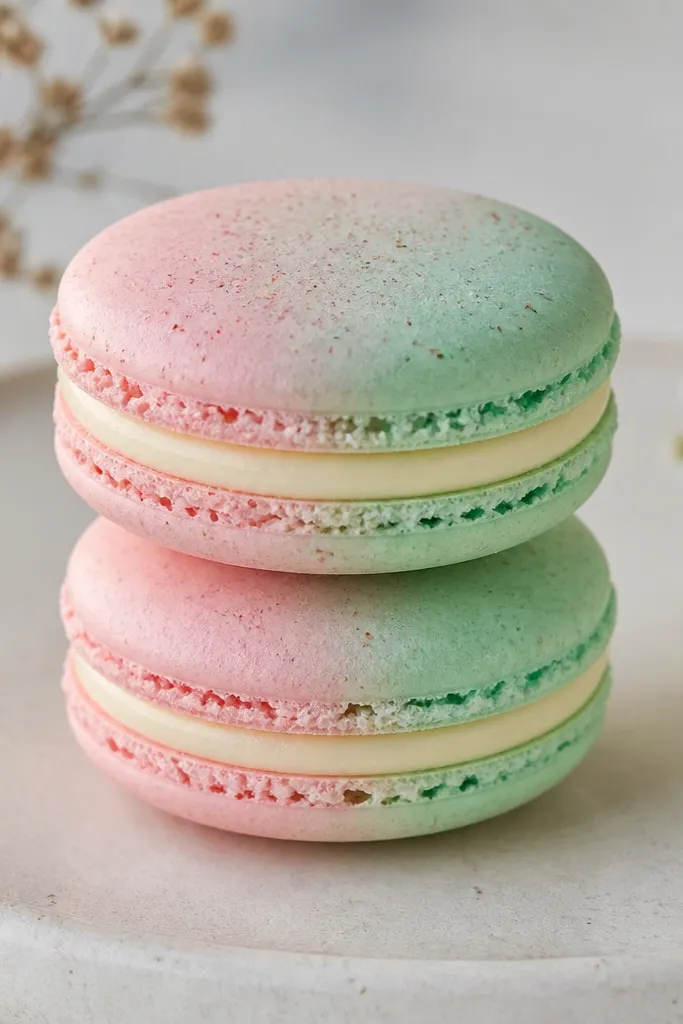
Macarons are pure aesthetic because the shell dome and filling edge matter. I cut layered shells from cardstock and color each shell with a smooth gradient using colored pencils, then add tiny freckles with a light brown pencil. The filling is a thicker cream strip so it looks like it has a soft bite. Inside, batting gives a gentle squish that doesn’t flatten the dome. This flatters fair and medium skin tones because the pastel shells soften harsh lighting and look pretty on camera.
Cut two circles for each macaron shell, about 4.8 cm wide, and cut two slightly smaller circles from thin foam or batting for the interior dome. Color the shells with pastel pencils: pink on one half and mint on the other, blending edges lightly. Glue foam/batting to one shell, then seal with the second shell. Make filling by cutting a ring-shaped piece from cream cardstock and glue it between the shell halves. Add freckles by tapping a pencil tip lightly on the surface, then press once to set.
Draw one thin shadow line along the filling edge to make the sandwich look layered.
Skip thick foam under macarons — the dome looks lumpy instead of airy.
19. Hot Dog with Ketchup Zigzags and Mustard Dot Hills
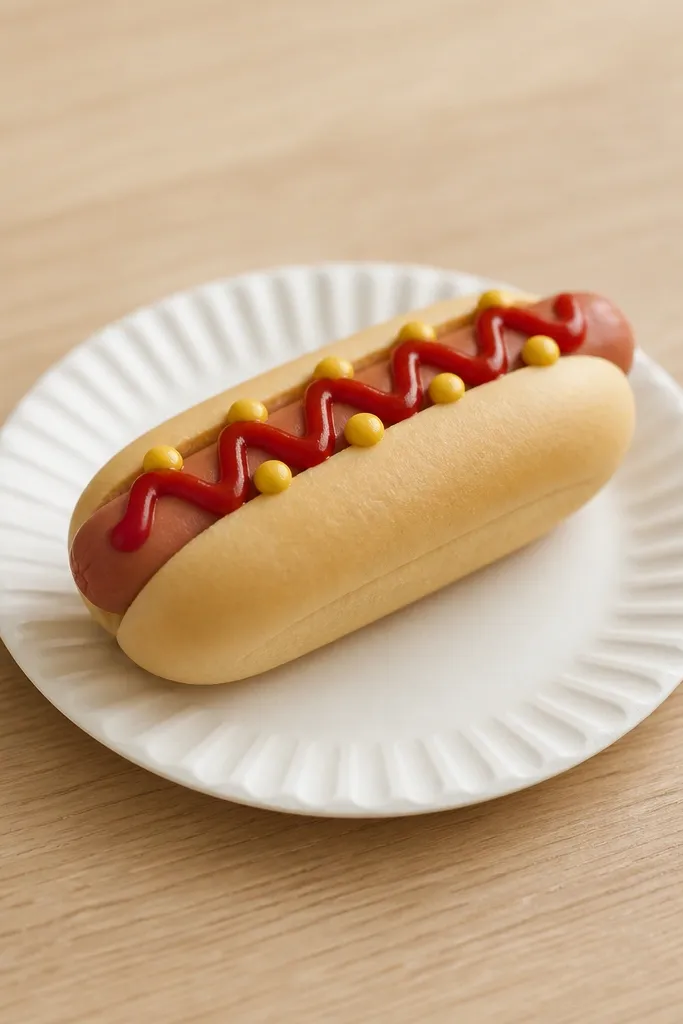
Cut two hot dog bodies: one bun outline and one sausage outline, then seal them together. For the squish, cut a foam insert about 9 cm long and 1.5 cm wide and glue it under the sausage layer. Draw bun texture with light brown pencil spots and a crease line. Add ketchup zigzags across the top using a red marker, then add mustard dots using a yellow pen. Seal the bun around the sausage edges with glue stick, and press-test along the length to ensure it dents evenly.
Hot dogs look fun because toppings are graphic and easy to control. I make the bun from soft yellow cardstock and draw a crease line along the top fold so it reads as a bun. The sausage is colored brown-pink with a slightly darker edge. Ketchup zigzags are clean marker lines, and mustard is a pattern of small dots that look like raised sauce. The fill is thin foam shaped to the sausage length so the squeeze feels like pressing a wrapped snack. This one is great for bright rooms because the red and yellow pop without looking muddy.
AvoidDon’t smear toppings while the ink is wet; it turns into one ugly band.
Pro tipUse a ruler for ketchup lines — straight zigzags look way more “designed.”
20. Pizza Slice with Pepperoni Circles and Cornmeal Specks
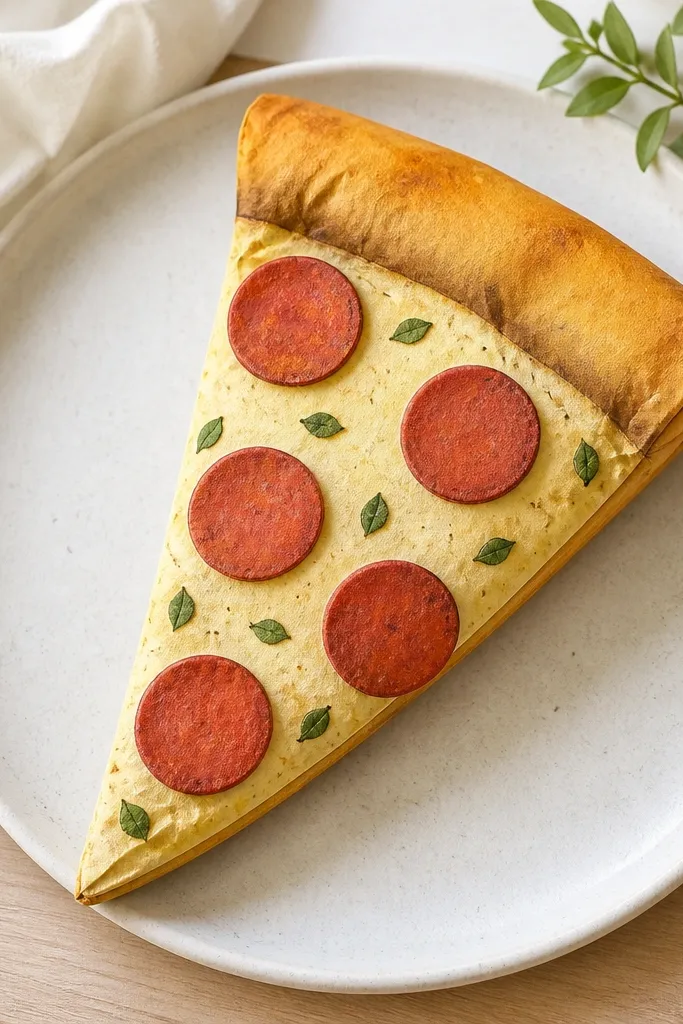
Trace and cut two pizza slice outlines, about 10 cm long, with a thicker base crust. Cut a foam wedge insert about 8.5 cm long and 3 cm wide, then glue it to one slice layer. Color cheese pale yellow and add cornmeal specks with a tan pencil. Add pepperoni circles and basil flecks on top before sealing. Seal the second slice layer on top, then glue the crust edge carefully so it stays defined. Press the center once and check that the crust still holds its shape.
Pizza slices photograph well because the slice shape creates natural shadows. I build the crust from golden cardstock and shade the edge like baked bread. The cheese is pale yellow with tiny cornmeal specks drawn with a tan pencil so it doesn’t look like flat paint. Pepperoni is easy: red circles with a slightly darker ring and a tiny highlight dot. Inside, I use a thin foam wedge under the slice so it squishes in the center without bending the crust too much. This looks great on both warm and cool backgrounds because the pepperoni red anchors the color.
AvoidAvoid using glossy paint on cheese — it reflects too much and looks plastic.
Pro tipAdd one thin darker line under a pepperoni circle to fake melted shadow.
21. Green Tea Mochi with Matcha Swirl
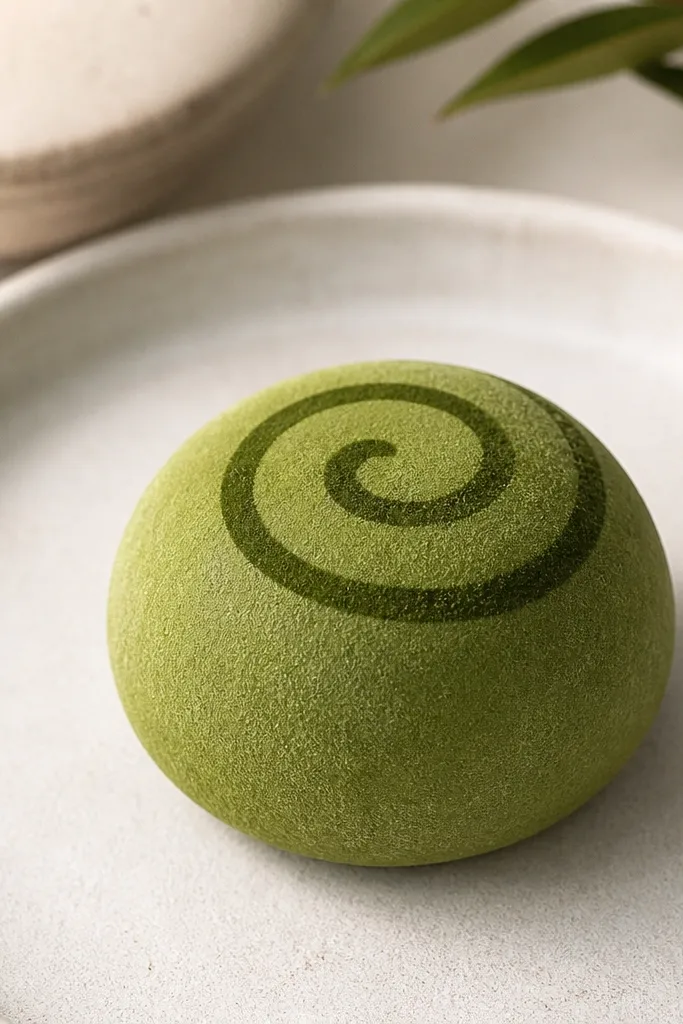
Matcha mochi looks expensive when the swirl is subtle. I color the base with a soft matcha green and keep it matte by using colored pencil instead of heavy marker. Then I add a darker green swirl line in a loose spiral, and I dust tiny specks around it like matcha powder. The fill is thin batting so it dents and bounces without creasing. This one flatters people with lighter hair and neutral outfits because the green looks calm instead of loud.
Cut two circles about 4.2 cm wide from matcha-green cardstock. Cut one thin batting circle slightly smaller and glue it to one circle. Seal with the second circle using glue stick around the edge. Add matcha swirl by drawing one spiral line with a darker green pencil and smudging lightly for a powdery look. Tap tiny specks with the pencil tip around the swirl, then press-test gently to check bounce.
If the swirl looks too dark, lighten it with a dry pencil rub on top.
Skip thick outlines on matcha — it should look powder-soft, not drawn.
22. Macaroni Salad Cup with Olive Bits
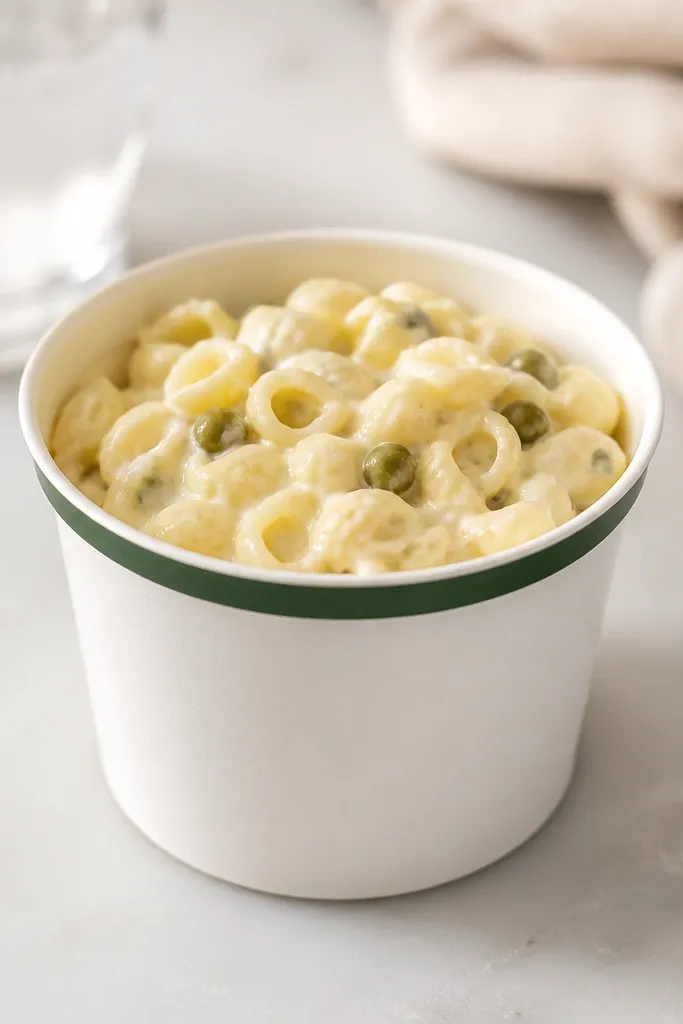
This is one of my favorite “desk snack” squishies because it looks like a real takeout cup. The cup shape is simple and the color blocking makes it read instantly. I use a white cardstock cup with a green rim, then I draw macaroni shells with short curved lines in pale yellow. Olive bits are small green circles with a tiny darker dot. The squish comes from a thin foam pad under the lid so the top dents like a soft container. It looks good with any outfit because the palette is clean and bright.
Cut a cup top circle or rounded rectangle about 7 cm wide and a matching second layer. Cut a thin foam pad slightly smaller and glue it to the underside of the top layer. Draw macaroni shell shapes on the top using light yellow and a slightly darker yellow pencil for depth. Add olive dots by placing tiny green circles and one darker center dot. Seal the lid with the second layer and glue the cup rim around the edges. Press the center to confirm the foam gives a gentle squish.
Add one tiny “steam” line in light gray pencil near the rim for a cute effect.
Avoid using too many tiny dots — the top gets visually noisy fast.
23. Cherry Pie Pocket with Crimped Crust Edge
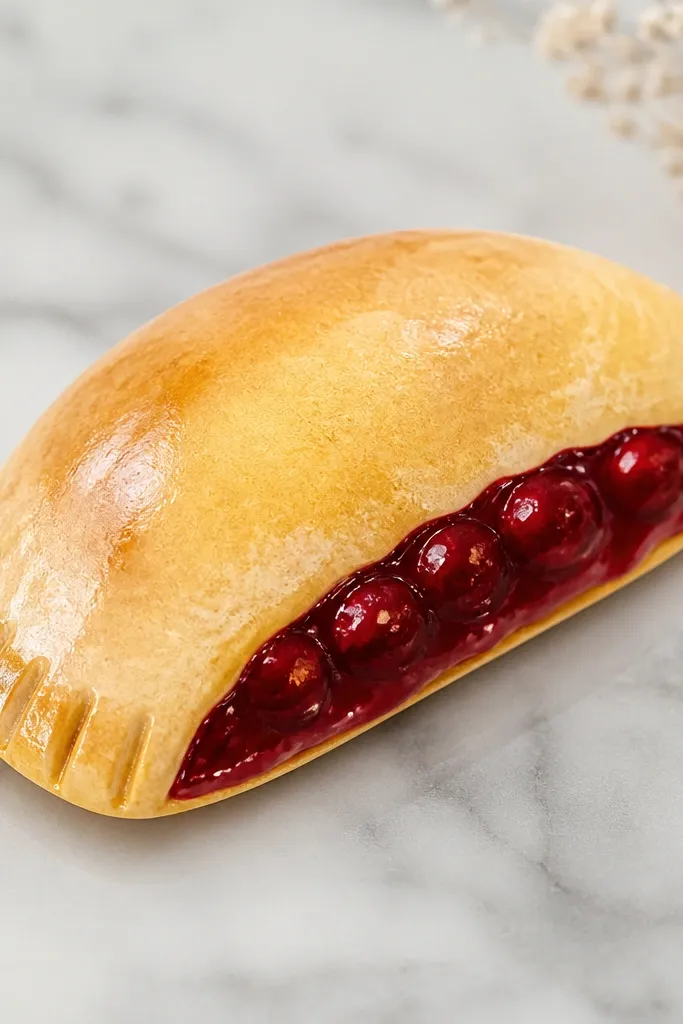
Trace and cut two half-moon pieces from golden cardstock, about 8 cm wide. Cut a batting insert half-moon slightly smaller and glue it to one crust piece. Color the filling area on the top crust layer by filling the inside with deep red and adding cherry spots in a darker red. Add a few highlight streaks with a white gel pen. Seal both crust layers around the border with glue stick, then crimp the edge by pressing small dents along the perimeter with a dull tool. Press once to set the filling in place.
Pie pockets look hard but they’re just good shapes. I make a half-moon crust and crimp the outer edge by scoring tiny dents along the border. The filling is deep red with darker cherry spots and a few lighter streaks to suggest juicy shine. For squish, batting gives a soft, bouncy bite without making the crust thick. This looks great for fall-themed displays and it holds up well in photos because the red filling creates contrast against the golden crust.
AvoidDon’t leave the crimp edge flat — flat edges read as unfinished.
Pro tipCrimp harder at the top curve and softer near the bottom for a more natural look.
24. Corn on the Cob with Buttery Edge Shine
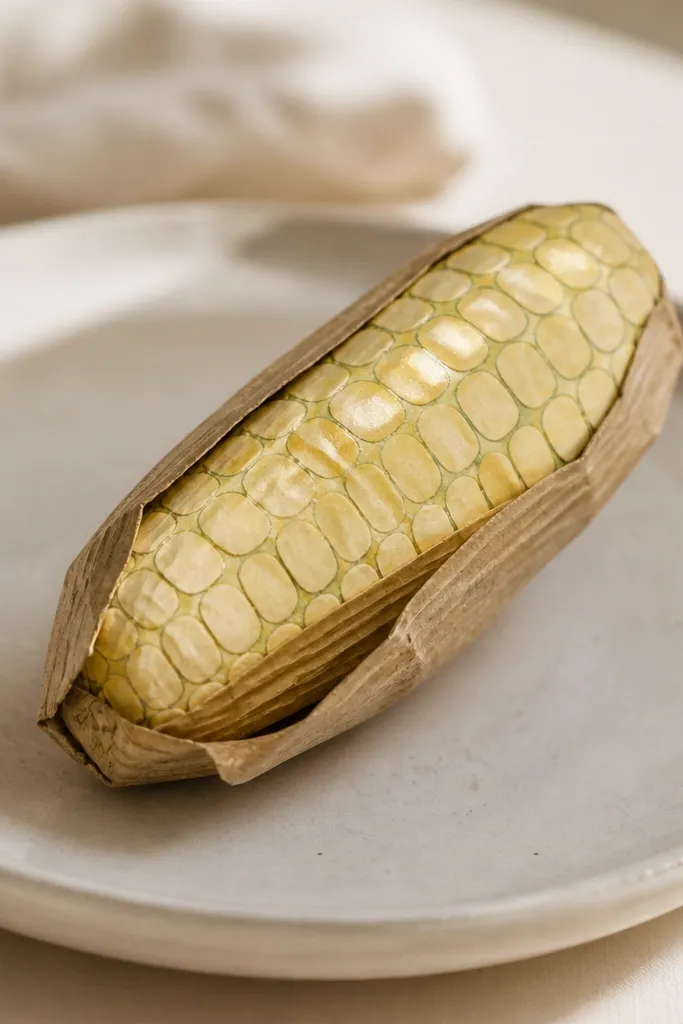
Corn is satisfying because kernels create texture even when the shape is simple. I color the cob with pale yellow cardstock and draw kernel rows using a fine marker, leaving tiny gaps so it looks airy. The husk edge is a strip of light green-brown paper around the top and sides. Inside, I use a thin foam strip running down the center so the cob dents but stays cylindrical. This is a good choice for beginners because you don’t need perfect symmetry — kernels can be slightly uneven and still look real.
Cut two corn cob outlines about 10 cm long from pale yellow cardstock. Cut a thin foam strip about 9 cm long and 1.2 cm wide and glue it to one cob layer. Draw kernel rows with a light brown or slightly darker yellow marker, keeping the lines thin. Add a husk by gluing a small light green-brown strip near the top curve and drawing a few vein lines. Seal the cob with the second layer and glue the husk edge down. Add buttery shine by drawing one thin highlight line with a white gel pen.
If the kernels look too dark, switch to colored pencil for a softer look.
Don’t use thick black marker lines — kernels should look delicate.
25. Mac and Cheese Bowl with Breadcrumb Dust
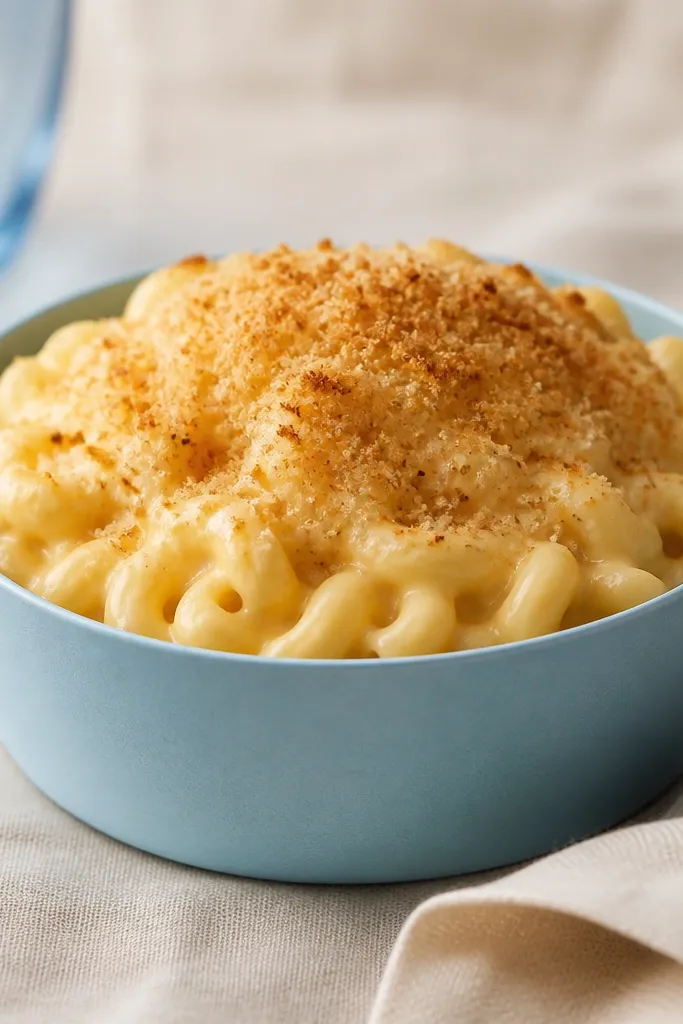
Cut two bowl-lid shapes about 8 cm wide from light blue cardstock, and cut a foam dome slightly smaller to sit in the center. Seal the foam under one lid piece and sandwich with the second lid layer using glue stick. Draw pasta elbow shapes in pale yellow, then shade some elbows with a slightly darker pencil. Add breadcrumb dust by tapping a brown pencil tip all over the top, then press lightly to set texture. Finish by outlining the bowl rim with a darker blue pencil for definition.
Mac and cheese is one of those foods that looks comforting and friendly. I build the bowl from light blue cardstock and outline it with a darker blue pencil so it looks like a dish, not a flat shape. The pasta is pale yellow with drawn elbow shapes, and the breadcrumb dust is done with a brown pencil stipple. Inside, I use a foam dome so the top compresses smoothly like a baked casserole. This is flattering in photos because the blue bowl gives you a cool contrast to warm yellow.
AvoidSkip big clumps of breadcrumb — small stipples look more baked.
Pro tipAdd one glossy spot on the cheese using a tiny dab of clear gloss gel.
26. French Fries Cone with Ketchup Packet Seal
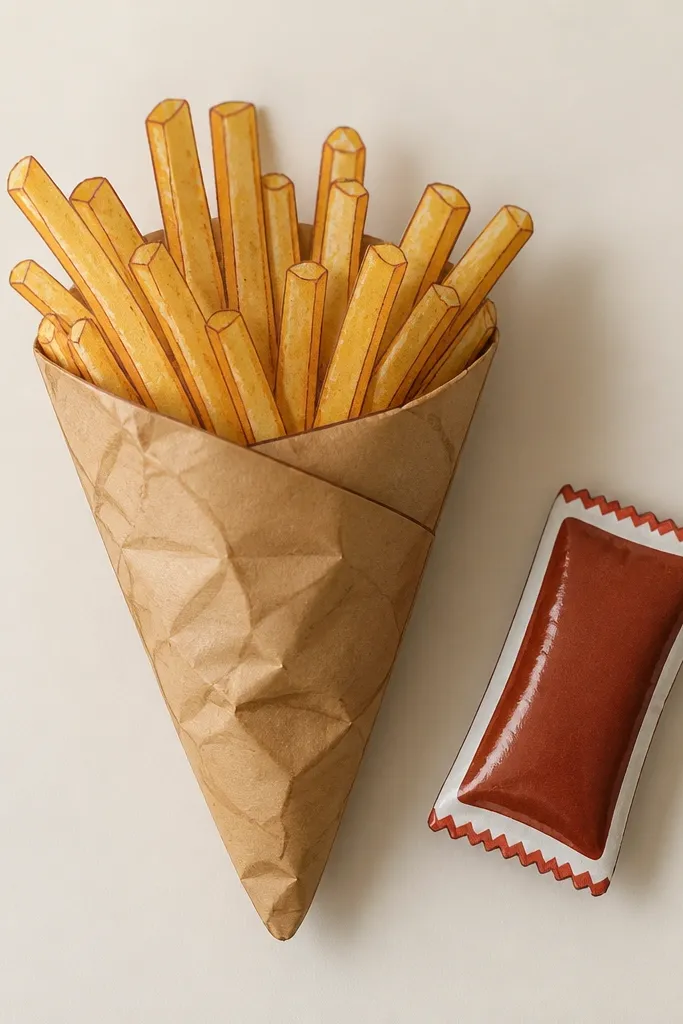
Cut two cone triangles and fold them into a cone, then glue the seam. Cut two fries-top layers about 7 cm wide and one thin foam insert slightly smaller. Glue foam to one fries layer, add drawn fries strips using a darker orange pencil, then seal with the second fries layer. Attach fries top to the cone opening. Make the ketchup packet by cutting a small rectangle, coloring it red, drawing a packet fold line, and adding a red zigzag seal at the top. Glue the ketchup packet beside the fries on the base.
This one looks like a fun snack and it’s easy to customize. I make the fries as thin strips drawn on a pale orange base so they look like actual fries without needing separate pieces. The cone uses brown cardstock folded into a triangle with crisp edges, which keeps the shape stable. The squish sits under the fries layer with a thin foam insert, so squeezing feels like pressing through paper packaging. The ketchup packet is a separate mini piece you glue on top — it makes the whole set more playful in photos.
AvoidDon’t glue fries too close to the cone edge or it will bunch when you squeeze.
Pro tipDraw 5-8 fries with slight uneven lengths — straight fries look too “clip art.”
27. Blueberry Muffin Top with Paper Cup Ridges
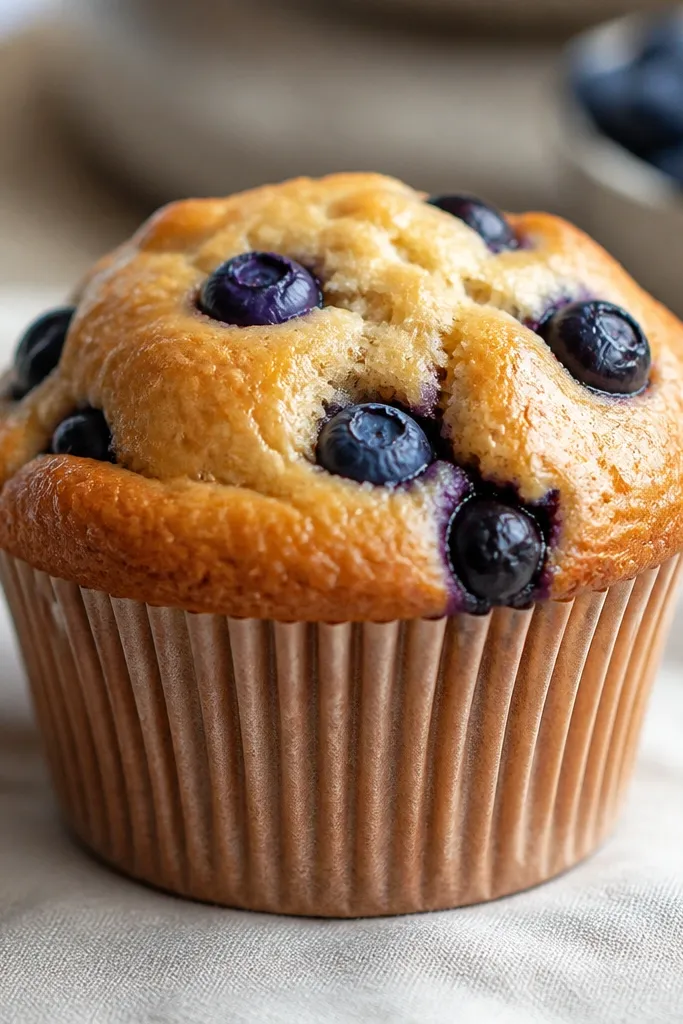
Cut two muffin top circles about 6 cm wide and one foam dome slightly smaller. Seal the foam between the two circles with glue stick. Color the muffin top golden and shade the edges darker, then draw a few tiny “crack” lines near the center. Add blueberries by placing 6-8 dark blue circles and adding lighter dots and a white highlight dot. For the cup, cut a ring strip from brown cardstock with a slight wavy edge and draw vertical ridges with a lighter pencil. Glue the cup ring under the muffin top and press lightly to anchor.
Muffins look great because the top dome is natural and the blueberries add instant color. I use golden cardstock for the muffin and shade the dome edges with a deeper brown pencil. Blueberries are dark blue circles with small lighter blue dots and tiny white highlight spots. For squish, a small foam dome under the top gives you a satisfying dent that returns. The paper cup ridges are a simple detail that makes the whole thing look like it belongs in a bakery basket.
AvoidAvoid flattening the dome — if you use too little foam, it looks like a coaster.
Pro tipAdd one torn-edge blueberry near the rim — it looks like it baked up and spread.
28. Taiyaki Fish with Crispy Scales Pattern
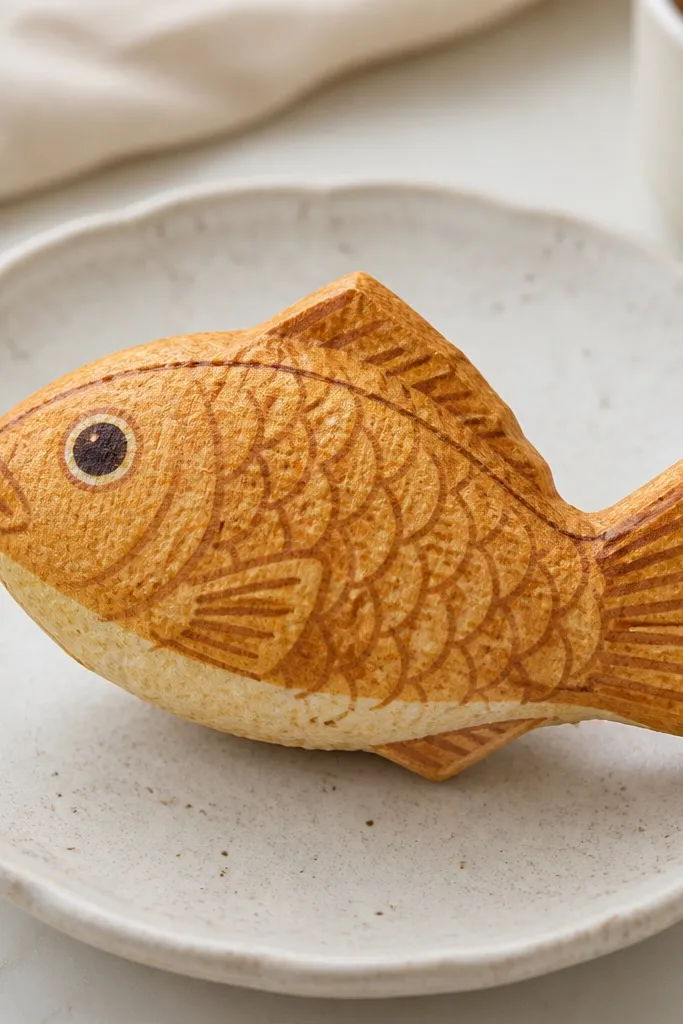
Taiyaki is one of the few foods where the shape itself sells the idea. I use a fish template and color the top with golden brown, then add darker “scale” marks using a pencil in small repeating arcs. The seam line along the spine is drawn lightly so it looks like the fish was pressed shut. Inside, thin batting keeps it soft, and a foam layer in the center makes it dent nicely. This looks good for both pastel and warm palettes because the scale pattern adds texture even if your background is plain.
Draw or trace a taiyaki fish outline about 10 cm long and cut two identical shapes from golden cardstock. Cut a batting insert slightly smaller and glue it to one fish shape. Color the belly lighter with a pale yellow-brown pencil and shade the back darker. Add scale marks by drawing small arc shapes in a darker brown along the body. Seal the second fish shape on top and glue along the edges. Draw a light seam line down the center and press-test at the middle to ensure the foam/batting gives the right squish.
Make the scale marks larger near the tail and smaller toward the head for a natural look.
Skip perfect symmetry — taiyaki scales look better when they vary slightly.
29. Taco with Minced Cheese Texture and Hot Sauce Dot
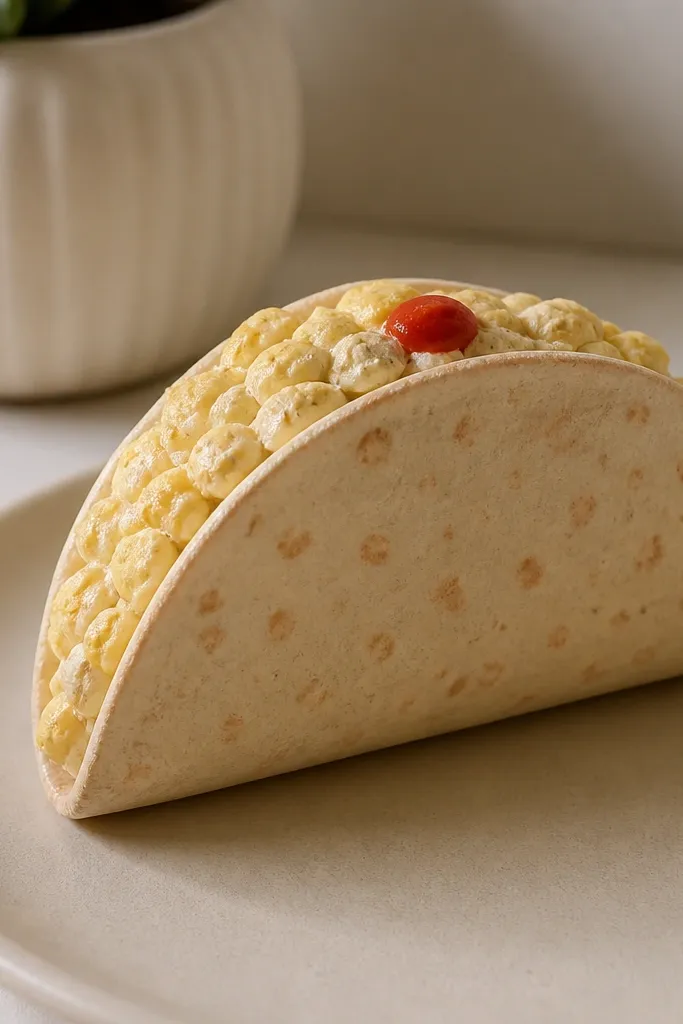
Tacos look great because they’re curved, so the seam can hide in the fold. I color the taco shell with toasted spots and then draw cheese crumbles as tiny irregular bits, not smooth blobs. The hot sauce is one or two red dots with a darker red ring so it looks thick. Squish comes from a thin foam wedge inside the taco shell, placed along the curve so it compresses without collapsing the top edge. This one looks especially good in warm indoor light because beige and pale yellow stay appetizing.
Cut two taco shell pieces shaped like a curved triangle, about 9 cm long. Glue the seam to form the shell and let it dry upright. Cut a foam wedge insert slightly shorter than the shell curve and glue it inside against the bottom. Draw toasted spots on the shell outside and draw cheese crumbles on the top filling area using a pale yellow pencil. Seal the top flap by gluing the second shell layer over the filled side. Add a red hot sauce dot by coloring a small circle and drawing a darker ring.
Add one tiny green lettuce edge line at the taco rim — it frames the filling.
Don’t make the cheese a single flat color — crumbles are what make it read as food.
30. Cinnamon Roll with Swirl Layers and Sticky Glaze
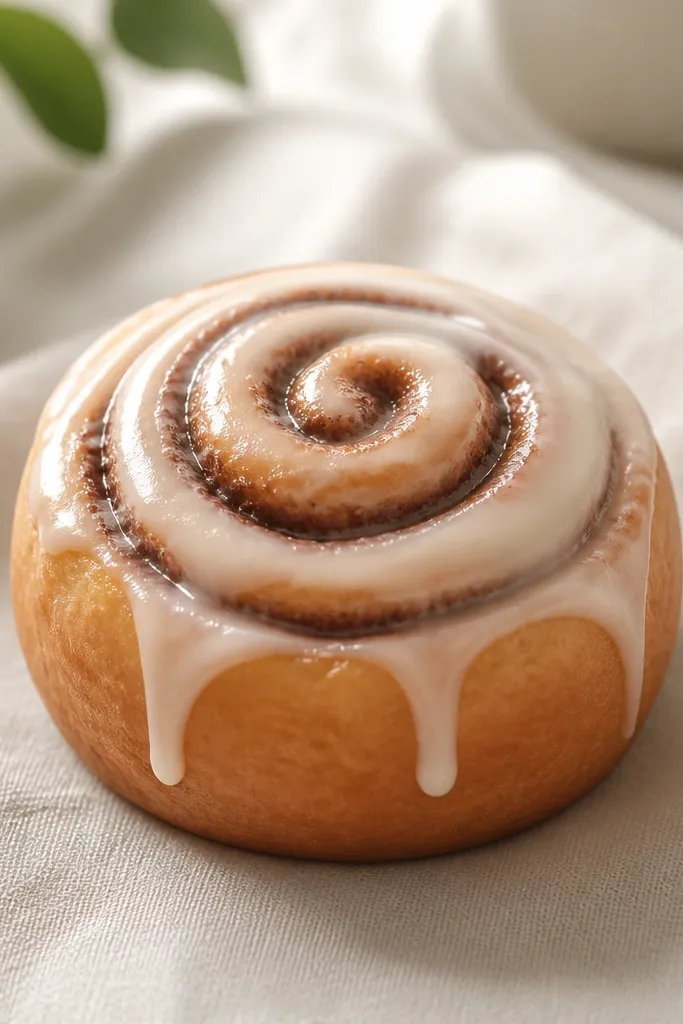
Cut a spiral template or freehand spiral rings on cardstock and cut two identical swirl tops. Cut a foam circle slightly smaller than the outer ring and glue it under one swirl top. Assemble by sealing the two swirl tops around the edge with glue stick, leaving the foam hidden. Color the swirl rings with alternating shades of brown using pencil or marker, and add glaze highlights in light cream. Draw three small glaze drips downward with a gel pen. Press gently once to settle the foam and keep the spiral domed.
Cinnamon rolls look good because the swirl creates depth lines. I use layered cardstock for the swirl so you can see the rings, then I add a pale glaze by coloring a thin top layer and drawing drips with a light brown marker. The fill is a foam circle under the spiral so the roll dents in the center and holds its shape. This is one of the best options if you want a “premium” look with simple cuts. It also looks great in neutral outfits because warm brown and creamy glaze match everything.
AvoidAvoid heavy marker on glaze — it makes it look matte and not sticky.
Pro tipUse a white gel pen to add one thick highlight on the glaze where light hits.



