
1. Oatmeal felt cable-knit border with caramel button charm
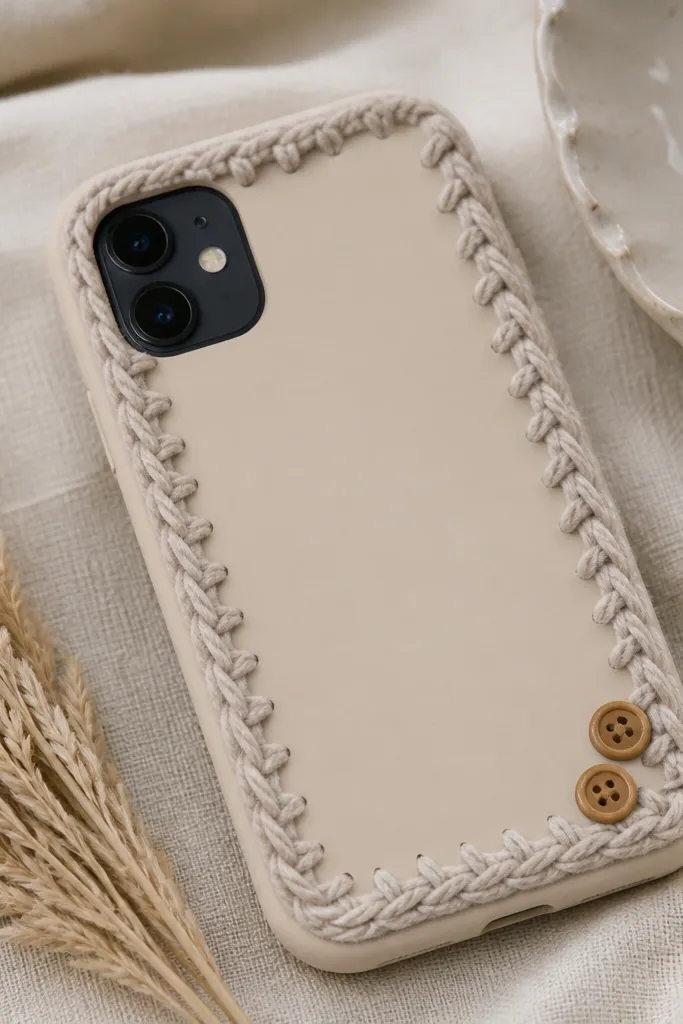
This one looks cozy because the border is soft and slightly raised, like a sweater cuff. Use oatmeal felt for the border strips, then cut a simple cable pattern by hand so it has little ridges you can feel with your fingertip. The caramel button charm gives you that warm “homey” detail without turning the whole thing into a craft fair mess. It flatters any skin tone because the palette reads neutral-warm, especially against cool-toned nails and silver rings.
Start by tracing two border pieces on oatmeal felt: one for the left/right sides (about 8 mm wide) and one for the bottom (about 10 mm tall), leaving the top open for your camera cutout. Glue the border to a clean TPU or silicone case using clear-dry fabric glue, then clamp lightly with binder clips for 10 minutes. Next, stitch a tiny loop on a caramel button with tan thread, then glue the button near the bottom-right edge so it sits 2-3 mm above the case. Finish by sealing the felt edges with a thin coat of matte Mod Podge or matte acrylic medium, keeping the center of the case free of glue.
Pro tipRun your finger along the felt edge after sealing. If it feels gritty, add one more thin matte coat and let it dry fully before touching.
AvoidSkip super-thick glue under the felt — it creates lumps that show through and look uneven.
2. Pressed daisy + warm honey resin window
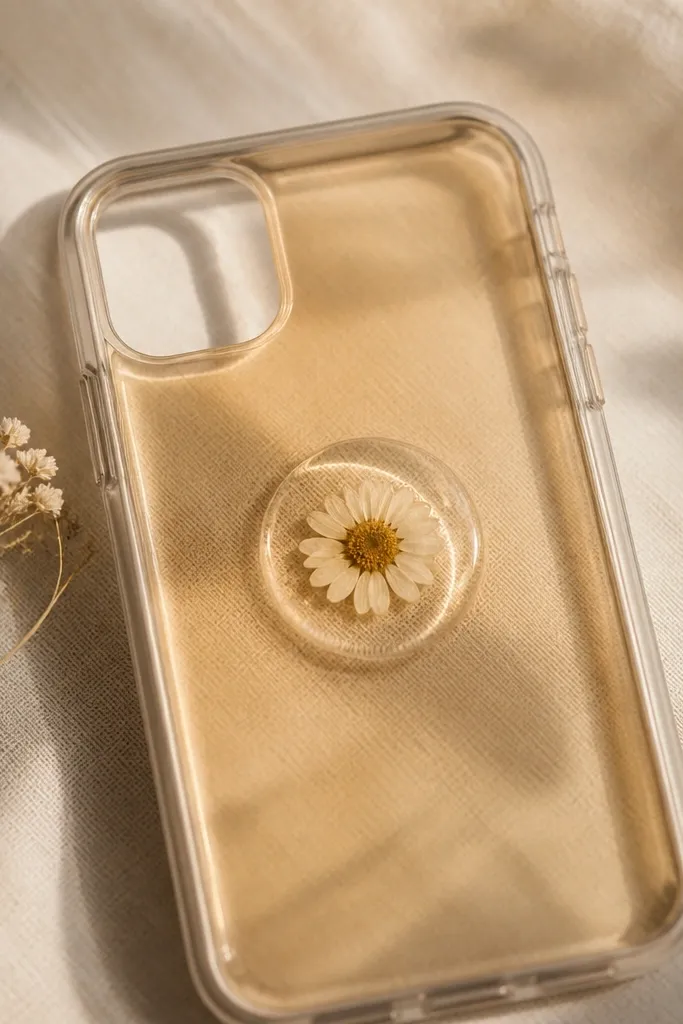
This is warm because honey-toned resin makes white petals look golden instead of icy. I’ve done it with small pressed daisies and it looks delicate without needing a whole collage. The “window” effect works great for people who like minimal decoration but still want the cozy diy phone case warm aesthetic. It also looks good on hands with gold jewelry since the honey tint echoes warm metal.
Clean the case with rubbing alcohol and let it dry. Place your pressed daisy in the center and trace a circle outline on the case to mark the resin area. Mix clear resin with a tiny amount of warm amber pigment until it looks like light honey in a spoon; pour a thin first layer, then set the flower and add another thin layer to cover. Use a toothpick to pop any bubbles and let it cure per your resin instructions. Once cured, lightly sand the edges with 1200-grit if needed, then apply a final thin topcoat so the rim feels smooth.
Pro tipUse daisies that are fully dry and flat, or the resin will trap curl and make it look warped.
AvoidDon’t pour thick resin in one go — it can crack or create a domed edge that catches lint.
3. Terracotta ombre paint drip on cream matte base
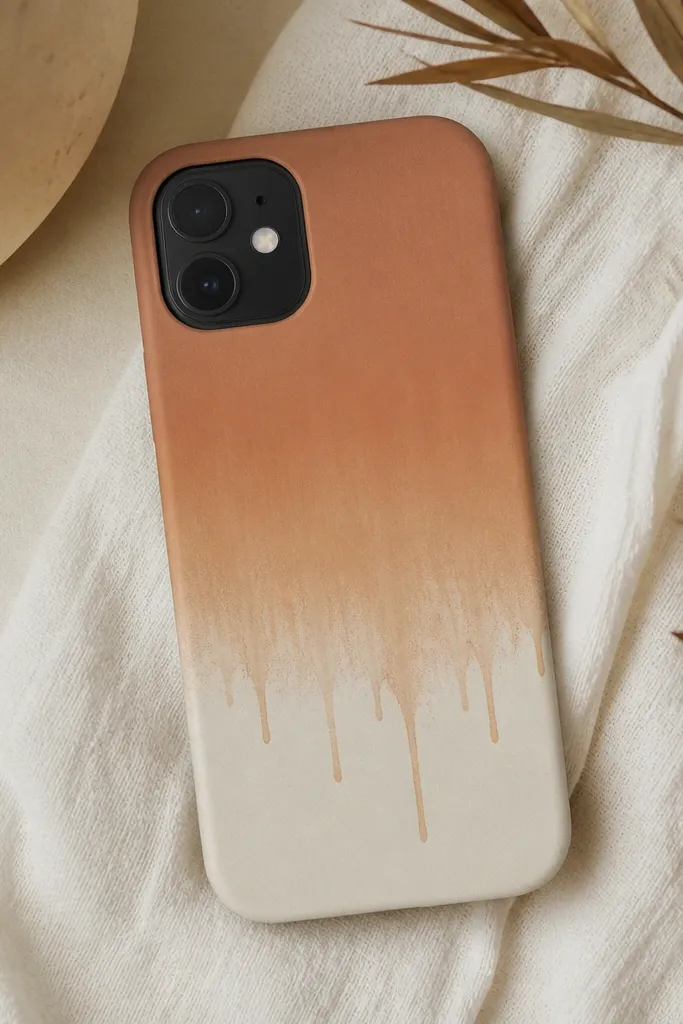
Paint drips look cozy when they’re controlled and matte, not glossy. I like a cream base because it softens terracotta and makes the whole case feel warm and calm. The ombre fade gives you movement without clutter, so it’s flattering for anyone who doesn’t want lots of charms or texture. This style also looks great with warm-toned makeup and browns, but it still works with cool outfits because the cream base keeps it balanced.
Start with a matte cream phone case or spray paint a clear case with matte cream paint. Mix terracotta acrylic paint with a little water and matte medium to keep it smooth and buildable. Paint a horizontal band near the top, then blend downward with a makeup sponge so the transition is gradual. For drips, load a fine brush with terracotta, touch it lightly to the lower edge of the ombre, and pull down 3-5 mm — stop before it looks like a spill. Let dry 30-60 minutes, then seal with matte clear acrylic spray in two light coats.
Pro tipDo a test swipe on cardboard first. Terracotta pigment can go darker fast, and you want soft, not harsh.
AvoidAvoid thick wet paint — it runs too far and makes the drips look uncontrolled.
4. Vintage scrapbook paper frame with warm tea-stain edges
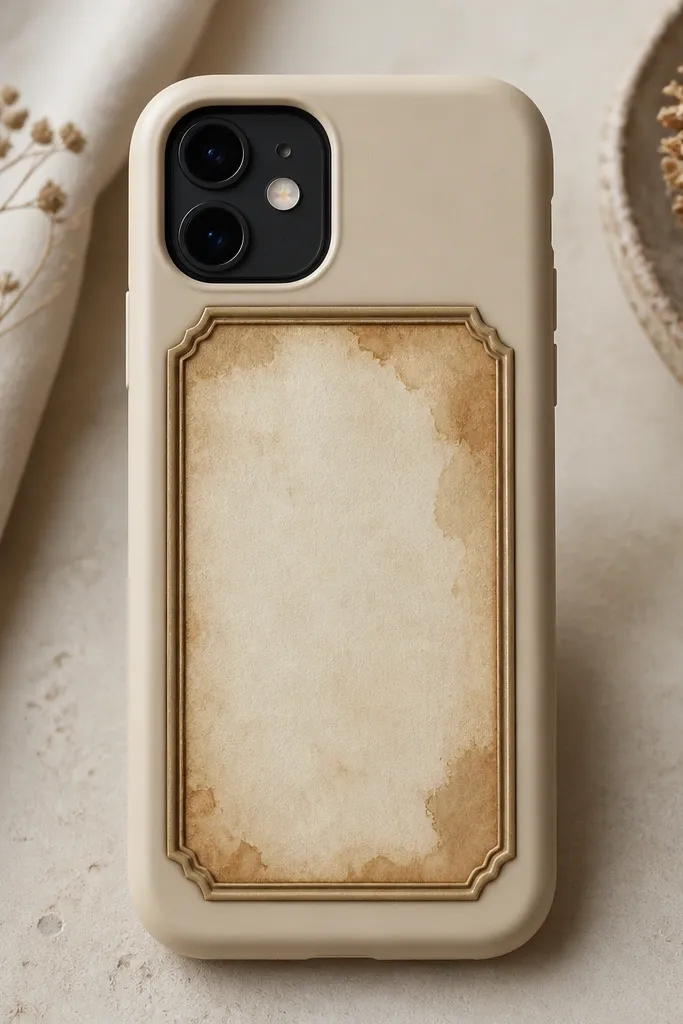
This one reads cozy because the paper has age-like warmth, but the frame keeps it neat. Tea-stained edges are the trick I use when I want the piece to look “collected” instead of printed. It flatters people who wear earth tones and also looks good against bright phone colors because the warm paper panel pulls everything together. The warm aesthetic comes from the edge color, not from adding more stuff.
Pick a scrapbook paper sheet with a pattern you like but keep the print small — tiny florals or subtle stripes look best. Cut a panel to fit the center area, leaving 2-3 mm margin around the camera opening. Tea stain: brew black tea, dip a sponge lightly on the edges only, then blot with a paper towel and let dry. Glue the stained panel to the case with a thin layer of decoupage glue, then add a frame strip around it using thin faux leather or cardstock painted warm tan. Seal everything with 2 coats of matte decoupage medium, letting each coat dry fully.
Pro tipBlot the tea stain quickly. The edges should look like a soft fade, not a wet ring.
AvoidSkip glossy seal on paper — it makes printed ink look plasticky and kills the cozy feel.
5. Ribbed knit fabric wrap with stitched faux seam
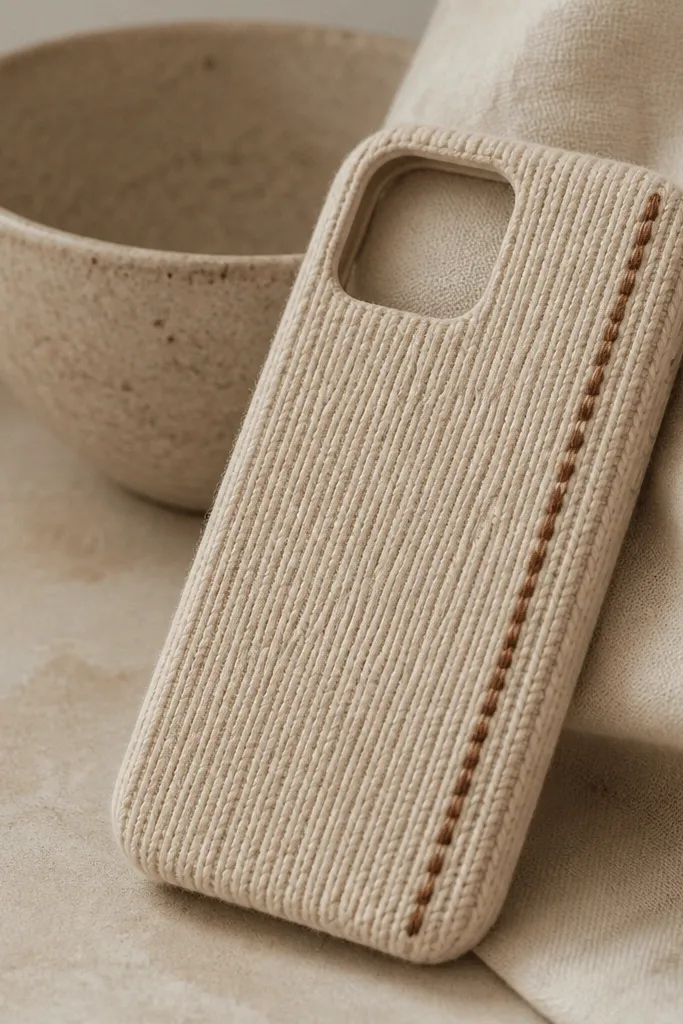
A ribbed knit cover is the closest DIY match to an actual sweater case. The ribbing catches light like fabric, so it always looks warm in different lighting. This works well for anyone who likes tactile cases and doesn’t mind a little softness under the fingers. It also looks great on darker nails because the oatmeal knit provides contrast without going harsh.
Cut knit fabric to cover the case front and sides. If your case is TPU, you can stretch slightly, but don’t pull hard or the ribs warp. Apply thin glue to one small section at a time and press the fabric down with a silicone spatula so you don’t trap air. Leave openings for camera and buttons — trace and cut carefully with a craft knife. For the stitched faux seam, use a fine-tip fabric marker or brown acrylic paint and draw a straight seam line 6-7 mm from the edge, then add short “stitch marks” with a toothpick. Seal the knit with matte fabric sealant in two light coats so it doesn’t fray.
Pro tipPre-wash knit fabric if it sheds. A case that sheds fuzz looks messy within a week.
AvoidDon’t cover the button area — it makes buttons feel mushy and can peel at the edges.
6. Cinnamon swirl heat-transfer vinyl on matte mocha case
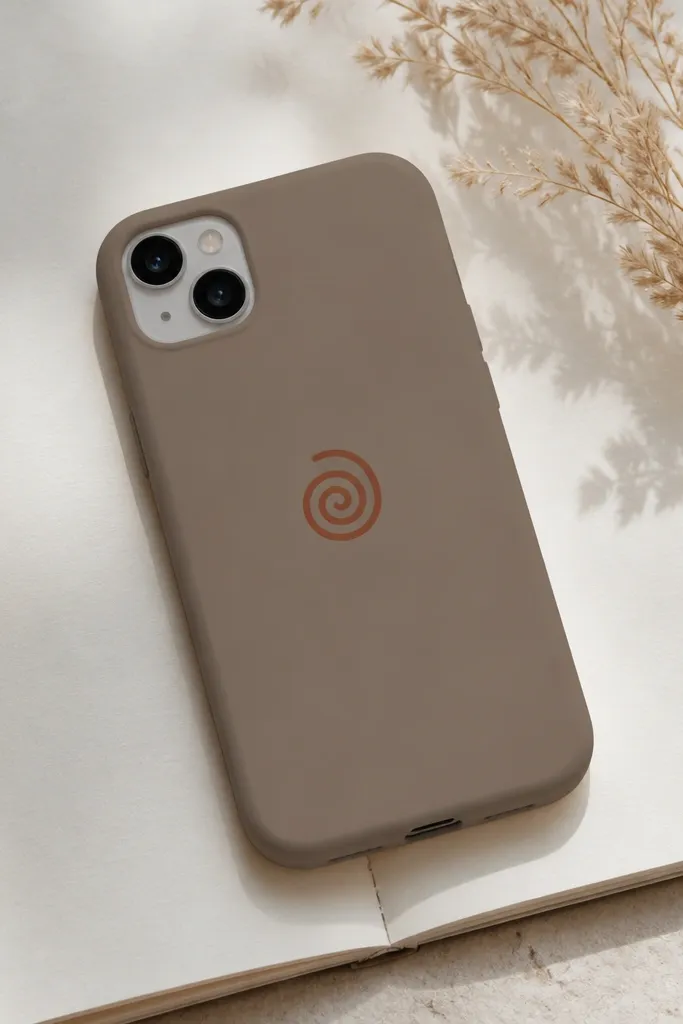
Heat-transfer vinyl looks cozy when the design is simple and the color is warm, not neon. A swirl in cinnamon brown gives motion without adding bulk, so it fits pockets and bags cleanly. This is ideal for beginners because the edges stay sharp and the finish looks like it came from a store. It flatters most styles because mocha and cinnamon match warm jewelry tones and look good with both casual and dressy outfits.
Start with a matte mocha case or paint a clear case with matte brown spray paint. Print or cut a swirl shape in warm cinnamon vinyl. Clean the case surface with rubbing alcohol, then place the vinyl where you want it and use a heat press or household iron with parchment paper between. Press at the recommended temperature for 20-30 seconds, let cool, then peel the backing. If you want extra warmth, add a tiny cream dot accent near the swirl tip. Seal with one thin matte clear coat to prevent scratches.
Pro tipUse parchment paper every time. Direct ironing can imprint texture into the vinyl.
AvoidAvoid glossy topcoat — it makes vinyl look like a sticker instead of part of the case.
7. Mini dried orange slice under clear topcoat
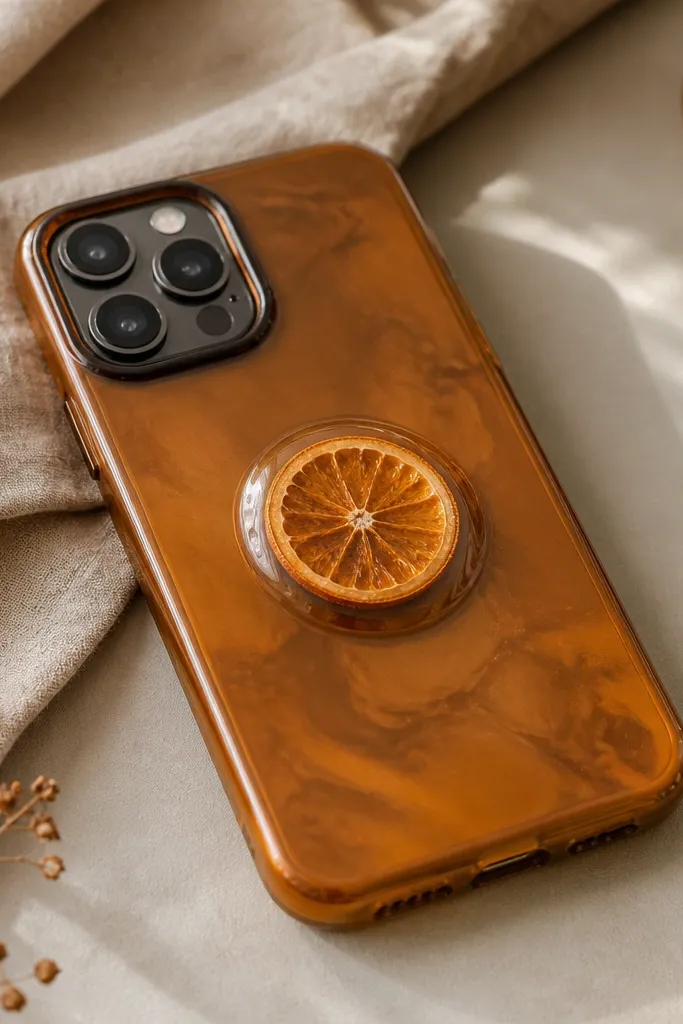
This looks cozy because orange slices bring warm color and a natural pattern that feels like winter drinks and cozy kitchens. The key is keeping the slice small so it doesn’t look bulky or cracked. I’ve done this with thin dehydrated orange rounds and it stays cute on both light and dark cases. It’s especially flattering if you wear gold-toned rings because the amber highlights match warm metal.
Dehydrate orange slices until they feel leathery, not wet. Cut one slice to fit inside a marked circle on the case, leaving 2-3 mm space around. Glue a clear film or thin acetate ring inside the circle area to create a clean boundary (this helps prevent resin seep). Pour a thin layer of clear resin, place the orange slice, and pour another thin layer to cover. Cure fully, then sand the very edge if it’s uneven and apply a final clear topcoat for a smooth dome.
Pro tipChoose orange slices with visible segments. Plain rounds look flat under resin.
AvoidDon’t use thick slices — they trap moisture and can discolor.
8. Warm faux leather patch with raw-edge stitching look
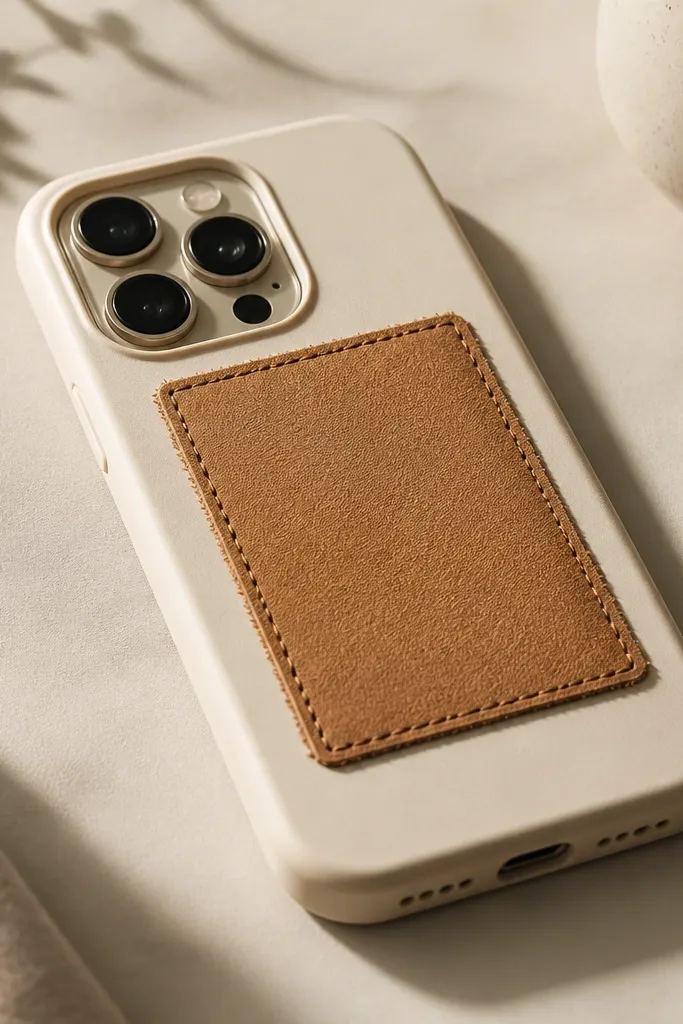
Faux leather makes a phone case feel cozy because it has a warm, matte texture and a soft drape. A patch layout also hides small imperfections in cutting, which is why I like it for DIY. The raw-edge stitching look gives the piece a handmade vibe without needing real sewing. This style looks great on people who wear neutral outfits — it adds warmth without shouting.
Choose a camel or tan faux leather sheet with a matte finish. Cut a patch panel sized to the center area of your case, leaving 3-4 mm margin around. Create the raw-edge look by lightly rubbing the edge with sandpaper so it softens and fuzzes — then trim loose bits. Glue the patch to the case with a strong craft adhesive and press firmly for 30 seconds, then let it set 10 minutes. Draw a stitched border around the patch using a fine paint marker in dark brown, making small evenly spaced dots. Seal with matte acrylic medium only on the patch surface, not around the edges where you want flexibility.
Pro tipUse a paint marker instead of a pen. Pen ink smears on leather texture.
AvoidSkip glossy faux leather — it reflects light sharply and kills the cozy warmth.
9. Pressed lavender sprig with sage-green matte overlay
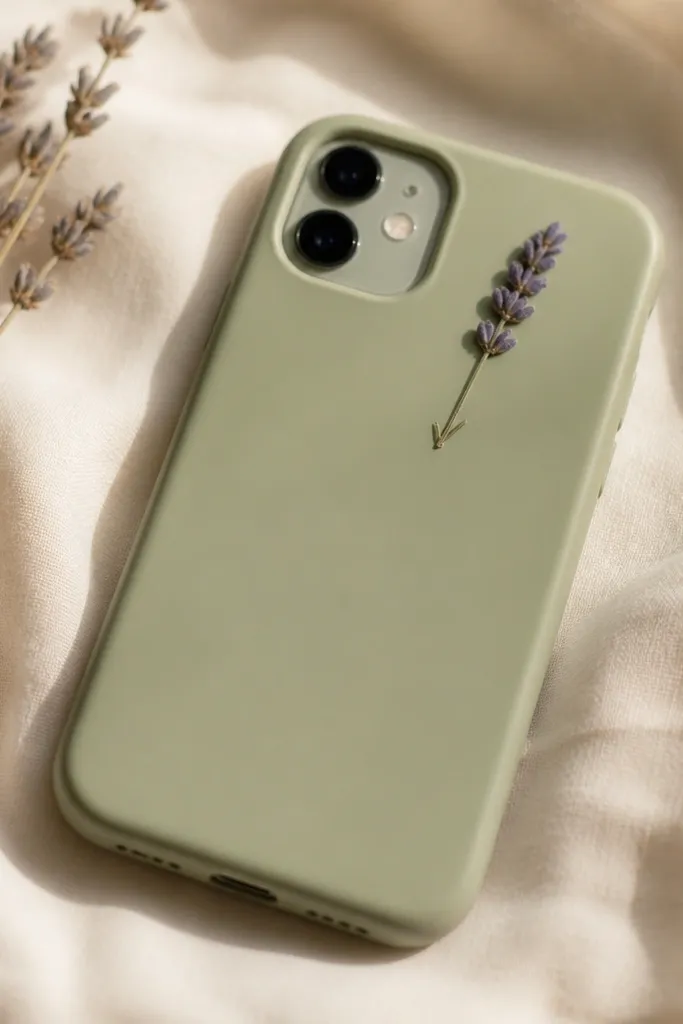
Lavender plus sage reads cozy because it’s soft, not icy. The matte sage base keeps everything calm, and the pressed sprig adds a delicate focal point. This is great for people who like “quiet pretty” cases and want something that looks thoughtful from a distance. It also works well for lighter skin tones because the sage base doesn’t overpower your hand.
Start by painting or using a matte sage-green case. Place a small pressed lavender sprig where you want it and outline it lightly with a pencil. Apply a thin layer of clear-dry glue only under the sprig, then press it down and hold for 30 seconds. Mix a tiny amount of white acrylic into clear medium to make a milky overlay tint, then paint a thin layer around the sprig so it blends into the base. Let dry fully, then add one more thin clear topcoat for protection.
Press lavender between paper for at least 5-7 days if you want it to stay flat under glue.
Avoid over-gluing — glue sheen turns lavender stems glossy and looks cheap.
10. Caramel latte marble swipe with cream base (paint + sponge)
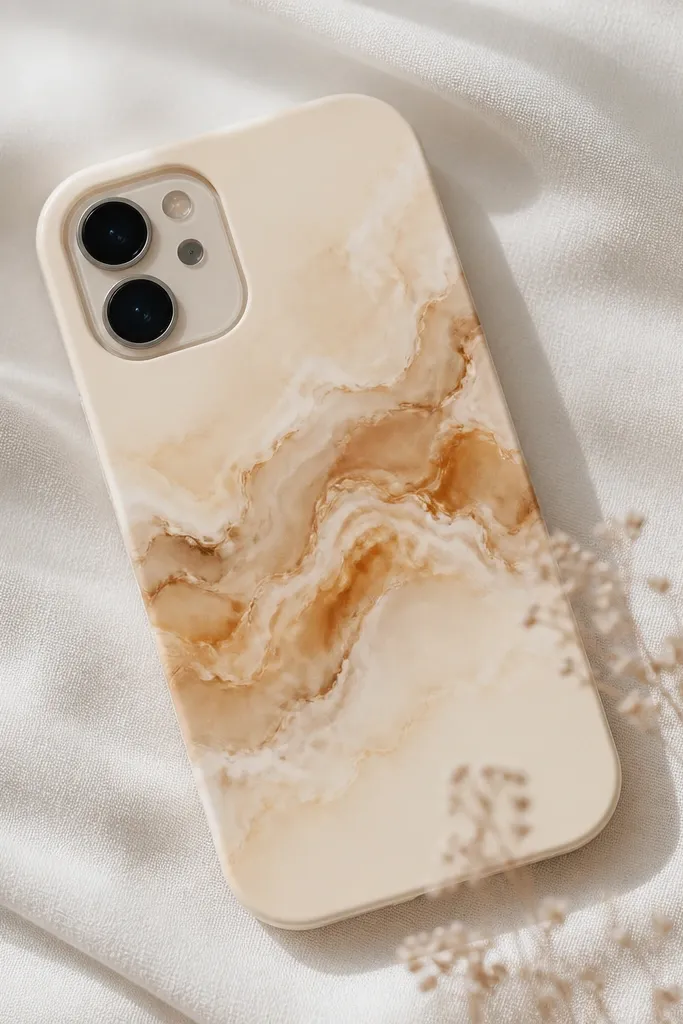
Marble looks cozy when it’s cloud-soft instead of high-contrast. A cream base with caramel swipes makes the case feel warm and creamy — like latte foam. This style flatters anyone who wears lots of neutrals because it adds interest without turning into a busy collage. It also looks good with both matte and glossy jewelry since the finish stays soft and not shiny.
Use a cream base case or paint one with matte cream. Sponge-paint: dab caramel brown acrylic and a lighter warm beige using a makeup sponge in broad, irregular swipes. For marble veins, use a fine brush with watered-down dark caramel and drag two or three thin lines through the swipes, then lightly smudge edges with the sponge so it doesn’t look like doodles. Add 2-3 tiny dot highlights in a near-cream color to mimic foam bubbles. Seal with matte clear spray in two light coats.
Keep your veins thin. Thick “veins” look like cheap nail art.
Avoid straight-line swirls. Real marble looks messy, and straight patterns look forced.
11. Warm polaroid-style photo frame with mini twine bow
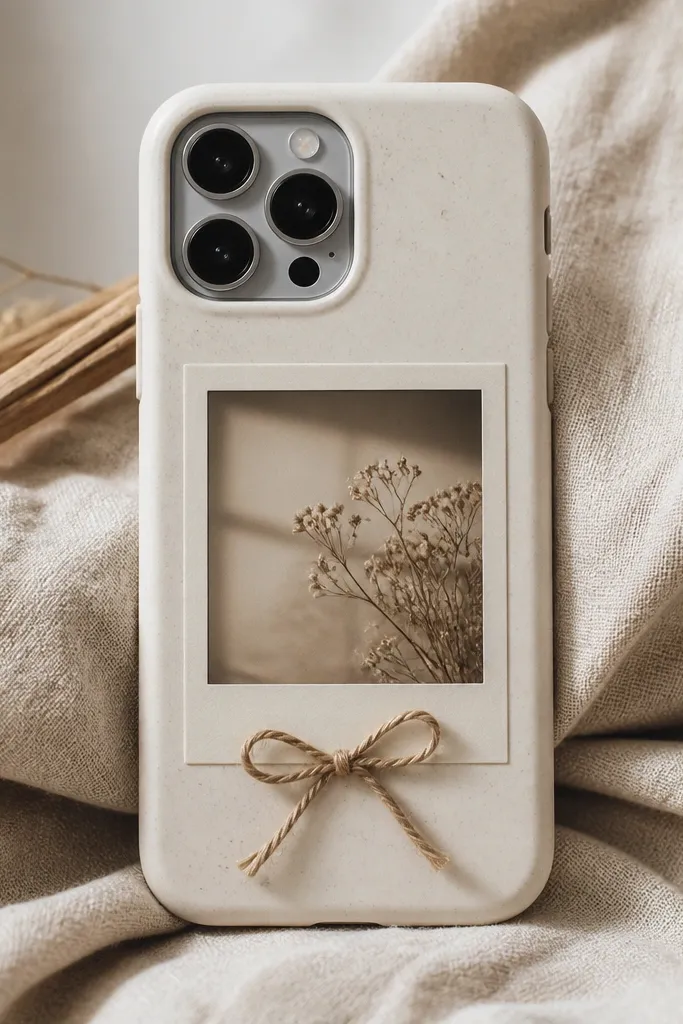
This has cozy appeal because it looks like a little memory card you can touch, but the materials keep it warm and grounded. The polaroid layout is easy to read, and the twine bow adds a tactile detail without heavy bulk. It’s flattering for hands that wear casual rings and bracelets because the twine detail looks handmade and personal. Choose a warm-toned mini print (cream background, brown ink) and it will match your outfits instead of fighting them.
Print a small photo or use a printed mini card on thick matte paper. Cut a polaroid frame: outer rectangle about 70% of the case front, then an inner photo window with a 6-8 mm border. Tea-stain only the frame edges for warmth. Glue the polaroid paper to the case with decoupage glue, smoothing with a plastic card to prevent wrinkles. Make a mini bow from natural twine, about 1.5-2 cm wide, and glue it at the bottom center of the frame. Seal with two coats of matte Mod Podge, paying attention to sealing the paper edges.
Pro tipUse thick matte paper (like cardstock) so the edges don’t curl after sealing.
AvoidSkip glossy photo paper — it reflects light and makes the frame look like a sticker.
12. Tiny terracotta tile pattern using ceramic-look nail art dots
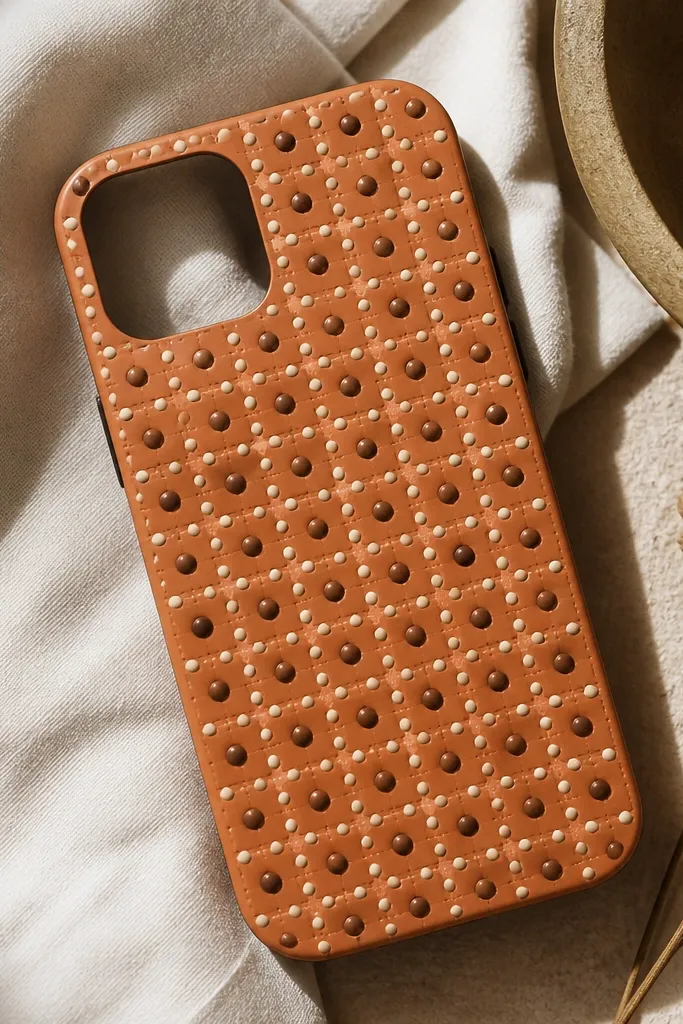
Tile patterns feel cozy because they’re structured but still handmade. A terracotta base with cream-and-brown dot tiles looks like tiny ceramic squares, and it doesn’t need a big design. This is perfect if you want a warm aesthetic that stays visible even when your case is in your bag. It also looks nice on all skin tones because the pattern is warm and neutral, not neon.
Paint the whole case terracotta and let it dry fully. Use a dotting tool or toothpick dipped in cream acrylic to place small dots in a grid, spacing about 6-8 mm apart. Add a second layer of tiny darker brown dots in the center of some cream dots so it looks like tile glaze variation. For dimension, mix clear gel medium into one dot color and dot over a few tiles only. Let it cure, then seal with a satin clear topcoat so the raised dots don’t snag.
Make one row first and check alignment before you do the whole grid.
Avoid tiny dots that are too close together — they blur and look like random specks.
13. Warm botanical line art sticker + matte seal (no raised edges)
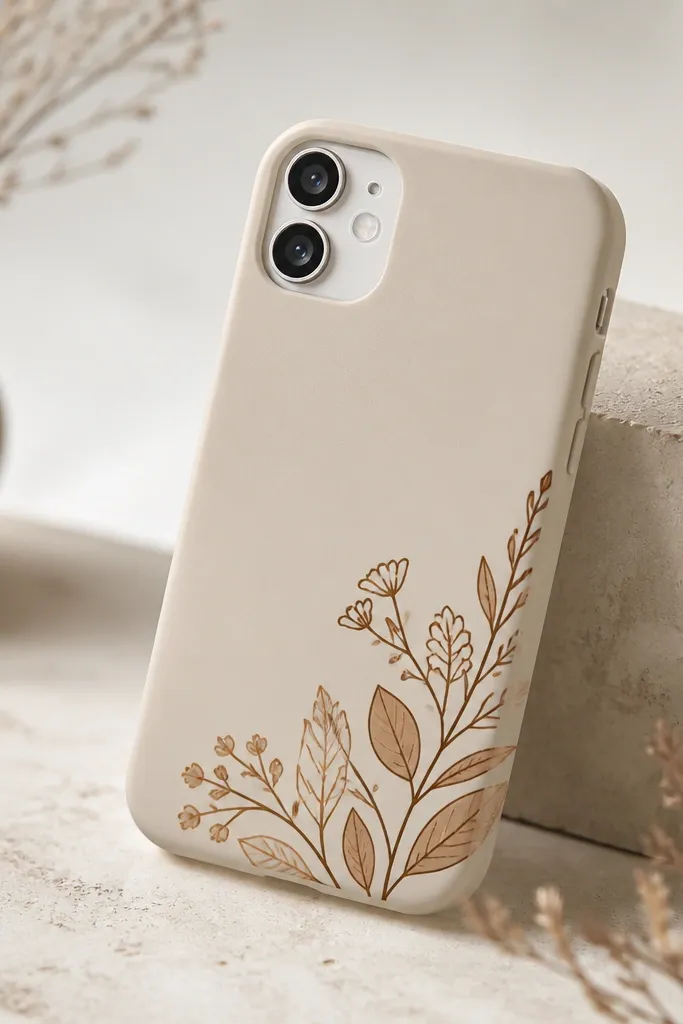
If you want cozy without bulk, line art is the cleanest route. Warm brown botanical lines look soft and “hand-drawn,” especially on a cream or blush base. This works for people who keep their phones in pockets because the seal prevents sticker peel. It flatters minimal outfits and also looks good with bold nails because the art stays calm and small.
Choose a warm brown line art sticker sheet or print line art on matte sticker paper. Place the sticker near the bottom third of the case, keeping it at least 8 mm away from camera cutouts. Press down firmly and use a craft knife to trim any edge that overlaps openings. Seal: brush a thin matte decoupage layer over the entire sticker area, then let it dry and add a second thin coat. Keep coats thin so the lines don’t fill in and lose sharpness.
Pro tipTrim sticker edges with a sharp blade. A jagged edge shows through even under matte seal.
AvoidSkip thick layers of seal — they blur the art and create a milky look.
14. Buttercream swirl washi tape border with soft gold leaf corners
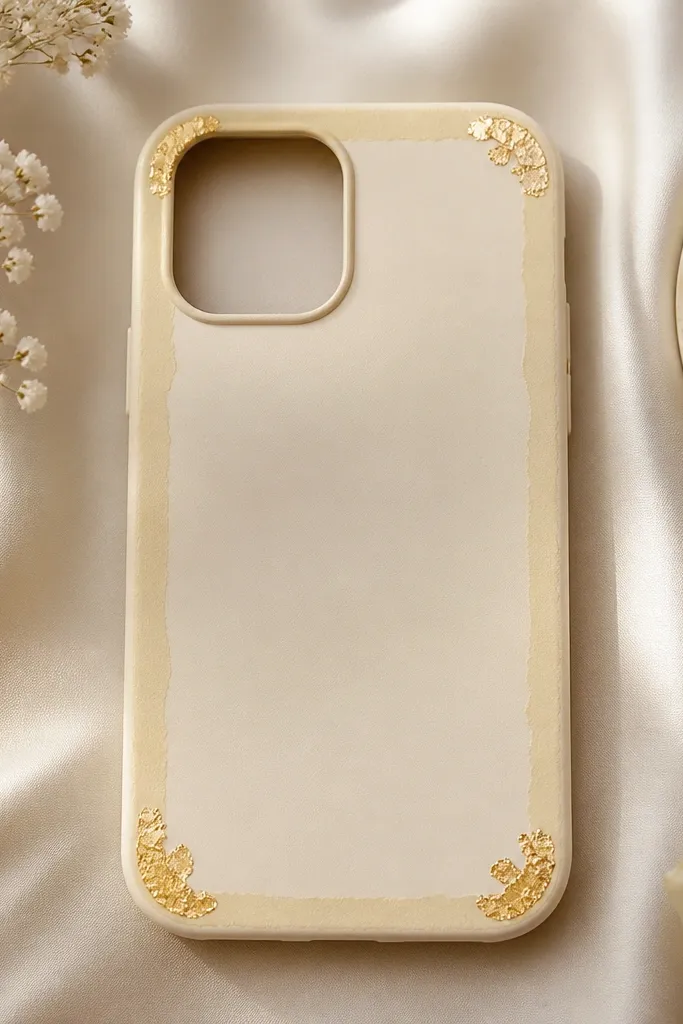
Washi tape looks cozy when it’s used as a border, not a full cover. Buttercream tones feel warm and friendly, and gold leaf adds a gentle glow without the harshness of glitter. I like this for days when you want your phone to look cute but still clean and usable. It flatters both warm and cool nail colors because cream and soft gold sit in the middle.
Start with a cream or light beige case. Apply washi tape strips along the top and sides first, overlapping by 2-3 mm so no raw edge shows. Use a second strip to create a corner frame — keep the design symmetrical across two sides. For gold leaf, dab a tiny amount of gold leaf adhesive in each corner and press small gold leaf pieces so they stay small and irregular. Seal the border lightly with a matte topcoat spray, but avoid the gold leaf center area if your adhesive gets cloudy — test on scrap first.
Pro tipUse a ruler and cut tape edges with a blade. Straight lines make washi look intentional.
AvoidAvoid covering button areas with tape — it peels from pressure and makes the case look worn fast.
15. Suede-like micro-pouch texture with mini tassel at the side
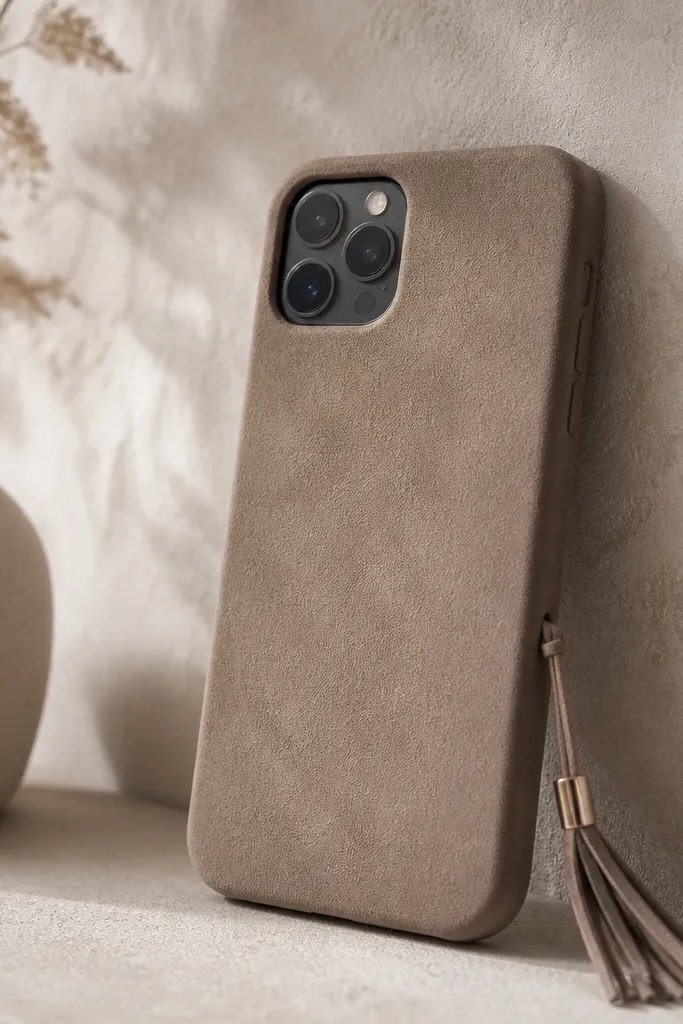
A suede-like texture reads cozy because it absorbs light instead of reflecting it. Adding a mini tassel gives you movement when you walk, but you keep it small so it still feels practical. This is the kind of case I wear when I’m in boots and a knit sweater because the materials match that mood. It also looks great on phones with darker finishes because the warm taupe softens everything.
Cut suede-like faux fabric in a front-and-sides wrap pattern. Glue in sections: front first, then sides, then trim the edges with a craft knife around camera and buttons. Let it dry under a flat weight for 15 minutes so it stays smooth. For the tassel, wrap embroidery thread around a small piece of cardboard, slide off, tie a knot at one end, then trim to make a 2-3 cm tassel. Glue the tassel to the side edge of the case near the bottom, then reinforce with a tiny dab of clear glue on the knot area. Seal the fabric surface with matte fabric sealer so it doesn’t shed.
Pro tipMake the tassel shorter than you think. A 2 cm tassel looks cute; a longer one catches on pockets.
AvoidAvoid shiny “suede” that’s actually vinyl — it shows glare and looks cheap in indoor light.



