
1. Rosemary herb sprig with clear resin-look coat
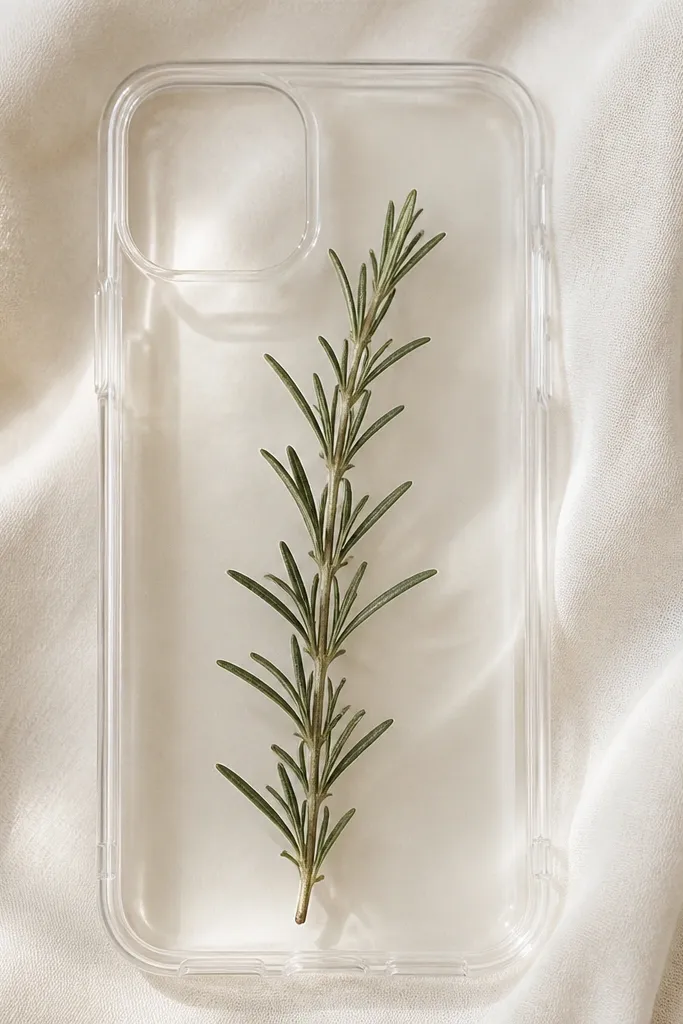
I love this one because it reads expensive without costing real money. I glue a small dried rosemary sprig in the center, right above the camera bump, so the phone still feels sleek in-hand. Dried herbs have natural texture and tiny veins that look good under glossy protection. It flatters cool skin tones and neutral outfits because the green stays earthy instead of neon. For a daily case, keep the sprig thin — thicker dried stems can lift at the edges.
Start by drying a rosemary sprig for 2-3 days between paper towels so it doesn’t stay damp. Cut the sprig down to about 2.5 inches long, then trim the base so it sits flat. Apply a thin line of clear craft glue or gel adhesive to the middle of the case and press the sprig for 60 seconds. Let it dry 30 minutes, then brush on a thin layer of glossy clear top coat over the sprig only, followed by a second thin coat after it turns tack-free. Finally, check the rim — if any coating reaches the raised edge, wipe it off with a damp cotton swab so it doesn’t peel.
If the herb looks too dark, sand a tiny bit of the glossy top coat off later and recoat — it brightens the green.
Don’t use fresh herbs — moisture makes the glue cloudy and the sprig curls.
2. Scrapbook paper marble stripe center panel
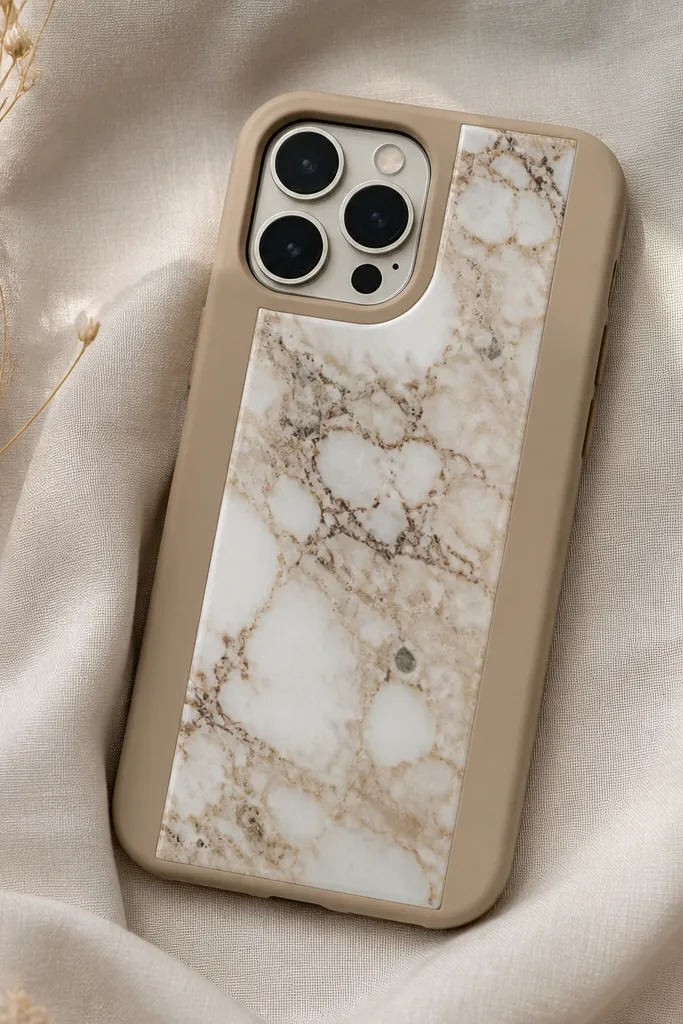
Measure the front of your case from the top edge to just above the camera opening, then cut a paper rectangle that’s about 1/8 inch shorter on each side. Trace the camera area lightly and cut a small notch so the bump stays uncovered. Apply a thin layer of decoupage glue or white glue diluted 1:1 with water, then press the paper panel down smoothly with a credit card. Let it dry fully for an hour, then seal with two coats of glossy clear coat, brushing from the center outward. Finish by trimming any excess paper at the edges with a sharp craft knife so it stays flush with the rim.
This is the fastest way to get a luxe look without buying expensive vinyl. Marble scrapbook paper looks like high-end phone accessories once you seal it, and the stripes give your case a sharp, graphic shape. I place the panel slightly above center so it frames the camera instead of covering it. This design looks good on warm and neutral skin tones because the beige and off-white tones stay soft. It also works well for office outfits because it doesn’t scream for attention.
AvoidDon’t skip sealing — paper edges scuff fast and start peeling at the corners.
Pro tipUse a matte paper first, then glossy top coat — it hides tiny wrinkles better than glossy paper alone.
3. Neon starburst vinyl over a black TPU base
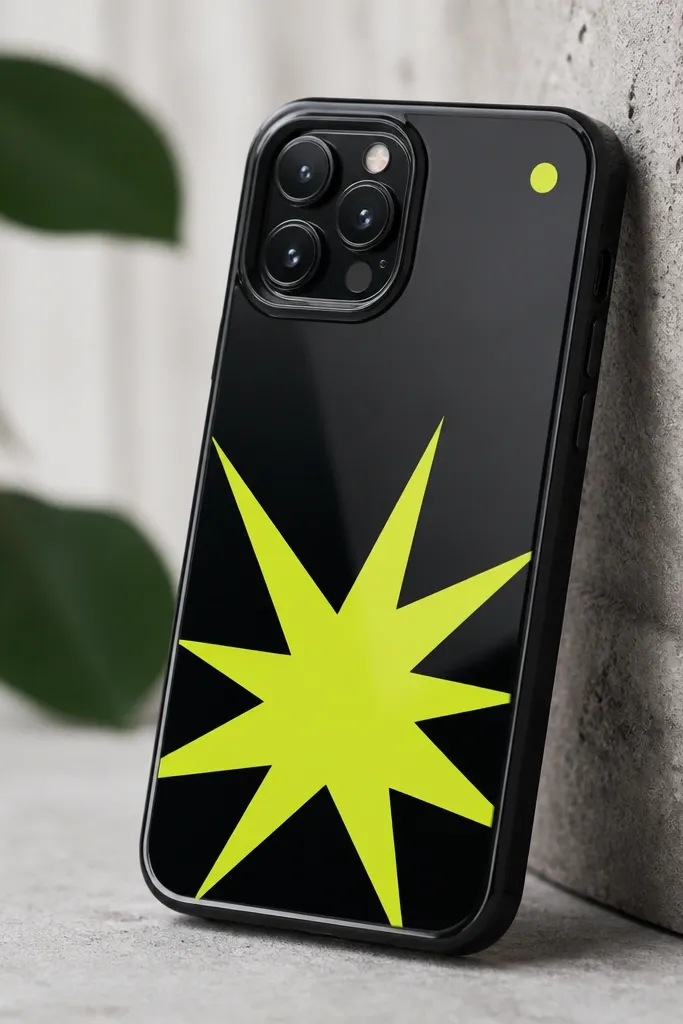
If you want a case that looks like it came from a boutique, vinyl does it. The starburst shape has energy, but keeping it to one graphic area keeps it clean instead of chaotic. I stick it on a black TPU base because black makes neon colors pop without looking cheap. This style looks great with silver jewelry and cool-toned wardrobes. It also hides minor scuffs better than bright bases since the design is already bold.
Clean the case with rubbing alcohol and let it dry. Cut a starburst from neon adhesive vinyl — about 2.25 inches wide for most phones. Peel and place it starting with the center point, then press outward with a squeegee or the back of a spoon. Add a single small neon dot near the top corner for balance, keeping it at least 1 cm away from the camera. Seal with a thin glossy clear coat over the vinyl only; two thin coats are better than one thick coat that can pool.
Warm the vinyl with a hair dryer for 10 seconds before sticking so it conforms to curves.
Don’t use glitter glue as a seal over vinyl — it turns gritty and dull.
4. Candy wrapper foil confetti with glossy top coat
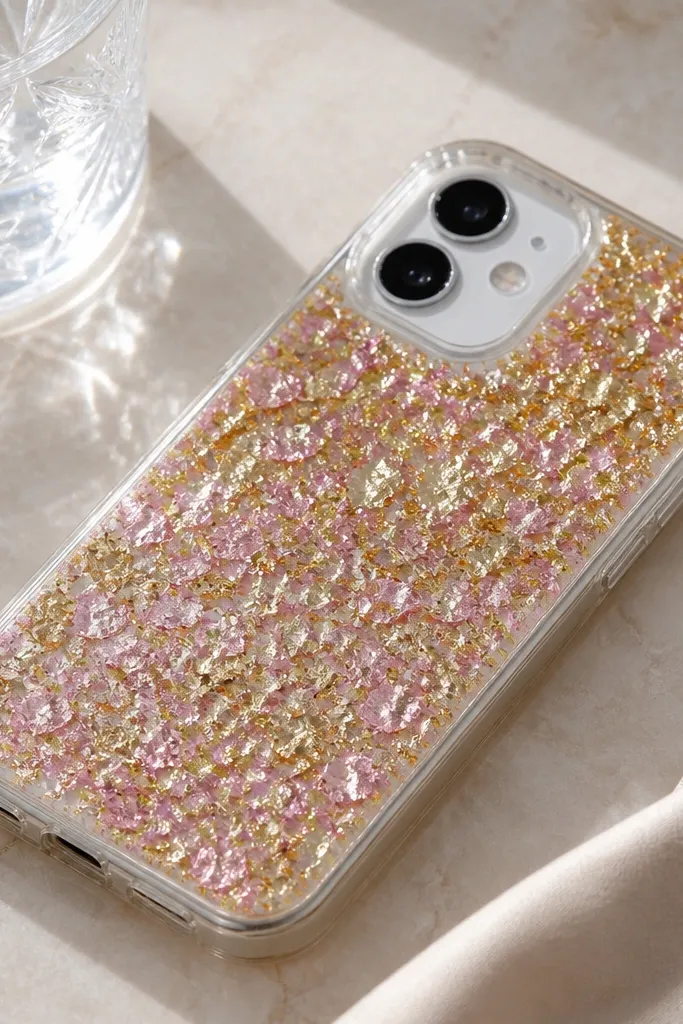
Cut candy wrappers into small squares and triangles, about 3-6 mm each. Press a few pieces onto the inside of a clear TPU case in a loose cluster, leaving a breathing gap around the camera bump. Use clear gel adhesive to tack down the densest areas, then cover everything with a layer of glossy top coat. Let it cure fully — give it 2-3 hours if the room is cool. Add a second thin coat for even coverage, and check with your finger for any sharp edges; smooth them with a light sanding sponge if needed.
This one gives you that fun “glittery but not messy” look. Candy wrapper foil is thin, shiny, and breaks into tiny shapes that reflect light like expensive confetti. I keep the pattern concentrated in the center so it doesn’t look like loose trash floating around your phone. It flatters warm outfits and looks amazing under sunlight. The secret is sealing — without a top coat, the edges catch lint and peel.
AvoidDon’t overfill the case — too much foil creates bumps that feel cheap in-hand.
Pro tipUse gold and rose only — too many foil colors makes it look chaotic.
5. Leather-look tab with micro-stitch effect
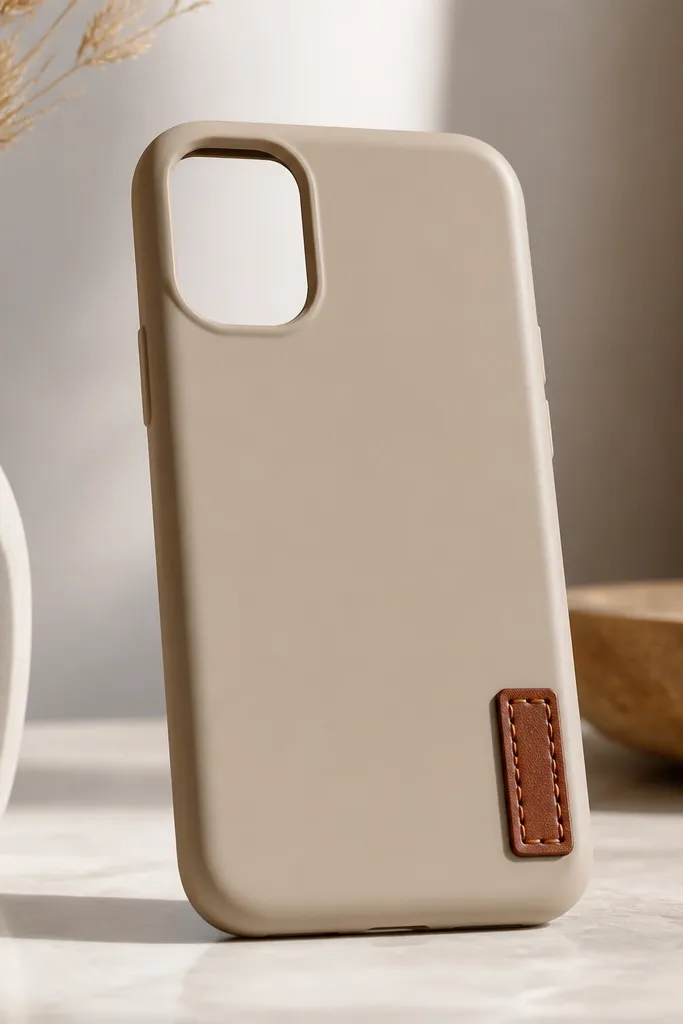
This design reads handmade because of the tab shape and the stitched lines. Faux leather is sturdy, so it holds its edges and doesn’t flop like fabric. I place it near the bottom right because it feels like a small label on a book cover. The warm brown stitching looks good on tan, olive, and neutral skin tones. It also pairs well with gold rings and minimal outfits.
Cut a faux leather rectangle about 1.5 x 0.8 inches. Round the top corners with scissors so it feels softer, then trace two stitch lines with a fine marker — one close to the left edge and one close to the right. Use a toothpick to add tiny “stitch dots” by tapping paint or marker at 5 mm intervals. Glue the tab down with a thin layer of contact adhesive or gel glue, then press with wax paper on top so the glue doesn’t smear. Seal with a matte clear coat only on the tab to keep the leather look natural, not shiny.
If your marker bleeds, paint the stitch lines with acrylic using a 000 brush.
Don’t place the tab over the camera — it makes the case wobble and looks uneven.
6. Fabric ribbon bow on the side edge
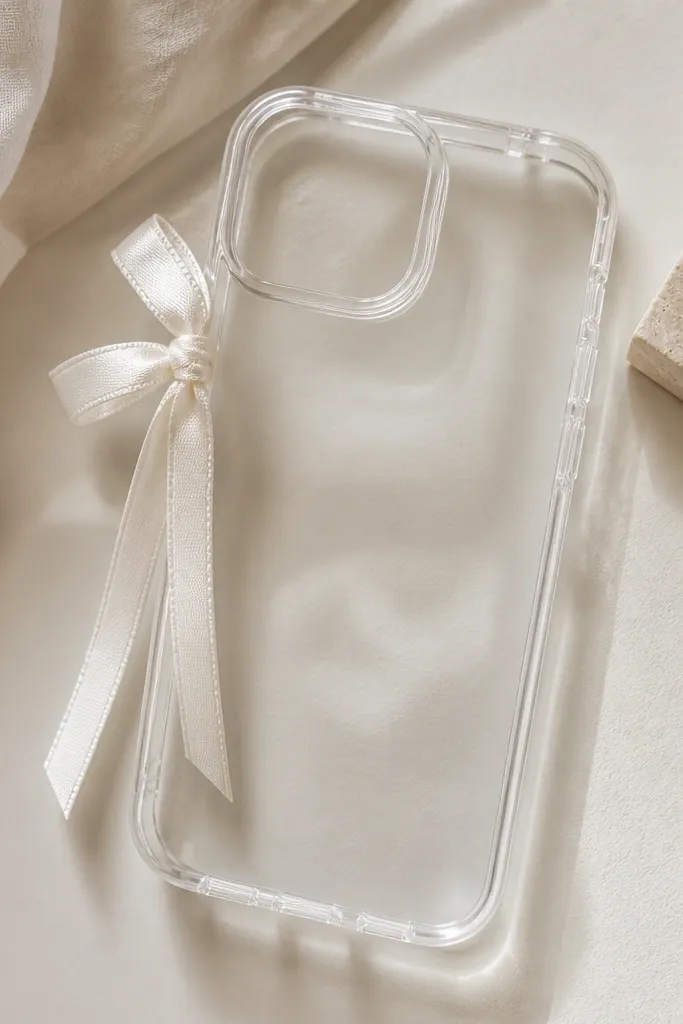
Bows look sweet, but most beginner cases look bulky. Hanging the bow on the side edge keeps the front flat and makes the design feel light. I use a thin grosgrain ribbon because it holds its shape and doesn’t fray fast. This style looks great with softer outfits and also works on phones with a slim case because it doesn’t add height. It flatters fair and warm skin tones because the ribbon colors catch light without going neon.
Cut ribbon strips: 2 pieces for the loops (about 2 inches each) and 1 piece for each tail (about 1.25 inches). Fold each loop, pinch the center, and tie with a tiny thread or twist tie. Trim tail ends at a slight angle. Apply a small dab of glue to the side edge of the case where the bumper is thick, then press the bow base into the glue. Hold for 45 seconds, let it set for 30 minutes, then brush a thin clear coat over the glue spot only so the bow stays flexible.
Use a lighter to seal ribbon ends — it stops fraying instantly.
Don’t glue the bow across the front flat area — it creates a ridge that catches lint.
7. Perforated lace panel with hidden tape edge
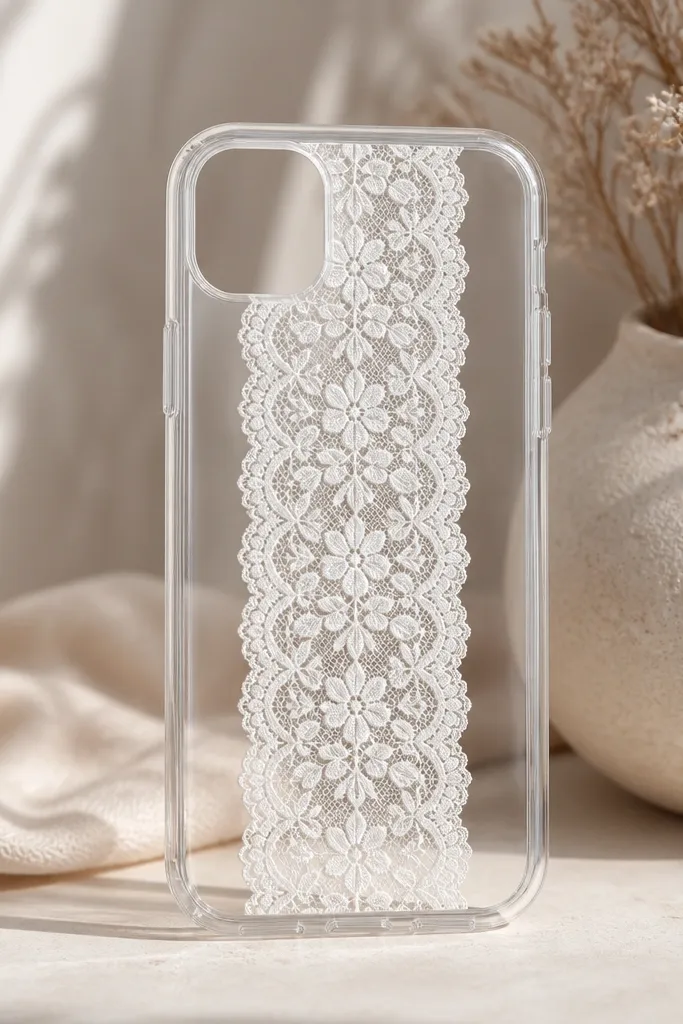
Lace looks expensive when you keep it flat. The perforations create a texture that catches light even without glitter, and the clear coat makes it feel smooth instead of scratchy. I center the lace panel so it frames the camera, and I stick to one thin strip rather than a big doily shape. This looks great on anyone who wears soft colors — it makes the phone look like part of your outfit. It also hides small imperfections in the case because the texture distracts your eye.
Cut lace to a rectangle about 2.25 inches tall and 1.3 inches wide. Apply a strip of clear packing tape on the back of the lace along the bottom edge — this gives you a clean glue border and prevents fraying. Glue the lace to the case with gel glue, starting at the center and pressing outward. After it dries, seal with two thin coats of clear top coat, brushing gently so the lace doesn’t lift. Trim any excess with a craft knife, then wipe the case with a microfiber cloth.
Choose lace with a tighter pattern — large open holes look flimsy on phone scale.
Don’t use hot glue — lace can warp and the bond looks lumpy.
8. Sticker collage with a single color rule
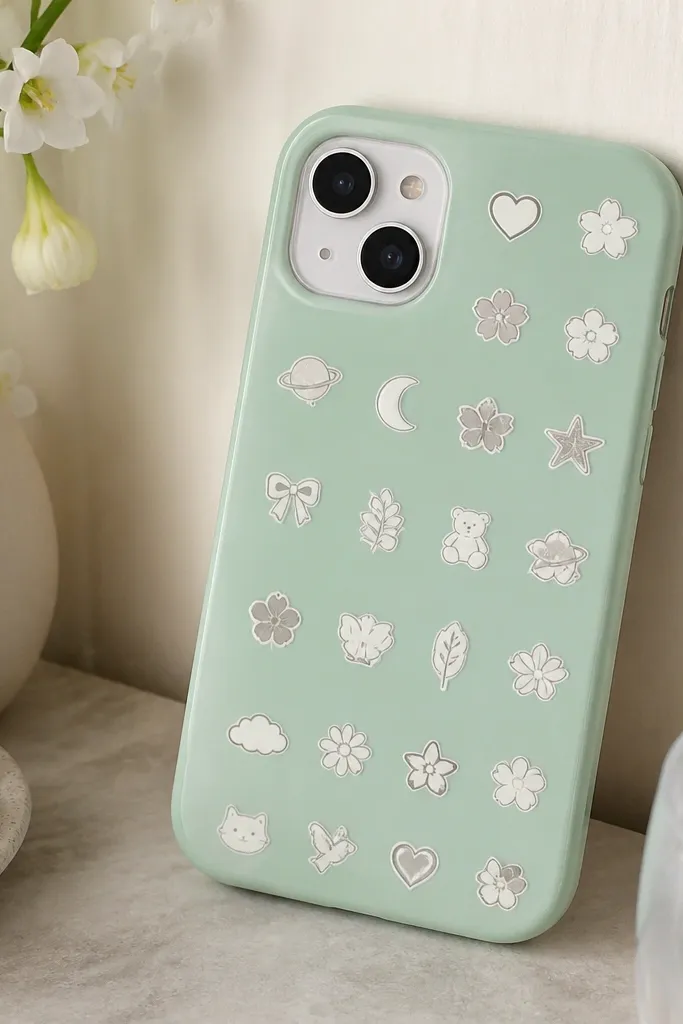
Sticker collages look messy when you mix too many styles. This one works because you pick one background color and one sticker color family — I’ve done white/gray on mint and it always looks tidy. The grid spacing makes it beginner-friendly; you’re not guessing where to place each piece. It flatters clean, minimalist wardrobes because it doesn’t clash. If you like a “cute but not childish” vibe, this is your lane.
Pick a base case color you like — mint, cream, or light gray. Choose 10-14 small stickers that share one theme and one color family, then lay them on the case front before gluing. Leave a 4-5 mm gap between stickers so glue doesn’t smear. Press each sticker down firmly, then seal with a matte or glossy mod podge-style sealer in thin layers. Two coats usually cover the edges, and the second coat should be lighter so it doesn’t pool. Let it cure overnight before you toss it in your bag.
Use a clear ruler to keep sticker rows straight — it makes the whole case look intentional.
Don’t skip spacing — overlapping stickers under top coat turn cloudy and bumpy.
9. Photo strip window for a mini memory moment
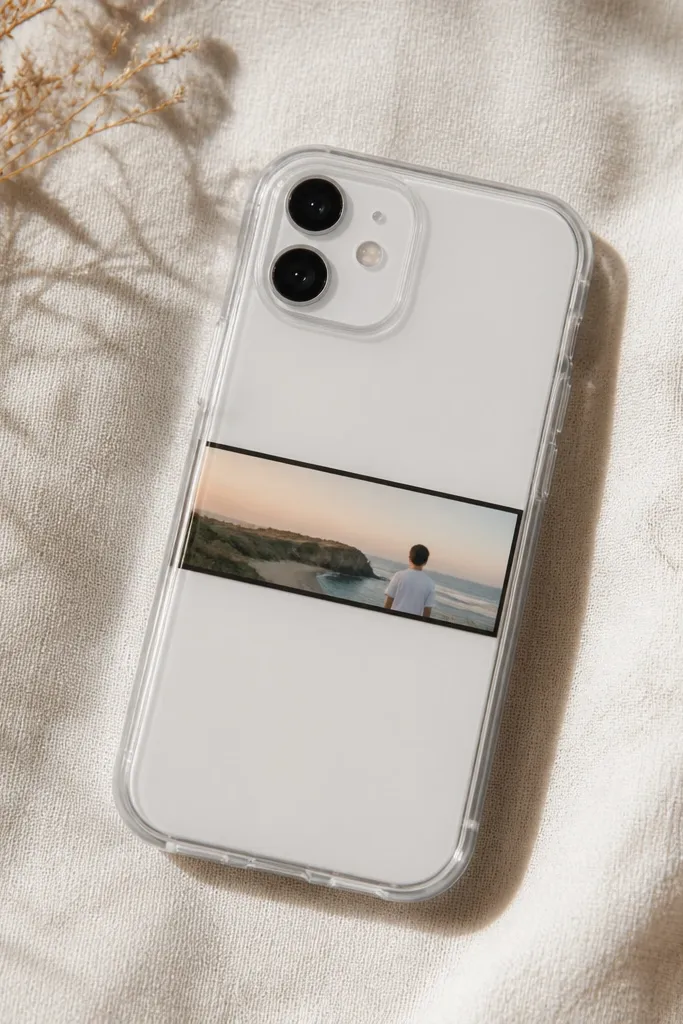
Pick 3 small photos and print them as a strip, or print one photo and slice it into a strip. Cut a photo strip about 3.5 inches long and 0.7 inches tall, then round the corners with scissors. Add a frame: cut a thin rectangle from black vinyl or black cardstock slightly bigger than the photo. Glue the frame to the case first, then center the photo strip inside and press. Seal with two coats of glossy clear coat, keeping clear coat away from button areas so it doesn’t interfere with grip.
This design gives you a “window” look without making the whole case busy. A narrow photo strip sits nicely above the camera and you still get a clean phone silhouette. I use black vinyl or black paper as a frame because it makes the photo pop and hides any uneven edges. It flatters people who like personal touches but hate clutter. Also, the sealed photo survives daily pocket rubbing better than loose photo paper.
AvoidDon’t use thick cardstock — it makes the window ridge feel obvious.
Pro tipIf your printer ink smears, spray the photo with a light clear fixative before sealing.
10. Sparkle gradient using sponge-dab pigment
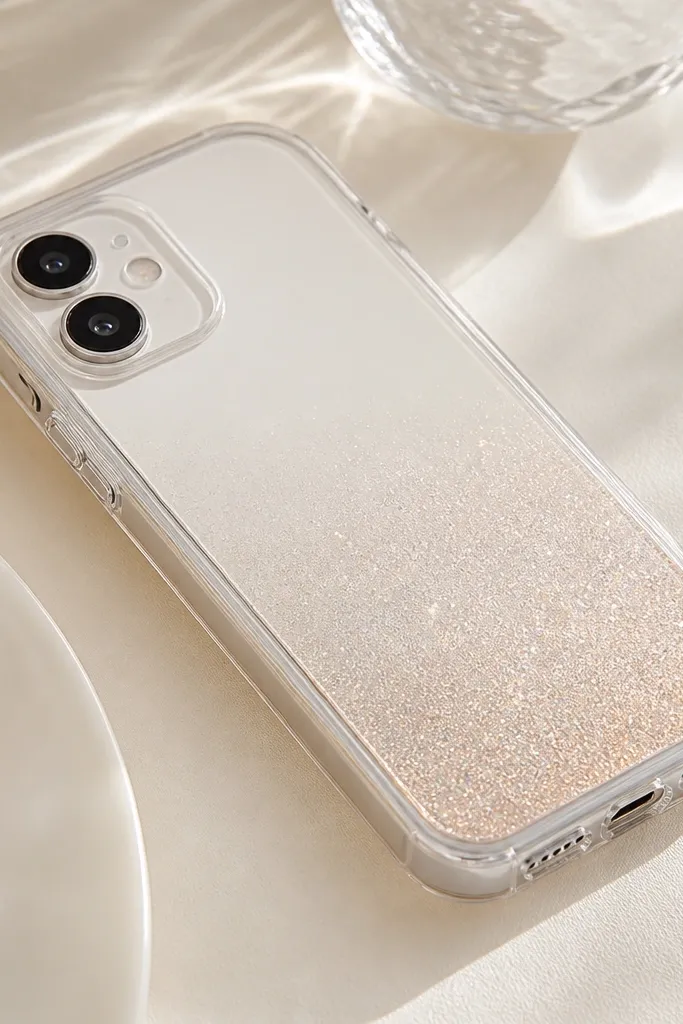
Tape off the camera area with small pieces of painter’s tape so you don’t get pigment where you don’t want it. Mix a tiny amount of shimmer pigment with clear gel medium, or use a pre-made glitter gel that spreads with a sponge. Dab with a makeup sponge starting at the bottom corner, then lightly drag upward to fade. Let it dry fully, then seal with three thin coats of glossy top coat. After the first coat, check for rough spots and add a second coat specifically over those areas. Remove tape carefully once the top coat is tack-free.
This is the one I do when I want sparkle but hate chunky glitter. Sponge-dabbing shimmer pigment creates a gradient effect that looks like nail art, not craft chaos. I start heavier near the bottom corner and fade upward so it looks intentional. It looks good on any outfit color because the shimmer is neutral, and it doesn’t clash with jewelry. For beginners, it’s forgiving because you can build up slowly.
AvoidDon’t apply top coat too early — pigment can move and blur.
Pro tipDust off excess pigment before sealing — it prevents grit from showing through.
11. Galvanized-look rivet dots with metallic paint
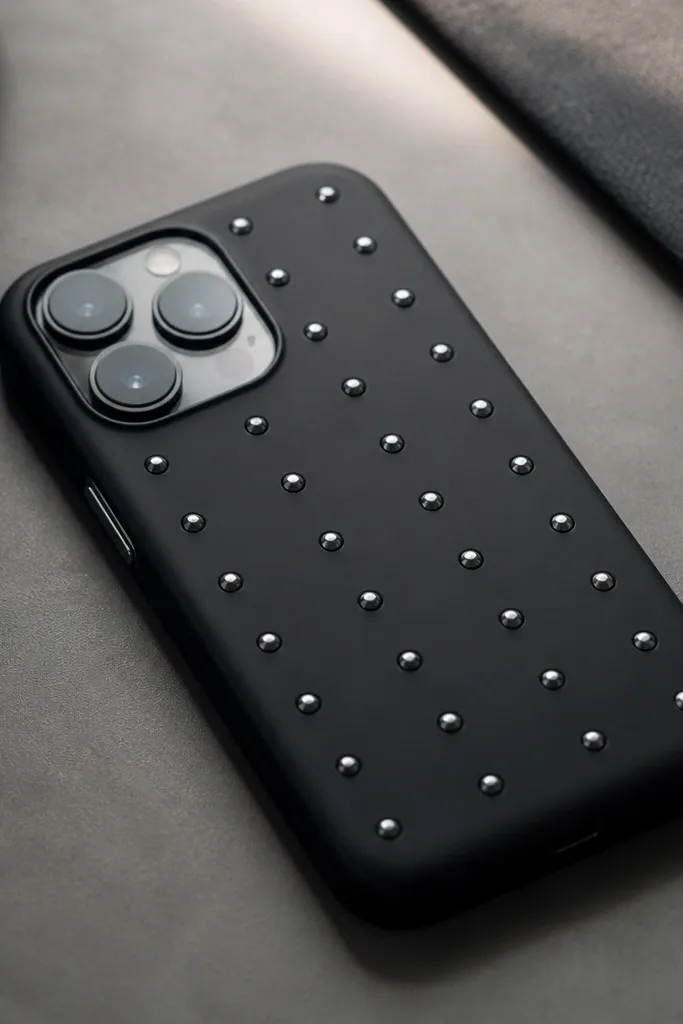
Metallic dot patterns look clean because you’re repeating one shape. The trick is to use paint that dries with a slight dimension, so the dots catch light like hardware. I like a matte black base with silver or gunmetal dots because it looks like a DIY industrial accessory, not a craft project. This style flatters dark nail polish and silver jewelry. It also hides minor scuffs because matte black doesn’t show fingerprints as much.
Use a matte black case or paint one with matte acrylic if needed. Mark a dot grid with a light pencil: for example, 3 columns by 4 rows, with the center dots aligned above the camera. Load a dotting tool or the back of a bobby pin with metallic paint, then press straight down to make uniform circles. Let dry 45 minutes, then add a tiny second layer for dimension. Seal with glossy top coat over the dots only, using a foam brush to avoid streaks. After curing, wipe with microfiber to remove any tacky residue.
If dots look too flat, add a second paint layer before sealing.
Don’t freehand random dots — uneven spacing makes it look accidental.
12. Tiny constellation dots with black vinyl night
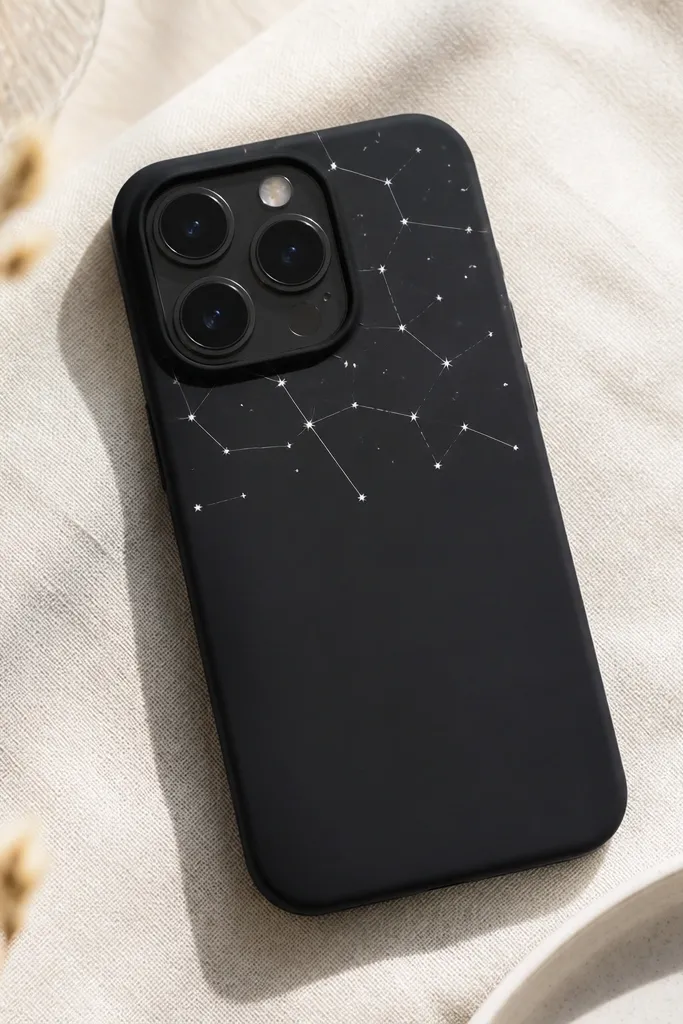
Constellation layouts look neat because they use small repeating points. I prefer vinyl lines because they stay crisp and don’t bleed like markers. This case works for people who want a night-sky vibe without glitter fallout. White dots on black read sharp and feel grown-up. It also pairs with both warm and cool outfits because the palette is simple.
Cut small white vinyl circles using a craft punch or a circle cutter, about 2-3 mm each. Cut thin white vinyl lines for the connections, or use pre-cut star line vinyl if you have it. Plan your constellation by placing dots first with tweezers, then connecting lines. Keep the tallest part of the constellation above the camera so it doesn’t cover lenses. Press everything down firmly and run a fingernail over edges to seal. Finish with one thin coat of clear top coat to protect the vinyl from scratches.
Use tweezers with a soft grip so you don’t scratch the vinyl surface.
Don’t cover the camera — the pattern should stop before the lens area.
13. Watercolor wash using rubbing alcohol and ink
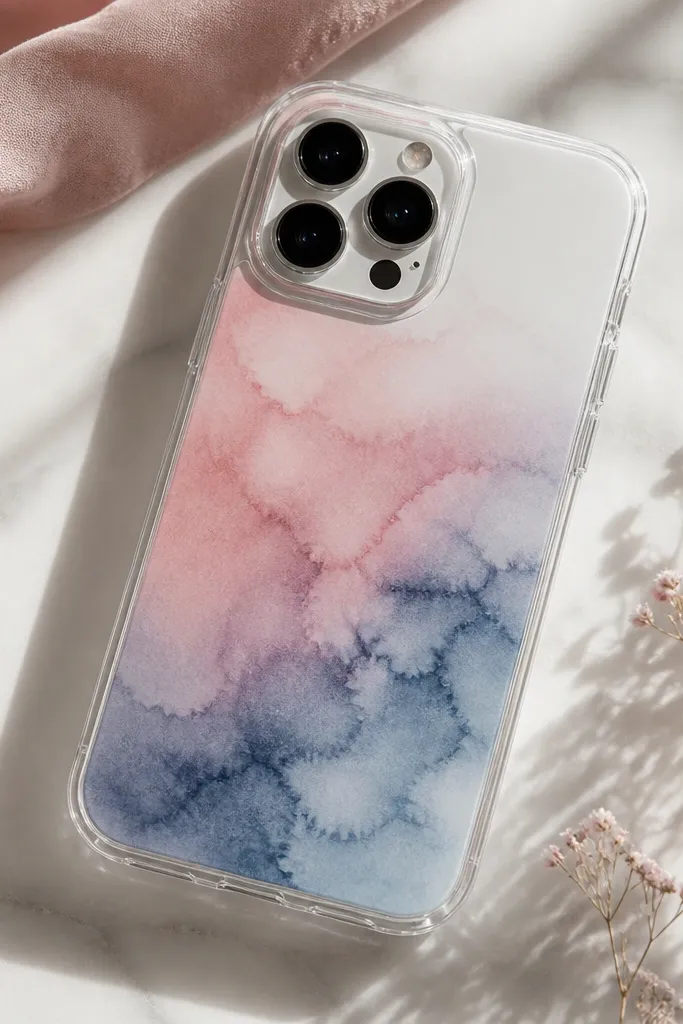
Put a few drops of rubbing alcohol on a palette or plate. Mix a tiny amount of alcohol with ink or diluted food coloring, then load a small brush or cotton swab. Lightly dab in the center of a clear TPU case, then rotate the case so the color spreads naturally. Build intensity slowly — do not flood the whole case at once. Let it dry completely, then seal with two glossy clear coats so the color doesn’t smear. If you get a hard edge, gently blend it while wet with a clean swab.
Watercolor washes look artsy, and they’re cheap because you’re using ink or food coloring and a clear base. The alcohol technique spreads color in a controlled way, so you get gentle blends instead of hard blotches. I place the darkest part in the center, then let it fade outward for a flattering, airy look. Dusty rose and blue work on almost every skin tone because they’re muted, not neon. It also looks great for spring and summer without feeling themed.
AvoidDon’t shake the case while wet — it creates streaks that look messy.
Pro tipUse cotton swabs for blending edges; brushes leave lines in this method.
14. Washi tape frame with one corner accent
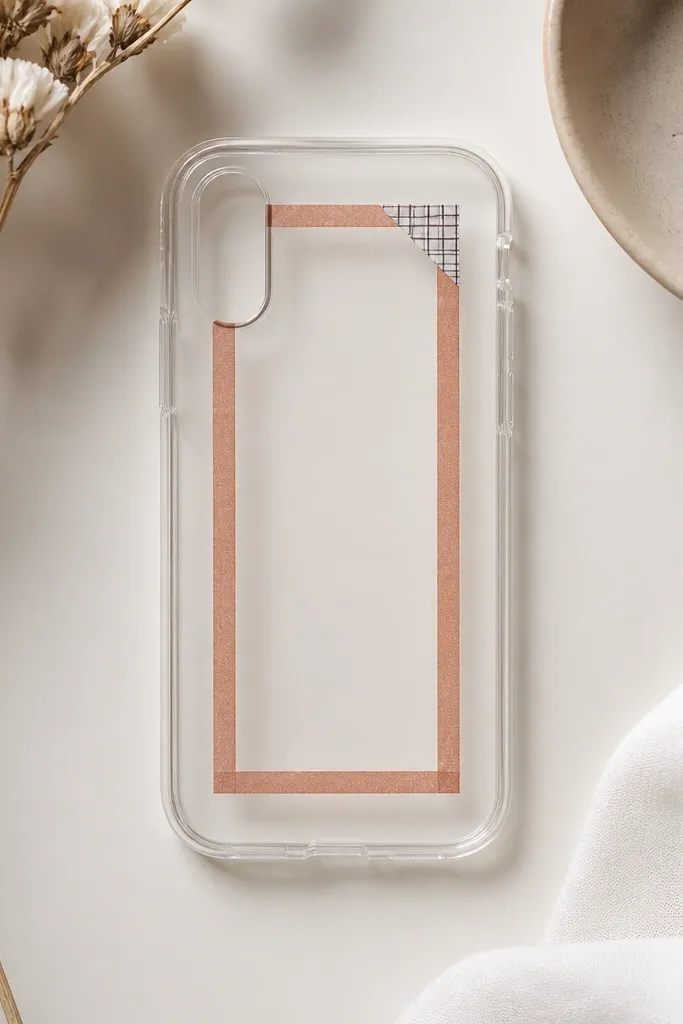
Washi tape is my go-to for beginners because it’s forgiving and repositionable. The frame look makes the case feel structured, not random. I keep the main frame in one tape pattern, then add a single corner accent in a contrasting pattern so the phone doesn’t look busy. This style looks great on people who like simple outfits because it adds texture without color overload. It also hides small glue mistakes because tape covers edges.
Cut two tape strips for the sides of a rectangle and two for the top and bottom, leaving a gap around the camera. Press tape down lightly first, then burnish with a credit card. Add one corner accent: a small triangle of contrasting tape at the top right or bottom left. Seal the tape edges with a very thin brush of clear top coat so it doesn’t peel. Do two coats, letting the first dry tack-free. Keep top coat away from the phone’s sides so it doesn’t make the case slippery.
Choose tape with a matte finish for the frame and a gloss tape for the corner — it adds dimension cheaply.
Don’t stack too many tapes — thick layers lift and snag lint.
15. Beaded keychain fringe strip (phone charm style)
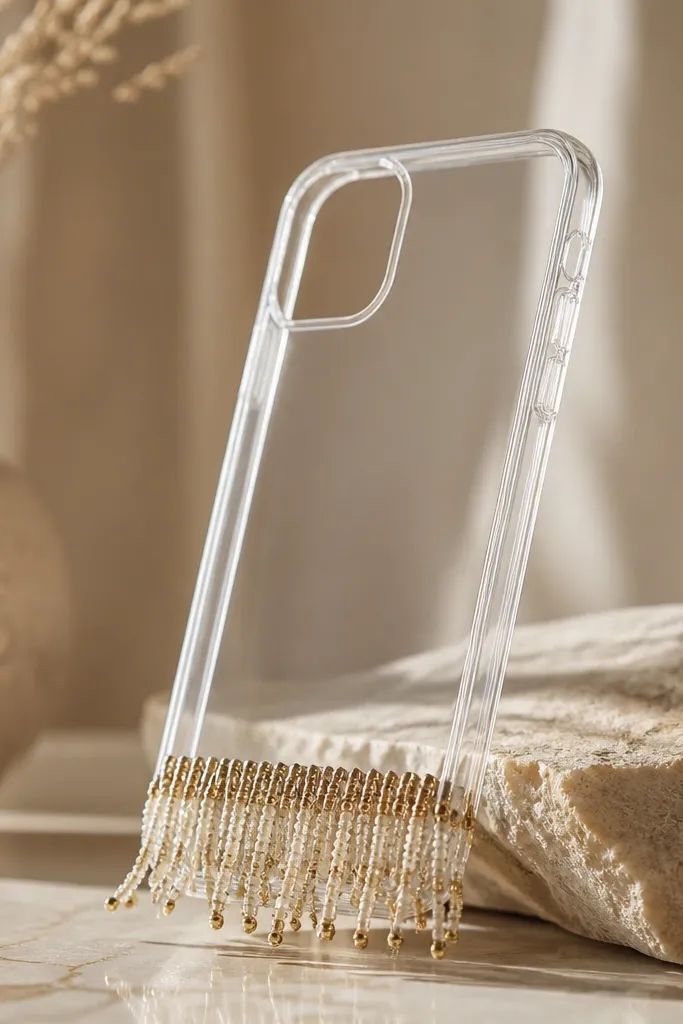
This is the aesthetic you get when you want motion. A short bead fringe at the bottom edge makes your phone feel like a mini accessory, not just a cover. I use small seed beads and keep the fringe short, about 1-1.25 inches, so it doesn’t snag screens or bags. It looks good on warm-toned outfits and also works with black because the beads catch light. The best part is it hides scratches on the lower half because your eye goes to the charm.
Cut a thin jewelry wire or elastic thread strip about 3 inches long. String seed beads in a repeating pattern, for example 3 clear beads then 1 gold bead, until you get 1-1.25 inches of fringe. Tie the ends with a tiny knot and dab a bit of clear glue on the knot to lock it. Glue the top loop to the bottom edge of a TPU case, right in the center, then press with wax paper. Let it set 30 minutes and seal the glue spot with one thin coat of clear top coat.
Use a drop of clear glue on the knot before attaching so it never loosens.
Don’t make fringe too long — it catches on pockets and looks messy fast.
16. Monogram in glossy acrylic paint on clear case
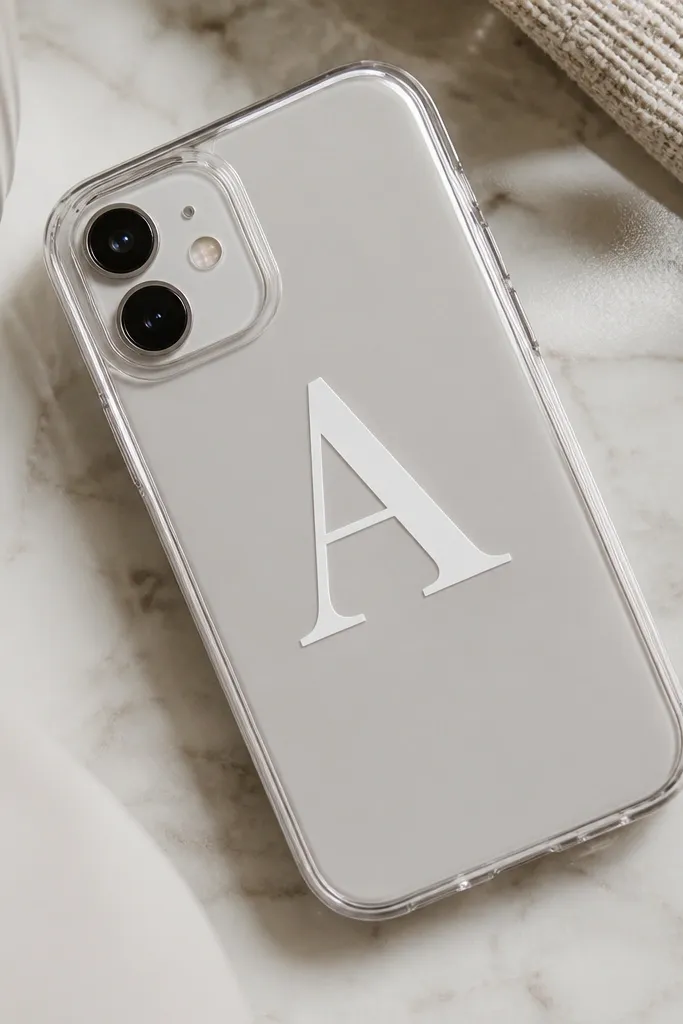
Clean the clear TPU with rubbing alcohol and let it dry. Print or trace one letter stencil — about 2 inches tall for most phones. Tape the stencil down and paint over it with acrylic paint mixed with a tiny bit of clear medium for a glossy finish. Use a small foam brush or fine detail brush for crisp edges. Let dry 45 minutes, then add two glossy top coats over the letter. Remove stencil carefully while paint is still slightly tacky to avoid peeling.
A single monogram looks clean because you’re not filling the whole case. I like painting on a clear TPU case because the edges of the letter look sharp and modern. White paint on clear looks bright without being loud, and it works with any outfit color. It flatters minimal wardrobes and looks good with both gold and silver accessories. If you like a sleek look, this is the one I recommend first.
AvoidDon’t use matte acrylic — it looks dull under pocket scratches.
Pro tipPractice one letter on scrap plastic first so you know how your paint behaves on TPU.
17. Matte black + silver tape diagonal stripes
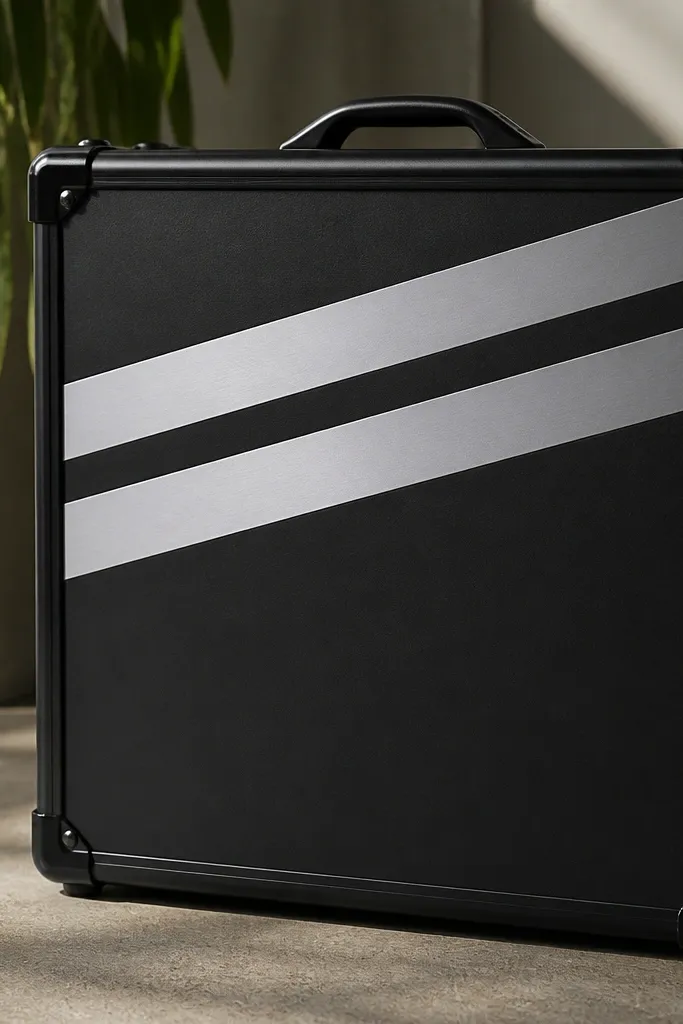
Diagonal stripes make a phone look faster and more graphic. Silver tape gives you that metallic look without buying a full metal case. I keep it to two stripes so it stays classy instead of costume-like. This design looks great with black outfits and silver jewelry, but it also works with denim because the contrast is sharp. It’s also good for hiding small scuffs because the stripes distribute wear visually.
If your case is clear, paint it matte black and let it cure overnight. Mark two diagonal lines with pencil — about 45 degrees, running from near the top left to near the mid-right. Lay silver washi tape or adhesive foil tape along those lines and press down hard with a card. Seal with a thin clear coat over the tape so the edges don’t lift. Add a second coat if you see any tape texture. Keep the camera area uncovered by stopping stripes at least 6-8 mm away from it.
Burnish tape edges with a fingernail wrapped in microfiber for a clean seal.
Don’t run stripes over buttons — it can interfere with grip and buttons feel sticky.
18. Pearl bead cluster near camera corner
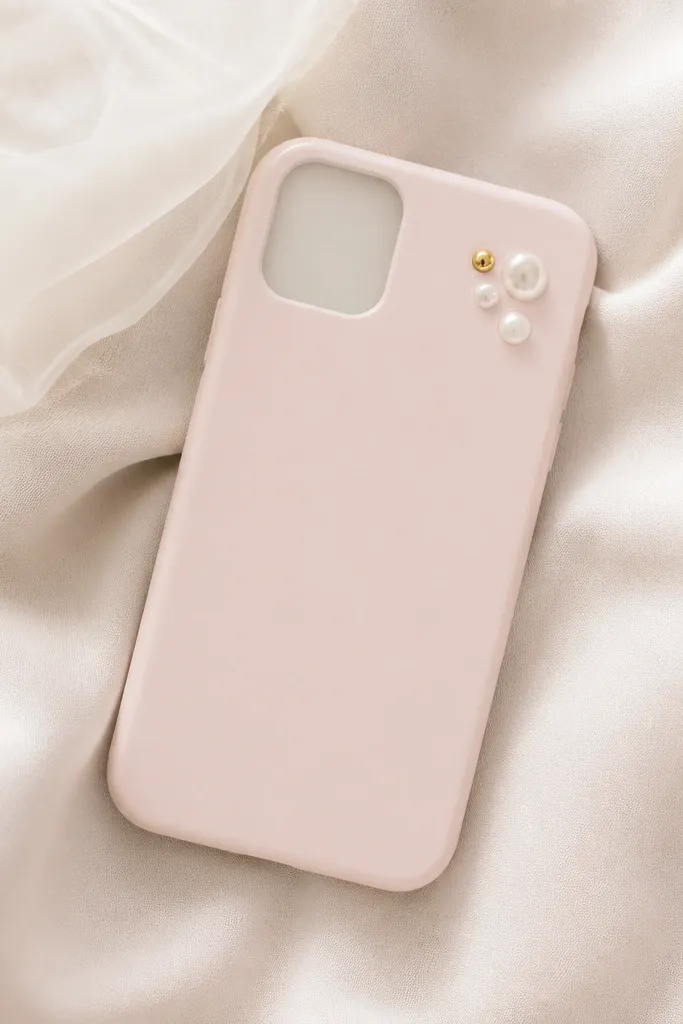
Pearls make a cheap case look like a jewelry piece when you keep the cluster small. I put it near the camera corner so the phone feels styled, not covered. Use faux pearls that are smooth and uniform — cheap uneven pearls look messy fast. This design flatters warm skin tones and looks pretty with cream, blush, and gold accessories. It’s also a great pick if you like romantic details but you hate loud patterns.
Pick 6-10 faux pearl beads in one size, plus one tiny gold bead for the center. Dab a tiny dot of gel glue on the case near the top right corner, about 8-10 mm away from the camera module. Arrange beads in a tight cluster so the outer pearls touch lightly. Let dry at least 45 minutes, then seal with a clear top coat over the entire cluster area. Use a thin brush to avoid ridges, then add a second thin coat after the first dries.
If beads wobble, press them with the eraser end of a pencil for 20 seconds while glue sets.
Don’t make a big cluster — bigger clusters lift and snag.
19. Pressed flower petal strip with matte finish
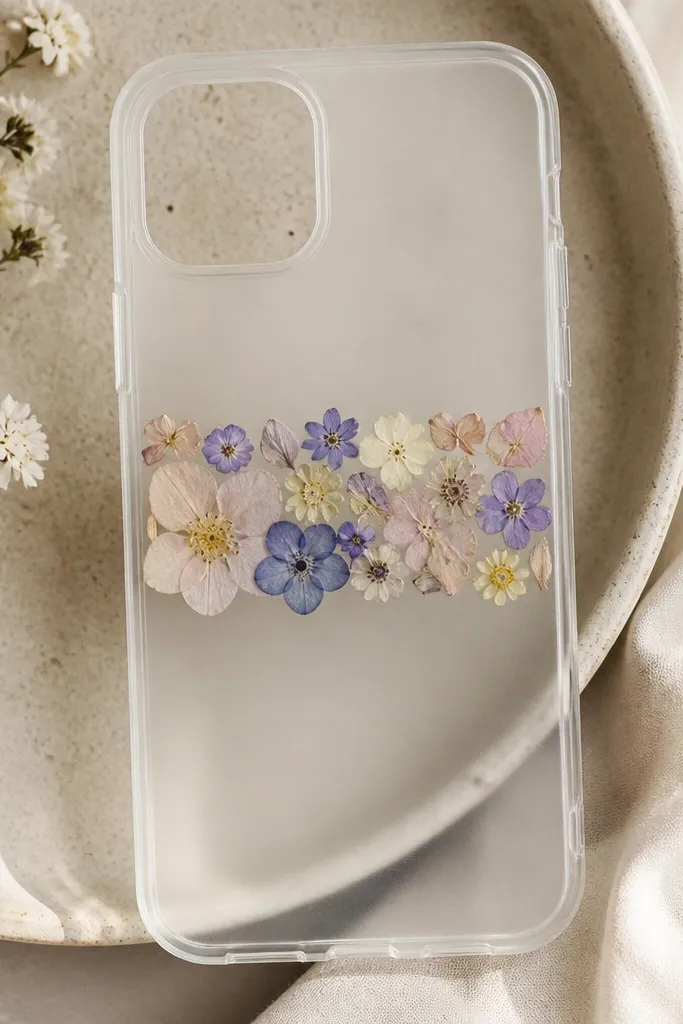
Pressed flowers look dreamy, but glossy resin can make them look plasticky. I like a matte top coat so the petals keep their paper-like softness while still getting protected. A thin horizontal strip feels balanced and doesn’t interfere with camera usage. This looks amazing on people who wear soft pastels and neutral tones because the colors stay gentle. It also hides tiny petal edges because matte finish doesn’t reflect harsh light.
Press small flowers between books for 5-7 days until flat. Cut petals into a strip about 2.5 inches long and 0.6 inches tall. Arrange petals on the case and tack them down with a thin layer of diluted decoupage glue. Let it dry, then seal with two coats of matte clear top coat. If petals float up, add a tiny amount of glue under the edges using a pin. After curing overnight, rub gently with a microfiber cloth to check for any rough spots.
Choose flowers with thin petals like pansies or daisies for flatter results.
Don’t use thick flower parts — they create bumps that look cheap.
20. Grid of tiny painted squares like a checker mini
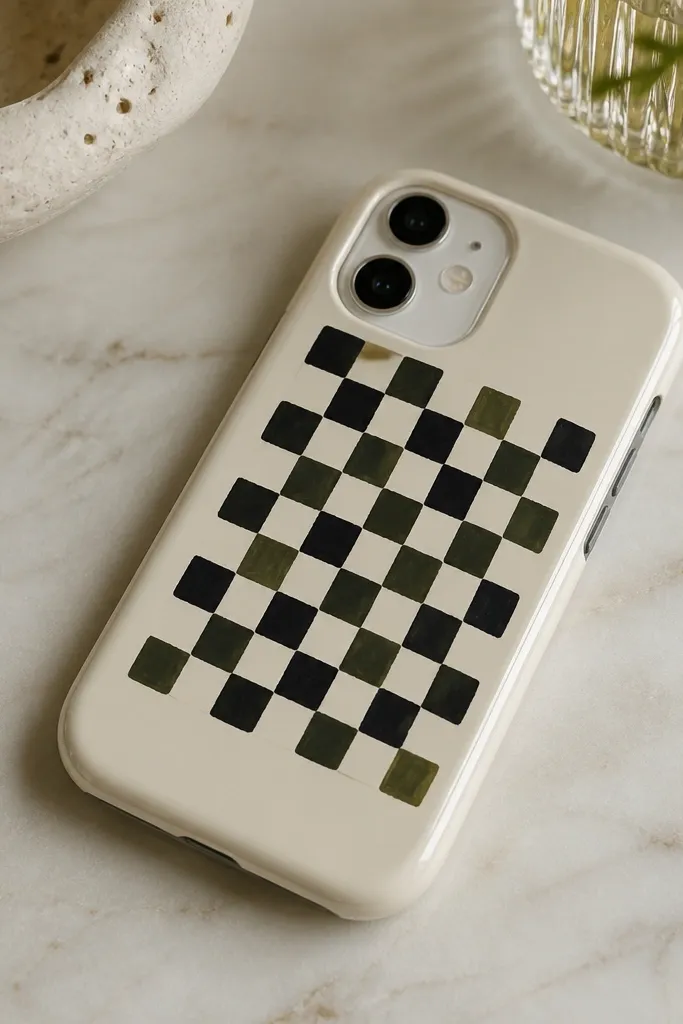
A checker mini pattern looks playful and structured at the same time. Small squares take patience, but the result looks clean because the grid controls spacing. I use muted olive with black on a cream base because it feels modern, not kid-like. This design flatters anyone who likes earthy colors and works well with both warm and cool wardrobes. It also hides minor imperfections because the pattern distracts your eye.
Base prep: paint your case cream or start with a cream case, then let dry fully. Use painter’s tape to create a grid guide — 4 columns by 4 rows works great for most phones. Paint each square with a small brush, alternating black and muted olive. Remove tape while paint is still slightly tacky so edges stay crisp. After drying, seal with two glossy coats. Check the surface by running your thumb — add one more thin coat if the paint feels rough.
Use a ruler edge for tape placement so the grid doesn’t tilt.
Don’t overpaint squares — thick paint makes the pattern look raised and uneven.
21. Comic pop art speech bubble in vinyl
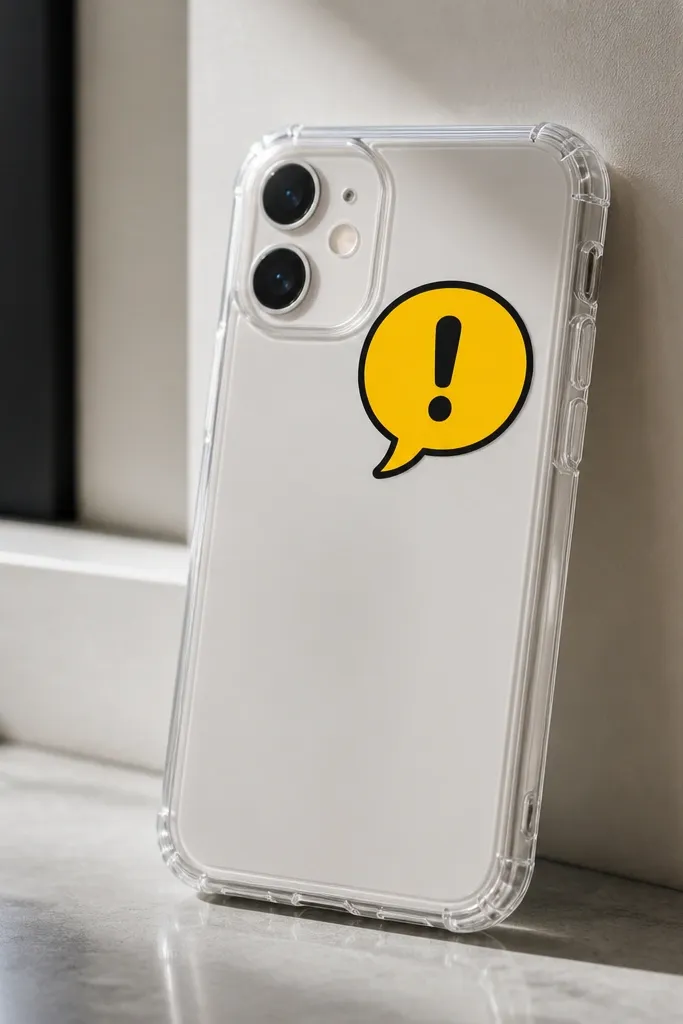
Clean your clear TPU case with rubbing alcohol. Cut a speech bubble shape from yellow adhesive vinyl and an outline from black vinyl. Place the outline first, then center the yellow bubble inside it. Add a small vinyl “!” or a tiny printed symbol sealed under top coat. Press firmly with tweezers and a card. Seal with one thin glossy clear coat, keeping it away from the case rim so it doesn’t peel.
Pop art looks fun, and vinyl keeps it crisp so it doesn’t look like a sticker slapped on. A speech bubble is instantly recognizable, but it stays clean when you keep it one piece and one color palette. I use a yellow bubble with a black outline because it reads like the comic panels I loved as a kid. This design looks great with bright outfits and also looks cool with black basics. It’s a good pick if you want personality without clutter.
AvoidDon’t add multiple comic elements — two stickers plus text turns into clutter fast.
Pro tipIf vinyl has bubbles, poke gently with a pin and smooth outward.
22. Faux marble corner with sponge and white paint
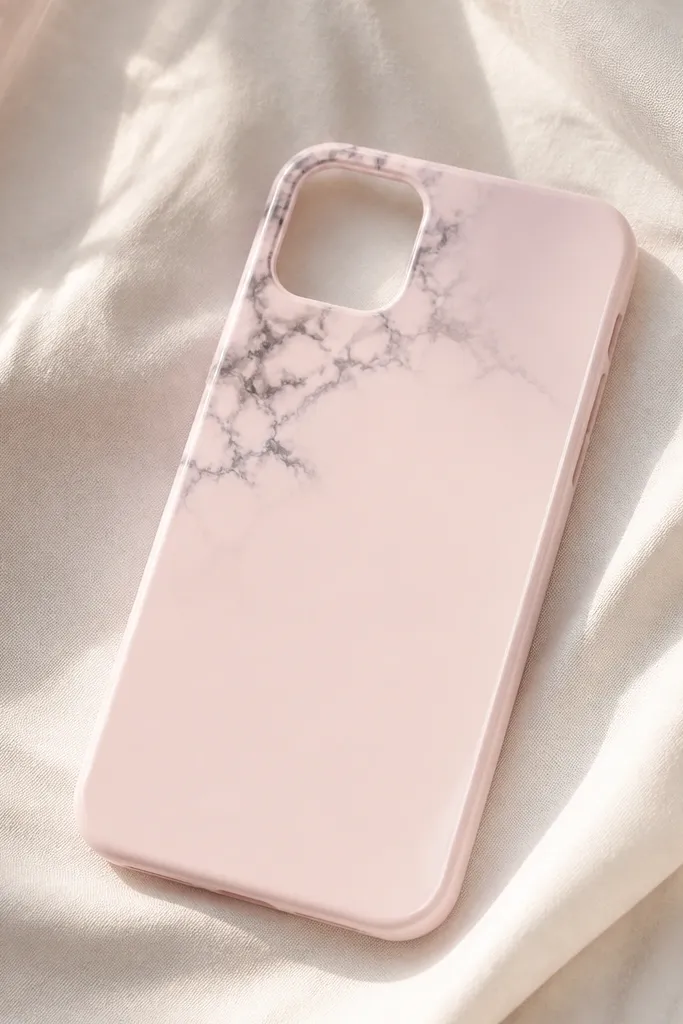
Paint or start with a pale pink base. For marble, use a sea sponge: dab on light gray paint, then blot with a paper towel to keep it airy. Create veins by dragging a thin brush or toothpick through darker gray paint — keep lines broken and wispy. Focus the marble into a 2-inch corner area and leave the rest plain. Let it dry fully, then seal with two glossy clear coats. If you see streaks, lightly sand with 1000-grit and recoat.
Marble looks hard, but you can fake it with a sponge and a few paint colors. Doing it in one corner looks intentional and keeps the case from turning busy. I use a pale base like blush pink, then add gray veining lines with a toothpick. This flatters soft outfits because the marble stays subtle instead of loud. It also looks good on camera-forward phones because the effect frames the top area without covering lenses.
AvoidDon’t cover the whole case — full marble on a phone reads busy and cheap.
Pro tipUse a paper towel to blot between layers so your veins stay light instead of muddy.
23. Minimal line art of a plant stem
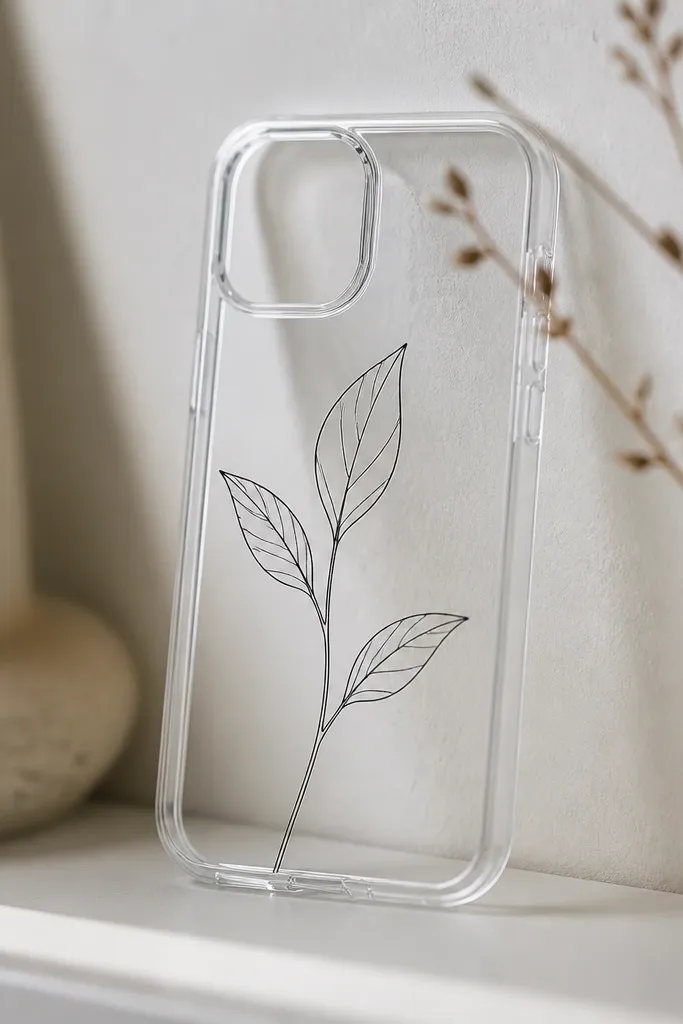
Line art looks premium when it stays thin and clean. A plant stem is a good subject because it flows naturally around the phone front without needing a big layout. I use a fine-tip paint pen or acrylic ink mixed with a tiny bit of flow medium so the line stays steady. This design looks good on clear TPU because the black line stays crisp against the phone’s color. It also flatters anyone who wears minimal jewelry — it’s calm, not loud.
Clean the case with alcohol and let it dry. Plan your stem: start near the bottom center, curve slightly upward toward the top right, then add two small leaf shapes. Draw with a fine paint pen, using short strokes for leaves. Let dry 20 minutes, then seal with a glossy clear top coat in two thin layers. Use a foam brush to avoid brush marks. If your line looks fuzzy, wait until fully dry and add a second seal coat to smooth the surface.
If your pen skips, warm it in your hand for 30 seconds and try again.
Don’t use thick marker nibs — bold lines make it look like a school project.
24. Gold foil tape scatter dots
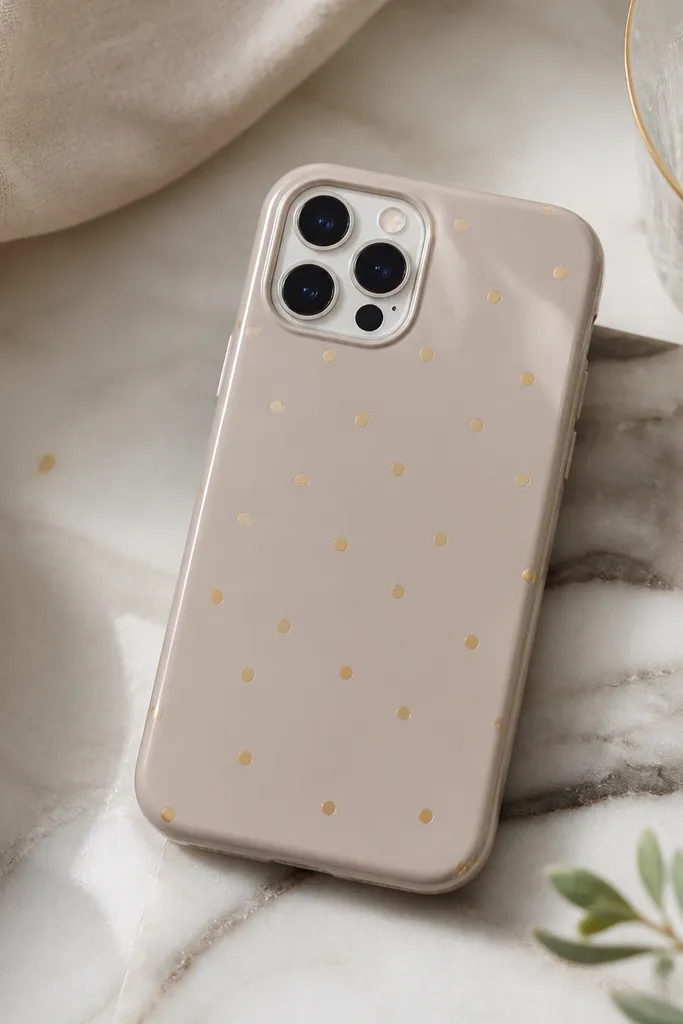
Clean your case surface with rubbing alcohol. Tear or cut foil tape into small circles or irregular dots, about 2-4 mm each. Place them in a cluster near the top half and a few near the bottom, leaving the center mostly open. Press each dot down firmly, then seal with a thin clear top coat. After the first coat dries, add a second coat to fully cover edges. Check by running your fingernail over the dots — if you feel sharp edges, add another thin coat.
Gold foil tape scatter looks like jewelry confetti. The trick is to use tiny pieces, not big strips, and to place them with breathing space. I like a taupe or cream base because it makes the gold look warm instead of harsh. This design flatters warm skin tones and looks great with gold rings. It’s also a good choice if you want a case that stays stylish even as seasons change.
AvoidDon’t use large pieces — they catch on fabric and peel faster.
Pro tipUse a black background under the case if you’re taking photos — it makes gold read brighter.
25. Abstract brushstroke band in two shades
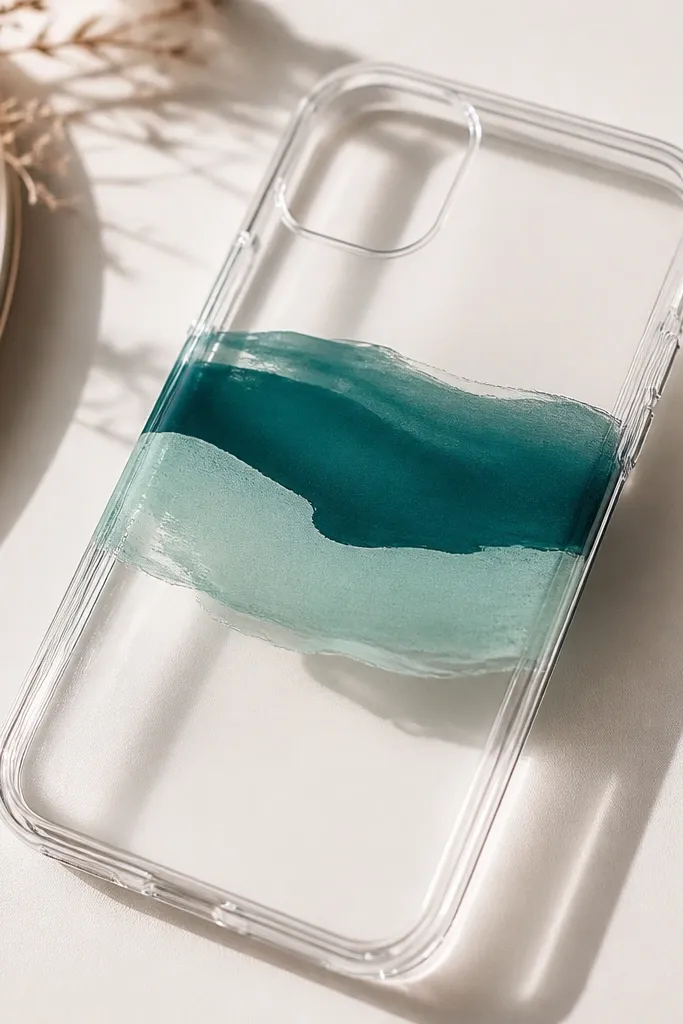
Start with a clear or light colored TPU case. Tape off a horizontal band across the middle — about 2 inches wide. Mix a small amount of acrylic paint with clear gel medium so it spreads smoothly. Paint thick brush strokes in teal first, then add aqua on top and blend edges with a slightly damp brush. Remove tape while paint is still tacky for crisp borders. Let dry, then seal with two glossy coats for protection.
This is the “artist wall” look for people who don’t want a full painting. A horizontal band is easy to place and it frames the phone grip area. I use two close shades so the strokes blend nicely instead of looking clashing. The deep teal and aqua combo looks great with both warm and cool outfits. It also hides fingerprints because the brush texture breaks up shine.
AvoidDon’t paint the band too close to the camera — it makes the case feel crowded.
Pro tipUse a sponge-dampened brush to soften edges without turning everything into one blob.
26. Button-up patchwork using fabric scraps and iron-on glue
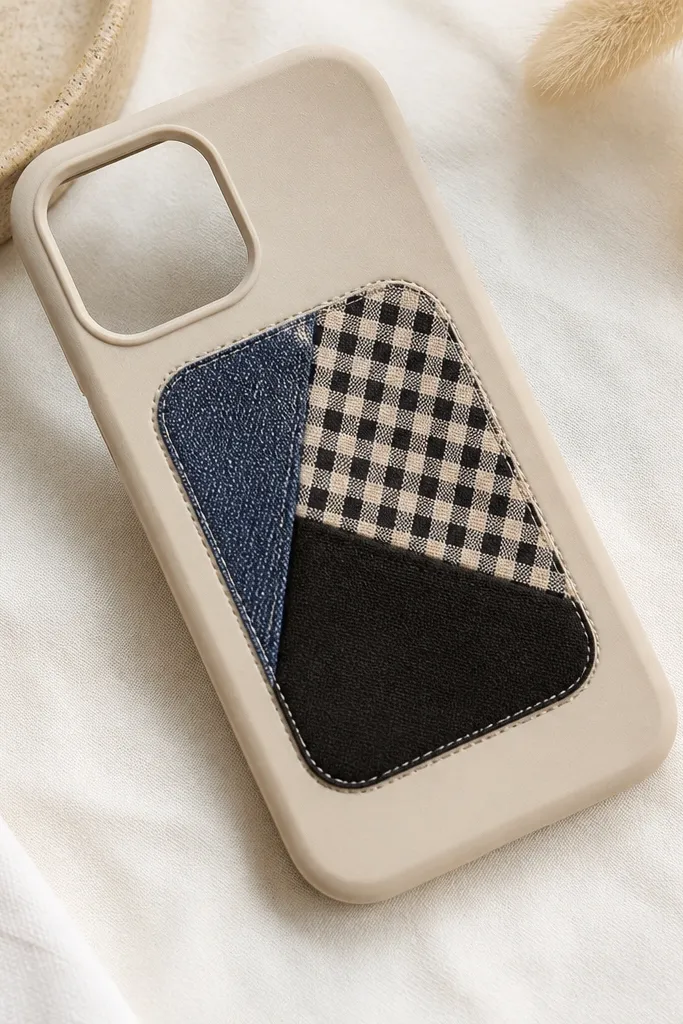
Patchwork looks expensive, and you can do it with scrap fabric plus iron-on adhesive. The panel gives texture without the mess of loose fabric edges. I use three scraps with different textures so the case reads handmade — denim, gingham, and a solid black piece. This works for anyone who likes casual outfits because it feels like a little quilt. It also flatters medium to dark skin tones because the contrast is strong and clear.
Cut fabric scraps into a small patchwork rectangle, for example 2.2 x 1.4 inches. Iron iron-on fusible web to the back of each fabric scrap, then cut patches to fit together. Assemble patches on the case front like a puzzle, then glue or press them down with a thin coat of fabric glue. Seal with a clear decoupage glue layer over the whole patchwork panel, then add two clear top coats. Keep the patchwork 1-2 mm inside the rim so it doesn’t catch on pockets.
Choose fabrics with similar thickness — thin and thick scraps create bumps.
Don’t skip sealing the edges — frayed fabric will lift under top coat.
27. Pastel butterfly silhouette with cutout and tape hinge
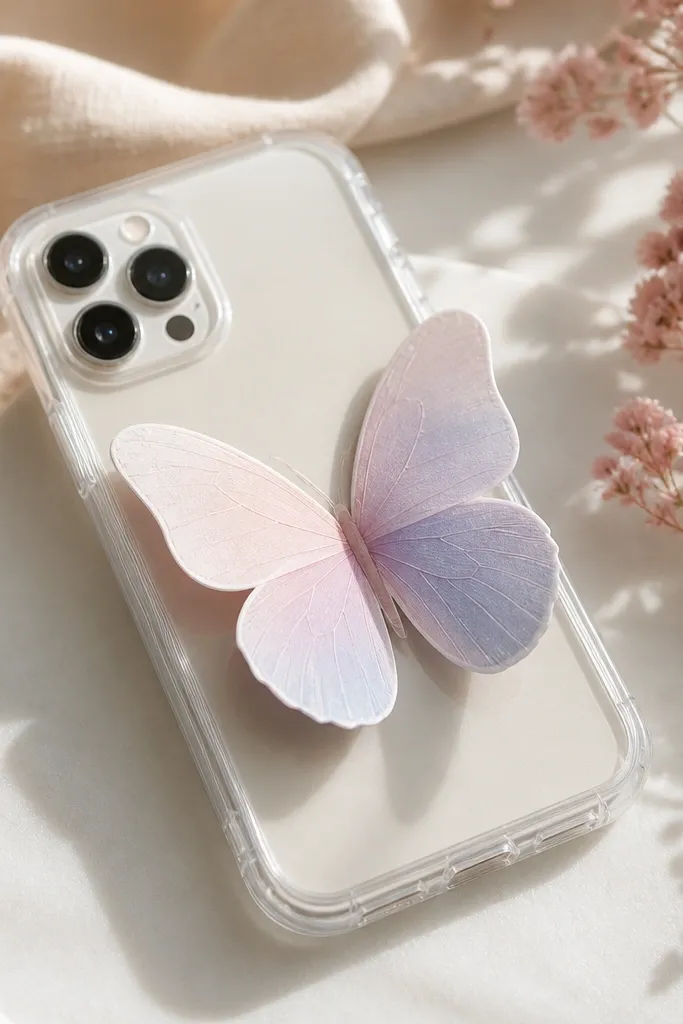
Cut a butterfly silhouette from pastel cardstock — keep it simple, about 2.2 inches wide. Cut a second butterfly from a slightly lighter or translucent paper. Glue the bottom butterfly flat to the case in the center above the camera. For the top butterfly, place a small strip of clear tape at the center crease like a hinge, then glue only the lower half so the wings lift. Seal the flat base area with a thin clear coat, avoiding the hinge so it stays flexible. Let it cure completely before bending the wing.
This one looks like a 3D paper craft without heavy materials. A butterfly silhouette gives instant personality, and a tape hinge lets one wing layer sit slightly raised. I use pastel paper or thin cardstock for the top layer and a matching translucent paper for the bottom so the colors glow. It flatters fair and light-medium skin tones because the pastels look soft. It also looks good for spring and gifts because it feels playful.
AvoidDon’t seal over the hinge — it turns stiff and the 3D effect disappears.
Pro tipUse a craft knife with a fresh blade — butterflies look clean when edges are sharp.
28. Monochrome animal print corner accent
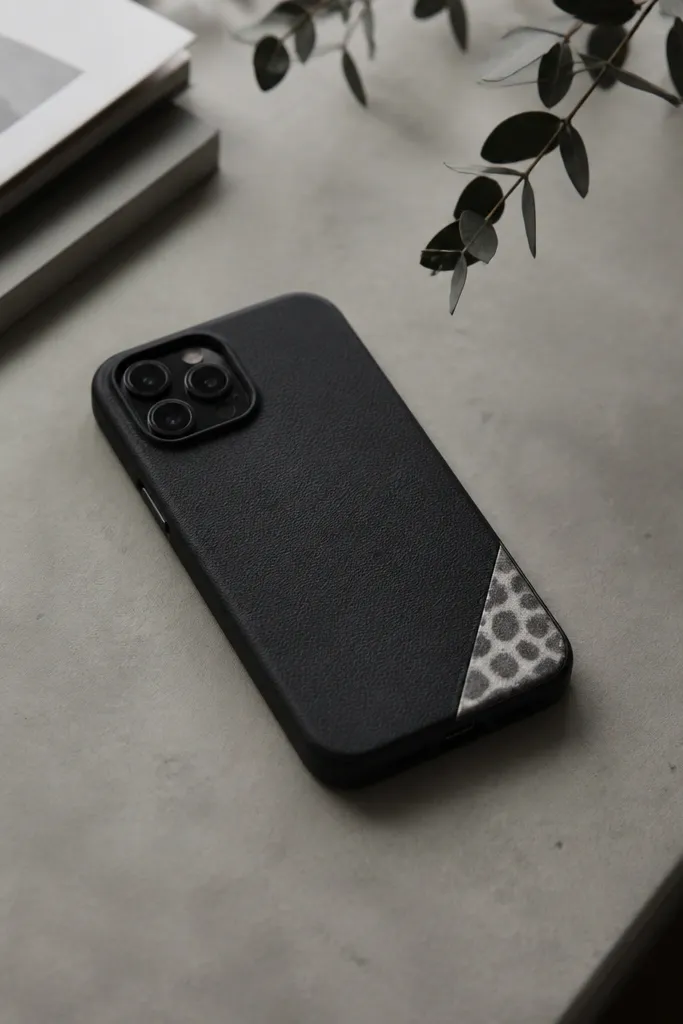
Animal print corners look stylish because they’re small and controlled. I pick monochrome animal print because it doesn’t clash with phone colors and it looks more grown-up than full-on leopard. The corner placement also protects the design since it’s away from the camera and mostly out of direct pocket friction. This style flatters people who wear black a lot because the print adds texture without adding color noise. It also looks good with neutral makeup and simple jewelry.
Choose animal print adhesive vinyl or print your own on sticker paper. Cut a corner patch about 1.6 x 1.6 inches and round the edges slightly. Clean the case with alcohol, then place the patch in the top left or bottom right corner, keeping at least 8 mm away from camera. Press firmly with a card. Seal with a clear top coat in two thin layers so the vinyl edges stay protected. If you’re using sticker paper, seal around the edges extra well.
Round corners with scissors, not a knife — it prevents tiny peeling points.
Don’t place it too close to the rim — corner friction makes it lift.
29. Clear case with black lace + pearl button center
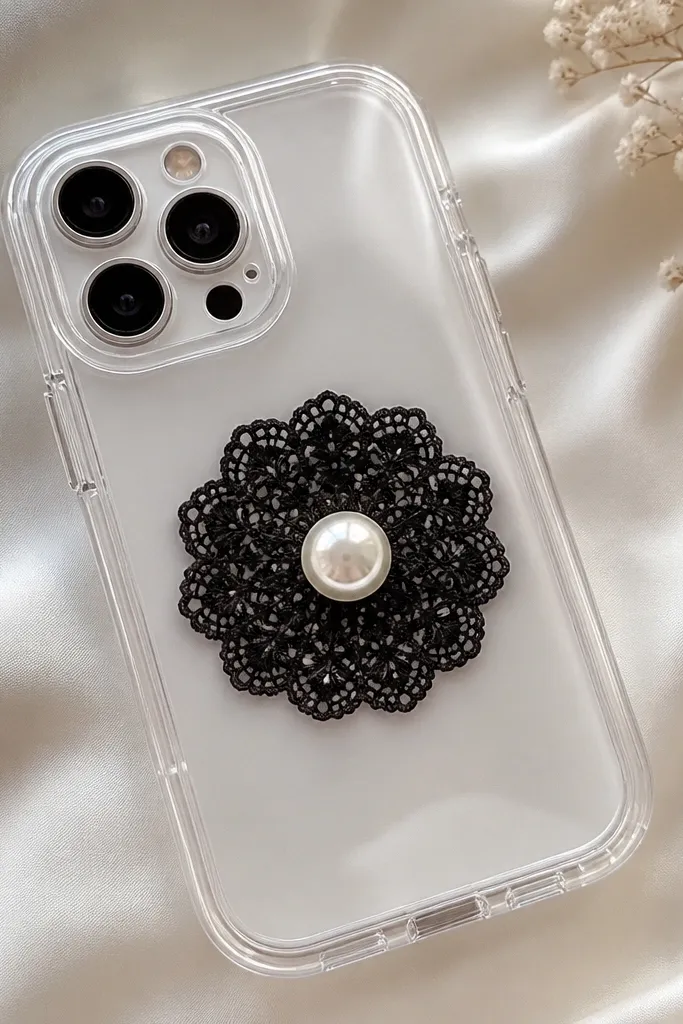
This is a “little dress” look for your phone. The black lace circle feels delicate, and the pearl button makes it look like a vintage accessory. I keep it centered and small so it doesn’t interfere with the camera bump. This looks great on light or neutral outfits because the black lace contrasts cleanly. It also flatters cool skin tones because black and pearl read crisp.
Cut a lace circle from a lace scrap — around 1.2 inches wide. Clean the case with alcohol, then glue the lace circle flat in the center above the camera. Let it set 20-30 minutes. Glue a faux pearl button on top using a small dot of gel adhesive. Seal the lace with a thin clear top coat around the edges, then add one more coat over the button for smoothness. Avoid getting top coat under the case rim so it doesn’t peel.
If your pearl button looks too shiny, use a matte top coat over only the button for a softer finish.
Don’t use thick lace — it will create a bump you feel every time you type.
30. Color-block stripes with painter's tape edges
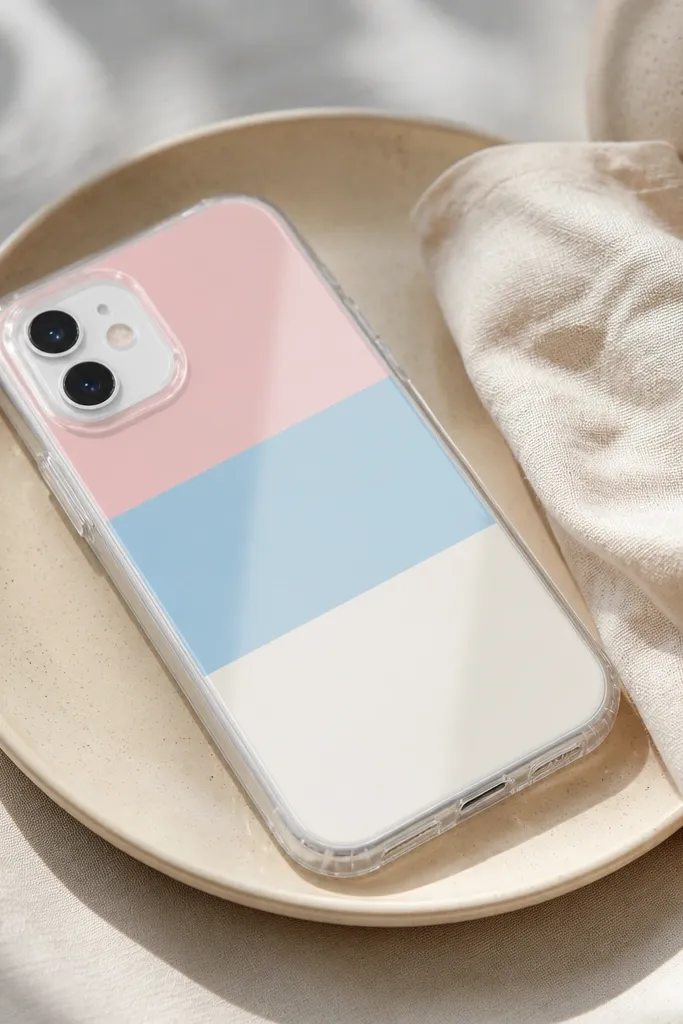
Color blocks look clean because straight lines feel intentional. Painter’s tape is the secret weapon — it gives you crisp edges that make the case look store-bought. I use three blocks across the middle so it frames the camera area while still looking balanced. This design flatters almost everyone because the colors are soft and not too saturated. It also works if you want something that doesn’t require tiny pieces or glue precision.
Start with a clear TPU case or paint a base color you like. Tape off horizontal or diagonal stripes with painter’s tape, then paint each block with acrylic paint mixed with a touch of clear medium. Peel tape only when the paint is slightly tacky so edges stay sharp. Let dry fully, then seal with two glossy clear coats. For phones with a camera bump, cut or leave a small gap in the tape layout so paint doesn’t cover lenses. Smooth any tiny paint ridges by lightly sanding after curing, then recoat.
Use thin paint layers. Thick layers crack at the tape edges as they dry.
Don’t rush the peel — if paint dries fully under tape, edges tear.



