
1. Neon vinyl lightning bolt on a clear case
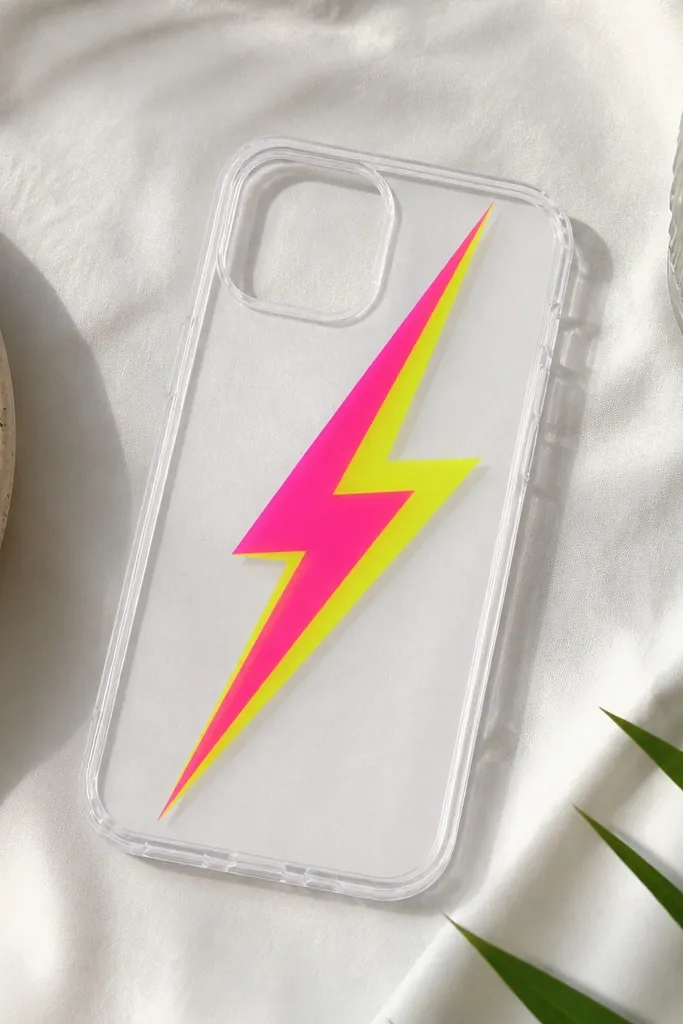
This one looks loud and expensive because vinyl has sharp edges and a glossy finish that catches light. I used neon yellow and hot pink because they pop against a clear base without needing extra layers. The bolt sits slightly above center so it frames the camera area instead of colliding with it. It looks best on cooler skin tones and with black, white, or denim outfits. Styling-wise, treat it like jewelry — pair with simple earrings so the case does the talking.
Start by cleaning the clear case with rubbing alcohol and letting it dry completely. Cut or print a lightning bolt shape on neon vinyl, then weed out the excess vinyl carefully. Position it on the back, keeping the bolt at least 2 mm away from the camera cutout, and press from the center outward. Finally, burnish hard along the edges with a plastic card so it seals and doesn’t lift when you slide the phone into a pocket.
Use a hair dryer on low for 10-15 seconds after pressing — it helps vinyl conform to the case curve.
Don’t stretch the vinyl while applying or you’ll get rippled edges that look handmade in a bad way.
2. Black-and-white tape checkerboard grid
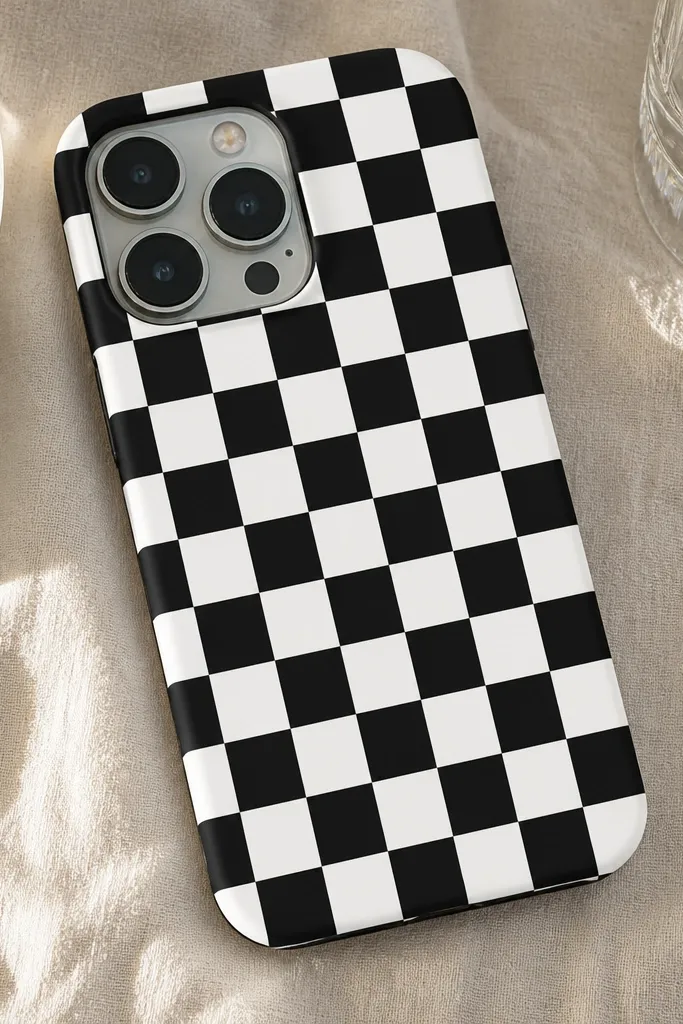
A tape checkerboard looks graphic and stylish because it creates a high-contrast pattern with clean geometry. I’ve done this with matte black tape and white painter’s tape for a slightly softened look, not shiny-plastic. It flatters smaller hands because the grid draws the eye upward and makes the case feel structured. If you wear a lot of neutrals, this adds instant punch without clashing. For a night out, it also looks great with a sleek updo because the pattern shows in photos.
Start by marking a light pencil guide on the back of the case (just faint marks) in a grid that matches the case width. Apply alternating squares using painter’s tape strips, pressing each strip down firmly. Cut around the camera opening with a sharp craft knife so you don’t leave ragged tape edges. Seal the whole design by pressing over the tape again with a credit card, then trim any tape that overlaps the port openings.
Use a metal ruler and a new blade for the camera cutout — tape edges look cleanest when you cut once, not twice.
Skip glossy duct tape — it reflects harshly and makes the pattern look messy in daylight.
3. Gold foil leaf corners
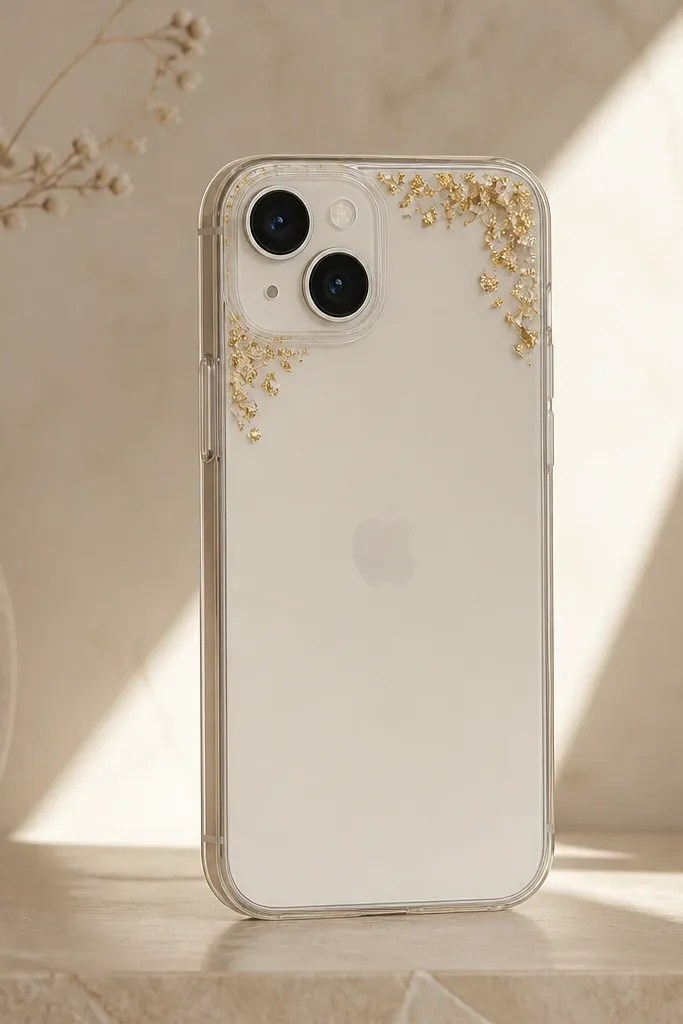
Gold foil leaf corners make a phone case look like it belongs in a gallery frame. I place tiny clusters in the top-left and top-right corners so the center stays clean and readable in photos. The effect flatters warm undertones because gold warms up the whole look. It also pairs beautifully with cream knits, camel coats, and black jeans. Keep the foil sparse; too much makes it look like a craft project.
Start with a matte case or wipe a clear case with alcohol so the surface holds adhesive. Apply a thin layer of foil adhesive or a tacky craft glue only in the corners (smaller than you think). Press gold foil leaf down gently, then tap off loose bits with your fingers. Finish by sealing with a clear matte top coat only over the foil areas to stop shedding.
If the foil keeps tearing, use smaller pieces and press with a cotton pad instead of your fingertips.
Don’t cover the whole back in foil — it turns into a shiny patchwork that scratches fast.
4. Felt flower cluster with stitched look
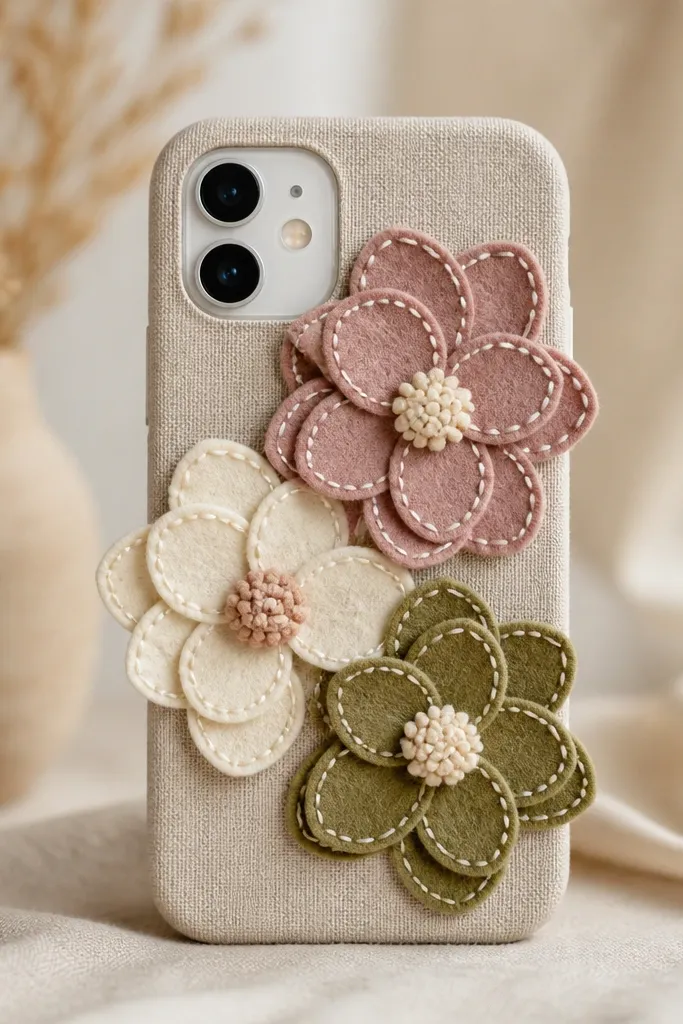
Felt flowers look soft and intentional, and the handmade texture reads expensive in close-up. I layer three petal sizes so the flowers look dimensional instead of flat stickers. Dusty pink and cream feel romantic without turning childish, and olive adds a grounded contrast. This style flatters people who wear earth tones or have warm skin undertones. It also looks great with a casual crossbody bag because the texture shows as you move.
Pro tipUse fabric glue, not hot glue, if you want the edges to stay flexible and not peel when the case bends.
Start by cutting petal shapes from felt: three small, three medium, and three large per flower. Layer them and glue the centers first, then glue the petals outward. Add a faux stitched ring by running a thin line of white or cream fabric glue around the outer edge of each flower. Place the cluster slightly off-center near the top third and press for 30-60 seconds so it bonds firmly.
AvoidAvoid thick glue blobs — they create bumps that catch lint and look uneven.
5. Nail polish marbling on a clear case
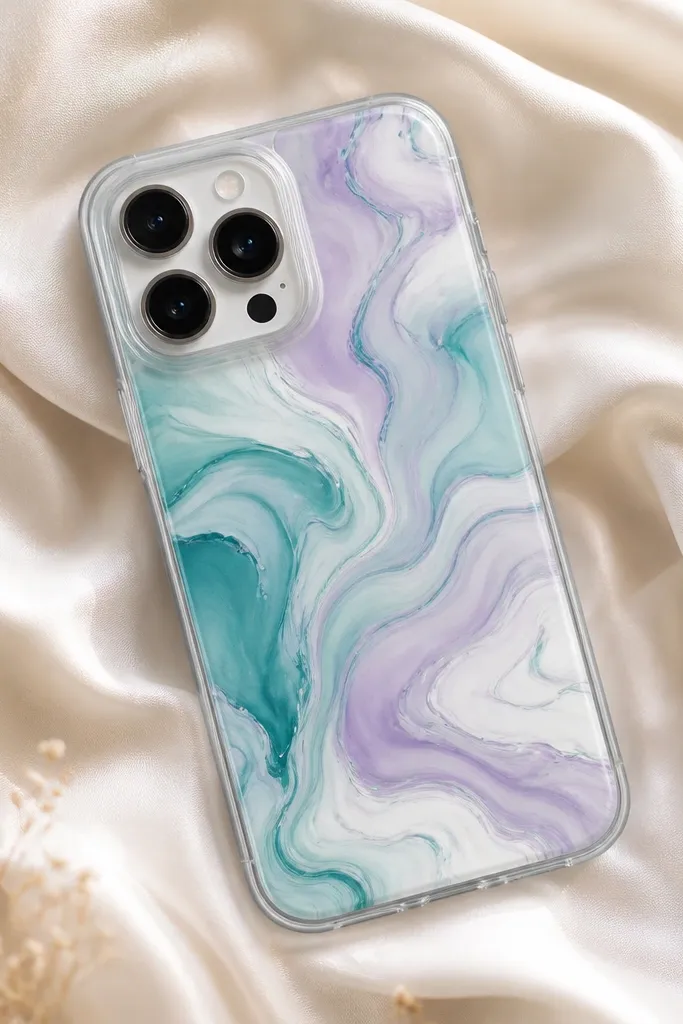
Marbling looks like you bought it, because the pattern is random in a way that hides small mistakes. I use nail polish because it floats and spreads in thin layers, then dries into a glossy film. Teal plus white gives a clean, modern look; lavender adds a soft highlight. This one looks great on almost any outfit, but it especially pops with silver jewelry and cool-toned makeup. It also photographs beautifully because the swirls catch light.
Start by protecting the camera and ports with painter’s tape, leaving the back exposed. Add a few drops of nail polish on a small plastic sheet or the case surface, then swirl gently with a toothpick to create streaks. Press the clear case lightly onto the marbled surface so the pattern transfers, then lift straight up. Let it dry fully, remove the tape, and seal with a thin clear top coat for a smooth feel.
Work in thin layers; thick polish wrinkles when it dries.
Don’t shake the polish bottle — bubbles ruin the swirl pattern.
6. Minimalist star decals in silver
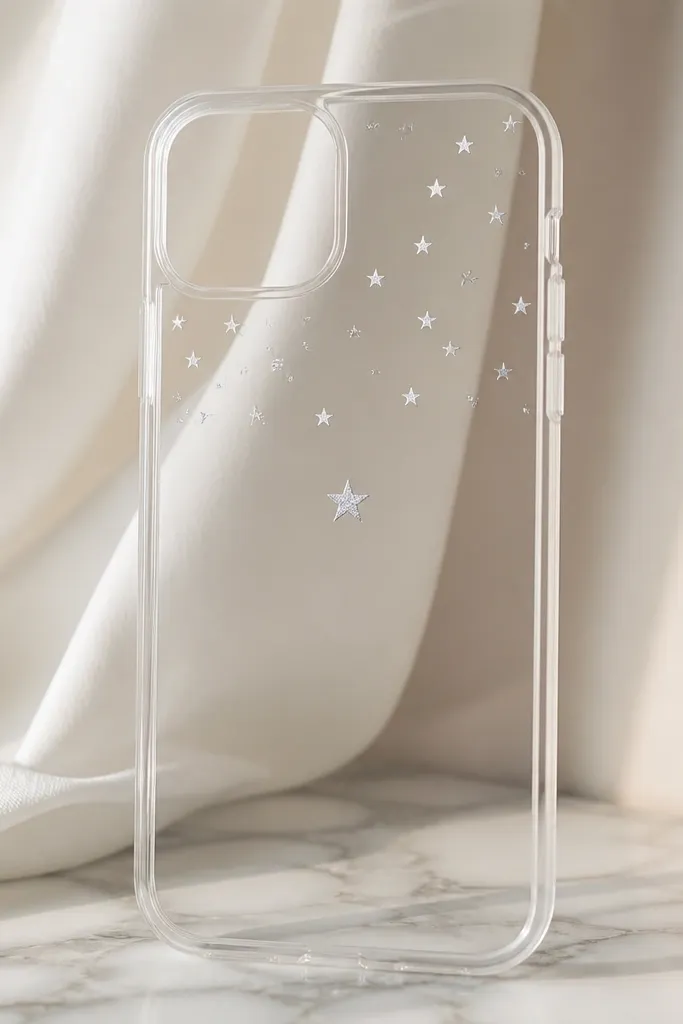
Tiny silver stars look clean and grown-up because they stay small and don’t overwhelm the camera. I place one larger star near the center and keep the rest clustered near the top edge, like a constellation. Silver works with both warm and cool outfits, and it looks crisp in both indoor and daylight. This case suits people who like a subtle aesthetic and don’t want their phone to scream for attention. It also pairs well with patterned phone straps because the stars stay minimal.
Start with a clean, dry case and lay the star decals on the back without sticking yet. Adjust spacing until you like the balance, then press each decal down firmly. Use a plastic card to burnish around the edges, especially on the tiny stars. Finally, check the camera and port openings — trim any vinyl that overlaps with a fine craft knife.
Use tweezers for the tiny stars so you don’t smear adhesive with your fingers.
Don’t place stars too close to the camera ring — the edge lifts from heat and handling.
7. Fabric ribbon bow on the back top
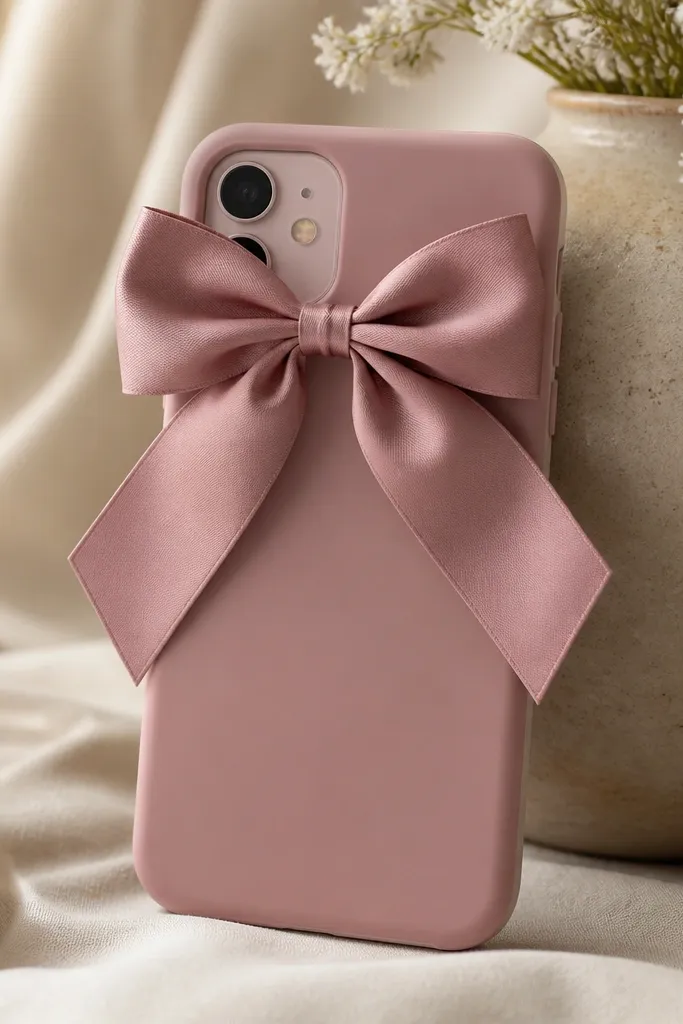
A satin bow reads cute and polished, and it gives your phone a “gift wrap” vibe without being childish. I like dusty rose or black satin because they look good against both clear and matte cases. The bow flatters most outfits because it’s a soft shape that frames the phone. It also works well for photos at parties because the ribbon catches light and creates highlights. If you wear a lot of monochrome, the bow adds a focal point without clashing.
Start by choosing ribbon about 1 cm wide so the bow looks proportional on a phone back. Make the bow on a flat surface, then glue the center knot to the case using a small dot of E6000 or strong craft glue. Press and hold for 60 seconds, then trim the tails so they end above the camera cutout. For a cleaner edge, hide the glue with a tiny strip of matching ribbon wrapped around the center.
Cut ribbon with sharp scissors and seal the ends with a tiny dab of clear glue to stop fraying.
Don’t use thin sheer ribbon — it looks wrinkly and the bow collapses fast.
8. Polka dot sticker peel-and-press
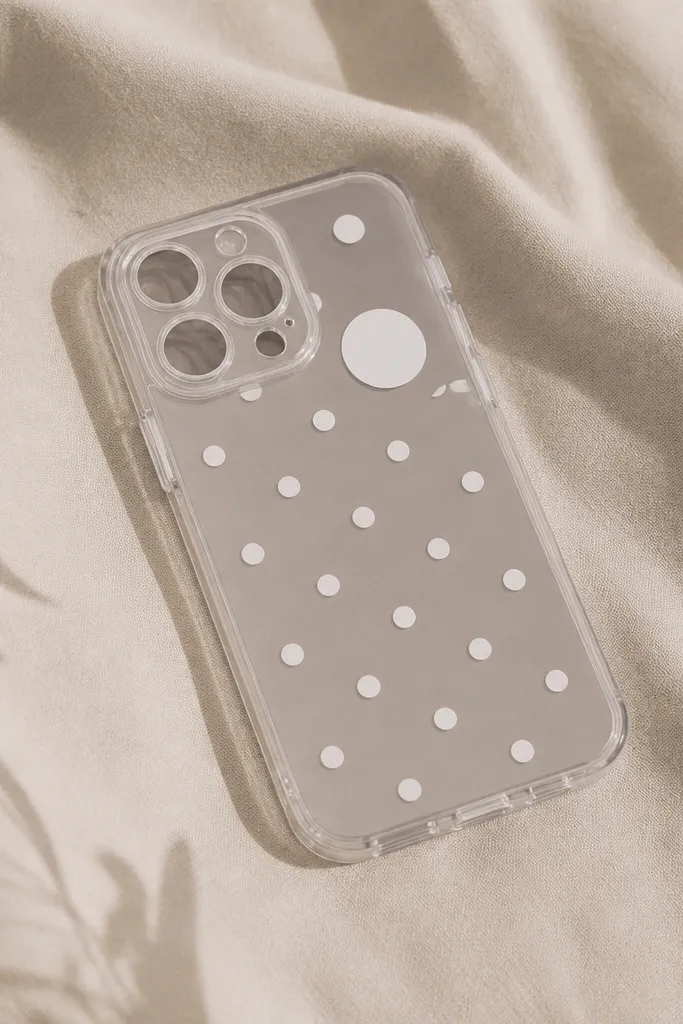
Polka dots are the fastest way to make a plain case look intentional. I use glossy white dot stickers on a clear base because the dots look like they’re printed, not glued. Spacing matters: medium dots across the back and one larger dot near the top make the composition feel balanced. This style flatters hands and wrists because it creates movement when you tilt the phone. It also works with bold outfits because the dots stay graphic rather than busy.
Pro tipUse a ruler or the edge of a notebook to keep dot rows straight.
Start by wiping the case with rubbing alcohol and letting it dry. Peel one dot and place it at the center height you want, then build outward using your phone as a visual guide. Press each dot for five seconds, then burnish with a fingernail around the edges. Keep the dots at least 2 mm away from the camera opening, and stop before the port cutouts.
AvoidDon’t overlap dots — the raised edges catch lint and look messy.
9. Lemon slice decal with translucent yellow overlay
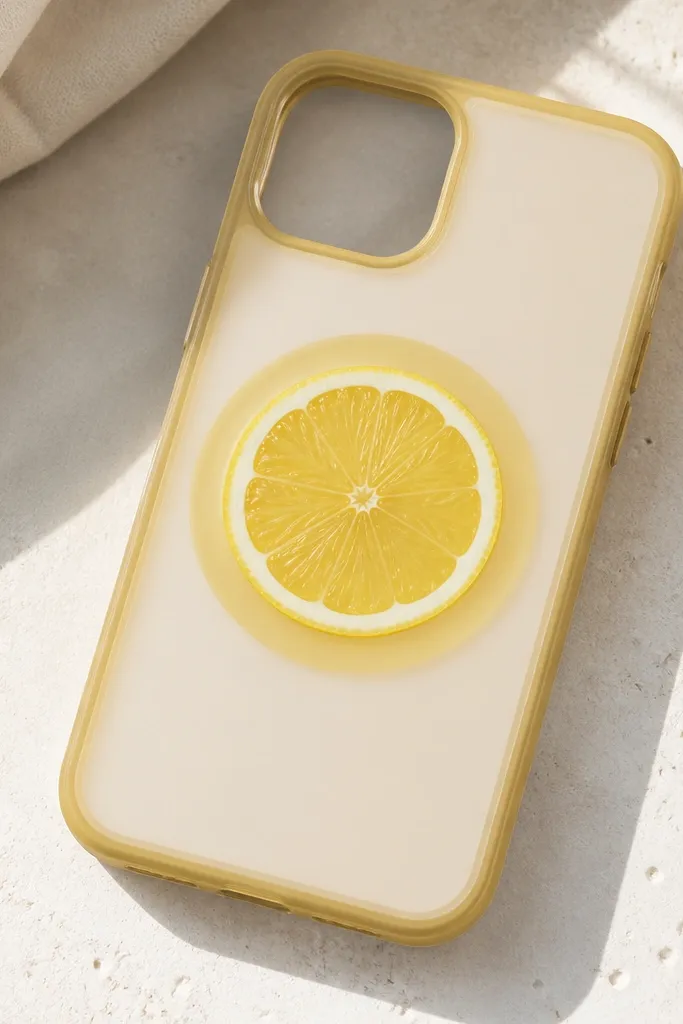
A lemon slice case feels fresh and bright, and the best part is it doesn’t need glitter to look fun. I layer a printed lemon image under a translucent yellow film ring so it looks like a real slice. The translucent ring makes the design feel juicy and dimensional. This style looks great on warm undertones and pairs well with summer whites, stripes, and denim. It’s also perfect for a kitchen gift or a vacation phone case.
Pro tipUse translucent film, not opaque yellow — opaque blocks the image and looks like a sticker.
Start with a clear case and clean it with alcohol. Place the printed lemon decal centered where you want it, then press it down firmly. Cut a circle out of translucent yellow vinyl or sticker film and place it around the decal, leaving the top third clear so it doesn’t crowd the camera. Seal with a clear top coat if you used vinyl, or leave it if your film already has a protective layer.
AvoidSkip thick layers — they make the case feel bulky and the edges lift.
10. Denim patch pocket with mini safety pin clasp
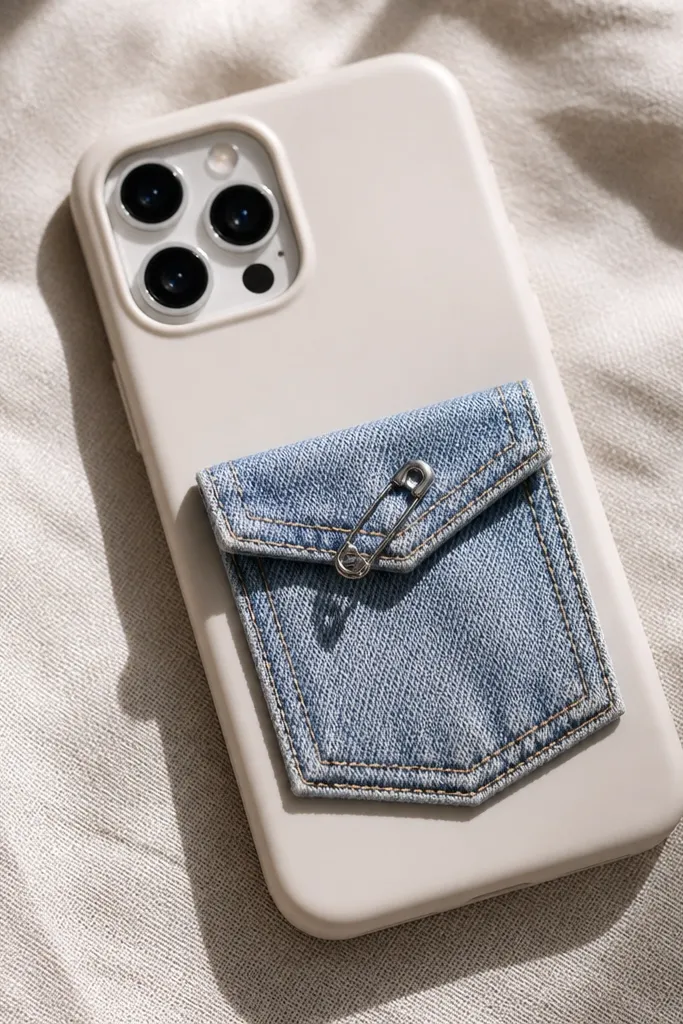
A denim patch pocket makes your phone feel like a tiny accessory, not just a gadget. I use a small rectangle patch with frayed edges so it looks worn-in without being messy. A mini safety pin clasp adds a bit of edge and keeps the flap from flopping. This style looks best with casual outfits — hoodies, denim jackets, and sneakers. It flatters people who like texture and don’t mind a slightly thicker case feel.
Start with a scrap of denim and cut a patch about 2.5 cm wide by 4 cm tall. Glue it to the case with fabric glue, then press. Cut a flap piece from denim and attach it at the top edge only, leaving the bottom free. Add a small safety pin through the flap and the patch base so it closes, then trim threads that stick out.
Use a denim needle and thread if you want real stitches, but fabric glue is fast and still looks good.
Don’t glue the flap on all sides — it needs one hinge edge or it looks flat and cheap.
11. Matte black case with copper vinyl circuit lines
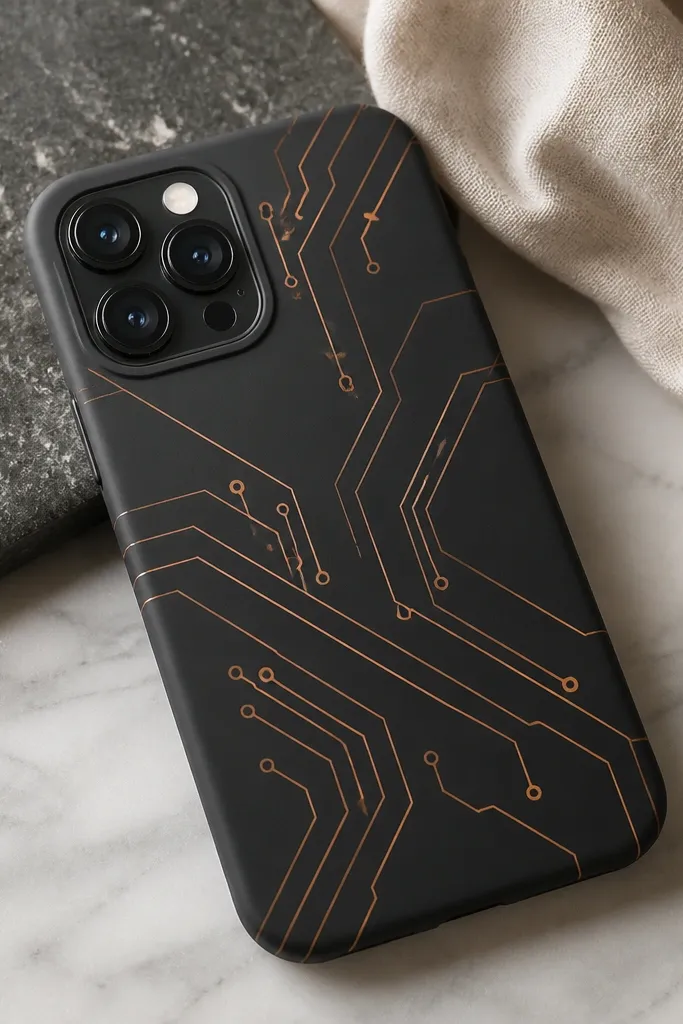
Copper circuit lines look techy without turning into a cartoon design. On a matte black base, the copper vinyl has a warm metallic glow that looks clean in photos. I arrange the lines diagonally so the design guides the eye across the back instead of sitting like a sticker blob. This looks great with black tops, leather bags, and warm gold jewelry. If you like a darker aesthetic, this is the one that always gets compliments.
Start by cleaning the matte case with rubbing alcohol and drying it fully. Cut thin circuit line shapes from copper vinyl or use a stencil you can trace. Place the diagonal pattern first without committing, then press down starting from the longest lines. Add tiny dot nodes where intersections are, and burnish all edges with a plastic card. Keep the design away from the camera cutout so the metallic film doesn’t snag when you set the phone down.
Trace your stencil lightly on paper first and test the spacing on the phone before you cut vinyl.
Don’t use thick vinyl strips — chunky lines look like craft foam.
12. Photo strip frame using washi tape and clear tape laminate
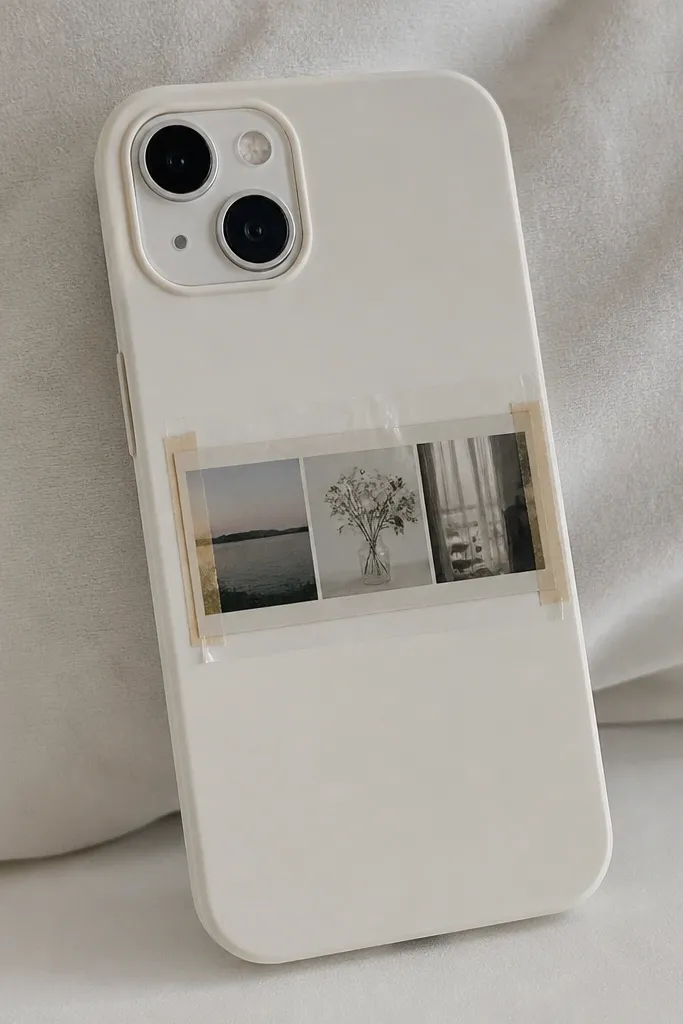
A photo strip frame makes your phone feel personal while still looking tidy. I use washi tape for the frame because it’s thin and bends around curves without lifting. The clear tape laminate over the photo keeps it from getting scratched in a pocket. This style flatters anyone who wants their case to match the rest of their decor — you can swap the photo seasonally. It also looks great with warm lighting because the photo has a soft, slightly hazy glow.
Pro tipUse a slightly matte photo print — glossy prints show fingerprints and glare.
Start by printing a narrow photo strip and cutting it so it fits the back area leaving a gap around the camera. Apply washi tape strips to form a rectangle frame, pressing each corner flat. Place the photo inside and tape the edges down with clear tape so the photo can’t slide. Smooth the laminate carefully, then trim any tape that overlaps the ports.
AvoidDon’t skip the clear tape top layer — the photo scratches fast otherwise.
13. Satin marble corners with tape resist
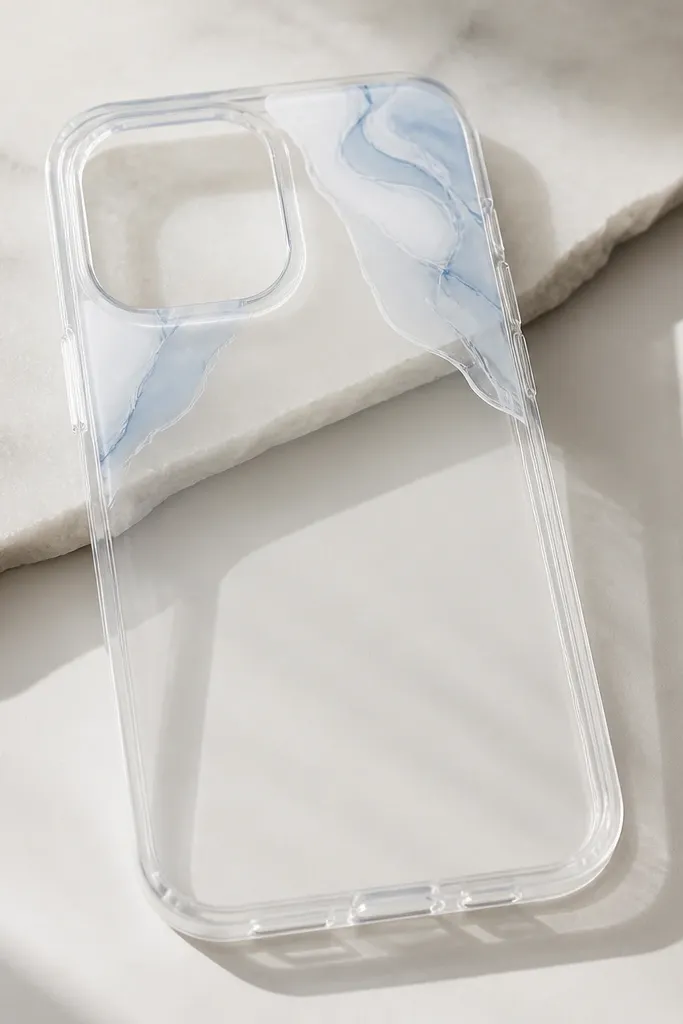
This is the “looks like nail art” option, but it stays elegant because it’s limited to the corners. Using tape resist keeps the pattern clean and stops mess from creeping toward the camera lens. I use white and pale blue (sometimes a tiny touch of silver) so it reads classy instead of loud. It flatters people who wear light neutrals and want a gentle pop. In photos, corner marble looks like a design detail, not a full cover job.
Pro tipPeel tape while the polish is fully dry, not tacky, or the edges smear.
Start with a clear case and clean it. Tape off two corner zones with painter’s tape so you have sharp boundaries. Drop white nail polish and pale blue into each taped zone, then swirl lightly with a toothpick. Let it dry fully, then peel the tape slowly to reveal crisp edges. Finish with a thin top coat over the marble areas only so it stays glossy and smooth.
AvoidDon’t cover the whole back — corner-only looks intentional; full coverage looks chaotic.
14. Mini faux leather label with typed slogan
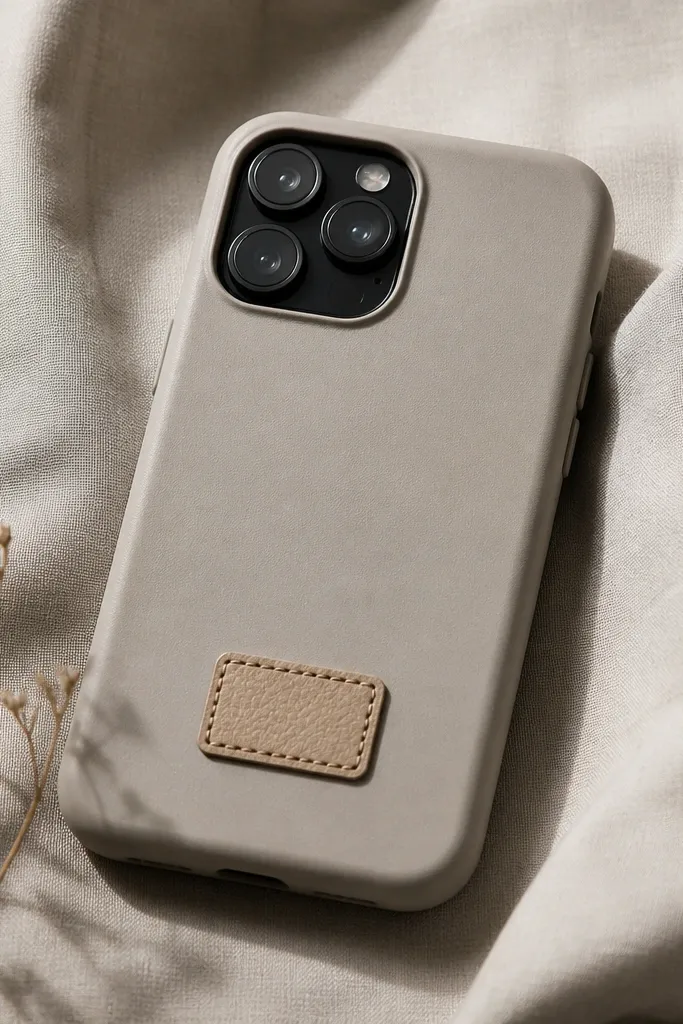
A faux leather label makes the case feel like it came with the phone. I use a small rectangle label, about the size of a stick-on bandage, and print simple black text on sticker paper. The typed look reads clean, and leather texture makes it feel tougher than vinyl. This flatters people who like minimal style and monochrome outfits. It also looks great with silver rings and a structured crossbody bag.
Cut a faux leather rectangle around 3 cm by 5 cm, rounded at the corners. Print text on sticker paper, stick it onto the faux leather, then trim tight around the letters. Add a border by drawing small dots with a fine black marker to mimic stitching. Glue the label onto the back of the case using a thin layer of fabric glue, and press for 60 seconds.
Roughen the glue side of the leather with 220-grit sandpaper so it bonds better.
Don’t use glossy sticker paper on leather — it reflects and makes the text look greasy.
15. Clear case with black lace strip diagonal
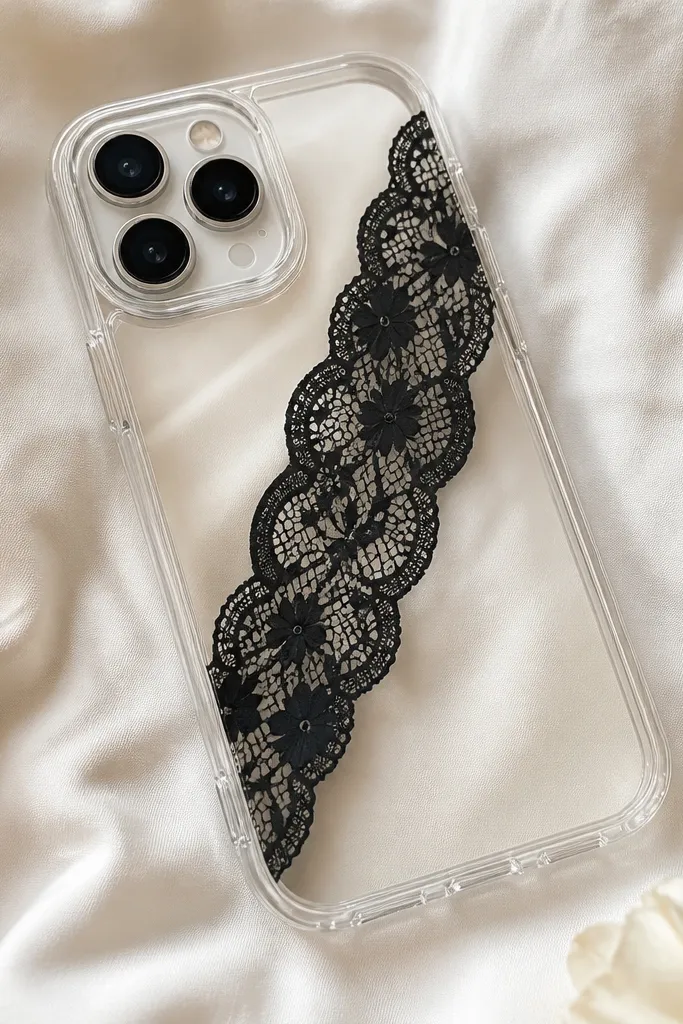
Lace looks fancy because it has fine texture and a pattern that reads like fabric art. I cut a lace strip and place it diagonally so the phone shape stays flattering and the design doesn’t crowd the camera. Black lace on clear looks dramatic without adding heavy color. This works well for people with cool undertones, and it pairs with black outfits, red lipstick, and silver accessories. It also photographs beautifully because lace catches light through the clear base.
Start with a clear case and clean it. Cut a lace strip slightly wider than the phone back, then trim so it doesn’t hit the camera opening. Glue the lace down with a thin layer of clear craft glue, then smooth edges with a plastic card. Let it set for a few minutes, then add a thin clear top coat over the lace to seal the texture. Keep the glue away from the charging port and speaker cutout.
Use a glue brush, not a blob — lace needs a thin coat or it goes stiff and lumpy.
Skip thick gel glue — it makes the lace curl and look uneven.
16. Rainbow ombre tape stripe from bottom
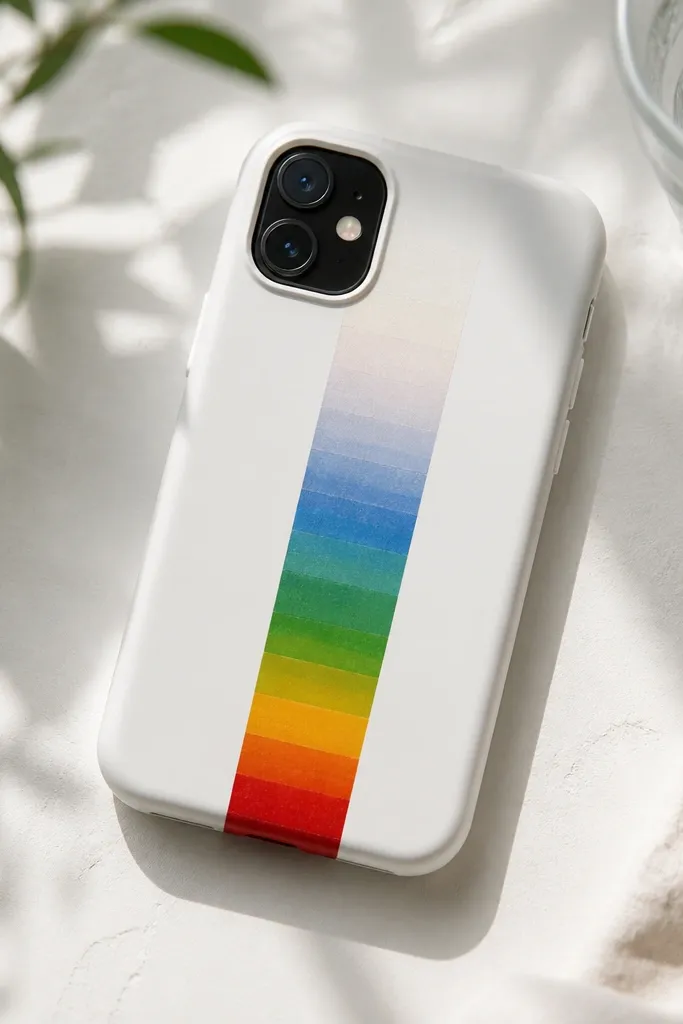
An ombre tape stripe looks cheerful and modern because it blends colors smoothly without printing. I use small tape strips stacked side-by-side, so each color band is crisp and the blend feels intentional. Bright bottom colors look best on clear or light matte cases because the fade stays visible. This style suits warm outfits and summer nails, and it makes your phone stand out in a photo without being loud. It also feels playful without turning into a character theme.
Pro tipUse the same tape brand for all colors so the texture matches and the blend looks even.
Start by cleaning the case. Choose 4-6 tape colors and cut them into equal-width strips — for a phone back, about 0.8-1 cm each works well. Place the bottom strip first, press down, then stack each next color above it, slightly overlapping for a smooth fade. Keep the stripe centered and stop before the camera cutout. Burnish each strip with a fingernail, then trim any overlap at the edges.
AvoidDon’t use too many thin stripes — it turns into clutter instead of ombre.
17. Pearl bead border around the camera ring area
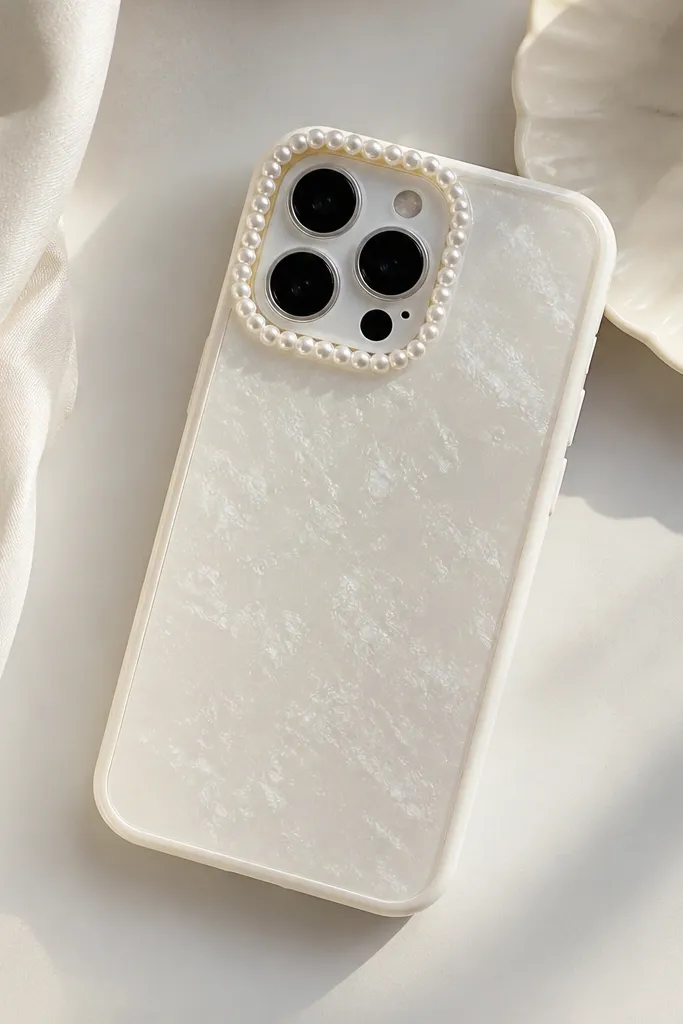
A pearl bead border is the quickest way to make a simple case look like it belongs in a jewelry store. I keep the beads only around the camera area so it looks like a decorative frame, not a full beaded mess. The effect flatters anyone who wears soft makeup or neutral outfits because pearls calm the look. It also adds a tactile detail that feels fancy when you pull the phone out of your bag. If you want a pretty case that still looks clean, this is a winner.
Start with a clean case and gather pearl beads, clear craft glue, and a toothpick. Apply tiny dots of glue around the camera area cutout — only where the beads will sit, not across the lens. Place beads one by one using tweezers, leaving a gap for the lens opening. Let it dry upright so gravity doesn’t smear glue. Finish by checking that the camera ring is still unobstructed and trimming any stray glue threads.
Use beads with flat backs if you can — they sit cleaner and don’t rotate.
Don’t glue beads directly over the camera lens cutout edge — it can scratch the lens or interfere with fit.
18. Book page print with clear topcoat seal
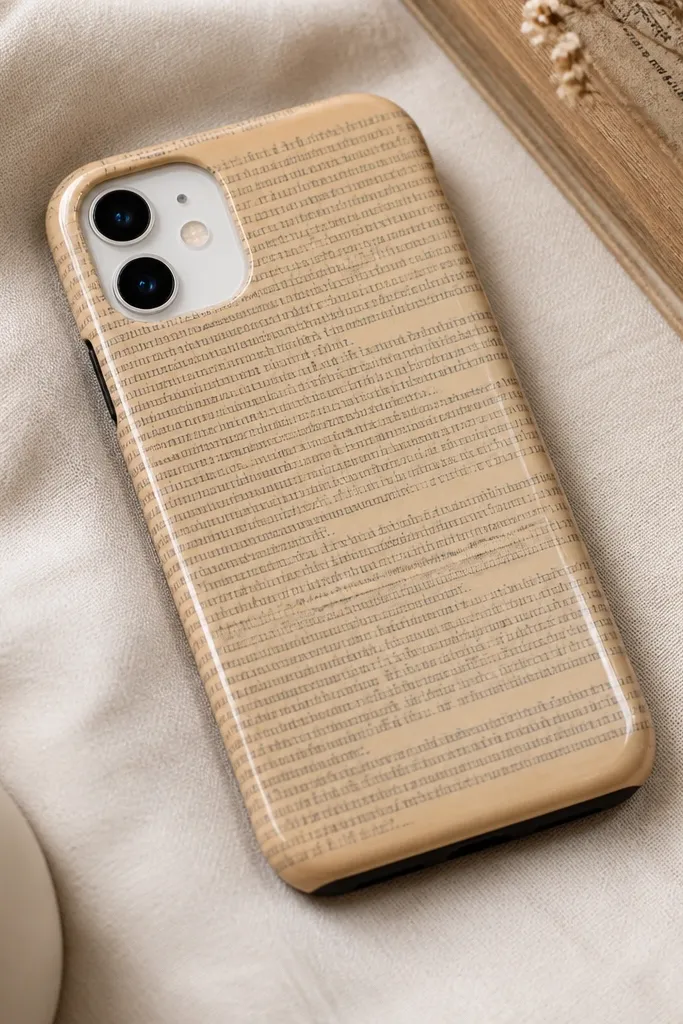
Book page print gives that vintage editorial feel, and the sealed finish keeps it from looking like paper stuck on a case. I tear the paper instead of cutting, because torn edges blend better under topcoat. The text background makes any accent color pop, especially if you add one small stamp or heart in the corner. This looks great with warm undertones and outfits with browns, creams, and burgundy. It also hides fingerprints better than bare glossy decals.
Pro tipSeal the edges with extra topcoat — that’s where peeling usually starts.
Start with a clear or light-colored case and clean it with alcohol. Tear a piece of book page to fit the back, then glue it down with a thin layer of Mod Podge or clear craft glue. Smooth wrinkles with a credit card, working from the center outward. Let it dry, then apply 2-3 thin coats of clear topcoat, letting each coat dry fully before the next. Trim paper at the edges so it doesn’t bunch near the ports.
AvoidDon’t use too much glue at the beginning or you’ll get bubbles under the paper.
19. Neon gradient nail polish swipe
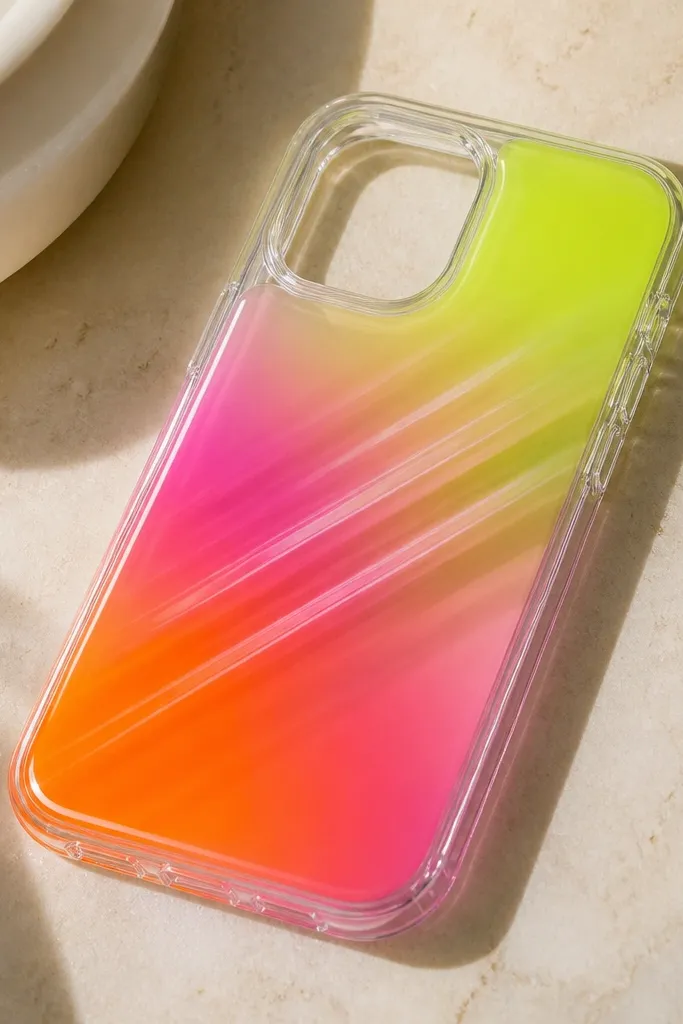
A neon gradient swipe looks like a designer case because it’s fluid and bright, but it’s still simple to place. I do it on a clear base so the color feels like it’s floating, not painted thick. Lime and pink make the biggest pop, and orange bridges them so it doesn’t look like random blobs. This style flatters darker outfits and also looks great against pale sweaters because the contrast is sharp. It’s the kind of case that makes even plain jeans feel styled.
Clean the clear case with alcohol. Tape off one diagonal band across the back using painter’s tape, leaving space around the camera. Paint lime nail polish into one end of the band, add pink in the middle, and orange at the other end. Drag a toothpick lightly through the colors to blend streaks. Let it dry, remove the tape, and seal with a clear top coat for a smooth finish.
Use a thin brush for the stripe so you don’t bleed under the tape.
Don’t do it on a dusty case — polish grabs dust and makes specks hard to remove.
20. Micro star confetti shaker look with clear tape
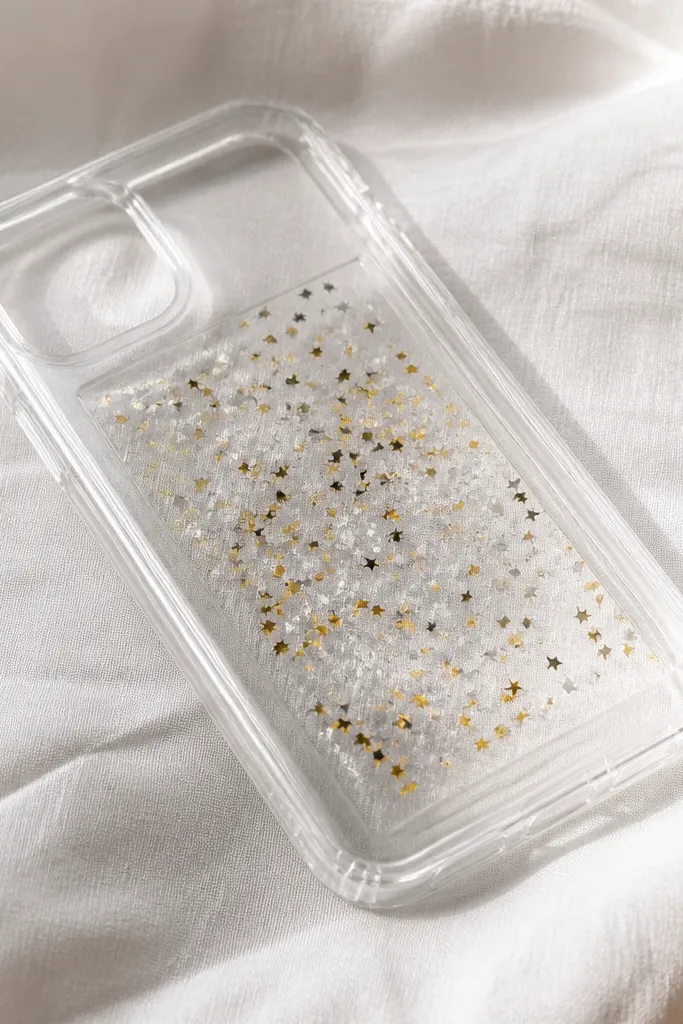
This gives a shaker effect without buying a whole kit. The trick is using a small window made from clear tape or clear film, then trapping micro confetti inside. I use micro gold and silver stars because they look like sparkles, not craft glitter. It’s flattering on camera-heavy phones because the window is near the top and draws the eye away from fingerprints. This style is great for party season and photos in warm lighting. It also feels fun without being childish.
Clean the case and decide where the window sits — I like upper center, about 2 cm by 3 cm. Place clear tape down to form the bottom layer, pressing edges firmly. Sprinkle micro confetti inside the window, then add a second clear tape layer on top like a sandwich. Press hard around the edges with a plastic card to seal completely. Test the phone in your pocket for a day — if any edge lifts, add a tiny strip of tape over it.
Use glitter that is labeled fine or micro — chunky pieces scratch the case when you slide it.
Don’t use loose glitter directly on the case — it smears and looks gritty fast.
21. Corduroy texture strip with fabric glue
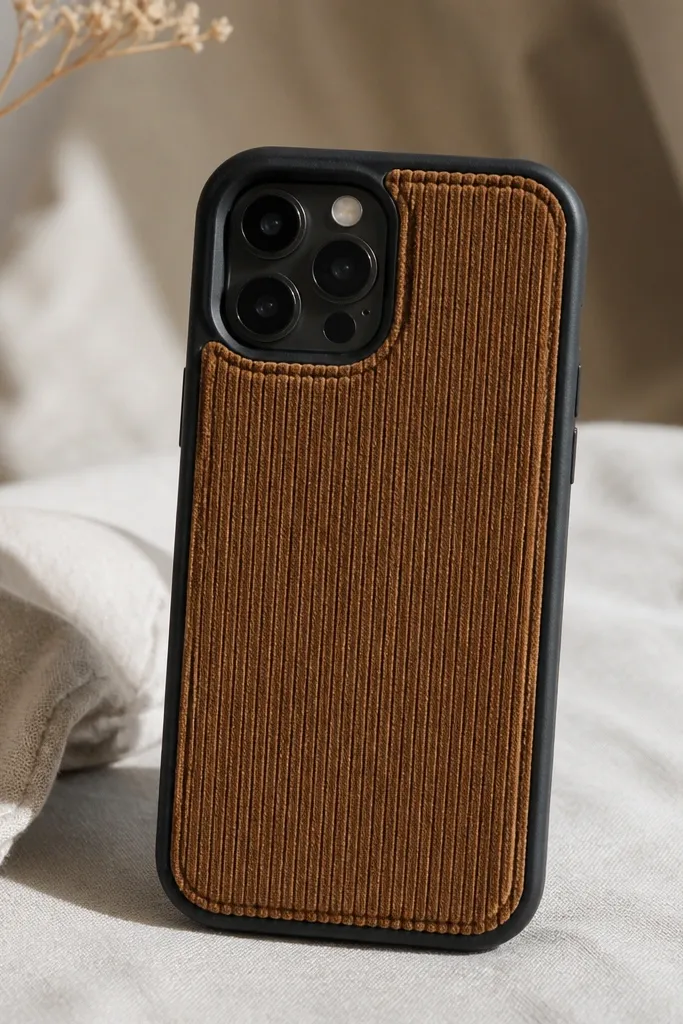
Corduroy has a soft, matte texture that makes your phone feel cozy and grounded. I use one vertical strip instead of covering the whole back, so it stays sleek and doesn’t add too much thickness. Camel or olive looks best because it matches everyday outfits and doesn’t clash with metal jewelry. This style flatters most skin tones because it’s neutral and warm. It also hides tiny scratches better than glossy cases.
Cut a corduroy strip about 1 cm wide and 6-7 cm tall to fit the back. Clean the case with alcohol so glue sticks. Apply a thin line of fabric glue along where the strip will sit, then press the corduroy down with a clean cloth. Trim any frayed edges so they don’t touch the camera opening. Seal over the fabric strip with a clear topcoat or Mod Podge so it feels smooth and doesn’t snag.
Seal twice if you want it pocket-proof — the first coat soaks in, the second coat locks it down.
Don’t skip sealing — fabric glue alone can stay tacky and collect lint.
22. Tiny acrylic paint dots with a fine brush
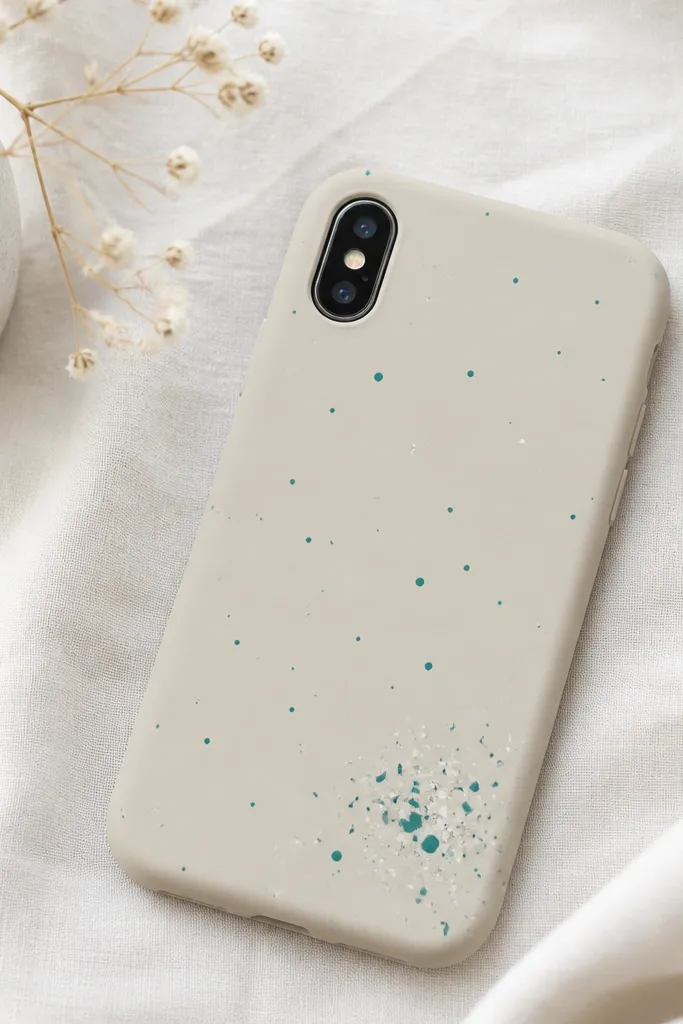
Tiny paint dots look like modern polka art, especially when you keep them small and spaced. I use acrylic paint because it dries opaque and doesn’t need fancy tools. Teal and white make a fresh contrast without turning into a loud color block. This style works for anyone who wants something handmade but controlled — the dots look deliberate. It also looks good on matte cases because the finish stays soft and not overly glossy.
Pro tipUse a toothpick to test dot size on a scrap first — brushes vary by brand.
Clean the case and let it dry. Dip a fine detail brush into acrylic paint, then wipe most off on a paper towel so you get micro dots. Tap the brush lightly for consistent dot size, spacing them evenly. Place a small cluster near the bottom edge for balance, but keep dots away from the ports and camera cutout. Let it dry fully, then seal with a matte or satin clear coat so the dots don’t scratch off.
AvoidAvoid watery paint — it spreads and turns dots into blobs.
23. Pearl-and-rhinestone swirl on a clear base
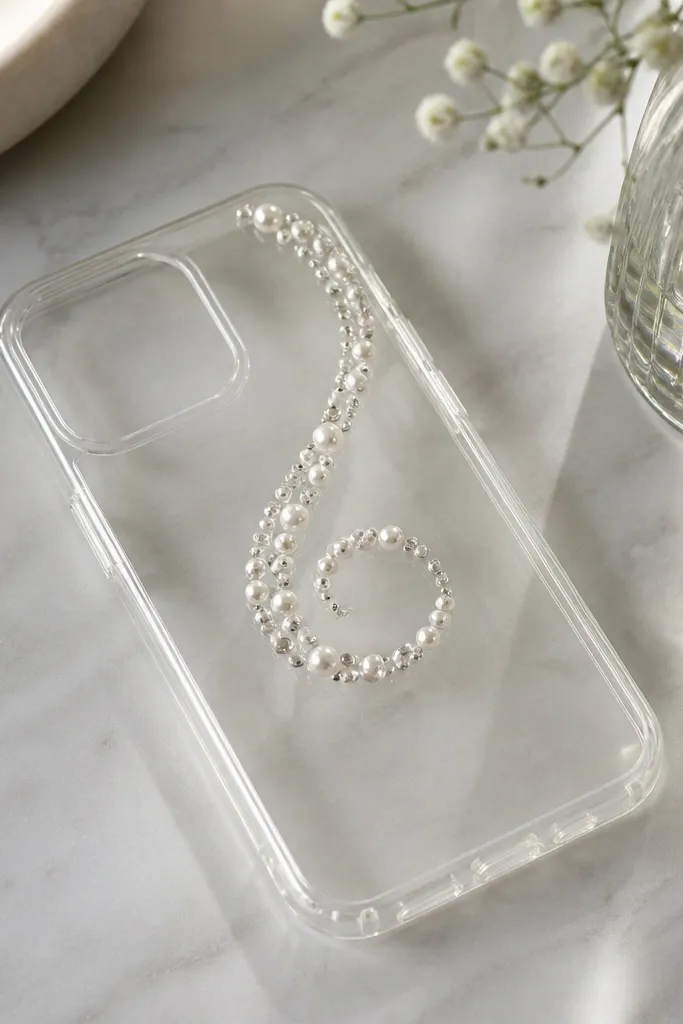
A pearl-and-rhinestone swirl looks like a manicure detail, but placed on the phone it feels extra. I use a swirl line because it matches how your hand naturally tilts the phone, so the sparkle flashes at different angles. Keep the rhinestones small and let pearls fill the gaps so it looks balanced. This style flatters people who wear glam makeup or silver jewelry because it harmonizes with that shine. It also photographs well at night because the stones catch light.
Pro tipUse clear glue with a fast tack so stones don’t slide while you place the next one.
Clean the clear case with alcohol. Plan your swirl by lightly marking a guide with a pencil on the back (faint marks only). Apply a thin line of clear glue along the guide, then place pearls and rhinestones alternately with tweezers. Work slowly and press each stone for a few seconds so it bonds. Let it dry flat, then check the camera opening and trim away any glue that creeps toward the lens cutout.
AvoidDon’t use big rhinestones — they make the swirl heavy and can lift at the edges.
24. Iron-on patch mini badge on a plain case
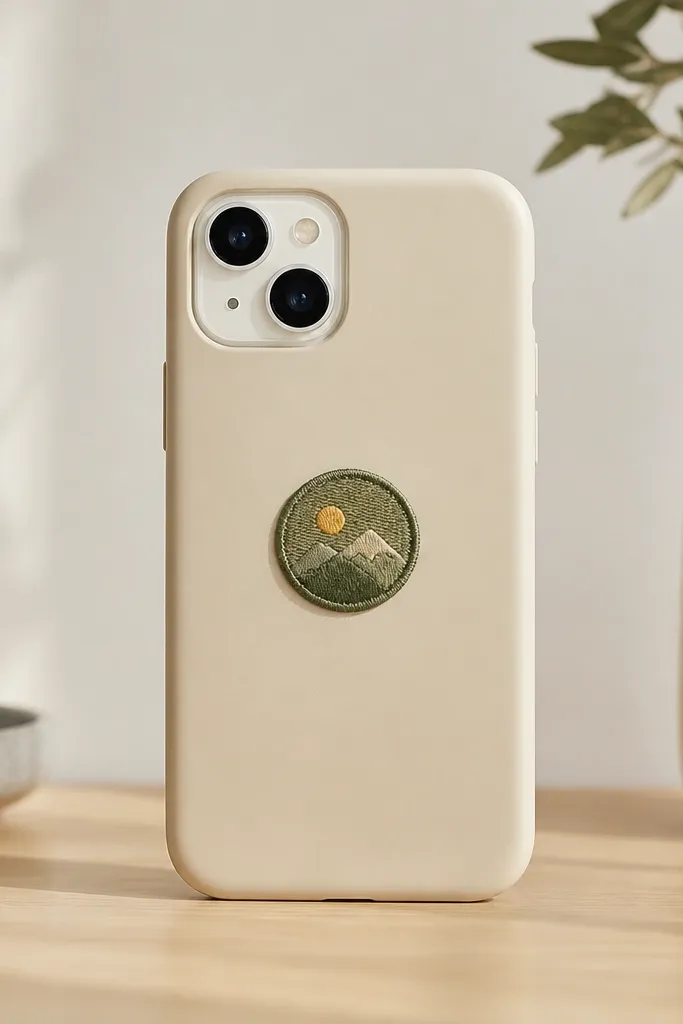
Iron-on patches make your case look like a jacket without sewing for hours. I like small badge patches because they keep the design clean and the case stays comfortable. The patch texture reads real fabric, and when it’s pressed properly, it doesn’t peel. This style looks great on people who wear sporty outfits — tracksuits, bomber jackets, and sneakers. It also works well for gifts because you can match the patch theme to the person’s hobbies.
Pro tipUse a pressing cloth so you don’t melt the case or leave iron marks.
Start with a heat-safe case or a case that’s compatible with iron-on — if you’re unsure, test a corner first. Place the patch on the back and cover it with a thin cotton cloth. Use a medium-hot iron and press firmly for 30-45 seconds, then let it cool. Press again for 10 seconds if the edges lift. Avoid the camera opening by centering the patch so it sits on the flat back area only.
AvoidDon’t crank the iron to max — heat warps cheap cases and the patch edge looks wavy.
25. Sticker sheet collage with clear tape borders
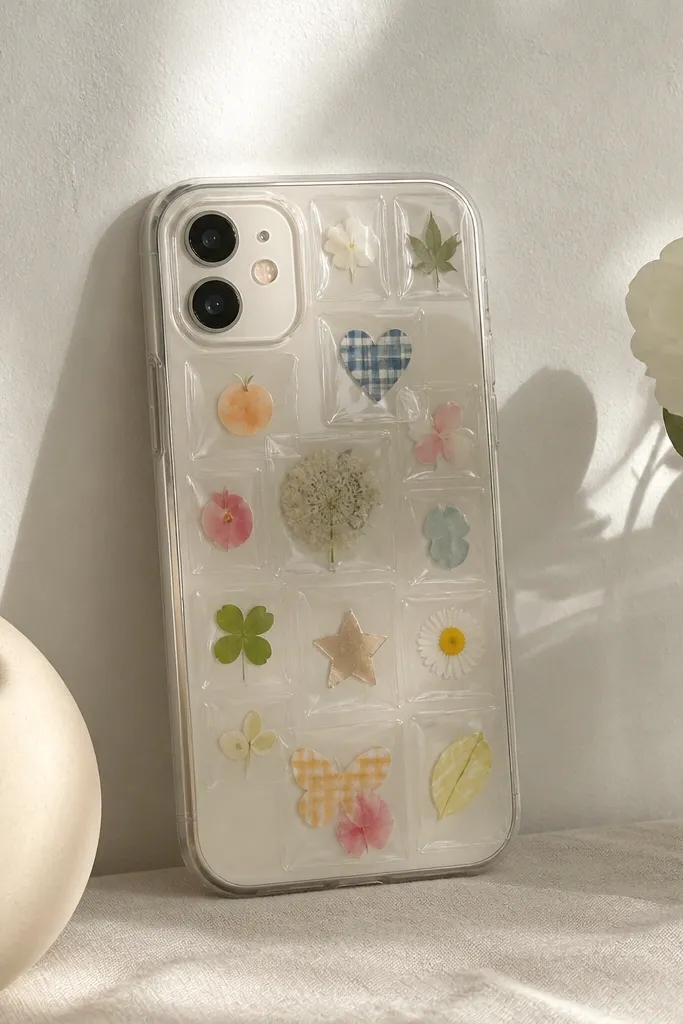
Collage stickers look artsy, but clear tape borders are what make them look tidy. I use a mix of small shapes — tiny flowers, hearts, and simple icons — then separate them into panels so nothing bleeds into everything else. This flatters people who like playful aesthetics but still want a clean phone pocket experience. It also looks good with colorful phone straps because the stickers add texture. The clear tape makes the whole thing feel smoother and more durable.
Pro tipIf a sticker edge curls, press it under a heavy book for 10 minutes before taping over it.
Start by laying your sticker pieces on the case without removing the backing yet. Pick a layout that keeps all pieces away from the camera cutout and ports. Stick one panel at a time, then run a strip of clear tape along the edges of each sticker to seal it. Press down firmly with a plastic card. Finally, add one thin clear tape layer over the whole collage if you want extra scratch resistance.
AvoidSkip the panel borders if you want it to stay neat — stickers without separation look messy fast.



