
1. Black-and-cream micro-check with vinyl strips
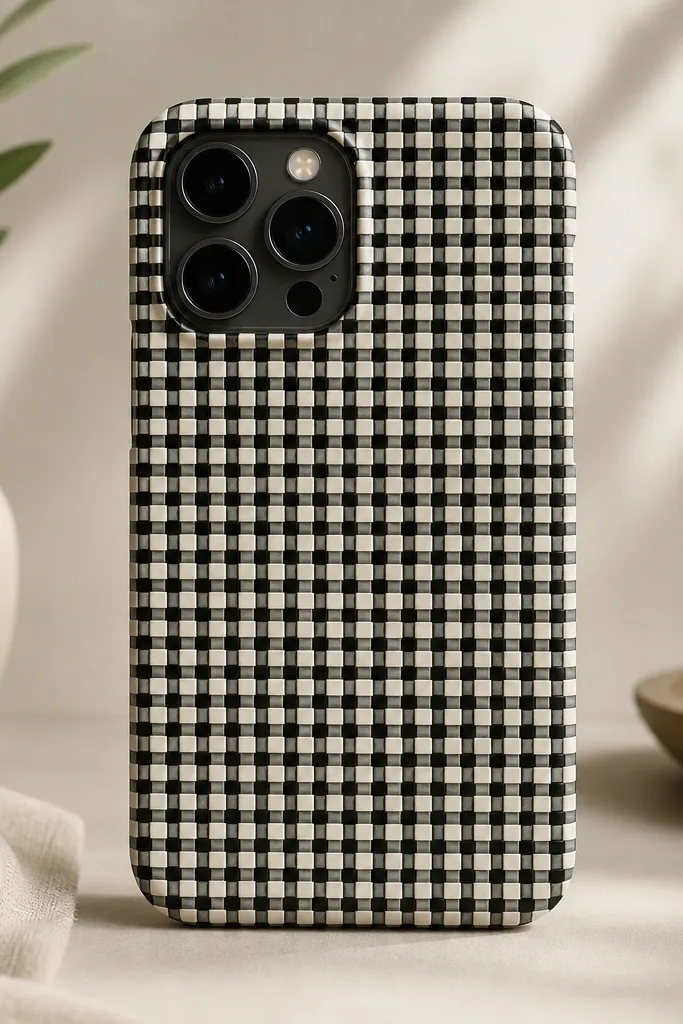
Start by measuring the phone case front area and marking a light pencil guide on the inside of the clear TPU (so you can see it through). Cut 2.5 mm strips from black matte vinyl and 2.5 mm strips from off-white vinyl, then apply the first row using a ruler as your straight edge. Build the grid row by row, pressing with a plastic squeegee so the adhesive grabs without wrinkles. When the pattern is complete, trim the vinyl flush with the case edges using a sharp craft knife. Finish with a thin coat of Mod Podge Outdoor brushed over the vinyl to lock it down and reduce edge lift.
This one looks expensive because the pattern is controlled. Use a black matte vinyl sheet and an off-white vinyl sheet, then cut thin strips (about 2.5 mm wide) and lay them into a micro-check on a clear TPU base. The contrast works with almost every skin tone and outfit because cream reads warm and black reads clean. I’ve worn this with gold rings and beige sweaters and it still looks sharp under daylight. The key is keeping the lines perfectly straight so the check reads like design, not “I eyeballed it.”
AvoidDon’t stretch vinyl while applying — stretched lines look wavy and cheap.
Pro tipPress the vinyl with a credit card wrapped in a microfiber cloth so you don’t scratch the finish.
2. Soft sage pressed-leaf corner accent
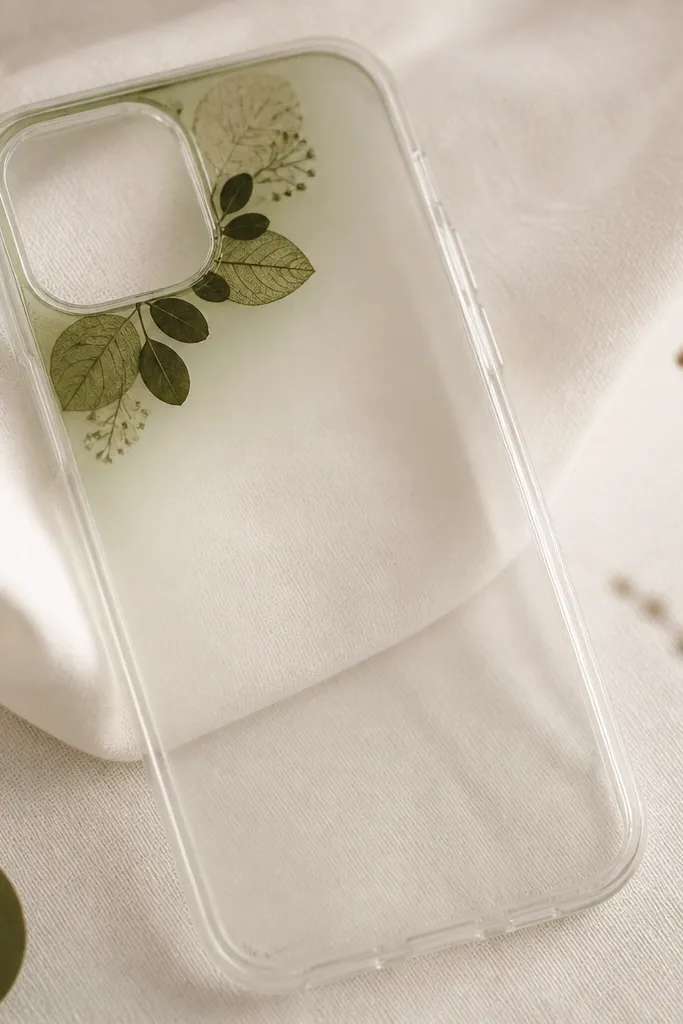
Start by pressing 1 small leaf (or a tiny set) between book pages for at least 3 days, then cut a piece of sage cardstock or thin craft foam the size of the leaf area. Place the cardstock behind the leaf location on the inside of the clear TPU, then position the leaf on top. Seal the leaf with a thin brush layer of UV resin or clear nail polish, just enough to hold it without flooding. Cure if using UV resin, then apply a final clear resin topcoat over the whole front so the edges don’t catch lint. If you want extra softness, add a second ultra-thin sage tint layer behind the leaf before sealing.
This is for the “I like nature but I don’t want it to look like a science project” crowd. You press real leaves flat, then tint the area behind them with soft sage acrylic so the leaf looks like it belongs to the case. The sage tint is flattering with warm or cool wardrobes, and it looks especially good with light denim and cream knits. I like this corner placement because it keeps the rest of the case clean and readable. The aesthetic comes from the tiny scale: one corner cluster, not a full front collage.
AvoidAvoid full-front dried flowers — they lift at the corners and start looking dusty fast.
Pro tipTrim the leaf edges with small scissors before sealing so you avoid ragged outlines.
3. Glitter gel ombre in three bands
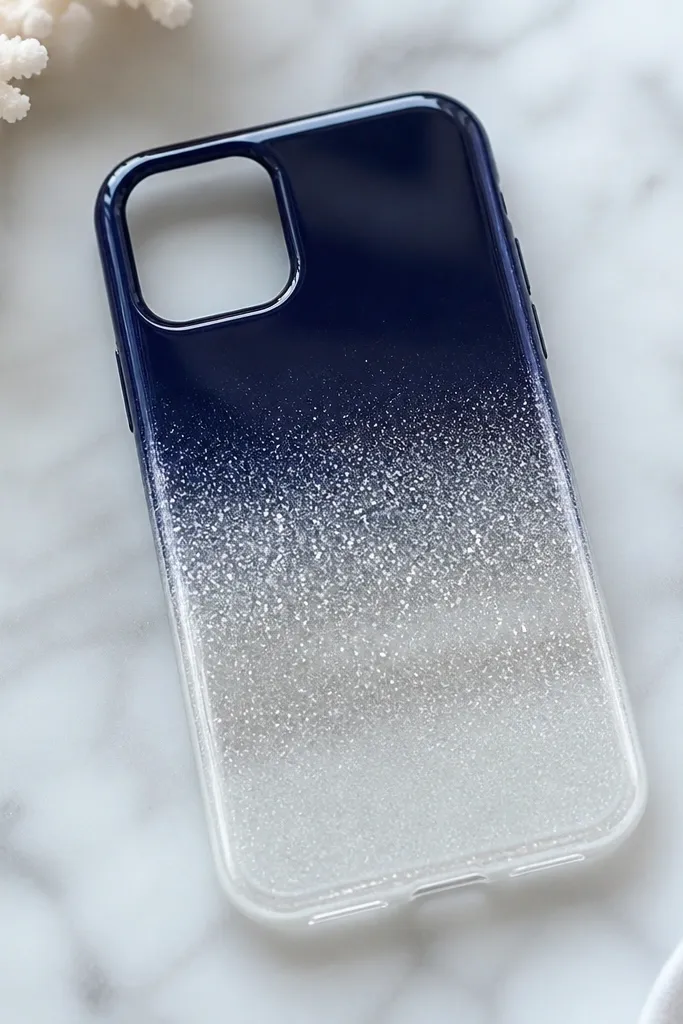
Start by taping off the bottom half of the case front with painter’s tape, leaving a strip about 10 mm tall where you’ll place the first band. Sponge or brush on a thin layer of navy glitter gel, then blend upward into clear using a clean makeup sponge. Repeat for the middle band with steel silver gel, then finish with a final soft fade into clear near the top. Let it cure fully (gel paint needs time) before removing tape. Seal with a glossy clear topcoat so the glitter doesn’t shed when you wipe the case.
This looks like store-bought nail art because it has controlled fades. Use glitter gel pens or craft gel paint in navy, steel silver, and clear, then build the ombre in three bands so the gradient stays smooth. Navy-to-silver reads clean and modern, and it works with both warm and cool makeup looks. The glossy finish makes the case catch light when you move, which is exactly what I want from a small apartment project. It also hides tiny imperfections better than fully painted solid colors.
AvoidDon’t apply thick gel in one go — it shrinks and leaves dips.
Pro tipUse a makeup sponge for blending — it gives a smoother fade than a brush with gel.
4. Pearlized wave line art with metallic paint pen
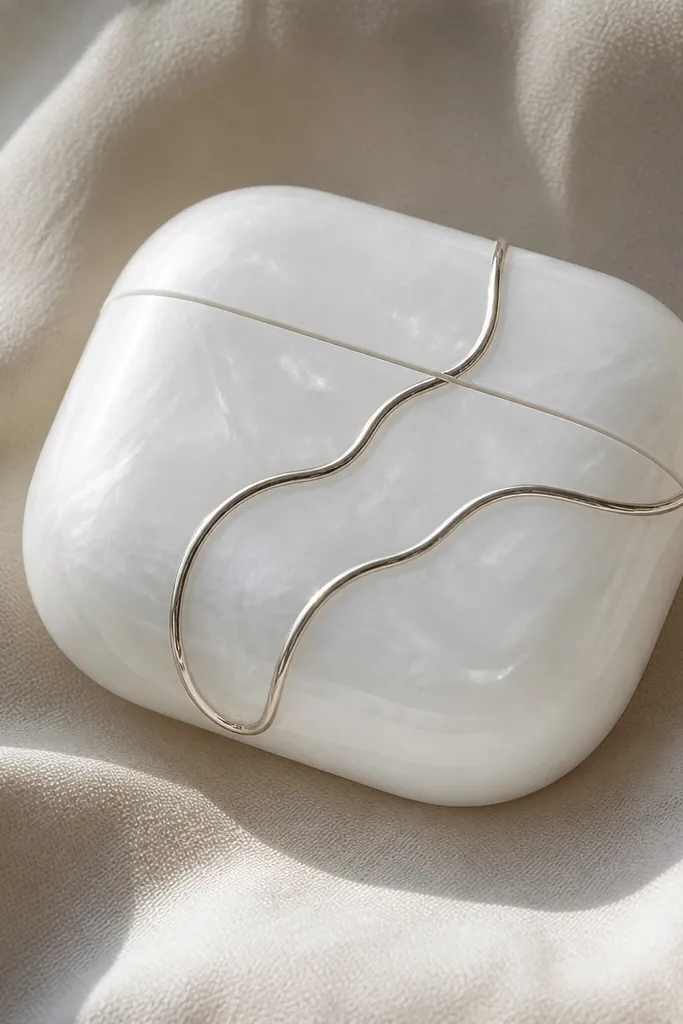
Start with a pearlized paint base or a pearl-white TPU case. Mark a gentle diagonal guide across the front with a pencil, then draw two thin waves following the guide. Let the paint pen sit for a minute so it levels, then add a second pass only where you need opacity. If the lines look uneven, lightly tap with a damp cotton swab to soften the edge before it fully sets. Finish with a clear topcoat over the whole front so the pen lines don’t scratch.
This is a “quiet but noticeable” case. I use a pearlized base (white or champagne) and then draw thin wavy lines with a metallic paint pen in rose gold or gunmetal. The raised line effect looks hand-done but still neat, and it doesn’t clutter your pocket space with bulky decorations. Pearlized white makes skin tones look warmer, and metallic rose gold looks great with nude nails. It flatters minimal outfits because the wave lines add motion without turning the case into a collage.
AvoidAvoid drawing too thick — chunky lines catch lint and look messy.
Pro tipPractice the wave on scrap paper first — your hand learns the curve faster than you think.
5. Pastel photo strip with tiny film border
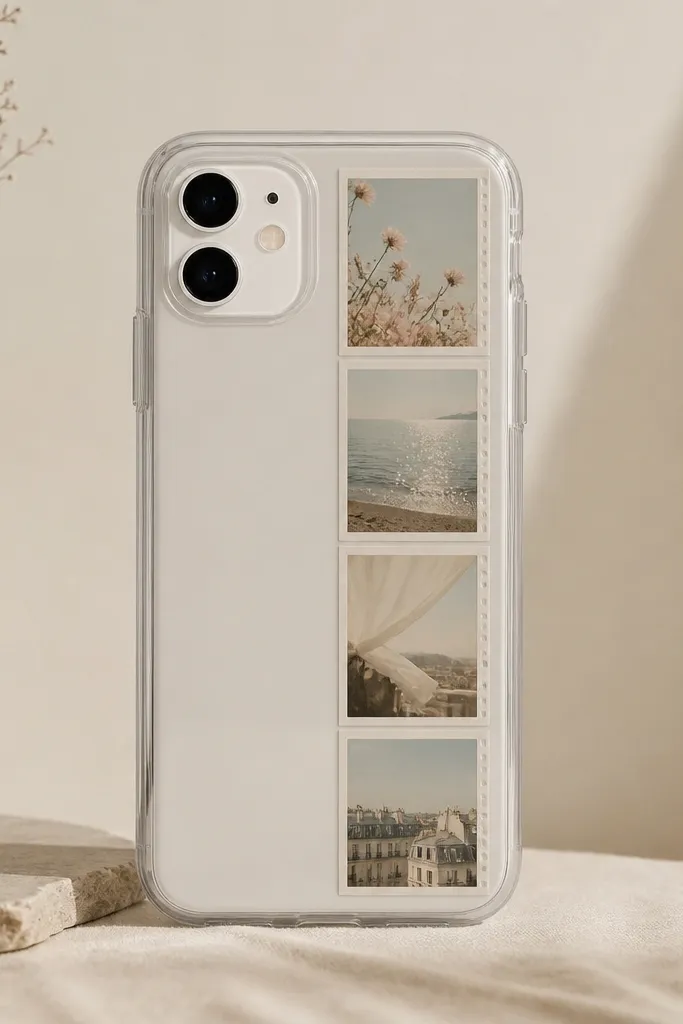
Start by printing or selecting four small images at about 1.2 inches tall each, then cut them into rectangles with clean edges. Create a film border using black or dark gray paper strips, about 2 mm thick, and glue the border behind the photos so it frames them. Apply the photo strip to the inside of a clear TPU case using craft glue for paper (a thin layer only). Seal the front with Mod Podge Outdoor in two thin coats, letting each coat dry 30-45 minutes. After the final coat, check corners by lightly running your finger over them — if any edge lifts, add a tiny dab of glue.
This one makes your phone feel personal without adding bulk. Use printed mini photos or printed color swatches that look like film — pale peach, faded teal, and soft lavender. Add a thin film border so the strip looks intentional, then seal it for a smooth glassy front. The pastel palette looks good with almost any wardrobe and looks especially cute with silver jewelry. I like it for small spaces because the project uses tiny prints and a simple layout, not big decor pieces.
AvoidDon’t flood the strip with glue — it wrinkles paper and makes bubbles.
Pro tipUse a craft knife and a metal ruler — paper strips with crooked edges read messy.
6. Neon sticker pop with matte topcoat
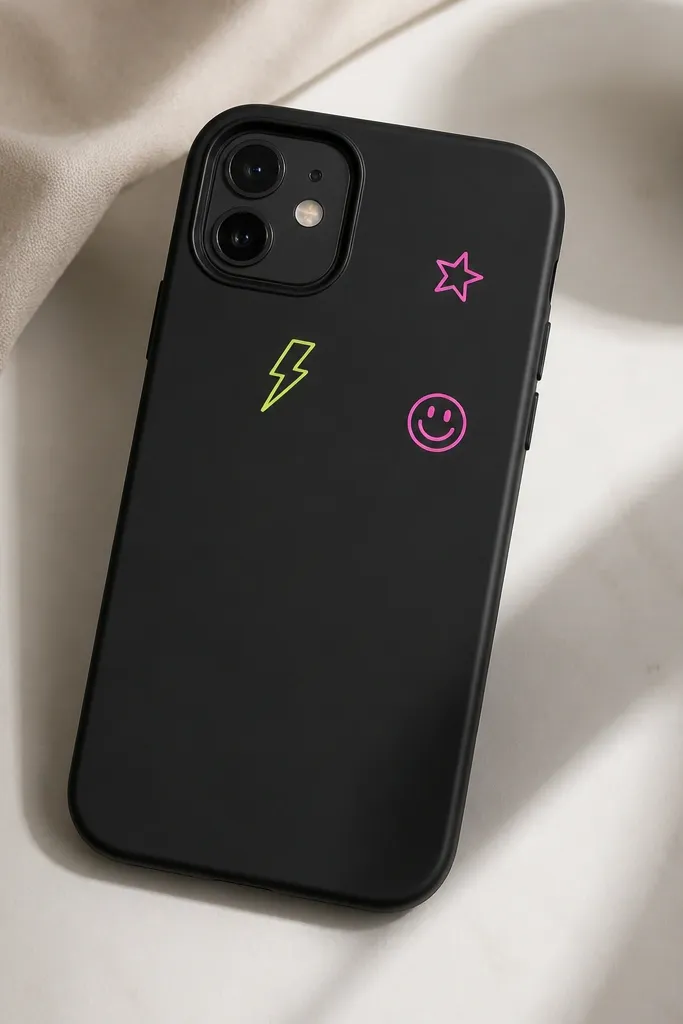
Start with a matte black case or paint a clear TPU matte black using matte acrylic. Place your stickers dry first, then move them until spacing feels right (leave at least 5 mm between stickers). Press each sticker down firmly with a squeegee so edges stick. Brush Mod Podge Outdoor over the stickers in thin layers, keeping the brush strokes gentle to avoid streaks. Once dry, add a second thin coat for uniform coverage, then let cure overnight before you toss it in your bag.
Neon looks loud in the best way, but only if you keep the rest matte. I use a black matte case as the base, then place small neon stickers (under 1 inch each) in a loose cluster near the top. The matte topcoat keeps reflections down so the colors stay clear in daylight. This style works great with darker outfits and also pops against light skin and rings because the colors are saturated. It’s a fun choice when you want your case to feel like personality, not a craft project.
AvoidAvoid glossy topcoat over neon stickers — it makes the surface look plasticky.
Pro tipTrim sticker edges with a sharp blade so you don’t get raised corners.
7. Tiny bead grid in a 1-inch square
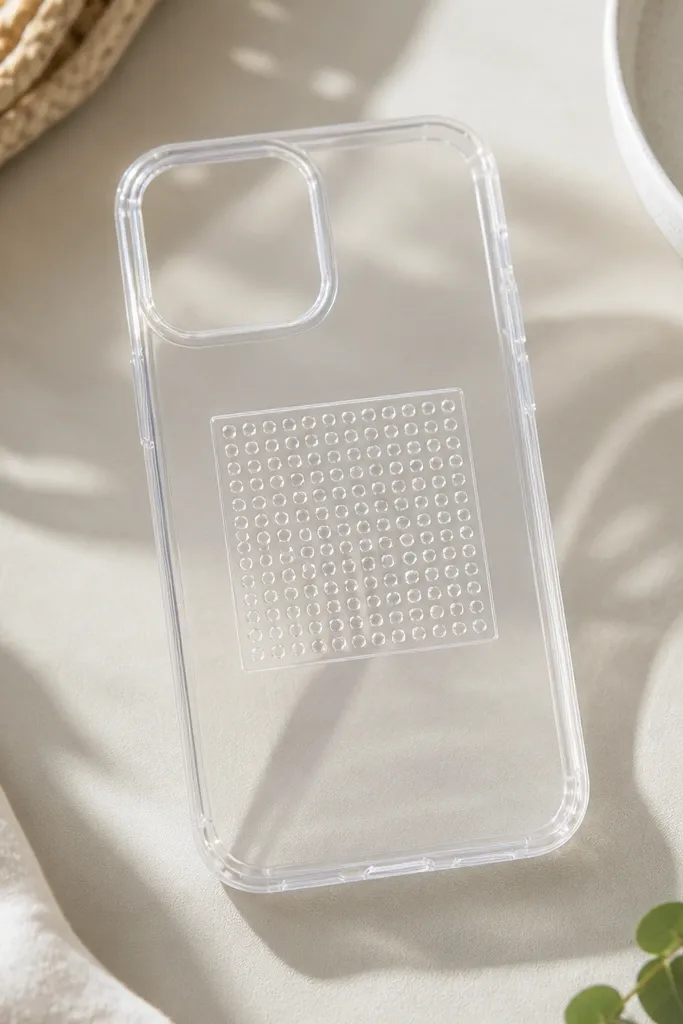
Start by marking a 1-inch square on the inside front of the clear TPU. Mix a small amount of clear craft glue with a toothpick so it spreads thin, then place beads one by one along the grid points. Work row by row so the spacing stays even, pressing each bead lightly into the glue. Once the square fills, let it dry for a full hour before moving the case. Seal with UV resin or a clear epoxy layer over just the front area, then cure fully so the bead tops become smooth.
This is for people who like texture but hate clutter. A small 1-inch bead grid gives a strong focal point without covering the whole case. Use uniform seed beads in two colors like black and pearl white, arranged in a crisp checker or straight grid. The texture reads tactile when you touch it, but the case stays slim. It looks good on phones with slim edges because the grid sits like a tiny art tile. I’ve worn this with simple outfits and it still feels special.
AvoidDon’t use mixed bead sizes — the grid won’t look straight.
Pro tipUse a bead tray or a shallow lid so beads don’t roll across your floor.
8. Fabric ribbon bow on the side seam
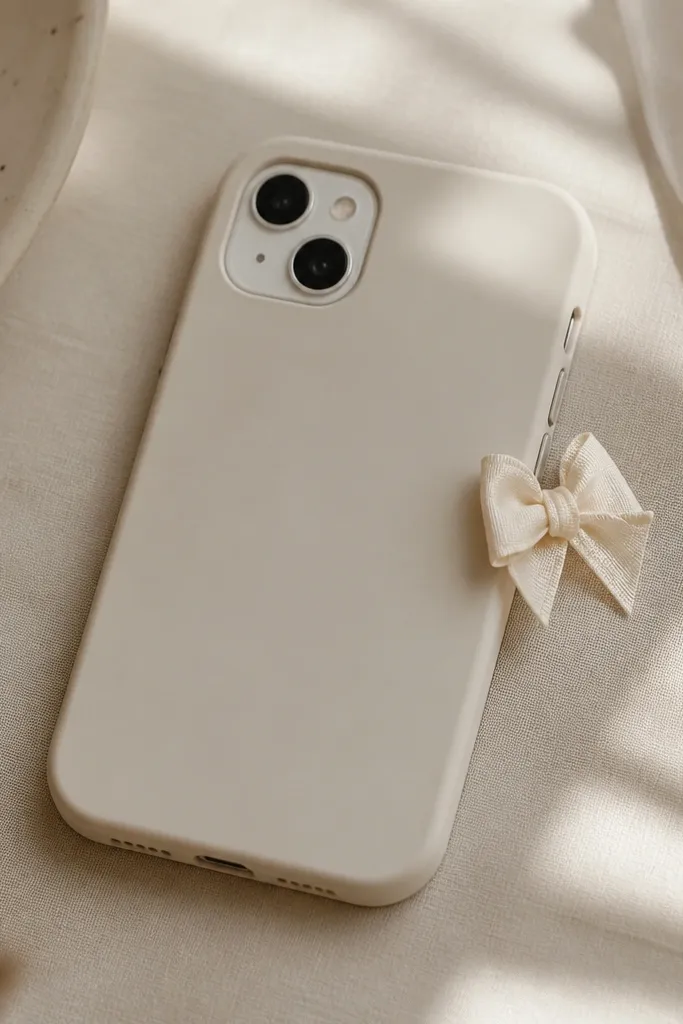
Start by cutting a ribbon piece about 7 inches long so you can tie a tiny bow and still have tail ends. Tie the bow, then trim tails to about 10-12 mm. Rough up the back of the ribbon with fine sandpaper so glue grips, then glue the bow to the side seam inside the TPU case opening (so the glue line stays hidden). Press for 60 seconds, then let it dry 2 hours. Finish with a thin coat of clear Mod Podge Outdoor over the glued area only, not over the whole ribbon so the ribbon texture stays visible.
A side bow looks cute and still practical because it doesn’t cover the whole front. I use a 6 to 8 mm grosgrain ribbon in blush pink or dusty blue and tie a tiny bow, then glue it right on the side edge where it catches light as you move. This works beautifully with warm undertones because blush reads soft and flattering. It also pairs well with gold hardware and simple tops. The secret is scale — the bow stays small so it doesn’t snag on pockets.
AvoidAvoid placing the bow on the front face — it catches lint and looks worn.
Pro tipUse a ribbon that holds shape like grosgrain; satin bows flatten fast.
9. Matte black with blush half-moon paint
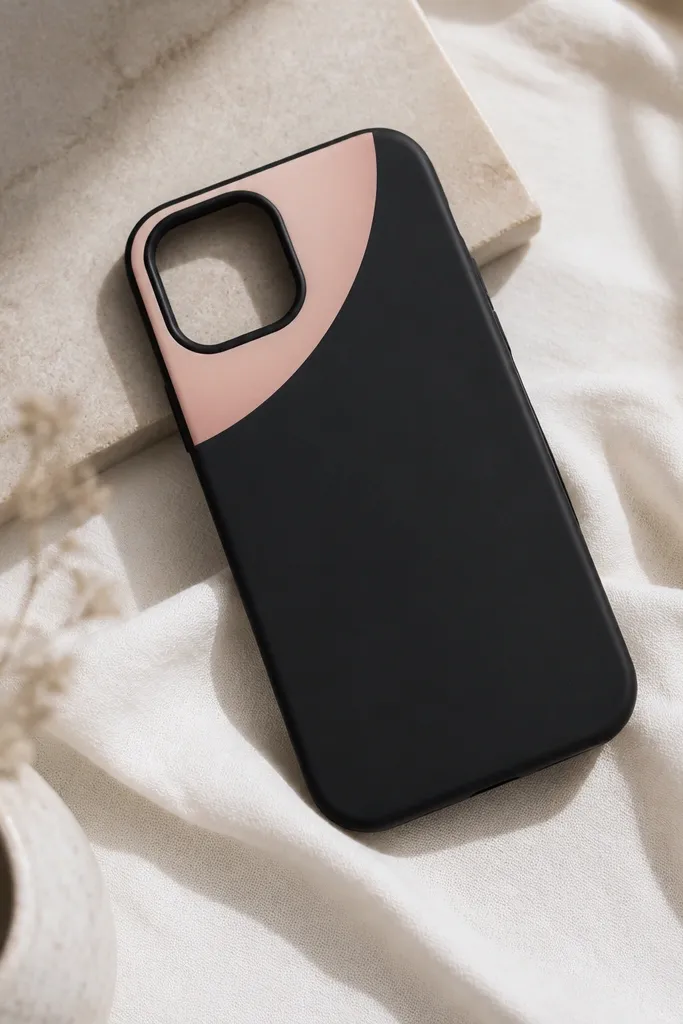
This is my go-to when I want something graphic but not loud. A matte black base makes everything look intentional, and a blush half-moon in one corner gives a modern vibe without needing extra pieces. Blush pink is flattering on most skin tones and looks great with either silver or gold jewelry. The half-moon also looks good on phones with rounded corners because the curve echoes the device shape. I like it because the design is simple enough to do in a small apartment with no special tools.
Start by painting a clear TPU case matte black or use a matte black shell. Cut a circle template from cardboard, then cut it in half to make a half-moon stencil. Tape the stencil in the top-left corner, then sponge blush acrylic paint through the stencil using a makeup sponge for crisp edges. Let it dry 20-30 minutes, then peel the stencil slowly. Seal with a matte clear topcoat so it stays non-glossy and doesn’t pick up pocket shine.
Mark the stencil position with a pencil dot first so you don’t have to guess placement.
Don’t use glossy paint on a matte base — the contrast looks patchy.
10. Pressed flower starburst behind clear window
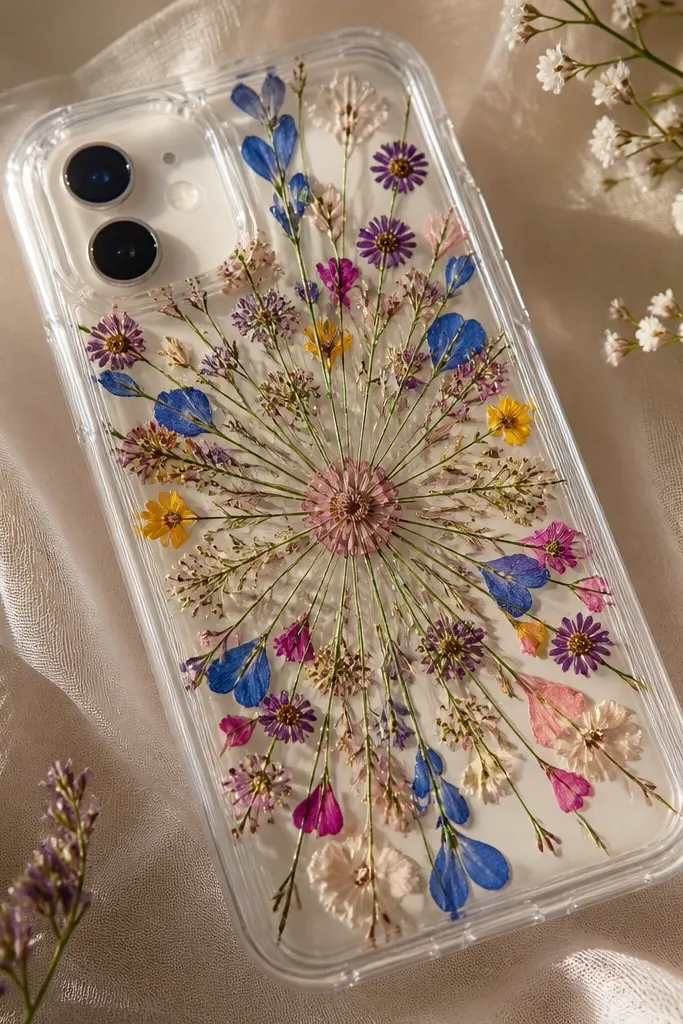
Start with a clear TPU base and pressed micro flowers (at least 3 days pressed). Place a small dot of clear glue in the center of your design area, then pick up each flower and set it along a gentle radial pattern. Work from the center outward so you don’t disturb earlier pieces. Once the starburst fills, seal with UV resin in thin layers — build up slowly so you don’t trap bubbles. Cure each layer, then do a final full-front resin coat for a smooth dome.
Starbursts look like you planned them on paper, and pressed flowers make it feel handmade. I use tiny flowers because they hold their shape better, then arrange them radiating from a small center point. The clear window look is clean, not busy, and it makes the case feel like mini art. This style is flattering on people who like soft colors and it pairs well with light sweaters and neutral makeup. The reason it works is that the flowers are small and the layout is geometric, so it reads intentional.
AvoidAvoid thick glue under flowers — it turns the flowers cloudy.
Pro tipUse tweezers with a flat tip so you don’t bruise petals while placing.
11. Clear case with faux stained-glass corners
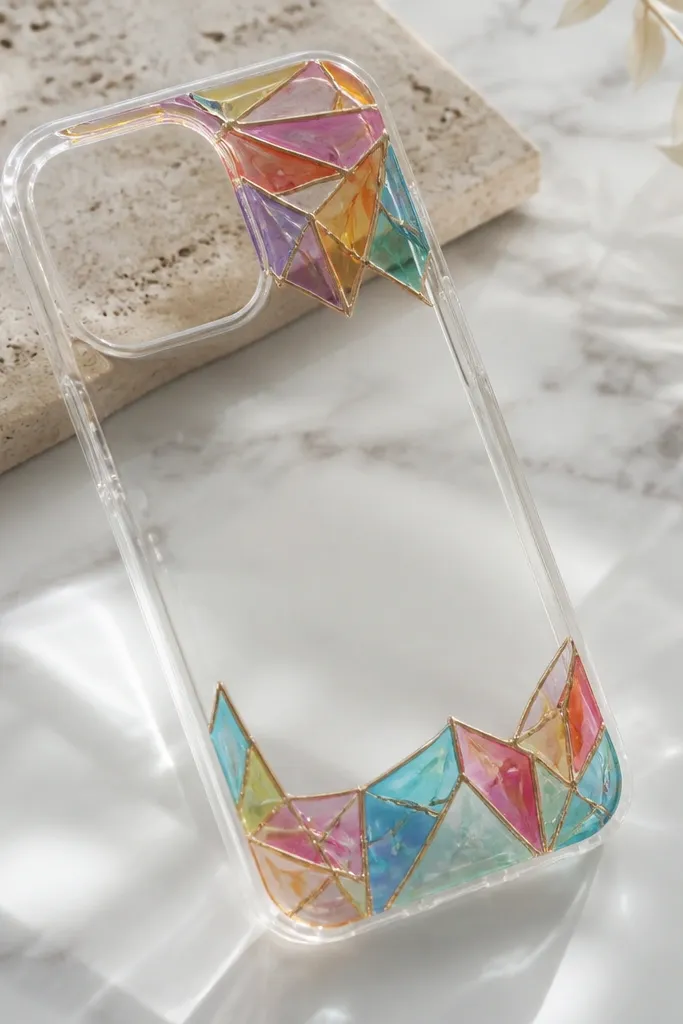
Start by cutting acetate or thin craft film into corner pieces that fit the top-left and bottom-right, about 1 inch wide each. Clean the inside of your clear TPU, then glue the translucent shapes down with a thin layer of clear craft adhesive. Pipe black dimensional paint around the edges to create lead-like lines, then let it dry fully. Add a thin UV resin coat over the corner areas to hold everything smooth. Finish with one more clear coat over the full front if you want a uniform glossy look.
This looks like stained glass without the weight. I place small translucent acetate shapes (or colorful craft film) in the corners and outline them with black dimensional paint so it looks like lead lines. The colors read bright but not neon, and they look great with both casual denim and dressier outfits. It’s also forgiving if your cutting isn’t perfect because the “lead” outline covers tiny gaps. This is a good pick for a small space because you’re only working on corners.
AvoidDon’t skip the outline — bare translucent shapes look like random stickers.
Pro tipUse a toothpick to push dimensional paint into corner seams so no edges lift.
12. Candy stripe stripes with washi tape + seal
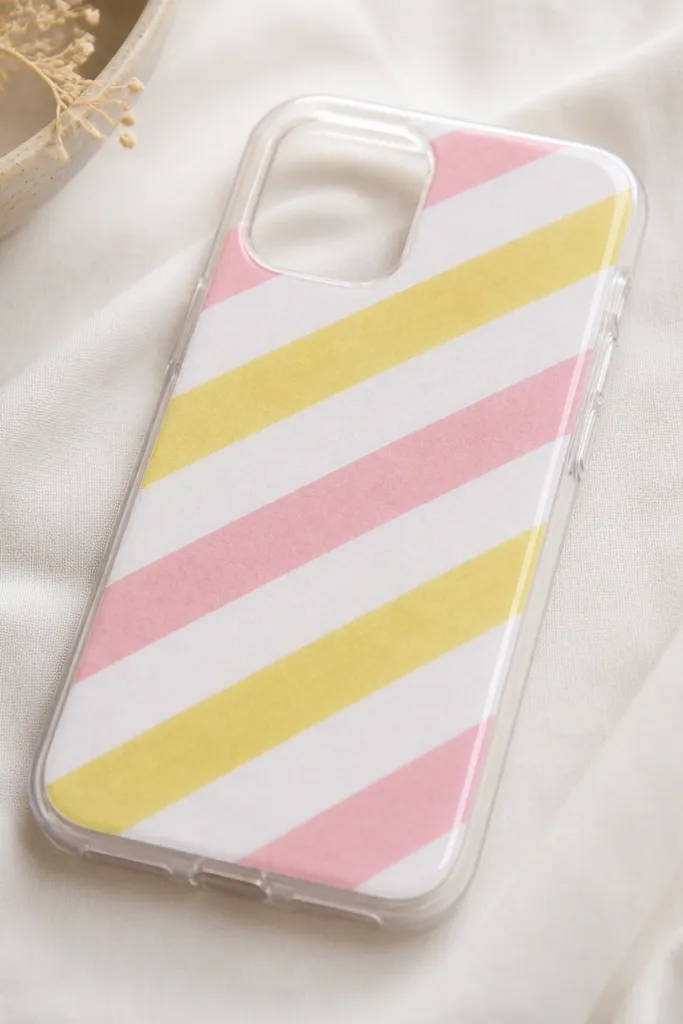
Start with a clear TPU case and clean it with alcohol. Cut long strips of washi tape about 6-8 mm wide, then place them diagonally across the front with slight overlap — keep the angles consistent. Press firmly with a plastic card so the edges stick. Trim any tape that creeps toward the camera area carefully so it doesn’t interfere with lens clarity. Seal with Mod Podge Outdoor in two thin coats, letting each coat dry before the next; the final coat should feel smooth when you run a fingertip over it.
Candy stripes instantly make a phone case feel playful, and washi tape is perfect for small apartments because it’s lightweight and easy to reposition. Pick two bright colors plus white, then do diagonal bands across the front so your case looks like a design pattern. The tape gives a clean look without needing paint skills, and the seal keeps it from peeling. It’s flattering with summer outfits and also works year-round because white breaks up the brightness. I like diagonal placement because it makes the phone look longer and slimmer.
AvoidAvoid thick sealing coats — they can create a lumpy surface you’ll feel in your pocket.
Pro tipUse a hair dryer on low for 20-30 seconds to help tape adhesive grab before sealing.
13. Monochrome marble with sponge texture
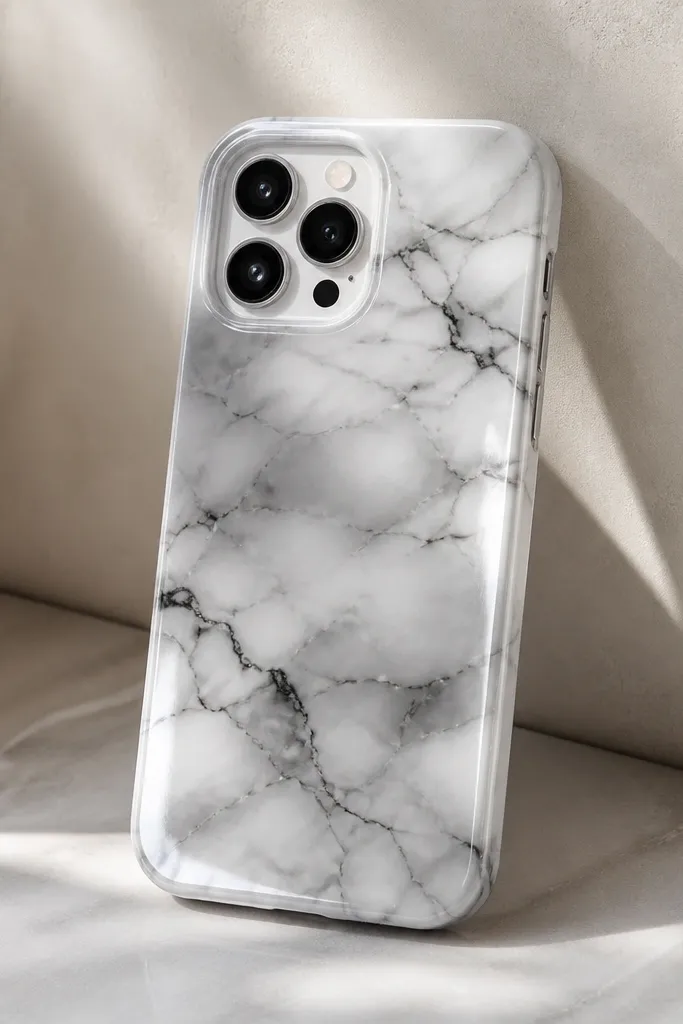
Start by painting a thin base layer of white acrylic or using a white TPU case. Mix cool gray paint and apply it with a makeup sponge in irregular patches, then dab out edges so you don’t get hard blocks. Add thin black lines using a fine liner brush, then blur them slightly with a clean sponge. Let everything dry fully, then seal with a glossy clear topcoat or UV resin. When the resin cures, wipe the case with a microfiber cloth so it looks glass-smooth.
Marble looks hard, but it’s easy if you use sponge texture instead of trying to paint perfect veins. I do monochrome marble in white, cool gray, and a whisper of black so it stays classy and doesn’t look childish. This style flatters almost every outfit because it’s neutral, and it looks especially good on darker phones where the marble pops. The gloss makes it feel like a designer case. The reason it works is that marble is messy by nature — the sponge gives you the right randomness.
AvoidAvoid overworking the marble — too many strokes kill the natural look.
Pro tipUse a second sponge for gray so you don’t contaminate your white base.
14. Rose gold foil flakes under matte coat
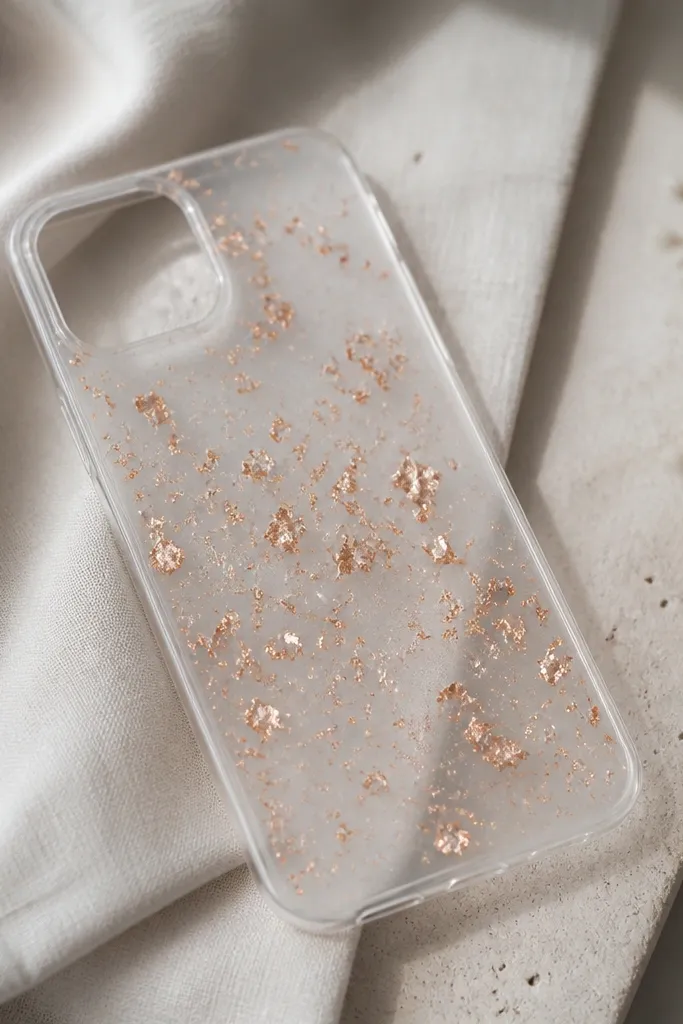
Start by applying a small oval patch of clear gel medium in the center of the inside of the clear TPU. Sprinkle rose gold foil flakes onto the tacky patch and press lightly with a clean fingertip or soft cloth. Remove extra loose flakes by tapping the case gently. Let it dry 30-60 minutes so the foil sticks, then brush a matte clear topcoat over the foil area only. If you want a smoother feel, do a second thin matte coat once the first one cures.
Foil flakes are the fastest way to get a luxe texture. I press rose gold foil fragments into a tacky spot on a clear case, then seal with a matte topcoat so the flakes look like crushed metal instead of glitter. The result is subtle sparkle that doesn’t scream at night, and it works with warm skin tones and gold jewelry. I place flakes in a loose oval in the center so the case looks balanced, not random. The aesthetic comes from contrast — matte background plus reflective flakes.
AvoidAvoid glossy topcoat — it makes flakes look uneven and overly sparkly.
Pro tipDo this over a tray or paper so foil flakes don’t end up in your carpet forever.
15. Tiny constellation dots with glow accents
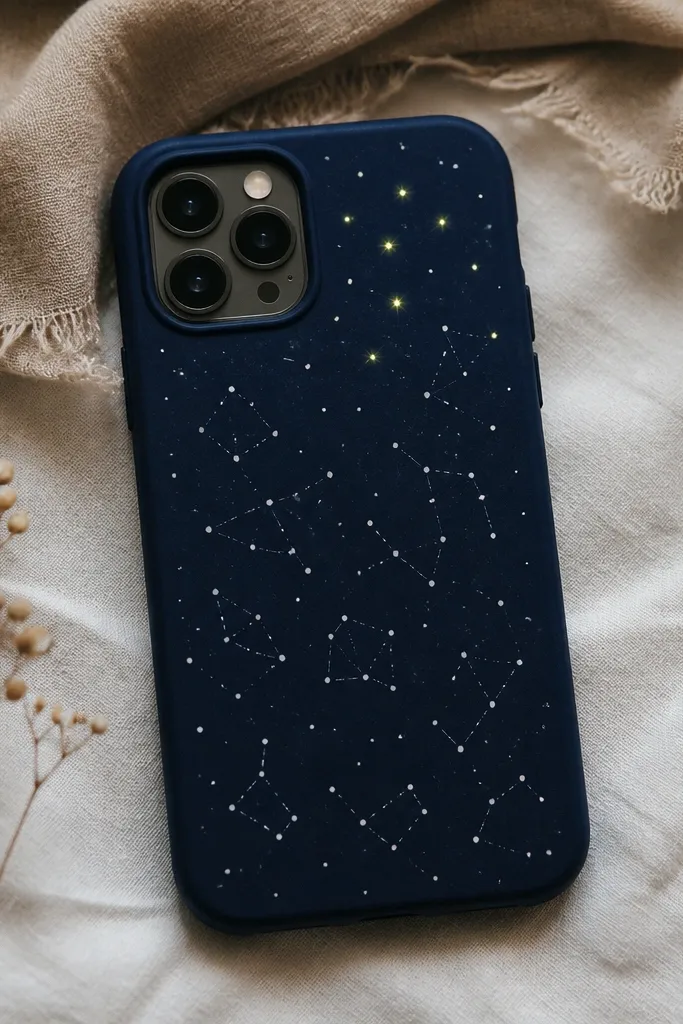
Start with a dark navy matte case or paint a clear TPU navy and let it dry. Use a fine dotting tool or the end of a toothpick dipped in white acrylic to place dots; aim for 1 mm dots, varying only slightly. Draw faint lines with a very thin brush using diluted gray so the constellation connects without looking harsh. Add glow dots last using glow paint, then let it cure. Seal with a matte or satin clear topcoat so the white dots don’t smear.
Constellations are the best “small detail, big effect” option. Use a dark navy base and paint tiny white dots at measured distances, then add a few glow-in-the-dark points for that midnight vibe. The glow looks fun on night walks and it’s flattering with cool-toned wardrobes. I like a simple arrangement — one small cluster near the top and a couple isolated dots near the bottom. It reads clean because the dots are consistent sizes.
AvoidDon’t use big dots — they look cartoonish and feel chunky in pockets.
Pro tipMark dot placements lightly with pencil on the inside of the case so you don’t guess spacing.
16. Sticker collage in a clean rectangle frame
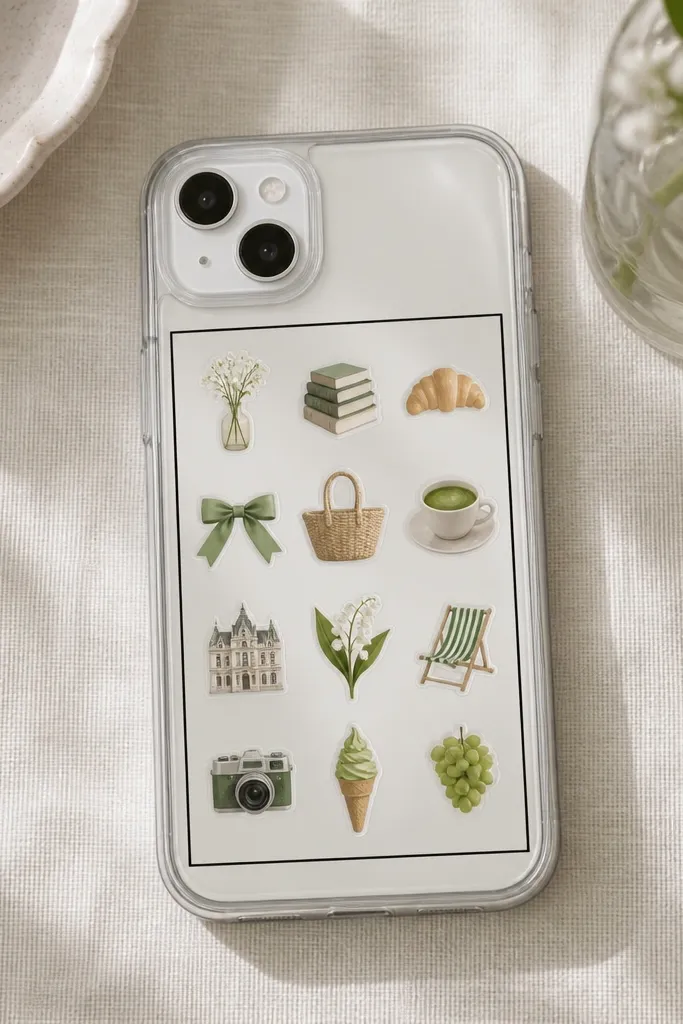
Start by drawing or taping a rectangle guide on the inside front of a clear TPU case. Apply a thin strip of black vinyl or black paper as the border, flush with the rectangle edges. Arrange small stickers inside the frame, leaving consistent gaps of about 3-5 mm. Press down each sticker and seal over the whole rectangle with Mod Podge Outdoor in two thin coats. After drying, run your finger around the border; if you feel any edge, add a tiny extra brush of sealant just on the edge.
Collage cases can look messy fast, so I force structure with a rectangle frame. Put small stickers inside a defined 1.5 x 2-inch area, then add a thin black border so everything looks designed. This style works for people who love maximal color but still want the case to look tidy. It flatters everyday outfits because the frame gives it order, and the stickers add personality. I’ve done this with travel stickers and it still looks good after months because the seal keeps everything flat.
AvoidAvoid layering tall stickers — they create bumps that catch lint.
Pro tipUse a ruler for spacing — your brain reads “intentional” when gaps are even.
17. Acrylic paint drip in one controlled line
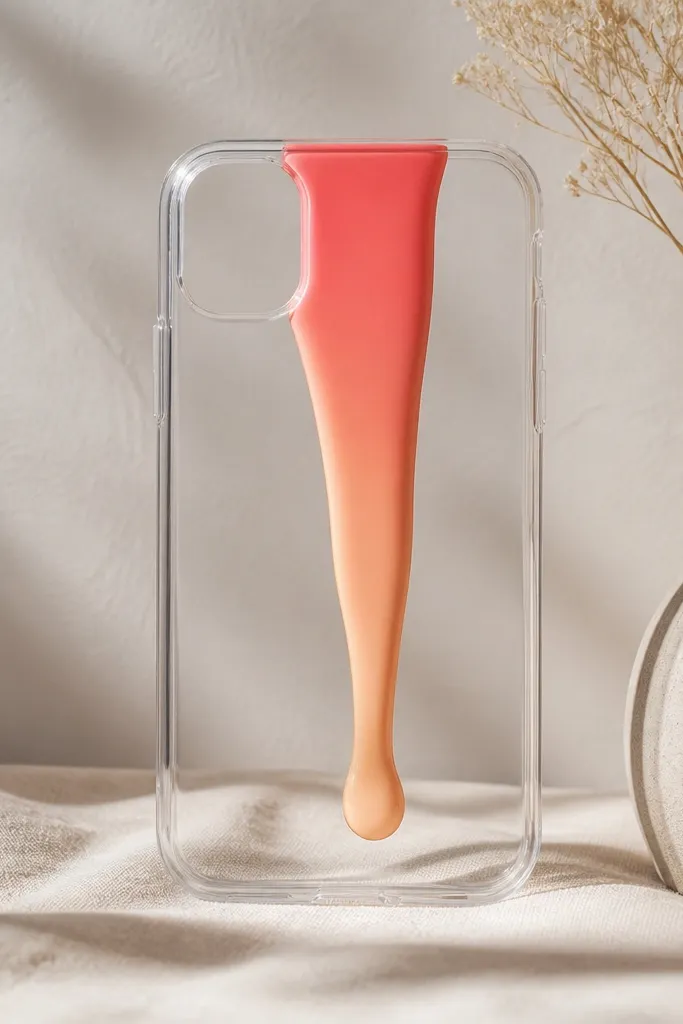
Start with a clear TPU case and paint the back area behind where you want the drip with a thin coral wash. Mix coral and peach acrylic, then load a small brush with thicker paint so it holds shape. Place a line at the top edge of the painted area, then gently drag the brush down just a little so gravity forms the drip. If you need a longer drip, add a second tiny dot of paint at the top and let it pull down. Once dry, seal with glossy clear topcoat or UV resin so the drip surface doesn’t feel sticky.
One controlled drip looks artsy without covering your whole case. I do a coral-to-peach gradient drip so it feels warm and flattering, and I keep it centered so the phone stays readable. This design works with casual outfits and also looks good with simple nail colors because it matches the warm palette. The aesthetic comes from restraint — one drip, one line, clean edges. It also hides tiny brush marks because drips are supposed to be imperfect.
AvoidDon’t do multiple drips — they look chaotic and make the case feel crowded.
Pro tipUse painter’s tape as a stop line so the drip doesn’t wander sideways.
18. Matte peach base with micro stamped dots
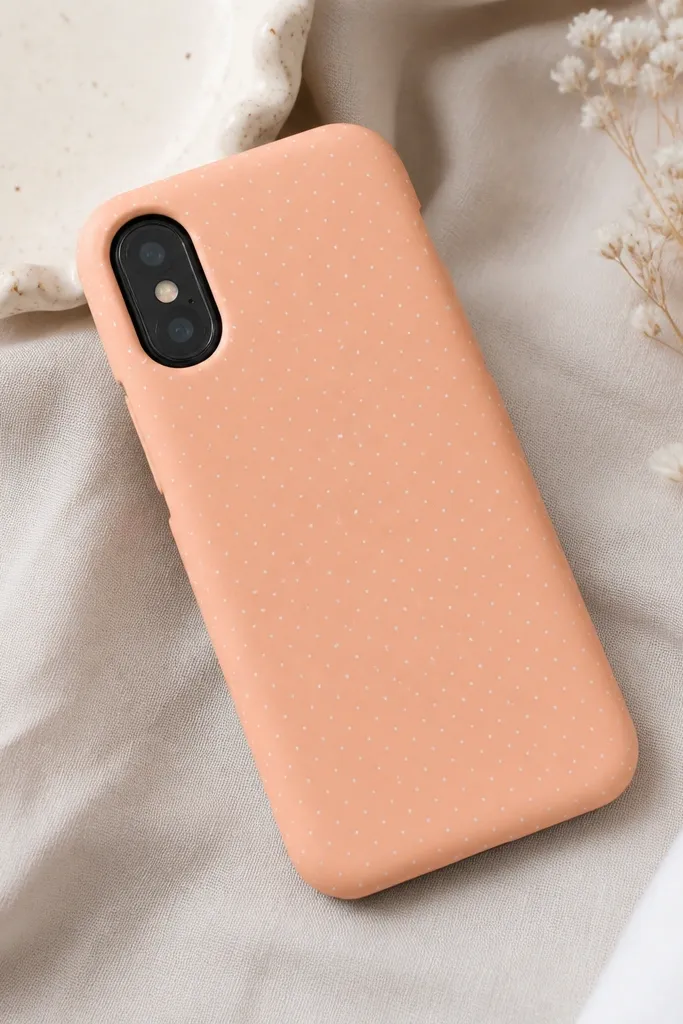
Start by painting or choosing a matte peach TPU case. Dip your dot stamp lightly in white acrylic so you don’t flood the surface. Stamp a grid pattern across the front, leaving small gaps so the peach shows between dots. For a clean look, stop the dot area about 5-8 mm away from the camera cutout. Seal with a matte clear topcoat in one or two thin layers so dots don’t smear when you wipe the phone.
Micro stamped dots look like a fabric print, and they make a plain case feel designed. Use a matte peach base and stamp white dots with a craft stamp or a DIY stamp made from eraser and a carved pattern. The peach is flattering because it reads warm and soft, especially with gold jewelry. This style is also easy to match with any season since the palette is gentle. The key is consistency — dots need even spacing and the same size.
AvoidAvoid wet acrylic — it smears and the dot edges go fuzzy.
Pro tipDo a test stamp on paper first — acrylic thickness changes dot size.
19. Heat-Transfer Vinyl Arch Window with Tiny Stars
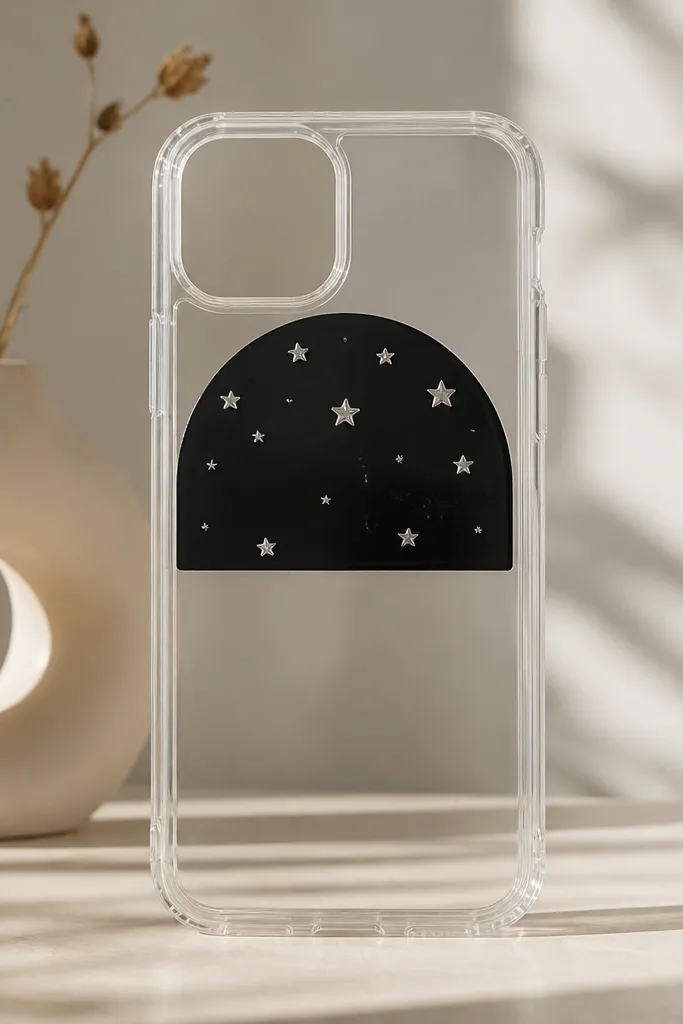
This one looks clean even in a small space apartment because you can do it with a cheap vinyl cutter or even a stencil and heat-transfer sheets. The arch shape frames the top of your screen area without covering the whole case, so it still feels light and airy. I like the contrast: matte vinyl against a glossy clear base makes the stars pop when you move the phone under a lamp. It also hides minor mess since the arch edge is a hard line and the stars are small enough to look intentional. If your style is minimal but still a little playful, this hits that sweet spot.
Start with a clear case that has a flat top surface and clean, grease-free plastic. Wipe the case with isopropyl alcohol and let it dry fully so vinyl sticks instead of lifting. Cut an arch template out of cardstock with a width about 1.25 inches (3.2 cm) at the widest point and about 0.8 inches (2 cm) height, then trace the arch onto the matte black heat-transfer vinyl. Position it on the top third of the case, then press with a household heat press or a firm iron through a thin cotton cloth for 25-35 seconds, checking once halfway. Peel the carrier while it is still slightly warm so the edges stay sharp. Add tiny star pieces inside the arch, spacing them unevenly, and press each star for 10-15 seconds so they don’t smear.
Use a lint-free cloth to press over the vinyl in small circles at the edges — it keeps the arch from lifting later.
Skip stretching the arch while you press — vinyl that gets tensioned will form a wavy edge.
20. Marbled Clay Swirl Border with Salt-Sparkle Finish
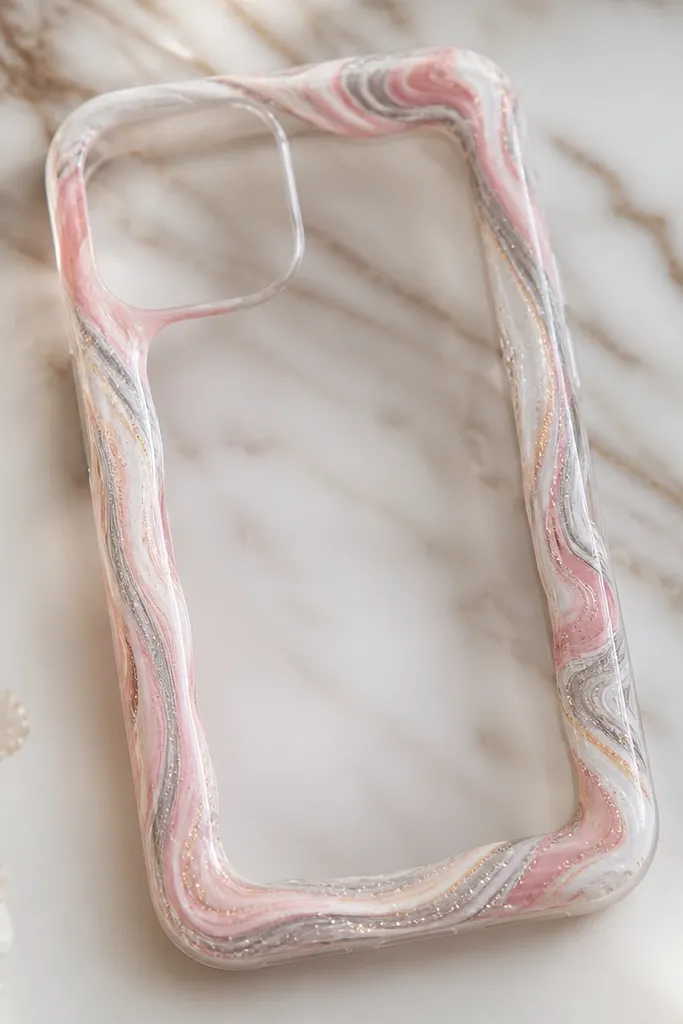
Condition polymer clay by kneading each color for 2-3 minutes until it feels warm and smooth, then roll each into thin sheets about 1-2 mm thick. Stack the sheets and swirl them together by folding once or twice, then roll the stack lightly so you get soft marbling streaks rather than one solid color. Slice strips that are about 3-4 mm wide and place them along the case edges like a picture frame, leaving the camera area clear. Press the strips down gently with a silicone tool so they hug the curve, then drag a toothpick lightly through the clay once or twice to create thin swirl lines. Bake according to your clay package instructions, usually around 265°F (130°C) for 15-25 minutes depending on thickness. While the clay is slightly tacky right after baking, dab a tiny amount of clear craft glue on the raised ridges and sprinkle fine glitter — shake off the excess after it dries.
This is the only phone case idea I’ve made that looks custom even when you mess up a little on the clay. The swirl border gives you that “I bought this” look because it creates depth along the edges, not a flat sticker surface. I like using polymer clay because it cures hard and holds fine lines you can’t get with paint on a curved case. The salt-sparkle finish adds texture that catches light without looking like chunky glitter. It’s also forgiving in a small space apartment since you can cure it in a normal toaster oven with a cheap foil-lined tray.
AvoidSkip making the clay strips too thick — thick borders crack when the case flexes.
Pro tipBake on foil and keep the case centered on the tray so the clay doesn’t slide and thin out on one side.



