
1. Sealed terracotta "counter-ready" planter sleeve
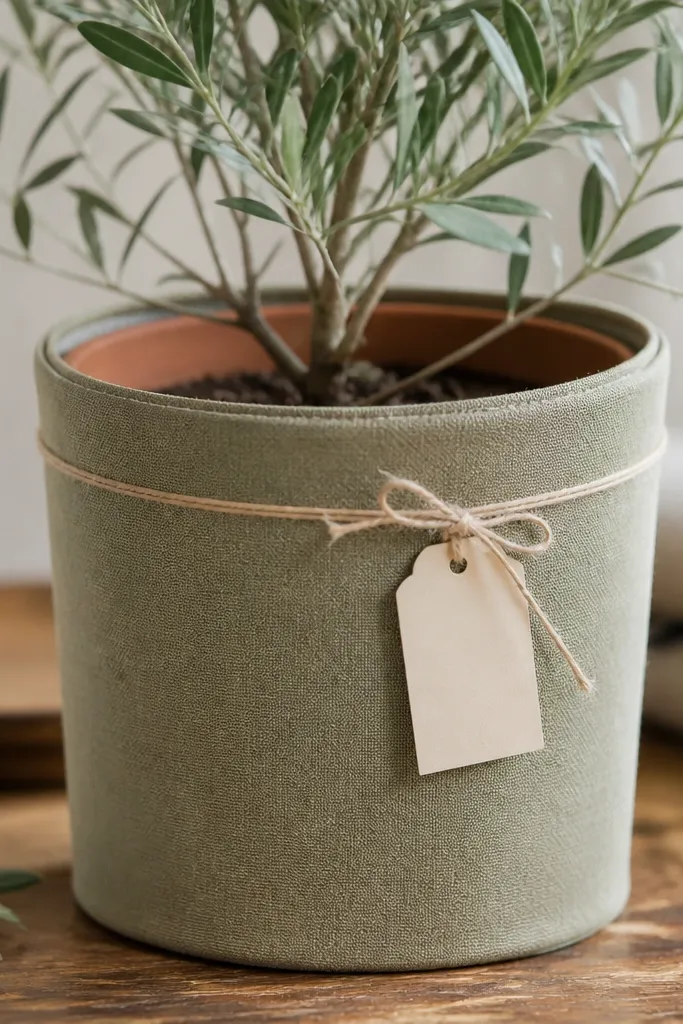
I made this after my first terracotta pot gift leaked onto a painted wooden base, and the stain never fully came out. This version uses a terracotta pot as the plant home, then wraps only the outside with fabric that has been sealed so it wipes clean. Use a cotton canvas or linen in oatmeal or sage — those tones hide soil dust and look warm under kitchen lighting. The label sits slightly above the soil line so it reads from across the counter, not from your knees. It flatters most spaces because the neutral sleeve makes the plant look like the “art,” not the mess.
Start by choosing a terracotta pot that fits your sleeve: measure the pot’s diameter and height, then add 1 cm for seam allowance. Brush a thin coat of clear waterproof sealant (I use a craft-grade polyurethane made for fabric) on the inside of the fabric sleeve, let it dry fully, then test wipe it with a damp paper towel. Place the pot inside, then use a hot glue gun or fabric-safe adhesive to tack the sleeve seam at the back only — never across the top rim. Tie a small cream label tag with 2 strands of twine and place it so it sits 2-3 cm above the soil. Finally, check that the pot can be lifted out for watering without ripping the sleeve.
Seal the fabric, then wipe-dust it once before you present it — the finished look stays sharp longer.
Don’t glue the sleeve over drainage holes or the pot can’t be watered properly.
2. Glass jar propagation set with a clean waterline label
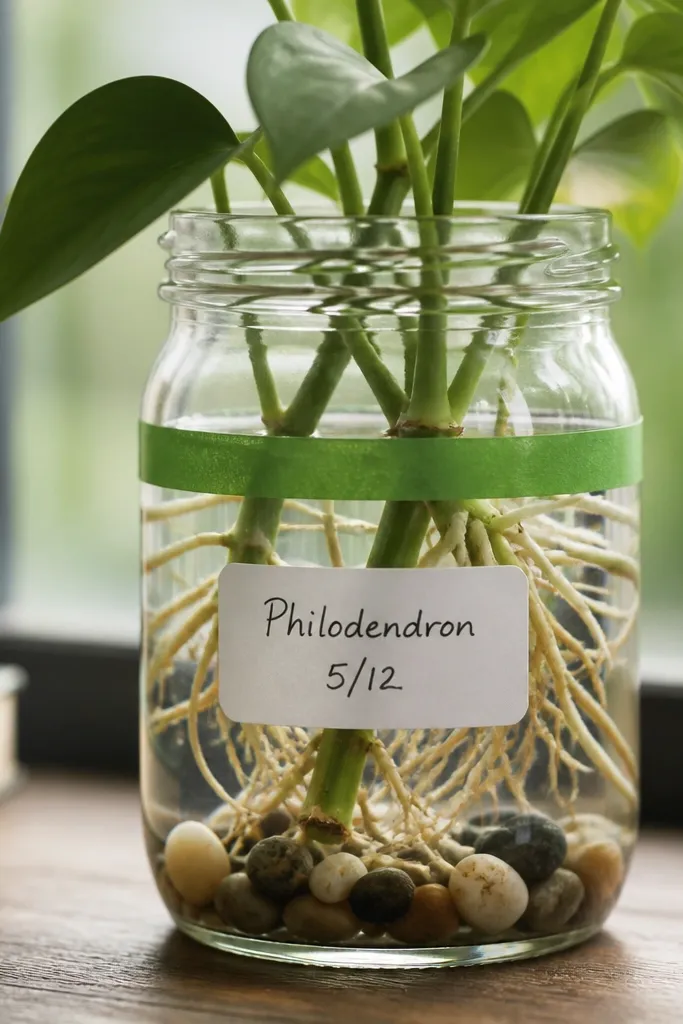
This is the gift I wish I had made the first time because it looks intentional even when the roots are still small. You’re giving a “process gift” — your best friend gets to watch growth, and the jar stays pretty because glass is honest about what’s happening. Use a clear jar with a wide mouth so the stems don’t scrape the sides, then add a thin layer of small pebbles so cuttings sit centered. For the look, keep the palette simple: white label, one green accent, and a single handwriting style. It fits desks, nightstands, and dorm shelves because the jar reads like decor, not storage.
Start by choosing cuttings that won’t tip — I use pothos or tradescantia cuttings with 3-4 nodes, about 6-8 cm long. Fill the jar with room-temperature water so the waterline hits just below the first node you want to root, then add a 1 cm layer of pebbles to hold stems off the glass bottom. Mark the waterline with painter’s tape, then remove one cutting and slide the label behind the tape area for a clean look. Write the plant name and a “top up to this line” note on white cardstock, and seal the label with clear tape so it won’t get soggy. Place the jar in bright indirect light, and top up water to the tape line every few days until roots show.
Use a permanent marker on cardstock and then cover it with clear packing tape for water resistance.
Don’t use thin craft paper labels that curl — the jar becomes messy fast.
3. Washi-tape plant tag set for a matching pot refresh
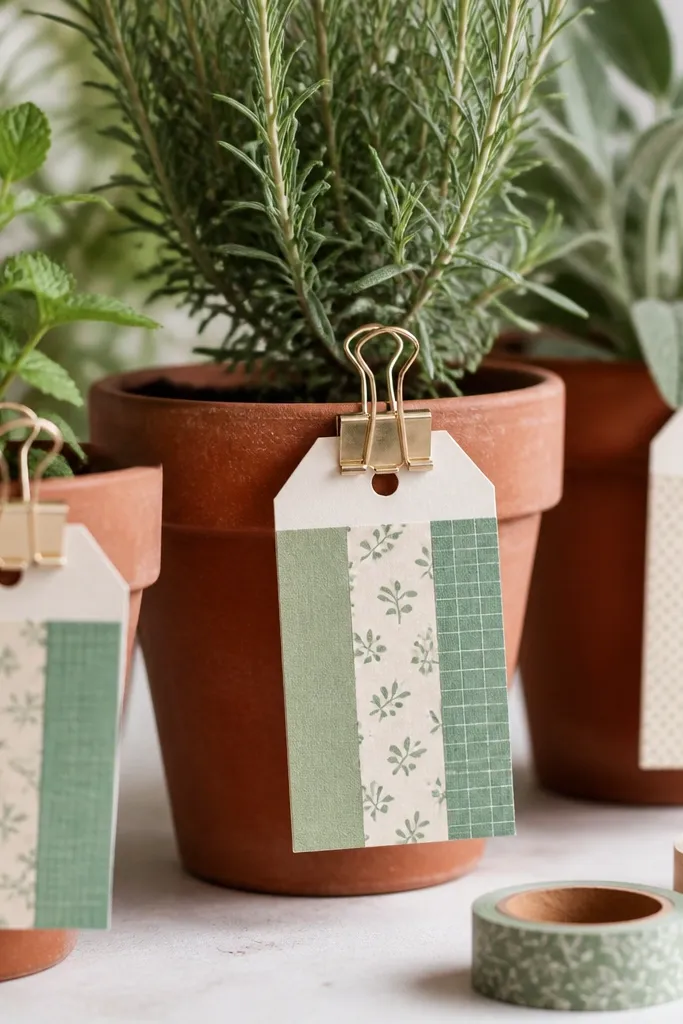
Start by cutting cardstock into 5 x 10 cm rectangles, then round the corners with scissors for a softer look. Layer two tapes along the top edge and one side edge only, leaving the center blank for handwriting so it stays readable. Punch a small hole near the top and tie the tag to the pot handle or a small hook using thin twine. Make one tag per plant, and add a second tiny tag for care notes like “water when top 2 cm is dry.” Attach the tags after the pot is fully set up so the tape doesn’t catch on soil. If you’re gifting multiple plants, keep all tags aligned by measuring the pot height from the table to the label position.
When my “plant name sign” attempt looked like a kid’s school project, I switched to washi tape tags, and the whole gift instantly looked cleaner. This idea works because it’s small, repeatable, and easy to personalize without getting messy with paint. Pick washi tape rolls with one pattern and one solid — I like sage solid plus a tiny leaf print, both in similar thickness. The tags sit at the front of the pot, so your friend gets instant identity for each plant. It’s also the safest option if you don’t know your friend’s exact taste, because neutral tape patterns match nearly every home.
AvoidDon’t cover the whole tag in patterned tape — handwriting turns unreadable.
Pro tipWrite with a fine-tip black pen, then add a tiny dot of white gel pen to mimic “highlight” on the letters for a crisp finish.
4. Macramé plant hanger with a height-tuned loop
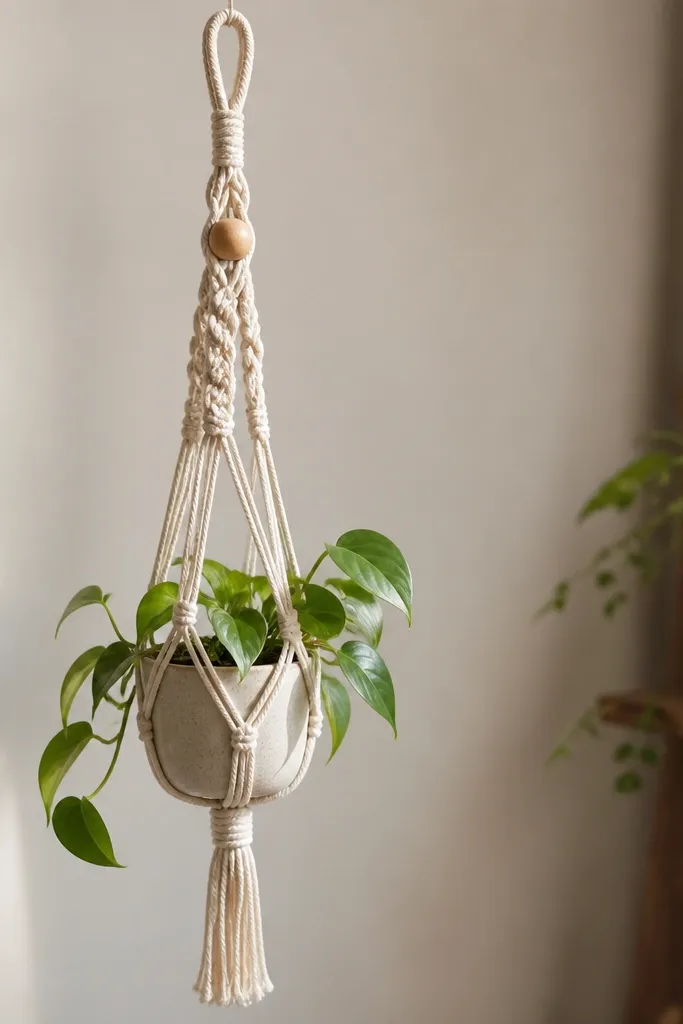
Start by measuring the plant pot height plus how high you want the leaves from the floor. Cut cord lengths so you get a hanger that holds the pot with the bottom sitting about 8-12 cm above the floor for an entryway, or 20-30 cm for a living room corner. Do the knot pattern on a flat surface first, then test-hang it with the pot before you lock the final knots. Trim the ends evenly, then melt the cord tips lightly with a heat source if your cord frays (follow cord instructions). Finish by adding one bead or small leather tie at the top so the hanging point looks neat. Finally, tie the hanger to a ceiling hook with a carabiner so it’s easy to remove for watering.
I made a macramé hanger once that hung way too long, and the plant looked like it was drooping in defeat. The fix is simple: tune the hanger height to the plant’s final size, then make the loop where it hides the knots. Use natural cotton cord (3-5 mm) because it grips light and looks warm without looking bulky. A small wooden bead or matte ceramic spacer near the top adds weight and visual interest without changing the plant’s silhouette. This gift looks great for people who like plants in living rooms, hallways, and entryways — vertical décor always reads intentional. It also flatters smaller plants because the cord frames the leaves instead of competing with them.
AvoidDon’t make the hanger “by eye” — uneven lengths make the pot swing and look messy.
Pro tipUse a carabiner — it keeps the hanger from stretching when your friend takes the plant down to water.
5. Painted ceramic pot with a sealed hand-lettered rim
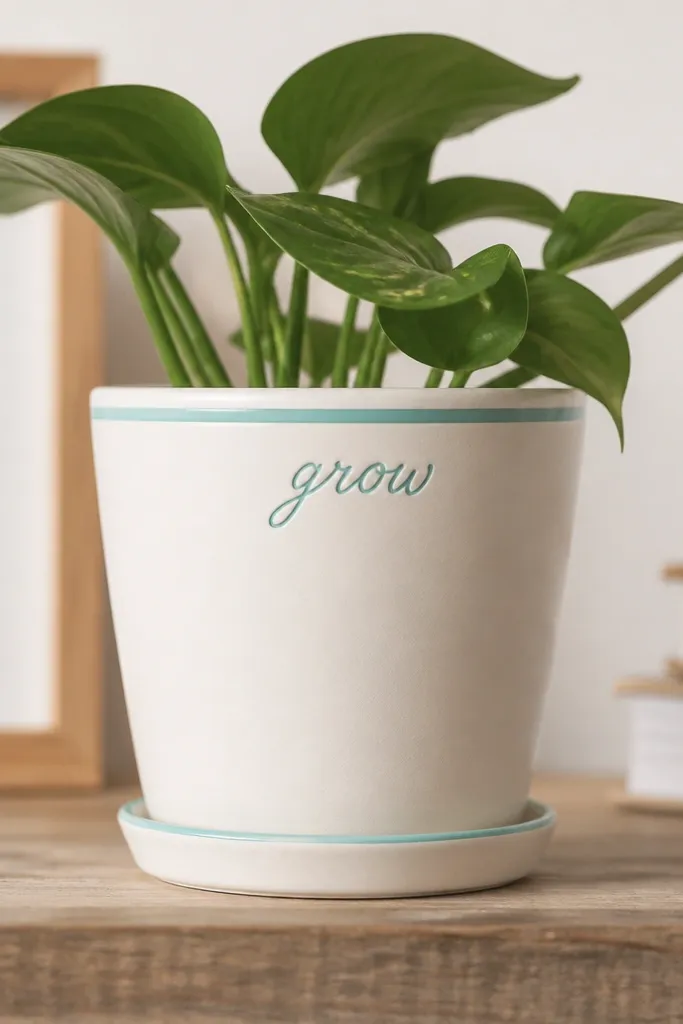
Start by cleaning the ceramic pot with rubbing alcohol so paint sticks — let it dry completely. Tape a thin strip around the top rim using painter’s tape to create a straight seafoam band, then paint the body off-white with two thin coats. Remove the tape after the last coat is tacky, not fully dry, so the edge stays crisp. Hand-letter the pot rim area with a small brush or paint pen, then let it cure according to the paint instructions. Seal the whole outside with a clear matte sealer made for ceramics, and let it dry overnight. Give your friend a small care note tag on cardstock so they know the label area is sealed.
This is my favorite “best friend gift” look because it reads like a custom shop pot, not something you made at midnight. The trick is painting only the outer body and the rim band, then sealing the hand lettering so it doesn’t smear when your friend waters. I like matte off-white ceramic paint paired with a seafoam rim because it makes green leaves look brighter. Hand-lettering works best when you keep it short — one word like “grow,” “bloom,” or your friend’s name initial. This style looks great for warm skin tones in photos because the off-white background is clean and flattering, and it fits both modern and cozy interiors.
AvoidDon’t paint over a glossy glaze without sanding or cleaning — the lettering peels.
Pro tipDo test strokes on cardboard first — ceramic paint can look darker once it dries.
6. Moss terrarium mini-diorama in a clear box frame
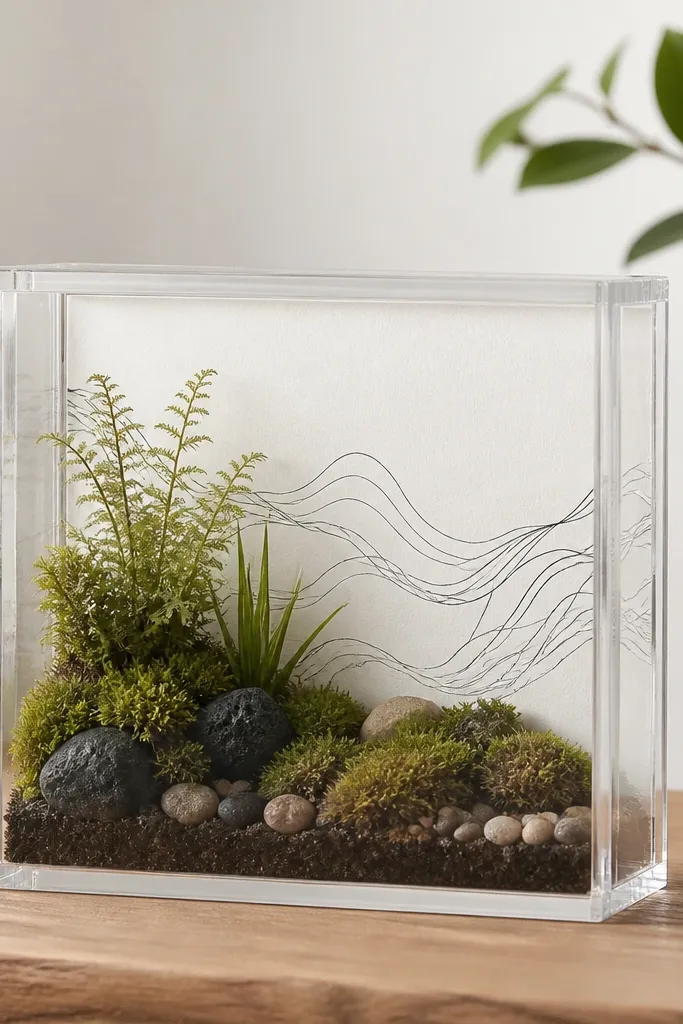
Start with a small clear display frame, then cut a white backing card to fit behind it. Layer in dry, clean moss — I use sheet moss — and fluff it with clean fingers so it doesn’t mat down. Add a base of charcoal or small decorative stones for drainage and airflow, then place your plant clump slightly off-center so the composition has movement. Mist lightly with a spray bottle so moss darkens just a touch, then avoid soaking. Seal the frame with its lid or cover if it has one, and keep openings clear if your design allows airflow. Place it near bright indirect light, and keep the terrarium away from direct sun so the moss doesn’t dry out or overheat.
I made one “moss terrarium” that looked like a damp lunchbox because I packed it too tight. A box-frame terrarium fixes that by giving you a controlled shape and a clean viewing window. Moss looks best when it’s layered with negative space — you want little pockets where light can hit the texture. Use a clear acrylic or glass display frame with a white backing paper so the moss stays bright and the plant pops. This gift suits best friends who like desk decor or who don’t want to mess with soil watering. It looks good on shelves because the frame makes it feel like a tiny art piece, and the white backing keeps it from looking muddy.
AvoidDon’t pack moss down hard — it turns flat, dark, and smells sooner.
Pro tipMist once, wait 20 minutes, then mist again only if the moss looks pale — two light mists beat one heavy one.
7. Fabric-wrapped self-watering planter with a removable water wick
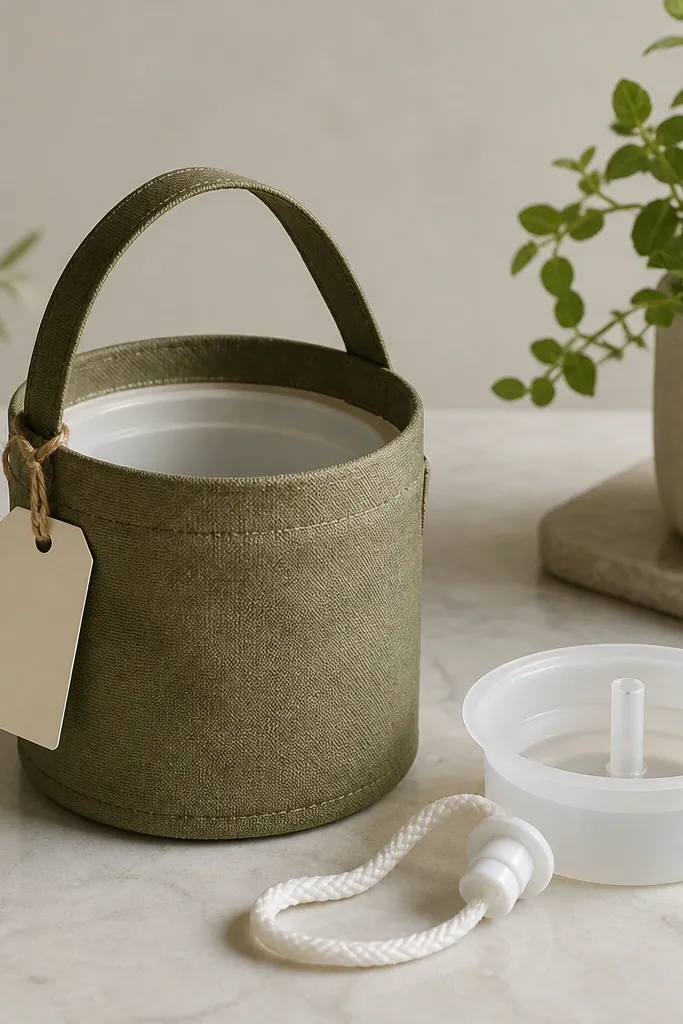
This one solves the gift-failure I see most: the plant gift looks pretty for a week, then the soil dries out and the plant looks neglected. A self-watering style keeps moisture steady, so your friend gets a better chance of success without hovering over watering days. Wrap the outside in patterned fabric like small dots or thin stripes, but keep the inner reservoir separate so you can clean it. The look stays neat because the fabric doesn’t touch wet soil, and the label tells your friend exactly how to refill. This gift flatters friends with busy schedules, and it also looks good in bathrooms or kitchens where humidity stays moderate. It’s a practical aesthetic — pretty outside, functional inside.
Start by buying or building a simple reservoir insert: a plastic inner pot that sits in a larger outer pot with a bottom gap, plus a cotton wick strip. Cut a wick strip from thick cotton fabric (like an old cotton t-shirt cut into strips) about 2-3 cm wide and long enough to reach the soil area. Wrap the outer pot in fabric using fabric glue along the outside walls only, then seal the fabric with a clear spray sealer so it wipes. Insert the inner pot and wick, then place soil in the inner pot so the wick touches the reservoir water line. Add the plant, then pour water into the reservoir until it just hits the wick, not higher. Make a refill label and place it where your friend can see it without removing the plant.
Use cotton wick, not synthetic — cotton wicks consistently and doesn’t smell as fast.
Don’t seal the wick area with glue or tape — it stops water movement.



