
1. Cinnamon Cocoa Layer Jar with Black Lid Wrap
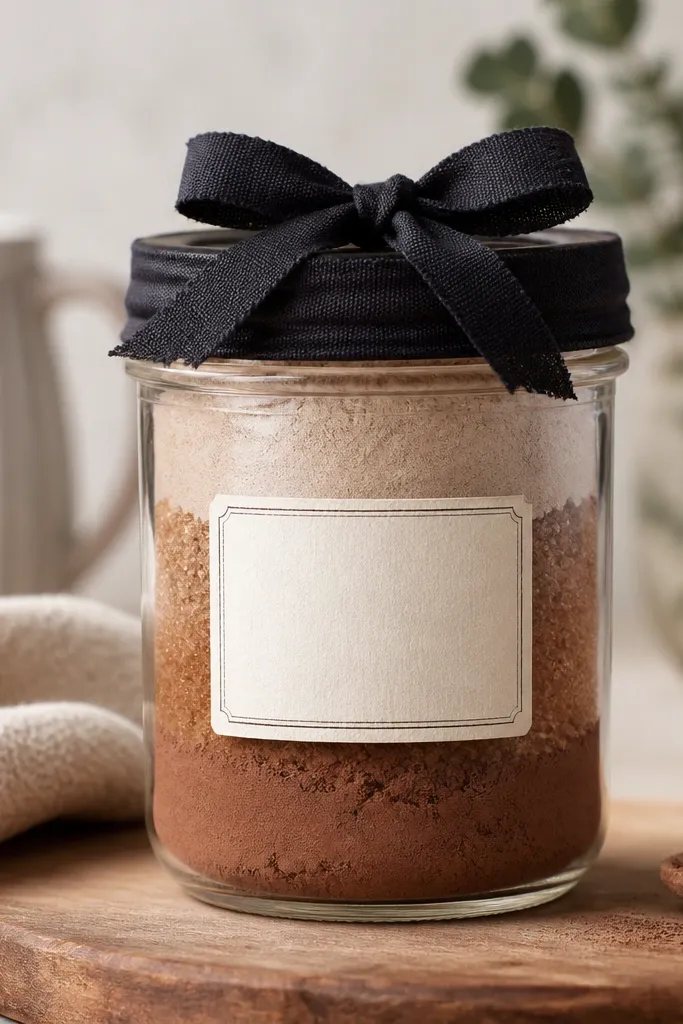
This one looks cozy because the layers read like a dessert, not a pile of powder. Use cocoa powder and cinnamon sugar in tones that shift from light beige to deep brown, then keep the bottom layer darker so the jar glows through the glass. I like a black lid wrap because it makes the warm powders pop without adding extra color. It flatters most kitchens because it doesn’t fight with dishware — it blends with wood, white, and black accents. It’s also great for friends who love hot drinks or winter desk snacks since the jar is visibly “useful” even before they open it.
Start with a 12 oz clear jar and dry-fit the lid so the ribbon sits flat, not twisted. Funnel cocoa powder into the bottom first, then add cinnamon sugar with a spoon so the surface stays level, then finish with another cocoa layer. Tap the jar gently on the counter to settle each layer, but don’t compact it so hard that it smears. Wrap the lid with 3/4 inch black cotton ribbon, then glue the ends under the lip and tie a small bow. Apply a cream label that is about 2.5 inches tall by 3 inches wide, centered horizontally, with ink that matches the darkest layer.
Pro tipDust the outside of the jar with a clean dry cloth before labeling so the label edges look crisp in photos.
AvoidSkip glossy vinyl labels — they wrinkle when the jar gets handled and can look cheap fast.
2. Lavender Sugar Jar with Soft Lilac Tissue Wrap
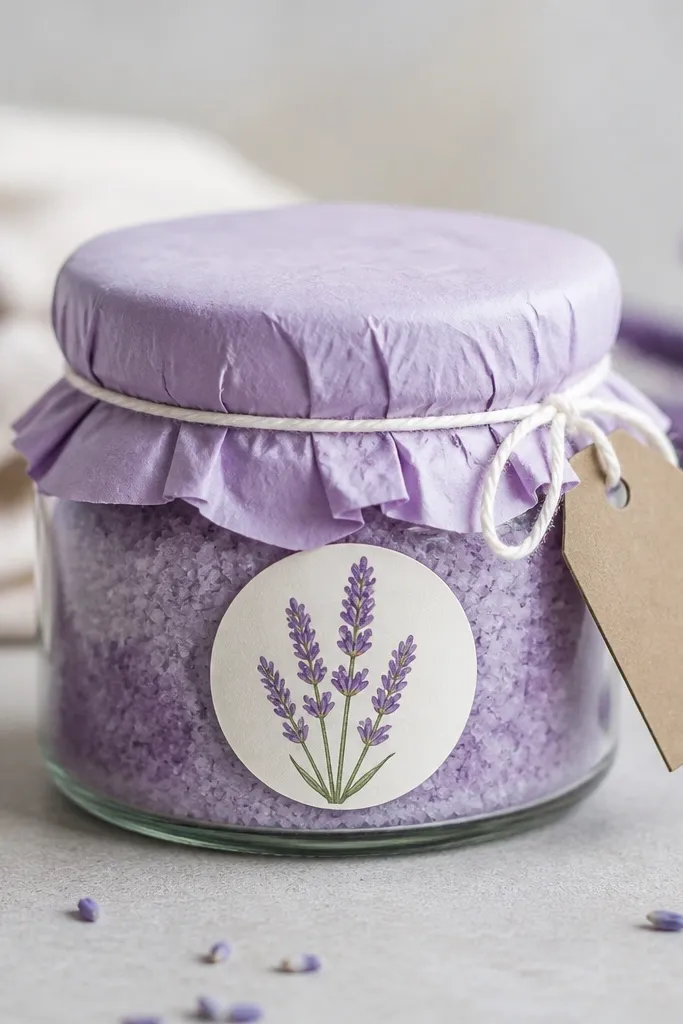
Lavender sugar looks pretty because the crystals catch light and the color stays gentle through clear glass. I use pale purple sugar (not neon) so it reads calm and not candy-bright. The lilac tissue wrap gives the lid a soft, matte look that matches the sugar’s delicate vibe. This jar flatters friends with light neutrals in their decor — think beige, white, gray — because the color stays airy. It’s also a great gift for someone who bakes, since the jar acts like a “flavor prop” they’ll actually use.
Fill an 8 oz jar about 3/4 full with lavender sugar, then level the top by tapping once and smoothing with a spoon. Cut tissue paper into a strip tall enough to cover the lid and tuck under the rim by 1/4 inch. Wrap the tissue tight around the lid, then tie white twine around the middle once, not twice. Make a round label (about 2.5 inches diameter) from kraft paper and attach it with a small dot of glue stick to avoid bubbles. Finish by tying a small kraft tag under the twine with a short piece of twine.
Pro tipIf your sugar looks clumpy, break it up with clean fingers before filling so the texture looks even through the glass.
AvoidAvoid thick, wet glue on the label — it soaks the kraft and turns it dark.
3. Vanilla Oat Bath Soak Jar with Linen Band
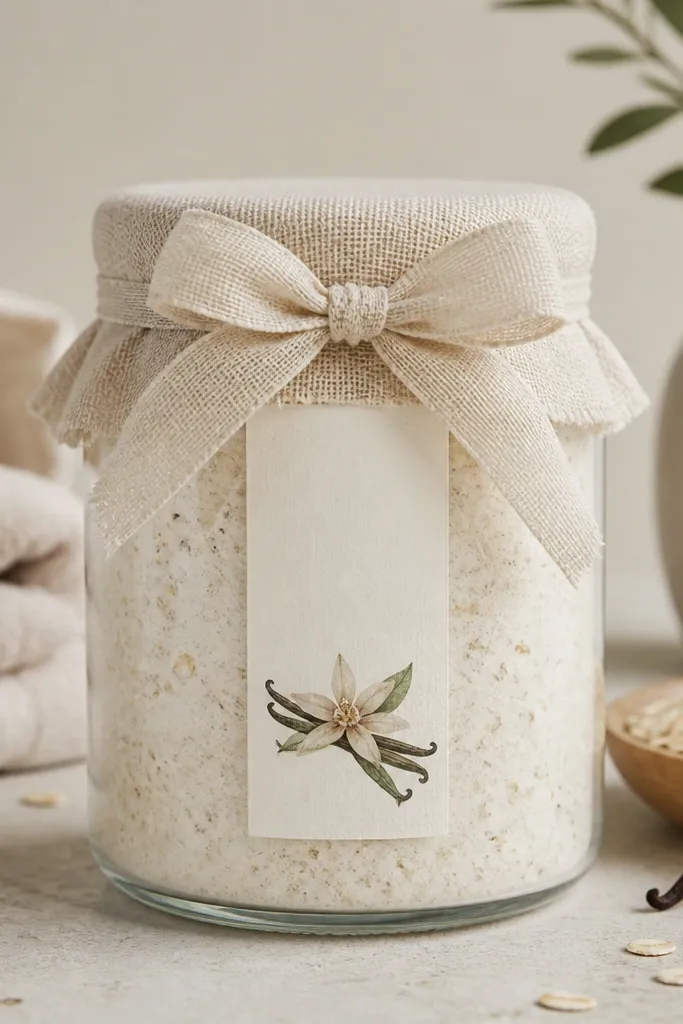
This jar looks spa-like because the fill is creamy and the vanilla flecks add tiny points of detail. I choose a natural linen band because it looks warm and textured without adding color noise. The jar flatters fair to medium skin tones on photos because the palette is soft and not harsh — it’s a calm gift that doesn’t scream for attention. If your friend likes baths, this jar feels thoughtful even if they don’t post about it, because the ingredients are visible and the label tells them exactly how to use it. It also works well for “I’m thinking of you” gifts because it doesn’t require a holiday theme.
Use a 16 oz jar so there’s room to show the creamy soak without looking skimpy. Fill with oat soak until you reach about 1 inch below the lid, then add a pinch of vanilla bean bits on top for a “speckled” look. Wrap a 1.5 inch wide strip of linen around the lid and secure with fabric glue at the back seam. Tie a bow that sits centered and is about 1.25 inches wide. Add a vertical label on the front with off-white paper and dark brown text; keep the label width narrow so it doesn’t cover the texture.
Pro tipPrint your label on matte paper and seal it with a thin layer of matte Mod Podge so steam from the bathroom doesn’t curl it.
AvoidSkip shiny satin ribbon — it reflects bathroom lighting and makes the jar look less “handmade.”
4. Matcha Pantry Jar with Mini Charcoal Tag
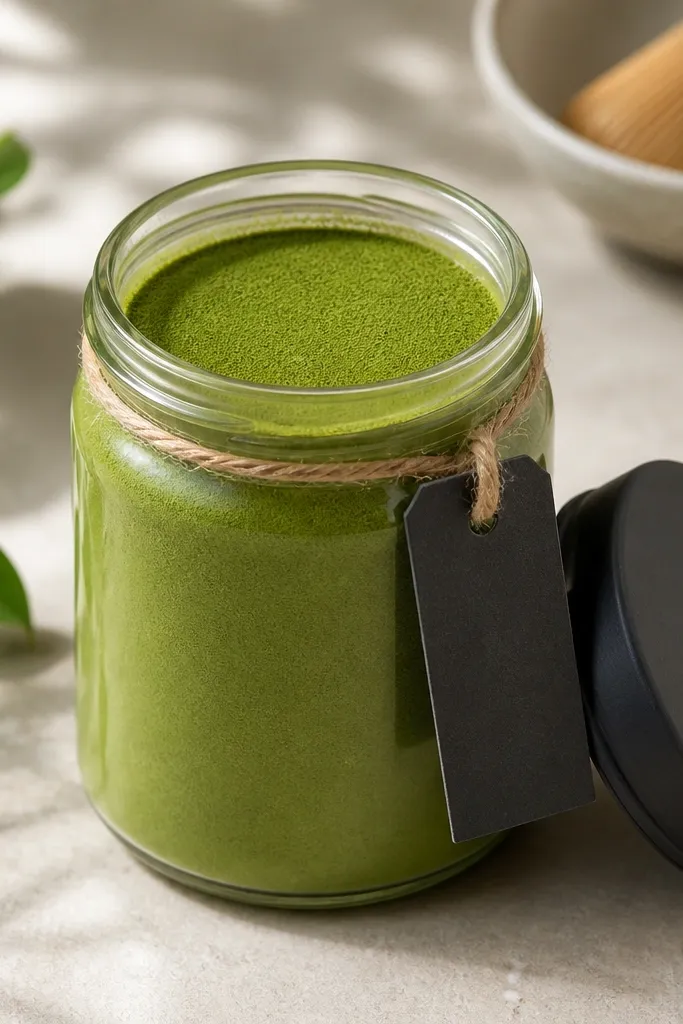
Matcha jars look sharp because green is bold and reads instantly through glass. I keep the jar simple: one ingredient, one smooth surface, and a lid that’s matte so it doesn’t clash with the powder. A charcoal tag makes the green feel more intentional, not “craft store.” This jar flatters friends who like modern kitchens — white cabinets, black hardware, light wood counters. It’s also a nice gift for someone who drinks tea daily because they can see the jar and grab it without digging.
Pour matcha powder into a 12 oz jar and level the top with a spoon, then tap the jar lightly to settle. Paint the lid with matte charcoal acrylic and let it cure overnight so it doesn’t smear when you handle it. Tie jute twine into a loop and attach it under the lid rim with a small drop of hot glue. Write on a small charcoal tag using a white gel pen, then punch a hole and slide it onto the twine loop. Place the tag on the front so it sits slightly off-center for a casual look.
Pro tipWipe the jar glass with a microfiber cloth before filling so the green looks clean, not dusty.
AvoidDon’t overfill — if the powder rises too high, it contaminates the lid wrap and looks messy.
5. Brown Sugar Coffee Scrub Jar with Kraft Wrap and Wax Seal
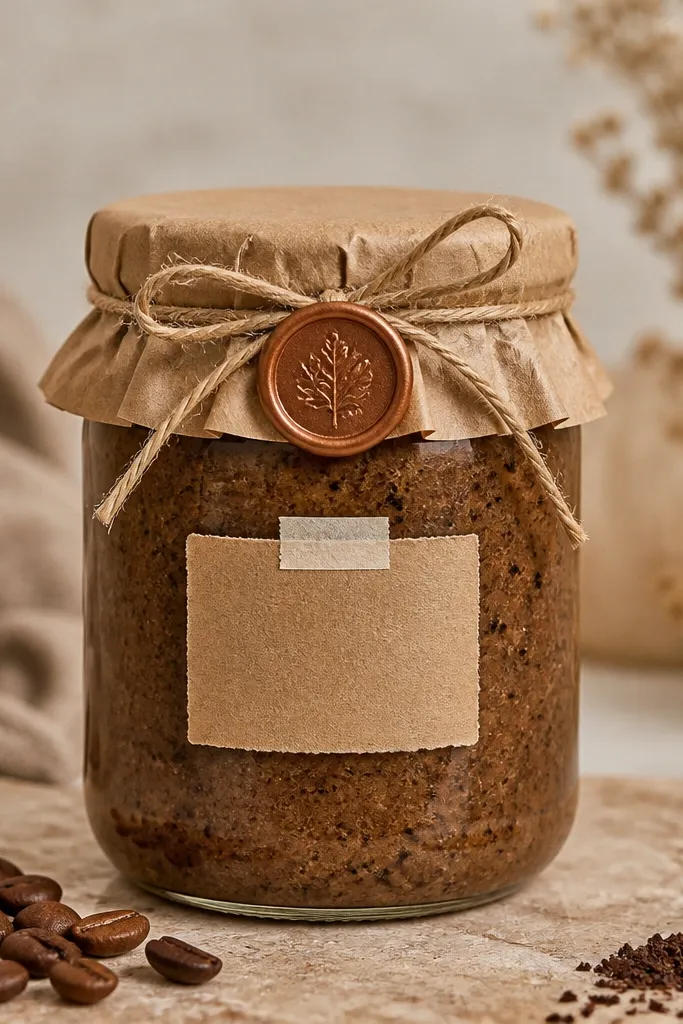
Scrub jars look legit when the fill looks textured, not powdery. Brown sugar and coffee grounds give you that grainy, spa feel that shows through the glass, and it makes the jar feel like a product, not a craft. The kraft wrap and wax seal combo gives it a handmade “letter” vibe without needing fancy tools. This jar flatters friends who like body care and also looks good in masculine-leaning bathrooms because the palette stays warm and dark. It’s great for winter gifts because the scent profile feels cozy and the texture looks rich.
Fill a 16 oz jar with brown sugar scrub until it’s about 1 inch below the lid so it doesn’t touch the band. Wrap the lid with a kraft paper strip that covers the sides and tucks under the rim. Tie twine around the middle once, then cut the ends to about 1 inch. Press a small wax seal onto the front of the kraft band using a wax stick and a metal stamp, then let it cool fully. Add a kraft label to the jar front with cream or light brown ink, keeping the label centered and 3 inches tall.
For a smoother top, press the scrub down with the back of a spoon before sealing the lid.
Skip clear tape over the label edges — it turns cloudy and ruins the vintage look.
6. Berry Jam Infused Tea Jar with Red Ribbon and Window Label
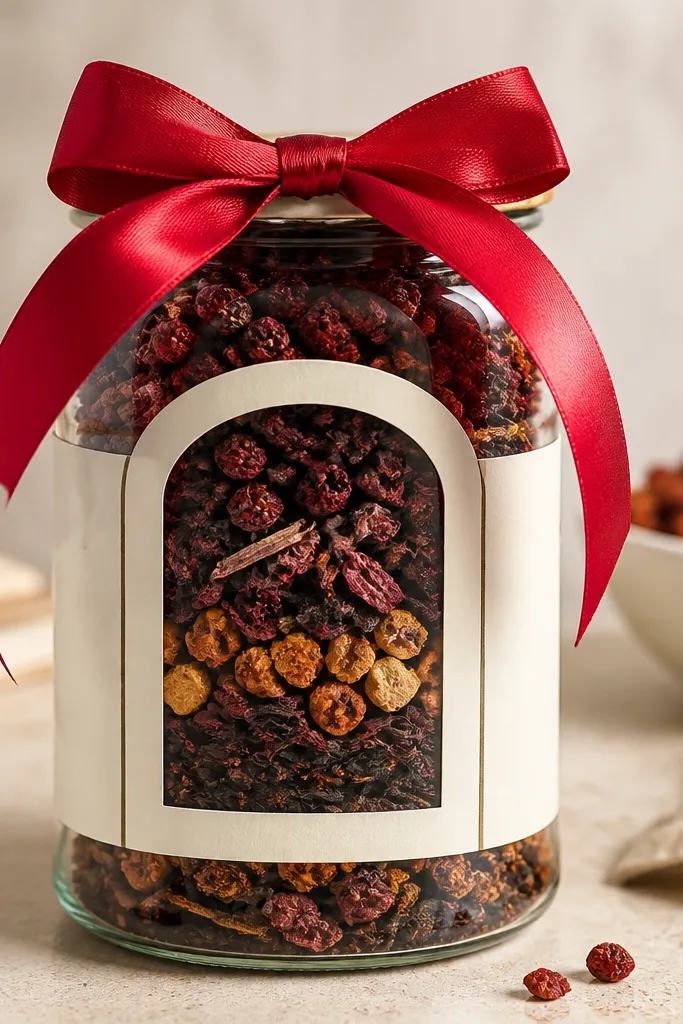
This jar looks special because the fill has visible chunks — dried berries — and the tea leaves add a fine texture layer behind them. The red ribbon pushes the color story without needing extra decorations. The window label is the secret: it frames the jar contents instead of hiding them, so the gift looks designed even from a distance. It flatters friends who like fruity flavors and also works for birthdays because red reads celebratory. For photography, the clear sleeve catches light and makes the jar look “clean” and shop-ready.
Use a 12 oz jar and fill with dried berry pieces first, then spoon in tea leaves around and on top until it looks layered. Level the top with a gentle shake, then stop before the jar hits the lid. Wrap the lid with a 1 inch red satin ribbon and tie a small bow, keeping the tails around 2.5 inches. Create a label on paper sized to fit a clear sleeve, then place it so it sits at about eye level on the jar. Secure the sleeve with double-sided tape on the back only so it stays flat.
Pro tipIf your berries are oily, dry them on a paper towel for 20 minutes so the label sleeve doesn’t fog.
AvoidDon’t use glitter on the label — it sheds and looks messy inside the sleeve.
7. Rainbow Sprinkles Baking Jar with Polka Dot Tie
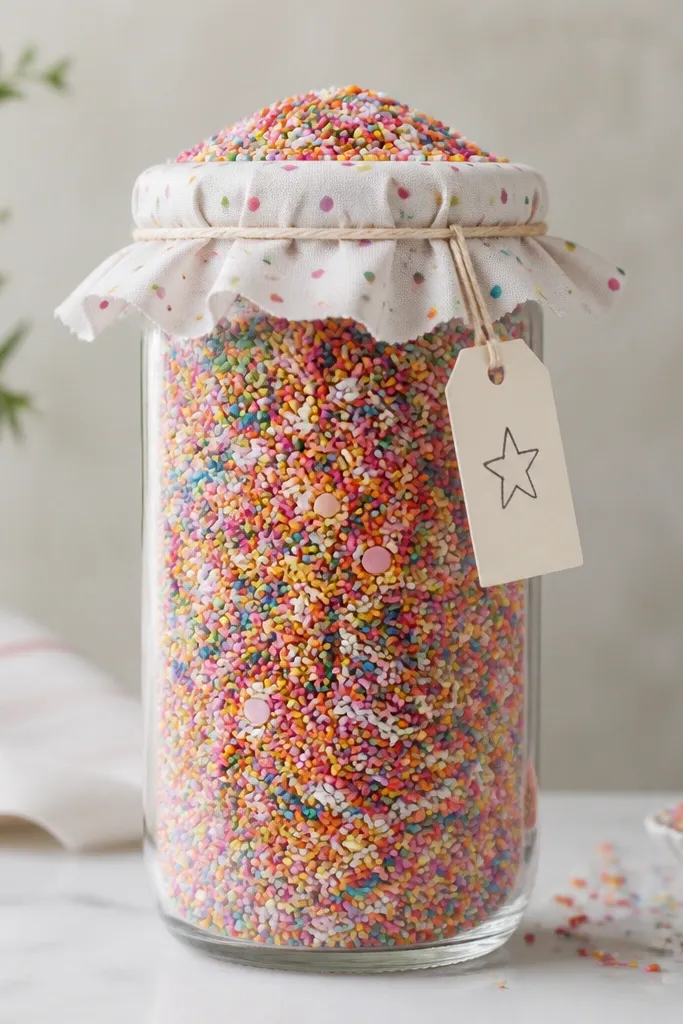
This is the jar you make when you want the gift to look fun before your friend even reads it. Sprinkles give instant color variety, and a tall jar makes the colors look like a mini confetti tower. I use a polka dot tie because it matches the sprinkles without competing — the background stays light and the pattern stays small. It flatters most skin tones in photos because the colors are bright but not neon. It also works for kids' birthdays or adult “treat yourself” gifts when you want the jar to look playful on a shelf.
Fill a 16 oz jar with sprinkles until it’s about 1/2 inch below the lid so they don’t get crushed under the band. For a neat look, pour in slowly and tap the jar once so the top domes. Tie a fabric strip around the lid and create a bow on the front, aiming for a bow width of about 1.5 inches. Write on a kraft tag with black ink and add a small star drawing. Attach the tag under the bow with a short piece of twine so it hangs slightly off-center.
Use a spoon to smooth the top lightly so the sprinkles don’t look scattered.
Avoid wrapping the lid with thick ribbon that hides the jar opening — it makes the jar harder to open cleanly.
8. Herbal Salve Jar with Sage Green Label and Cork Lid
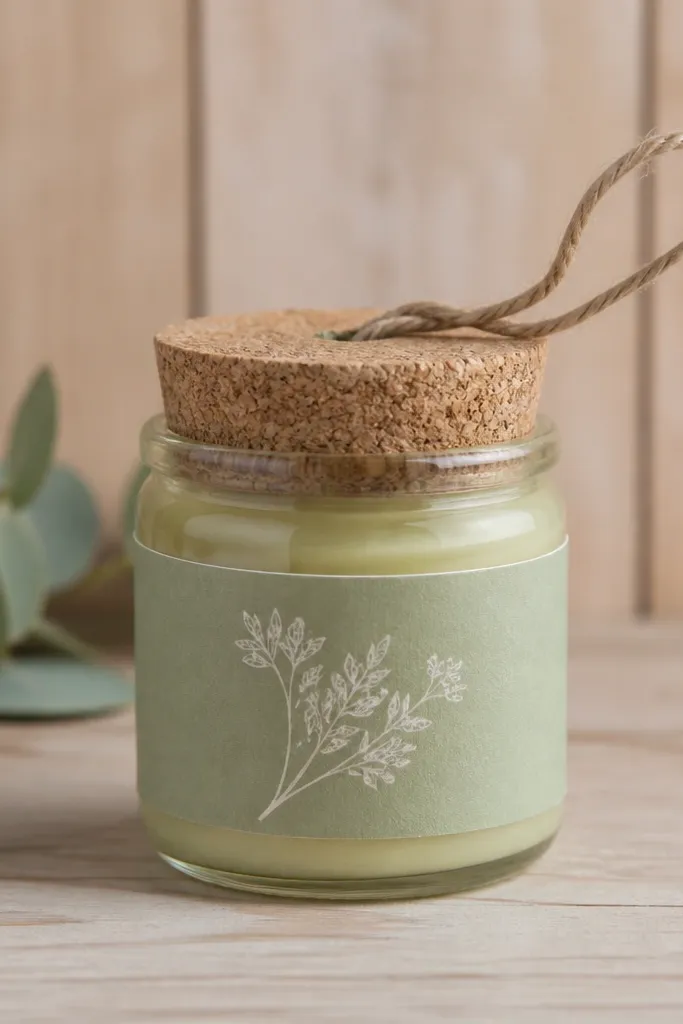
Salve jars look high-end when the color stays soft and the closure looks natural. Pale green salve through a small jar reads “apothecary” without needing a fancy store label. A cork lid adds texture that matches the herbal vibe, and the sage label keeps it calm. This flatters friends who like botanical aesthetics — think linen, wood, cream walls, and simple ceramics. It also works as a practical gift because they’ll use it on dry hands, cuticles, or elbows.
Use a 4 oz jar and fill to the shoulder, then smooth the top with a clean spoon. Add a cork lid and wrap the neck with a thin twine loop, tying a simple knot on the front. Cut a sage green label about 2 inches wide and 3 inches tall, then add a white botanical icon printed or drawn by hand. Attach the label with double-sided tape so the edges stay flat. Place the label slightly above center so the cork texture is visible.
Pro tipWrite usage instructions on the back of the label in tiny text so the front stays clean and aesthetic.
AvoidDon’t use bright neon green for the label — it makes the salve look like craft paint.
9. Chocolate Mint Hot Cocoa Jar with Striped Straw Tag
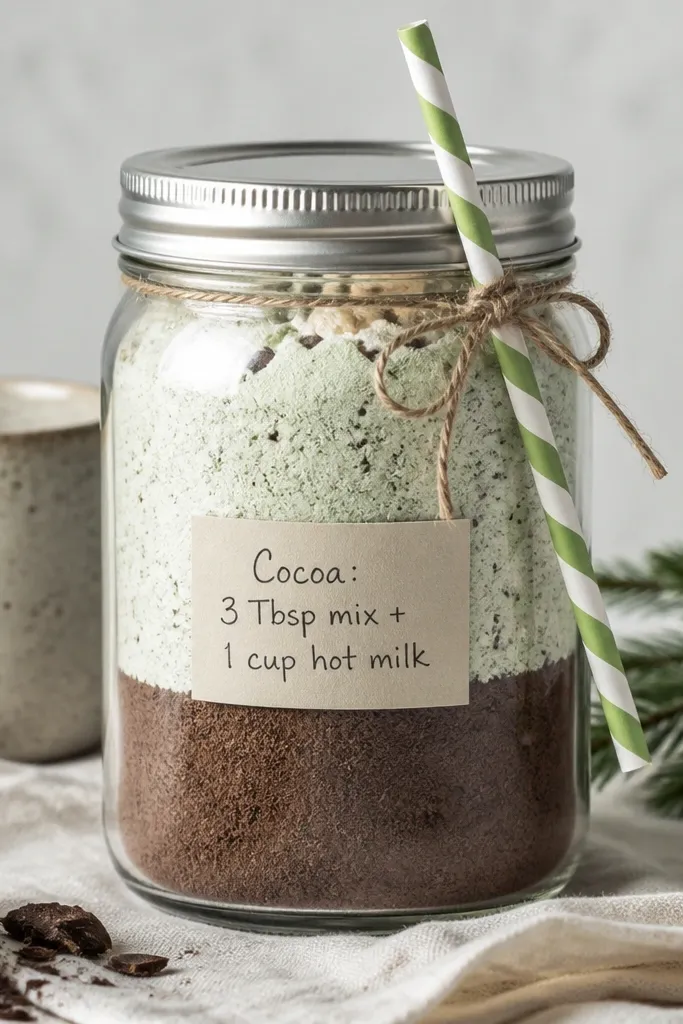
This jar looks like a dessert shop because it has a clear color contrast and a playful detail on the lid. Dark cocoa plus a pale mint mix makes the jar look layered even if someone adds water later and the mix changes. The striped straw detail is small, but it gives the whole thing a holiday-card energy without being childish. It flatters friends who like mint and chocolate and also looks great in kitchens with white counters and green plants. The label with a one-line recipe makes it feel thoughtful instead of decorative.
Fill the bottom of a 12 oz jar with dark cocoa powder, then add pale mint mix on top until you have a distinct line. Keep the top layer level by tapping the jar once after filling. Wrap the lid with thin twine and place a short piece of green-and-white striped paper straw under the twine knot so it points upward. Make a small label that includes a simple instruction like “Mix 2 tbsp + hot water” (keep it short). Center the label and press it flat so it doesn’t curl at the edges.
Pro tipIf your mint mix is fine, keep it dry — moisture makes it clump and the top layer stops looking clean.
AvoidSkip big bows — they snag on handles and make the jar harder to carry.
10. Floral Bath Bomb Mix Jar with Dried Petal Confetti
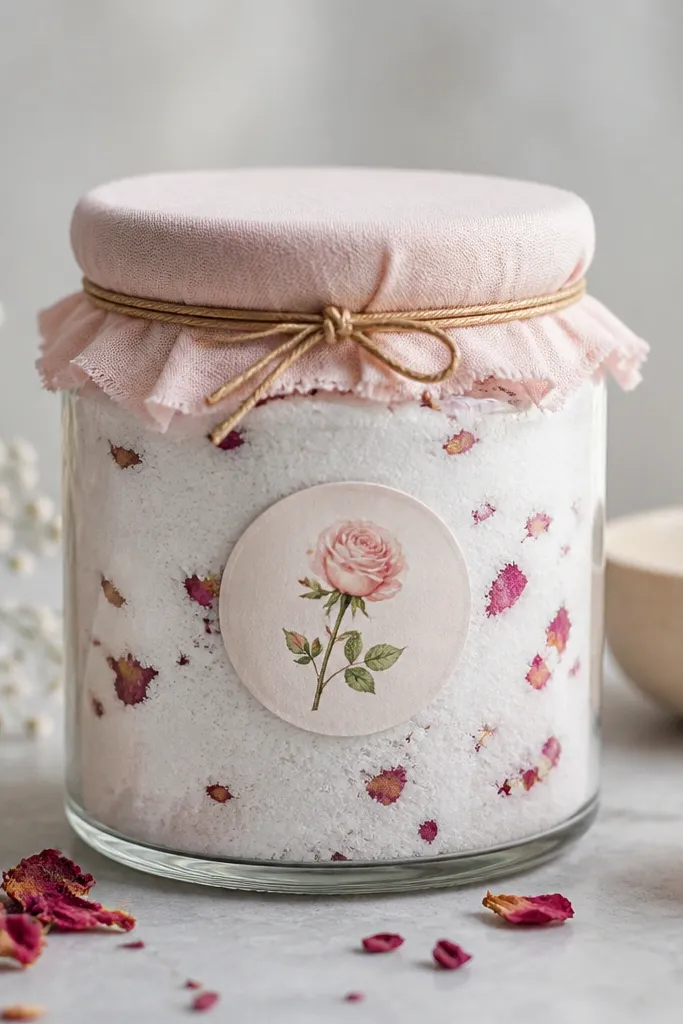
This jar looks romantic because the dried petals show up as tiny flecks in the white powder. I like white base mix because it makes petals pop and keeps the jar from looking muddy. The pink fabric band adds softness, while the thin gold cord gives a little “dress up” without turning it into glitter. It flatters friends who like floral scents and also looks great on vanity counters because it’s not too dark. It’s a strong gift for spring birthdays or “you deserve a break” moments.
Use a 16 oz jar and fill with white bath bomb mix to about 1 inch below the lid. Sprinkle dried petals sparingly on top and gently shake so they distribute without clumping. Wrap the lid with a soft pink fabric band about 1 inch wide, securing it with fabric glue at the back seam. Tie a thin gold cord around the middle once, then knot it on the front. Apply a round sticker label about 2.75 inches wide and center it so it frames the petal flecks.
Dry your petals on a paper towel for 10 minutes before mixing so they don’t add moisture.
Don’t pack the powder down hard — it can shift and make the petals look uneven.
11. Lemon Vanilla Cleaning Mix Jar with Yellow Label Block
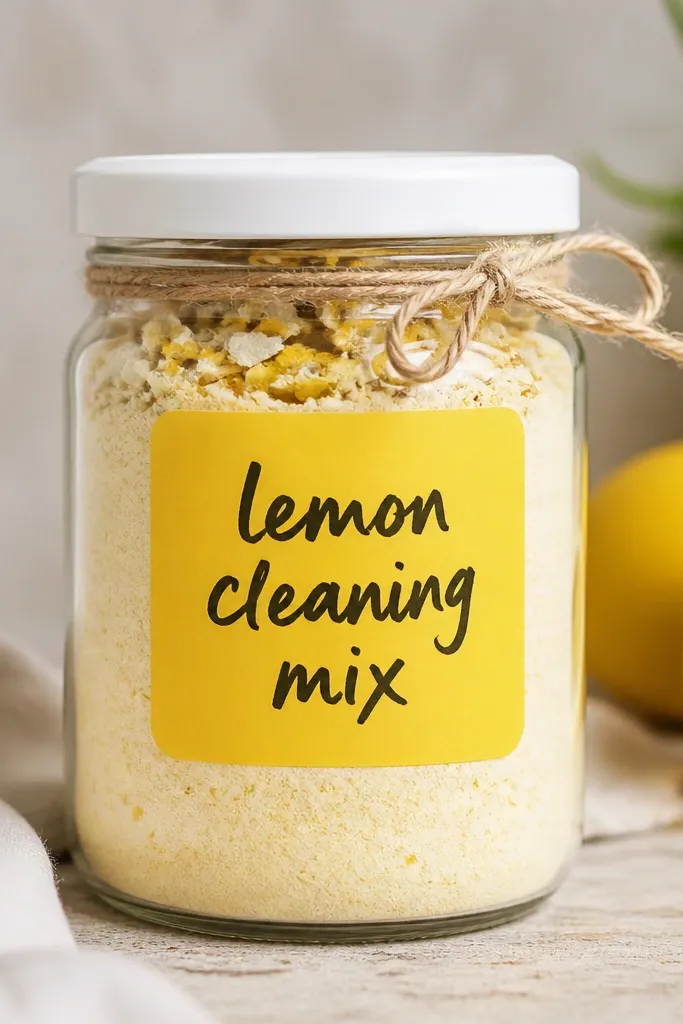
Cleaning mix jars look surprisingly pretty when you keep the palette tight. Pale yellow powder plus dried lemon peel flakes reads clean and bright, and it looks good on shelves by the sink. I like a matte white lid because it matches the “fresh” vibe without making the jar feel like a candy container. A yellow label block gives you readability at a glance, which matters when your friend grabs it with wet hands. This jar is perfect for friends who love practical gifts that also look cute on a counter.
Fill a 12 oz jar with pale yellow cleaning mix until it reaches about 1 inch below the lid. Add a small scatter of dried lemon peel flakes on top, then gently tap to settle. Tie twine around the lid once and secure the knot at the front. Make a yellow label block from matte paper about 2.5 inches wide by 3.5 inches tall and write the use instructions in black. Stick the label centered and keep the jar dry so the ink doesn’t smear.
Seal the label with a thin coat of matte spray (or matte Mod Podge) so splashes don’t ruin it.
Avoid glossy labels — they show smudges and make the jar look messy.
12. Sourdough Starter Gift Jar with Fabric Lid Cover
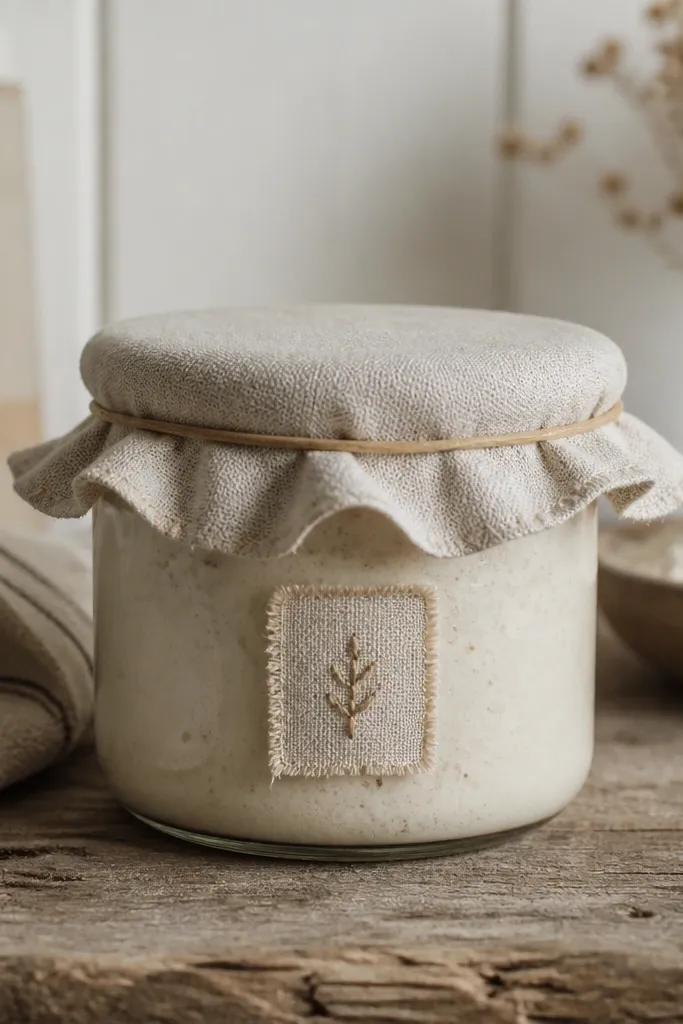
A sourdough starter jar is one of the most personal handmade gifts you can give, because the “ingredient” is alive and changes daily. I like a fabric lid cover because it keeps the jar breathable while still protecting from dust. A stitched patch label looks warm and durable, and it doesn’t peel off when the jar gets handled. This jar flatters farmhouse and neutral kitchens, but it also looks clean in modern spaces because the colors stay muted. It’s also a gift your friend can use immediately if you include a starter guide note.
Use an 8 oz jar and add starter to about halfway, leaving room for growth. Cut a square of breathable cotton (like muslin) and stretch it over the lid rim, then secure with a rubber band so it stays snug. Sew or glue a small stitched patch label to a piece of kraft paper, then stick it to the jar with a removable tape dot so it doesn’t tear the glass. Write the feeding schedule in marker on the kraft insert and tuck it behind the label area. Keep the fabric color light beige or cream so it doesn’t stain easily.
Pro tipUse a marker to write today’s date directly on a small tape strip on the side — it peels off clean later.
AvoidDon’t seal it airtight — starter needs airflow or you risk a bad smell and weak fermentation.
13. Spruce Tip Bath Salt Jar with Pine Green Band
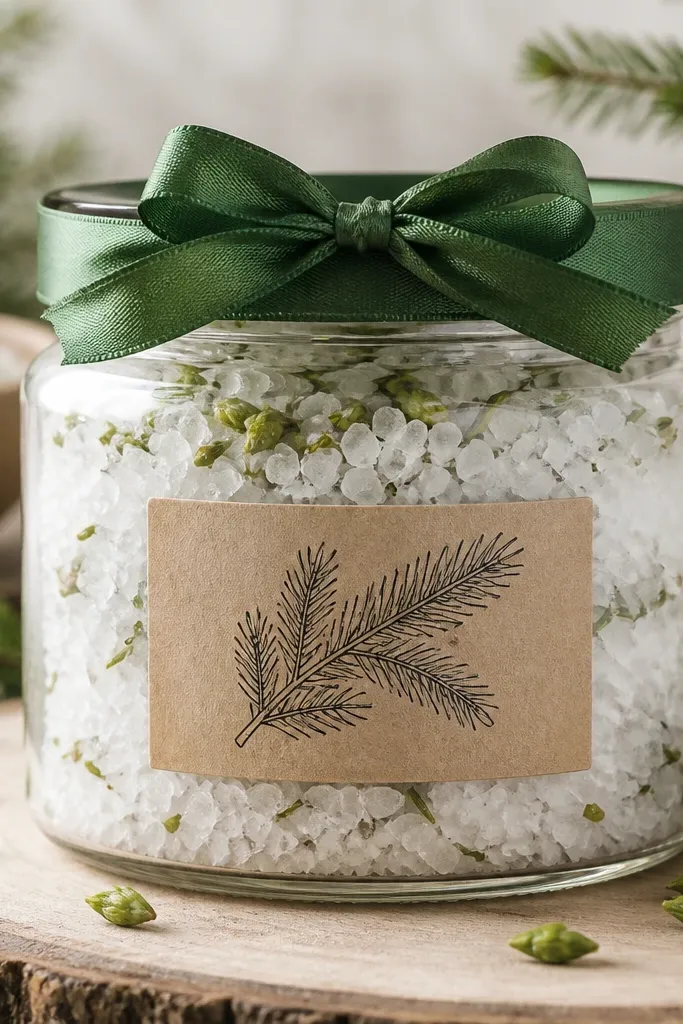
Bath salt jars look best when you can see the coarse texture and a few real botanicals. White salts plus tiny green spruce tips make the jar feel seasonal and outdoorsy without turning it into a gimmick. Pine green ribbon gives a strong color anchor, and a kraft label keeps it grounded. This jar flatters friends who like winter scents and cabins — it looks right next to candles and wood trays. It’s also a strong “host gift” because it’s easy to carry and looks good on a bathroom shelf.
Fill a 16 oz jar with coarse bath salts to about 1 inch below the lid. Sprinkle spruce tips lightly on top so they’re visible through the glass but not packed down. Wrap the lid with pine green ribbon about 1 inch wide and tie a bow centered on the front. Make a kraft label with a simple spruce line drawing and attach it with double-sided tape. Keep the label fairly small (about 2.5 inches tall) so the botanicals stay the visual star.
Pro tipIf the spruce tips are wet, dry them first or they can clump the salts and dull the color.
AvoidAvoid overloading with botanicals — too many pieces makes the jar look messy and uneven.
14. Vanilla Bean Candle Jar with Twine Crosshatch
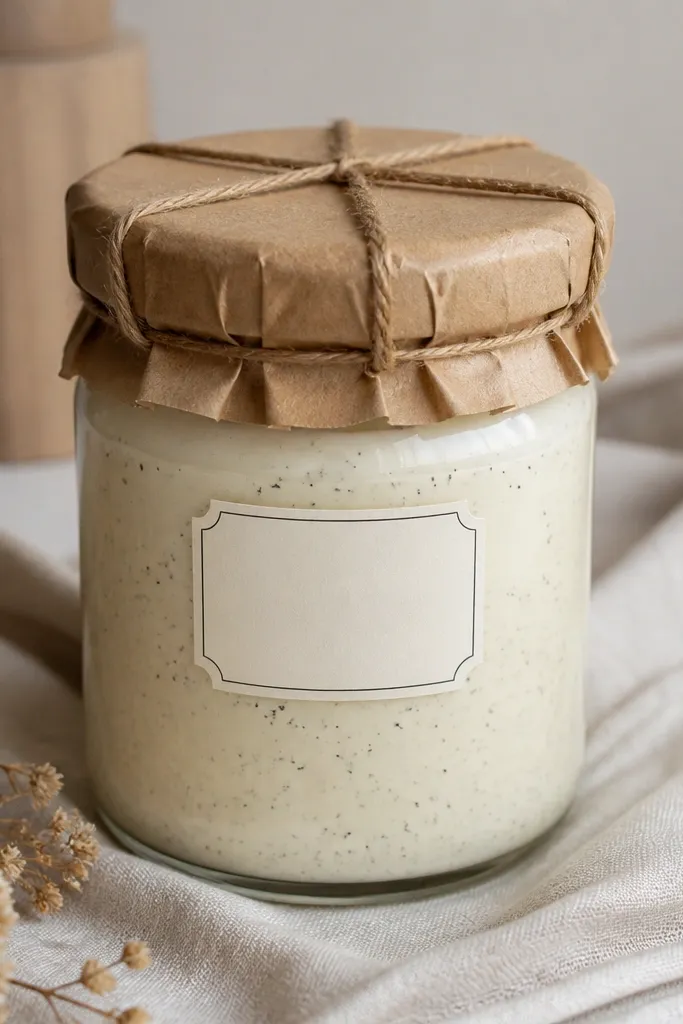
Candles in glass jars look handmade when the lid has texture and the label is simple. Pale cream wax with dark vanilla specks feels warm and expensive, and it reads well on both white and wood backgrounds. The twine crosshatch on kraft paper gives a graphic look without needing stamps or fancy tools. This jar flatters friends who like cozy home decor and also looks good in small spaces because the jar shape is clean. It’s a gift that doesn’t depend on food tastes, which makes it safer if you don’t know their pantry habits.
Use a clean clear jar and pour or set a cream candle wax blend with a few vanilla bean pieces added before the wax fully sets. Let the candle cure fully before gifting so the top is smooth. Cover the lid with a kraft paper square and wrap twine around it in a crosshatch pattern (two directions, tight spacing). Tie off the twine at the back so the front stays neat. Add a small cream label centered on the jar front with dark handwriting and keep it short so it doesn’t hide the vanilla specks.
Pro tipIf you want the label to look sharper, sand the jar lightly where the label sits so it grips flat.
AvoidSkip thick marker scribbles — they smear on glass and look messy.
15. Peppermint Foot Soak Jar with White Ribbon and Faux Tag
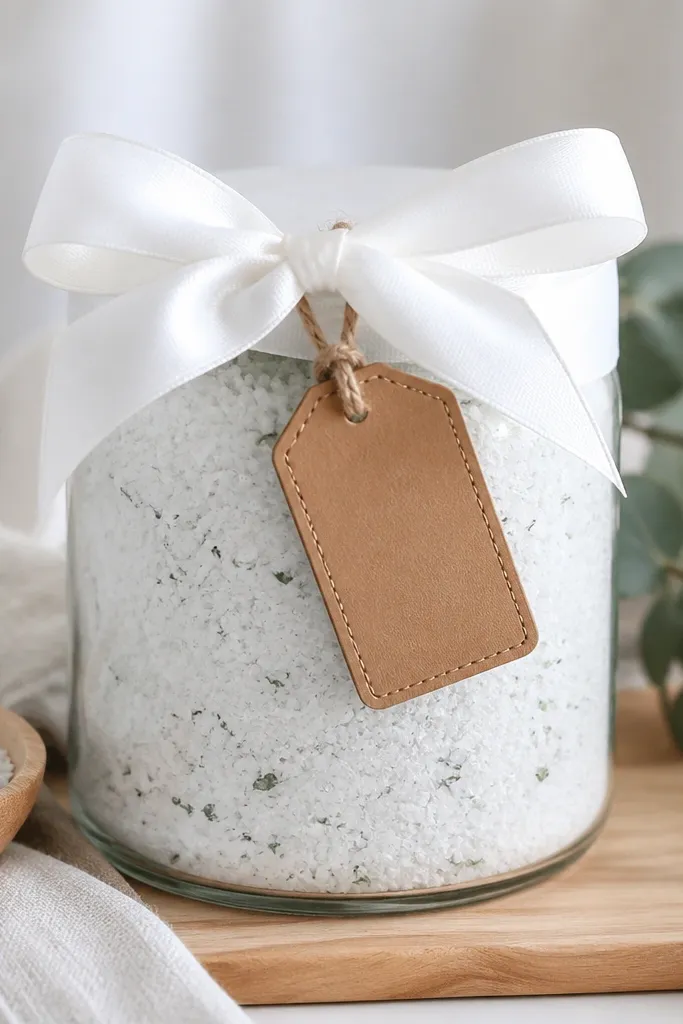
Foot soak jars are one of those gifts people actually use because they feel like a treat after work. White powder with pale green peppermint bits looks clean and spa-like, and it keeps the jar from looking messy. A wide white ribbon makes the jar feel soft and “gifted,” while the tan tag adds contrast. This flatters friends who like neutral bathroom decor, and it photographs well because the colors are bright but not loud. It’s a great choice for coworkers and close friends because it’s practical and still looks pretty on a shelf.
Fill a 12 oz jar with white foot soak powder, then stir in a small amount of peppermint bits so you get light green flecks. Leave about 1 inch of space under the lid so the ribbon doesn’t get dusty. Wrap the lid with a wide white ribbon and tie a bow centered on the front. Make a tan faux leather tag (about 2.5 inches long) and punch a hole near the top, then attach it to the bow knot with twine. Place the jar label on the front but keep it smaller than the tag so the ribbon remains the focal point.
Pro tipWrite the soak time on the back of the label — it keeps the front clean and stops you from crowding the jar look.
AvoidDon’t use cheap plastic tags — they reflect light and make the jar look off.



