
1. Braided Keychain with Adjustable Slider Knot
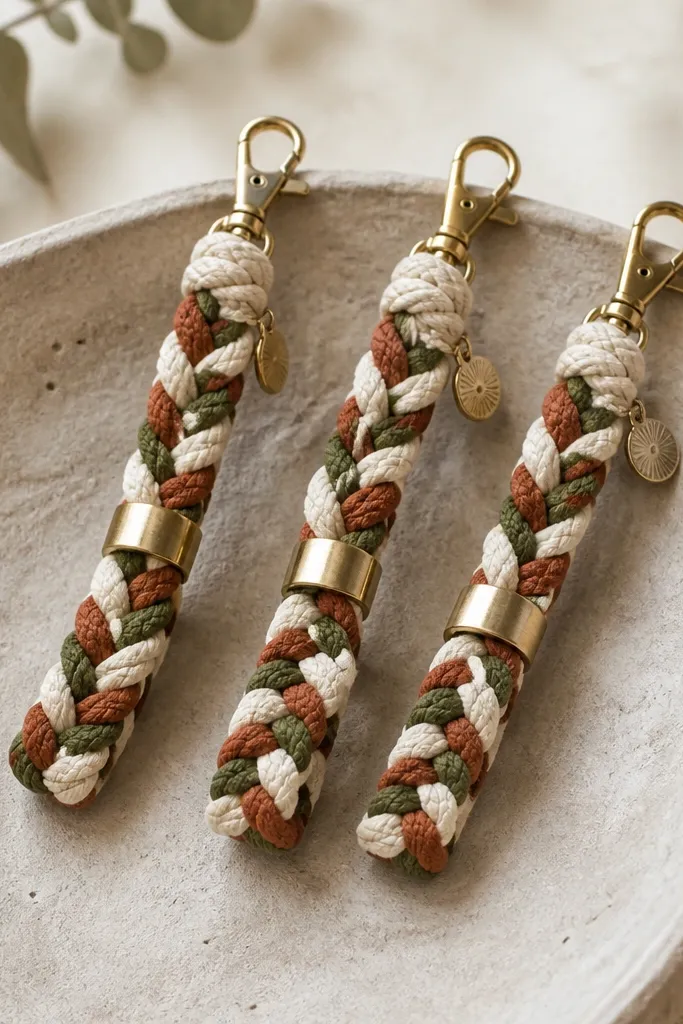
Start by cutting three cords at 18 inches each. Tie them together with a simple overhand knot at the top, braid tightly for about 6 inches, then finish with another knot. Thread the braid ends through an adjustable cord slider (the kind used for lanyards), pull until the braid sits centered, and knot the ends under the slider so they lock in place. Attach a key ring to the top knot area using a small jump ring so it hangs straight. Trim cord ends to 1/4 inch and dab a tiny dot of clear craft glue on knots to keep frays from creeping back.
This is my go-to low maintenance gift because it looks styled even when you’re working fast. Use three cords per chain, each about 1/8 inch thick, and keep the braid tight so it reads “knit” from a distance. For color, I like cream + rust + olive because it looks warm against almost any jacket color. It flatters everyone because it’s compact, lightweight, and won’t tangle like ribbon keychains in a purse. The focal point is the braided texture, and the slider makes it feel custom without extra measuring.
AvoidDon’t leave long fuzzy ends — trim and glue the knots or it reads unfinished.
Pro tipPick cord colors that match the friend’s everyday bag — brown leather, black nylon, or a denim tote — and the gift looks instantly “them.”
2. Felt Bookmark Trio with Stitched Corners
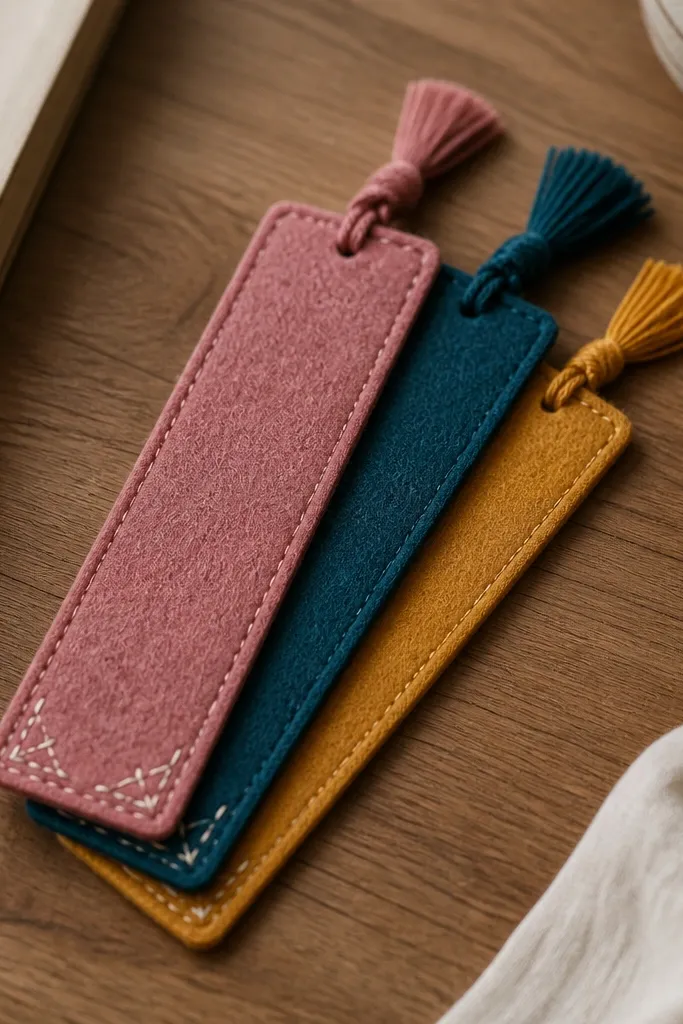
Bookmarks are the kind of gift people actually use, and felt makes them look cute without tricky sewing. Cut rectangles about 2 inches wide by 8 inches tall, then shape the bottom into a gentle curve so it sits nicely in a book. Felt also flatters different reading habits — kids, students, and avid readers — because it doesn’t snag pages. I like adding stitched corners in contrasting thread because it makes the piece look intentional even if your stitches aren’t perfect. The focal detail is the corner stitching, which frames the bookmark like a tiny flag.
Cut three felt bookmarks: 2 x 8 inches each, and round one end slightly. For each one, mark a small triangle at the bottom corners with a washable marker, then stitch along the triangle lines with embroidery thread. Add a tiny tassel by tying two strands of embroidery floss, then stitching it through a small slit at the top. Finish by running one quick line of straight stitches around the perimeter if you want extra durability. Keep thread colors consistent across the trio (like cream thread on all three) for a matching set.
Use embroidery floss for the stitches, not regular craft thread — it holds tension better and looks cleaner.
Don’t use thin felt that frays — choose sheets labeled for crafts so edges stay smooth.
3. Stamped Ceramic Mug Label and Ribbon Collar
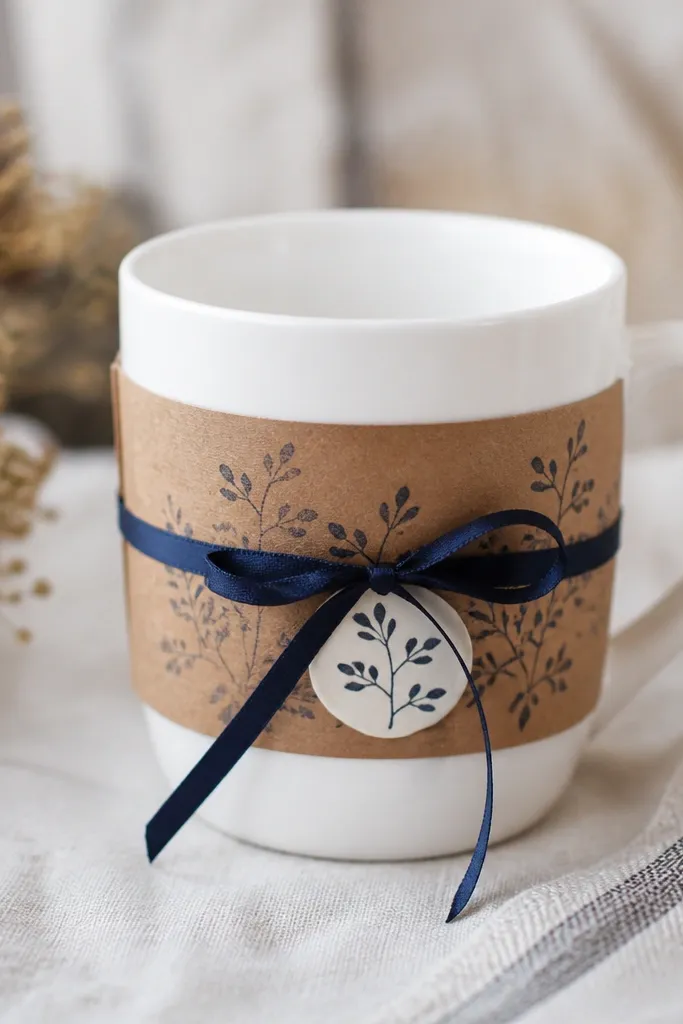
Cut kraft paper strips to fit around the mug: wrap once, then trim so it overlaps by 1/2 inch. Stamp your design in one corner, then apply a light coat of clear acrylic spray to seal the ink. Wrap the band around the mug and tie navy or forest green ribbon over the overlap. Tuck the ribbon tails behind the knot so they don’t hang unevenly. If you’re gifting multiple mugs, keep the stamp placement identical across all of them for a matching set look.
This one turns a plain mug into a gift with almost no effort. Use a white mug or a light-colored one so the stamped label shows up clearly. Make a kraft paper band about 8 inches long by 2.25 inches tall, then stamp a single icon like a coffee bean or tiny star in black ink. Tie a ribbon collar around the band — 1/4 inch width looks neat — and seal the knot with a small dab of clear glue so it doesn’t slip. It flatters people who like simple, clean aesthetics; it also works for anyone because the label band is universal and not personal in a way that might miss the mark.
AvoidDon’t use glitter ink on labels you expect to handle daily — it smears faster than plain black.
Pro tipStamp on a paper test first — some stamps need a second press to show crisp edges on kraft.
4. Heat-Transfer Vinyl Gym Tote Pocket Patch
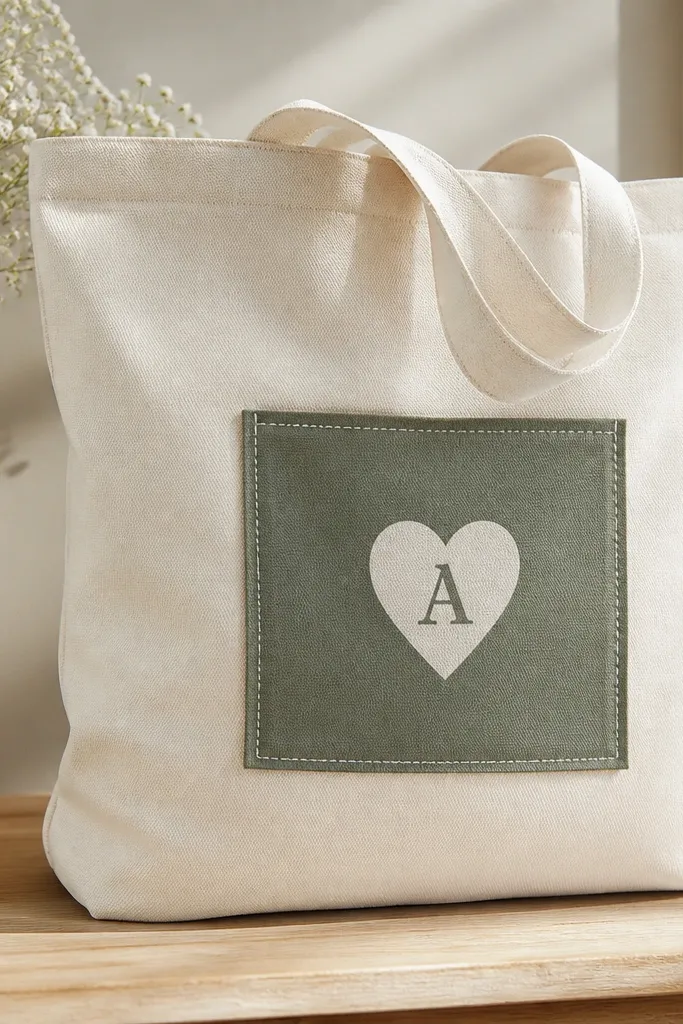
If your friends use totes for gym, groceries, or school, this patch makes the bag look custom fast. Vinyl holds up better than printed paper and it doesn’t need sewing. Use a small patch size like 4 x 5 inches so it sits cleanly above the existing pocket seam. Choose one bold icon — a heart, a lightning bolt, or a simple mountain — and one single initial so the design stays readable. It flatters almost everyone’s style because it’s graphic and clean, not overly personal.
Cut a fabric patch from sturdy cotton or canvas, about 4 x 5 inches, and fold the edges under 1/4 inch for a clean look. Iron the patch to the tote front at a height of about 10 inches from the bottom seam. Cut heat-transfer vinyl in black or a bright color like teal, weed the excess, and place it centered on the patch. Press with a heat press or household iron on high, using parchment paper between vinyl and iron for 20-30 seconds, then let it cool. Optional: run a short decorative stitch line effect using fabric paint on top of the patch edges for a “stitched” look.
Use a scrap tote first to test pressure — vinyl peels if your iron isn’t hot enough.
Don’t stretch the tote fabric while pressing — vinyl will warp and look crooked.
5. No-Sew Ribbon Bookmark with Button Clip
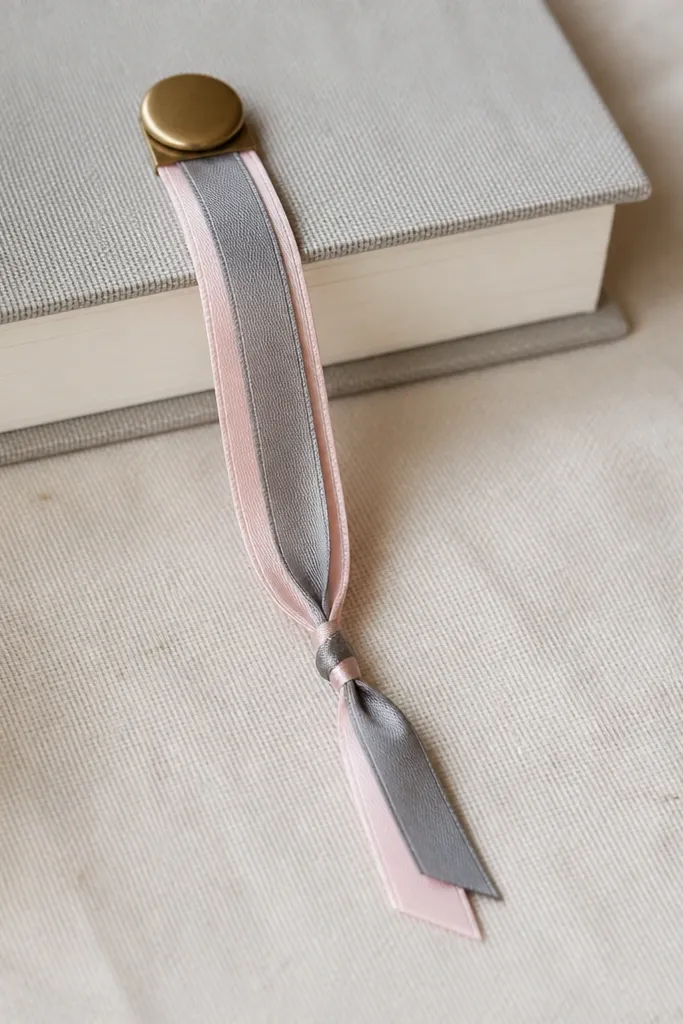
This is the fastest gift on the list that still looks polished. Layering two ribbon widths gives depth without extra work, and the button clip keeps it from sliding out of the book. Choose satin for shine and grosgrain for grip; the mix looks expensive in photos. It fits any friend because it’s neutral enough for a library book and pretty enough for a personal planner. The focal point is the button clip and the layered ribbon ends, which catch light when the book opens.
Cut two ribbon strips: one 10 inches long (1/2 inch wide) and one 10 inches long (1/4 inch wide). Stack them so the narrower ribbon sits centered on top. Tie a tight knot about 1/2 inch from one end, trim the tails evenly, and seal with a tiny dab of clear glue. Attach a small button clip: either slide it onto the knot area or stitch through the knot using a needle and thread if you want more security. Finish by trimming ends at a slight angle so they look intentional instead of blunt.
Use a lighter for satin edges to prevent fraying — quick passes, no long heat.
Don’t use cheap thin ribbon that curls — it makes the bookmark look messy in a week.
6. Photo Transfer Coaster Set in 4 Steps
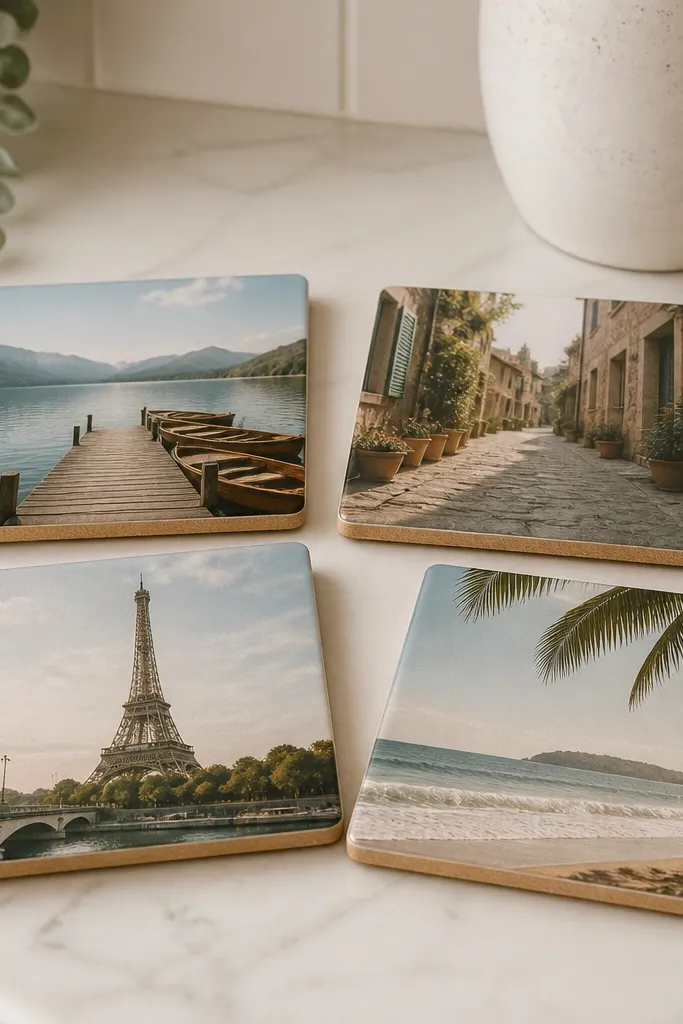
Coasters are one of the few handmade gifts that get used immediately and don’t require a big “craft personality.” You’ll want photos with bold shapes because the transfer reads best with contrast. I’ve made sets where the images are simple: a friend’s dog face, a city skyline, a favorite concert poster crop. The glossy finish protects the image and makes the coasters look like they came from a small shop. It flatters people who like practical decor — it looks good on a coffee table and it doesn’t feel like clutter.
Start with four blank coasters or cork-backed tiles sized around 4 inches. Print your images in laser quality if your transfer method needs it, then cut them slightly smaller than the coaster. Apply a medium like mod podge photo transfer or a dedicated transfer gel, lay the image face-down as directed, and smooth bubbles out with a plastic card. Let cure fully, then seal with 2-3 coats of clear topcoat for a glassy surface. Wipe the edges clean before the final coat so you don’t get streaks.
Choose photos with thick outlines and avoid tiny text — it turns gray when sealed.
Don’t skip the full cure time between coats; soft topcoat smears under handling.
7. Sew-Free Scrunchie with Folded Elastic Seam
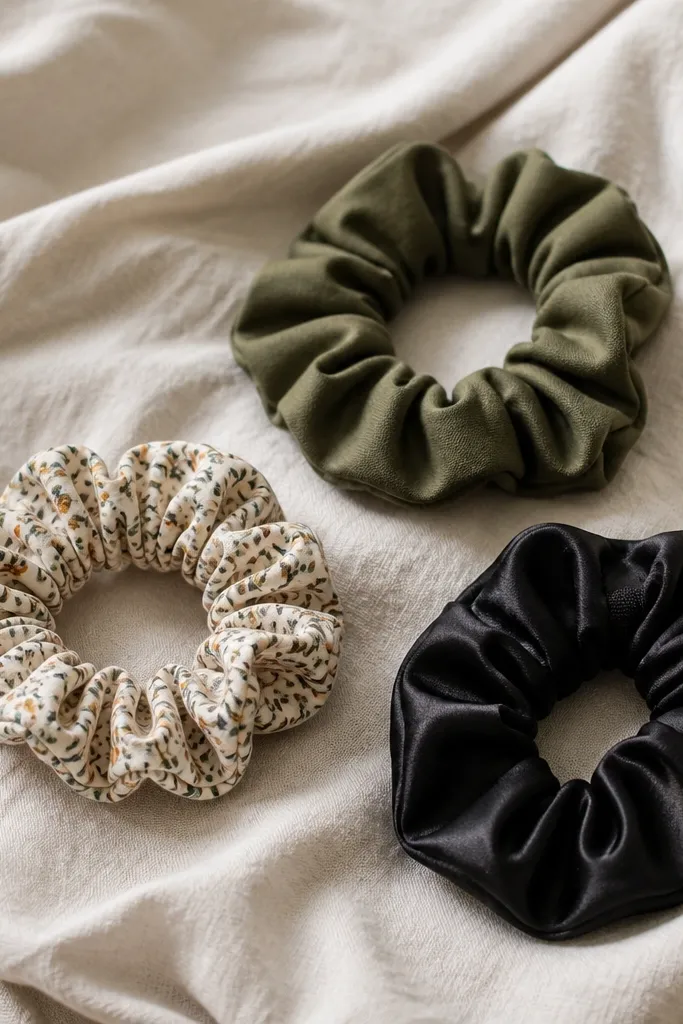
Cut fabric strips 9 inches long by 4 inches wide, then fold lengthwise so the right sides touch and press lightly. Stitch or glue the long edge if you want, but the key is making a neat elastic channel: fold the fabric over the elastic and secure with a short line of stitch or fabric glue. Use a 3-inch piece of elastic as your base, then overlap ends and secure tightly. Wrap the fabric around the elastic, tuck the ends inside, and close the seam with a small hand stitch. Turn right-side out, then smooth the seam so it sits on the underside.
Scrunchies are low maintenance because they look cute even when you’re not a perfectionist. The trick is using a folded elastic channel so it holds tight without bulky knots. I’ve gifted these to friends who wear their hair up every day, and they actually keep them in rotation. Choose fabrics that match their wardrobe — satin for a sleek look, cotton for everyday softness. The focal point is the fabric sheen or pattern, so it flatters different skin tones because the scrunchie sits away from the face and doesn’t depend on makeup matching.
AvoidDon’t use thin elastic — it stretches out and the scrunchie stops holding by week two.
Pro tipUse a fabric glue that dries flexible — stiff glue makes the scrunchie look lumpy.
8. Candle Label with Handwritten Burn-Safe Directions
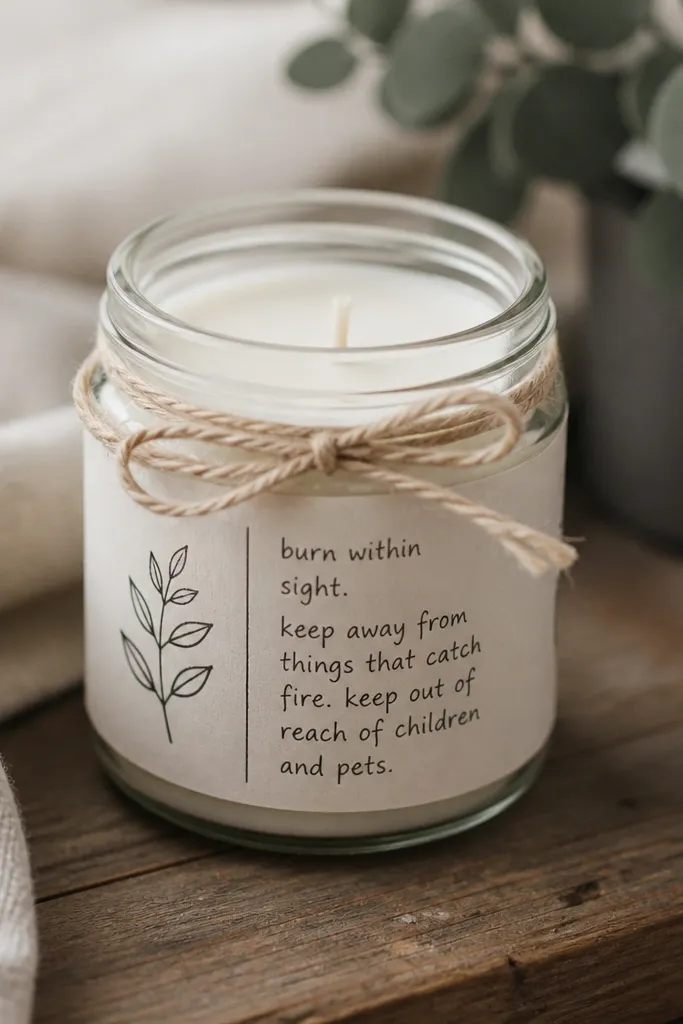
Cut label paper to fit the jar circumference: wrap around and trim so it overlaps by 1/2 inch. Write your text in pencil first, then go over with a paint pen. Seal the label with clear matte spray so handwriting doesn’t smear. Wrap around the jar, secure with a strip of double-sided tape on the overlap, and tie twine or thin ribbon over the seam. Add one small stamped icon or sticker in the corner to keep it from looking plain.
This gift is personal without needing a photo of your friend. Use a plain jar candle from any store, then upgrade it with a hand-lettered label that looks clean and grown-up. Keep the font consistent — I use a black fine-tip paint pen — and include a small burn-safe note like “Trim wick to 1/4 inch.” That makes the gift feel thoughtful and practical instead of just decorative. The label is the focal point, and it flatters anyone because it avoids inside jokes. It also hides a cheap-looking label from the original candle.
AvoidDon’t put tape or glue near the lid edge where heat can soften adhesive.
Pro tipUse matte spray, not glossy, if you want the handwriting to look like ink on paper.
9. Marbled Phone Stand from Air-Dry Clay
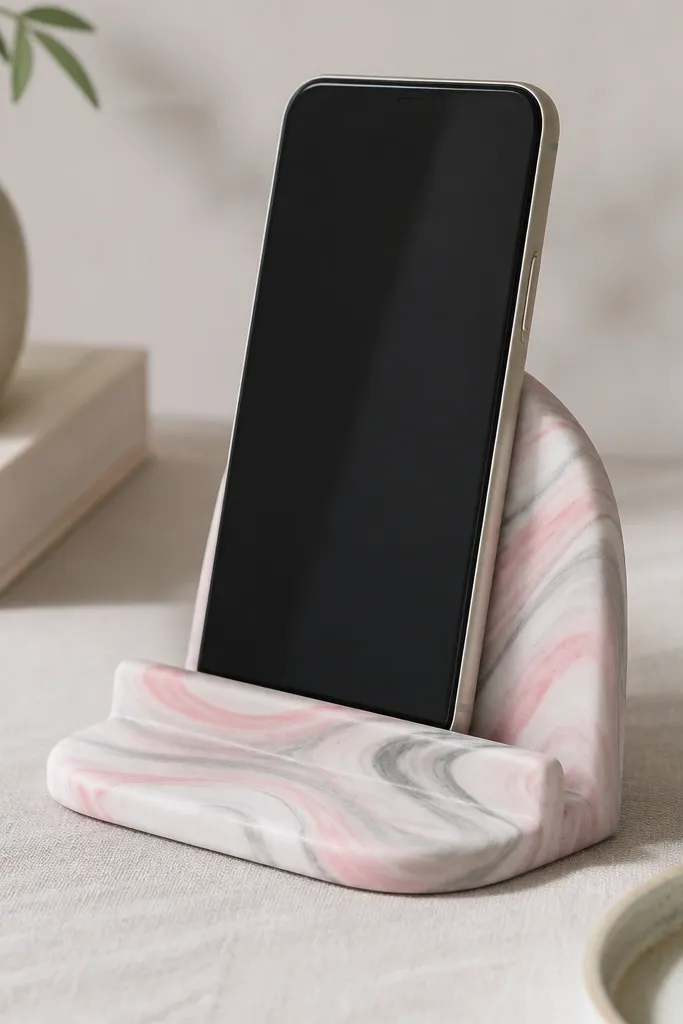
Roll a slab of air-dry clay about 1/4 inch thick and cut a base rectangle roughly 5 x 3.5 inches. For the back support, roll a smaller piece into a gentle ramp about 3 inches tall, then blend the seam with water and a silicone tool. Marbling: press thin strips of different colored clay into the slab and twist lightly before smoothing the top. Smooth edges with a damp sponge, then use a phone template to test the angle before it dries. Let dry fully, then seal with 2 coats of clear acrylic so it wipes clean.
A phone stand is one of those gifts people use daily, and the clay finish makes it feel artsy without being fragile. Air-dry clay is forgiving: you can reshape the curve and smooth it with a wet finger. For a clean aesthetic, go for marbling in light tones — white + blush + soft gray — because it looks good in any room. It flatters desk setups of any color since it’s mostly neutral. The focal point is the swirl pattern, which looks intentional even if your lines aren’t perfect.
AvoidDon’t skip sealing; unsealed clay darkens with fingerprints.
Pro tipTest the phone angle by placing the phone on the stand while it’s still leather-hard, not after it dries.
10. Printable-and-Laminated Desk Nameplate Set
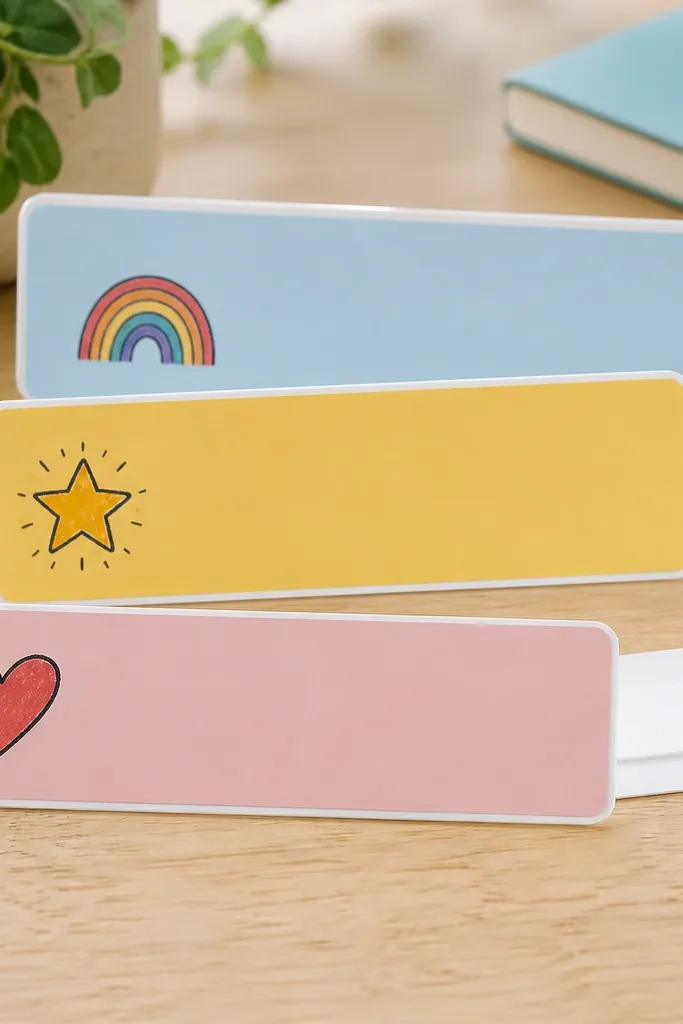
Design nameplates on your computer in one style: rounded font, one icon, and a consistent margin. Print on cardstock, cut to size around 3 x 5 inches, and round corners with a craft corner punch. Laminate each piece using a pouch laminator, then trim excess laminate at the edges. Add a small strip of removable adhesive on the back so it doesn’t rip paint or wallpaper. If the friend uses a laptop, add a second version scaled down to fit the laptop stand area.
Desk nameplates sound boring until you make them look like a designer prop. Laminating is what makes it low maintenance: it wipes clean and doesn’t curl. Choose one friend’s vibe: calming neutrals for someone who likes tidy minimal spaces, or bold colors for someone who likes fun desk energy. The gift works for students, remote workers, and anyone with a bag full of notebooks. The focal point is a hand-drawn icon (like a tiny mug, plant, or comet) placed beside their first name.
AvoidDon’t laminate over smudged ink — the smear gets sealed forever.
Pro tipUse removable adhesive like museum putty if you’re worried about dorm desks or rented spaces.
11. Hand-Painted Tumbler with One Clean Color Block
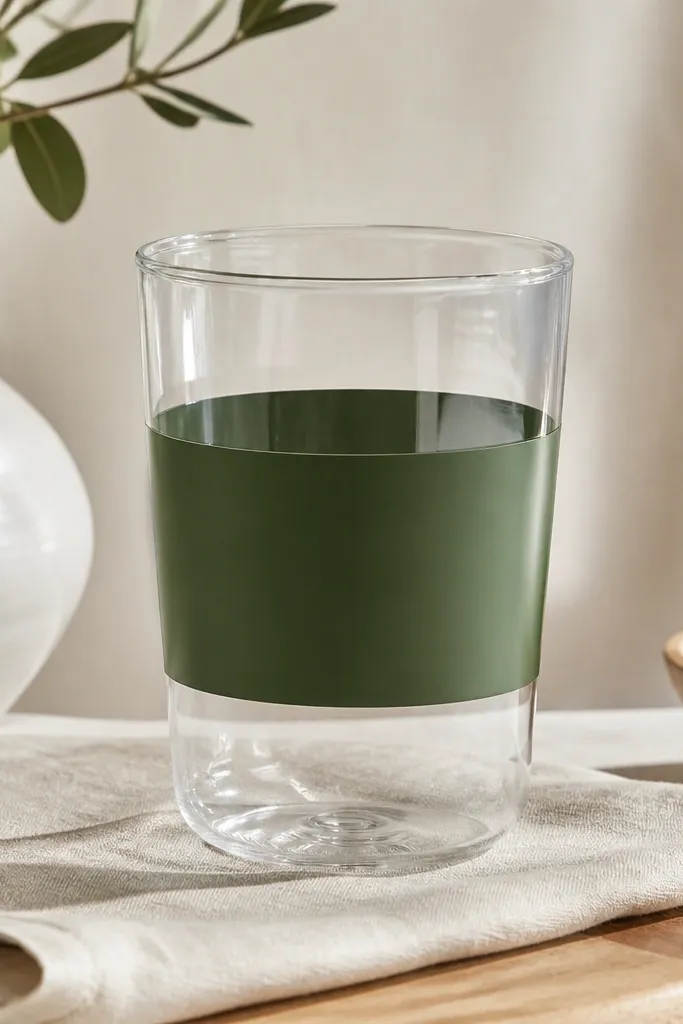
Clean the tumbler with rubbing alcohol and let it dry completely. Tape a band around the middle using painter’s tape, leaving a width of about 2 inches. Paint the band in one coat, then add a second thin coat once the first is dry. Remove tape while paint is still slightly tacky for crisp edges. Bake or cure the paint if your brand instructions say to, then seal with a clear topcoat designed for drinkware. Let cure overnight before gifting.
This is for the friend who loves a simple look and hates fussy crafts. One clean color block looks modern and hides small hand-paint imperfections better than detailed designs. Use acrylic paint made for glass or a tumbler paint, and pick colors that match their wardrobe: cobalt for jeans people, sage for neutral lovers, or terracotta for warm-toned style. It flatters because it draws the eye to the center without covering the whole cup. Maintenance is manageable if you seal it right — it should handle daily sipping.
AvoidDon’t skip degreasing; fingerprints make paint peel in patches.
Pro tipPaint in thin layers — thick paint cracks when cured.
12. Origami Heart Key Holder on Cork
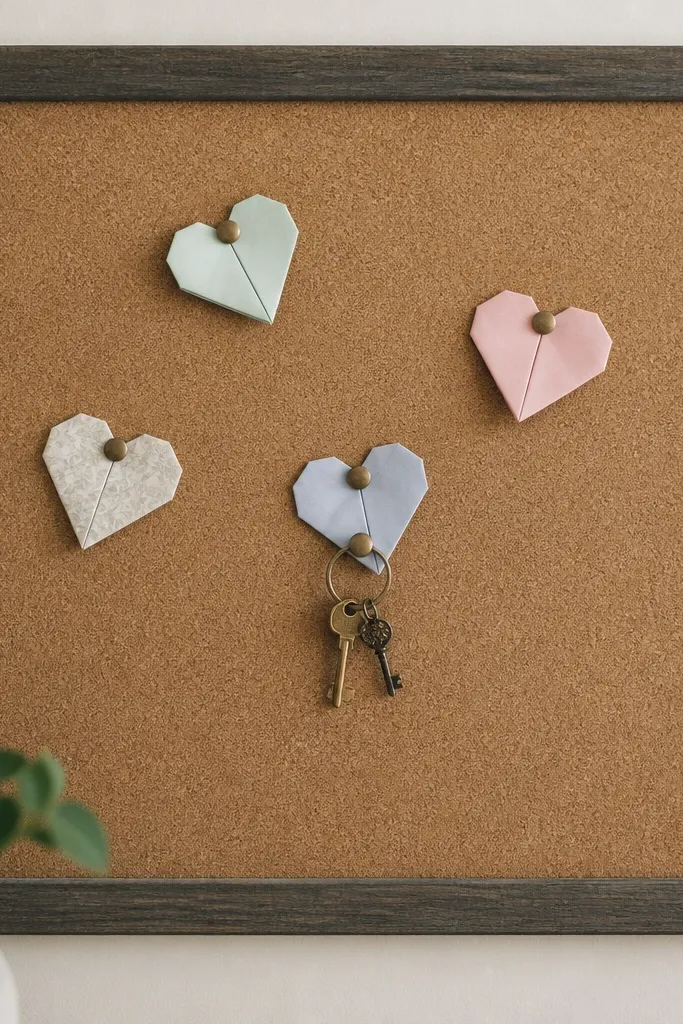
This is a wall gift that still feels personal, and it’s surprisingly low maintenance once it’s sealed. Origami hearts look delicate but cork backing makes it stable. I like using solid paper in one color family — blush, terracotta, or deep red — because it looks cohesive even with multiple friends. The heart shape reads cute without being childish, and the pinned key ring gives it a practical job. It flatters people who like functional decor and hates clutter on countertops.
Cut a cork piece about 6 x 8 inches and stain lightly or leave natural. Fold origami hearts from 6 x 6 inch square paper, then flatten and crease sharply. Pin the hearts onto the cork using small pushpins placed in the heart’s center. Attach a small key ring or clip to one heart with a jump ring. Seal the cork edges with a thin coat of clear varnish so it wipes clean if you bump it with a bag.
Choose paper with a matte finish; shiny paper shows pin marks and glare.
Don’t put pushpins too close to the paper edge or the heart tears after a week.
13. Thread-Wrapped Mason Jar Pen Holder
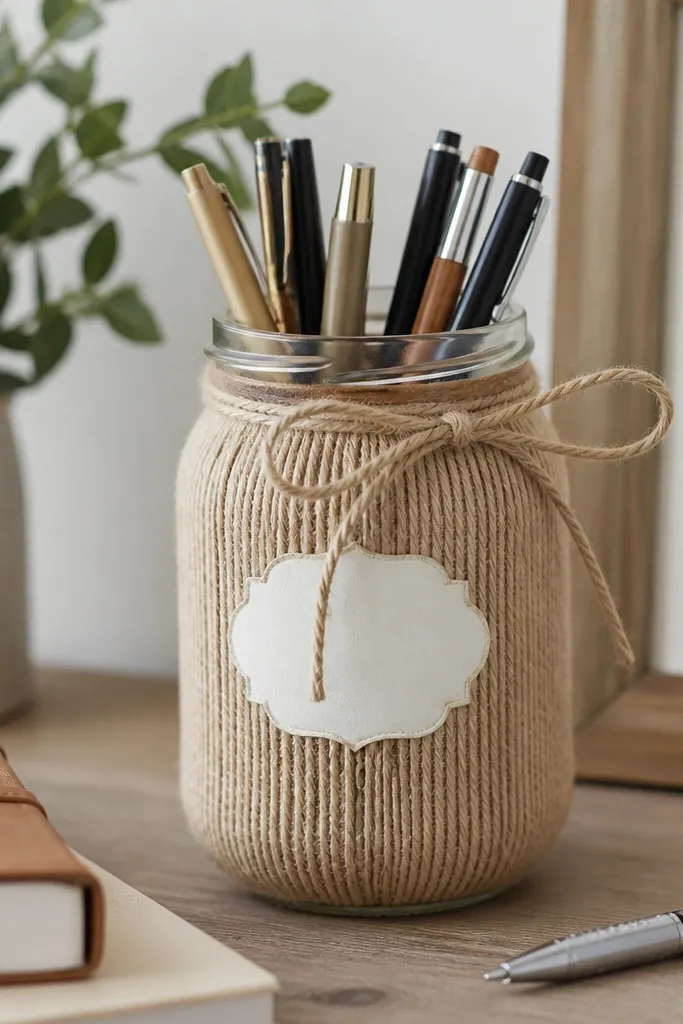
Pen holders are underrated gifts because they solve a real mess. Thread-wrapping a mason jar makes the jar look craft-store fancy while still being sturdy. Use cotton twine, not jute — jute sheds and feels scratchy. For color, I like natural tan + a tiny accent label in black marker. It flatters desks of every style because the neutral wrap blends with wood, metal, and fabric. The focal point is the wrap texture, which looks good even if the label is simple.
Clean the jar and let it dry, then apply a thin layer of tacky glue in a vertical strip. Start wrapping twine at the base, keeping tension snug so gaps don’t show. Continue spiraling upward, pressing each new wrap against the last. When you reach the top rim, trim twine and tuck the end under a wrap line. Add a label: cut a small rectangle of paper, write a short word like “Notes” or “Pens,” then seal it with clear tape or mod podge. Tie a small bow around the jar neck if you want a finishing touch.
Use a thin foam brush for glue so you don’t soak the twine and create lumps.
Don’t leave glue strings on the outside; wipe with a dry cloth before it sets.
14. Crochet-Look Infinity Scarf from No-Knit Supplies
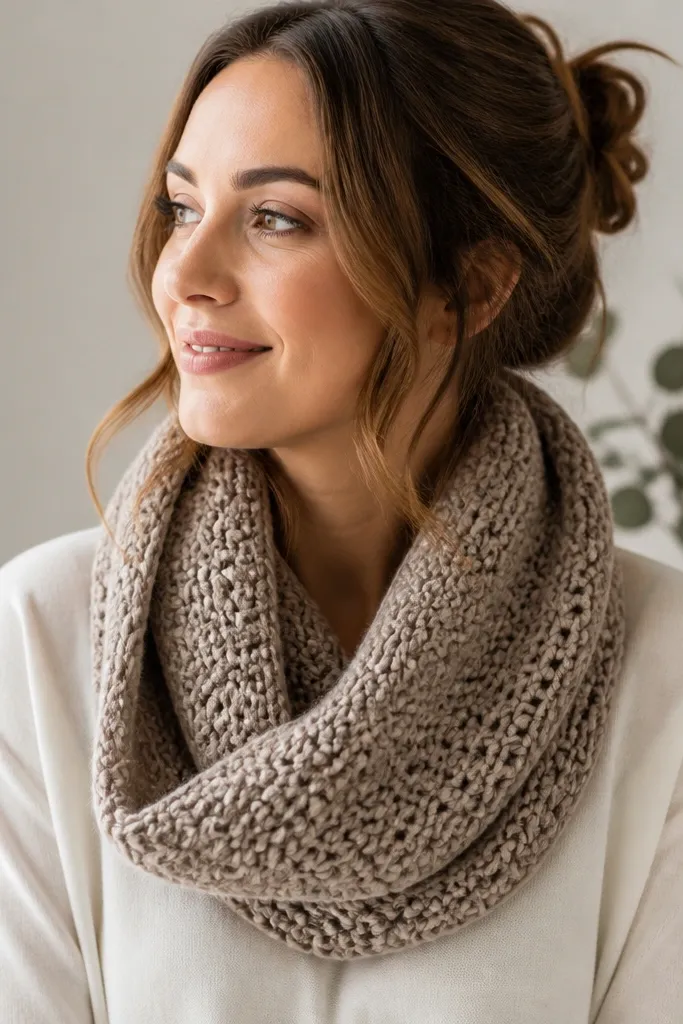
Use super bulky yarn (around 6-7 inch skein thickness) and a large hook if you’re doing quick chain-loop work, or follow the loop method with pre-cut yarn strips. Make a starting chain long enough to wrap around once, then build loop rows until the scarf reaches about 9-10 inches wide. Join the ends to form an infinity loop and stitch the join with a whip stitch so it doesn’t gape. Weave in ends tightly with a yarn needle and trim close. Add a small fringe only if your friend likes texture; otherwise keep edges clean and simple.
You get the cozy look of crochet without the long learning curve. The secret is using a chunky yarn and a technique that creates loops quickly, so it reads handmade instead of “store bought.” This is a gift for friends who live in hoodies and big coats — it adds warmth without a bulky fit. Choose colors that flatter: charcoal for cool undertones, cream for warm undertones, or deep green for both. The focal point is the loop texture, which sits beautifully at the collar and frames the face.
AvoidDon’t use yarn that sheds — it turns into lint on black coats.
Pro tipIf you’re gifting in winter, block the scarf by misting and shaping it lightly so it drapes smoothly.
15. Macrame-Style Plant Hanger from Pre-Cut Cord
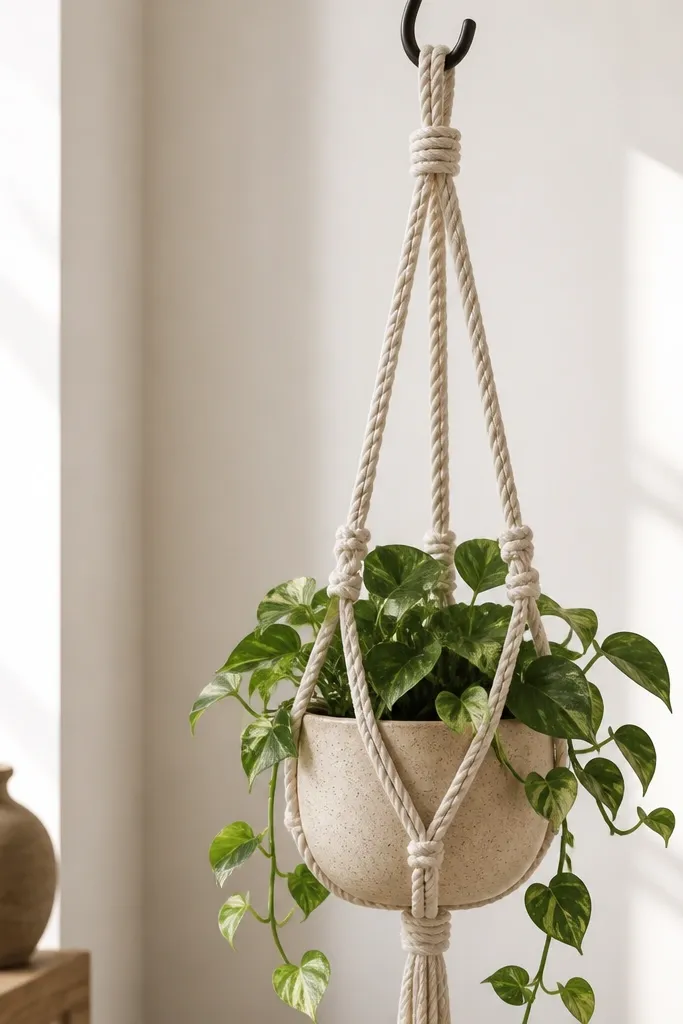
Buy pre-cut cord lengths around 6 feet each and thread them through a ceiling hook ring. Separate cords into three groups of two strands each for a clean look. Make a tight overhand knot bundle at the top, then braid or knot down about 10 inches depending on desired height. Create a simple loop at the bottom for the pot: spread cords around the pot rim, tie a knot bundle, and trim ends evenly. Tighten so the pot sits centered and doesn’t swing too much. Finish by sealing cut ends with a tiny dab of clear glue so fibers don’t fray.
Plant hangers look like you spent hours, but pre-cut cord makes it manageable. The “macrame look” comes from spacing and knot consistency, not from complicated knots. Use natural cotton cord in a light tan — it looks good with green plants and matches wood shelves. This gift flatters friends who keep plants alive (or who want an excuse to try) because it upgrades a basic pot without changing the plant itself. The focal point is the knot bundle at the top, which catches the light when the plant moves.
AvoidDon’t hang a heavy planter with thin cord; it stretches and the knots loosen.
Pro tipMatch the cord thickness to the pot weight — thicker cord holds better and looks more substantial.
16. Handmade Soap Bar with Dried Orange Peel Top
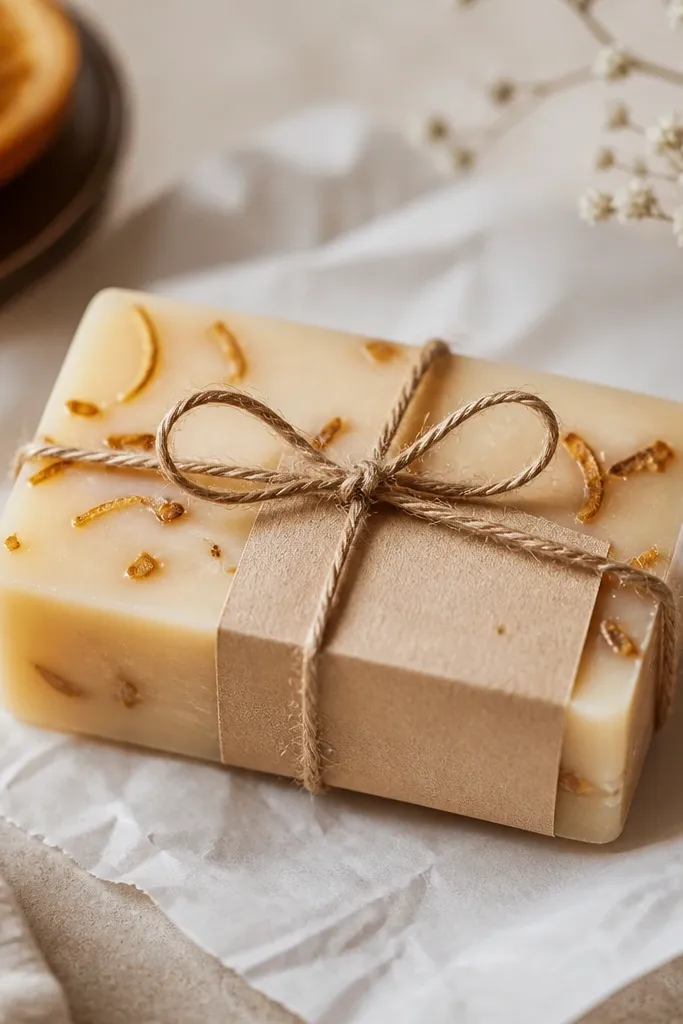
Melt clear soap base in short bursts, then stir in your fragrance at the right temperature for your product. Add a small amount of pale colorant if needed, then pour into silicone molds sized around 3 x 2 inches. Sprinkle dried orange peel on top while the soap is still liquid so it adheres. Let set in the freezer briefly if your base allows, then unmold carefully. Wrap each bar in parchment and tie with twine, attaching a small kraft label with the scent name.
Soap is an easy gift when you keep the design simple and the scent clean. Dried orange peel adds texture and looks expensive, especially when you use a clear or translucent soap base. Choose a warm scent like sweet orange + a hint of vanilla, and keep the color pale — think honey gold, not bright neon. It flatters people who like skincare gifts because the bar feels premium and smells fresh. Maintenance is manageable because soap is stable and doesn’t need special handling, just wrapping.
AvoidDon’t overload peel pieces — too many float and look uneven.
Pro tipDry the orange peel fully before using so it doesn’t add moisture and mess with the set.
17. Faux Leather Key Organizer Wallet with Snap Closure
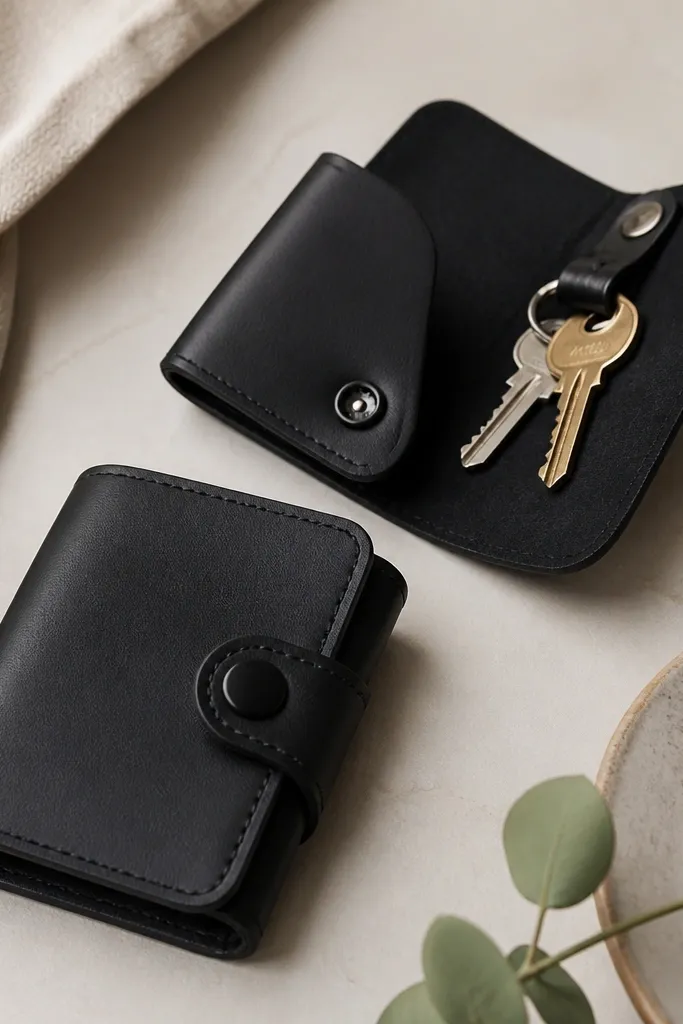
This is a “looks like you bought it” gift that’s still doable for non-experts. Faux leather hides minor unevenness, and snap closures make it low maintenance for the receiver. I like this design for friends who carry too many keys because it keeps everything from clinking in a bag. Pick colors that match common accessories: black, deep brown, or navy. The focal point is the snap button and the clean front panel. It flatters people who prefer practical style and doesn’t require personal sizing beyond fitting the key bundle.
Cut faux leather panels into a front and back roughly 4 x 6 inches each, plus a small interior strap about 1 inch wide and 3 inches long. Glue or stitch the interior strap to the back panel so it forms a pocket for keys. Layer the front and back panels and bind edges with a thin strip of faux leather or edge binding tape for a tidy finish. Install a snap button kit at the front center, following the kit instructions for alignment. Insert keys to test thickness, then trim any excess so the snap closes without strain.
Use a craft punch for snap holes; hand-tearing faux leather makes edges look rough.
Don’t use fabric glue only — it peels on faux leather snaps under tension.
18. Hand-Lettered Recipe Card Set with Magnetic Backing
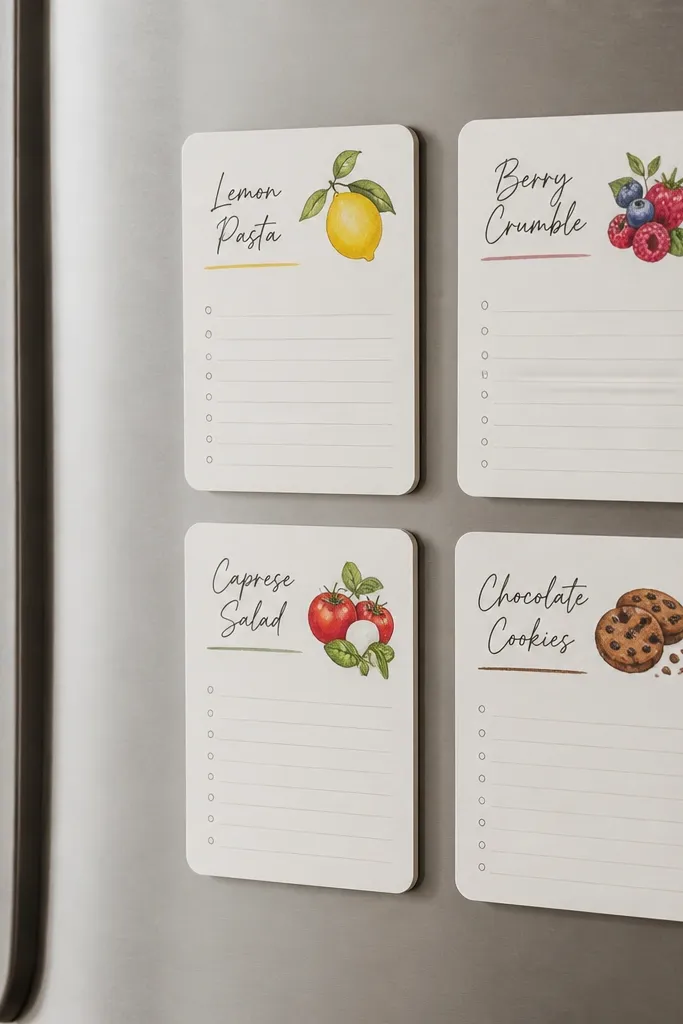
Print or sketch four recipe card layouts on cardstock sized around 4 x 6 inches. Write with a fine-tip brush pen or paint pen in consistent lettering, then add a small icon in the corner. Seal the ink with clear matte spray so it wipes clean if someone spills. Cut adhesive magnetic sheets to fit the back and stick them centered. Add a hole punch at the top only if you want them to go in a ring binder later.
Recipe cards feel personal because they’re useful, and magnetic backing keeps them from getting lost. I’ve made sets for friends moving apartments, and they use them within days. Keep the design clean: one line title, a short ingredient list, and a single icon. Use thick cardstock so the handwriting looks crisp and the card doesn’t bend. It flatters any kitchen style because you control the colors — I use cream cards with black ink and one small accent color like sage or terracotta.
AvoidDon’t use watery markers — the ink bleeds on cardstock and looks fuzzy.
Pro tipWrite the measurements in a way your friend will actually cook — grams for baking people, cups for everyone else.
19. Mini Macrame Coaster with Braided Edge
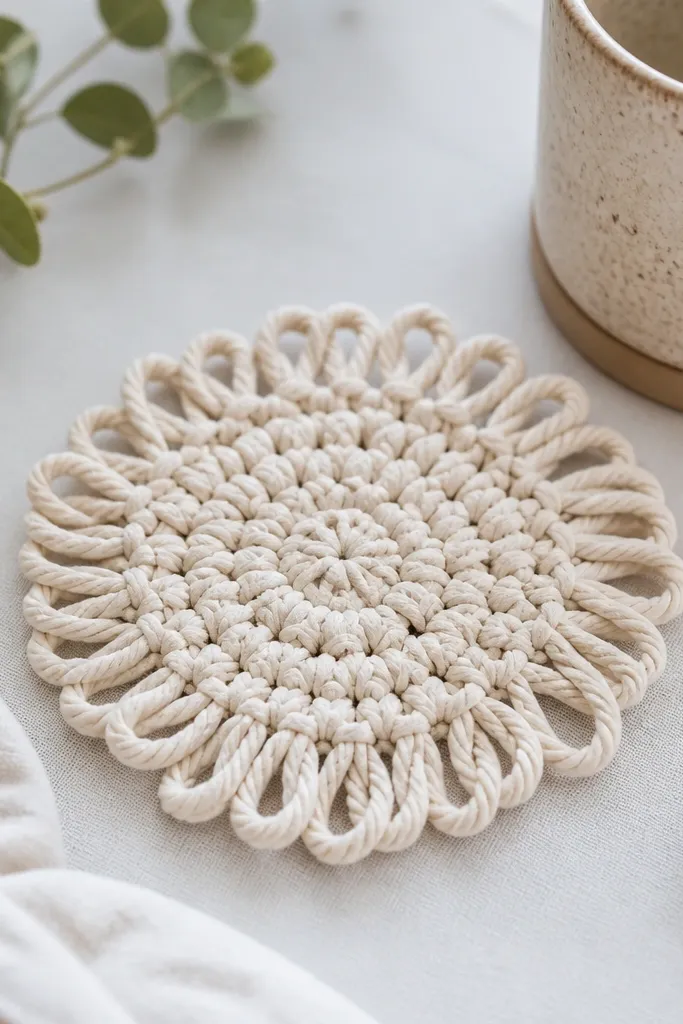
Coasters are small enough to finish quickly, and the braided edge makes them look like you bought them from a craft market. This design works best for friends who like neutral home decor. Use cotton cord in light beige, sand, or natural cream so it doesn’t clash with wood or ceramic. It flatters because it adds texture without adding color noise. The focal point is the tight center knot and the braided rim, which reads “handmade” even up close.
Cut 12-16 cord strands about 20 inches long and bundle them into a ring base using a tight knot. Arrange cords evenly around the center so the coaster stays symmetrical. Create a braided edge by grouping strands and looping around the perimeter in consistent turns, then finishing with a final knot. Trim ends evenly and dab clear glue on knot points to lock. Test with a cup to ensure diameter is around 4 inches so condensation doesn’t spill past the edge.
Use a stiff cord for coasters so they don’t sag after drying.
Don’t make it too large — oversized coasters look sloppy and take longer to dry.
20. Paint-Pen Galaxy Bookmark on Thick Paper
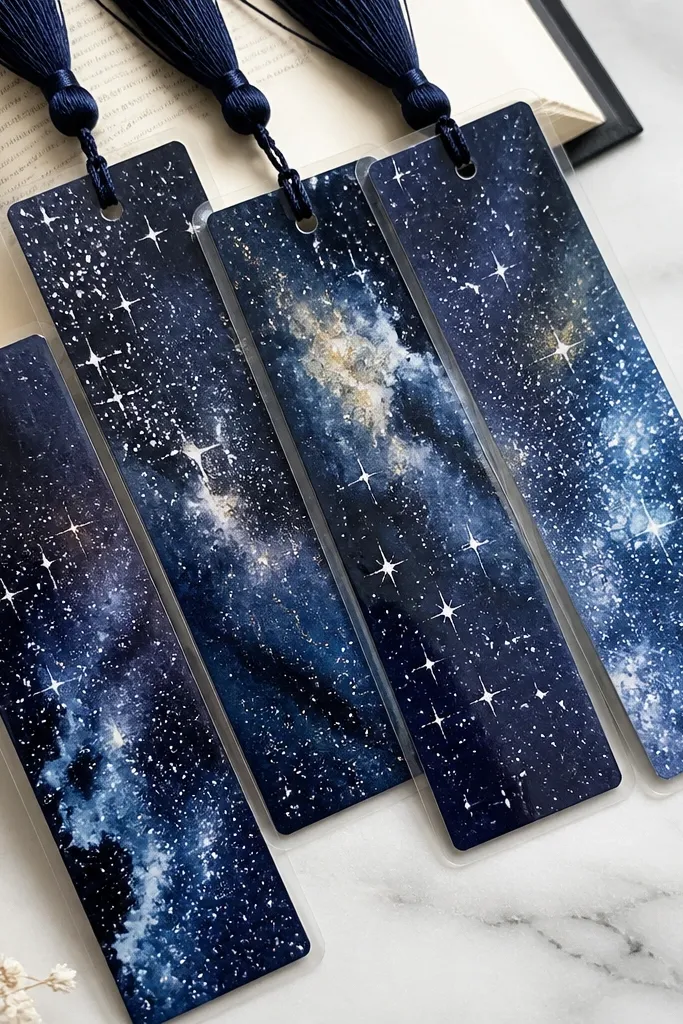
This is an aesthetic gift that still counts as low maintenance because you’re working on paper and sealing it. Thick cardstock holds paint better than thin paper, and lamination protects it from finger smudges. I like a dark navy base because it makes white star dots pop, and it looks good in almost any book. It flatters friends who read at night or like moody decor since the bookmark feels like a tiny piece of art. The focal point is the galaxy splatter and the star dots, done with paint pens for crisp control.
Cut bookmarks from 110 lb cardstock to 2.25 x 7.5 inches, then round corners. Paint a navy watercolor wash or acrylic base, leaving some lighter streaks for a cloudy effect. Add white paint pen dots and tiny short lines for stars, then splatter lightly with a toothbrush for a controlled drift. Let dry completely, then laminate with a pouch laminator. Punch a small hole at the top and attach a short tassel made from embroidery floss.
Do splatter last, and cover the desk with a sheet so you don’t end up with unwanted dots.
Don’t laminate before fully dry — trapped moisture fogs the laminate.



