
1. Oxblood Leather Key Fob with Brass Snap
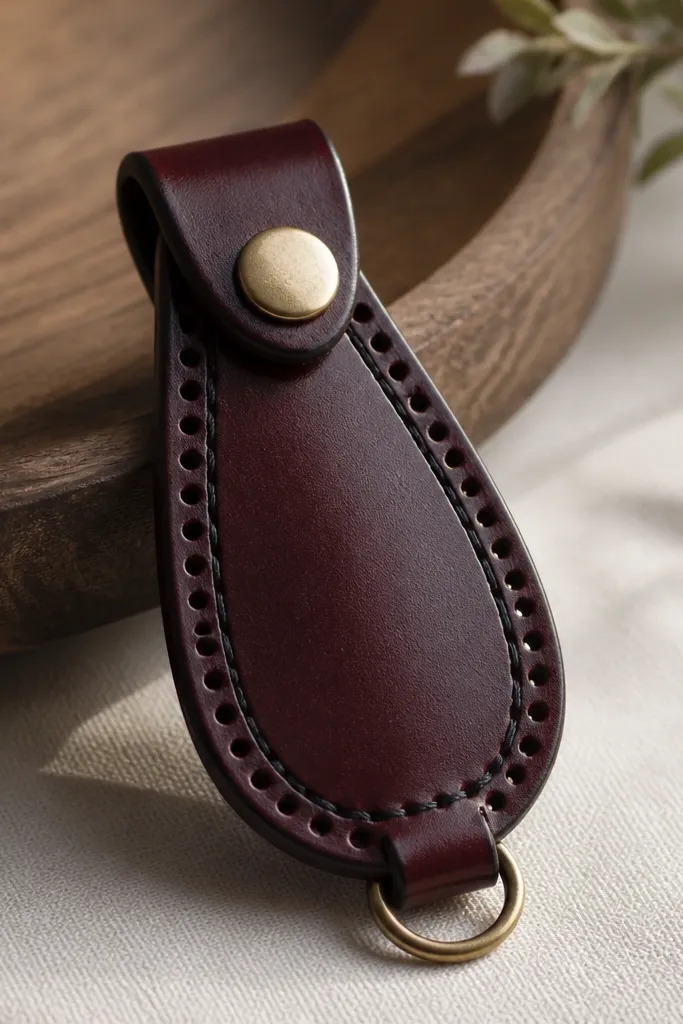
This key fob looks luxe because the hardware is real and the leather edge is finished. I use 4-5 oz leather in oxblood (it reads warm, not red), and I pair it with a brass snap so it catches light when your friend moves. The fob sits flat on a key ring and feels weighty, which is where the high-end look comes from. It works for any skin tone and any vibe because leather is neutral, and the brass adds a soft glow. It’s also a great gift for friends who always lose keys but hate clutter.
Pro tipSpritz the leather with a tiny amount of water before burnishing edges; it makes the rim go glassy instead of fuzzy.
Start by cutting a 3.5 in x 6 in rectangle of oxblood leather. Punch two rows of edge holes and stitch with waxed thread, then burnish the edges with a little beeswax so the rim looks smooth. Mark the snap position, set the brass snap halfs, and attach the key ring using a small split ring. Finish by trimming any thread tails and doing a quick rub with leather conditioner so it looks even. Keep the stitching consistent — one stitch width from edge to edge — so it reads intentional.
AvoidAvoid using thin, floppy leather — it makes the snap look cheap.
2. Champagne Gold Resin Name Tag Keychain
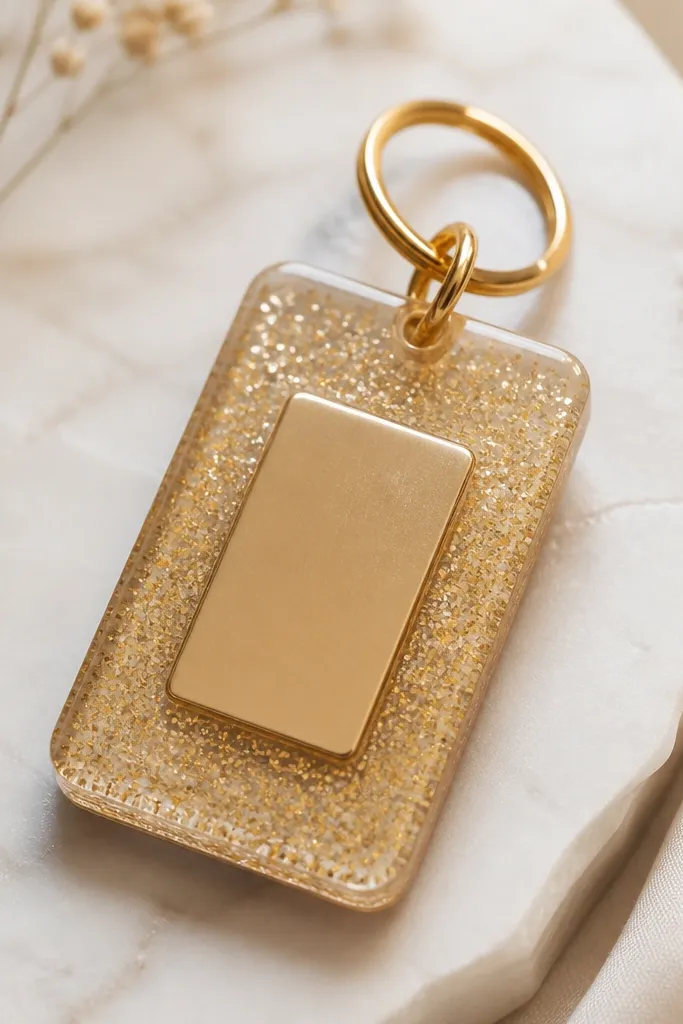
This one feels luxe because resin lets you build a clean, glassy surface with a controlled sparkle. I use champagne gold mica so it glows without looking like craft glitter. The name plate gives it a personal touch, and the rounded corners keep it from looking like a DIY coaster. It suits friends who like minimal accessories because the design stays simple but polished. It also looks great on warm undertones because champagne gold flatters most skin tones.
Start with a silicone rectangle mold and mix clear resin with champagne gold mica until it looks like wet champagne. Pour a thin base layer, let it gel for 10-15 minutes, then place a small stamped metal name tag in the center. Add a final resin layer to fully cover the plate, pop bubbles with a gentle heat tool, and let cure overnight. Demold carefully, then sand only the edges lightly to remove any flash and wipe clean. Attach a gold keychain ring using a jump ring plier.
Stamp the name tag with a matte finish; the contrast between matte metal and glossy resin looks expensive.
Avoid overloading mica — if it looks like glitter dust, it reads cheap.
3. Mini Herb Oil Bottle with Hand-Lettered Label
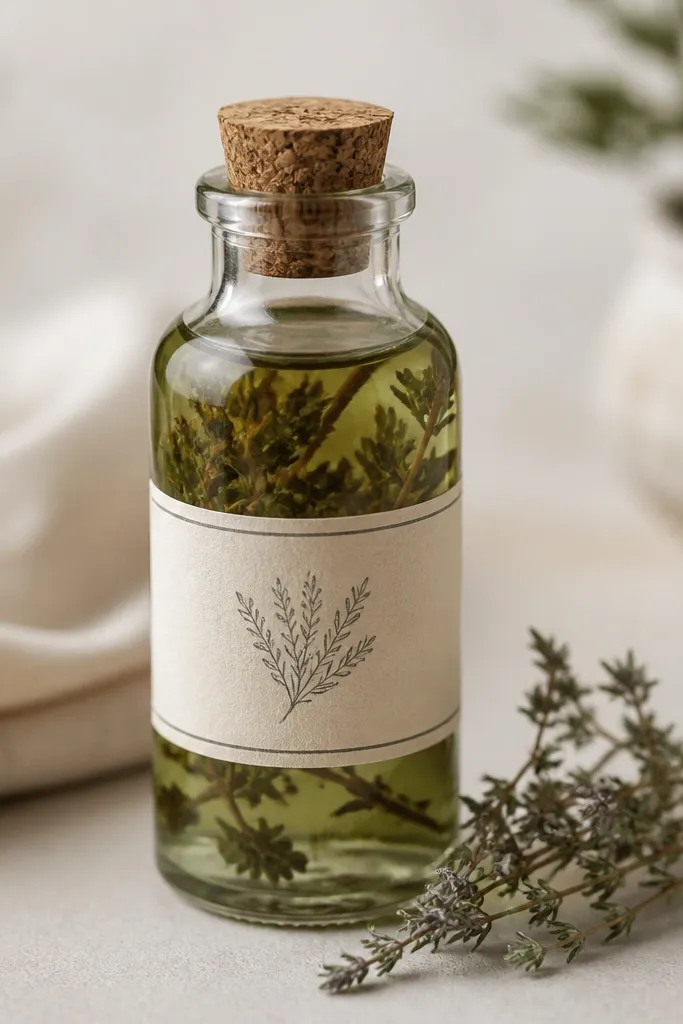
A mini herb oil bottle looks luxe because it’s useful and visually clean. I use a 100 ml bottle with a cork or screw cap and fill it with olive oil infused with rosemary and lemon peel, so the liquid stays light and glossy. The hand-lettered label is where the gift turns from “homemade” to “designed.” Keep the label cream paper and black ink; it reads modern and expensive. This gift works for friends who host, cook, or just like having a nice bottle on the counter.
Start by infusing oil: warm olive oil gently with rosemary for 20-25 minutes, then cool and strain. Pour into a clean bottle, then wipe the glass with a lint-free cloth so no fingerprints show. Cut a label sized to wrap the bottle, and letter it with a fine-tip black pen on cream cardstock. Seal the label with a clear matte label tape so it doesn’t smear if the bottle sweats. Tie a thin ribbon around the neck or skip ribbon and let the label be the only decoration.
Write the date on the bottom label — it makes the gift feel cared for and helps your friend use it before it fades.
Avoid glossy sticker labels printed on cheap paper; they look flat and mass-made.
4. Sage Green Quilted Pouch with Magnetic Closure
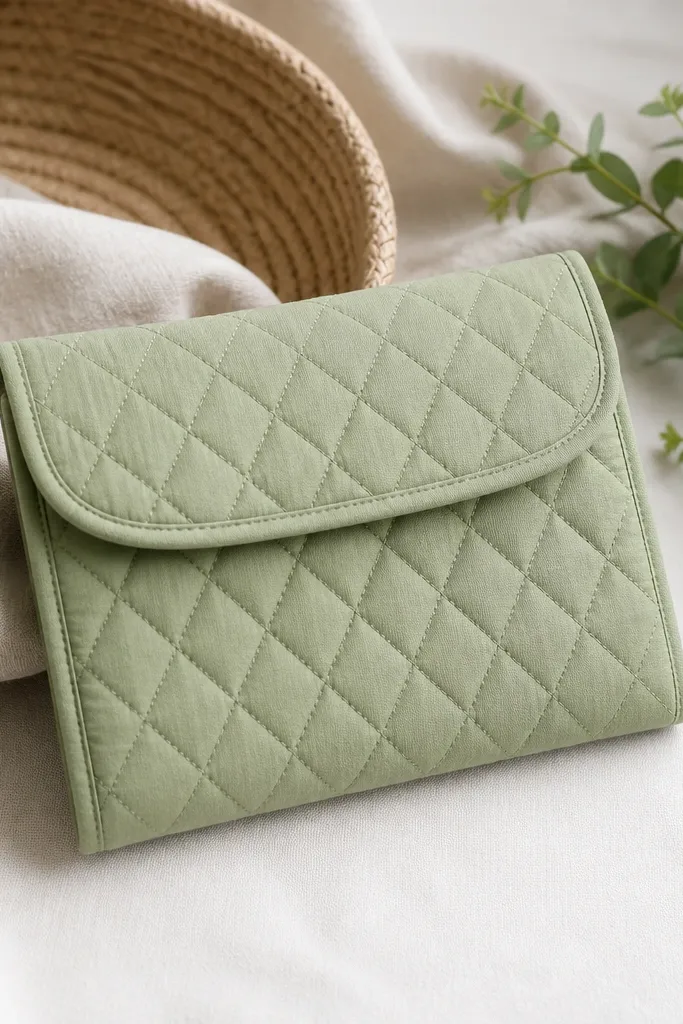
Quilted fabric plus a magnetic closure reads luxe because it looks structured and intentional. I use sage green cotton or cotton-linen blend with a thin batting layer, then topstitch in matching thread. The magnetic snap keeps the front smooth, no bulky zipper pull, so it sits nicely in a tote. This one flatters most wardrobes because sage goes with denim, neutrals, and gold jewelry. It’s perfect for makeup, chargers, or travel toiletries because it holds shape.
Start by cutting a front and back panel and adding a thin batting layer between them. Quilt the top panel in a simple grid or diamond pattern, then layer with the back panel and sew around the edges with a 1/4 in seam. Turn right-side out, press hard with steam, then topstitch 1/8 in around the perimeter for a crisp finish. Install a concealed magnetic snap on the flap and add a small fabric tab for opening. Finish by adding a lining pocket if you want extra function.
Use a walking foot for quilting; it keeps the layers from shifting and makes the stitching look even.
Avoid stretchy fabric — it warps the flap and makes the snap misalign.
5. Velvet Candle Sleeve with Monogram Tag
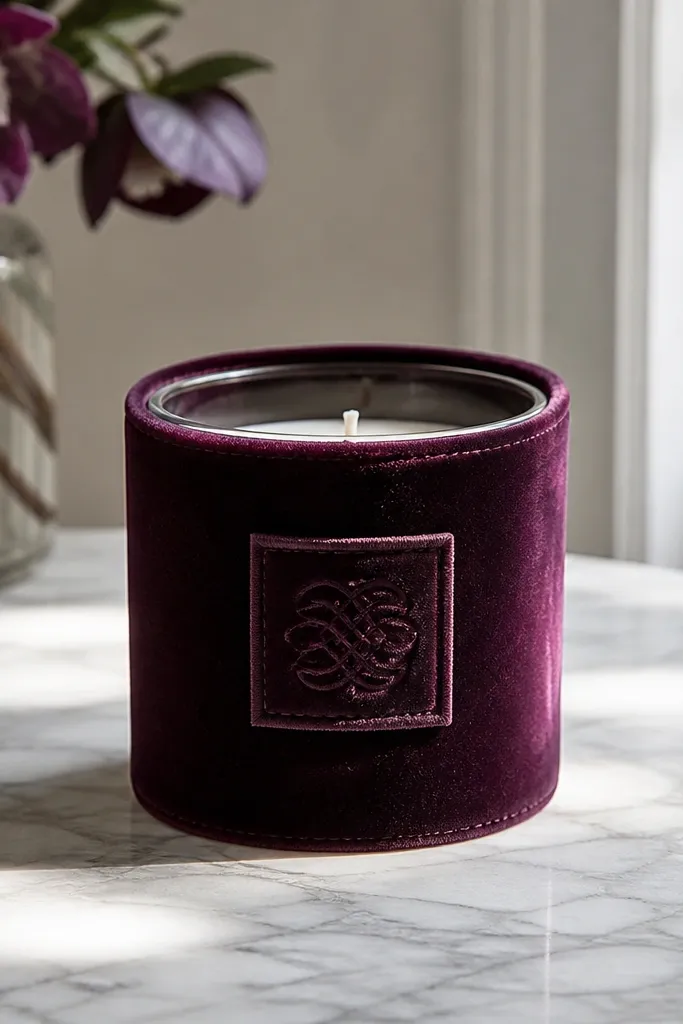
This looks high end because velvet makes even a simple candle feel dressed. I wrap the glass jar with a sleeve in deep plum or forest green velvet and add a monogram tag in matching thread or a small leather tag. The monogram gives it a personal feel without adding clutter. It’s flattering for friends who love cozy nights, and it looks great in photos under warm lighting. The luxe part is the sleeve fit — snug at the jar, not baggy.
Start by measuring the candle jar circumference and height, then cut velvet to wrap with a 1/2 in seam allowance. Sew the sleeve seam, turn it right-side out, and press so the nap lies smooth. Cut a simple tag from faux leather or thick cotton webbing, stitch the monogram with embroidery thread, then attach it to the front. Slide the sleeve over the jar and tuck the bottom edge so it sits flush. Add a thin piece of satin ribbon around the middle if you want extra structure.
Hand press velvet with a cool iron and a pressing cloth; heat can flatten the nap and dull the look.
Avoid bulky decorations — they snag on the velvet and ruin the clean silhouette.
6. Marble Look Soap Bars in Concrete Molds
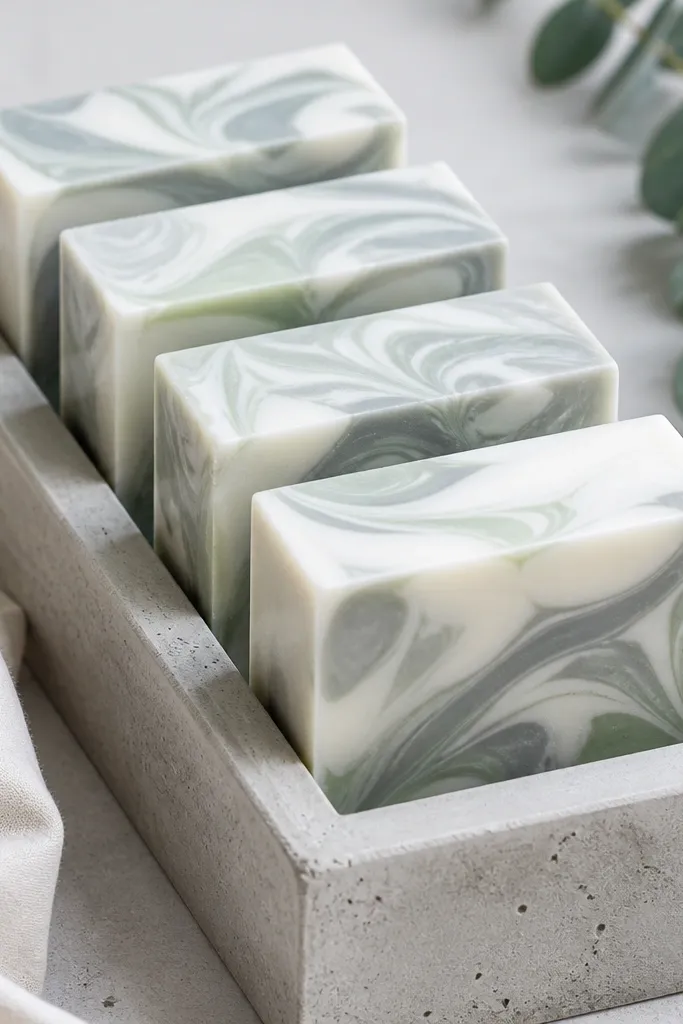
Marble soap looks luxe because the pattern is controlled and the bars have clean edges. I use a white soap base and swirl in gray and sage using a spoon, then pour into a mold with sharp corners. The concrete-style mold makes the top look smooth and the bars come out with crisp definition. This gift works for friends who love skincare and also for people who just like nice things in the bathroom. The scent stays subtle when you pick light essential oils like lavender and cedar.
Start by melting clear or white soap base in short bursts until it’s fully liquid. Add your fragrance and colorants, then pour a thin layer into the mold. Drop gray and sage drops on top and swirl with a chopstick once or twice — stop early so it looks like marble, not muddy paint. Pour the rest of the base, tap the mold to release bubbles, then spritz the top with rubbing alcohol. Let cure until firm, unmold, and cut if needed.
Add mica colorants very lightly; over-coloring turns marble gray instead of soft and luxe.
Avoid over-swirl — once it turns uniform, it stops looking like marble.
7. Knotted Silk Hair Scarf in Dusty Rose
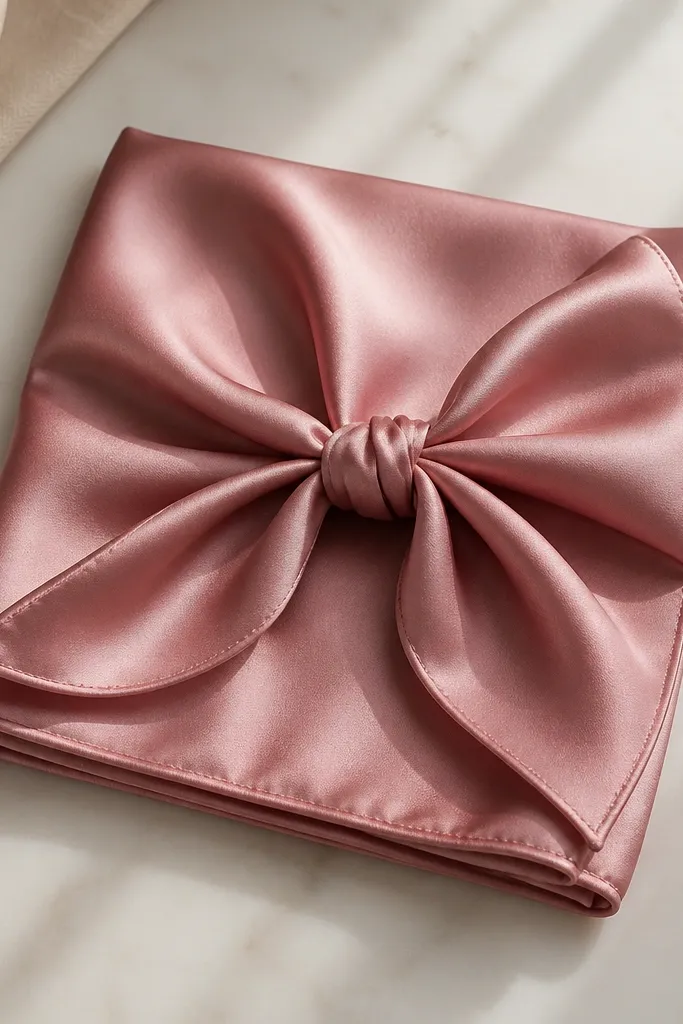
A silk hair scarf looks expensive because silk drapes and reflects light smoothly. I choose a dusty rose with a slight sheen, then finish the edges with a narrow hem so it doesn’t fray. The knot style is simple but reads luxe because the fabric does the work. It’s flattering for friends with warm or neutral undertones, and it makes any basic outfit look styled. This is also a low-stress gift if you’re not sure what perfume or makeup they like.
Start by ironing the scarf flat so it doesn’t fight you when folding. Fold into a square, then tie a small center knot using the same length on both sides. Secure the knot by tucking one tail under the other and leaving a small tail visible for shape. If you’re sewing, hem the edges first with a 1/4 in turn and stitch close. Wrap it around a ponytail or bun and tie loosely — you want movement, not tight tension.
Use a light fabric spray on the scarf and let it dry fully; it reduces static and keeps the drape smooth.
Avoid stiff polyester scarves — they look shiny in the wrong way.
8. Satin Bow Gift Wrap Belt for Bags
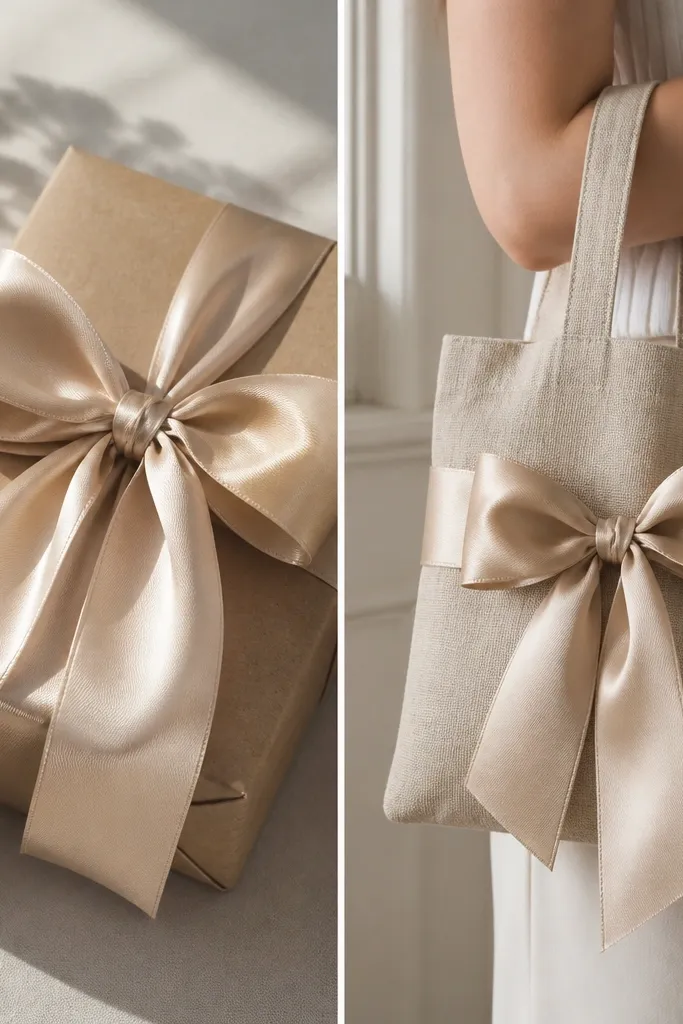
This gift idea is luxe because it’s functional after the unwrapping. I make a satin bow “belt” that wraps around a small tote or storage bag, so your friend can reuse it on a weekend outing. The key is satin quality — choose a medium-weight satin that holds a fold, not thin ribbon that collapses. Champagne works with almost any wardrobe, and the bow gives a polished look without adding bulk. It’s perfect when you want the gift to feel thoughtful even before they open it.
Start with a small tote or zip bag and wrap it in tissue or skip wrapping if the bag looks good. Cut a strip of satin 1.5 in wide and long enough to wrap around twice with a tail. Tie a classic double bow with tightly pinched loops, then tack the center with a hand stitch so it holds shape. If you’re attaching permanently, sew the bow to a removable tag that clips with a small binder clip. Add a small charm or tag with their initial for personalization.
Pin the bow in place for 10 minutes before stitching; satin shifts while you work.
Avoid floppy ribbon — it won’t keep the bow shape and looks like party supplies.
9. Custom Photo Transfer Coaster Set (Stoneware Look)
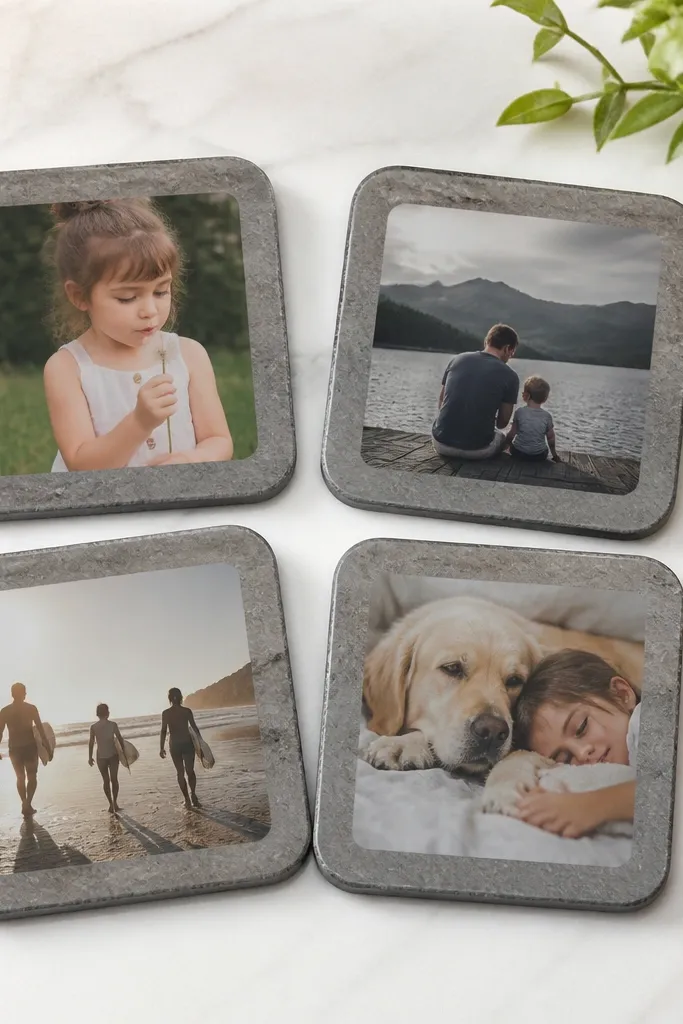
Photo coasters look luxe when the finish is glossy and the background stays neutral. I use ceramic-style tile coasters or MDF coasters sealed with a clear topcoat, then transfer a photo using a photo transfer medium. Choose a photo with high contrast and warm tones, like golden hour, so it doesn’t look washed. The neutral gray background makes the images look framed, not pasted. This gift works for friends who have a coffee table and like decor that’s personal.
Pro tipUse photos with a single subject — coasters look best with less clutter in the image.
Start by choosing four matching photos and resizing them to fit your coaster centers with a small margin. Apply photo transfer medium to the coaster surface, place the photo face down, and rub gently to remove bubbles. Peel once the medium sets according to your product instructions, then seal the image with 2-3 thin coats of clear topcoat. Let each coat dry fully before the next. Finish with felt pads on the bottom so they don’t scratch surfaces.
AvoidAvoid thick layers of topcoat in one go; it creates bumps.
10. Woven Friendship Bracelet with Gold Accent Beads
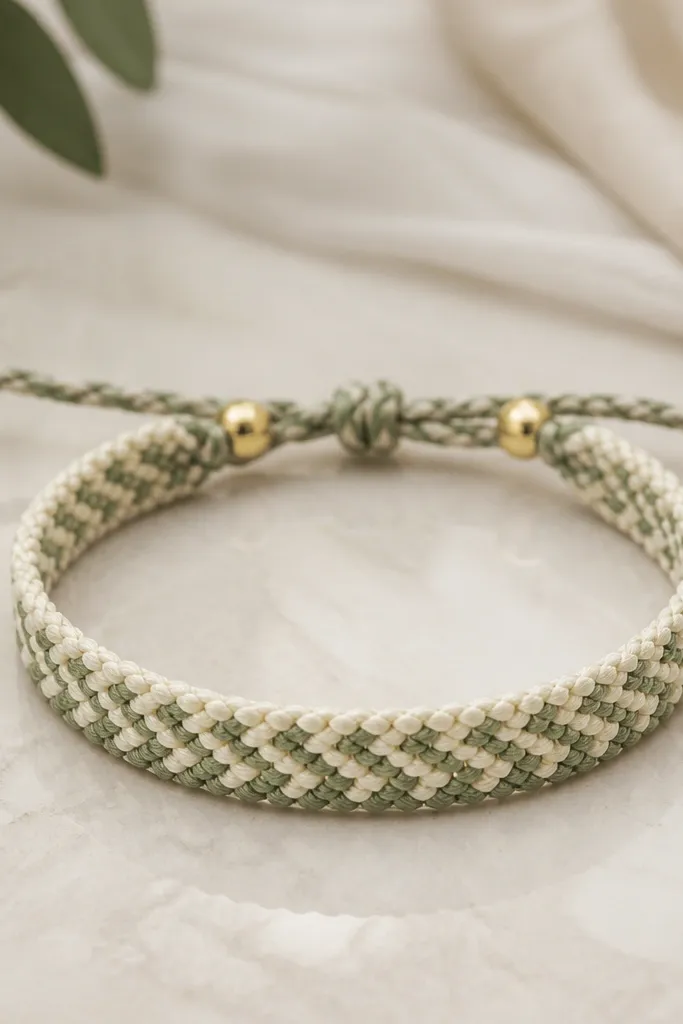
Friendship bracelets can look luxe when the materials look like jewelry, not craft string. I weave with thicker embroidery floss or satin cord, then add tiny gold accent beads at the center and at the clasp. Tight weaving matters — you want no gaps between threads. The neutral base plus one gold moment reads elevated, and it pairs with gold rings and watches. This is perfect for a friend who wears minimal accessories but loves sentimental details.
Start by cutting 6-8 strands of embroidery floss in cream and muted green, then tie a tight knot at one end. Weave in a simple diagonal pattern, keeping tension even so the bracelet stays flat. Add a gold accent bead every few rows — I place mine at the midpoint and again near the clasp — and secure it by weaving around the cord. Finish by knotting the ends cleanly and trimming frays. Optionally attach a small adjustable slider clasp made from a thin gold chain.
Use a clipboard to hold the bracelet steady while you weave; it keeps tension consistent.
Avoid loose weaving — gaps make it look like a craft from a table at school.
11. Terracotta Planter with Painted Minimal Face
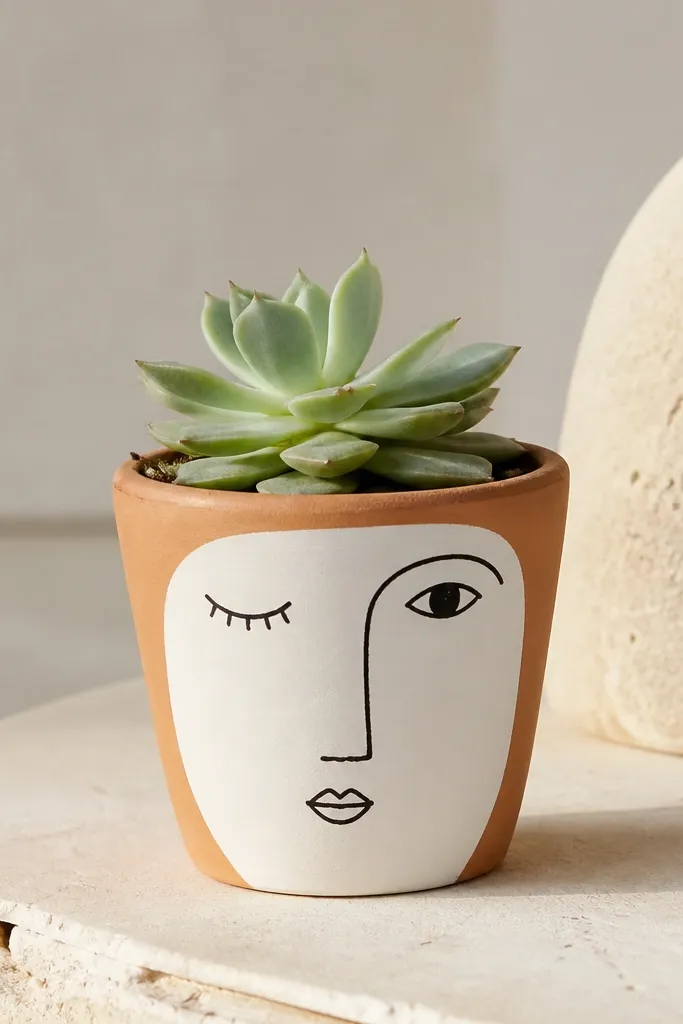
A mini planter looks luxe when it’s simple and the paint job is crisp. I use a small terracotta pot, seal it with a matte primer, then paint a minimal face with warm white and black acrylic. The face is tiny and centered, so it reads like modern ceramics. Add a succulent or pothos cutting and keep the soil clean — no messy spills on the pot rim. This suits friends who like decor but don’t want fussy maintenance. The matte finish makes it feel like a boutique item.
Pro tipUse painter’s tape to mask the face edges; it makes the lines look like they came from a studio.
Start by washing the pot and letting it dry completely. Prime the outside with matte primer, then paint the face using a fine liner brush so the lines stay sharp. Let the paint dry and seal with a matte clear coat so it doesn’t scuff when handled. Place the plant and fill with well-draining soil, wiping any soil off the rim. Add a small paper tag with the plant name in neat handwriting.
AvoidAvoid painting over dusty terracotta — the paint peels and ruins the clean look.
12. Linen Makeup Bag with Leather Corner Tabs
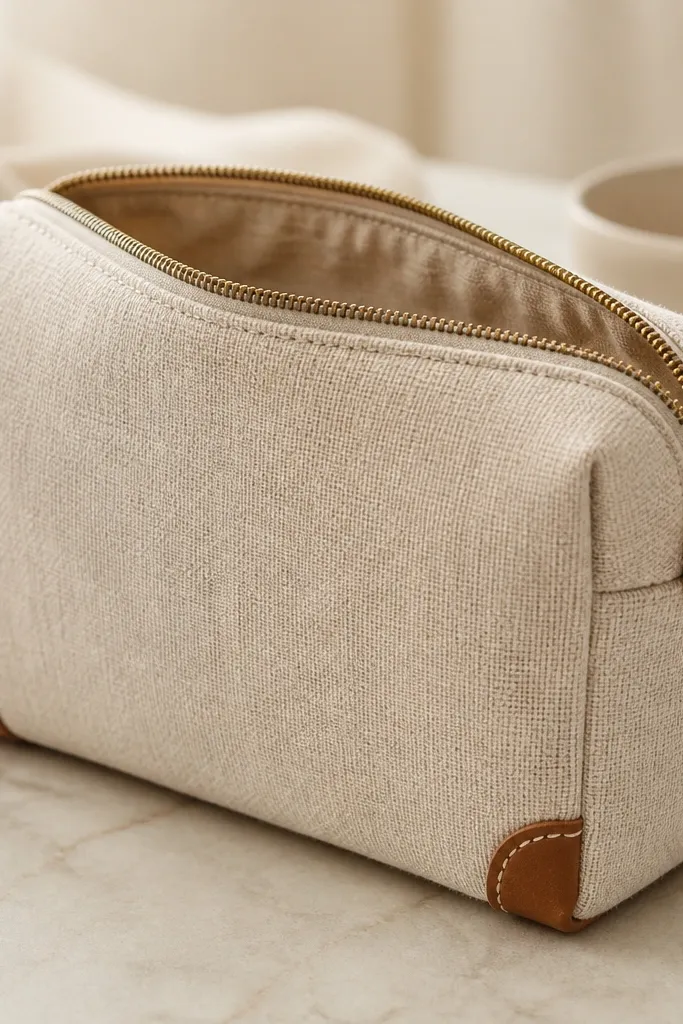
This bag looks high end because it has structure at the corners and real leather accents. I use linen in cream or natural, then add a boxed bottom so it stands up without collapsing. A brass zipper pull and leather corner tabs give it that “buy it online for $60” vibe. The interior lining keeps it clean, and the neutral color works for every skin tone and every wardrobe. It’s a great gift for makeup, brushes, or skincare travel kits.
Start by cutting linen panels and a lining in a matching neutral tone, then sew the outer and inner separately. Add boxed corners by pinching the bottom corners and sewing a small rectangle, then trim and turn. Install the brass zipper first, then sew the lining to the outer around the top edge. Add leather tabs by cutting small squares, punching a hole, and stitching them to the corner seams before closing the bag. Press flat and topstitch 1/8 in around the seams so it looks crisp.
Use zipper foot on your machine; it keeps the seam tight and makes the zipper sit flush.
Avoid skipping interface or batting — soft bags look like they came from a beginner kit.
13. Coffee Scrub Body Polish Jar with Brown Sugar Texture
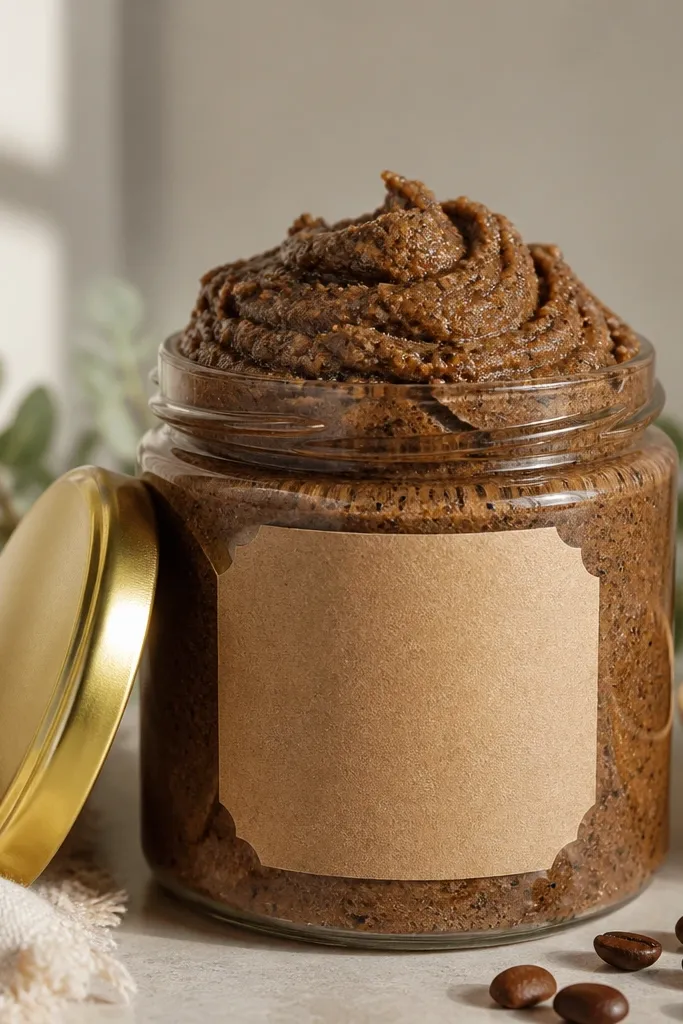
This gift feels luxe because the texture looks thick and whipped, not watery. I use finely ground coffee and brown sugar with a small amount of coconut oil, then whip it until it holds shape in the jar. The scent is warm and not sharp when you keep the ratio right, like coffee plus a hint of vanilla. The gold lid and kraft label add a calm, upscale look. This works for friends who love self-care and also for friends who are hard to shop for.
Pro tipGrind coffee finer than you think — gritty scrub looks rough in the jar.
Start by mixing brown sugar and finely ground coffee, then add coconut oil slowly while stirring until it becomes a paste. Whip with a spoon or hand mixer for 30-60 seconds so it looks airy and holds texture. Spoon into a clean glass jar, wipe the rim, and cap with a gold lid. Label it with usage instructions and the date you made it. If you want extra polish, add a small strip of ribbon around the lid band.
AvoidAvoid watery oil — it separates and makes the jar look unfinished.
14. Pressed Flower Bookmark Set in Clear Resin Domes
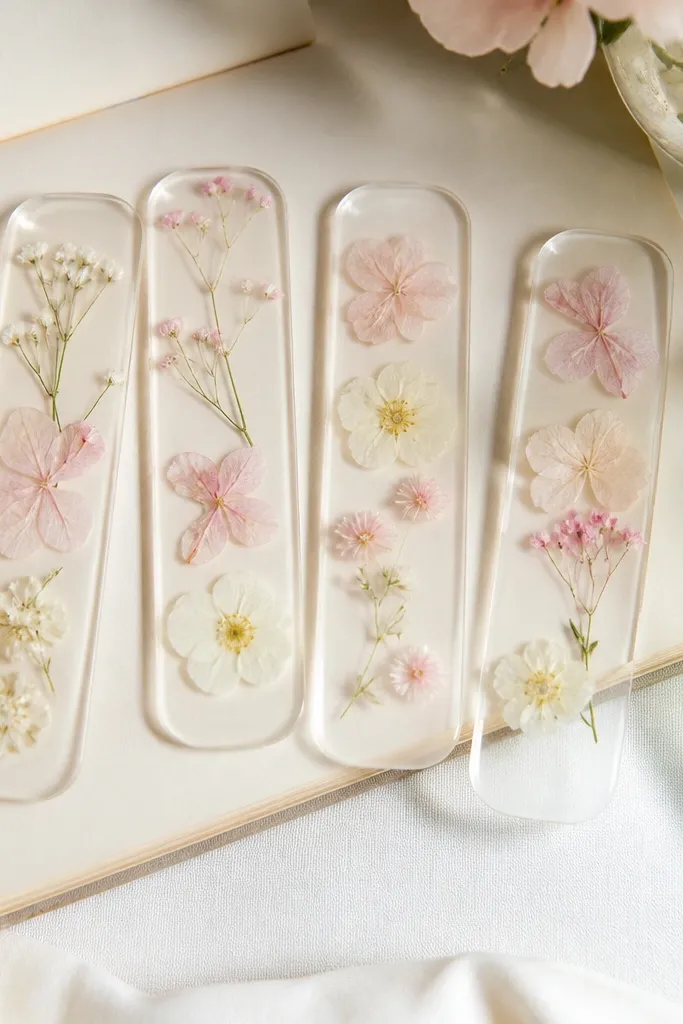
Pressed flowers look luxe when they’re sealed under a clear dome and the edges are smooth. I use tiny pressed blossoms in pale pink, blush, and white, then pour a thin layer of clear resin to lock them in. The resin dome makes the flowers feel like jewelry instead of paper. This gift works for book lovers who keep bookmarks in their bags and need something that won’t bend or tear. It also photographs beautifully on dark spines.
Pro tipTrim the pressed flowers so no paper edges show; it makes the dome look clean.
Start by pressing flowers flat between book pages for 1-2 weeks so they don’t warp under resin. Choose a bookmark base in clear acrylic or thick cardstock and cut to size. Place one flower per dome mold and pour a small resin base, then set the flower and cover with resin. Pop bubbles carefully with light heat and let cure fully without moving the mold. Attach the dome to a bookmark base using clear adhesive or resin glue, then seal edges if needed.
AvoidAvoid thick resin — too much height makes bookmarks snag in books.
15. Monogrammed Knit Mug Cozy with Cable Stitch
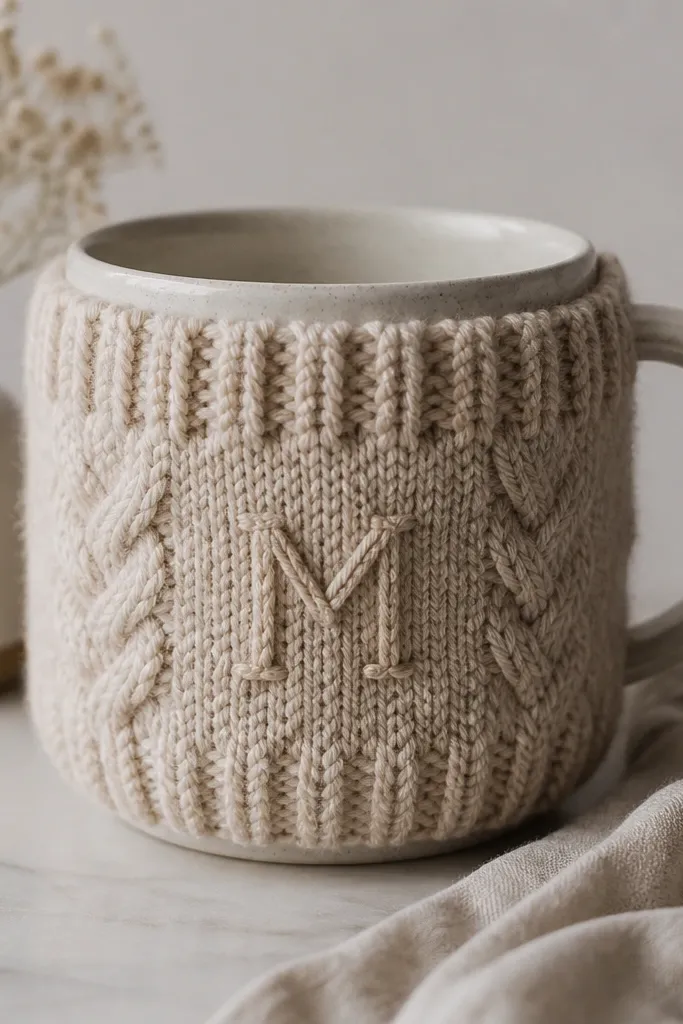
A mug cozy looks luxe when it fits snug and has texture, not just a plain sleeve. I knit in oatmeal or cream chunky yarn, then add a small cable stitch panel for visual interest. The monogram can be embroidered in a darker thread like espresso or charcoal. It’s flattering because neutral knit tones look good with any kitchen style, and the cozy hides the mug’s plain look. Friends who drink coffee or tea every day will use this constantly.
Start by measuring your mug height and circumference so the cozy covers the sides fully without drooping. Knit a ribbed top band so it grips the mug and doesn’t slide, then switch to a simple cable panel in the center. Keep the stitches tight so the cozy holds shape and feels substantial. Embroider the monogram on a flat front panel once the cozy is done and blocked. Steam lightly to shape, then test-fit on the mug and trim any loose edge.
Block the piece before finishing; steam and gentle shaping makes knit textures look crisp.
Avoid thin yarn — it won’t insulate and looks flimsy.
16. Hand-Painted Silk Scarf with Fabric Paint Dots
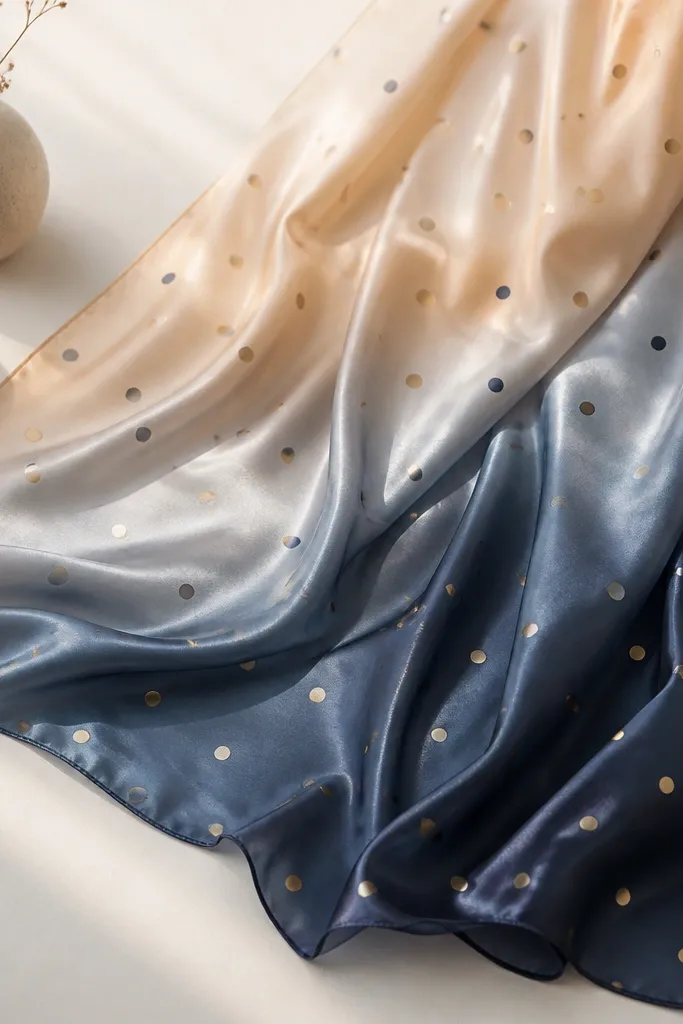
This gift reads luxe because silk paint looks like design, not craft, when the dots are even. I use fabric paint or silk dye with a simple pattern: a light wash background and small dot clusters in gold and navy. The scarf drapes and moves, and that motion makes the color look expensive in real life. It suits friends with any wardrobe because navy and gold work with denim, black, and neutrals. It’s also a great choice if your friend loves accessories but hates clutter.
Pro tipPractice dot spacing on paper first; even spacing is what makes it look designer.
Start by soaking the silk in clean water and laying it flat on plastic. Apply a light wash of color with a sponge, then rinse lightly if your product requires it. Add gold and navy dots using a dotting tool or the tip of a round brush, spacing them evenly so the pattern looks intentional. Let cure according to the paint instructions, then heat-set if required. Finish by hemming the edges if you’re using raw silk, or use a scarf that already has finished edges.
AvoidAvoid thick paint lines — they crack and look like sticker dots.
17. Luxe Faux Leather Journal with Elastic Pen Loop
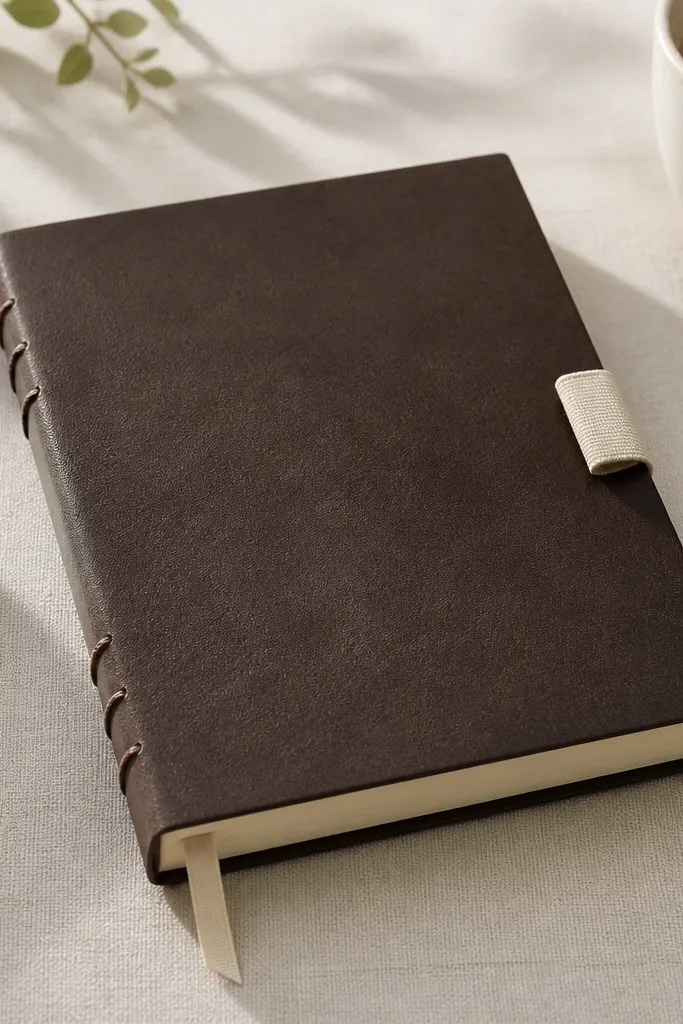
A journal looks high end when the cover feels solid and the inside is tidy. I use dark chocolate faux leather or real leather, then build a stitched spine so it doesn’t bow. The elastic pen loop is in a contrasting cream, which makes the front look styled, not plain. A ribbon bookmark inside adds a small luxe detail your friend will notice. This gift works for friends who plan, journal, or need a place for recipes and ideas.
Pro tipUse a bone folder along the spine edges; it makes the cover look sharply finished.
Start by cutting cover panels and a spine strip, then glue and stitch along the spine for a firm structure. Add a cream elastic loop by anchoring it under the front cover seam so it holds a pen without stretching out. Insert thick paper (like 120 gsm or a lined refill) and attach the binding so pages open flat. Add a ribbon bookmark by stitching it into the inner cover. Finish by trimming edges cleanly and burnishing or pressing the cover so it looks crisp.
AvoidAvoid cheap thin paper — it makes the journal feel light and unfinished.
18. Scented Drawer Sachets in Cotton Muslin
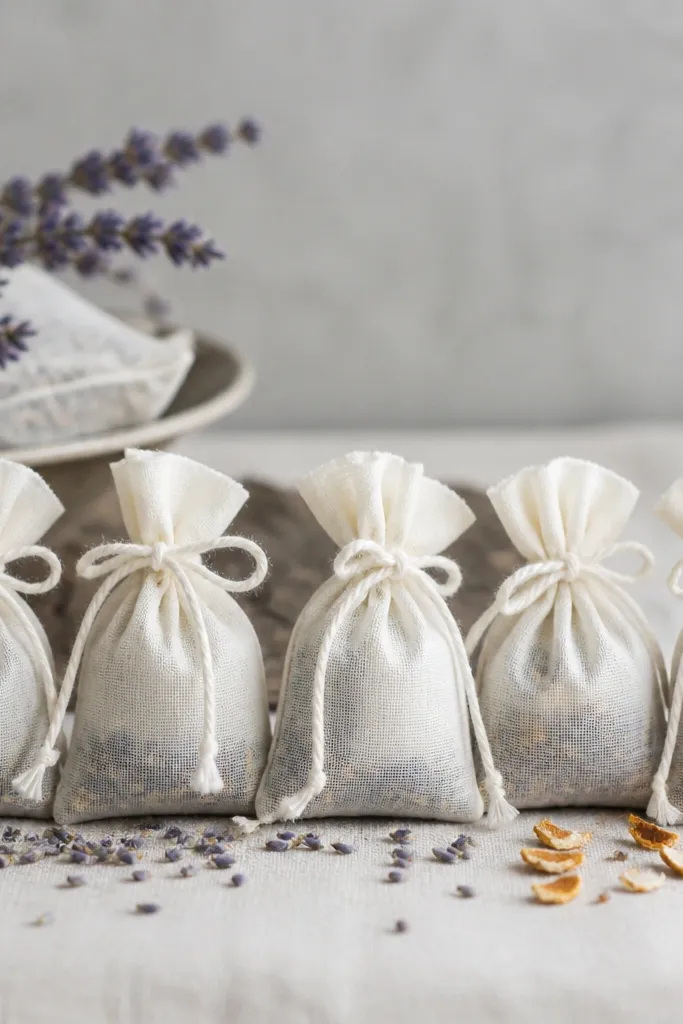
Drawer sachets feel luxe because they add a clean scent without any visible mess. I use cotton muslin so the fabric breathes, then fill with dried lavender and a few strips of dried orange peel for a brighter top note. The twine tie and simple shape look handmade but intentional. This is perfect for friends who like linen closets, guest rooms, or just want clothes to smell fresh. It also works as a small add-on gift if you’re building a bundle.
Pro tipWarm the orange peel in a dry pan for 30 seconds to boost scent before you mix it.
Start by drying lavender fully and cutting orange peel into thin strips. Mix in a small bowl — I do about 2 parts lavender to 1 part orange peel by volume. Cut muslin squares, fill, and tie with twine leaving enough slack so the sachet puffs. Stitch a tiny reinforcement knot if the twine frays easily. Label the sachets on the back with a date so your friend knows when to refresh the scent.
AvoidAvoid using too much essential oil — it stains fabric and smells harsh.
19. Gold Foil Hand-Stitched Greeting Card Envelope Set
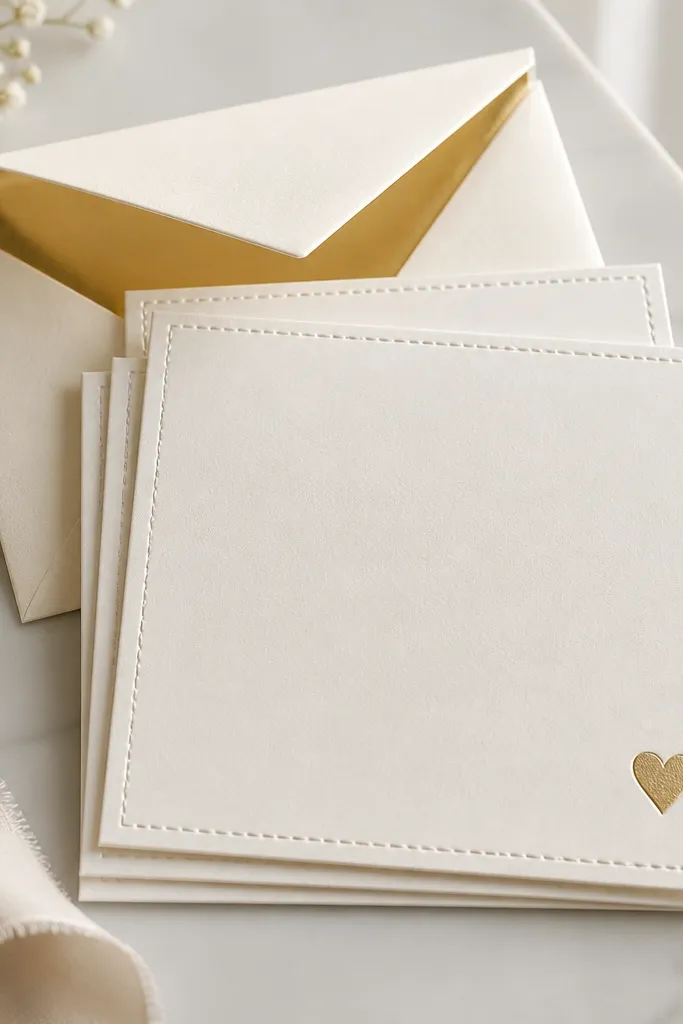
Paper gifts can look luxe when the card is thick and the finishing is physical. I print or cut on 120-140 lb cream cardstock, then add a stitched border with gold thread for a clean, tactile frame. The matching envelope also gets the same cream paper and a neat crease so it looks intentional. Gold foil stays classy when it’s small and placed in one corner. This is great for friends who keep cards in a keepsake box.
Start by cutting cards to a finished size like 5x7 in and fold on a bone-folded crease. Add gold foil elements using a small stamp or foil transfer sheet, keeping it to one spot. Stitch a border around the card edges with a simple running stitch, then do the same for the envelope flap. Write your message on the inside with a gel pen so it doesn’t feather. Seal with a thin strip of washi tape that matches the gold tone.
Use a piercing tool to mark stitch holes; it keeps the border straight without measuring every time.
Avoid thin printer paper — it warps and kills the luxe feel fast.
20. Bamboo Handle Spa Brush Set with Custom Label
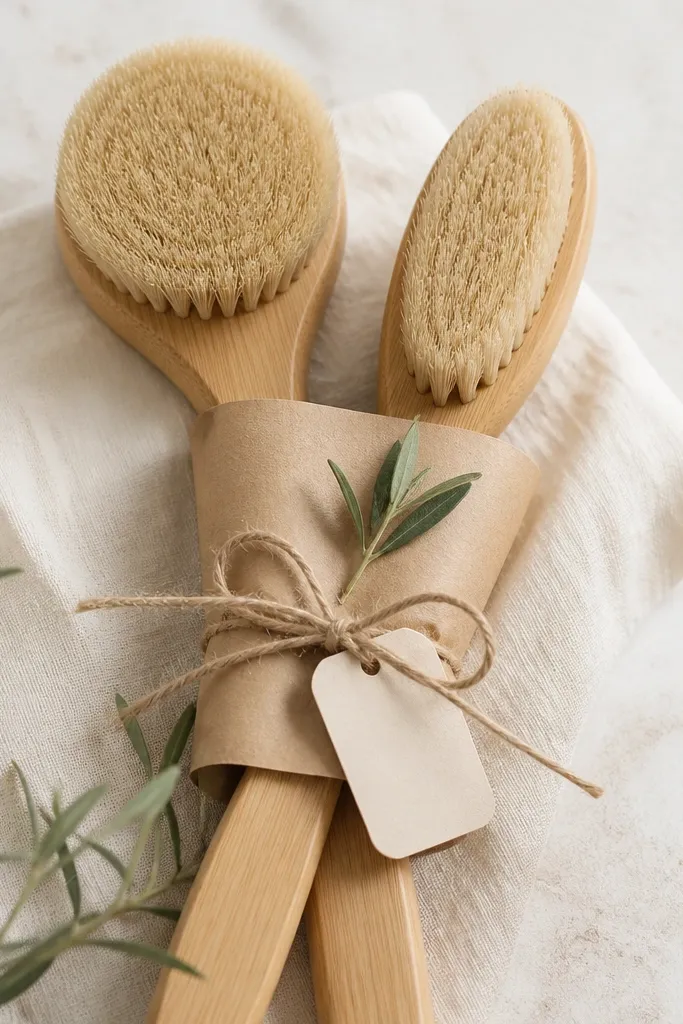
A spa brush set looks luxe because it’s practical and the materials feel real. I wrap two brushes — one for dry brushing and one for body massage — and add a custom label with their names or uses. Bamboo handles look warm on camera and in real life, and bristle texture reads as quality. This works for friends who like skincare routines and also for anyone who likes “self-care but simple.” It’s also a good gift if you want low mess and fast assembly.
Start by buying brushes with natural bristles and bamboo handles, then wipe them clean so they look flawless. Wrap each brush in kraft paper, then stack them so the handles align. Tie with twine and add a small label using thick cardstock and a black pen. If the brushes are too tall, cut the kraft wrap shorter so the tie sits cleanly at the midpoint. Finish by adding a small ribbon strip in a neutral color so it doesn’t look like a grocery bundle.
Write the routine on the label in tiny text — like “Dry brush 2-3x/week” — it makes the gift feel personal.
Avoid glossy stickers — they peel and look like a mass-market product.
21. Rose Gold Wire Wrapped Mini Photo Frame
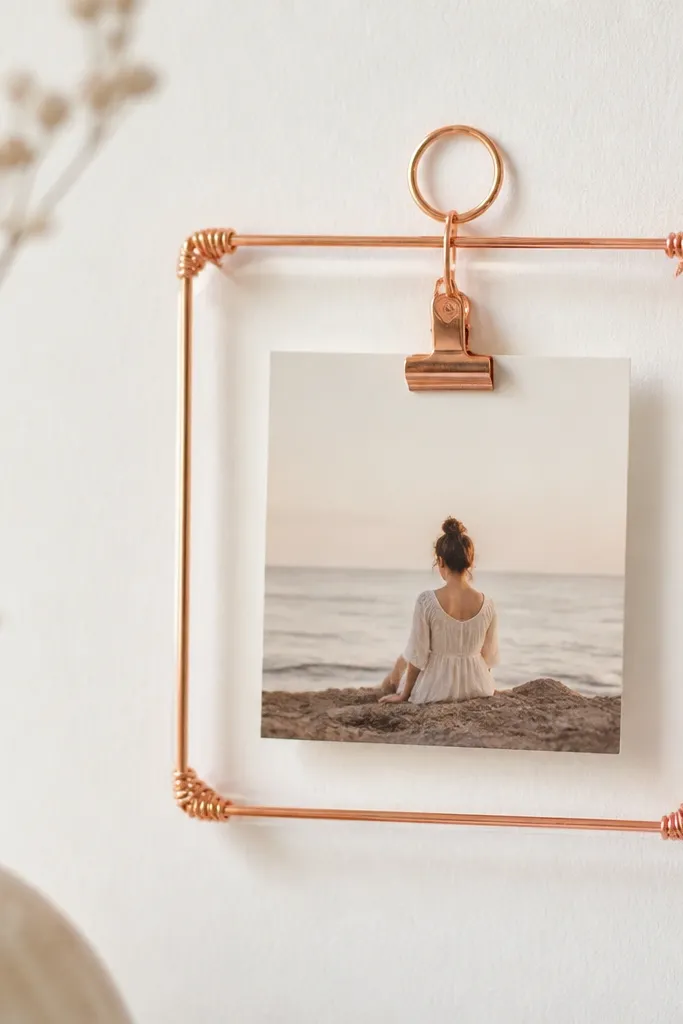
This mini frame looks luxe because wire wrapping is all about tension and neat spacing. I use rose gold craft wire and wrap it tightly around a simple backing card so it holds shape. The photo sits in the center with a small clip or tied backing, so it looks like a tiny display piece. It flatters warm palettes and looks great next to candlelight or string lights. This is ideal for friends who love desk decor or keep photos on shelves.
Start by cutting a backing card to frame size and bending wire into four sides with a slight overlap at corners. Wrap the wire around the card edges tightly so the metal sits flush and doesn’t leave gaps. Create a small top loop for hanging and tuck the ends neatly under the backing. Add the photo, then secure with a clip or tape strip on the back. Finish by straightening the frame so the corners look even.
Use needle-nose pliers and wrap in small sections; long wraps drift and look uneven.
Avoid loose wire — gaps make it look handmade in a sloppy way.
22. Lemon Verbena Bath Soak Sachets in Organza
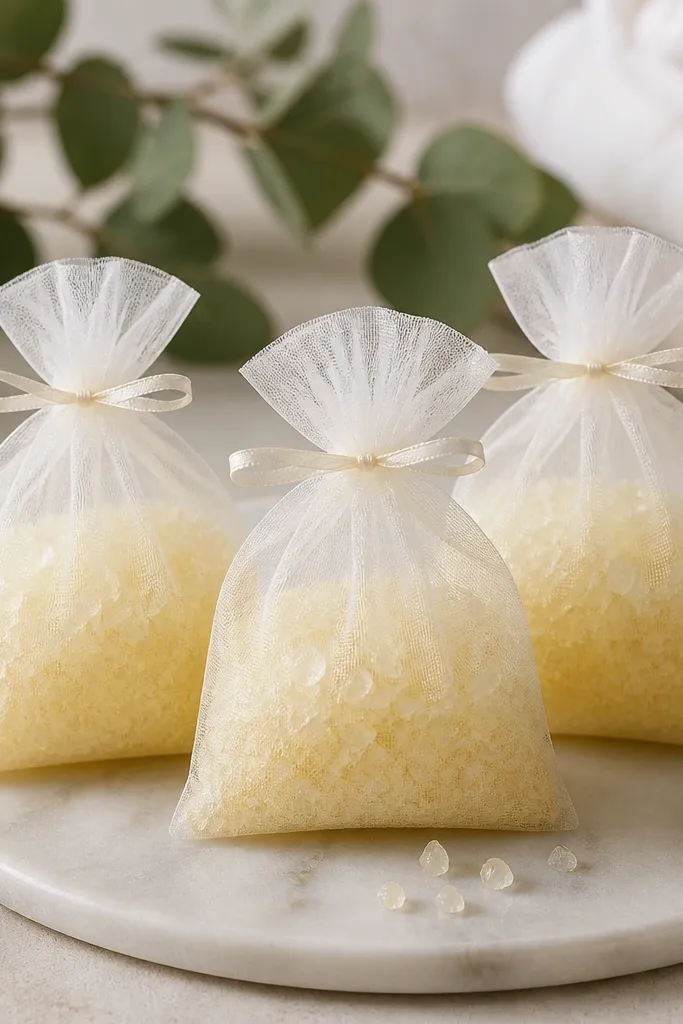
Bath soak sachets feel luxe because they look like spa samples, not a homemade bag of ingredients. I use a pale yellow soak blend like Epsom salt plus a touch of baking soda and add lemon verbena essential oil. The organza makes the crystals visible, and the ribbon adds a clean finish. This gift works for friends who love baths and also for people who need a small reset after busy weeks. The scent is bright but gentle when you keep the essential oil amount modest.
Pro tipIf the crystals clump, microwave the mixture for 10-15 seconds and stir — it loosens without cooking the scent.
Start by mixing Epsom salt and a small amount of baking soda until it looks uniform and dry. Add lemon verbena essential oil and stir well, then let sit 10 minutes so it absorbs and stops clumping. Spoon into organza squares, then tie with thin ribbon and knot tight. Trim ribbon ends evenly and add a label with how much to use per bath. Place in a small gift box or wrap in tissue for a luxe unboxing.
AvoidAvoid strong scent — overdoing essential oil makes it feel like cleaning products.
23. Stoneware-Style Soy Wax Candle in Reusable Tin
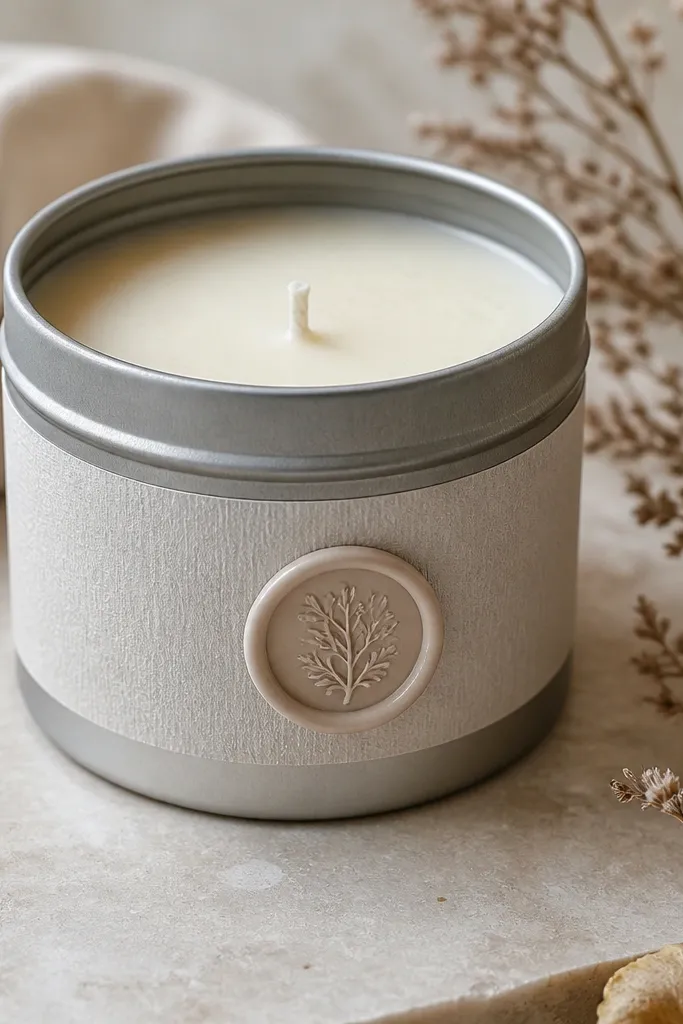
Candles look luxe when the pour is smooth and the vessel looks intentional. I use soy wax with a simple fragrance like vanilla bean or cedar and pour into a reusable tin that has a stoneware-like label design. The speckled look comes from adding a tiny amount of colorant or mica — just enough to add depth, not glitter. A minimalist label and a clean wick top make it feel like something you’d buy at a boutique. This gift is perfect for friends who light candles but don’t want loud scents.
Start by melting soy wax in a double boiler and heating to the recommended pour temperature for your wax blend. Add fragrance at the correct temp so it holds scent and doesn’t fade. Pour into a clean, pre-warmed tin, then center the wick using a wick centering tool. Let cool undisturbed until fully set, then trim the wick to 1/4 in. Label the tin with thick paper and a matte finish so it doesn’t look like a sticker.
After pouring, cover the candle with a box to prevent dust from settling on the top.
Avoid tunneling — pour at the right temperature and cure long enough for an even burn.
24. Macramé Plant Hanger with Leather Tie at the Top
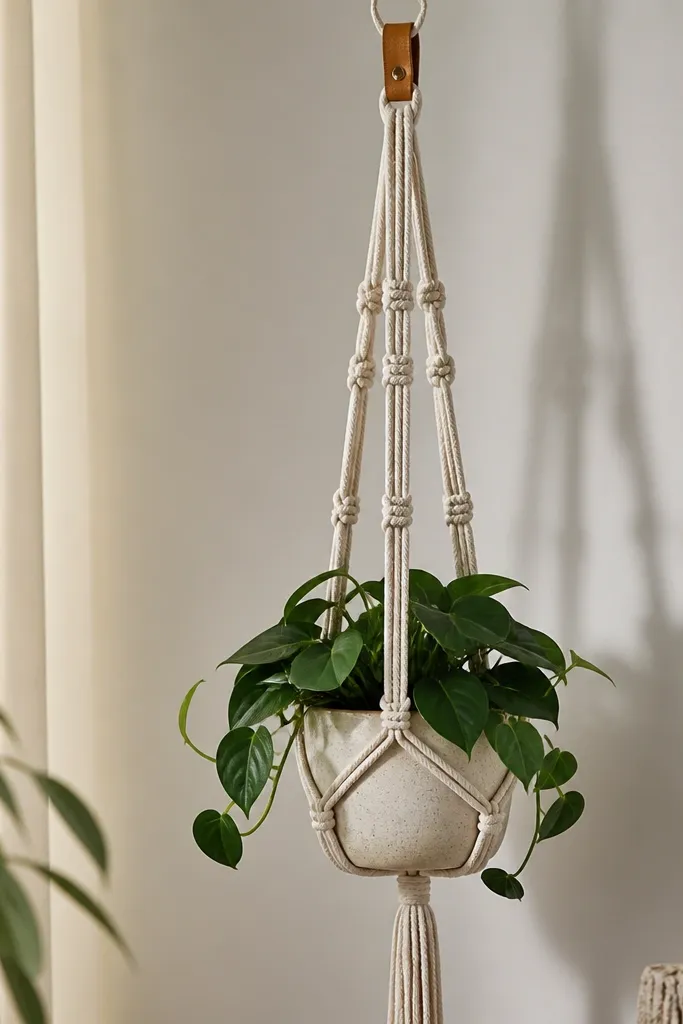
Macramé looks luxe when the knots are even and the top hardware looks intentional. I use natural cotton rope in a medium thickness, then tie it to a small leather strip at the top instead of a cheap plastic ring. The leather gives you that warm, finished feel, and the rope knots look clean because the tension is controlled. This works for friends with plant corners and neutral home decor because natural fibers fit almost any style. It also looks great hanging near light — the rope casts soft shadows.
Start by cutting rope strands long enough for your hanger length plus extra for knots. Attach strands to the leather tie using a secure knot and make sure all ends are the same length. Create a top row of square knots, then space additional knot rows evenly to keep the hanger straight. Add a loop at the bottom to hold the pot or insert a wooden ring for a smoother lift. Trim ends, seal frays with fabric glue, and steam lightly to relax the rope.
Measure knot spacing by counting rope segments, not by eyeballing; it keeps everything symmetrical.
Avoid mixing rope thicknesses — it makes the hanger look uneven and messy.
25. Handmade Ceramic Look Mug with Painted Handle Accent
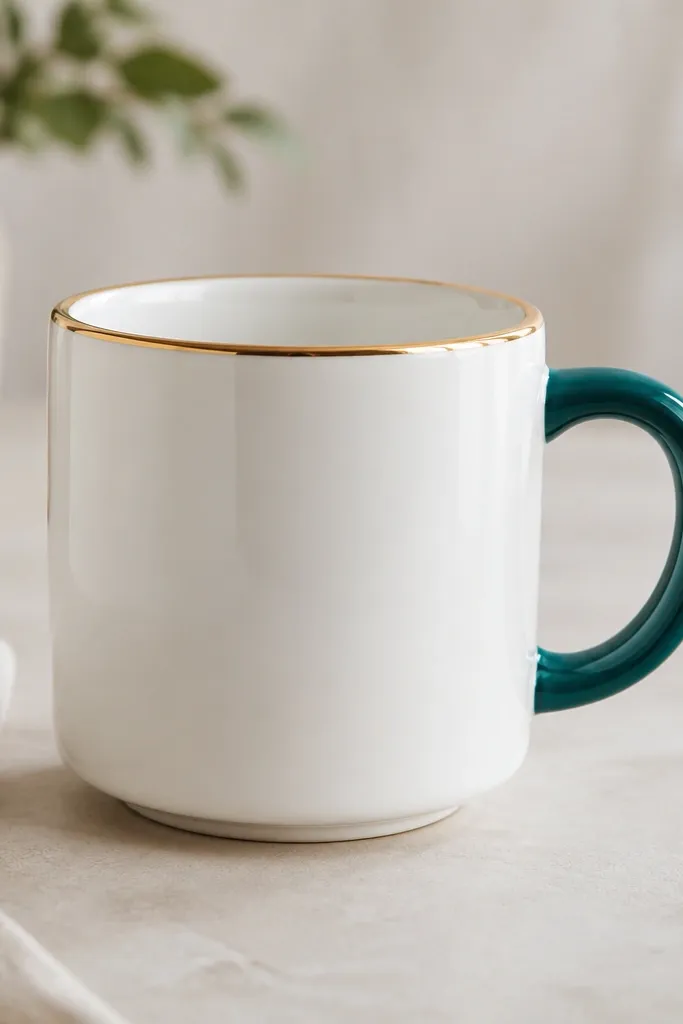
This mug looks luxe because you treat it like a studio piece, not a kid craft. I use a plain white mug and paint only a small accent on the handle and a thin line near the rim, keeping the rest clean. Deep teal plus a thin gold stripe makes it look designed and intentional. The limited paint area also means it’s less likely to smear or crack if you use the right paint and bake it properly. This gift works for friends who love mugs but don’t want something bulky like a full set.
Start by cleaning the mug with rubbing alcohol so paint sticks evenly. Use ceramic paint made for mugs, then mask the rim line with painter’s tape for a straight gold stripe. Paint the handle accent in deep teal, keeping it to the outer curve so it looks balanced. Let it dry fully, then bake according to the paint instructions so it becomes dishwasher-safe if your paint supports that. Add a small note on the bottom with the date you painted it.
Do one thin coat first, then add a second — thick coats look streaky when baked.
Avoid painting too close to the lip — it feels rough and can wear faster.



