
1. Terracotta & Sage Macramé Plant Hanger with Beaded Tie
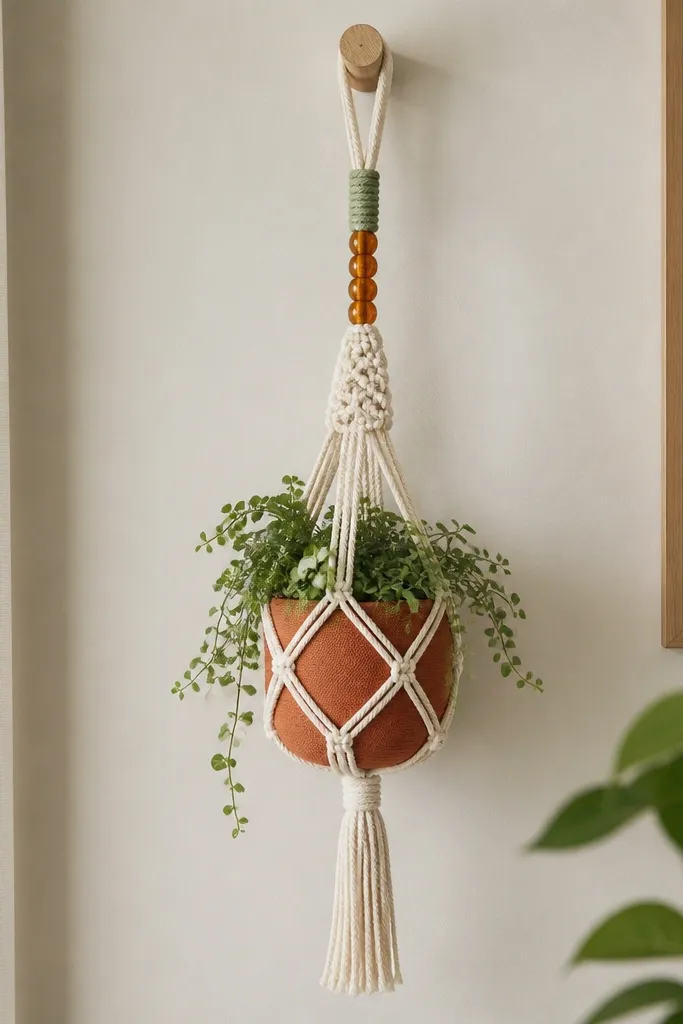
Start by cutting 8 strands of cotton macramé cord to 4.5 feet each, then group them into a 1.5-inch top braid for the hanging loop. Tie your first row of square knots about 6 inches down, then create a second knot band after another 3 inches. Wrap the pot with terracotta fabric using spray adhesive, then tuck the fabric seam underneath where it won’t show. Add a sage cord wrap around the top of the pot for contrast, then finish the bottom with a short fringe cut to equal lengths. Thread amber beads onto a 10-inch sage tie strip and secure it around the pot rim so it sits centered.
This hanger looks aesthetic because the colors feel warm but controlled: natural cotton cord paired with terracotta-wrapped pot and a single sage accent. The beaded tie adds a focal point without making the whole piece busy. I’ve made this for friends who love houseplants and it always gets compliments because it frames the pot and lifts the plant to eye level. It also flatters most home styles — farmhouse, modern boho, and even minimal rooms — as long as you keep knot spacing consistent. For best results, use a medium-thickness cord so the knots look chunky and clean instead of stringy.
AvoidDon’t use too-thin cord or uneven knot spacing — it makes the whole piece look like a craft project.
Pro tipSteam the cord gently before tying so the strands lay flat and show defined knot edges.
2. Pressed Flower Bookmark Set in Clear Gel Frame
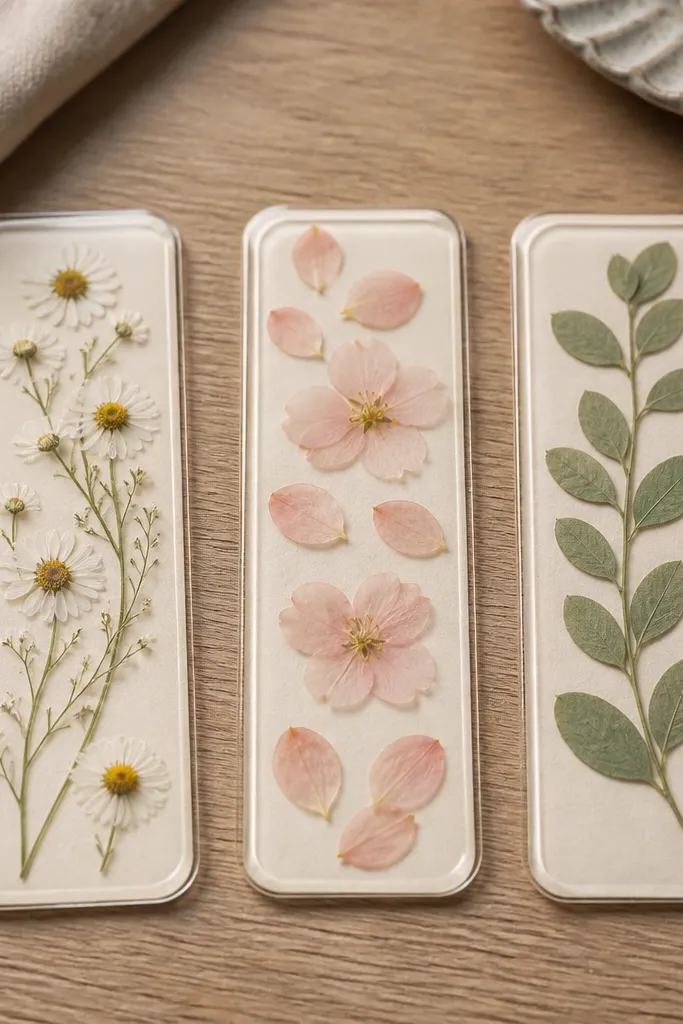
Start by drying flowers between paper towels for 7-10 days, then trim each flower so it fits a 2-inch by 6-inch bookmark window. Cut cream cardstock rectangles to size, round the corners with a 3/8-inch radius punch, and place flowers centered. Mix clear gel medium and apply a thin coat to the top, then press a sheet of plastic wrap lightly over the surface to prevent bubbles. Let it cure fully, usually 24 hours, then add a second thin gel coat for a glassy finish. Finally, trim any gel edges with a craft knife so the bookmark sits clean in the book.
Pressed flower bookmarks look premium when the flowers sit perfectly flat behind a clear, glossy layer. I always use cream cardstock backing because it makes white and pink petals pop without turning the piece yellow. Your friend gets something practical, but it still reads decorative on a bookshelf. This works especially well for book lovers who also like calm, aesthetic desk setups. If your friend has neutral outfits or a light-toned home, the cream base keeps the gift from clashing. Keep the flower shapes small and spaced; dense clumps look messy under resin-like gel.
AvoidDon’t skip full drying of flowers — moisture causes cloudiness and lifted petals.
Pro tipUse tweezers to position flowers and tap the bookmark on the desk to settle them before the gel sets.
3. Monogram Keychain from Upcycled Denim with Brass D-Ring
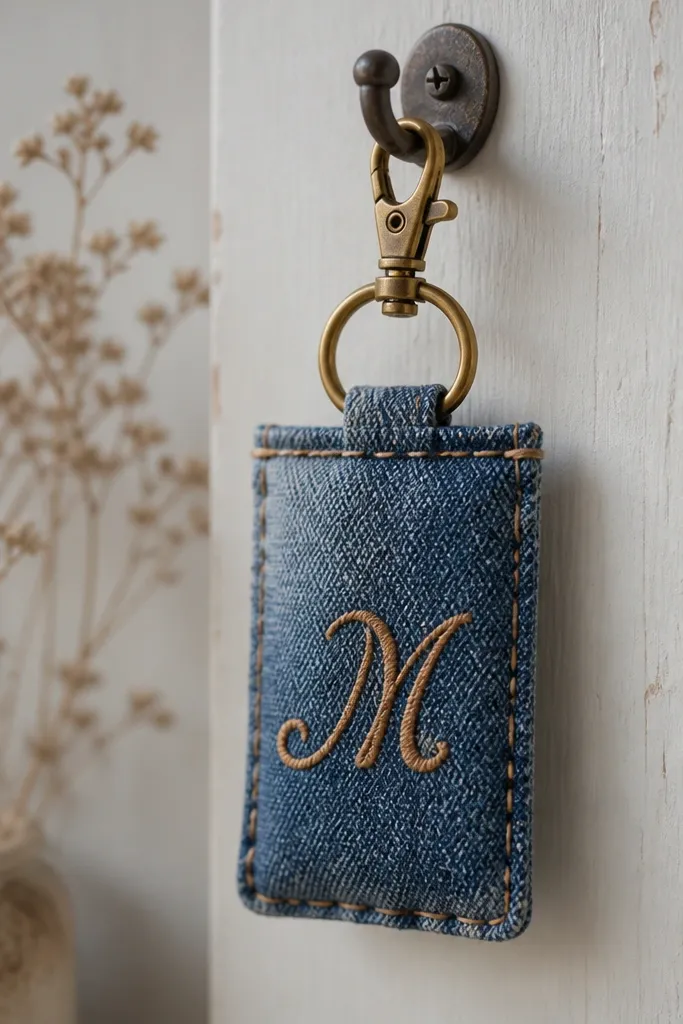
This gift looks aesthetic because denim gives texture and the brass hardware adds a clean shine. The monogram makes it personal without needing a complicated design. I’ve given this to friends who lose keys constantly, and they actually keep using it because it’s sturdy. It flatters hands and bags too — the small size doesn’t overwhelm a tote. If your friend likes Americana, casual, or minimal accessories, denim + brass always lands. Use tan thread so the letters look warm against the blue.
Start by cutting a 4-inch by 3-inch denim piece and ironing it flat. Fold it in half to form a 2-inch by 3-inch rectangle, then stitch the side seams with tan thread using a straight stitch. Cut the monogram stencil from paper, trace it onto the folded denim lightly, then stitch over the lines with a tight zigzag or satin stitch. Punch a 1/4-inch hole at the top center on the back layer, thread a short 1-inch strip of denim through the hole, and attach the brass D-ring. Finish by hand-stitching around the edges with a single continuous running stitch for a crisp border.
Condition the denim with a quick fabric softener rinse before sewing so the thread grips better.
Don’t use black thread on faded blue denim — it looks harsh and cheap against the worn fabric.
4. Satin Ribbon Bookmark with Fabric Tassel and Button Accent
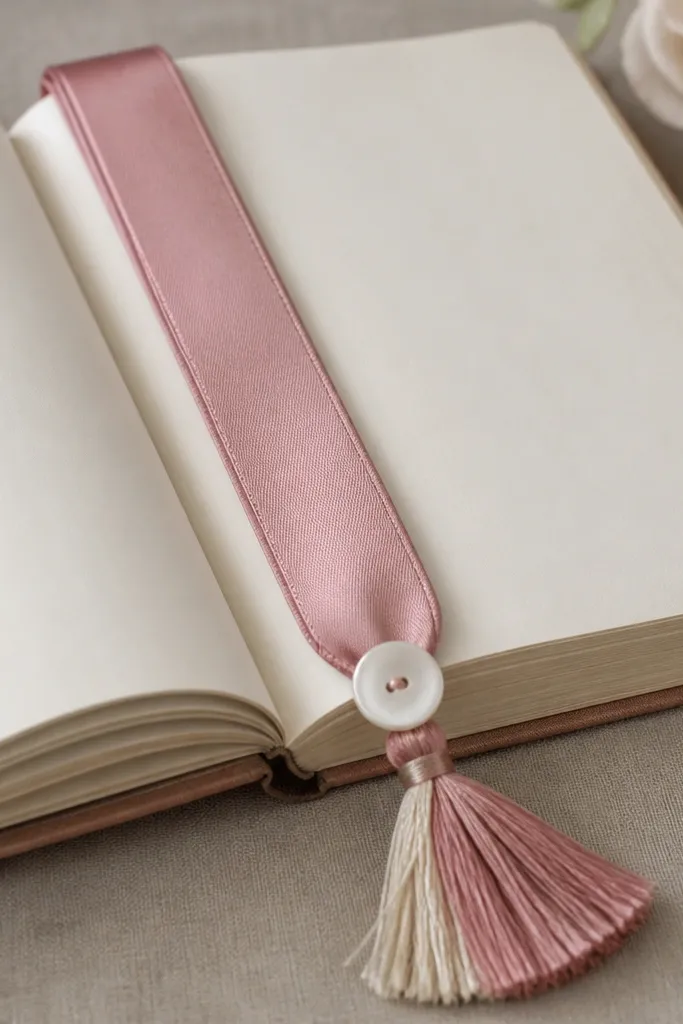
Start by cutting a 12-inch strip of 3/8-inch satin ribbon and folding 1 inch from the top to make a loop. Use fabric glue or a quick zigzag stitch to secure the fold. Wrap cream embroidery thread around the top of the tassel to anchor it, then attach the tassel to the bottom of the ribbon with a knot. Add the mother-of-pearl button by sewing it onto a small loop of thread so it sits centered and doesn’t slide. Finish by trimming tassel strands to equal lengths, then lightly press the ribbon flat with a low iron.
This bookmark is one of the prettiest “small gifts” I’ve made because the ribbon catches light in a way paper can’t. Dusty rose satin looks soft on skin tones and pairs well with almost any book cover color. The tassel reads handmade, but the button keeps it looking intentional. I’ve used this for friends who love gift packaging and want something that feels like it came from a boutique. It’s also great for people who like reading in bed because it’s easy to grab and doesn’t snag like thick paper bookmarks.
AvoidDon’t choose a ribbon wider than 3/4-inch — it makes the bookmark bulky and it sticks out of books.
Pro tipUse a drop of clear jewelry glue under the knot so the tassel doesn’t loosen after a few weeks.
5. Custom Fabric Coaster Set with Heat-Transfer Labels
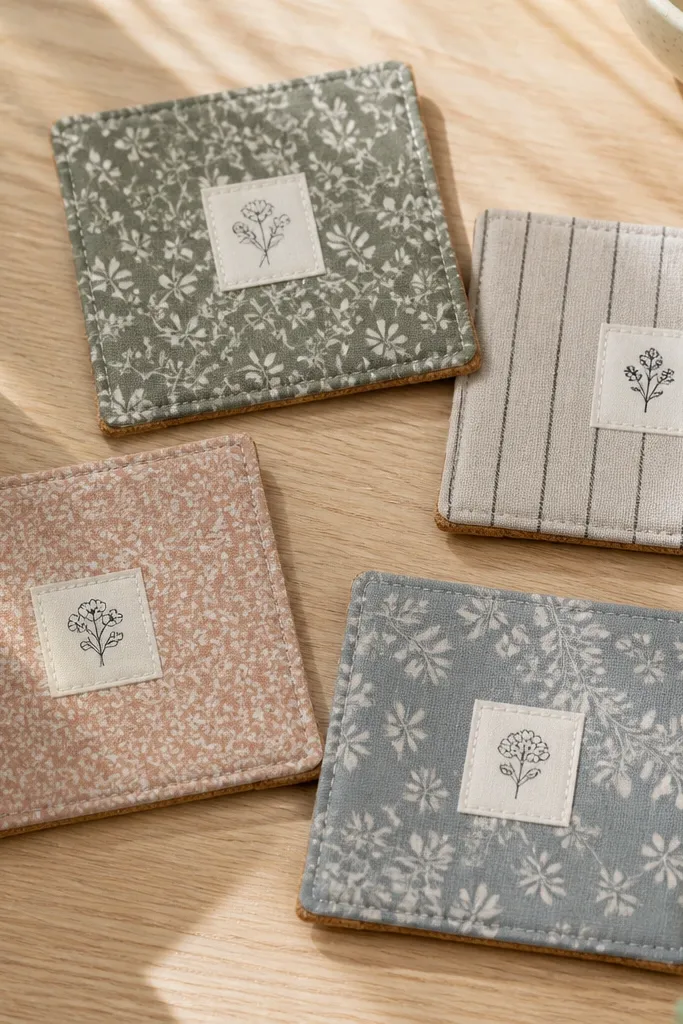
Coasters look aesthetic when the edges are crisp and the center design stays flat. Fabric + cork is a combo I trust because it prevents sliding and protects surfaces without needing fancy molds. The heat-transfer label gives you a clean graphic that doesn’t feel like a messy craft decal. This gift fits friends who host, drink tea, or set up their kitchen like a mini cafe. The muted fabric keeps it classy even if your friend’s home is colorful. Choose one pattern per coaster, but keep the same color palette so they match as a set.
Start by cutting four fabric circles or squares — I use 4-inch squares trimmed to 4.25 inches for a clean wrap. Cut matching cork pieces to the same size, then layer fabric on top and fold the corners or edges under. Top-stitch around the perimeter with black or dark brown thread using a tight stitch length. Apply heat-transfer vinyl labels centered on each coaster front using a heat press or iron with firm pressure for the full time on your transfer sheet instructions. Let everything cool flat, then wipe the surface once to remove any dust before gifting.
Use a walking foot on your machine if you have one — cork and fabric feed more evenly.
Don’t skip sealing the fabric edges if you’re using fray-prone prints — they start to look ragged after washing.
6. Watercolor-Inspired Ceramic Mug Wrap with Acrylic Pour Paint
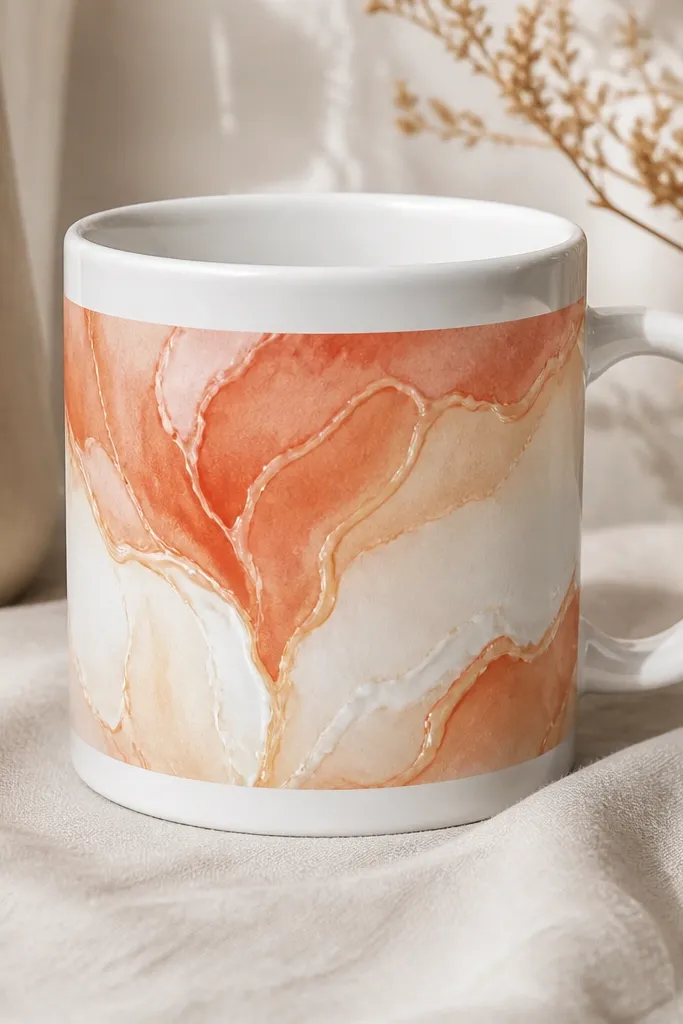
Start by cutting a 10-inch by 4-inch strip of thin craft paper or heat-resistant paper wrap and wrapping it around the mug to check fit. Mix acrylic paint in three colors: cream, peach, and terracotta, then add pouring medium so the paint flows. Tilt the strip and pour thin lines, then swipe lightly with a palette knife for soft edges. Let it cure fully, usually 24-48 hours depending on thickness. Seal with a clear acrylic sealer for a glossy finish, then wrap it around the mug and secure with two small strips of double-sided tape hidden behind the handle side.
If your friend drinks coffee daily, a mug wrap looks personal and stays in the routine. The trick is keeping the artwork in a narrow band so it reads like design, not random splatter. I’ve used acrylic pour paint techniques on paper wraps because they cure shiny and look like watercolor blooms when you blend colors carefully. This is ideal for friends who like warm neutrals, subtle color, and things that feel artsy without being loud. It also works for people who don’t want a fragile ornament. Keep the pattern airy — too many drips make it look sloppy.
AvoidDon’t put the wrap too high on the mug — the design gets cut off by steam and looks uneven.
Pro tipDo a quick test strip on scrap paper — the first pour always teaches you how thick your mix needs to be.
7. Soy Wax Candle Jar Labels with Hand-Lettered Fonts
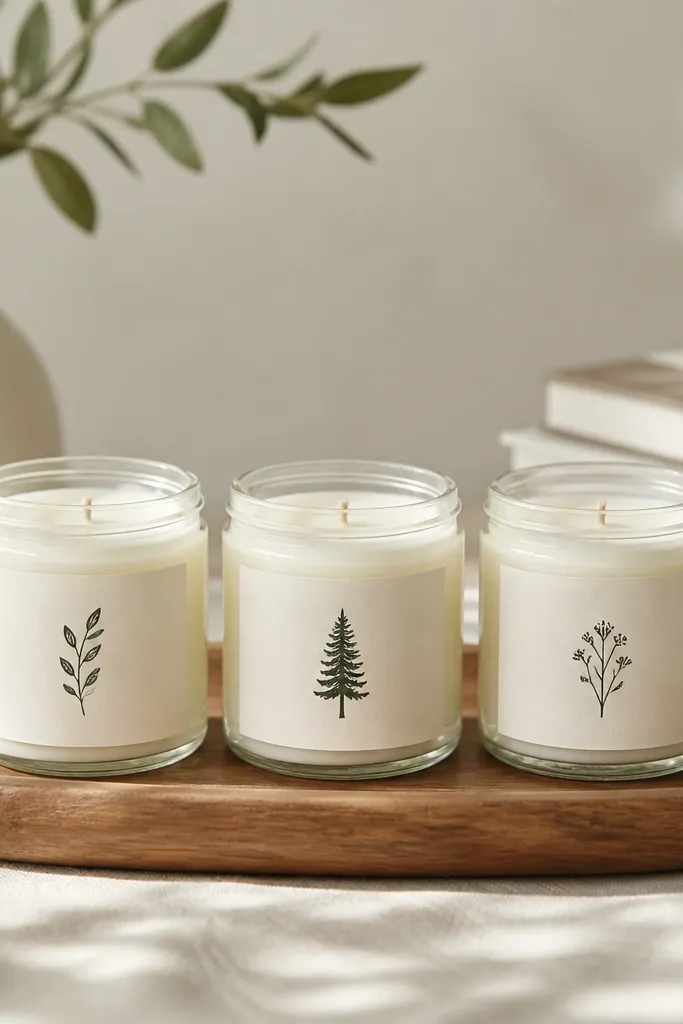
This gift looks aesthetic because the label is doing the heavy lifting. A clean hand-lettered font on cream paper makes even a basic candle jar feel custom. I like soy wax because it finishes smooth and you can see the label through the glass. It’s a great option for friends who love cozy nights, but it also works for people who like simple decor. Keep the design minimal: one line for scent name and one icon. When the label is centered and the edges are straight, the whole thing looks intentional.
Start by pouring or buying soy candles in matching jars, then let the wax set overnight so the surface is level. Cut cream cardstock into 2-inch by 3-inch rectangles and lightly sand the edges so they don’t curl. Use a fine brush pen to hand-letter the scent name and a short note like “cedar + vanilla” in a consistent style. Seal the label with clear matte spray so the ink won’t smear when you wipe the jar. Wrap the label around the jar with double-sided tape, then add a small strip of washi tape as a hidden hinge at the back.
Trim the wick to 1/4-inch before gifting so the first burn looks neat.
Don’t choose neon markers — they bleed on candle jars and make the label look messy.
8. Tiny Framed Fabric Quote with Linen Mat and Brass Thumbtack
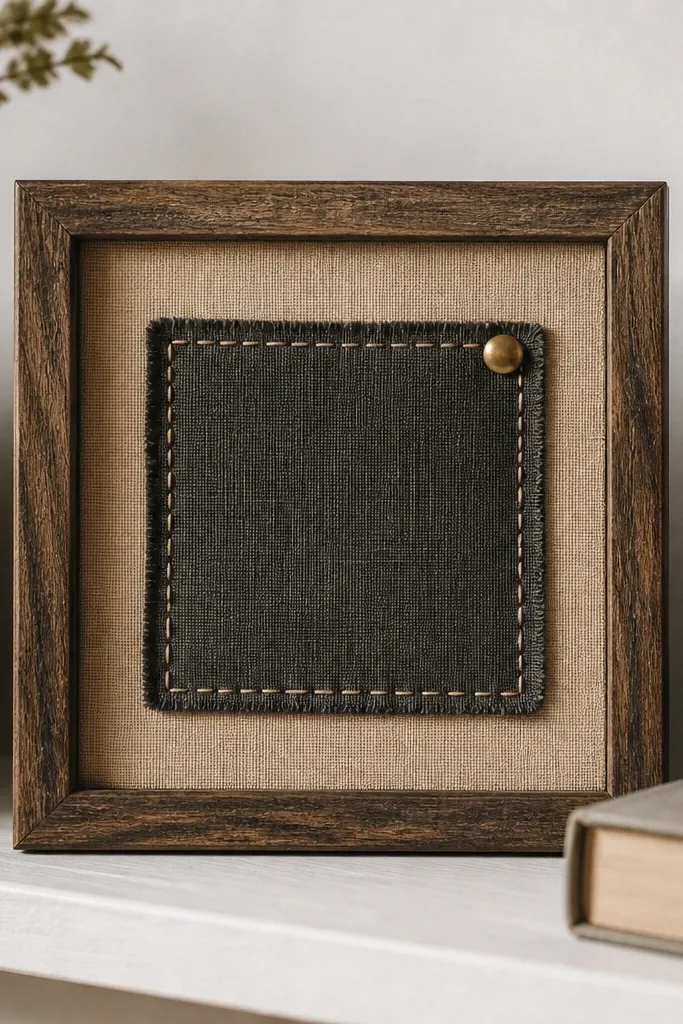
Start with a 5x5 or 6x6 shadow box frame and cut a linen mat to fit the inner opening. Cut a 3-inch by 3-inch charcoal fabric square and stitch your quote onto it using a simple running stitch or straight stitch with contrasting thread. Position the fabric square centered on the linen mat, then tack one corner with a brass thumbtack so it holds flat. Add a thin layer of craft glue only at the very edges if needed. Close the frame and check that the quote sits perfectly centered from eye level.
Fabric quotes look best when you treat them like a mini art print: linen mat, controlled colors, and visible stitching that looks purposeful. Charcoal fabric plus warm beige linen reads modern and calm, and the brass thumbtack adds a tiny highlight. I’ve made these for friends who love gallery walls, and they fit the space because the piece is small but crisp. This also flatters friends who like neutral decor and want personal meaning without clutter. Use one short phrase and one patch — anything longer starts to look crowded.
AvoidDon’t use stretchy knit fabric for the patch — it puckers and ruins the clean square look.
Pro tipMark your stitch lines with a light pencil guide, then erase carefully after stitching.
9. Beaded Phone Charm with Starburst Pattern and Flat Back Clips
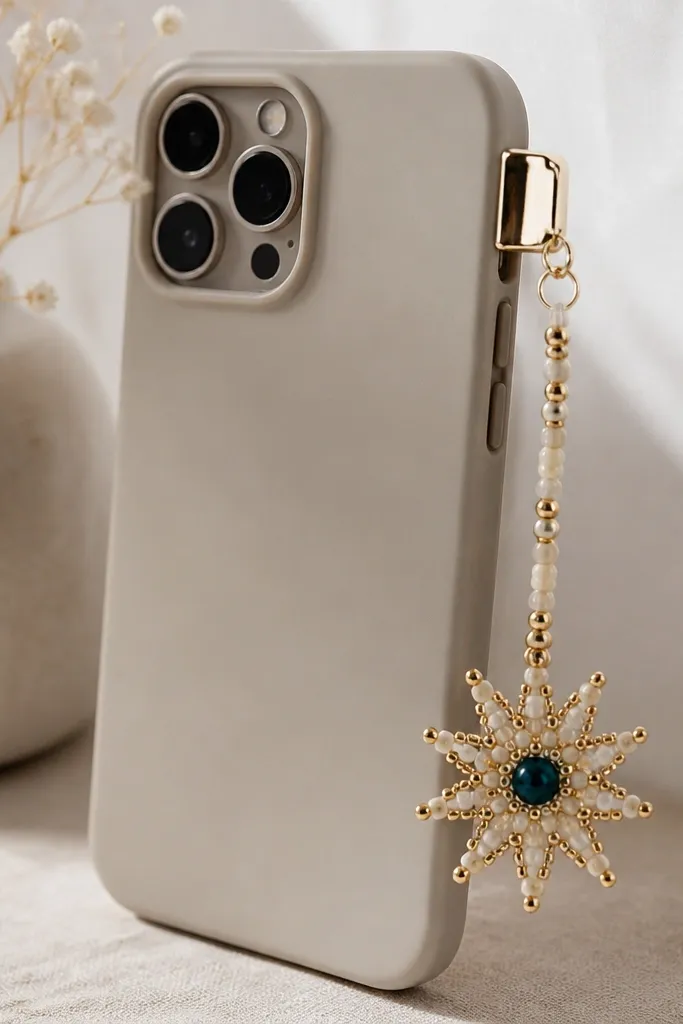
A beaded phone charm looks aesthetic because it turns a plain accessory into a little piece of jewelry. The starburst pattern gives structure, so it doesn’t swing like a random bead chain. I’ve made these for friends who carry their phone everywhere and the charm becomes a daily “you” detail. Cream and gold seed beads look warm next to most skin tones and match common phone case colors. The deep teal center bead is the accent that makes it feel designed instead of generic. Keep the charm short enough to avoid hitting your screen.
Start by choosing seed beads in two sizes: one main size for the star rays and a slightly smaller size for the center. Use a beading needle and strong nylon thread, then build the starburst on a flat surface with a simple radial pattern. Tie off securely and weave the thread through the last few beads so it doesn’t loosen. Attach a flat back clip by sewing the thread around the clip loop, then knot and bury the end inside the beadwork. Trim any stray thread and test the charm on the phone case to confirm it sits 1-2 inches below the case edge.
Use a bead board or taped template so the star rays stay even.
Don’t use heavy jump rings — they make the charm swing and twist the bead pattern.
10. Knife-Edge Paper Garland with One-Sheet Folded Stars
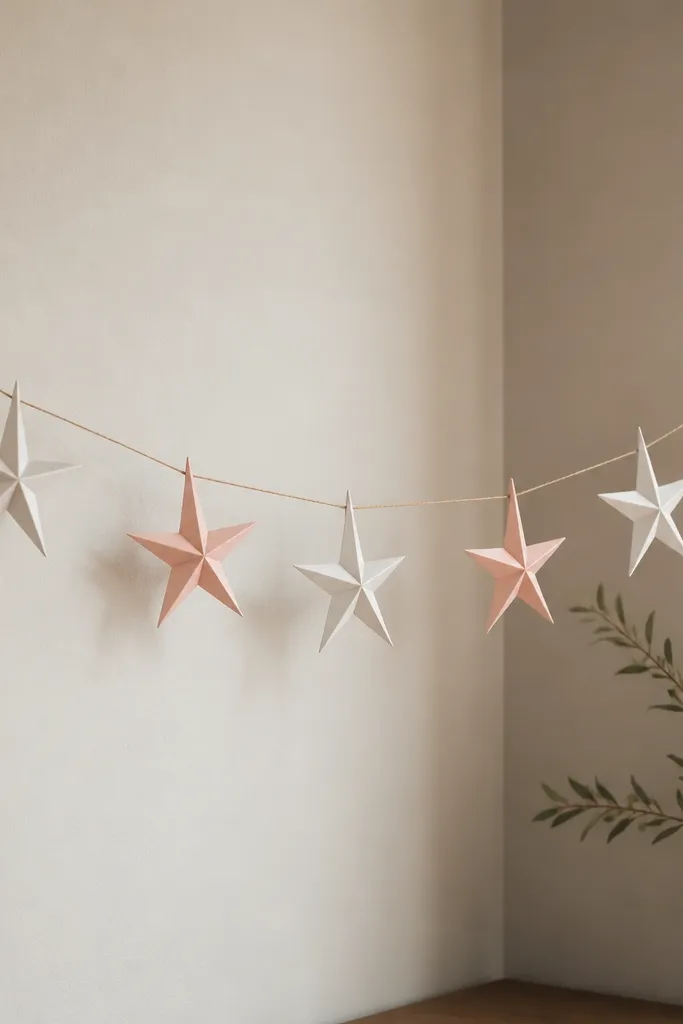
This garland looks aesthetic because the stars are folded sharply, not just cut. Those crisp points cast a shadow that makes the piece look expensive in natural light. I made one for a friend’s birthday dinner and it photographed really well because the paper stays flat and doesn’t curl. This is a good gift if your friend likes decorating for seasons or wants something temporary that still looks styled. Keep it in two colors — white plus blush — so it looks intentional rather than busy. It also works for desk backgrounds if you hang it on a small wall hook.
Start by choosing 8.5x11 matte cardstock in white and blush, then cut a strip of paper to 1-inch widths if you want narrower stars. Fold each star from a single sheet using a consistent accordion fold, then pinch the edges to form sharp points. Make 20-24 stars, then lay them out to check spacing and color alternation. Thread a thin twine through tiny slits at the top of each star, then tie knots so the stars don’t slide. Hang the garland with two small command hooks so the line stays straight.
Pre-bend the folds with a bone folder so the points stay crisp after assembly.
Don’t use glossy paper — it reflects light and the shadows that make it look fancy disappear.
11. Hand-Painted Silk Scarf with Dipped Edge Tie-Dye Fade
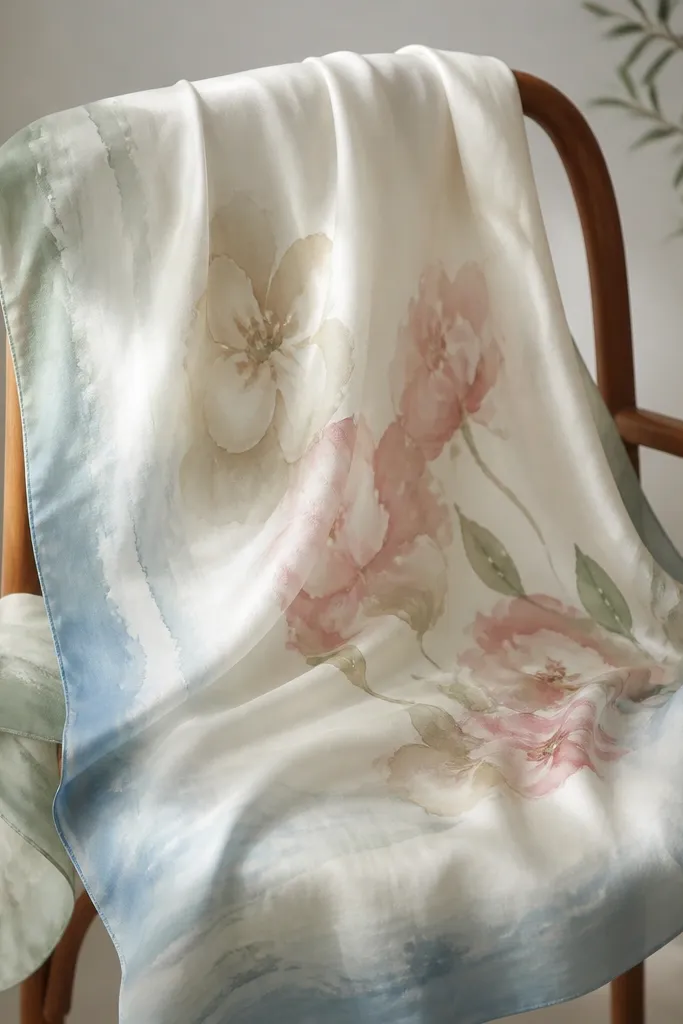
A silk scarf looks aesthetic when the color fade is smooth and the center stays light. I like a dipped edge fade because it looks intentional and doesn’t require complex patterns. The creamy base makes it flattering for lots of skin undertones, and sage-to-sky tones look calm without turning the scarf boring. This gift works best for friends who wear neutrals and want one accessory that adds color near their face. Keep the color concentration at the edges — that’s where the scarf frames the outfit. Use silk because it holds dye differently than cotton and the finish looks more fluid.
Start by washing the silk scarf in gentle soap, then rinse until water runs clear. Mix fabric dye for silk in two tones like sage and sky, diluted for a soft gradient. Dip only the scarf edges into the dye — about 1.5 inches — then hold the edge underwater for 20-30 seconds before lifting slowly. Use a clean brush to drag a tiny amount of dye inward for a watercolor bloom effect. Let the scarf dry flat, then rinse according to dye instructions until rinse water runs clear and steam set if your dye requires it.
Use a plastic wrap barrier under the work area so dye doesn’t stain your table.
Don’t dye on a dry, dirty scarf — it creates blotches that look like mistakes, not design.
12. Reusable Gift Wrap Set with Stamped Kraft Paper and Twine Rosettes
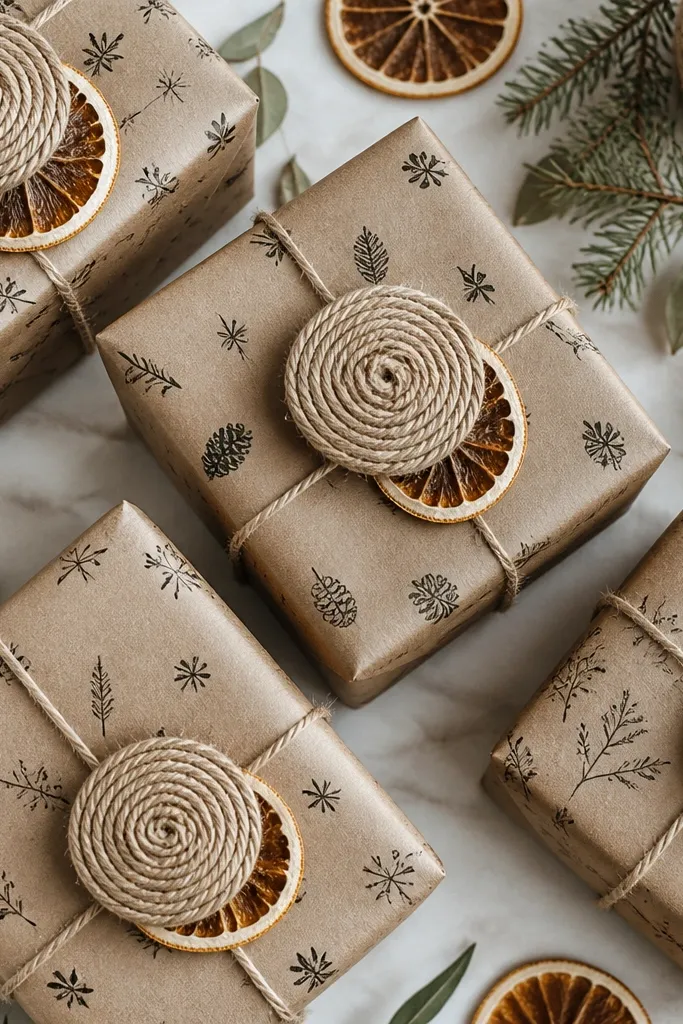
Start by cutting kraft paper into 3 sizes: 16x20 inches, 12x16 inches, and 8x10 inches. Stamp each sheet with black ink icons spaced evenly, leaving a 2-inch margin for folding. Fold the paper around a test box and mark where the twine tie lands, so you can repeat the same placement across sets. Make twine rosettes by wrapping twine around your fingers 12-15 times, then tying a center knot and trimming ends evenly. Attach each rosette on top of the wrapped box with a small bit of tape underneath, then tuck a dried orange slice or cinnamon stick to anchor the look.
This is an aesthetic gift for friends who love giving gifts or hosting because it’s reusable and looks styled. Kraft paper gives that warm, handmade base, and a small stamp pattern keeps it from looking blank or random. The twine rosette is the “wow” detail that makes the wrap look like it came from a boutique. I’ve used this set for birthdays and it always gets compliments because it’s flat to store and fun to assemble. Choose one stamp style and repeat it — consistency is what sells it. Add one natural accent like dried citrus or a tiny sprig for a clean final touch.
AvoidDon’t stack too many accents — one natural piece per wrap looks intentional, three starts to look cluttered.
Pro tipUse a foam stamp pad and press firmly for 2 seconds per stamp so the impression stays crisp.
13. Scented Drawer Sachet Set in Cotton Muslin with Embroidered Corners
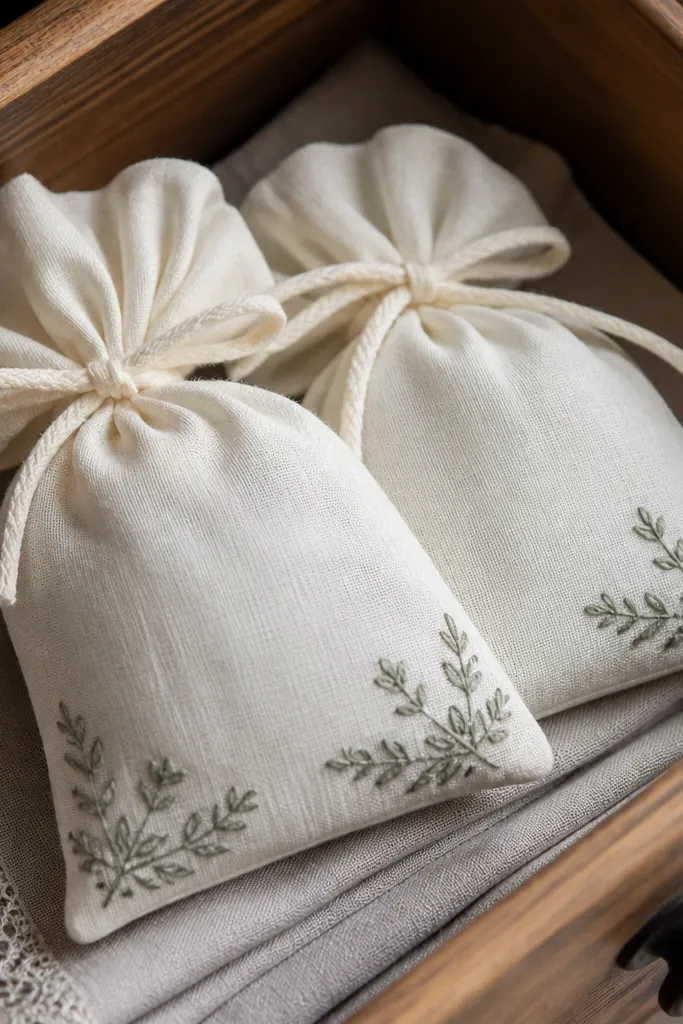
Start by cutting muslin into 5x7 inch rectangles, then fold into a 5x3.5 inch pouch and stitch three sides with a simple running stitch. Add a small embroidery corner: use a backstitch or small satin stitch on the top two corners before filling. Fill with dried lavender — about 1/3 cup per sachet — then tie the top with a 6-inch piece of cotton ribbon. Trim the corners so the pouch lies flat when folded. Make two or three sachets, using the same embroidery color but different sizes so it looks like a set.
Drawer sachets look aesthetic because they add color and texture in a place people forget to decorate. Muslin is airy and matte, and embroidered corners make it look handmade without getting messy. Lavender-filled sachets also smell clean, not overpowering, which matters if your friend has allergies or sensitive noses. This gift is perfect for friends who love linen closets, seasonal swaps, or keeping socks and sweaters fresh. The embroidered corners stay neat and frame the sachet like a mini handkerchief. Choose sage thread if your friend likes calm tones.
AvoidDon’t use too much essential oil — it can stain fabric and the smell gets sharp fast.
Pro tipFreeze the dried lavender for 48 hours first if you’re worried about bugs living in plant material.
14. Painted Terracotta Pot with Faux Marbling and Mini Catch-All Tray
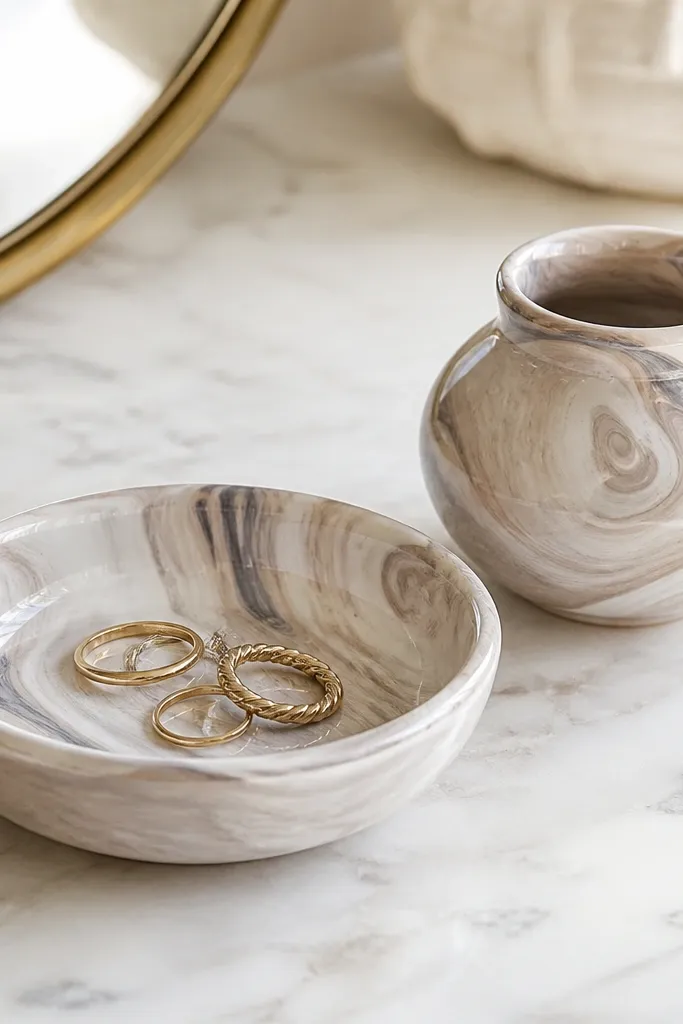
A mini catch-all set looks aesthetic when it’s coordinated, glossy where it counts, and not overly busy. Faux marbling gives you that “designer stone” vibe without the cost. I like terracotta because it has a natural warmth that makes cream and gray swirls look softer. This is a strong gift for friends who keep jewelry on a nightstand or have a desk drawer that turns into a mess. The dish shape helps it stay useful, and the matching pot adds a second focal point. Keep your marbling colors to three tones so it looks calm and expensive.
Start by choosing a small terracotta dish and a mini pot, then scrub and let them dry completely. Base coat with a thin coat of off-white acrylic paint and let it cure 24 hours. Create faux marbling by mixing taupe and soft gray acrylics with a touch of water, then drag the colors across the surface with a sponge and a fine comb. Wipe any harsh lines with a damp cloth so the swirls look natural. Seal with 2-3 thin coats of clear acrylic sealer, letting each coat dry, then place a small felt circle on the bottom so it doesn’t scratch furniture.
Practice marbling on one spare terracotta piece so you learn how much pressure creates the right swirl depth.
Don’t seal before the paint fully cures — it traps moisture and can dull the finish.
15. Macaron-Color Salt Scrub Jar with Hand-Typed Ingredient Tags
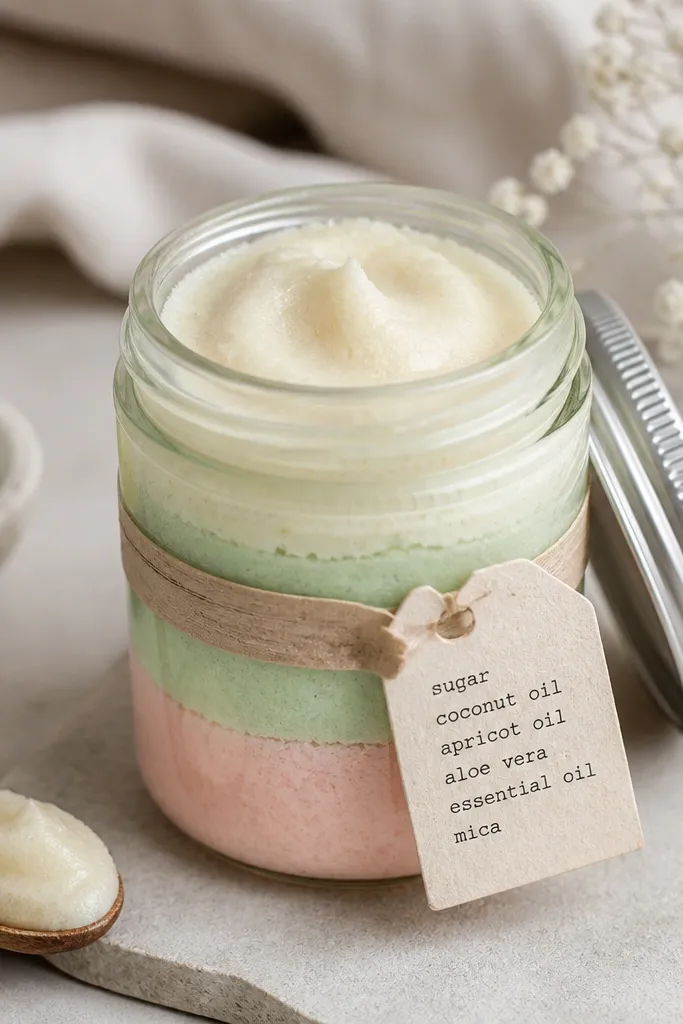
This gift is aesthetic because the layers look like dessert and the jar stays photogenic. Macaron colors — pale pink, mint, and cream — look good on any bathroom counter. Salt scrub is practical, but the hand-typed ingredient tag makes it feel like a real product. I’ve given this to friends who love self-care nights and it gets used within a week. Choose a jar size your friend will actually finish, like 8-12 ounces. The key is smooth texture on top so it looks clean, not grainy.
Start by mixing scrub base: 1 cup fine sugar or sugar-salt blend, 1/2 cup carrier oil (like sweet almond or grapeseed), and 1-2 teaspoons fragrance. Divide into three bowls and tint each with cosmetic-safe colorant — use tiny amounts to avoid clumps. Spoon each color into the jar in layers, then level the top with the back of a spoon. Cut a paper band to wrap around the jar and type ingredients in a neat font using black ink. Seal the label with clear packing tape on top edges so it wipes clean, then tie a small ribbon around the band if you want extra polish.
Add a small parchment liner under the lid so the label area stays dry.
Don’t use coarse salt — it feels scratchy and the jar looks uneven.



