
1. Mirror Tape Rim + Marigold Dot Center
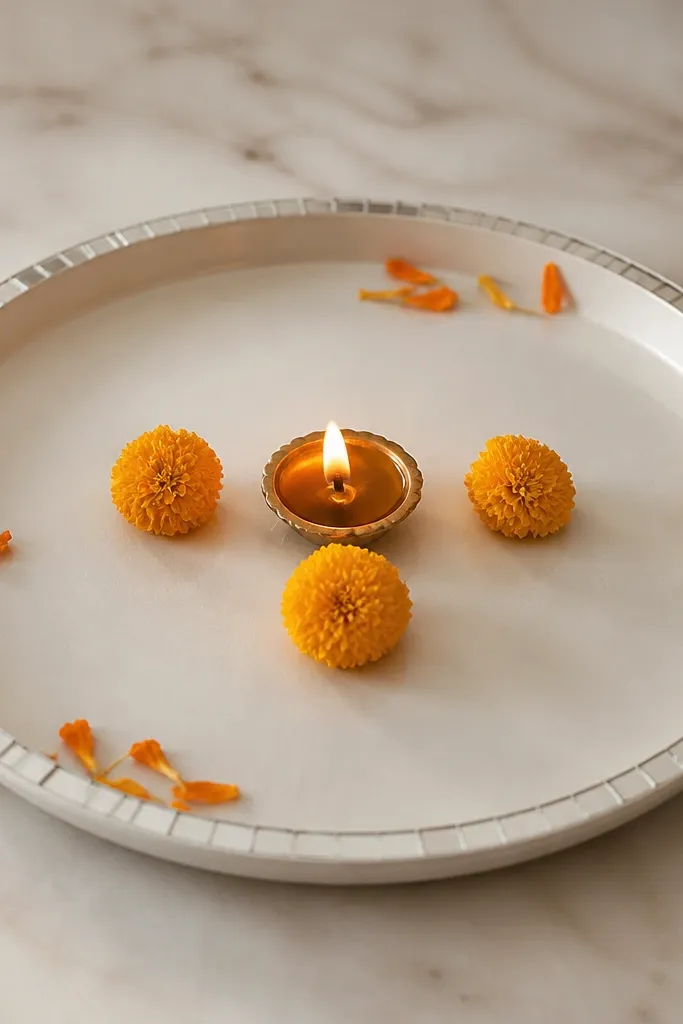
This one looks sharp because the mirror tape catches the flame and bounces light back up, so the plate looks brighter even with a small number of diyas. I like it for clay diyas because the silver edge makes the earthy brown look intentional. The color combo is simple: yellow marigold dots against a silver rim, so it flatters warm skin tones and looks great in photos. It also works for both single-diyaa setups and small clusters because the rim gives a clear boundary.
Start by wiping the plate clean and dry so tape sticks properly. Cut a narrow strip of mirror tape and stick it around the outer rim in a full circle, pressing firmly at the corners. Place one diya in the center, then add three marigold petals/dots around the diya like a small triangle. Finally, tuck 4-6 loose petals at the tape edge so the border looks soft, not bare.
Pro tipUse matte marigold petals, not glossy ones, because glossy petals reflect harsh spots under flame light.
AvoidDon’t place tape too close to the flame; keep it on the outer rim only.
2. Red Velvet Thread Border + Saffron Powder Sprinkle
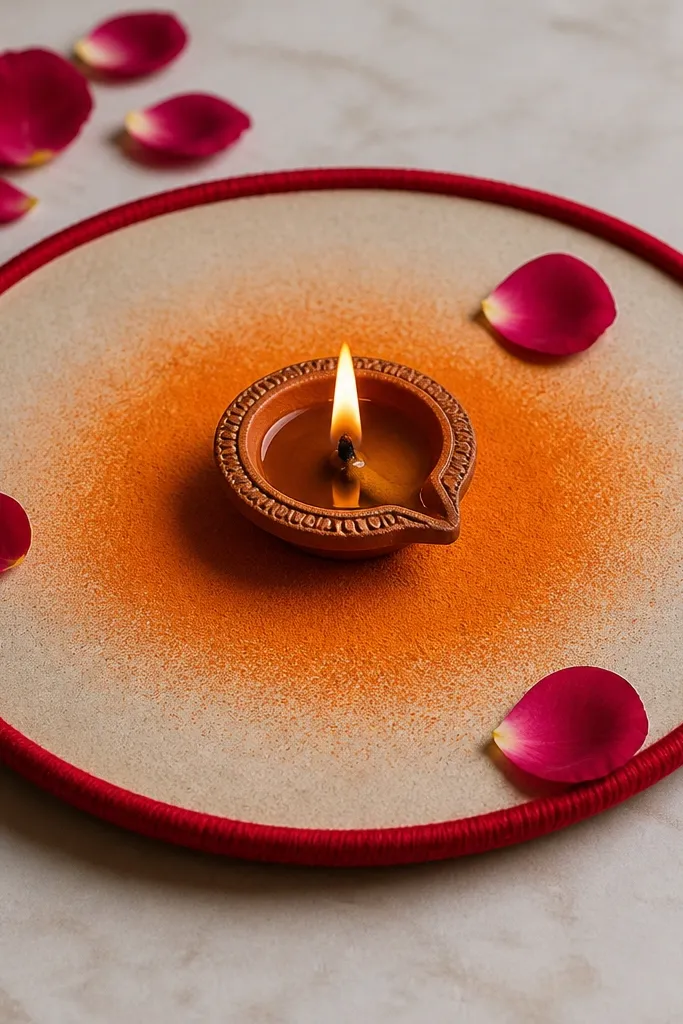
Velvet thread gives a soft, high-end look because it has a fuzzy texture that doesn’t glare under diya light. The warm saffron powder makes a halo effect around the flame, which reads like a rangoli glow without needing any drawing. This style suits anyone who wants a cozy, festive look for living rooms and entryways. It also flatters darker color palettes — deep red and orange pop beautifully against black or dark-brown plates.
Start by tracing the outer rim area lightly with your finger so you know where the border will sit. Glue or tie a thin line of red velvet thread around the plate edge, leaving a small gap so the diya sits comfortably. Sprinkle a pinch of saffron-colored rangoli powder in a loose circle around the diya base, not covering it. Finish by placing 2-3 rose petals on the thread border so the texture mix looks deliberate.
Pro tipIf your powder looks chunky, rub it through your fingers once before sprinkling for a smoother halo.
AvoidAvoid thick powder piles; they look dusty and can smoke if they get too close to the flame.
3. Bangle Frame Around Four Diyas
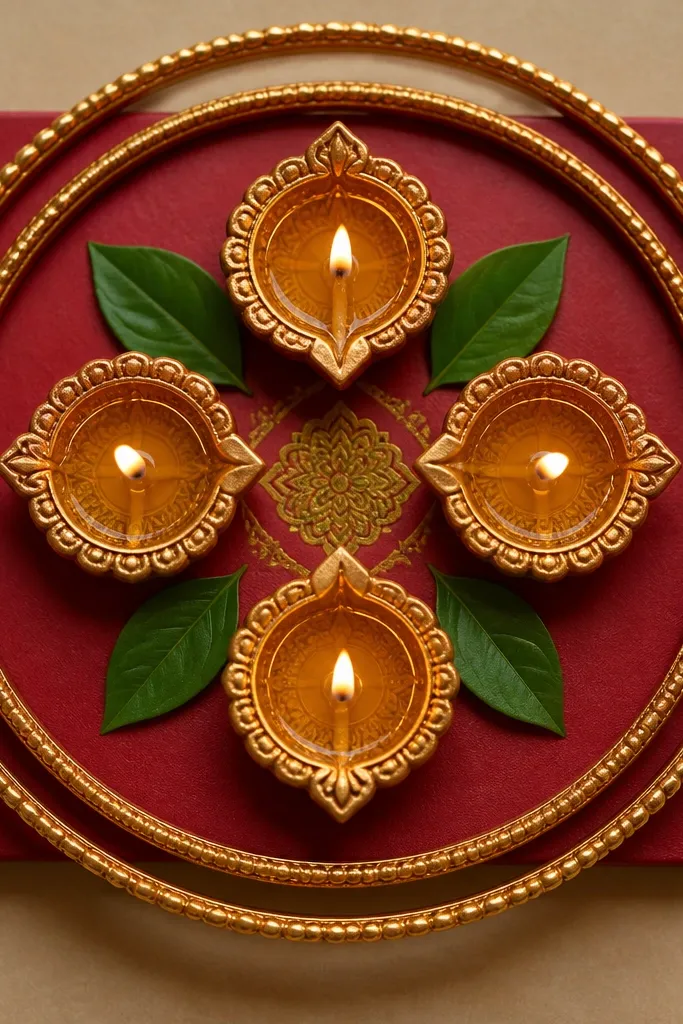
This is my go-to when I want the setup to look like a mini centerpiece. The bangles create a clean geometric frame, so even if the diyas are slightly different sizes, the overall look stays tidy. The metal reflects the flame and gives a festive sparkle without adding bulk. It looks especially good for entry tables because it’s structured and easy to spot from a distance. I’ve used it with both warm gold bangles and silver ones; gold feels more Diwali-traditional, silver feels more modern.
Place four diyas on the plate in a cross pattern: one in the center area and three around it, keeping equal gaps. Lay two bangles parallel on opposite sides of the plate, then position the remaining two bangles to complete a frame around the diyas. Add 2-4 small betel leaves or fresh curry leaves between the bangles and the plate edge for a green accent. Finally, tuck a few petals at the corners so the frame doesn’t look empty.
Use bangles that are smooth inside; rough bangles snag petals and make the arrangement look messy.
Don’t stack bangles on top of the flame area; keep the frame on the outer perimeter.
4. Pine Needle and Rose Petal Mini Border
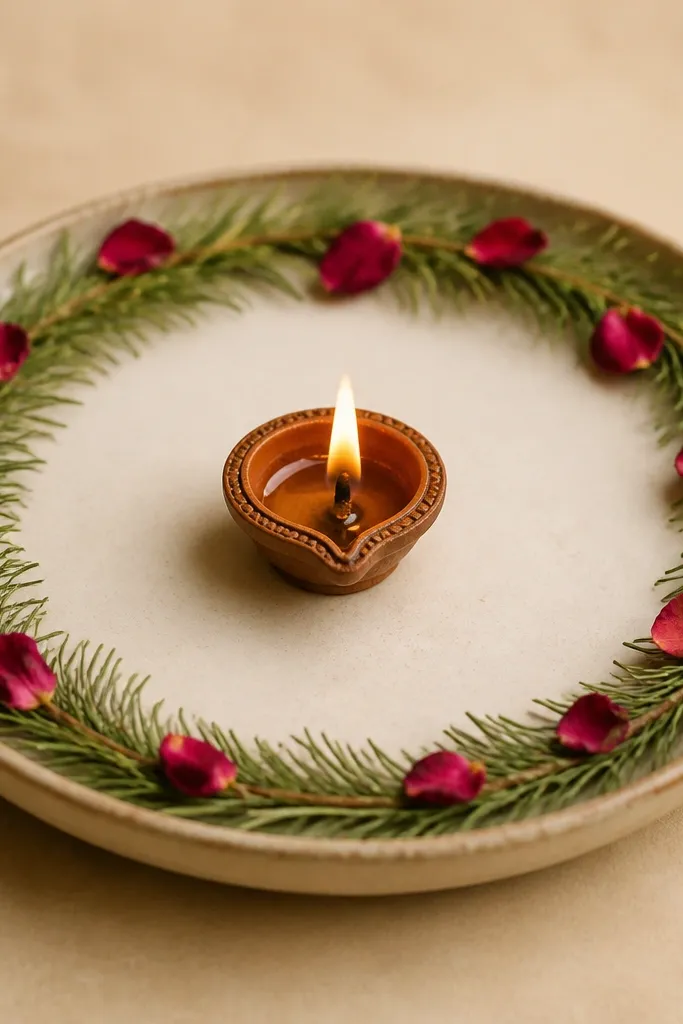
Green pine needles add a crisp, forest-fresh look that makes the flame feel cozy instead of plain. Rose petals bring romance and a soft red-pink pop, and together they look good in both warm and cool lighting. I like this for smaller plates because the border stays thin and doesn’t crowd the diya. It also photographs beautifully because the green texture gives depth behind the orange flame.
Start by forming a loose ring of pine needles around the plate rim, leaving 1-2 cm space from the outer edge. Place one diya in the center and keep the needles away from the flame path. Sprinkle 6-10 rose petals between the needles like small gaps of color. Adjust the ring so the petals are evenly distributed — too many on one side looks lopsided.
Pro tipIf your pine needles are long, cut them into 2-3 inch pieces so the border looks even.
AvoidDon’t use wet petals; they darken fast and look uneven under the heat.
5. Foil Starburst Under a Single Diya
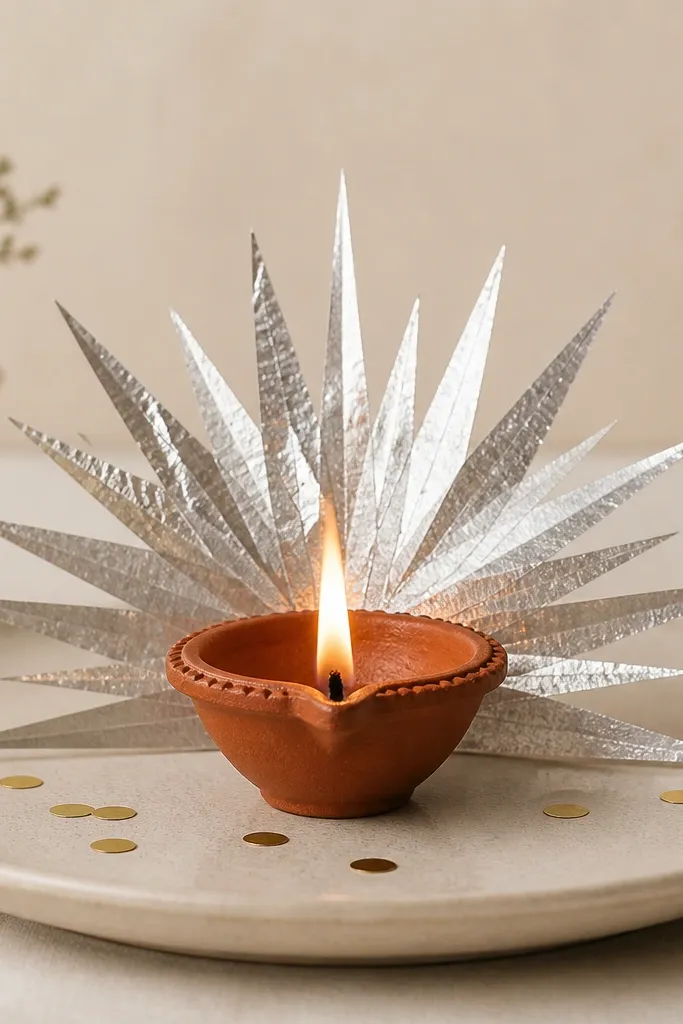
A foil starburst makes one diya look like a focal centerpiece. The reflective rays shoot light outward, and that’s exactly what you want when you only have one diya and still want impact. This works best for plain plates — matte steel, white ceramic, or even plain plastic trays. It also flatters minimal decor styles because the design stays clean and graphic.
Cut a small starburst from silver foil: draw 8-10 rays that meet at a small center circle. Place the starburst on the plate first, then set the diya directly over the center so the rays are visible around it. Add 8-12 tiny gold confetti dots near the outer rays, not on the center. Finally, keep the rest of the plate empty so the starburst is the only background texture.
Use thick foil (like craft foil) so it holds its shape under the diya’s heat without curling.
Avoid covering the flame with foil; the diya should sit above it with open air around the wick.
6. Tea-Light Cup with Floating Marigold Ring
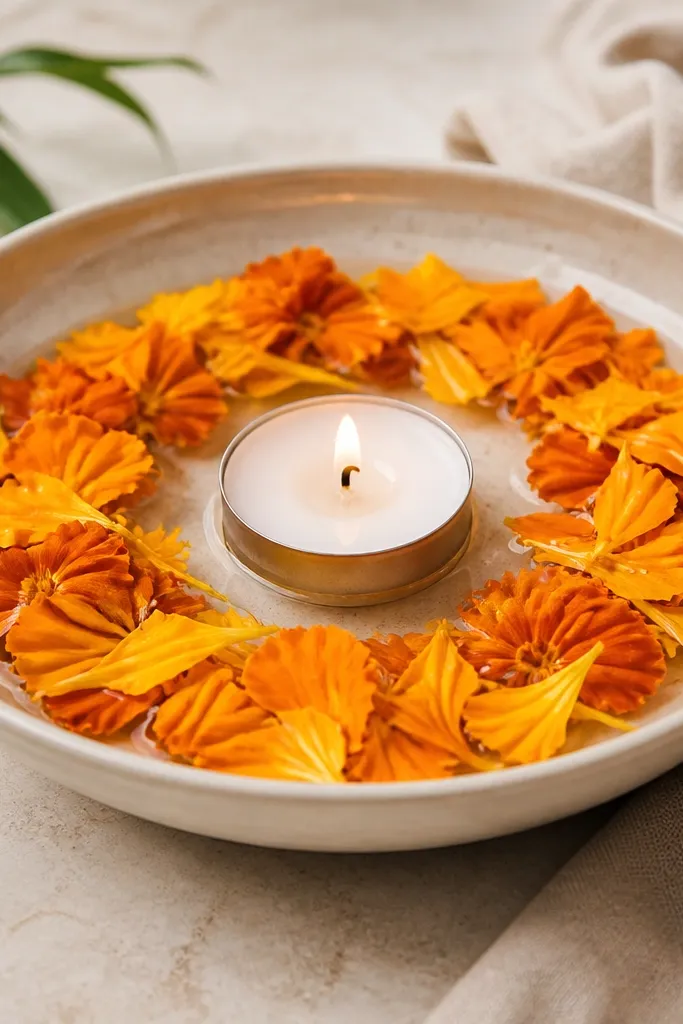
Floating petals around a tea-light cup look soft and layered, like a mini flower bowl. Because tea-lights are steady and the cup lifts the flame slightly, you can place petals closer than with very small clay diyas. The marigold ring reads as a wreath, which makes the setup feel complete without extra items. This style is great for balconies and dining tables where you want a gentle, romantic look.
Place a tea-light cup or taller diya in the center of the plate. Arrange marigold petals in a circle around the cup, overlapping each petal by about half its width. Keep the petal ring even so it forms a full loop. Add 3-4 petals as loose accents near one side of the ring so it looks natural, not machine-made.
Pro tipIf petals slide, lightly mist the plate with water before arranging, then let it settle for 20 seconds.
AvoidDon’t pack petals too tightly; the flame heat lifts them and they can shift into a messy clump.
7. Kolam-Style Dots with White Rangoli Paste
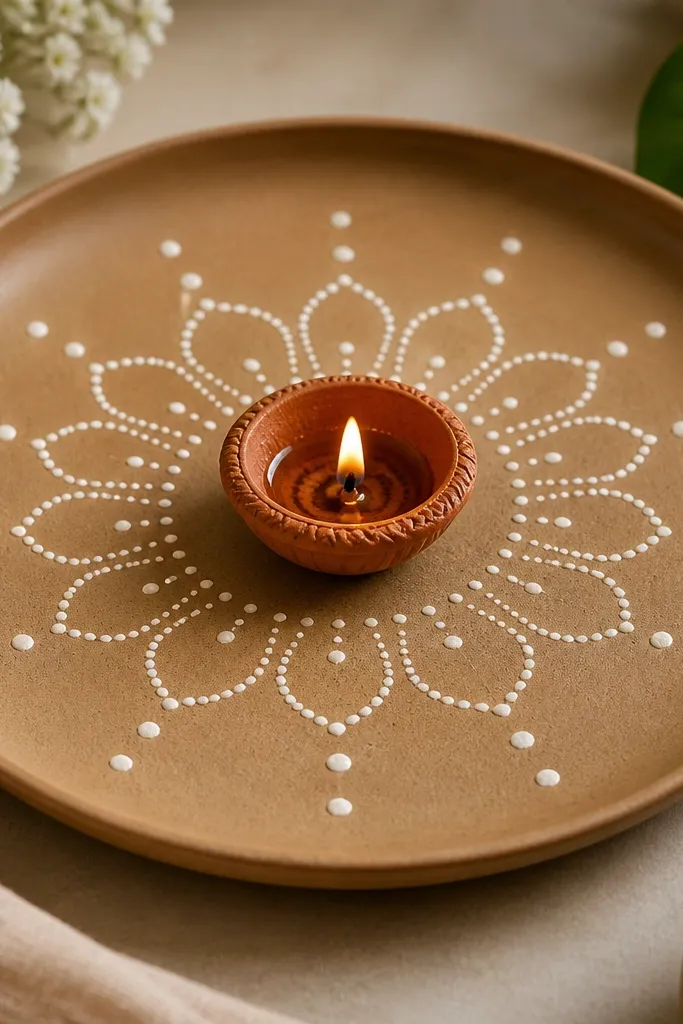
You don’t need full rangoli to get that “prayed-and-prepared” look. A dot pattern around the diya creates a rhythm that feels traditional, and white paste makes the flame glow more cleanly. This works for people who don’t want messy petals or glitter on the floor. It also looks great on photos because the contrast is high: white pattern against warm orange flame.
Start by placing the diya in the center and keeping the plate dry. Use white rangoli paste or white chalk to mark a small ring of dots around the diya base, leaving about 1 cm gap. Connect the dots with gentle curves — just 2-3 arcs are enough, don’t overfill the space. Finish by adding a few loose dots as accents near the outer arc so it feels airy.
Pro tipUse a toothpick to draw the paste lines; it keeps the curves thin and crisp.
AvoidAvoid thick lines; they look like paint and can crack when the candle heat rises.
8. Stitched Fabric Strip Garland Around the Plate
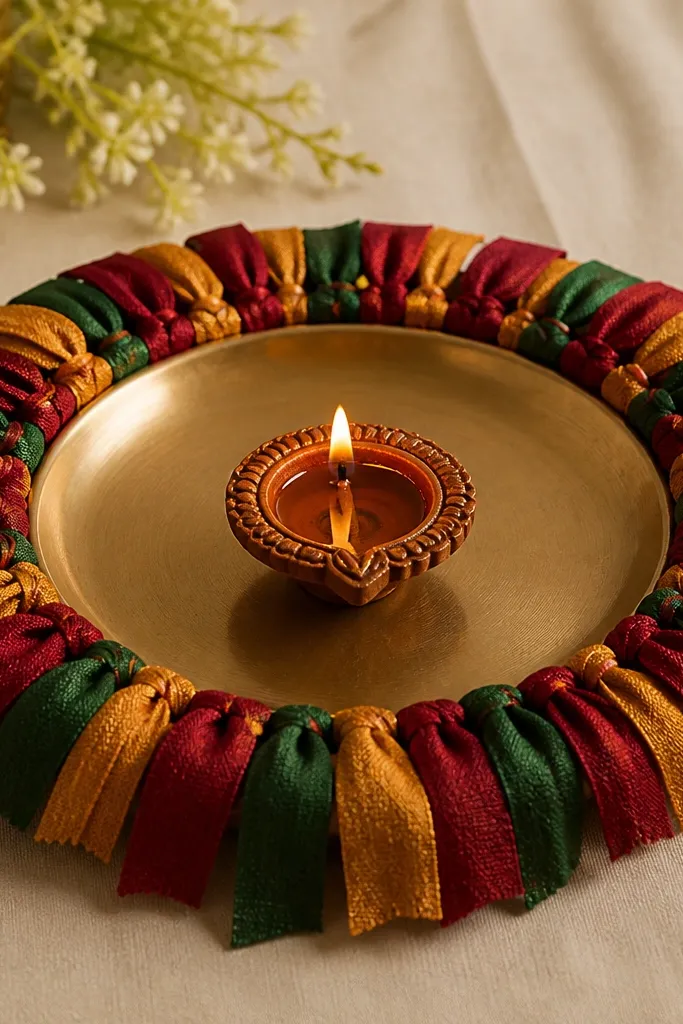
Fabric strips give you movement and softness without needing craft glue everywhere. The stitched look makes it feel handmade in a good way, not like random cloth scraps. This style looks best with small diya clusters because the fabric frames the group and makes it feel intentional. I’ve done this with old sari borders; maroon with gold trim looks gorgeous under flame light.
Cut fabric strips about 2 cm wide and 10 cm long, then lightly fray the ends for a natural finish. Tie 8-12 strips around the outer rim of the plate using a thin thread or glue dots on the underside. Place diyas in the center in a tight cluster of three or four. Tuck the strip ends so the colors alternate around the rim — that’s what keeps it from looking lopsided.
Pro tipUse one fabric with sparkle (gold border) and one plain solid color; the mix looks richer.
AvoidDon’t use stiff polyester that stands away from the rim; it looks plastic under warm light.
9. Pearl Bead Circle for a Clean Centerpiece
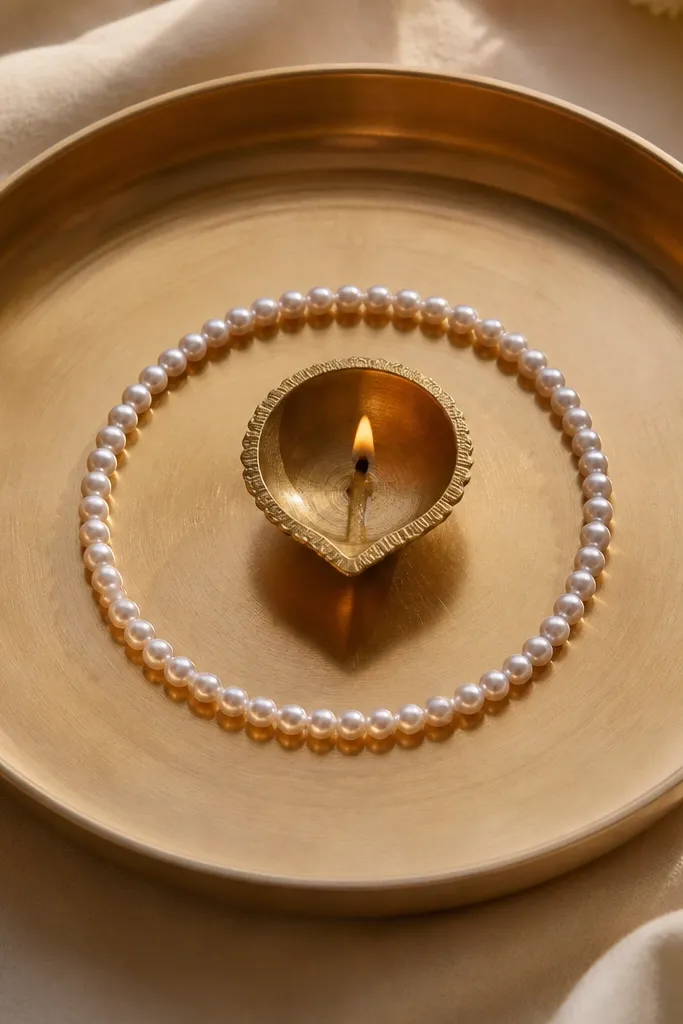
Pearl beads make a diya setup look like a table decoration, not just a functional lamp. The white ring frames the flame and gives a clean, luxury feel even if you use only one diya. This is perfect if you’re doing Diwali for guests and want the setup to match silver or white tableware. The look flatters cool-toned decor and looks crisp in daylight and evening.
Use a shallow plate so the bead ring sits flat. Make a bead ring by pouring beads in a circle around the center diya, then gently press them into a slightly tighter loop. Leave a small gap at the top so you can place a single red petal or tiny marigold there for balance. Finally, add one extra bead cluster near the diya base so the ring doesn’t look floating.
Pro tipIf beads roll, press them into a thin layer of rangoli powder first so they lock in place.
AvoidDon’t overfill the plate with beads; too many turn it into a cluttered mess.
10. Coconut Shell Half-Bowls with Diyas
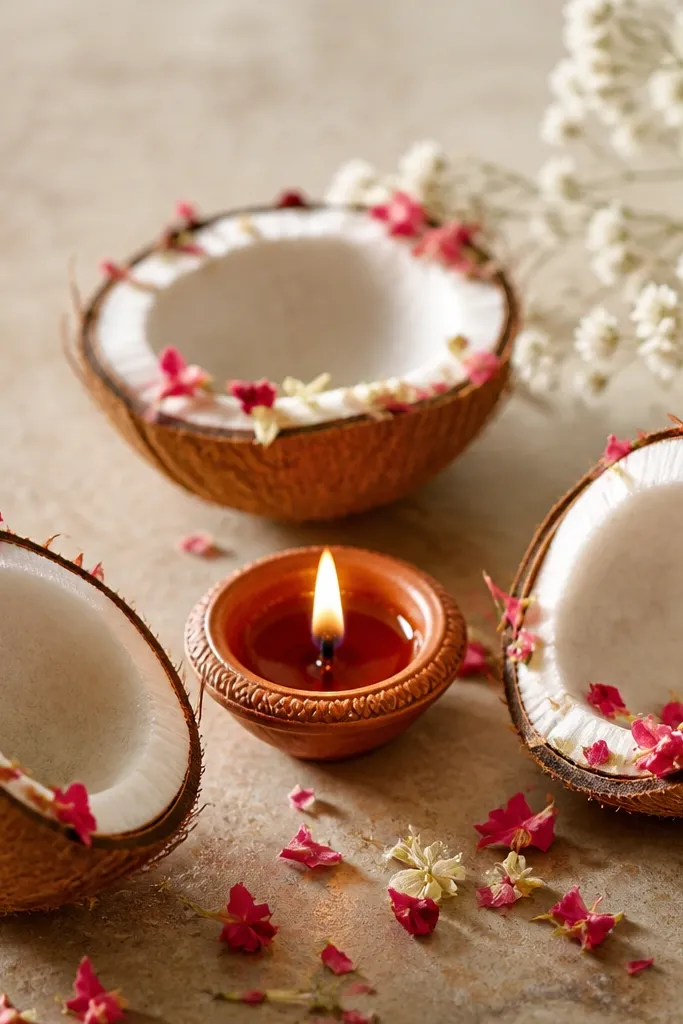
Natural coconut shells make the decoration feel grounded and earthy, and the texture looks great next to warm flames. I use this when I want the setup to feel more “homey” than glittery. The shells create little stages for diyas, so the flame looks layered instead of flat. It also works well for people who don’t want mess from powders — shells hold their shape and don’t scatter.
Place the largest diya in the center of the plate. Arrange two or three coconut shell half-bowls around it so their open sides face up. Add a thin layer of flower petals or a small pinch of kumkum in each shell, then place a small diya inside one shell or keep it as a petal holder. Adjust the angle so shells are evenly spaced — aim for equal gaps between them.
Pro tipWipe coconut shells dry before use so petals don’t stick and turn dark.
AvoidAvoid using shells with cracks near the rim; they can shed pieces when you move the plate.
11. Rangoli Powder Swipe + Diya Shadow Glow
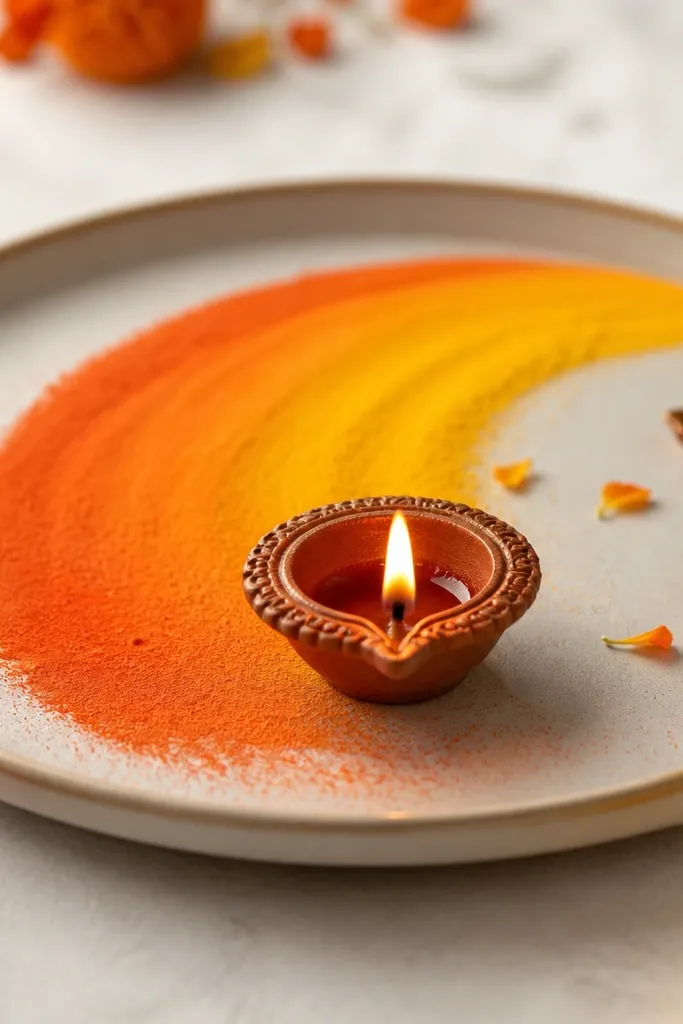
This looks like you planned a whole rangoli, but you’re doing it in minutes. The powder swipe creates a backdrop that makes the diya flame look brighter and more dramatic, especially against dark plates. Orange and yellow powder blends look warm and flattering for most home lighting. It’s also a good choice when you want a cleaner look than loose petals.
Choose a dark plate or place a dark tray liner under your diya plate. Spoon a line of orange rangoli powder and spread it into a sweeping arc behind the diya, then blend a small amount of yellow on the inner edge. Keep the powder thin so it doesn’t look dusty. Place one diya in the center front and add two tiny petals on the outer arc for a finishing touch.
Pro tipUse a makeup brush or small paintbrush to spread powder evenly instead of your fingers.
AvoidDon’t make the swipe too thick; thick powder looks chalky and can blow around.
12. Satin Ribbon Bow at the Rim with Tiny Gold Confetti
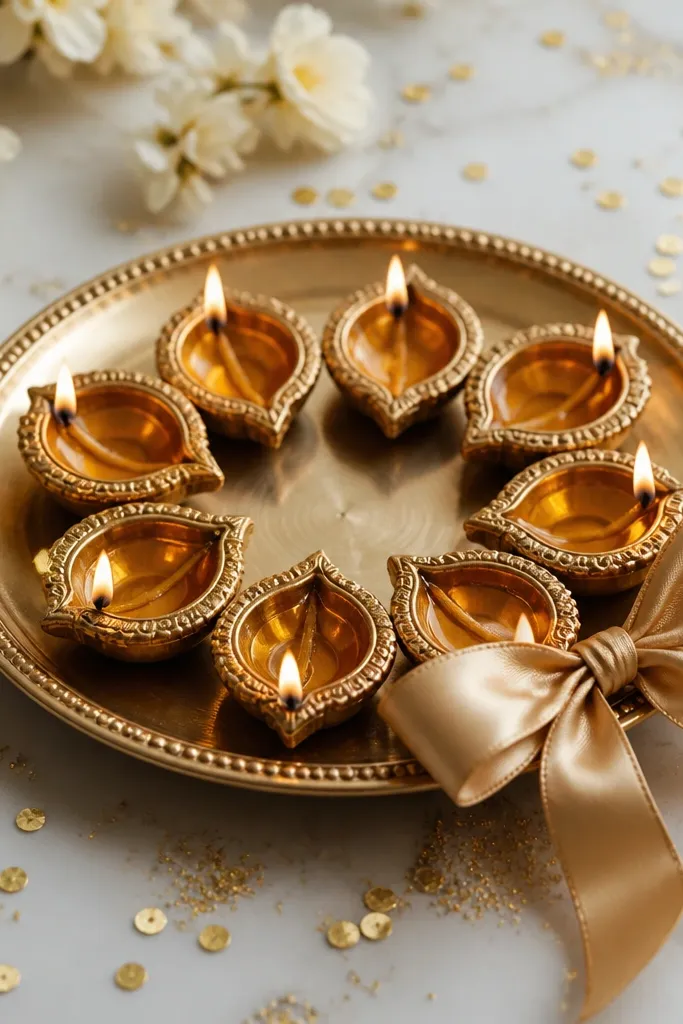
Ribbon makes the diya plate look gift-like, and it’s the fastest way to add “decor” without complicated steps. Satin catches flame light gently and gives a soft sheen that looks pretty in videos. This works best with neutral plate colors like white, cream, or light beige. I like it for family gatherings because it looks festive from a distance and still neat up close.
Tie a small satin ribbon bow around the rim — 6 cm wide ribbon is enough for a medium plate. Secure the knot with a tiny stitch or glue dot on the underside of the rim. Sprinkle a pinch of gold confetti in a rough semicircle around the diya base, keeping the center clean. Add 1-2 rose petals or a single marigold beside the bow so the ribbon doesn’t look lonely.
Pro tipPick ribbon colors that match your diyas — red ribbon with brass diyas looks best.
AvoidAvoid loose ribbon ends hanging near the flame; they can singe.
13. Green Leaf Fan Border with Floating Kumkum Dot
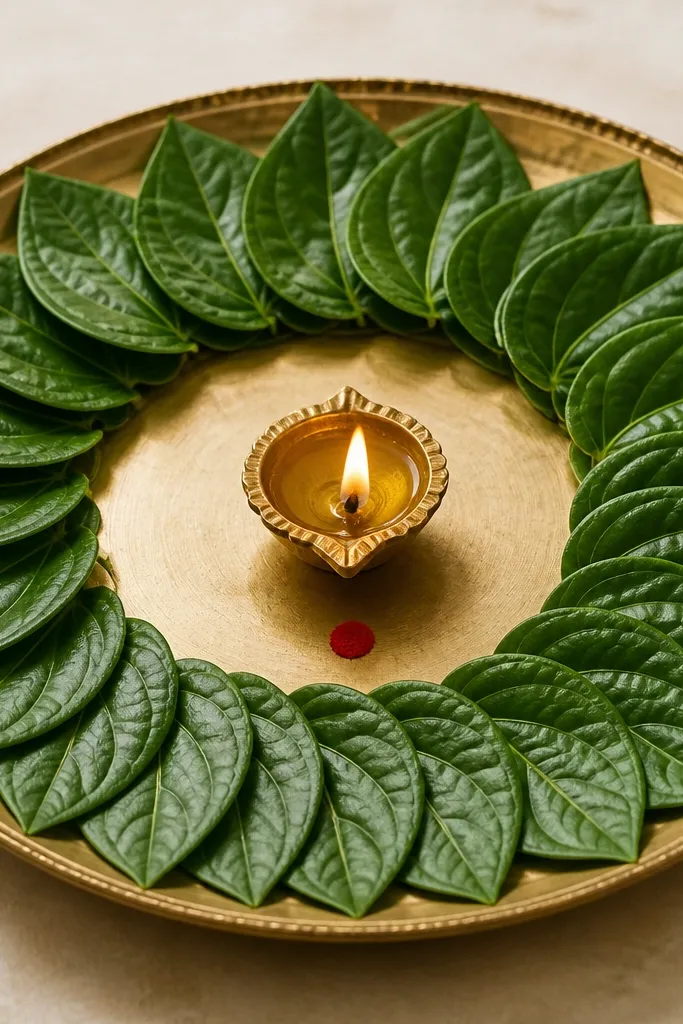
Leaf fan borders look crisp and fresh, and they frame the diya without adding clutter. Betel leaves also add a natural green that balances red-orange flame light, so the setup feels balanced. I’ve used this when I had only a few petals left — leaves fill the space instantly. It looks good for both formal puja and casual home dinners because it reads traditional and clean.
Cut betel leaves into 2-3 inch wide strips or use whole small leaves. Arrange them around the outer rim like a fan, with each leaf slightly overlapping the next. Place the diya in the center and add a single kumkum dot near the diya wick — not on the flame, just beside it. Finish by adding two more kumkum dots on opposite sides to keep symmetry.
Pro tipWipe leaves with a dry cloth so they don’t drip and stain the plate.
AvoidDon’t place leaves too close to the flame; keep at least 2-3 cm gap.
14. Red and Gold Paper Cut Garland Ring
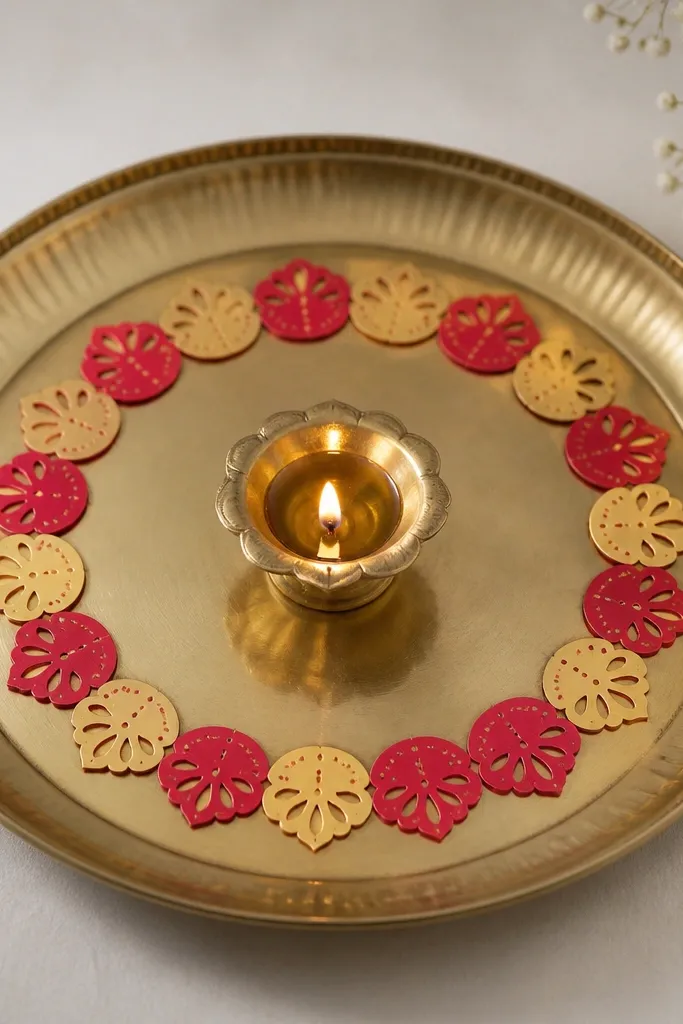
Paper garland rings give you that celebratory look without the mess of rangoli paste. Red and gold reads Diwali instantly, and the ring shape keeps the plate from looking empty. This is a good choice when you’re decorating a shelf or dining table where you want something that stays neat even after the diyas burn out. It also looks great on camera because the colors are strong and the ring is graphic.
Cut small triangles or scalloped paper pieces from red and gold craft paper. Make a ring by tying or gluing pieces onto a thin thread or directly onto the plate rim with small dots. Place one diya in the center and adjust the ring so it sits about 1 cm away from the diya base. Add one extra gold paper piece at the top of the ring so the pattern doesn’t look too uniform.
Use thick cardstock so the ring doesn’t collapse when you move the plate.
Don’t let paper touch the flame; keep it as a rim decoration only.
15. Chandan Stick Slivers Around the Diyas
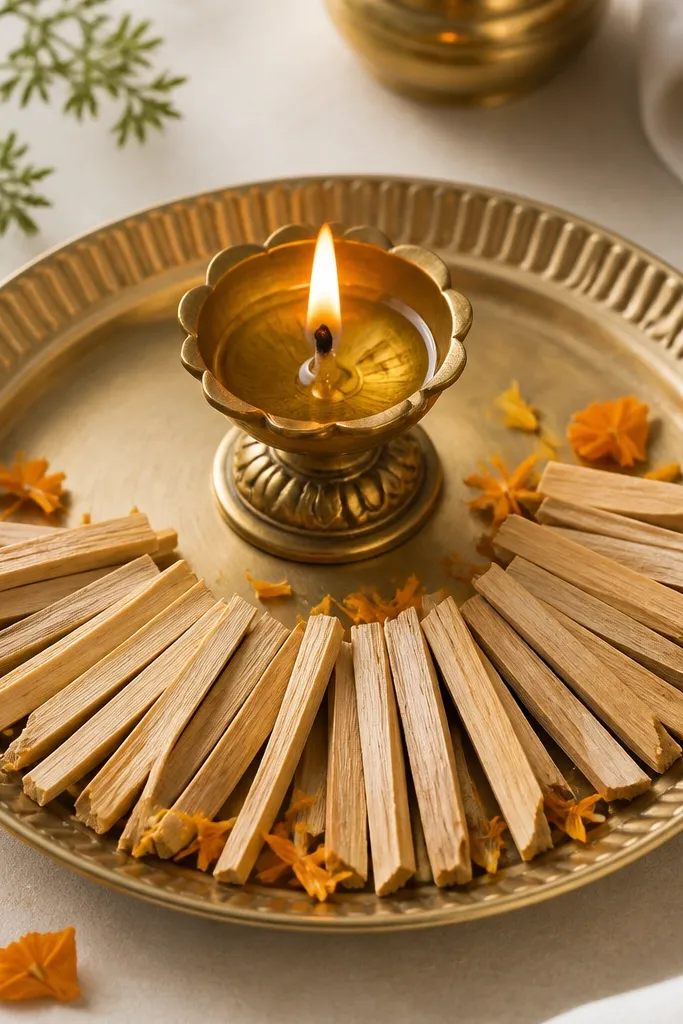
Chandan stick slivers look classy and smell amazing, and you get an instant “puja-ready” vibe. The pale cream-brown tone works with almost every color scheme, especially red and gold. I like this when I want the decoration to feel meaningful without using glitter or heavy beads. It also flatters warm-toned interiors because the neutral scent and color blend in.
Break chandan sticks into thin slivers about 1-2 cm long. Arrange them in a loose semi-circle around the diya, leaving the center area clear. Place 4-6 marigold petals in the gaps between slivers so the border looks soft. Finally, add one tiny marigold cluster at the far edge so both sides feel balanced.
Pro tipIf the slivers are too thick, tap them once with a spoon to split them thinner.
AvoidAvoid placing slivers directly under the diya; keep them on the outer ring area only.
16. Kora Cotton Tassel Border
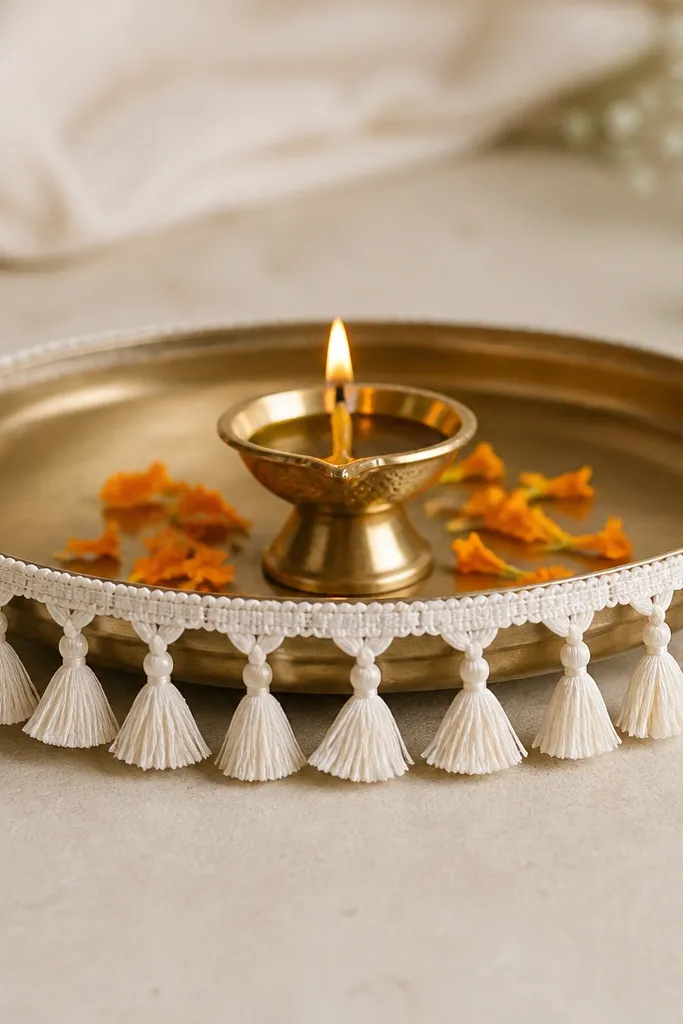
Kora cotton tassels look airy and sweet, and they make the diya plate look soft instead of hard and shiny. White tassels also make the flame look warmer, which is why I like this in bedrooms and puja corners. The effect is gentle and pretty, not flashy. This style flatters people who prefer minimal decor or have light-colored home interiors.
Cut kora cotton into strips about 6-8 cm long. Tie a knot at one end of each strip and glue or stitch the other end to the underside of the plate rim so tassels hang down. Place a single diya in the center and add 6-8 marigold petals around it like a small ring. Keep the tassel border thinner at the front so the flame stays visible.
Pro tipTrim tassels to equal length — around 3 cm hang looks best on small plates.
AvoidDon’t let tassels touch the flame; keep them at least 3-4 cm away.
17. Rhinestone Sticker Path + Single Pink Rose
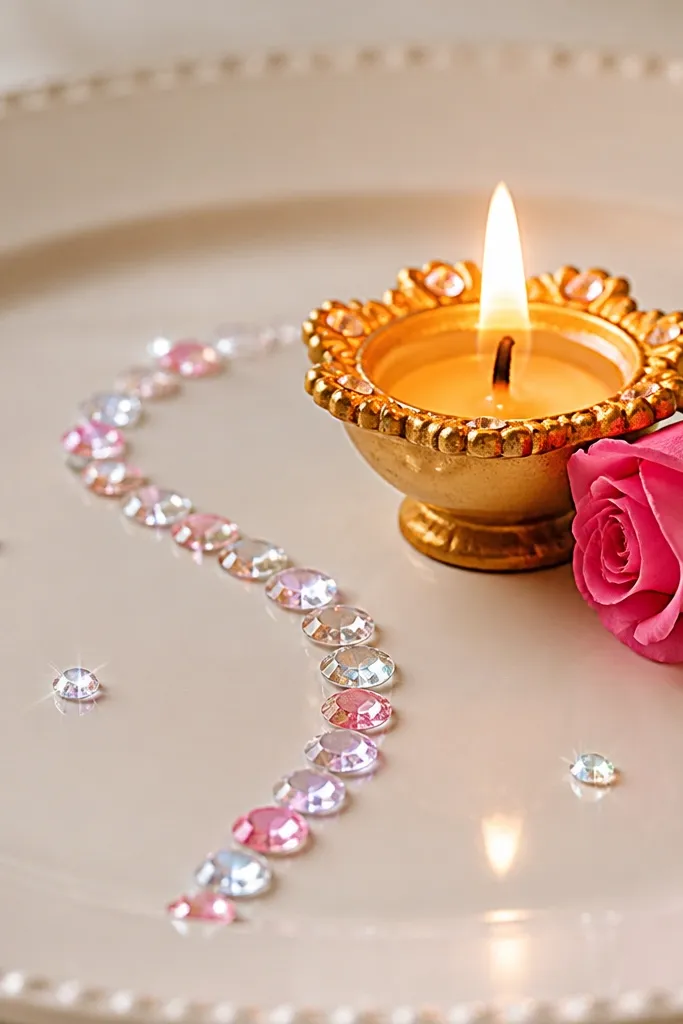
A rhinestone sticker path makes the diya look like it has a “trail,” which draws attention toward the flame. I’ve used this for quick table decor when I wanted something pretty but fast. The sparkle is controlled because it’s a line, not a full scatter, so it doesn’t look cheap. Pink rose beside the flame gives a soft color contrast that looks great with both warm and cool room lighting.
Clean the plate with a dry tissue so stickers stick. Place rhinestone stickers in a curved arc starting from one side of the plate and ending near the diya base. Press each sticker for 10 seconds to secure it. Add one pink rose bud beside the diya and place 2-3 tiny marigold petals at the other end of the arc. Keep the center area clear so the flame is the main focus.
Pro tipUse flat-back rhinestones; they reflect evenly and don’t lift at the edges.
AvoidAvoid putting rhinestones directly around the wick; heat can loosen stickers.
18. Rose Water Color Wash with Floating Petals
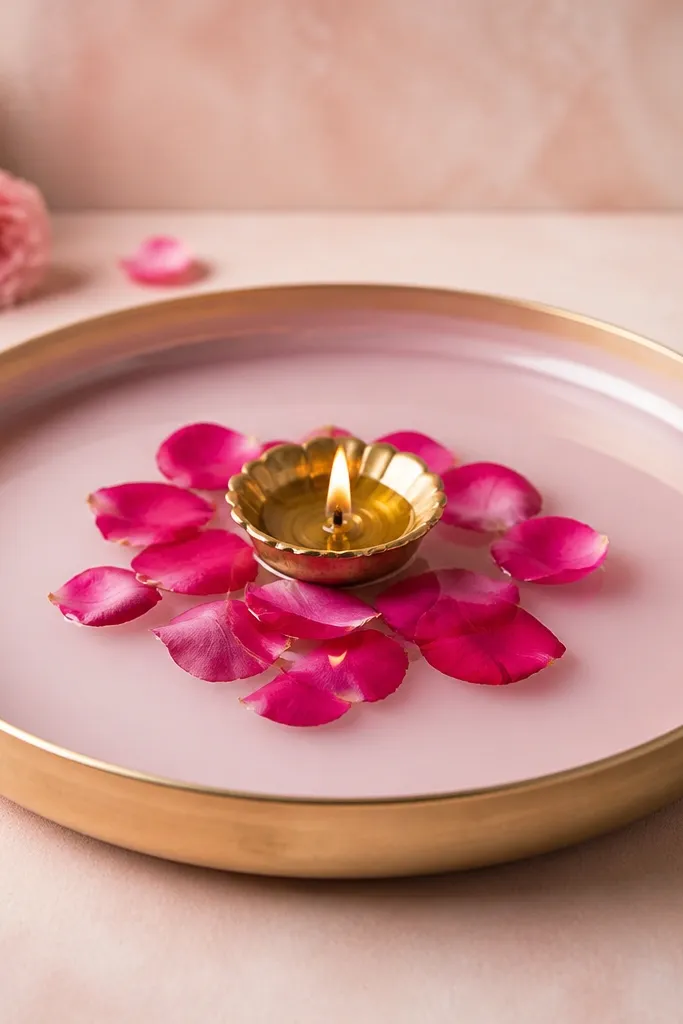
This gives a classy spa-like look, and it’s surprisingly fast. A light pink tint makes the flame look smoother and more flattering, especially on white or light ceramic plates. Floating rose petals feel delicate and romantic, which works well for dinners and guest tables. The key is keeping it light — too much liquid makes a messy, streaky surface.
Pour a tiny amount of rose water into a small bowl and add a pinch of pink food color or use rose water with existing tint. Dab the surface of the plate lightly with a cotton pad to create a faint wash, then let it sit 30-60 seconds until it looks matte. Place the diya in the center and arrange 8-10 rose petals around it like a loose ring. Finish by adding 1-2 petals slightly closer to the flame side for depth.
Pro tipTest on a corner first; some plates absorb color and can stain more than you want.
AvoidDon’t soak the petals; wet petals stick together and look clumpy.
19. Spice Frame with Cinnamon Stick Square
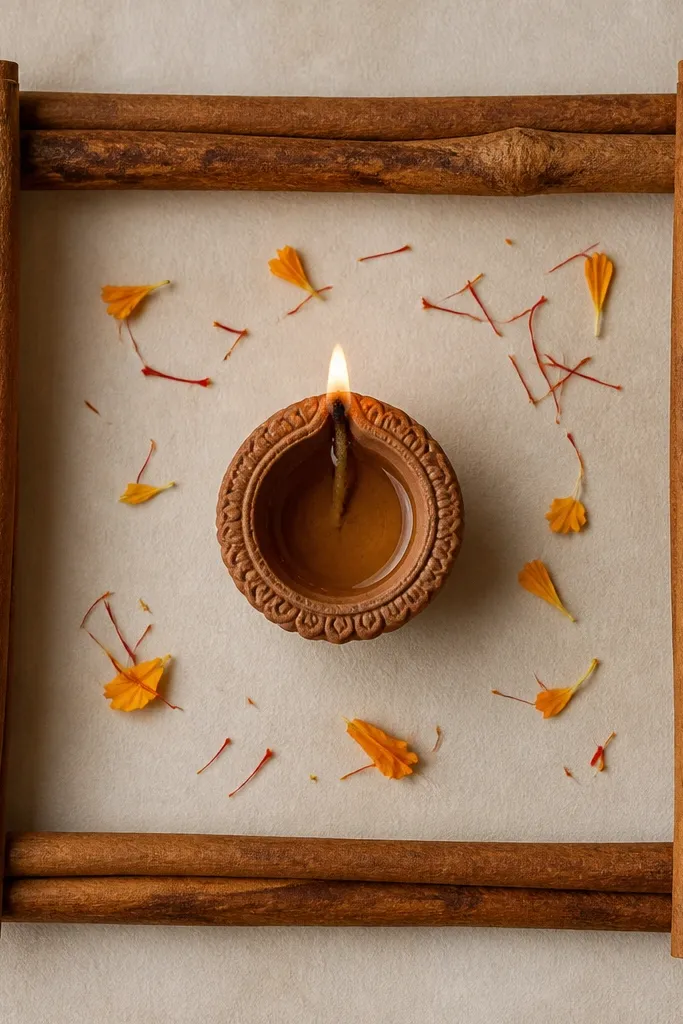
Cinnamon stick frames look warm, cozy, and a little rustic — exactly the vibe Diwali needs when the rest of the house is already busy. The wood-brown color pairs well with saffron threads and marigold yellow. I like this for smaller plates because the square frame makes the whole thing feel organized. It also smells good, and your guests notice it even when they don’t comment.
Arrange cinnamon sticks into a square near the outer edge of the plate, using 4 sticks for the sides. Place the diya in the center and add saffron threads around the diya base in a small circle. Tuck 4-6 marigold petals at the corners of the cinnamon square so the frame looks decorative. Adjust the spacing so the square is even on all sides — it’s the only “geometry” you need.
Pro tipUse whole cinnamon sticks that are dry and straight so your square doesn’t warp.
AvoidDon’t use cinnamon powder; it turns into a dark paste around the flame.
20. Gold Leaf Paper Cut Corners
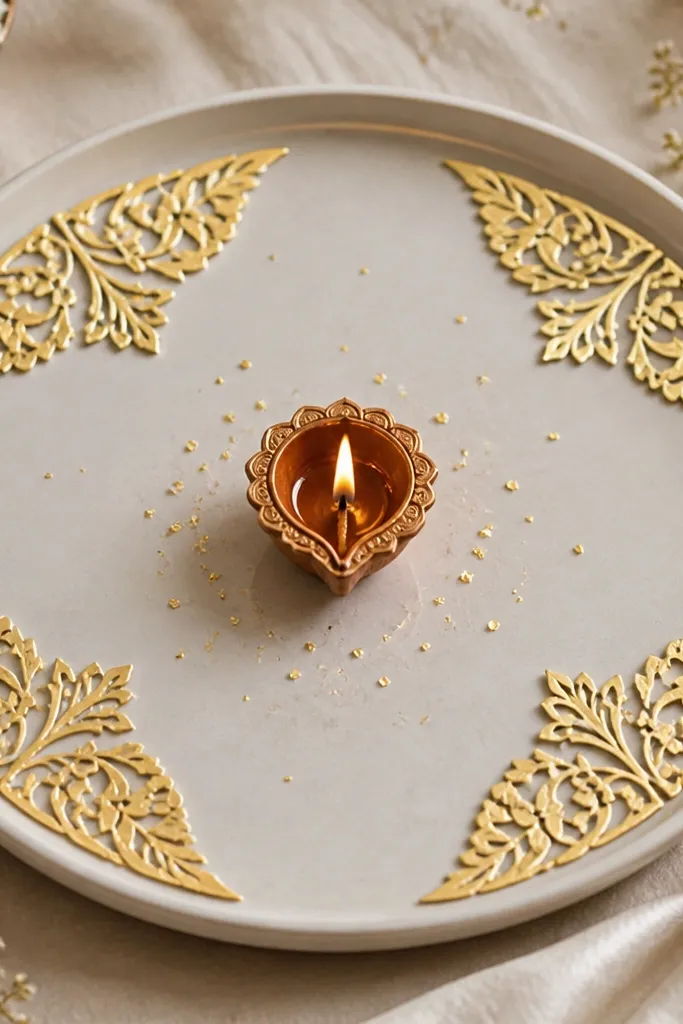
Gold leaf paper corners make the plate look like it has a decorative border without covering the diya area. The gold catches light and looks festive even when the rest of the table is simple. This style is best when you want a clean, modern Diwali look — not too much clutter. It also works with any diya color because gold is forgiving.
Cut gold leaf paper into small corner shapes — think 1.5-2 inch L-corners. Place one corner at each outer corner of the plate, leaving about 2-3 cm from the rim edge. Put the diya in the center and add a few tiny gold flakes around the diya base, like confetti but controlled. Finish by adding one tiny red petal or kumkum dot between two corners to connect the gold to the flame color.
Pro tipPress corners flat with your palm so they don’t curl at the edges.
AvoidAvoid big gold flakes; they look like glitter that migrated from another craft.



