1. Kettle Corn + Black Sea Salt Mini Jar
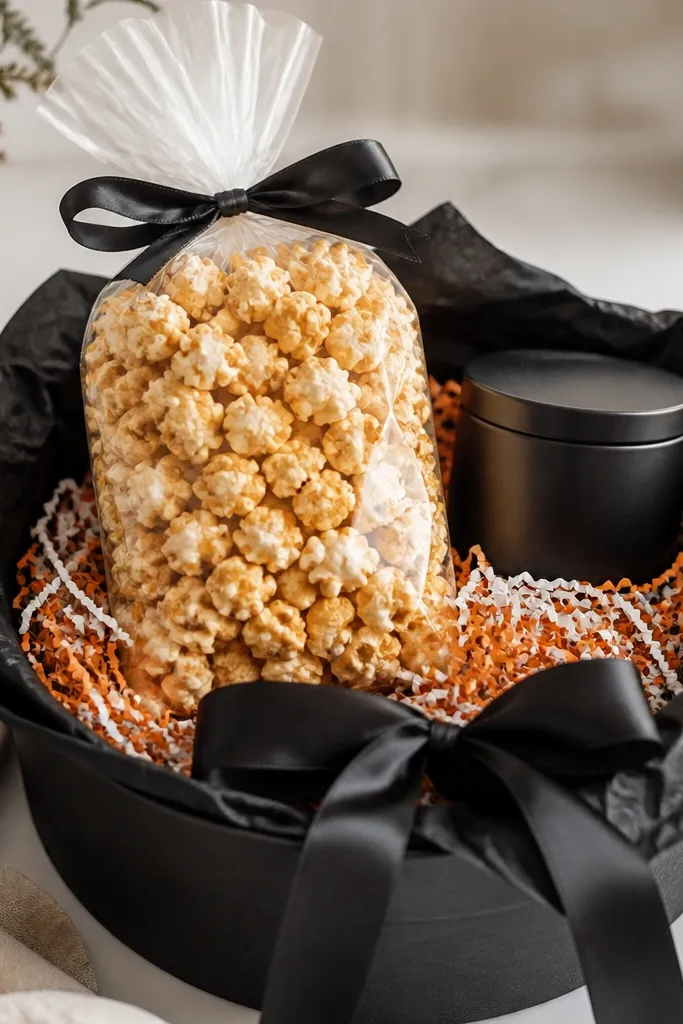
This combo looks expensive because the textures fight for attention in a good way: the kettle corn bag has glossy cellophane highlights, while the matte-black jar kills glare. I’ve used it for people who love snacks but hate “cute clutter” — the jar feels like something they’ll actually open. The warm yellow/orange corn color pops against black, so it flatters medium and light skin tones when you hold the basket up for a photo. The visual rule here is contrast: one bright food color and one dark matte anchor.
Start by lining the basket with black tissue, but scrunch it so it bunches behind the center. Place the kettle corn upright in the middle first, then tuck the black sea salt jar slightly back and to the side so it’s visible over the rim. Add orange crinkle paper around the jar, not on top of it, so the jar stays readable. Finish by tying a black ribbon bow on the front handle area and leaving the top of the kettle corn bag uncovered for the light to catch.
Pro tipUse a small piece of white label tape to write the flavor on the jar — it makes the whole thing look custom in seconds.
AvoidSkip mixing three different snack themes at once (like salty, sweet, and spicy) — it makes the basket look like leftovers.
2. Mini Candle + Witch Hat Favor Tag
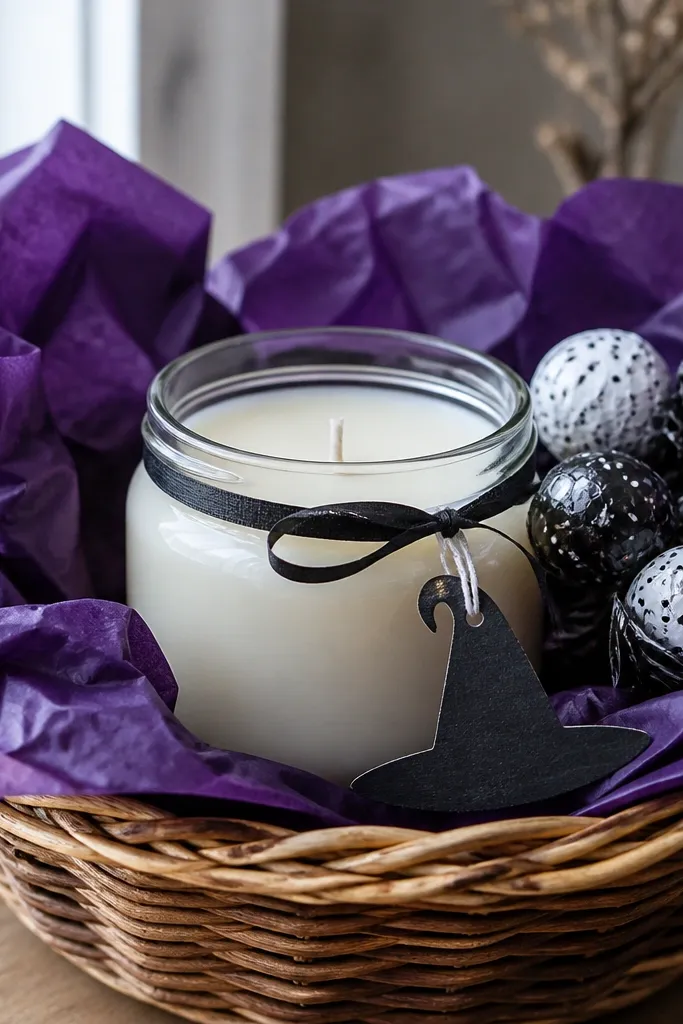
A mini candle jar is the cleanest “after transformation” anchor I know. The glass catches light, and the label gives you a focal point even if the rest of the basket is simple. I like this for adults and teens because it reads cozy, not childish, and it works for most skin tones in photos since the candle color usually leans warm. The witch hat tag makes it feel intentional without adding bulk. The styling principle is one clear centerpiece plus one readable custom element.
Start by adding a layer of deep purple tissue and flattening it only around the basket center. Place the candle jar in the middle so it sits 1-2 inches above the basket rim. Tie black ribbon around the jar once, then attach the witch hat tag so it hangs toward the front. Add two or three wrapped chocolates around the base of the candle, then tuck one small packet (like cocoa or tea) behind the candle so it peeks through.
Pick a candle scent with a color cue — cinnamon or vanilla pairs perfectly with warm orange accents and looks cohesive.
Don’t place the candle too low — if it sinks under tissue, it stops being the focal point and the basket looks empty.
3. Spooky Lip Balm Trio in Black Organza
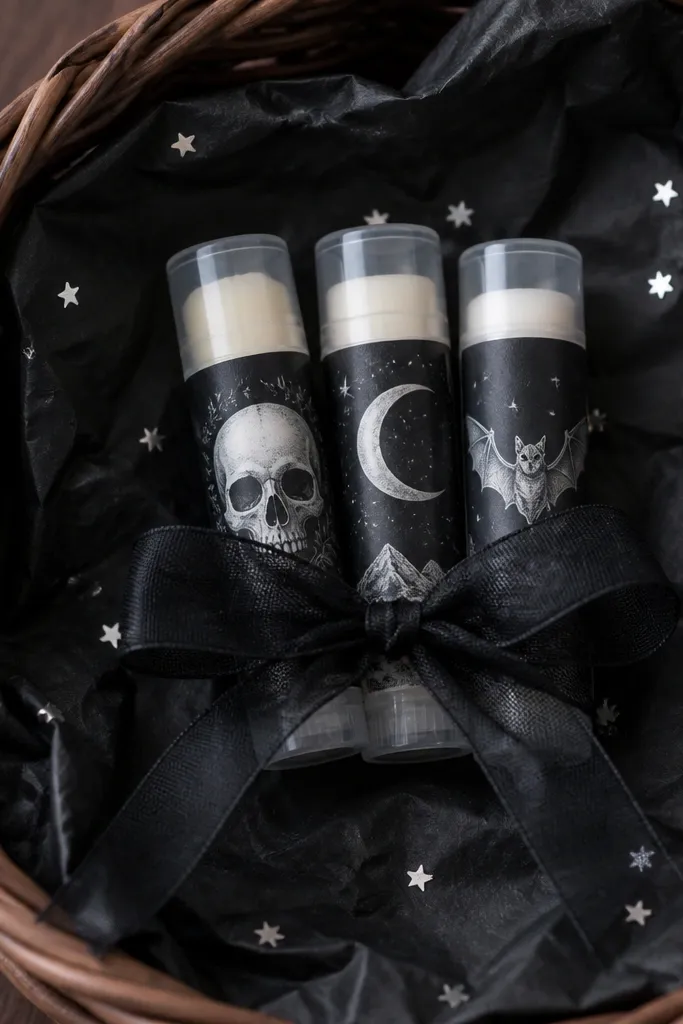
This is my go-to for “boo” gifts because it looks cute but still feels useful. Lip balms give you three colors at the surface level — red, berry, and nude — and they look great against black tissue. Organza adds a soft, slightly see-through layer that makes the labels stand out instead of getting swallowed by paper. I’ve given this to friends with cool-toned skin and warm-toned skin and it photographs well either way because the lip colors provide the warmth. The principle is a controlled mini-color story.
Start by cutting black organza into two long strips and crisscrossing them over the tissue so they form a gentle X behind the lip balms. Place the three lip balms standing up in the center with the labels facing outward. Use a small dab of hot glue or a strip of double-sided tape under the organza knot so the bow holds its shape. Tuck silver star stickers into the tissue around the cluster, then cover the basket rim with a thin loop of organza so the top looks full.
Pro tipChoose lip balms in similar finishes (matte or satin) so the labels and tubes look like one set.
AvoidSkip loose tissue on top of the lip balms — it smears the labels and makes the set look messy.
4. Hot Cocoa Bomb + Marshmallow "Cloud" Sleeve
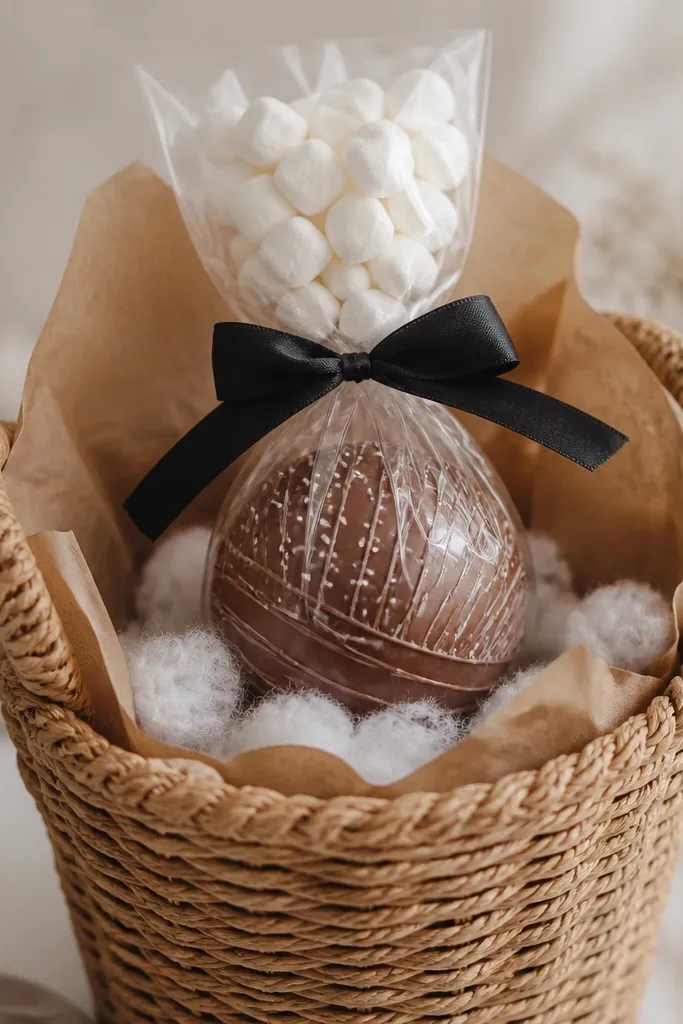
Hot cocoa bombs create instant height, and that height is what makes the basket read “transformed.” The clear sleeve shows the cocoa bomb color, which usually looks rich and dark against kraft. Marshmallows add a soft white texture that breaks up the darkness without turning the whole thing into a candy dump. I’ve made this for people who prefer cozy winter vibes over Halloween gore — it still looks spooky because of black ribbon and dark cocoa. The styling principle is dark anchor + white texture contrast.
Start with kraft paper lining so the basket base looks warm and sturdy. Put the cocoa bomb in the center upright and secure it with a black ribbon loop around the basket rim. Tuck the marshmallow bag behind the cocoa bomb so it stands slightly higher than the bomb. Add a small pinch of faux cotton around the base edges and press it gently so it stays put. Finish with a mini stirring spoon or a single-serve cocoa packet tucked on the side.
Use a black marker to write “stir” or “add milk” on a small kraft tag and tie it to the ribbon — it reads handmade.
Don’t crowd the top with multiple tall items — one cocoa bomb plus one marshmallow height piece is enough.
5. Bath Soak Sachets + Black Lace Ribbon Tie
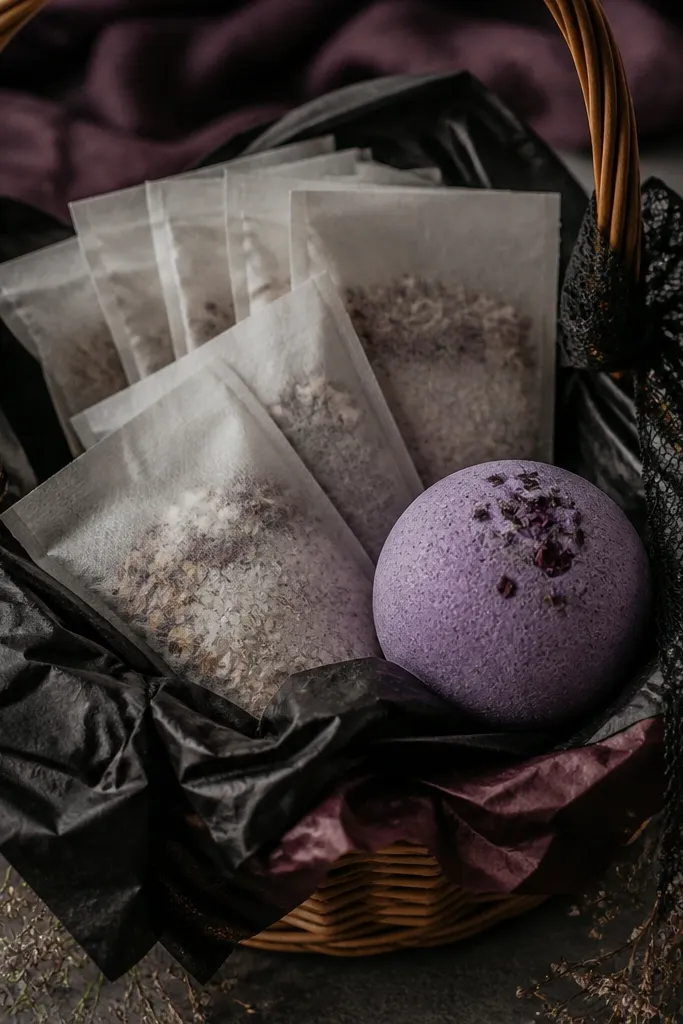
Bath sachets look clean and intentional because they come as uniform packets. That uniformity lets you play with arrangement instead of scrambling around for matching shapes. Black lace adds a soft, old-school Halloween vibe that doesn’t look childish, and plum tissue makes the whole thing feel moody. This flatters anyone because the main colors are deep and neutral, so the basket doesn’t compete with skin tone in photos. The principle is consistent packaging + one textured ribbon.
Start by laying black tissue across the bottom and adding a strip of plum tissue underneath so it peeks out. Stack 4-6 bath soak sachets in a shallow fan, labels facing up. Nestle one small purple bath bomb on the right side so it acts like a second focal point. Wrap black lace ribbon around the handle area twice, then tie a bow that sits at the front. Tuck shredded tissue into gaps so the fan looks full but not crushed.
Pick sachets with the same paper finish (matte vs glossy). Matte labels look more cohesive in DIY baskets.
Skip mixing lace with shiny plastic confetti — it clashes and makes the basket look cheap.
6. Candy Apples DIY Kit in a Kraft Crinkle Nest
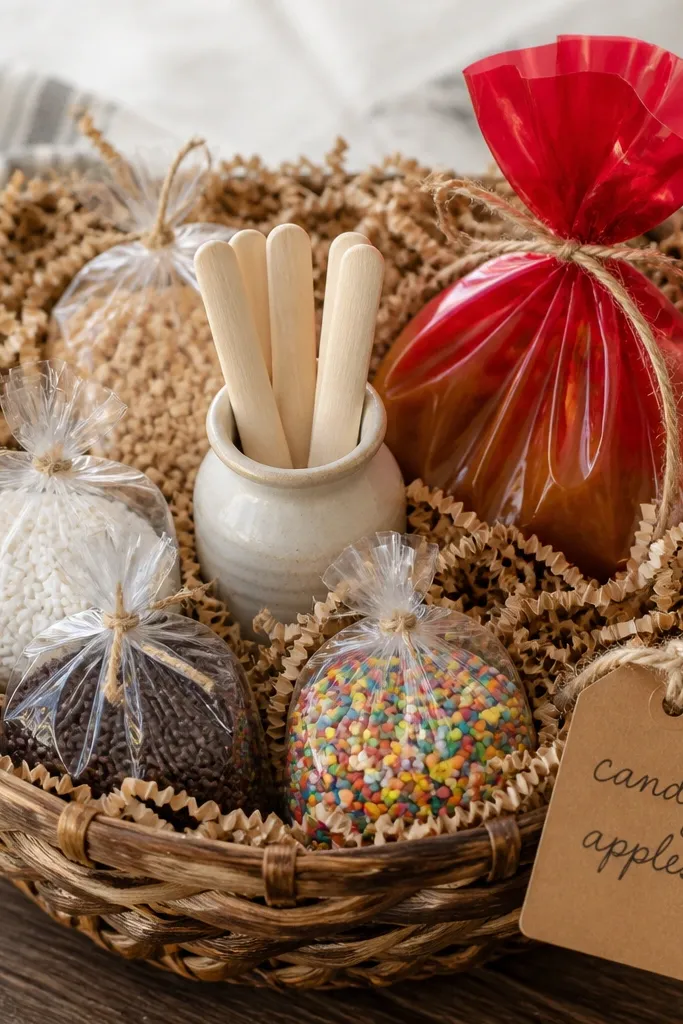
A DIY food kit looks like you spent time because it has components that belong together. The kraft crinkle nest creates a warm base that makes red candy packaging look richer instead of harsh. I like this for groups — it works for a couple or a family because it feels like an activity, not just snacks. The handwritten tag is the difference between store-bought and DIY styled. The principle is a themed mini project with a visible “why.”
Start by shaping kraft crinkle paper into a nest — push it into the basket bottom so it holds the items upright. Place the red caramel topping bag in the center and angle it slightly toward the front. Add topping bags around it so their labels are visible, not hidden under crinkles. Tie twine to a kraft tag and anchor it to the handle or rim so it hangs in the photo. Finish by tucking 2-3 small apple picks into the crinkle paper like they’re sprouting.
Pro tipUse a thick black marker on the tag. Thin pens smear on kraft when you handle the basket.
AvoidDon’t put the stick holder flat — upright items create the height that makes a basket look styled.
7. Black Licorice + Orange Swirl Candy Stripe Basket
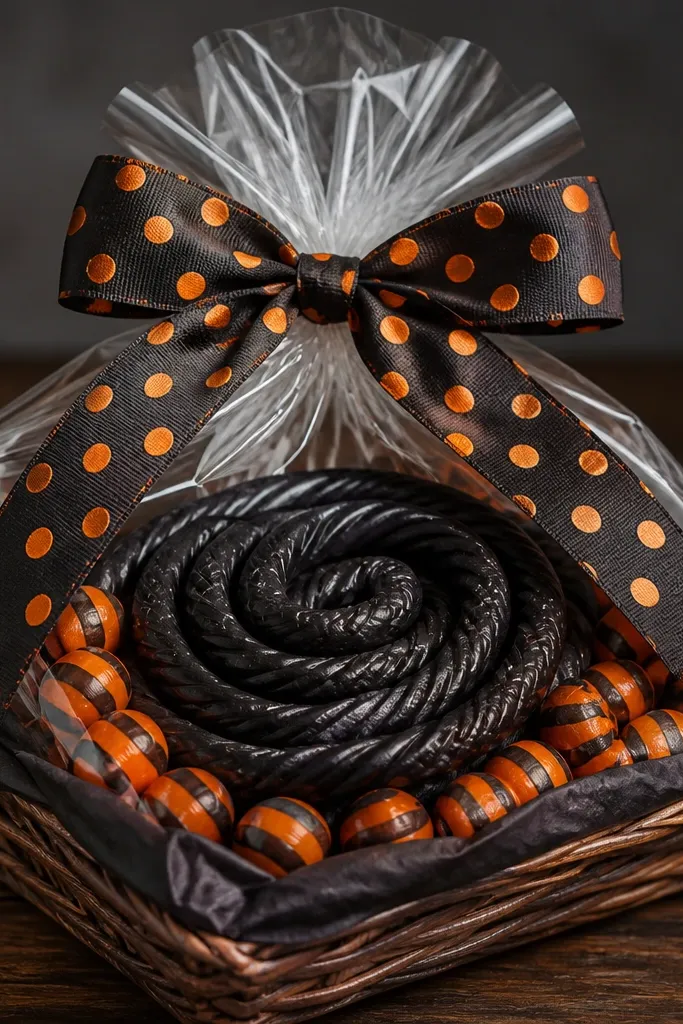
This is a bold look and it works because you’re committing to a two-color candy palette. Black licorice gives you a dark, glossy texture that looks dramatic, while orange swirl candies add movement and brightness. I’ve used it for younger kids and it still looks grown-up because the candy palette is controlled. It flatters lighter skin tones in photos because the orange pops; on deeper skin tones, the black reads strong and graphic. The principle is graphic contrast, not random variety.
Start with black tissue and press it into the corners so the basket holds shape. Coil the licorice rope on top, then tuck the ends under a few candies so it doesn’t shift. Arrange striped candies in a ring around the licorice coil, labels facing out. Tie an orange polka dot ribbon around the rim so it frames the center coil. Add one small plastic spider at the back edge, then stop — one small creepy detail looks better than five.
Pro tipChoose candies with similar wrapper gloss. If one brand is matte and another is shiny, you’ll see the mismatch immediately.
AvoidSkip adding too many different candy shapes — the coil needs negative space to look intentional.
8. Creepy-Cute Socks + Mini Cauldron Planter
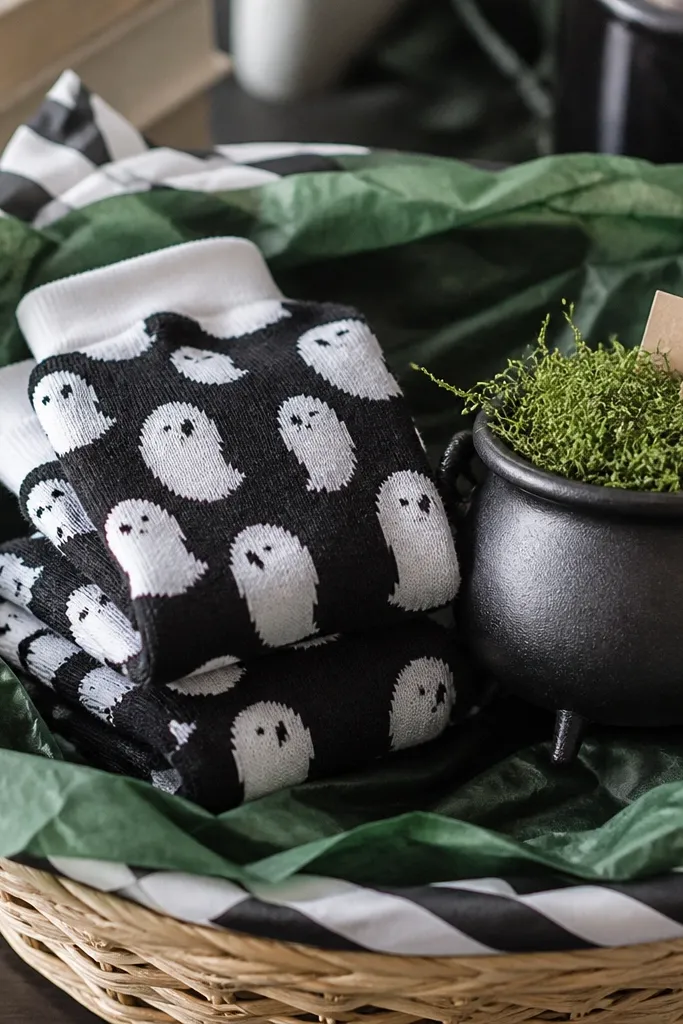
Socks are one of the best “boo” fillers because they look like a gift even when they’re folded flat. The mini cauldron planter adds a grounded, decorative anchor that doesn’t melt or get sticky like candy. I like it for adults because it reads practical and a little spooky, not just sugar. The green moss with black accents gives a strong Halloween color story that looks good on any skin tone. The principle is practical item + decorative anchor.
Start by lining the basket with green tissue and placing the cauldron planter toward the back center. Fold the ghost socks into tight rectangles and set them upright leaning against the cauldron so they form a gentle V shape. Tuck a few small candy pieces behind the socks so they peek through but don’t sit on top. Add a small plant tag or printed label to the cauldron rim using twine. Finish by wrapping a thin black ribbon around the handle and leaving the socks visible.
Pick socks with a similar color family to the tissue (white/black for black tissue, cream/green for mossy greens).
Don’t hide the socks under tissue — folded items disappear fast and the basket looks like it’s missing the main gift.
9. Halloween Tea Sampler + Mini Honey Jar
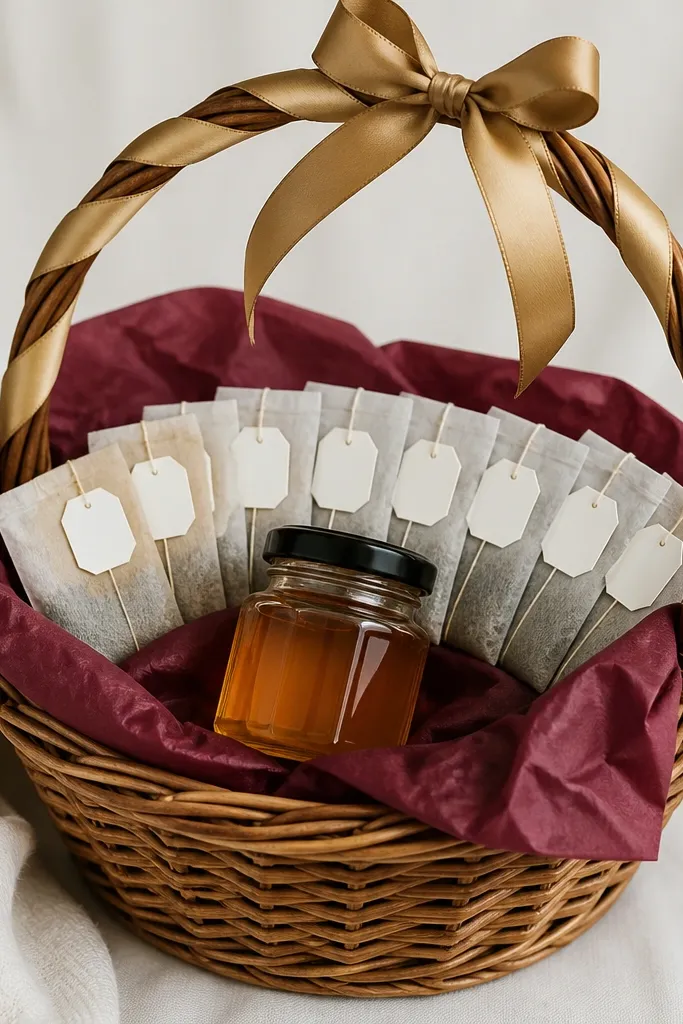
Tea samplers look classy because the sachets show their labels, and they don’t require a lot of arrangement to look tidy. The mini honey jar gives you color warmth and a glass texture that catches light. I’ve built this for coworkers and it always lands well because it’s not messy and it feels thoughtful. The burgundy + gold combo reads warm and flattering for most skin tones in photos, especially when the honey is visible. The principle is readability: you want labels facing up.
Start with burgundy tissue in the bottom and place the honey jar near the front center. Fan out tea sachets behind it in a shallow curve so each tag is visible above the rim. Tie a gold ribbon around the handle and let the ends hang toward the front. Add one small honey stick or a tiny spoon on the side so the front looks full. Finish with a single printed label tag tied to the ribbon with twine.
Use tea sachets with similar tag sizes. If the tags vary wildly, the fan looks chaotic.
Skip mixing loose tea packets in a pile — they look like trash unless they’re fanned or stacked.
10. Spooky Popcorn + Black Stovetop Popper Sticker
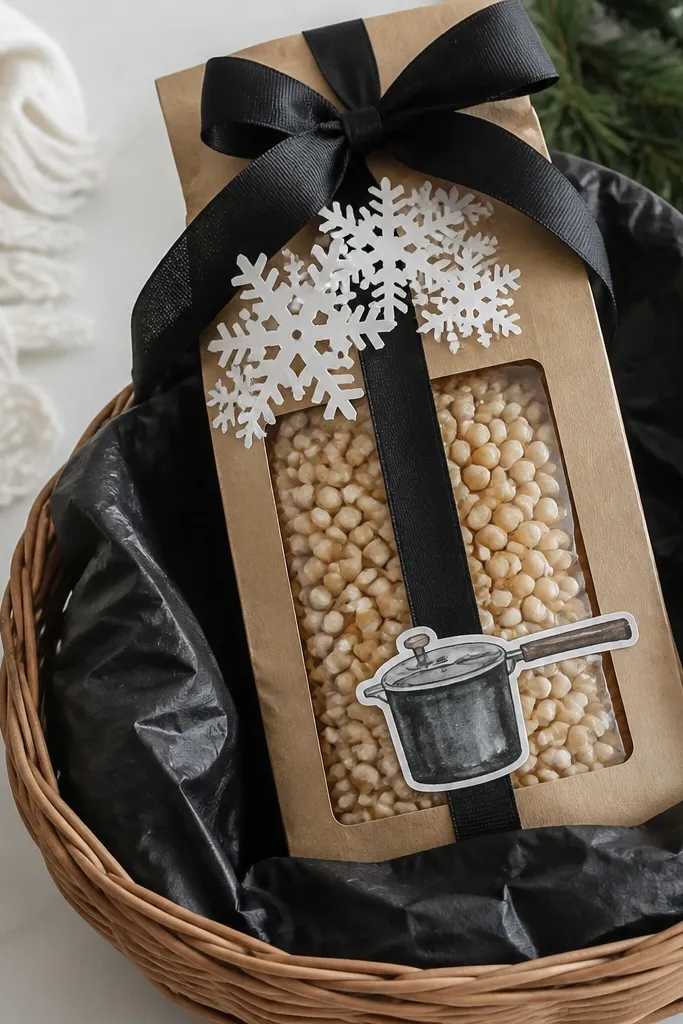
Popcorn is the easiest “after” upgrade because it naturally stands upright and brings its own shape. The secret is the sticker detail — it makes the bag look like it’s part of your theme instead of a random store bag. I’ve done this for door-drop boo baskets where you need it to look good fast but still feel customized. The black tissue makes the white popcorn kernels feel bright, and the sticker keeps everything on-theme. The principle is adding one cohesive graphic element.
Start by lining the basket with black tissue and placing the popcorn bag upright in the center. Tuck white paper cutouts around the base so they peek from behind the tissue, not on top of the bag. Add a few small candies in a ring around the lower third of the popcorn bag. Apply a stovetop popper sticker at eye level on the bag so it shows in photos. Tie a black ribbon bow on the front of the basket rim and let the ribbon tails hang evenly.
Put the sticker on the bag window side so it doesn’t get lost under the tissue fold.
Don’t cram the bag tight — leave a little space so the sticker and window stay visible.
11. Halloween Cookie Mix + Red Plaid Ribbon Wrap
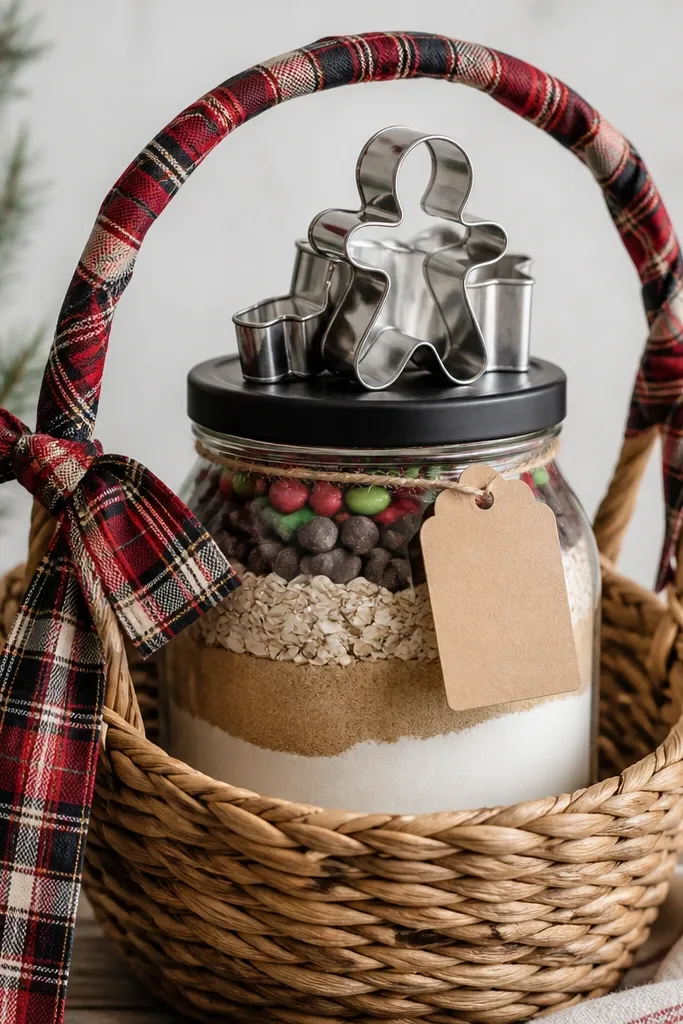
A cookie mix jar looks instantly “planned” because it has a clear ingredient stack and a label. Red plaid ribbon adds a warm, home-kitchen vibe that still reads Halloween when paired with black lids and dark cookie cutters. I’ve used this for adults and it feels more thoughtful than grabbing a random candy box. The black lid grounds the reds so it doesn’t look like a fall craft mess. The principle is a jar anchor plus a kitchen-themed ribbon.
Start by placing the jar in the center of the basket, with the black lid facing up. Wrap the handle area with red plaid ribbon twice, then tie a bow at the front. Place cookie cutters on top like a small fan — one slightly higher than the others. Add a kraft tag attached with twine to the ribbon knot so it sits in the upper third of the photo. Fill empty gaps with a single layer of shredded kraft paper so the top stays clean.
Pro tipIf the jar label is plain, add a printed label strip with big text and a small icon like a bat silhouette.
AvoidDon’t use multiple ribbon patterns. Plaid plus polka dots plus glitter looks like costume supply, not a gift.
12. Gummy Eyeballs + Black Glitter Foam Base
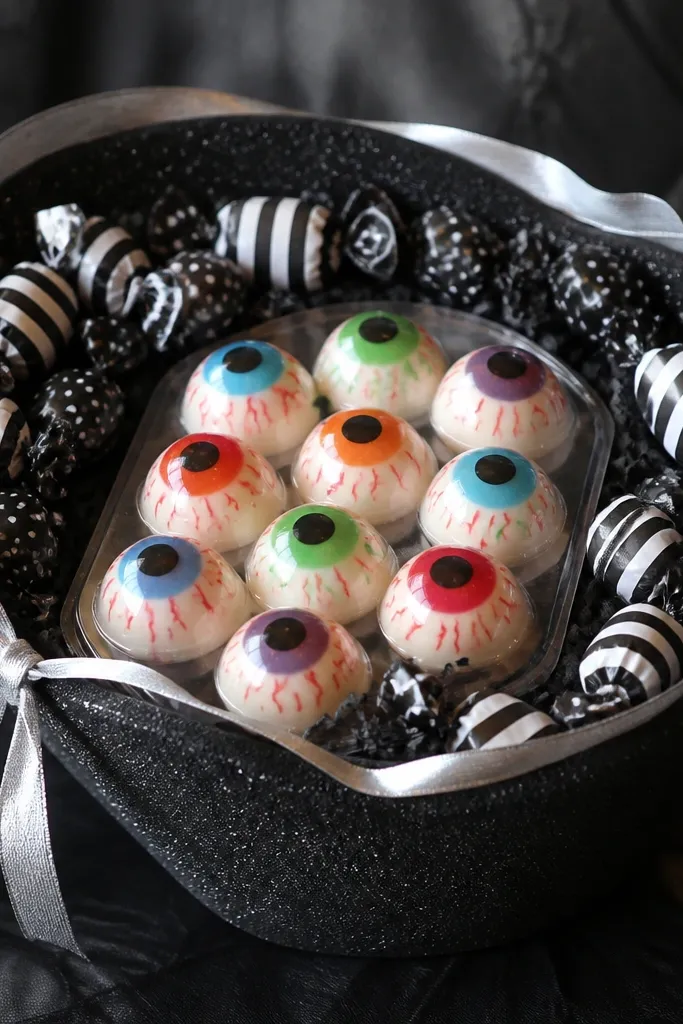
This is the “fun scary” look that still photographs well because the base is controlled. Black glitter foam gives you consistent sparkle without random loose glitter everywhere. Gummy eyeballs are bright and playful, so you don’t need a lot of extra decorations; the eyeballs do the work. I like this for kids and teens because it reads like a game. The silver ribbon adds a cool highlight that makes the gummies look even shinier. The principle is one bold novelty item plus a stable decorative base.
Start by cutting black glitter foam to fit the basket bottom and bend it slightly so it hugs the sides. Place the gummy eyeballs tray in the center and angle it slightly so the eyes face outward. Add black-and-white wrapped candies around the tray edges, keeping them at the same height. Tie a thin silver ribbon around the rim and tuck the ribbon ends behind the candy so it looks neat. Finish by adding one or two small Halloween stickers on the foam — just enough to show at the corners.
Pro tipUse a foam base even if you use tissue — it keeps the gummies from sliding and makes carrying easier.
AvoidSkip loose glitter. It sheds onto wrappers and makes the whole basket look dusty.
13. Bath Bomb + Faux Spiderweb Doily
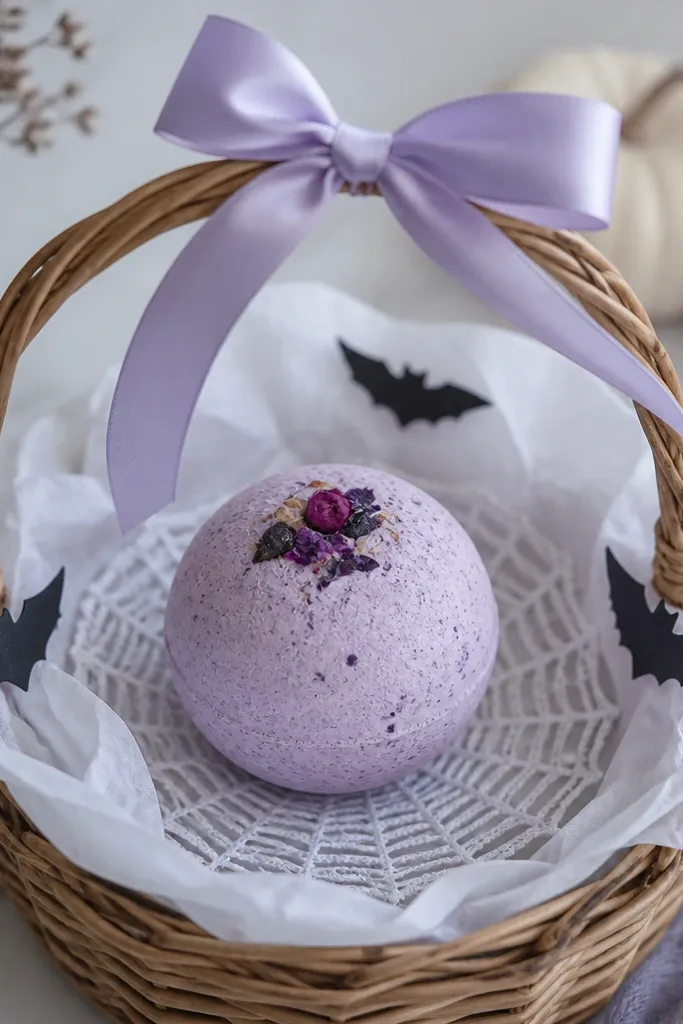
One large bath bomb looks cleaner than ten small ones because it gives a single focal shape. The faux spiderweb doily is the trick that makes the basket look styled without adding clutter — it frames the bath bomb like a plate. White tissue keeps the bath bomb color looking true, especially if it’s lavender, blue, or green. This combo flatters everyone because the base is bright and neutral, and the bath bomb color becomes the only strong hue. The principle is framing: put the main item on a “stage.”
Start by lining the basket with white tissue and pushing it into corners so it doesn’t collapse. Place the spiderweb doily flat in the center, then set the bath bomb on top. Tie pale lavender ribbon around the handle and let it drape down the front. Add tiny black bats (die-cut stickers) near the rim, not on the bath bomb, so you don’t cover the color. Tuck a small packet of lotion behind the bath bomb so it peeks from the side.
Choose a bath bomb with a smooth top. If it’s too rough, the doily pattern looks messy on top.
Don’t add multiple bath bombs. Two or more makes it look like a pile instead of a centerpiece.
14. Apple Cider Caramel + Cinnamon Stick Bundle
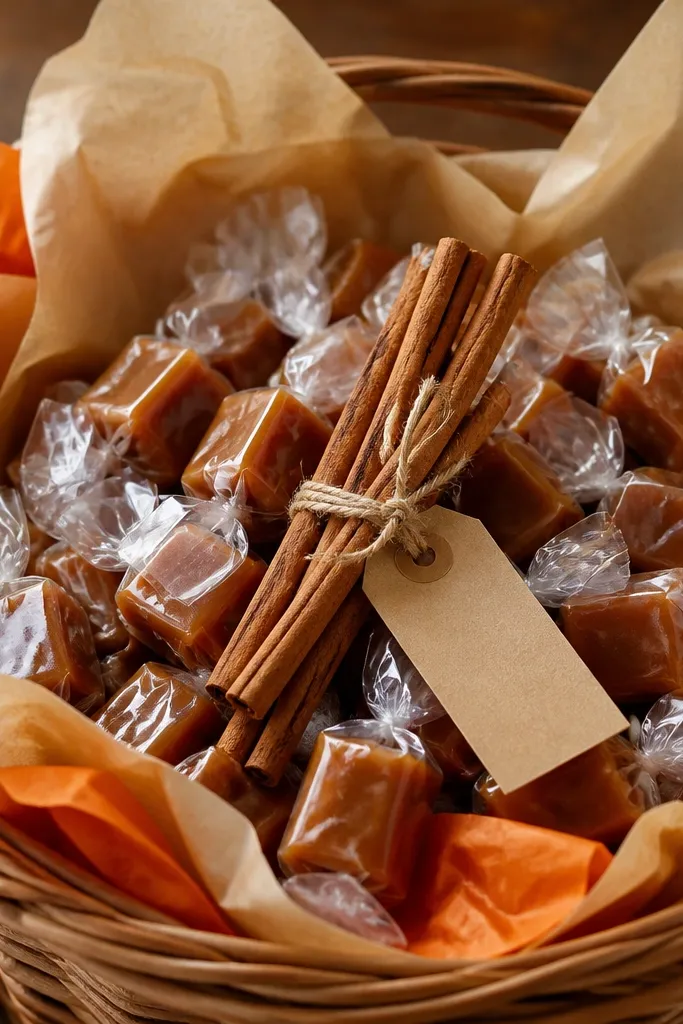
This filler set looks like fall baked goods instead of candy chaos. Apple cider caramel wrappers are usually warm brown and creamy gold, which makes them look richer than bright neon candies. Cinnamon sticks add height and a natural texture that reads cozy in photos. I like it for adults because it smells like something you want to open immediately. The kraft base keeps everything grounded, and the orange tissue gives a Halloween nod without screaming. The principle is using scent cues and warm neutrals.
Start with kraft paper lining and tuck orange tissue under the rim so it shows as a thin band. Place the wrapped caramel candies upright in the center, leaning slightly against each other. Tie cinnamon sticks with twine to a kraft tag and place them so they lean outward from the center like a small bouquet. Add two or three small chocolate squares around the base so the bottom looks full. Finish by tying a simple ribbon around the basket handle in a warm orange or dark brown.
Pro tipIf the cinnamon sticks don’t stay upright, tape the bottom bundle to the kraft paper with double-sided tape.
AvoidSkip bright teal or neon colors. Warm spice palettes look right; neon makes it look like party favors.
15. Black Chocolate Bars + Silver Foil Confetti Tray
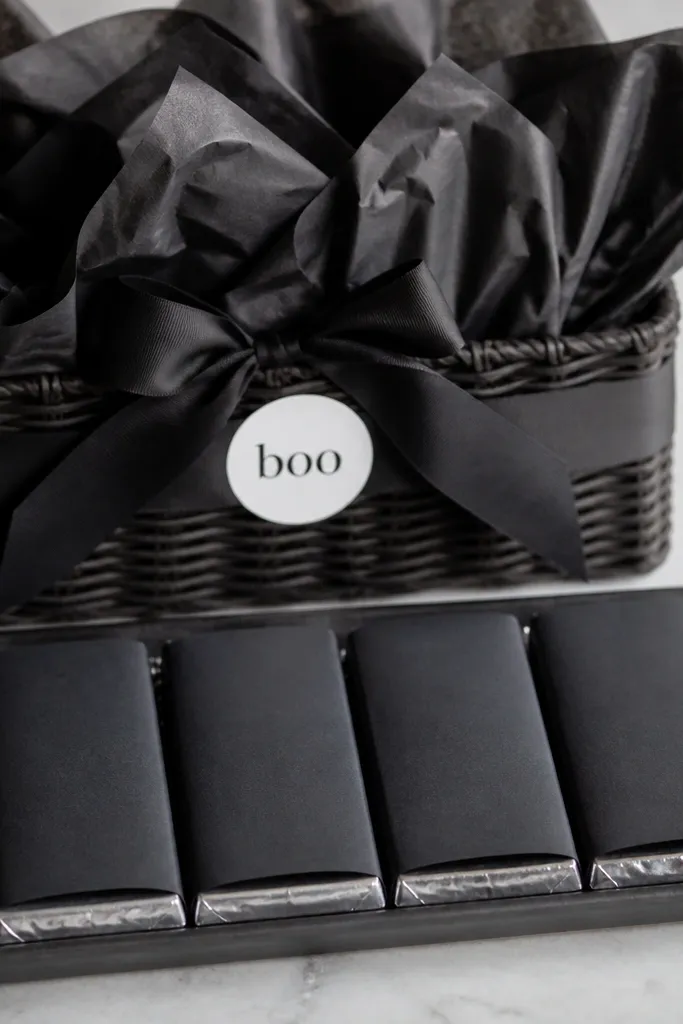
Black chocolate bars look sleek, and that sleeker vibe is exactly what turns a plain basket into a styled one. Silver foil confetti is best when it’s controlled — a tiny pinch around the edges gives sparkle without covering everything. I’ve used this for date-night boo baskets because it feels more grown-up than gummy chaos. It also flatters because the black wrappers look clean and the silver adds highlight. The principle is minimal color with controlled sparkle.
Start by lining the basket with matte black tissue and flattening it in the center where the tray will sit. Place the chocolate bars in a row on a small flat tray or even a folded cardboard piece wrapped in black paper. Add a tiny pinch of silver foil confetti around the tray edges, not on top of the bars. Tie a ribbon across the front of the basket and add a white 'boo' label sticker to the bow. Fill any gaps with a thin layer of black crinkle paper so the basket doesn’t look hollow.
Pro tipUse a tray or stiff base so the bars don’t slide when you carry the basket to the door.
AvoidAvoid glittery loose confetti that spreads — it turns into a mess on floors and wrappers.
16. Mini Photo Frame + "Spooky Memories" Tag
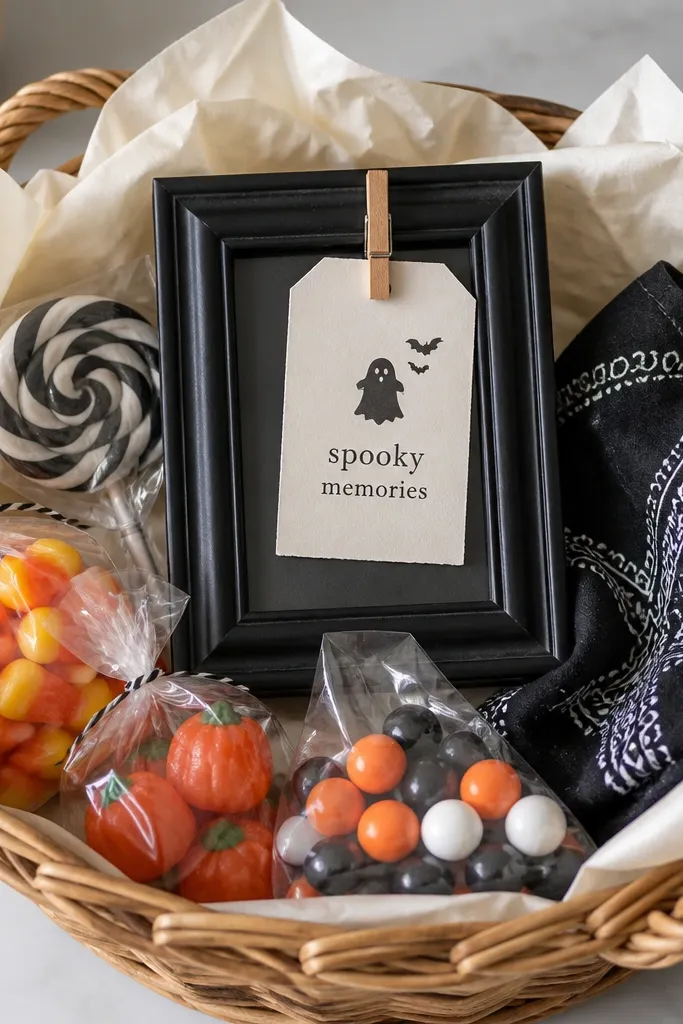
A mini photo frame is a gift that feels personal, and it instantly upgrades the basket from candy pile to keepsake. The black frame against cream tissue looks crisp and clean, which is what I want when I’m aiming for that “after” look. It also works for anyone — kids, adults, and coworkers — because you’re not guessing a flavor preference. The bandana texture adds softness and a subtle pattern, so the basket looks layered. The principle is a keepsake anchor plus small edible fillers.
Start by lining the basket with cream tissue and placing the photo frame in the center so it rises above the rim. Clip or tape a small cardstock tag to the frame so it faces forward. Fold a black-and-white bandana and tuck it behind the frame so it peeks out on both sides. Add small candy packs around the lower half of the frame, keeping the top of each pack visible. Finish by tying a thin black ribbon around the basket handle and leaving the frame tag uncovered.
Write the tag in thick marker and keep the font simple — bold text reads clean in photos.
Don’t hide the frame behind tissue — if it can’t be seen, it loses the transformation effect.
17. Hand Lotion + Black Velvet Ribbon Bow
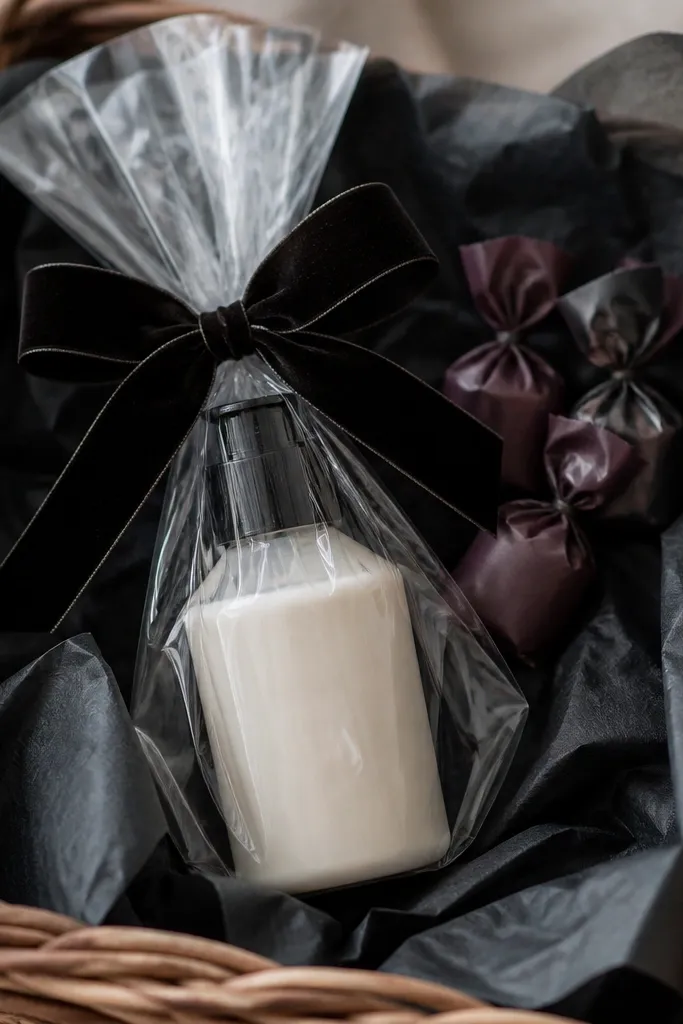
Velvet ribbon changes the whole vibe. It looks soft and expensive, even if the lotion is a basic drugstore bottle. I’ve used this when the recipient is picky about sweets or already has a ton of candy. Charcoal tissue keeps everything moody, while plum candy wrappers add a second color that still feels Halloween. This set flatters because the velvet absorbs light — it avoids harsh glare in photos. The principle is texture contrast: matte tissue, smooth bottle, soft velvet.
Start with charcoal tissue and press it into the corners. Place the lotion bottle in the center and wrap a thin clear cellophane sheet around it if you want extra shine control. Tie black velvet ribbon around the bottle neck and make a bow that sits at the front. Add plum wrapped candies in a small cluster at the base so they don’t cover the ribbon bow. Finish with a single small tag tied to the basket handle so the top looks intentional.
Choose a lotion bottle with a label color that matches the ribbon (black or deep plum). It keeps the look cohesive.
Skip shiny satin ribbon. It throws light reflections and makes the basket look cheap on camera.
18. Mini Witch Brew Soda + Chalkboard Label Strip
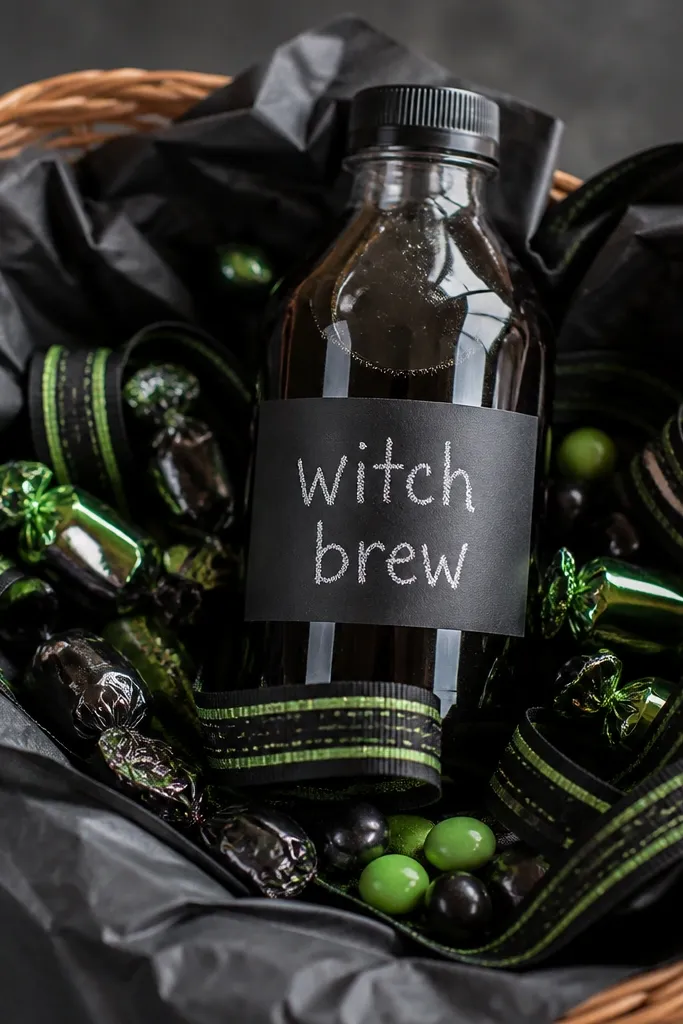
A mini soda bottle gives you instant height and a glassy shine that looks great in overhead photos. The chalkboard label strip is the DIY part that makes the bottle feel like it belongs to your theme. I like this for teens and adults because it reads like a drink + treat set, not a kid basket. The black tissue and dark label keep the palette tight, while the green accents make it spooky without going full orange. The principle is customizing one item so the whole basket feels made, not assembled.
Start by lining the basket with black tissue and placing the soda bottle in the center upright. Wrap a chalkboard label strip around the bottle and write the name with white chalk marker so it looks crisp. Add candy pieces around the bottle base, keeping them low so the bottle stays visible. Use a black ribbon with green accents around the basket rim, then tie a small bow at the front. Tuck a single printed “serve cold” tag behind the ribbon so it peeks from the side.
Pro tipTest your chalk marker on the label strip first. Some brands smear on glossy tape.
AvoidDon’t use three different label styles (chalk, glitter, and stickers). Pick one so the bottle stays the hero.
19. Creepy-Cute Book + Bookmark of the Month Clip
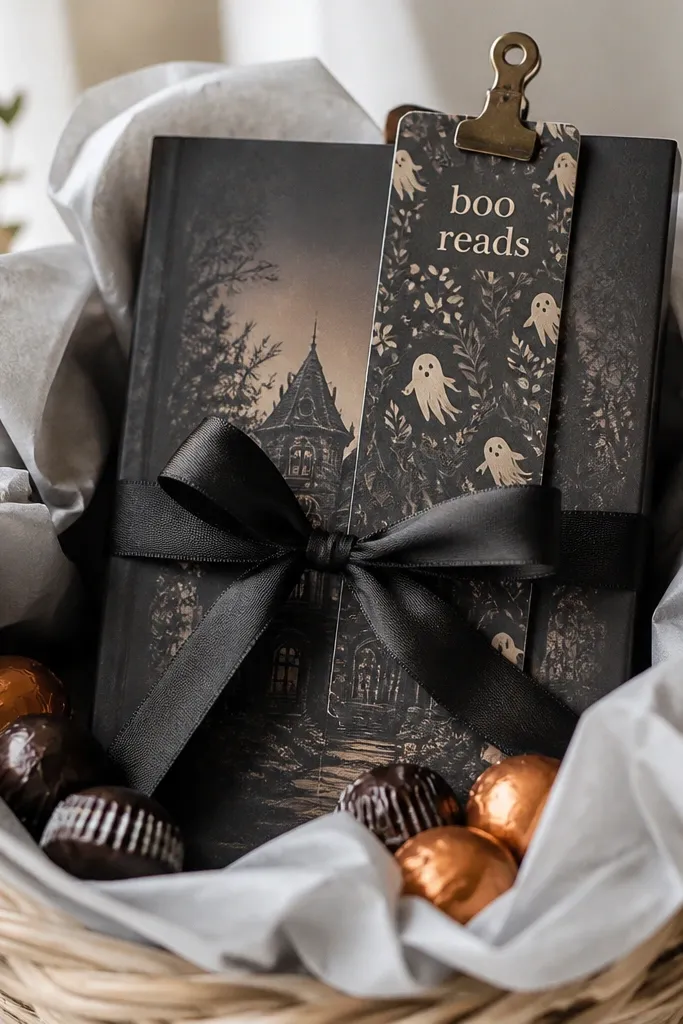
A small book changes the whole feel because it reads thoughtful and it doesn’t melt, spill, or get sticky. I picked this for a friend who hates candy but loves cozy reads — the basket still feels like a boo gift because of the black ribbon and the bookmark details. The light gray tissue makes the black ribbon pop, and it looks clean next to a variety of skin tones. The bookmark clip adds a little shine without turning into glitter chaos. The principle is a keepsake-ish filler that stays neat.
Start with light gray tissue and place the book upright in the center, wrapped with black ribbon around the spine area. Clip a patterned bookmark to the top of the book using a metal binder clip so it stands out above the rim. Tuck mini chocolates around the bottom edges of the book, not on top, so the bookmark stays visible. Add a small kraft tag attached to the ribbon tail with twine. Finish by shaping the tissue so it forms a soft frame around the book.
Pro tipPick a book cover color that matches your tissue (black ribbon + gray tissue is a clean combo).
AvoidSkip loose bookmarks thrown into tissue. They end up bent and look sloppy.
20. Chocolate Covered Pretzel Rods + Black Stripe Wrap
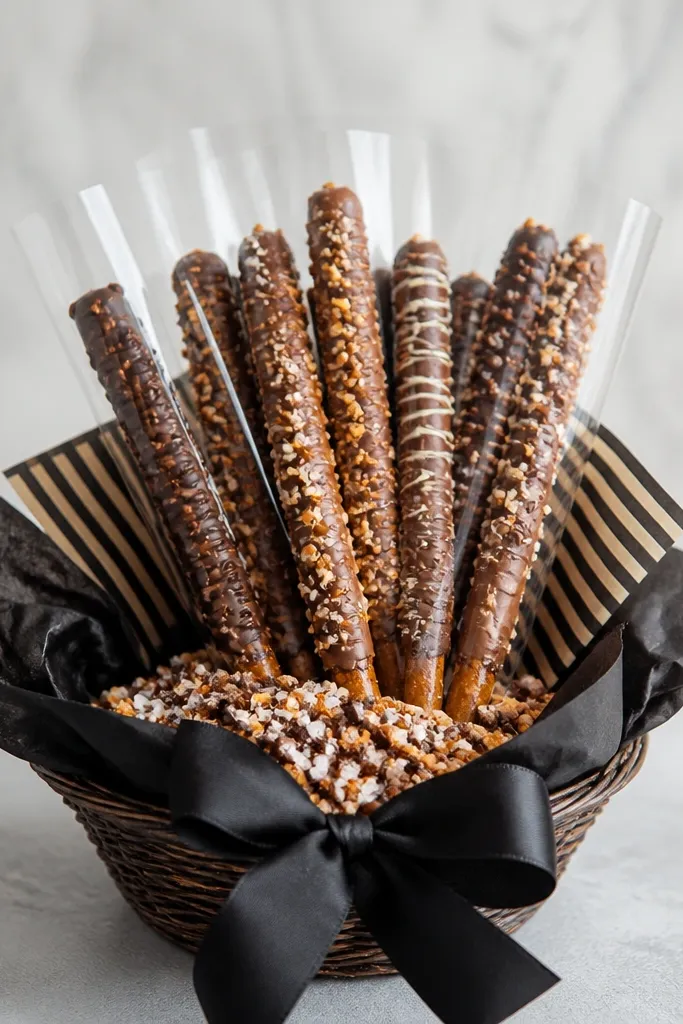
Pretzel rods look dramatic because they have shape — straight lines that create height and structure. Chocolate coating adds a glossy texture that contrasts with matte tissue. The black striped wrap makes the rods look like one set instead of random snacks. I used this for a friend who loves salty-sweet combos, and it always looks “after” because the rods are arranged vertically. The principle is line and height: straight items make the basket look intentional fast.
Start with black tissue and place a small layer of crushed candy topping at the bottom so the base looks textured. Stand the pretzel rods upright in a clear bag or wrap and place the bundle in the center. Arrange the rods so the tallest one hits near the rim, then tuck the shorter ones behind it for a staggered look. Tie a black ribbon bow on the front of the basket and let the rod bag opening face forward. Add one small candy piece on each side of the base to fill gaps without covering the rods.
Pro tipIf your rods lean, use a rolled piece of cardboard inside the bag to keep them vertical.
AvoidDon’t lay them flat. Flat pretzels look like you dropped snacks in a basket.