1. Black-and-Cream Checker Jack-o-Lantern
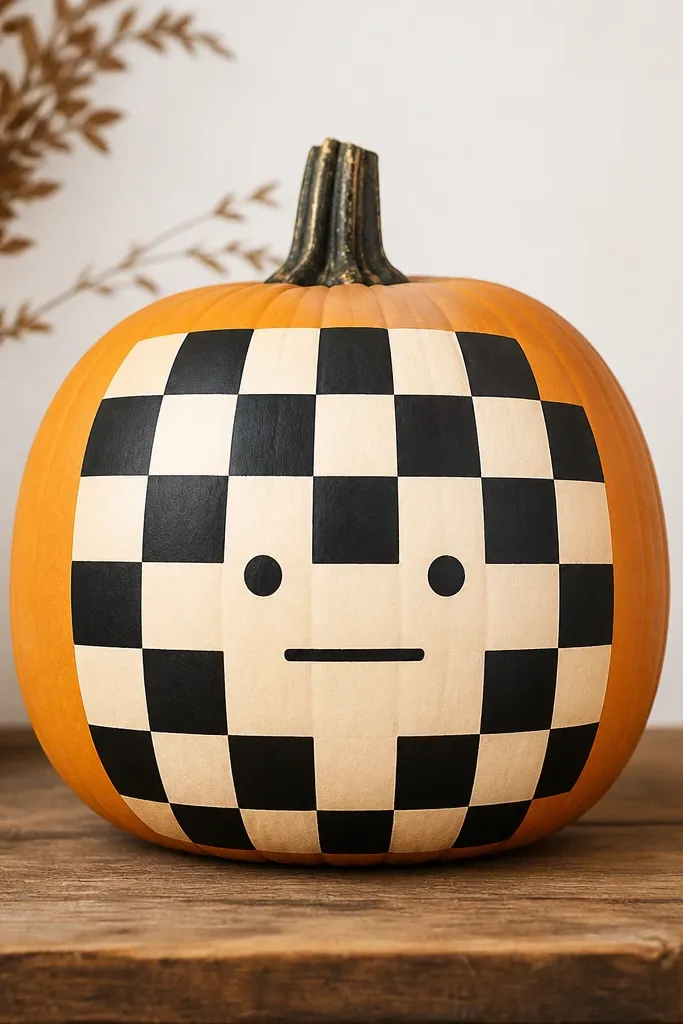
This one looks expensive because the pattern is controlled. Start with a smooth cream base (or paint over the orange) and then add black squares with painter’s tape so every cell lines up. The checker reads bold from far away, and the cream keeps it warm instead of spooky. It flatters most porch setups because it matches black planters, cream mums, and white string lights. For beginners, it’s forgiving because small imperfections blend into the grid — but only if your tape lines are straight.
Pro tipMark your grid lightly with a pencil first. If you can erase it after, your spacing stays consistent.
Start by wiping the pumpkin, then paint the whole surface with cream acrylic in two thin coats. While it dries, cut small strips of painter’s tape and map a grid — I do about 1-inch squares on a 10-12 inch pumpkin. Press tape down firmly, paint black over the exposed squares, and peel tape only after the paint is dry to the touch. Finally, paint the face: two small almond eyes and a simple straight mouth in black, staying centered so it looks intentional.
AvoidAvoid thick paint layers — they make tape edges bleed and the checks look fuzzy.
2. Gold Leaf Polka Dots with a Matte Base
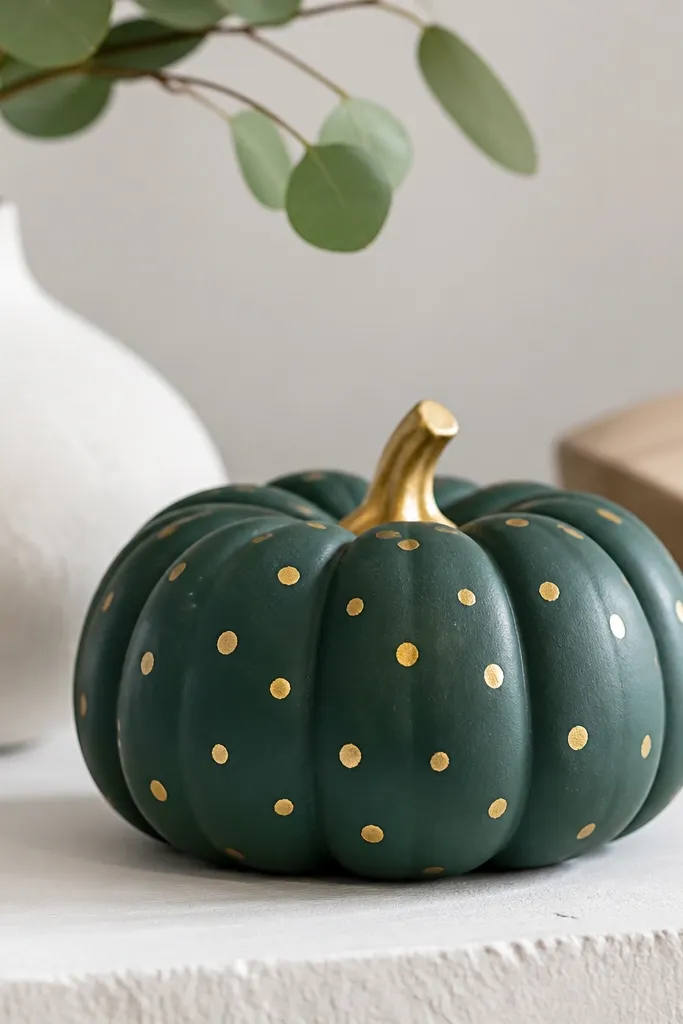
Matte base + metallic dots is my go-to for “wow without effort.” Deep green keeps the gold from looking costume-y, and the matte finish hides skin texture so your dots look like they float. This style looks great on medium to large pumpkins because the polka pattern scales well. It’s also flattering for warm skin tones because gold ties in with peachy and amber décor. If you want something that works for fall parties and still looks good on Thanksgiving day, this hits the sweet spot.
Paint the pumpkin a matte deep green (I use satin-matte craft acrylic) in two thin coats. After it dries, use a foam dotting tool or the eraser end of a pencil dipped in gold acrylic to place dots — aim for 10-20 dots, not full coverage. If you want a leafier look, press small pieces of gold leaf adhesive dot onto a few dots instead of painting them all. Finish by sealing with a clear matte spray if you used acrylic, or a light protective spray if you used gold leaf adhesive.
Do a test dot on cardboard first. Gold can look darker once it hits the pumpkin’s texture.
Don’t use shiny base paint — it makes the whole thing look like glitter glue.
3. Pressed Leaf Silhouette on White Pumpkin
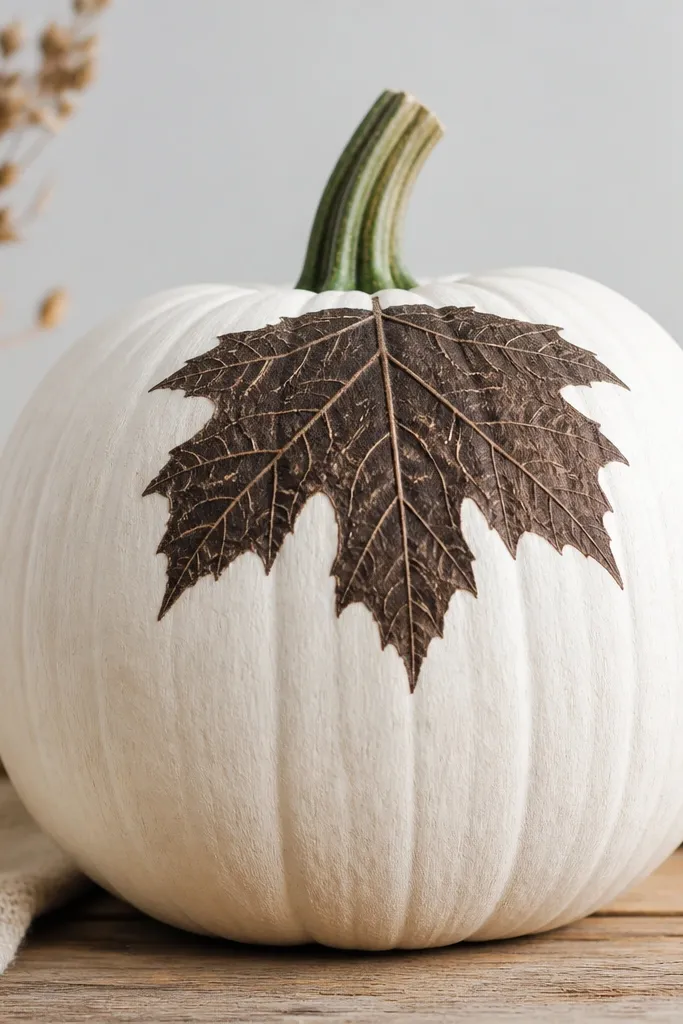
This one is surprisingly easy and looks artsy in a quiet way. The key is using real leaves and transferring the shape with paint or ink, so the edges look organic instead of cartoonish. A white base makes the silhouette pop and keeps it looking clean even if your leaf placement isn’t perfect. This design looks best on smaller pumpkins or gourds because the silhouette reads delicate up close. It flatters cool-toned décor — think silver trays, white candles, and black lanterns.
Pro tipPick leaves that are dry and not brittle. Brittle leaves tear and give you ragged edges.
Start by painting the pumpkin white and letting it cure for at least 30 minutes. Choose a thin leaf with clear veins (maple or ivy works), then press it flat on the pumpkin and rub over it with a sponge loaded in dark brown paint or craft ink. Lift the leaf carefully to reveal the silhouette and vein texture. If you want extra definition, outline the shape with a fine-tip brown paint marker.
AvoidDon’t skip the paint or ink transfer step — just gluing leaves without sealing can look patchy by day three.
4. Striped Ombre Bands with Washi Tape
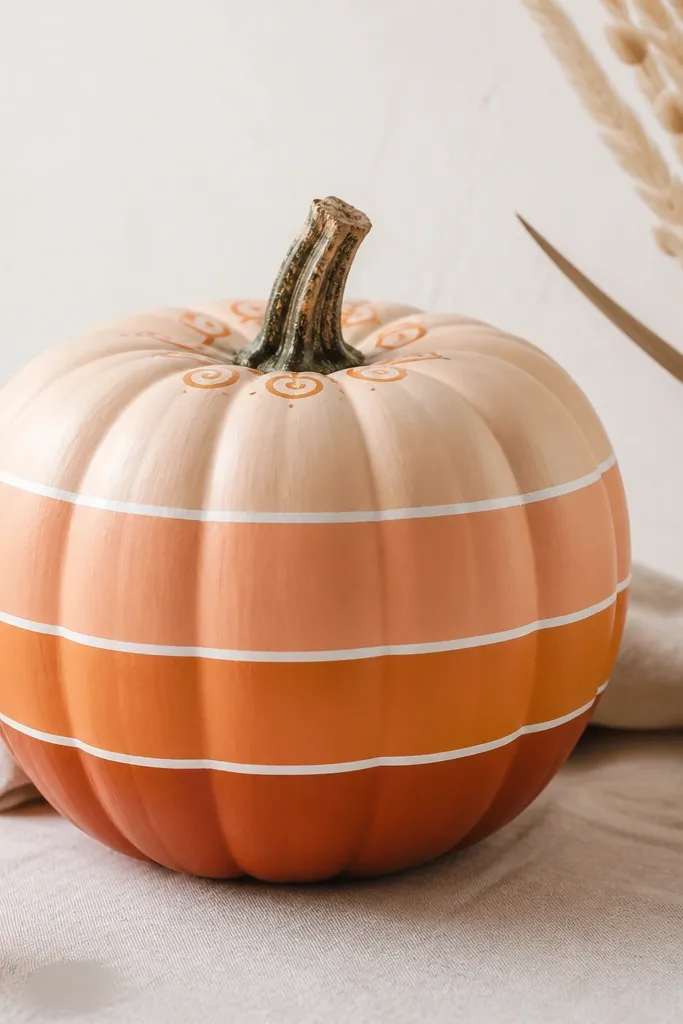
Washi tape makes stripes look straight even if you’re not. This design gives you that “designer gradient” look but stays beginner-friendly because the tape creates clean boundaries. Use an ombre direction that matches your décor — peach to orange looks friendly, while cream to rust looks more vintage. It’s flattering on any porch because it blends with pumpkins, wood tones, and warm wreaths. I like it on medium pumpkins where the stripes have room to breathe.
Pro tipUse painter’s tape on the bottom edge if you’re worried about wash tape lifting. Washi can peel if the pumpkin is dusty.
Paint the pumpkin a light base color first (peach or cream) and let it dry. Apply washi tape in horizontal bands spaced about 1 inch apart, pressing down along the edges. Paint each band a different shade — start light at the top, get darker toward the bottom — and remove tape only after paint dries. Add one small accent near the stem, like a swirl or tiny dot cluster, in a darker shade to anchor the composition.
AvoidAvoid painting over wet tape — it bleeds and you lose the crisp line.
5. Monogram Initial with Felt Banner
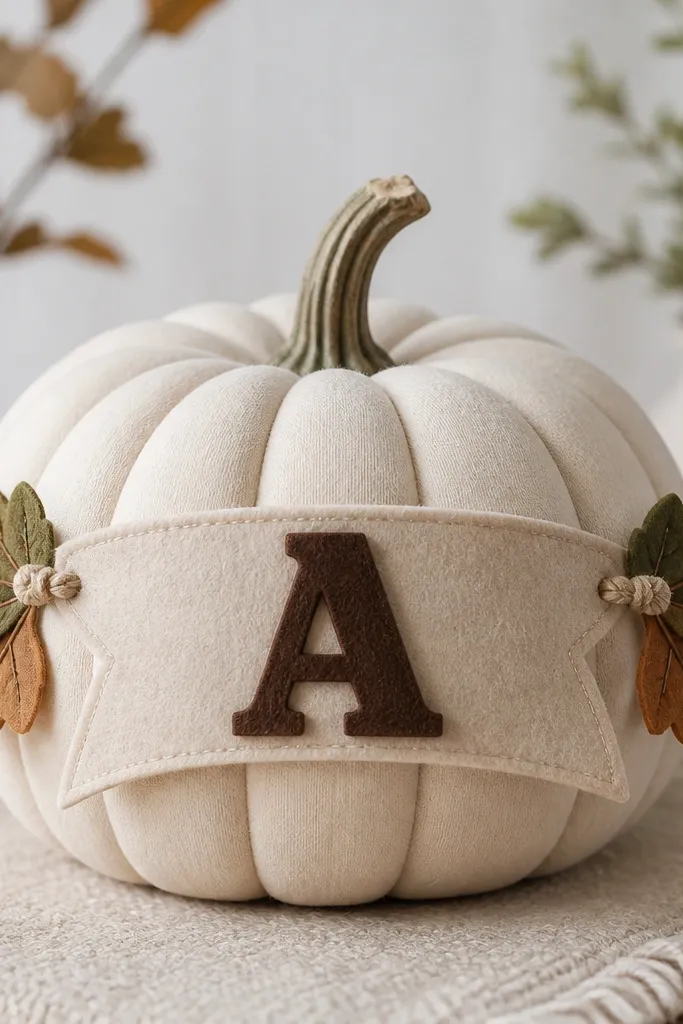
Felt banners make pumpkins look like décor, not a craft experiment. The thick felt covers uneven pumpkin curves and makes the letter feel dimensional. Cream base keeps the monogram readable and bright, and dark brown felt looks classy next to natural wood and neutral planters. This style flatters people who like a “clean and cozy” look, especially if you use it as a seasonal place-holder. It also works for a family theme because you can change the letter each year.
Paint the pumpkin cream and let it dry fully. Cut felt strips into a banner shape about 2-3 inches tall, then cut a single letter from contrasting felt (I use 1/2-inch thick letters for readability). Glue the banner to the pumpkin with a hot glue gun, keeping it centered at eye level. Add two small felt leaf shapes on the banner ends and glue them so they point outward.
Trace the letter onto felt with a pencil, then cut slowly with sharp scissors.
Avoid flimsy craft felt — it curls and the banner looks wrinkled.
6. Button Flower Cluster on Cream Base
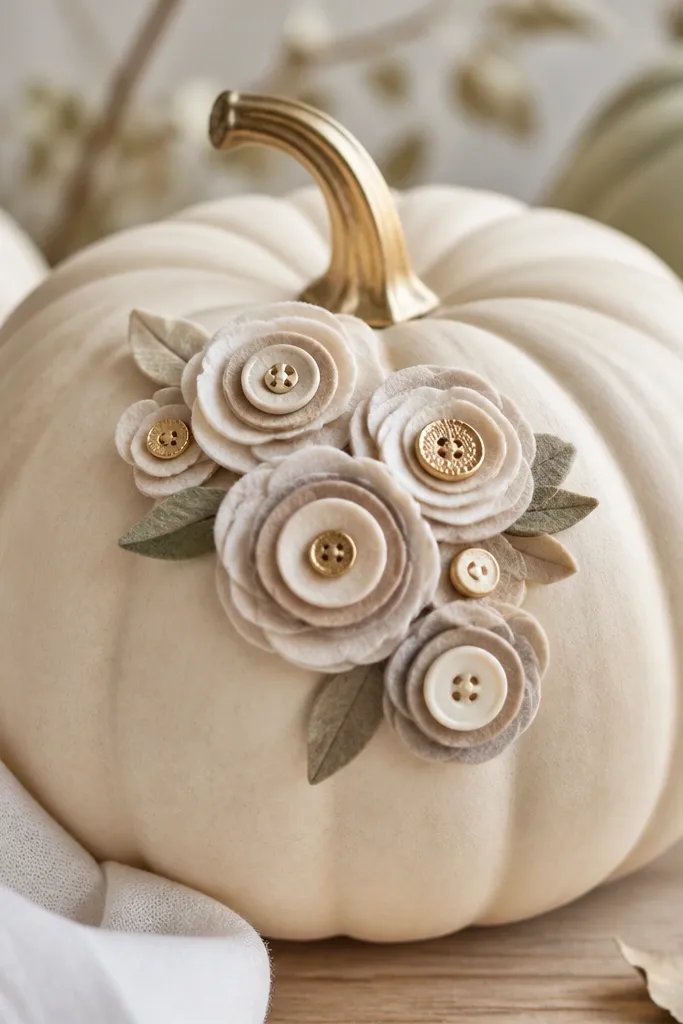
Buttons turn a plain pumpkin into something you can’t buy pre-made. The best look is a small cluster on one side rather than scattered all over. Cream base makes the button colors pop, and using mixed sizes of buttons gives the flower a natural depth. This looks great on entry tables and mantels because it reads as cozy and tactile. It also flatters warm neutrals — think beige, tan, and caramel tones.
Pro tipSort buttons by size before you glue. It prevents the cluster from looking lopsided.
Paint the pumpkin cream in two coats. Choose 3-4 button colors that work together: burnt orange, deep brown, and mustard, plus a gold button for the center. Use hot glue to build one flower cluster on the front — start with larger buttons around the outside, then stack smaller ones toward the center. Finish by adding a couple of small felt leaves under the cluster so it looks attached, not floating.
AvoidAvoid gluing too close to the pumpkin stem — bumps there make buttons lift.
7. Stenciled Constellation Stars on Navy Pumpkin
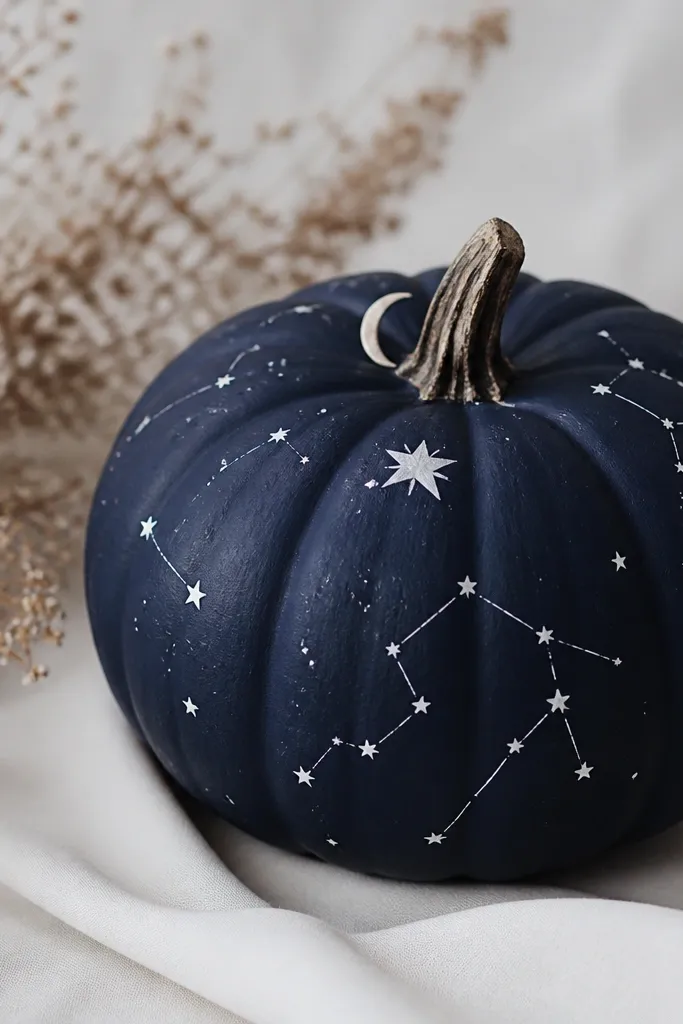
This style looks crisp and modern because the stars are tiny and evenly spaced. Navy is my favorite base for constellation designs; it makes white paint look bright without turning harsh. It’s also a nice change if you’re tired of orange pumpkins everywhere. This one flatters anyone who likes farmhouse-modern décor because it pairs with black lanterns and gray planters. It also looks good in photos at night because the contrast pops.
Pro tipUse a foam stencil applicator so the paint stays speckled instead of streaky.
Paint the pumpkin navy and let it dry completely. Use a star stencil or cut your own from cardstock and tape it in place. Dab white acrylic over the stencil with a sponge so you don’t flood the edges. Add thin lines with a fine brush to connect 4-6 stars into a simple pattern, keeping it on the front third so it reads clearly.
AvoidAvoid using glitter pens — they smear and don’t look sharp at small scale.
8. Washable Chalk Paint Leaf Veins (No Stencil)
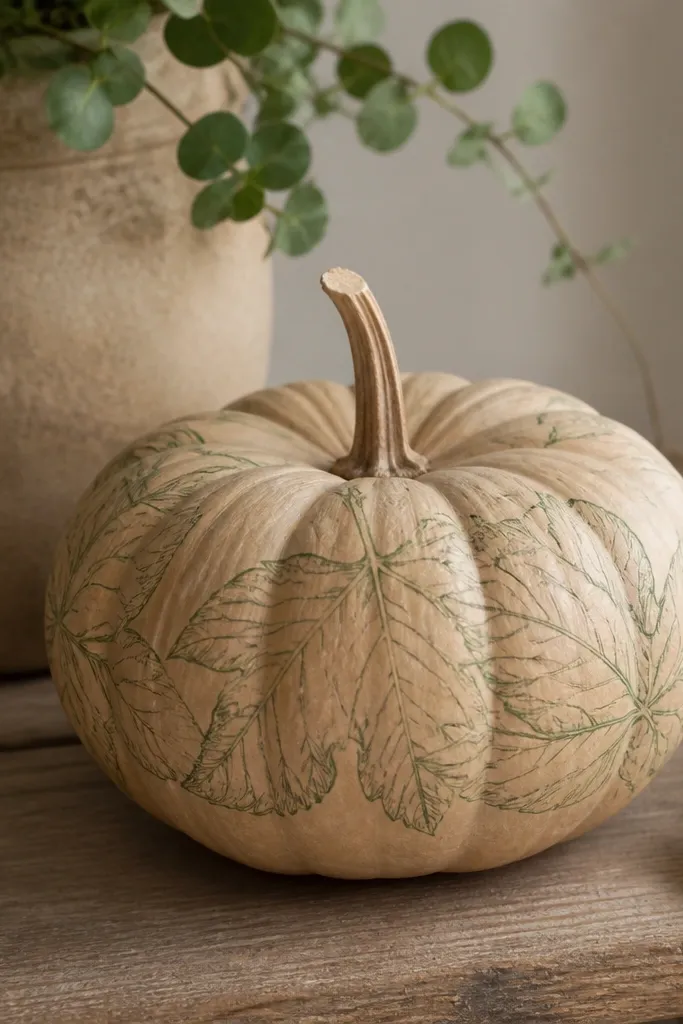
Chalky paint gives you that washed, hand-drawn fall look without perfect lines. Leaf veins drawn with a fine brush look natural and add texture even if your pumpkin isn’t perfectly smooth. Tan or light beige is the best base because it makes the green lines feel botanical. This style looks flattering on warm wood shelves and pairs well with cream candles and woven baskets. It’s also a good choice if you want something that doesn’t scream “Halloween” but still feels seasonal.
Paint the pumpkin tan and let it dry. With a small liner brush, sketch 3-5 leaf shapes lightly, then add vein lines in pale green. Blend the leaf color a bit with a dry brush so it looks faded, not solid. If you want more contrast, add a thin darker green vein line near the center of each leaf.
Practice one leaf on paper first. Your brush pressure will match the pumpkin’s curve faster.
Don’t load the brush with too much paint — it turns into thick blobs on the bumpy skin.
9. Rope-Wrapped Pumpkin with Twine Bow
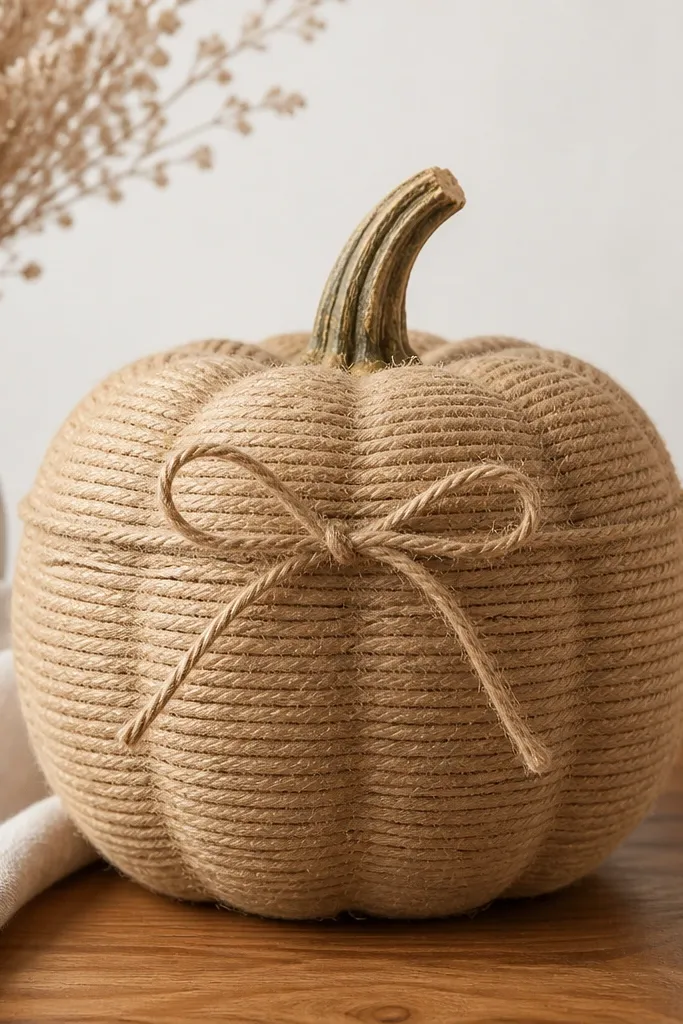
Rope wrapping hides the pumpkin surface and makes it look like a store-bought piece. Jute gives texture and warmth, and the bow adds a focal point without needing paint. This style looks best on larger pumpkins because the rope coils have space to show. It also flatters rustic décor — farmhouse shelves, wood benches, and woven baskets. If you want a neutral pumpkin that works beyond Halloween, this is the one I keep reusing.
Start at the bottom with a line of hot glue and press jute rope around the pumpkin. Keep coils tight with no gaps, going upward in rows until you reach the top third. Trim rope ends neatly near the stem area and tuck them under a later coil. Tie a twine bow around the top third and glue it in place so it doesn’t slide.
Pull the rope taut while pressing so the coils don’t look loose.
Avoid glue overload — it can seep between coils and harden glossy.
10. Spray-Paint Marble Look with Dish Soap
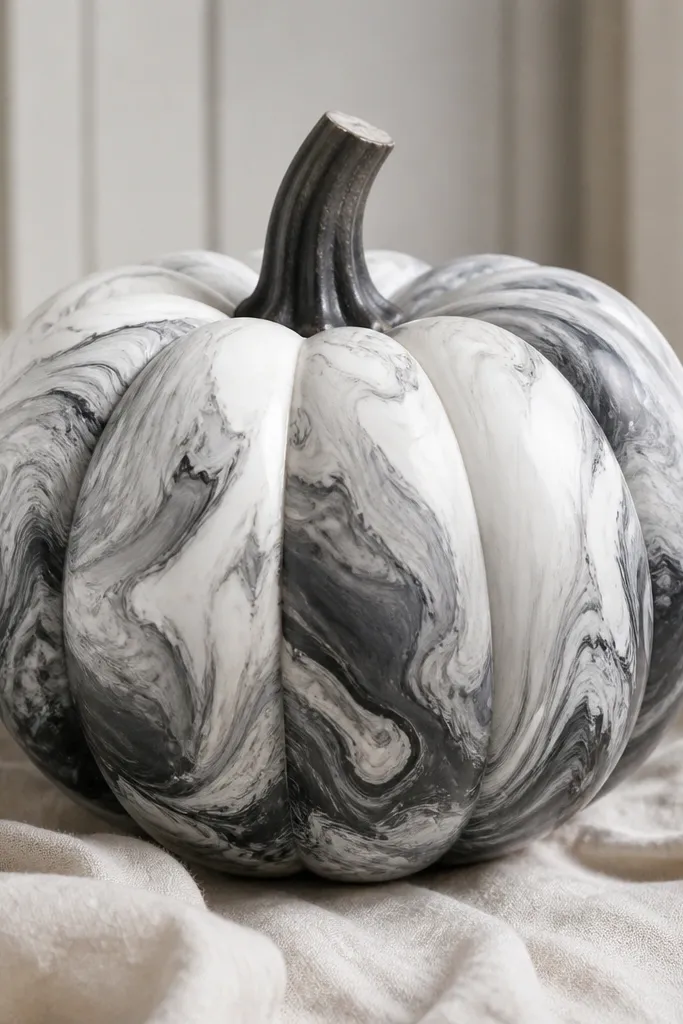
Marble pumpkins look high-end because the pattern feels organic and no two are the same. The trick is controlling the feathering so it looks like stone, not messy splatter. Use a white base and then add black and gray swirls for a modern look. This style looks great in a monochrome fall setup with black planters and white candles. It also photographs well because the swirls catch light on the pumpkin’s curve.
Pro tipDo fewer passes than you think. Marble looks best when the base still shows.
Paint the pumpkin white and let it dry fully. In a separate cup, mix a few drops of black and gray acrylic with a tiny amount of water and a drop of dish soap. Flick or drip the mixture onto the pumpkin using a brush so it spreads in soft swirls. Add a few heavier drops near the center for depth, then let it dry and seal with a clear coat.
AvoidAvoid spraying directly from far away — it creates hard speckle instead of soft swirls.
11. Vinyl Lettering + Tiny Dot Accents
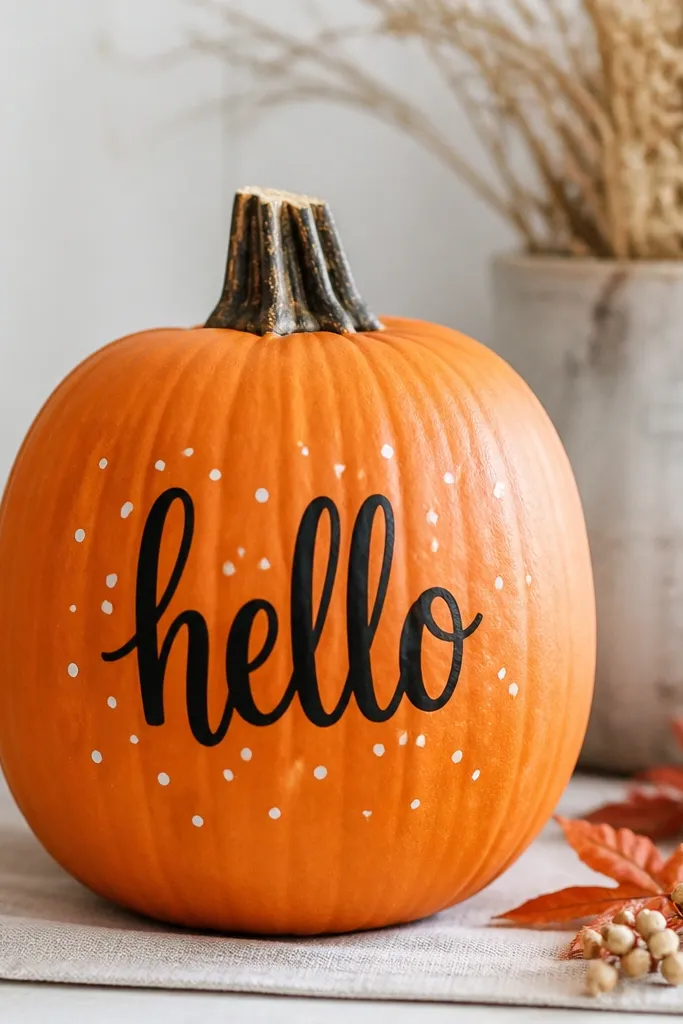
Vinyl makes it clean. The letters look sharp even on a bumpy surface, and tiny dot accents keep it from looking too plain. This works for beginners because you’re not painting steady lines freehand. Use it for a simple word like “Boo,” “Gather,” or a family initial — the pumpkin doesn’t need a full face. It flatters almost every porch because black vinyl reads bold and modern against orange, cream, or white bases.
Clean the pumpkin with a damp paper towel and dry it. Apply vinyl lettering using transfer tape so you can place it straight — press firmly along the edges. Use a craft paint pen or small brush to add tiny dot accents around the letters in a contrasting color like white. Seal with a clear spray if the vinyl is exposed to weather.
Press with a credit card edge so the vinyl sticks into the pumpkin’s curves.
Avoid placing vinyl on a dusty pumpkin. If the surface isn’t clean, corners lift fast.
12. Felt Pumpkin Face Appliqué (No Carving)
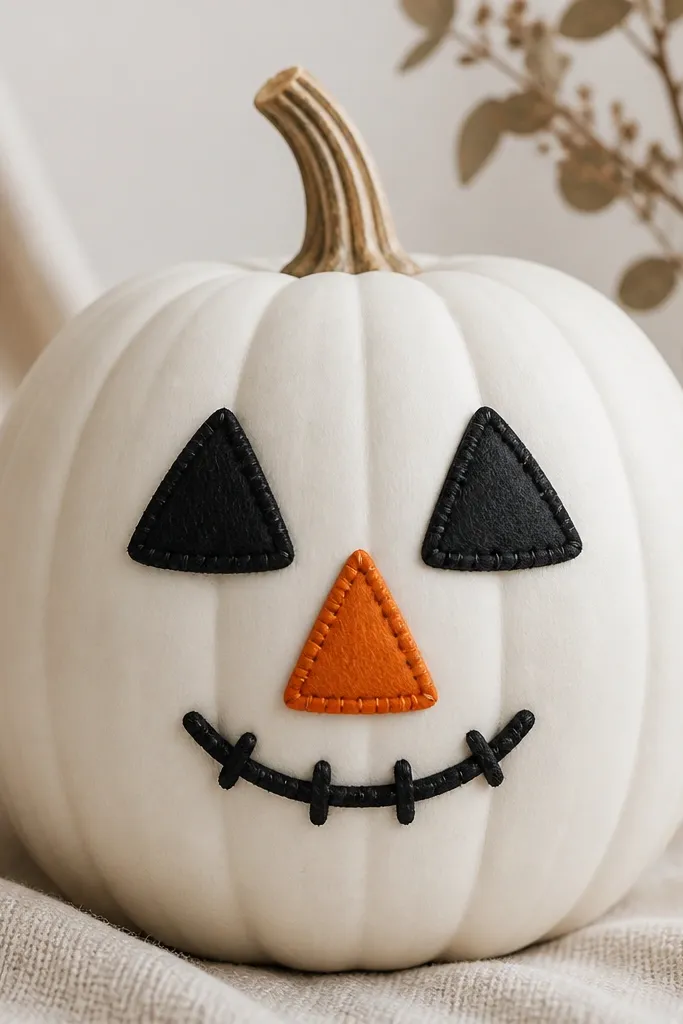
Felt faces are the easiest way to get a cute expression without carving. Because felt has thickness, the face looks dimensional, and you can tweak the expression until it looks right. White or cream base makes the eyes and mouth read clearly. This works for kids' décor too because it stays safe and doesn’t rot as fast as carved pumpkins. It also flatters cozy interiors since felt looks soft under warm lighting.
Paint the pumpkin white and let it dry. Cut felt shapes for eyes, eyebrows, nose, and mouth — I make eyes about 1.5 inches tall on a medium pumpkin. Glue the pieces in layers: eyes first, then eyebrows, then nose, then mouth so the face has depth. Add a tiny line of “stitch” detail by drawing short strokes with a dark brown paint pen along the mouth edges.
Use a glue stick or hot glue just on edges. Too much glue in the middle can make felt sag.
Avoid using felt that sheds fuzz — it makes the edges look messy.
13. Ombre Burlap Collar with Mini Pinecones
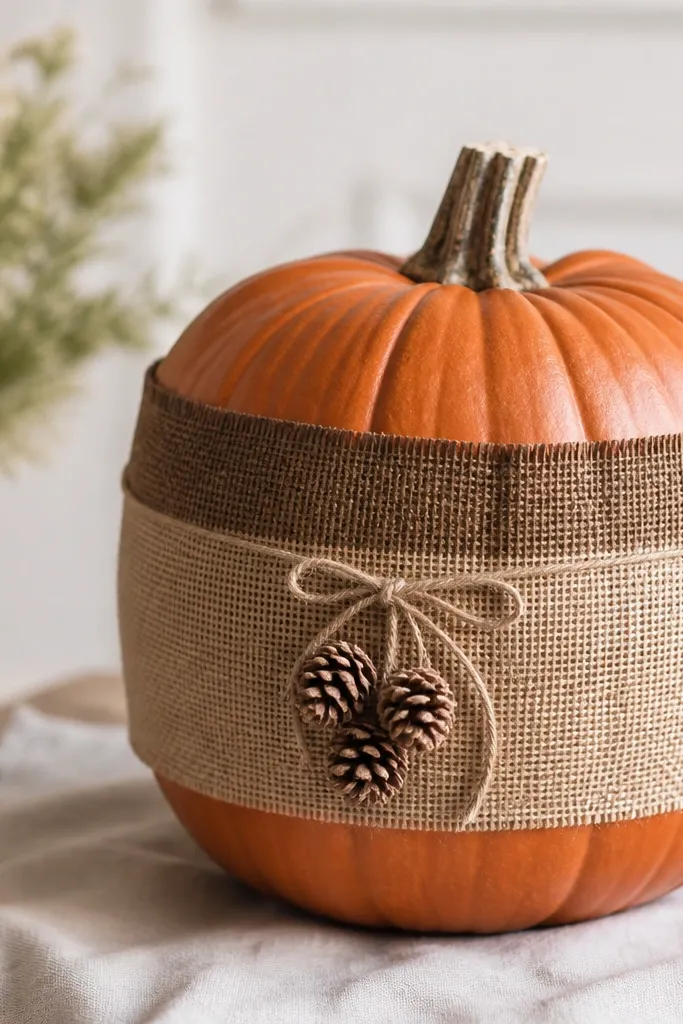
A burlap collar is my favorite “quick upgrade” because it frames the pumpkin and hides uneven paint. The ombre dye on the burlap edge looks intentional, and pinecones add real texture that reads premium in photos. This looks best on pumpkins that are slightly larger so the collar has a good width. It flatters both farmhouse and traditional décor because burlap and pinecones belong everywhere in fall. If you want something that looks good even when it’s not perfectly centered, the collar does the job.
Pro tipCut the burlap band slightly wider than you think. You can trim after it dries and settles.
Wrap the pumpkin in a soft burlap band around the middle, leaving a 1-2 inch overlap. Dye the top edge of the burlap darker by lightly brushing fabric dye or watered-down acrylic, then let it dry before gluing. Glue the collar in place with hot glue, then tie a small twine knot on one side. Glue mini pinecones into the center of the knot area and add 2-3 tiny twig stems if you have them.
AvoidAvoid a collar that’s too narrow. It makes the pumpkin look top-heavy.
14. Stencil Face with Off-White Base and Black Eyeliner Lines
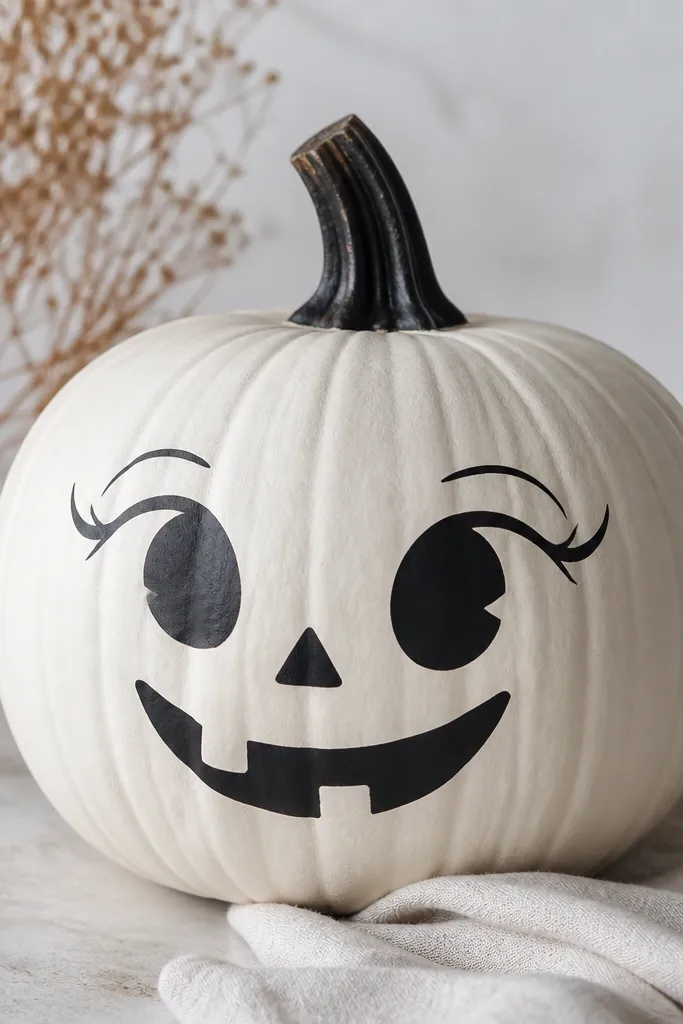
This is the Halloween look I reach for when I want “cute spooky” instead of scary. Off-white makes it feel cozy, and black stencil features keep it crisp. The eyeliner-style extra lines add personality — they make the eyes look expressive even if the face is simple. This works for medium pumpkins and looks great next to black lanterns and orange string lights. It’s also flattering because the off-white base hides any orange undertones and makes skin tones around the porch look warmer.
Pro tipUse a small makeup sponge for stencil edges. It prevents paint ridges.
Paint the pumpkin off-white and let it dry. Use a stencil for the eyes and mouth, then paint black acrylic over it and remove carefully. Once dry, add thin black lines extending slightly outward from the top of the eyes, like a cat-eye. Finish by dotting tiny white highlights inside the eyes so the face looks alive.
AvoidAvoid freehanding the whole face. That’s where beginners get uneven lines.
15. Mini Succulent Transfer with Green Vinyl
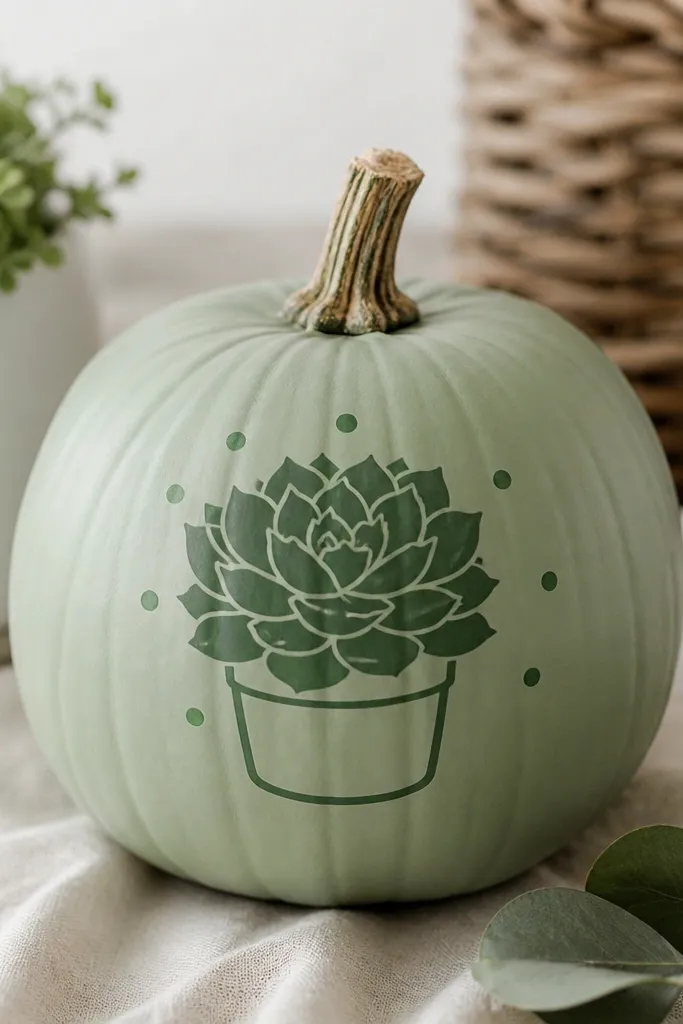
Succulent graphics turn pumpkins into décor you can keep longer than Halloween. Vinyl is clean, and the layered green-on-green look feels fresh instead of traditional. This style flatters people who like modern farmhouse and neutral planters because it looks like a plant pot label. Pale green also blends with sage curtains and white bead garlands. It’s beginner-friendly because the graphic is pre-made and you’re only placing it straight.
Pro tipWarm the vinyl slightly with your hands before placing. It sticks better on curved surfaces.
Paint the pumpkin a pale green base and let it dry. Apply green vinyl succulent and pot graphic using transfer tape. Press along edges with a credit card, especially around the leaves where the vinyl wants to lift. Add 3-5 tiny dot accents in a darker green near the bottom of the graphic for balance, then seal if it’s outside.
AvoidAvoid placing vinyl on a shiny base. If it’s too slick, the vinyl won’t grip.
16. Confetti Corn Dot Pumpkin (Yellow + Brown + Cream)
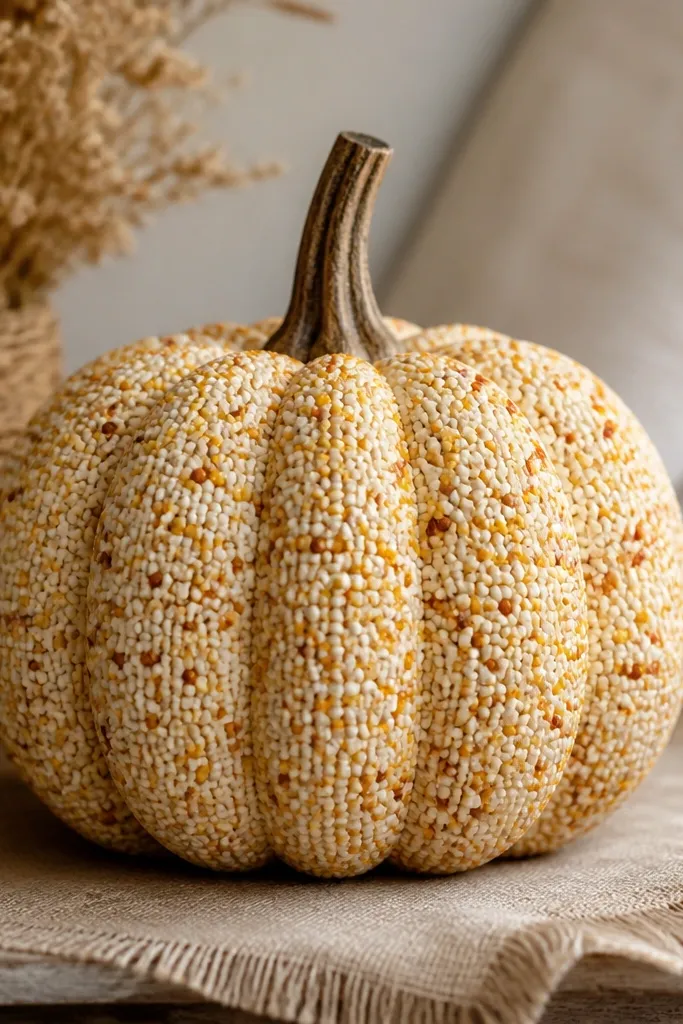
Confetti dot work looks playful and still reads “designed” when you keep the dot sizes consistent. The corn color combo makes the pumpkin feel like fall produce instead of Halloween candy. This style works best on small to medium pumpkins because the dot pattern looks dense and intentional at that scale. It flatters warm décor — wicker, terracotta planters, and wood lanterns. It’s also forgiving because tiny variations in dots look like texture, not mistakes.
Paint the pumpkin cream and let it dry. Using a dotting tool or foam brush tip, place small yellow dots in a loose grid pattern across the front third. Add honey-brown dots between the yellow ones and finish with tiny orange specks for contrast. Optional: paint the stem in brown and add a couple of lighter brown dots on it for realism.
Stick to one dot size for the main layer, then use a smaller dot tool for the specks.
Avoid mixing paint thickness. Thick paint makes some dots look like blobs.
17. Cinnamon Stick Frame Around a Simple Face
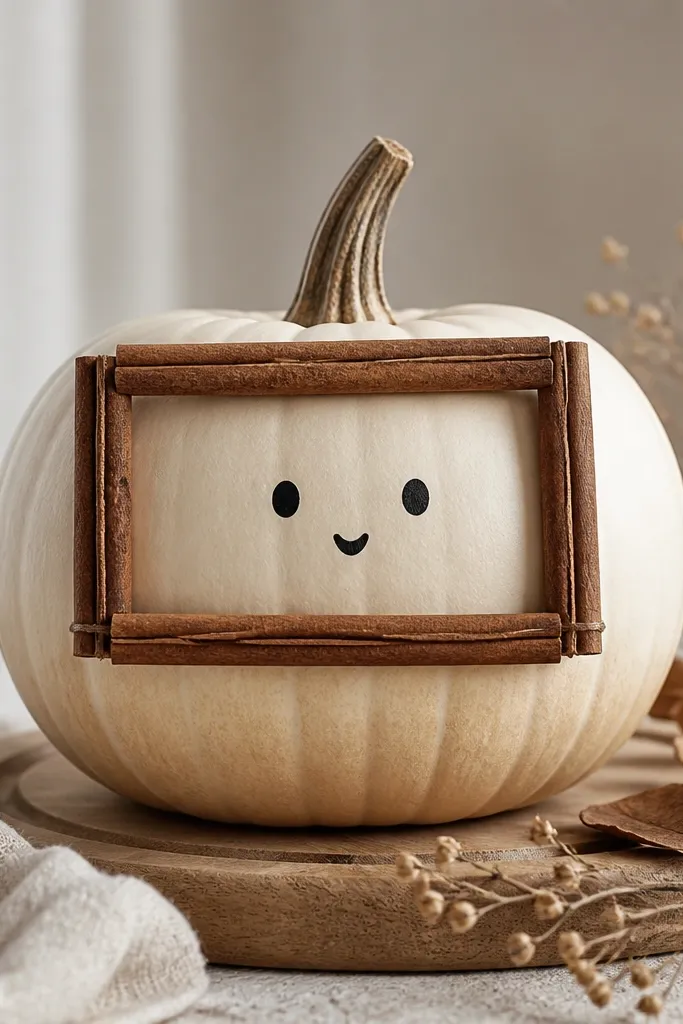
Cinnamon sticks make a pumpkin look like an arrangement, not a painted object. The frame gives structure, so even a simple face inside looks intentional. Cream base keeps it warm and neutral, and the cinnamon color adds texture that looks good in daylight and warm indoor lighting. This is a great choice if you like scent-based décor. It also works for events because it looks cohesive with candles and spice jars.
Paint the pumpkin cream and let it dry. Lay out cinnamon sticks on the front in a rectangle or arch shape, then glue them with hot glue. Inside the frame, paint a small face: two tiny black eyes and a short smiling mouth centered. Add one or two extra cinnamon stick pieces angled near the sides for a natural look, then leave it alone to dry fully before moving.
Choose sticks with similar thickness so the frame looks even.
Avoid using wet glue. It can soak the cinnamon and make it look dark and uneven.
18. Fabric Scrap Patchwork with a Single Ribbon Tie
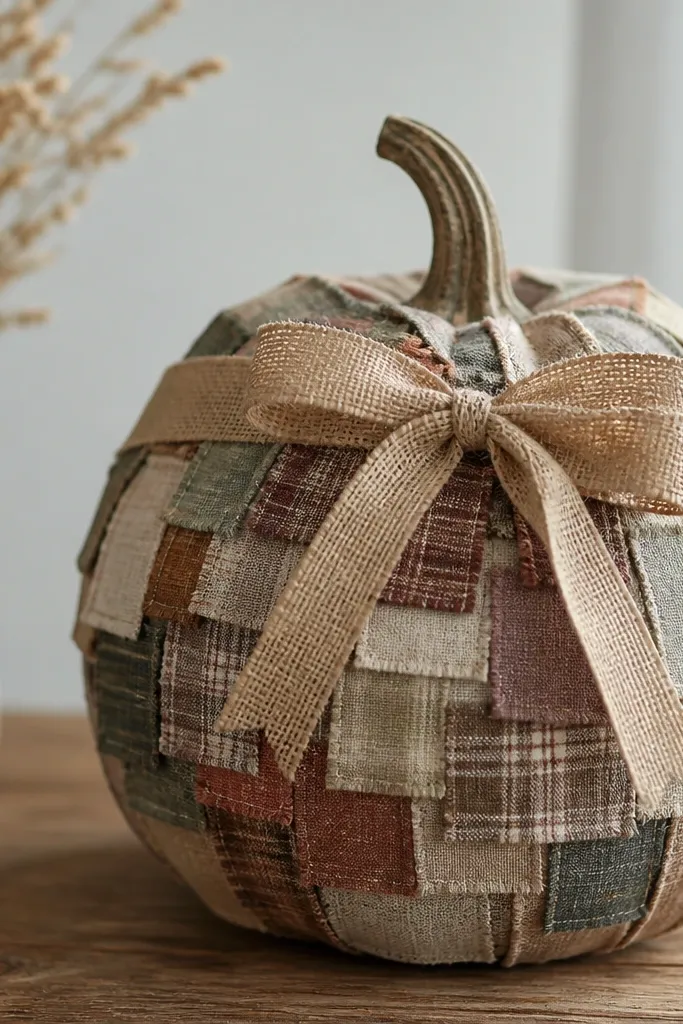
Patchwork looks amazing because it reads like a quilt, and you can control the vibe with your fabric choices. Muted plaids and warm solids look best on pumpkins because the seams and edges look intentional. This style flatters anyone who likes cozy seasonal décor and wants texture without carving. It also hides small dents and imperfections on the pumpkin skin. I like using a single ribbon tie so the patchwork doesn’t look like random leftovers.
Paint the pumpkin a matching base color if your fabrics are translucent, then let it dry. Cut fabric into 1.5-2 inch squares and overlap them, gluing edges down with hot glue so seams sit flush. Cover the front first, then wrap around the sides, keeping the overlap consistent. Tie a burlap ribbon bow around the top third and glue the tails so it sits centered.
Use fabric with a similar weight. Lightweight cotton stretches and makes edges curl.
Avoid covering the whole pumpkin with tiny scraps. Big blocks look cleaner and more beginner-friendly.
19. Painted Teardrop Scales on a Green Pumpkin
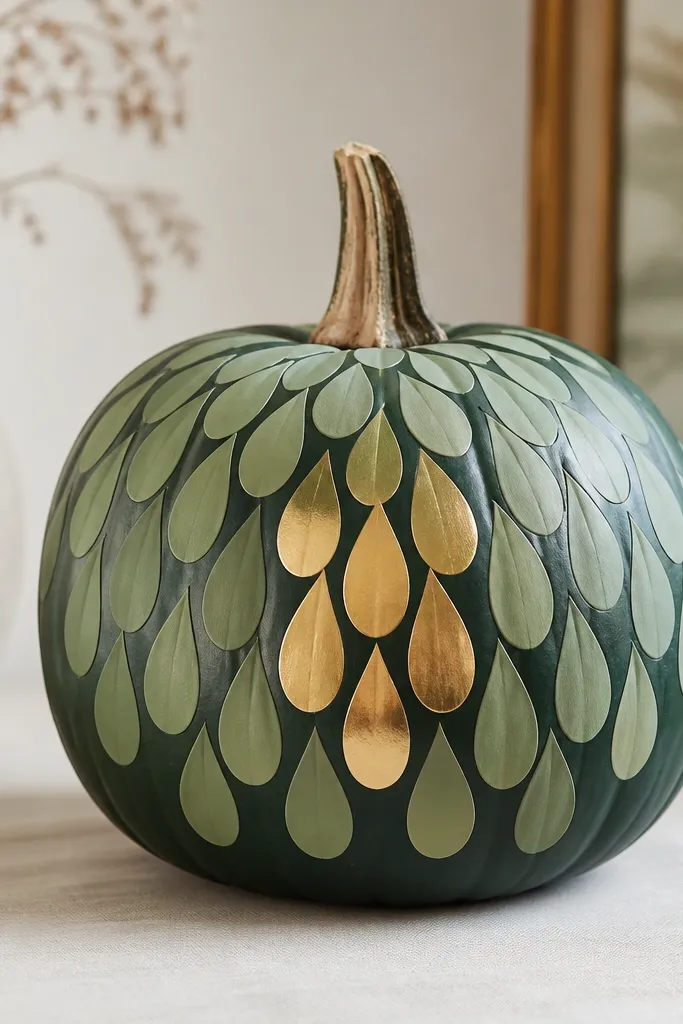
Scale painting looks hard, but it’s just repetition with a pattern. The trick is using teardrops that are all the same size so the rows line up. Deep green base makes the lighter green scales pop, and a few gold teardrops add a magical accent without making it look like a costume. This design fits fall fantasy parties and also looks good in a dark, moody porch setup. It flatters people who love richer greens and gold metals — it looks cohesive with candle holders and matte black lanterns.
Paint the pumpkin deep green and let it dry fully. With a small round brush, paint teardrops in rows — start at the bottom and work upward, overlapping each teardrop slightly. Use a lighter green for most scales and add a couple of gold teardrops in the middle row to draw the eye. Keep the teardrop tips pointing up so it reads like scales, then seal with a clear coat when dry.
Dip the brush lightly and wipe off excess paint. You want crisp teardrops, not puddles.
Avoid random sizes. If teardrops vary too much, the pattern looks messy.
20. Razor-Cut Paper Snowflake Style Leaves (Fall Version)
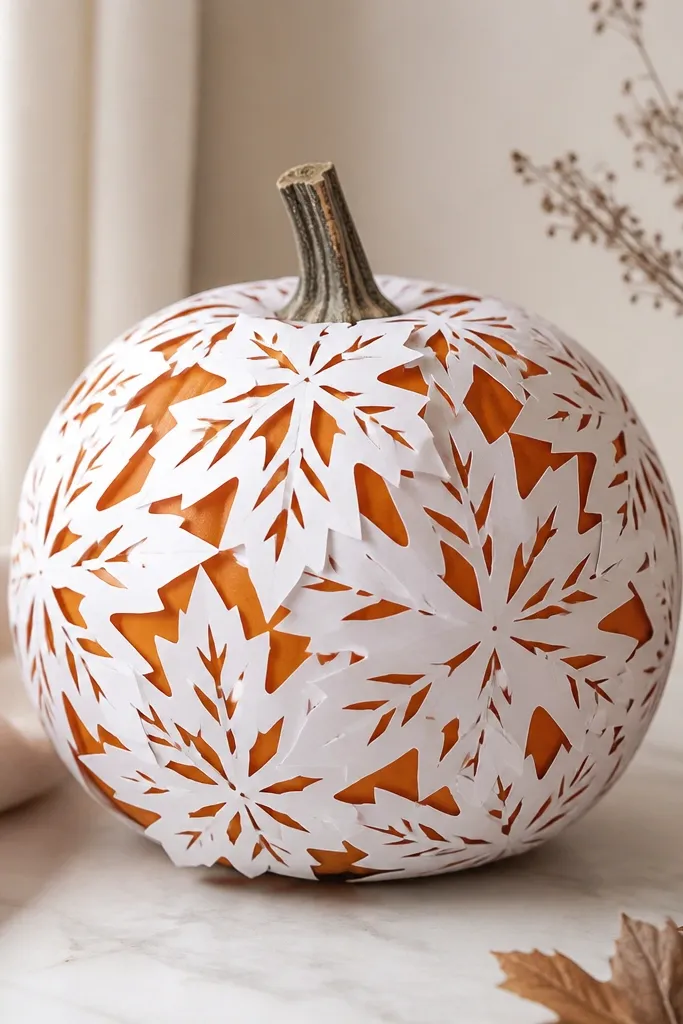
Paper cutouts give you that delicate lace look without needing carving tools. The best part is how fast you get a “wow” texture when the cutouts are layered. Use thicker craft paper or cardstock so the edges hold their shape on the pumpkin curve. This style looks stunning on white pumpkins or orange pumpkins with a white paper overlay. It flatters minimal décor because it brings light texture without loud colors.
Use a white cardstock sheet to cut leaf-point shapes that resemble a snowflake pattern, keeping each cutout about 3-5 inches across. Paint the pumpkin base white if you want the paper to look bright, or leave orange showing if you want contrast. Lightly mist the back of each cutout with spray adhesive and press onto the pumpkin in a layered cluster on the front. Add one larger cutout near the center and smaller ones around it, then seal with a light clear spray to protect the paper.
Cut one master shape and trace it for consistency across the pumpkin.
Avoid thin printer paper. It collapses on the curve and wrinkles.
21. Simple Face with Washi Tape Teeth and a Bow
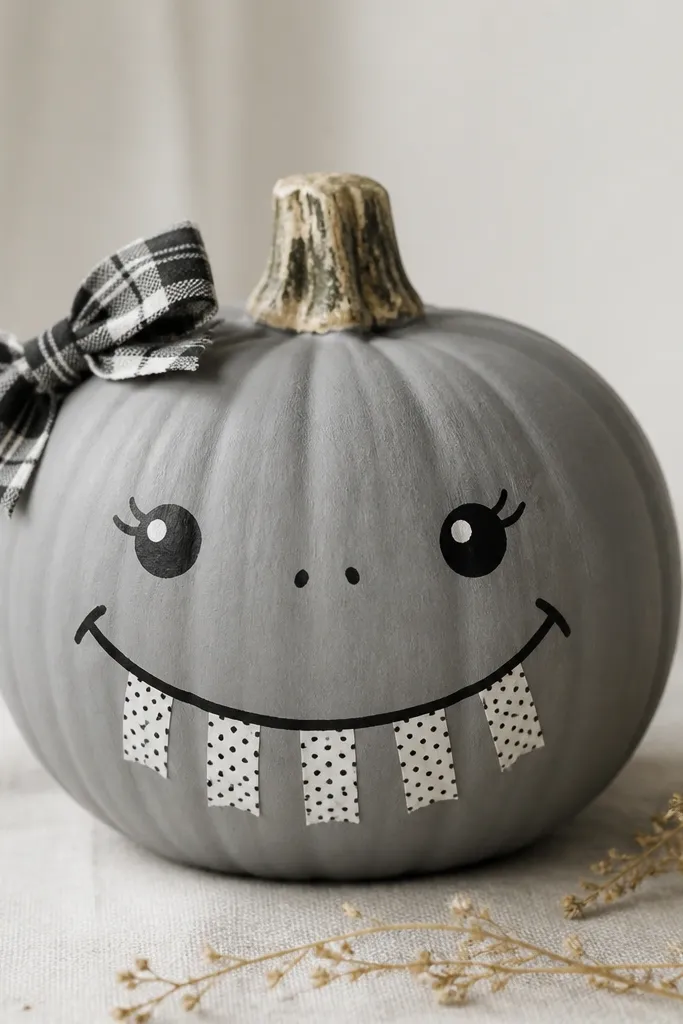
This is a clever way to make a face look neat without trying to paint tiny teeth. Washi tape teeth give you consistent spacing and a clean edge that reads like a grin. Gray base makes the whole look modern and slightly spooky but still cute. The plaid bow adds fall personality without taking over. This style flatters people who want a Halloween vibe that doesn’t scream “cartoon.” It also works well for photo booths because the tape teeth show up clearly.
Pro tipTrim the tape ends with scissors for sharp tooth edges.
Paint the pumpkin a muted gray and let it dry. Draw the eyes and mouth outline in black acrylic. Cut short strips of white washi tape and place them inside the mouth area as teeth, overlapping slightly so there are no gaps. Press the tape down firmly, then glue a small plaid bow on the side near the top third.
AvoidAvoid using overly glossy tape. It can look shiny and cheap against matte paint.
22. Chalkboard Pumpkin with White Vine Writing
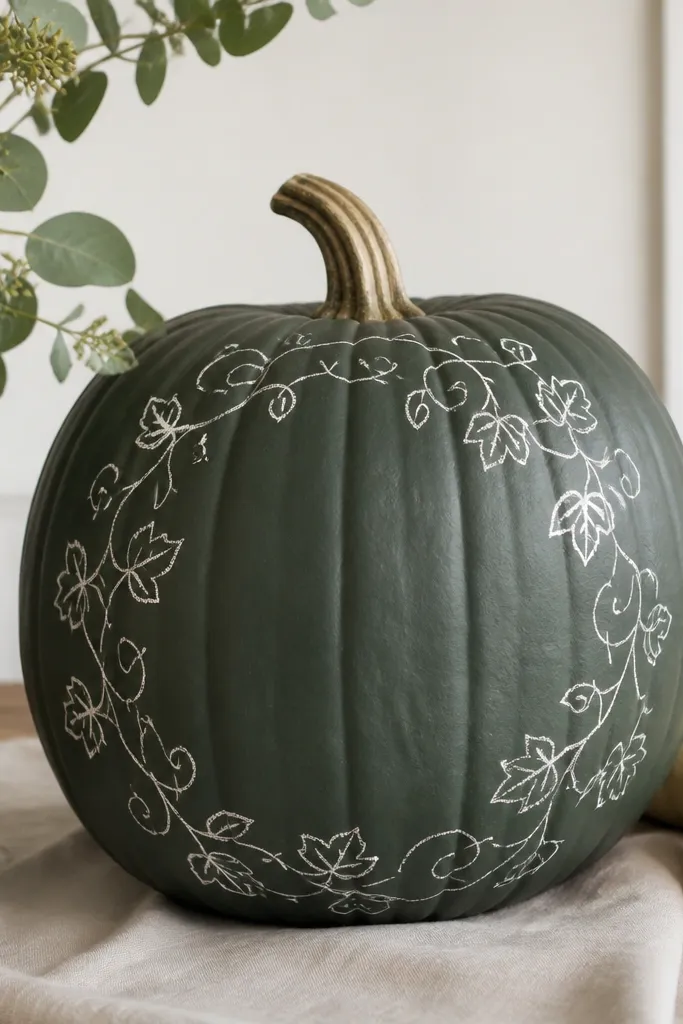
Chalkboard pumpkins are my favorite for beginners because you can fix mistakes instantly. The dark green base makes white writing pop, and the vine-like script looks like a little sign. This works for people who want to change the message each year or each week. It also looks great with chalkboard décor — black frames, wooden signs, and mason jars. If you’re decorating for a dinner party, you can write a name or date in minutes.
Paint the pumpkin with chalkboard paint or dark green acrylic mixed with a little chalky medium, then let it cure. Use white chalk or a white paint pen to write one short message across the front, like “Gather” or “Trick Treat.” Add a few vine curls around the text, and draw small leaf shapes to balance the layout. Wipe lightly between drafts and seal with a chalkboard-safe clear spray when you’re done.
Keep the message to 1-2 words so the lettering stays bold and readable from the doorway.
Avoid writing too small. On a pumpkin curve, tiny letters disappear.
23. Acrylic "Stained Glass" Pumpkin with Clear Tape Panels
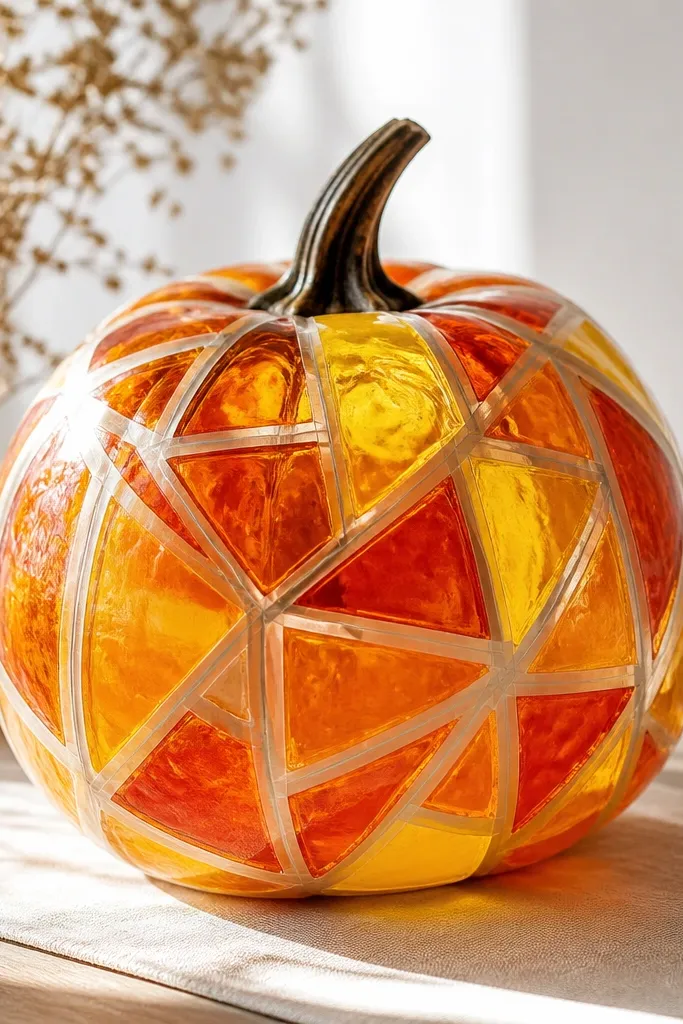
Stained-glass pumpkins look like they took hours, but the geometry does the heavy lifting. Clear tape creates crisp borders, and translucent paint makes the color glow. Use orange, amber, and yellow for warm fall light, and keep the shapes large so they read from across the room. This style flatters night porch lighting and works beautifully with string lights. It’s also great if you hate messy glue because the tape gives you clean edges.
Paint the pumpkin lightly (or leave it warm-toned) and cover the front with a grid of clear packing tape in geometric sections like triangles or rectangles. Mix translucent acrylic paint with a little water until it looks like colored window gel. Fill each taped section with a small brush and let it dry without moving the pumpkin. Once dry, add a thin second coat for brightness, then remove tape only if you want raised borders — otherwise leave it for a sealed look.
Use a foam brush for translucent paint so it doesn’t streak.
Avoid heavy, opaque paint. True stained-glass needs light through the color.
24. One-Side Rosebud Pumpkin with Rolled Paper Flowers
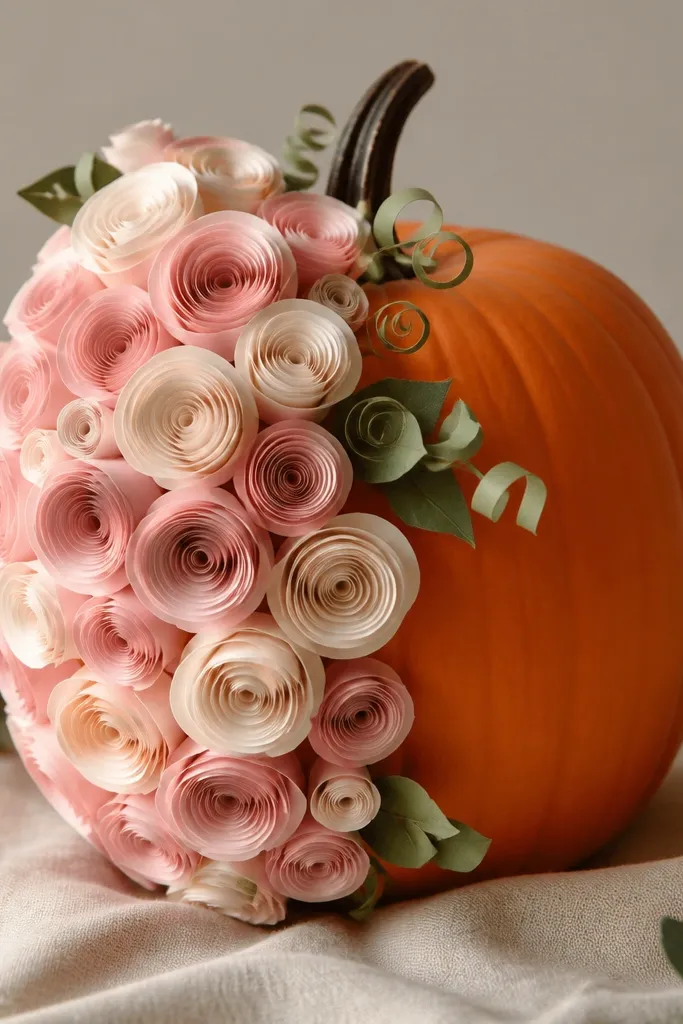
Rolled paper flowers make a pumpkin look like a bouquet. The one-side placement is the key — it keeps it elegant and avoids the “wall of craft supplies” look. Blush and cream tones soften the orange base, so it feels romantic instead of Halloween-only. This style flatters lighter décor like white lanterns and neutral wreaths. It’s also beginner-friendly because you can stop after one cluster and it still looks finished.
Pro tipPress each flower for 10 seconds before letting go. Paper adhesive needs a brief hold time.
Paint the pumpkin base cream or leave it orange if you want more contrast. Make or buy small rolled paper rosebuds in blush and cream, each about 1.5-2 inches wide. Glue the flowers in a cluster on one side only, starting with the largest at the bottom and filling with smaller buds toward the top. Add a few rolled green leaves between blooms so the cluster looks natural.
AvoidAvoid covering the entire pumpkin. The one-side cluster is what makes it look intentional.
25. Cinnamon-Stick Border with a Burnt-Orange Ombre Center
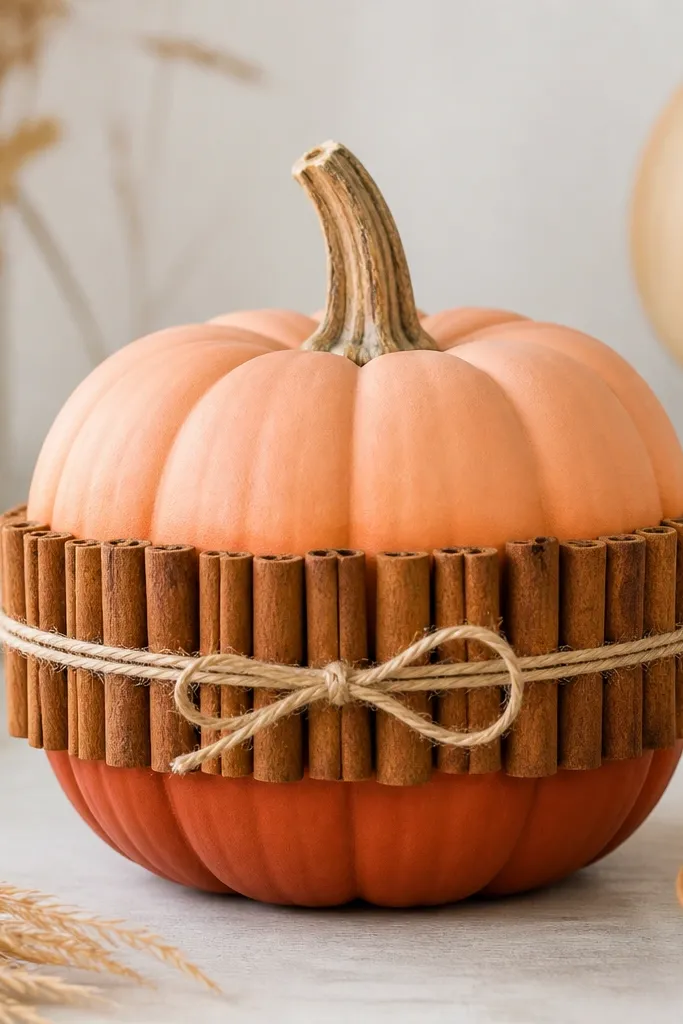
This one looks store-bought because the cinnamon sticks give you instant texture without carving. The ombre paint keeps it modern and clean, so the border doesn’t look like a messy craft table. I did this on a 6-inch pumpkin and the cinnamon ring read clearly from across the room. It also smells like fall every time you walk by, and it hides any uneven paint spots behind the stick border.
Pro tipPick cinnamon sticks that are the same length within about 1/8 inch — mismatched lengths make the ring look lopsided fast.
Start by painting the pumpkin with craft acrylic. Use a sponge or makeup sponge and dab deep rust orange at the bottom third, then blend upward with a lighter burnt-orange mix so the center fades smoothly. Let it dry fully, then wrap a strip of thin twine around the pumpkin at the height you want the cinnamon ring and tie it tight — this marks your guide line. Glue cinnamon sticks to the twine guide using a hot glue gun. Place the sticks vertically so their flat sides touch the pumpkin, then work around in a single circle, aiming for tight gaps. If you see daylight between sticks, add a small dab of glue and press the stick closer. Finish by tying a small bow from the same twine on the front and brushing a dry paintbrush with a tiny bit of brown paint over any glue shine.
AvoidDon’t paint a glossy pumpkin first — the ombre will look streaky until you scuff the skin lightly with 220-grit sandpaper.