1. Cream Bucket, Black Ribbon, Mini Witch Brew Set
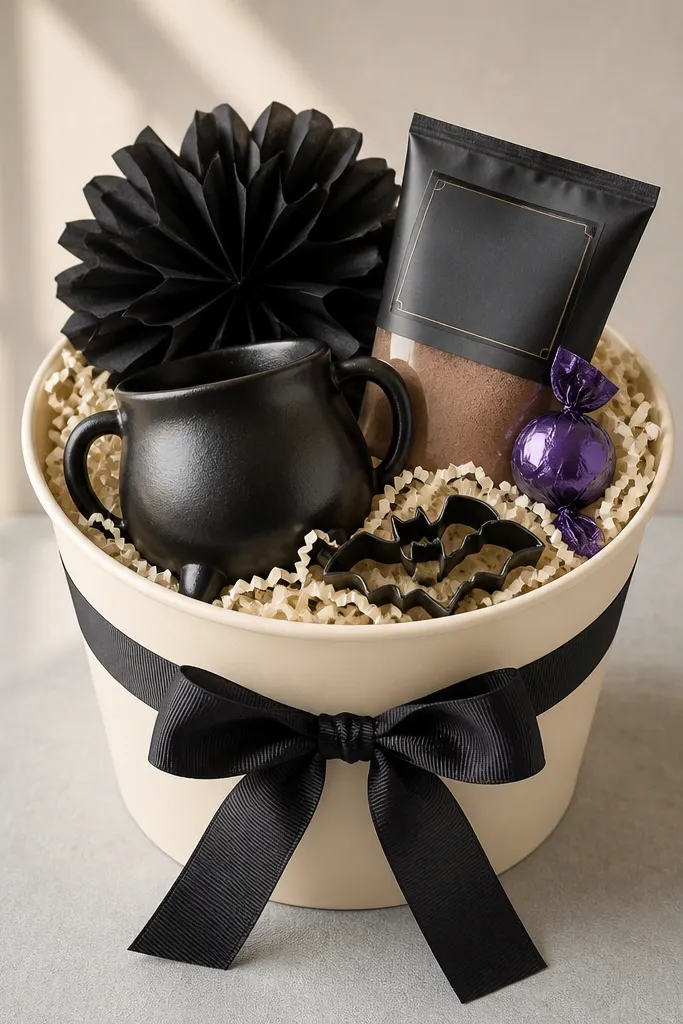
This one looks crisp because the bucket is matte and the ribbon is high-contrast. I use a cream base (it hides smudges from handling) and pair it with black accents so the items look intentional instead of random. The witch brew items are kid-safe and feel themed without turning into a clutter pile. It flatters kids of all skin tones because the palette stays neutral, and the purple candy adds a gentle pop. The trick is keeping the mug and cookie-cutter set in the same visual “family” — dark shapes against light filler.
Start by filling the bottom with a thin layer of off-white shredded paper, just enough to raise the items about 1 inch. Place the mug toward the back right corner, handle angled slightly outward so it’s visible. Add the cocoa mix tube next to it, then tuck the cookie-cutter set flat under the tube so it doesn’t wobble. Finish with a black tissue rosette on top and one purple wrapped candy centered like a topper. Tie the ribbon through the bucket handle area and pinch the bow tails so they sit flat.
Pick one “hero” item with a strong shape (cauldron mug or scoop spoon) and build around it.
Don’t add loose candy bags — they break the clean silhouette.
2. Kraft Gift Bag, Gray Tissue, Ghost Face Stationery Stack
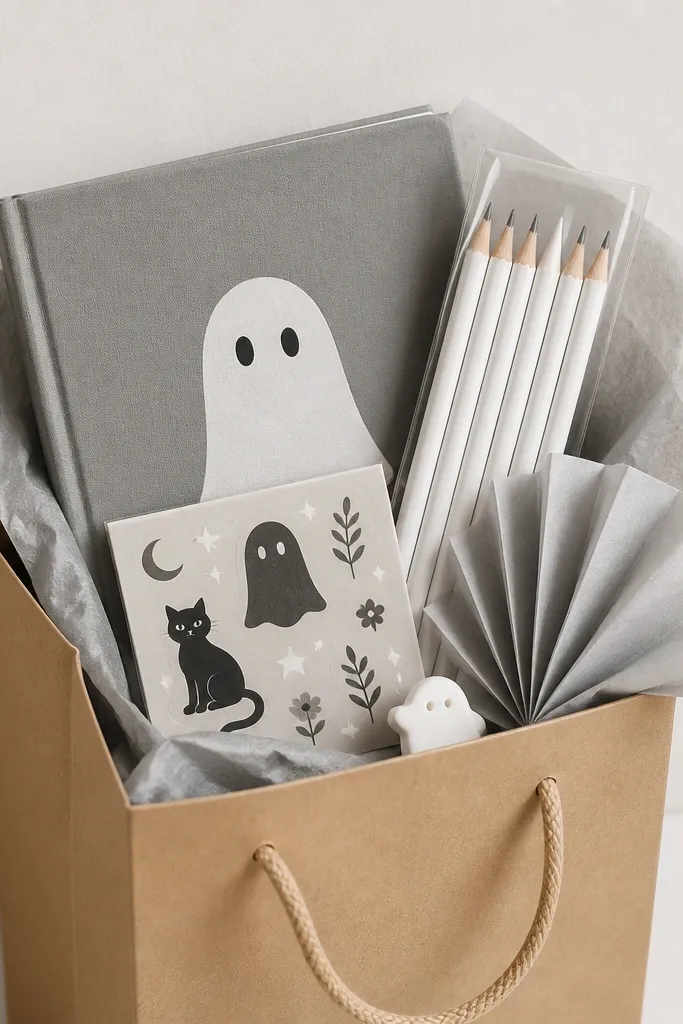
This is the minimalist boo basket I make when parents want something that looks calm on the counter and still feels Halloween. The kraft bag gives warmth, while gray tissue keeps it modern instead of “paper bag costume.” Stationery looks tidy because it comes in flat packs and doesn’t spill. Kids love it because it feels like a secret school supply stash. The ghost face is simple and graphic, so it reads cute on kids without getting too spooky. If you’re worried about age range, stationery works for ages 3 through 10.
Start by cutting gray tissue into 3 strips about 2 inches wide and crisscross them inside the bag for structure. Place the notebook flat at the back, centered, with the cover facing out. Add the pencil set in a clear sleeve next to the notebook so both edges line up. Slide the sticker sheet on top at a slight angle, then tuck the mini eraser into the front fold of tissue. Fold the tissue fan at the top so it creates a soft frame around the sticker sheet.
Pro tipUse only black/white/gray stationery so the bag stays “modern” even with a Halloween character.
AvoidDon’t add glitter glue or mixed-color markers — the bag looks busy fast.
3. Sage Woven Basket, Natural Filler, Pumpkin Spice Bath Mini
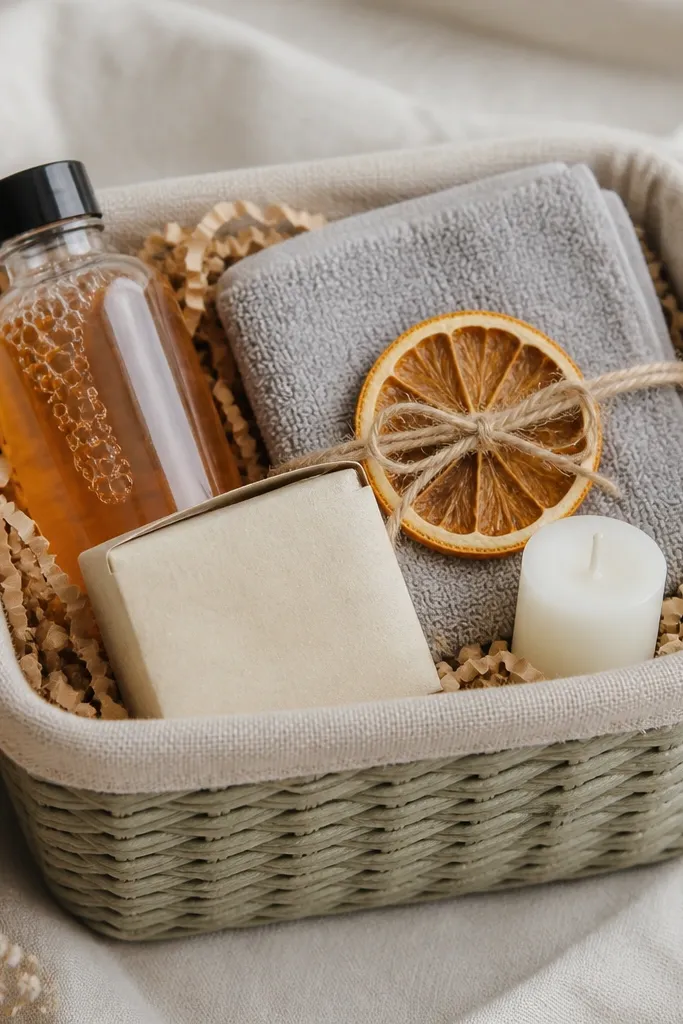
Woven baskets look warm and grown-up, and sage makes them feel fresh instead of traditional orange. This build works because the items are all in similar tones: beige, tan, cream, and one muted orange accent. Bath minis are also great for kids because they feel like a treat without being messy. The washcloth adds texture and keeps the top from looking flat. Dried orange slice on top gives a real sensory cue — it smells like holiday without loud packaging. This palette looks best on kids with cooler undertones too, but it’s honestly flattering across the board.
Start by lining the basket with a thin linen piece so the woven texture doesn’t snag tissue. Add tan shredded paper up to about 2 inches high. Place the washcloth first — fold it into a square and set it slightly off-center so it creates a base. Put the bar soap in the back, then set the clear bubble bath bottle in front at a slight tilt. Tie the dried orange slice to a short piece of twine and place it on top; tuck the cream candle behind it.
Choose unscented or mild-scent soap for younger kids and keep the strong scent item to one bottle.
Skip bright neon labels — they fight the sage basket.
4. Black Bucket, Orange Accent, Build-Your-Own Spider Web Craft
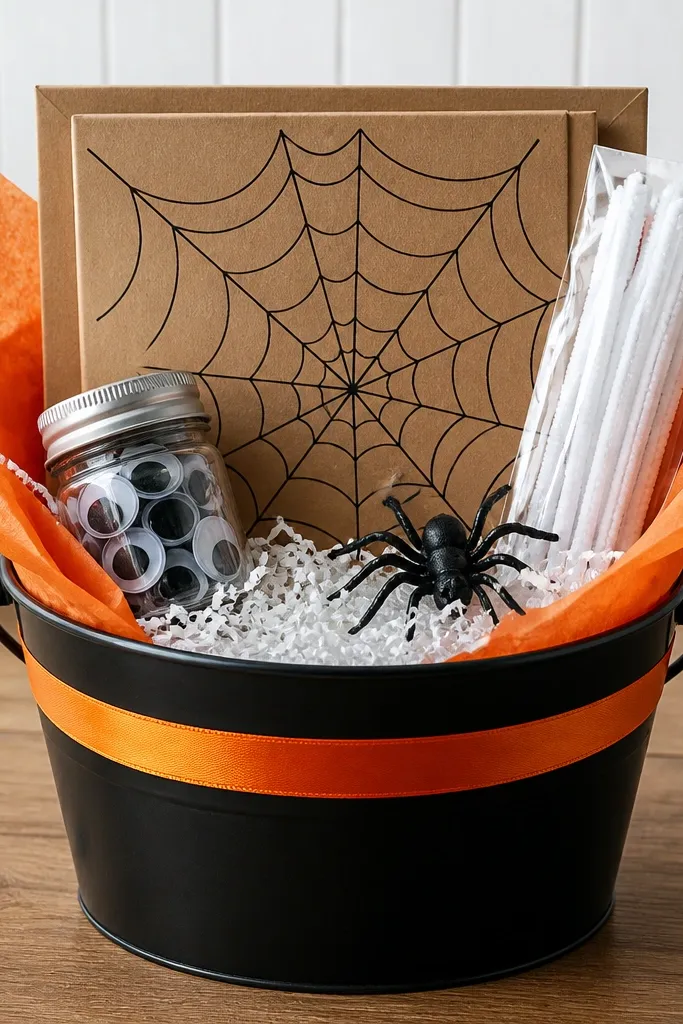
Black buckets make everything look intentional, and orange ribbon keeps the Halloween energy without turning it into a costume shop. Craft kits are perfect for minimalist baskets because the packaging is usually flat and structured. Spider web crafts look great because the white materials contrast against black — it reads clean and graphic. Kids get a “build it myself” moment, which beats random candy every time. This palette also photographs well, which matters if you’re taking group photos at drop-off.
Start with white shredded paper and compress it slightly so it holds items upright. Place the craft kit in the back center, stand it straight, then add pipe cleaners on the side so they lean lightly against the kit. Set the googly eyes jar in the front left so it’s visible but not tall. Top with orange tissue folds and place the plastic spider on the tissue, legs spread upward. Wrap the orange ribbon around the bucket once and tie it so the knot sits at the front.
Pro tipPick a craft kit with mostly white packaging; you’ll get the spider-web contrast without extra work.
AvoidDon’t add multiple tall toys — the bucket starts to look crowded.
5. Clear Cellophane Sleeve, Minimal Boo Snack Mix
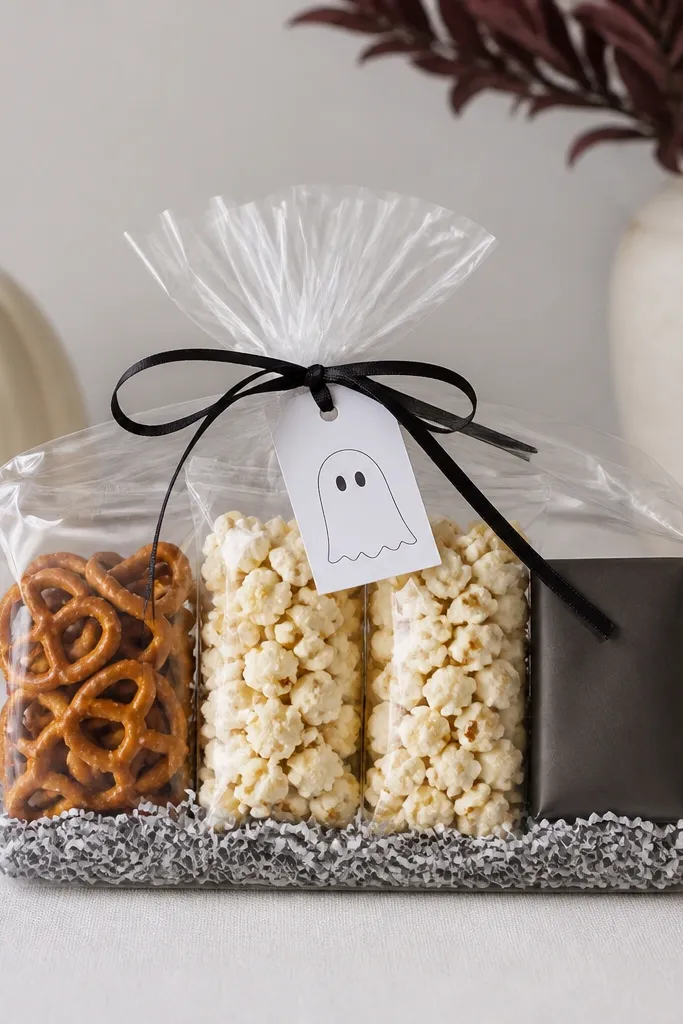
This looks minimalist because it shows the items clearly instead of hiding them under crinkly paper. The transparent sleeve makes it feel modern and gift-like, not like a grocery bag. Snack mixes work for older kids because they’re easy to grab and share. The key is staying consistent: use small single-serve packs and keep the colors muted. The ghost tag gives Halloween without adding clutter. This setup also handles allergies better because parents can read labels quickly.
Start by adding a thin layer of pale gray shredded paper on the bottom so the snack packs don’t slide. Place the mini pretzel bag first, then stack the popcorn packs so their fronts line up. Add the chocolate bar last, centered and slightly forward. Tie the cellophane sleeve with black ribbon at the top — pull tight enough to remove slack, not so tight it wrinkles. Attach a ghost tag with a mini hole punch and string so it sits at eye level.
Use matte-wrapped chocolate instead of shiny foil for a cleaner look under lights.
Skip a mix of big and tiny snack sizes — the visual rhythm breaks.
6. White Ceramic Planter, Spooky Succulent Boo Basket
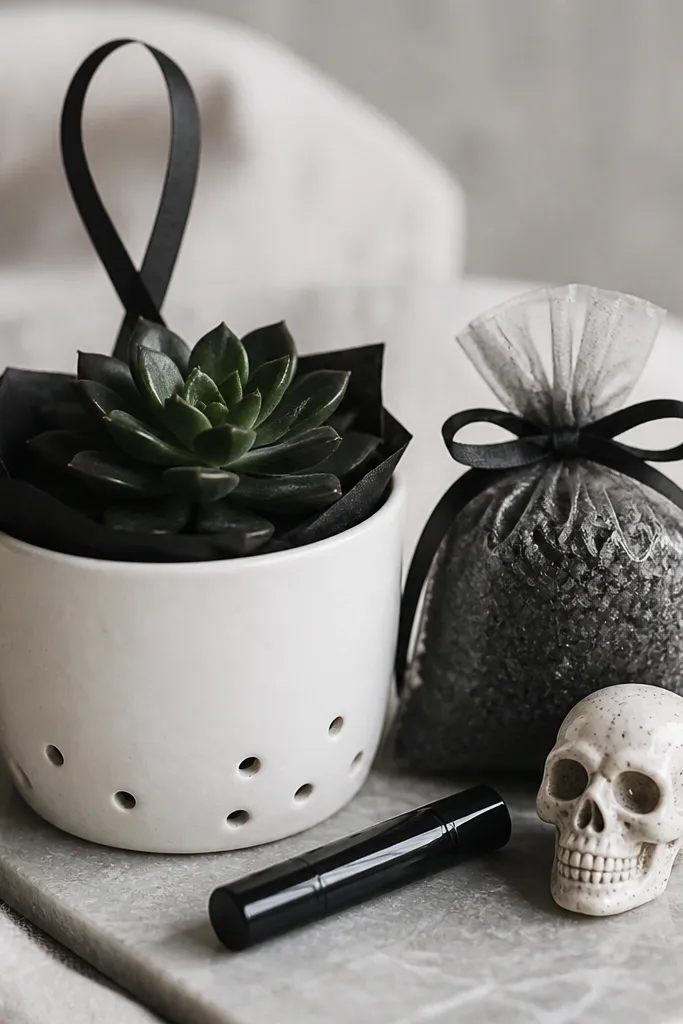
A planter turns a boo basket into a keepsake, and white ceramic makes it look clean and modern. The succulent gives a structured shape that holds the whole arrangement together. I pair it with dark, low-saturation items like charcoal bath salts and a black tube lip balm so the palette doesn’t drift into loud Halloween orange. This is a great option for kids who like “real” things and not just candy — it feels special without being messy. The black tissue acts like a stage curtain, making the green leaves pop.
Start by lining the planter with black tissue and tucking it against the sides so it covers the bottom. Place the artificial succulent in the center, then add the charcoal bath salts bag behind it so it doesn’t block the leaves. Set the lip balm tube to the right, label facing forward. Put the tiny skull figurine on top, slightly off-center, and wrap a thin ribbon loop around the planter rim. Add one extra small item only if it stays flat — a sticker pack works.
Use faux succulents for kid baskets so you don’t deal with watering or soil mess.
Don’t include loose glitter or powder — it gets everywhere fast.
7. Gray Lunchbox, Orange Dot Stickers, Halloween School Supply Set
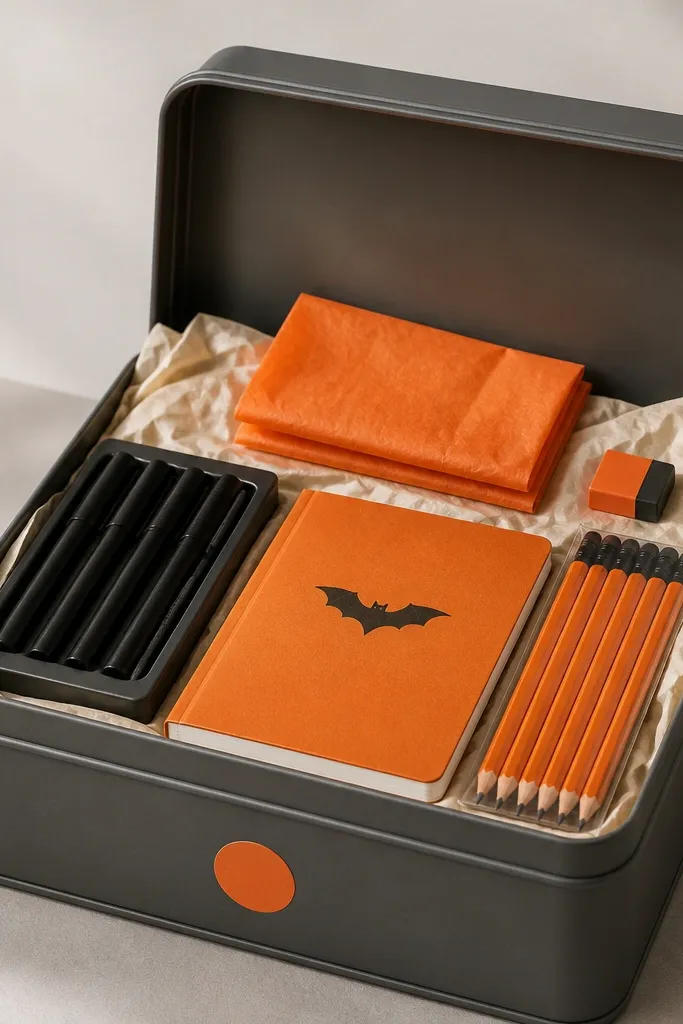
Lunchboxes are the most underrated boo basket container because they’re already organized. Gray looks modern, and orange dot accents feel playful without yelling. This is ideal for kids who get excited about school supplies — it turns Halloween into “new gear day.” The key is using items that fit the lunchbox footprint so you don’t need filler to hide gaps. The orange notebook and pencils give a clear accent color. It also looks good on camera because the items line up like a product photo.
Start by wiping the lunchbox clean and lining the inside with cream tissue cut to the base size. Place the orange notebook flat at the back with the bat icon facing forward. Add the black marker set to the left side, then stack orange pencils on the right. Tuck the mini eraser under the folded tissue at the top so it peeks out. Finish by placing a folded tissue square at the center top and closing the lunchbox for a clean silhouette.
Pro tipPut one label-facing item at the front — it makes the basket look curated even if it’s simple.
AvoidDon’t cram tall items into a shallow box — they bend the look.
8. Black and White Stripe Tote, Tiny Halloween Baking Kit
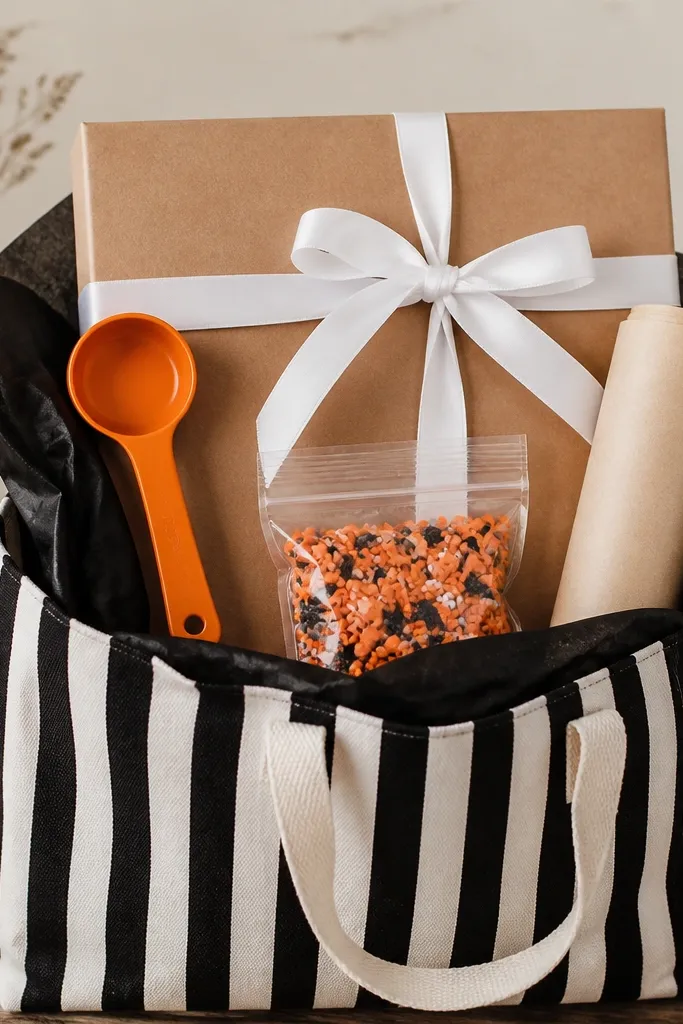
Stripe totes feel modern because the pattern already does the design work. Keeping everything black and white with one orange touch keeps the basket from looking like it came from a party store. Baking kits are great for kids because the steps feel like a craft and you get an end result. The tote shape is also sturdy, so the top stays neat even if kids carry it around. This build flatters kids who love sensory activities — measuring and mixing feel hands-on. It also works for ages 5 and up if the kit includes safe mixing steps.
Start by folding black tissue into a base sheet and placing it flat across the bottom. Stand the baking kit box upright in the back center. Slide the parchment paper roll behind the kit so it doesn’t tip forward. Add the sprinkles bag flat on one side and tuck the measuring spoon so it rests diagonally across the top edge. Tie a white ribbon bow around the tote handles and trim the tails to match the tote height.
Pro tipChoose a kit with mostly monochrome packaging so the tote stays the star.
AvoidSkip shiny foil sprinkles bags — the light glare makes everything look messy.
9. Clear Plastic Ornament Box, Mini Potion Slime Bottles
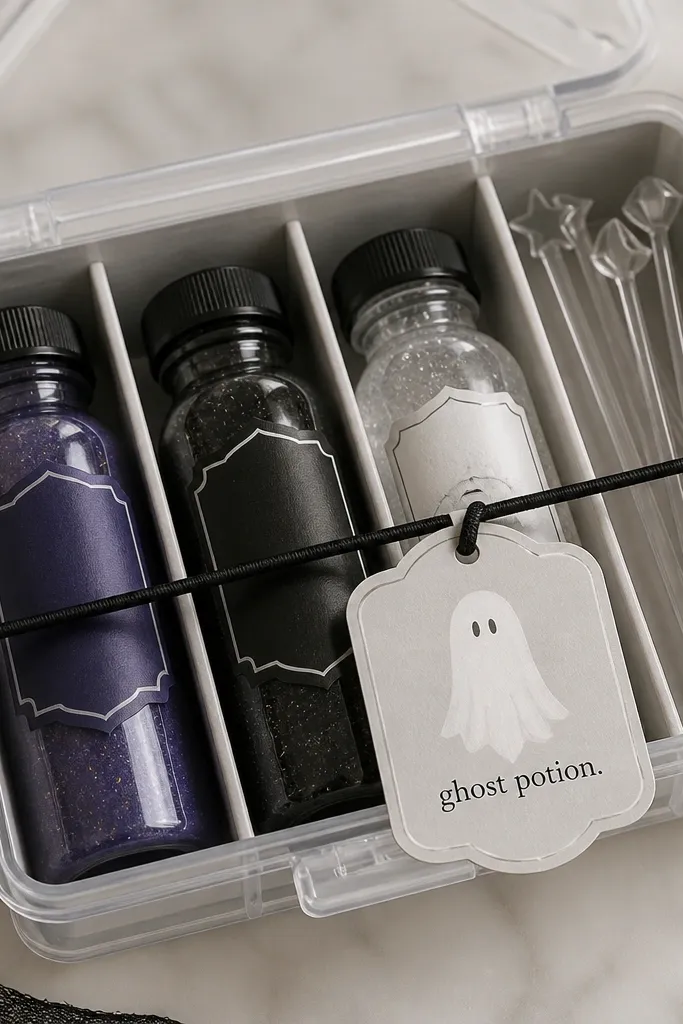
Using a clear organizer box makes the basket look clean because the compartments control the chaos. The modern look comes from the clear container and dark potion colors — purple, black, and clear — which look cohesive. Mini slime bottles are fun for older kids because they feel like a “magic ingredient” and they don’t explode if they’re sealed. This build is also great for kids who don’t want candy. The clear lid makes the design visible, so you don’t need a bunch of decorative filler.
Start by cutting light gray paper to fit the bottom and lining the inside walls to reduce glare. Place the darkest slime bottle (black or deep purple) in the back center compartment. Add the clear slime bottle to the left, then the purple bottle to the right. Put stirrers in the top right compartment so they don’t float loose. Snap the lid on and tie a thin elastic with a tag at the front so it looks like a product set.
Pro tipUse only sealed mini bottles so the basket stays neat in transit.
AvoidDon’t include open jars — spilled slime ruins the minimalist look.
10. Beige Felt Basket, Soft Fabric Monsters Plush Treat
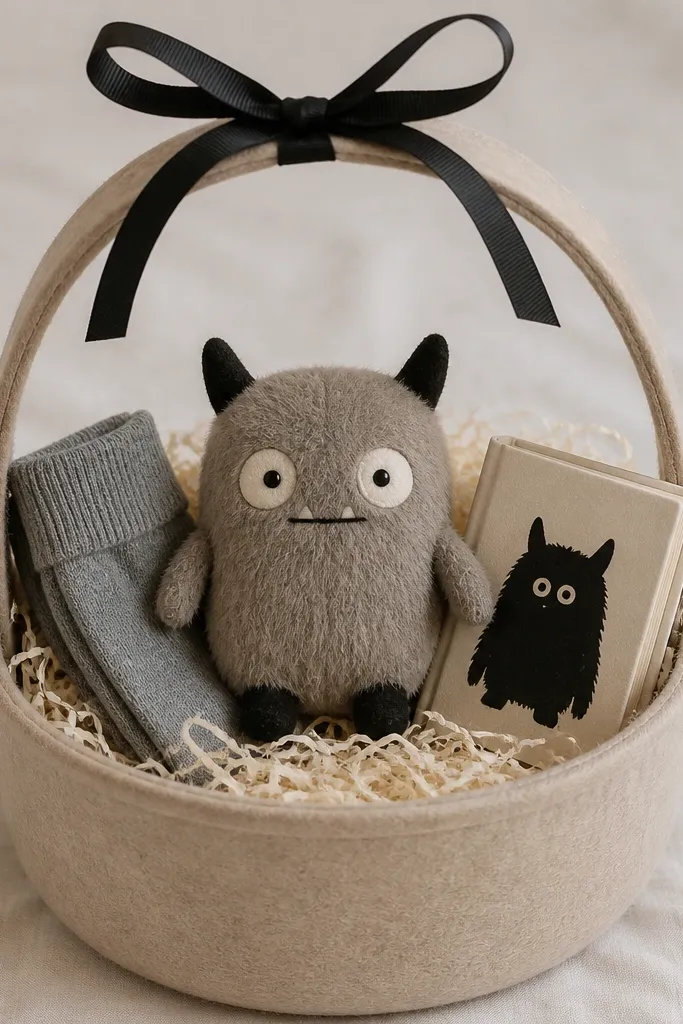
Felt baskets look modern because they’re soft and structured at the same time. Beige feels gentle and works for any kid because it doesn’t clash with clothing colors. The plush monster is the hero, and it anchors the basket so the rest can be simple. Pairing it with a storybook and socks keeps it practical, not just cute. The black silhouette on the book adds graphic contrast that reads Halloween without turning spooky in a harsh way. This is a great option for toddlers and early elementary kids who love tactile gifts.
Start by adding a small amount of cream shredded paper only around the plush base so it doesn’t sink. Place the plush monster upright in the center, then fold the socks into tubes and tuck them on the left and right like bookends. Add the storybook flat behind the plush, spine toward the back. Tie black ribbon around the felt handle and make the bow small so it doesn’t crowd the top. Adjust the shredded paper so it frames the plush instead of covering it.
Pick a plush with a simple face — embroidered features look cleaner than fuzzy textures.
Don’t stack too many boxed items — felt baskets look best with 3-5 pieces max.
11. Matte Black Tray, White Mini Treats, No-Filler Display
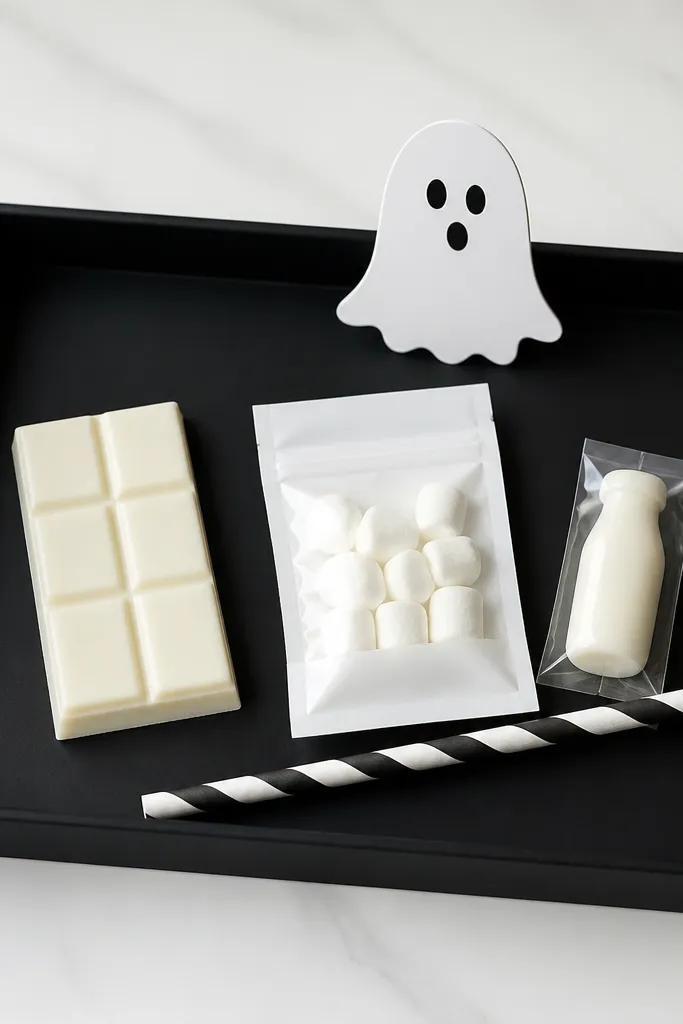
This one is the closest thing to “minimalist” you can do with kids' Halloween. A matte black tray gives you a clean stage, and no filler means you control the look with spacing. White mini treats look cohesive, and the striped straw adds a graphic line without adding clutter. The ghost cutout stands like a sign, so the basket reads as themed even without lots of decorations. It’s perfect for kids who get overwhelmed by too many loose items. Also, it’s fast — you’re arranging, not stuffing.
Start with a clean, dry tray and wipe it so there are no smudges on black. Place the tallest item (marshmallows pouch or mini candy bottle) in the back center. Add the chocolate bar to the left and the small marshmallow bag to the right, leaving a gap between them. Lay the striped straw diagonally so it creates a visual “S” curve. Stand the paper ghost cutout at the front center and skip any extra filler so the spacing stays crisp.
Pro tipUse small clear sleeves on candy packs so labels stay readable and neat.
AvoidDon’t add more than five items — trays look messy when they’re crowded.
12. Vintage-Style Glass Jar, Gray Ribbon, Candy Corn in a Controlled Layer
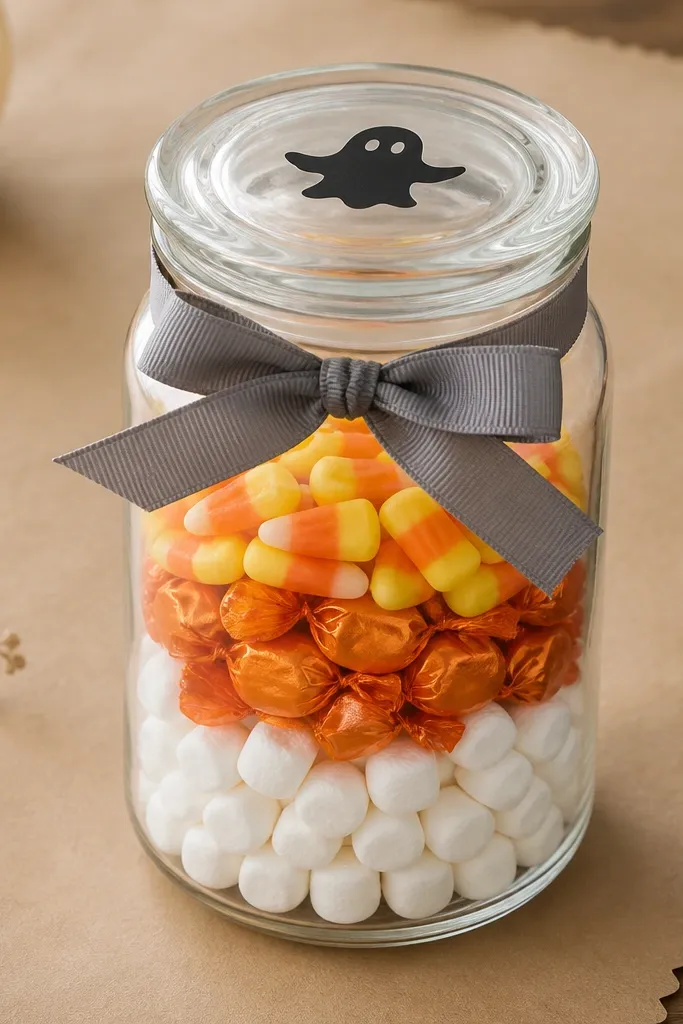
Glass jars look minimalist because the shape is simple and the contents are visible. The trick is layering so it doesn’t look like a spill. I like using a gray ribbon because it keeps the Halloween colors from going too loud. Candy corn gets a cleaner look when it’s contained and layered, not scattered across tissue. This works for kids who love sweet things but also for parents who hate messy baskets. The jar shape also makes it easy to carry — no loose items, no crushed packaging.
Start by cleaning the jar and letting it dry fully so the ribbon sits flat. Add marshmallows first, then pour a thin layer of orange wrapped minis, then top with candy corn pieces. Press down gently so layers stay even, but don’t crush the candy. Tie gray ribbon around the neck and cut the tails so they hang straight. Add a small ghost sticker to the lid and place the jar inside a kraft bag liner if you want extra presentation.
Pro tipUse wider-mouth jars so kids can scoop without dumping the whole layer.
AvoidAvoid mixed-color loose candy — it removes the clean layered look.
13. White Paper Wrap, Black Twine, Ghost Popcorn + Movie Night Card
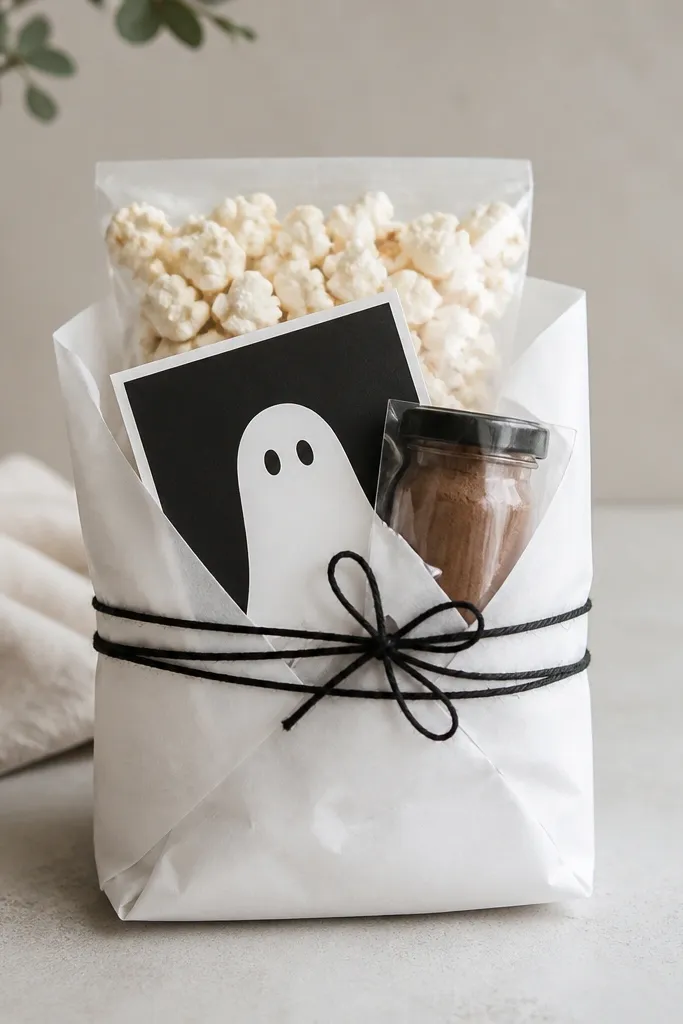
Paper wrap bundles look clean when the folds are tight and the materials are monochrome. White paper plus black twine reads modern immediately, and the ghost popcorn is the kid-friendly treat without messy tissue. A movie night card makes it feel like an experience, not just snacks. I like adding one “stationery” item because it gives structure and keeps the bundle from slumping. This works for kids who like calmer Halloween plans at home. The black/white card also looks good on different skin tones because it’s high contrast.
Start by placing the popcorn pouch at the front, standing it slightly angled so the label faces out. Slide the cocoa mix jar behind the pouch and tuck it so it stays upright. Put the movie night card between the paper and the items so it’s visible. Fold the white paper around the bundle, then tie black twine around the middle in two loops and finish with a tight knot. Trim the paper edges so they end evenly at the same height.
Pro tipUse thicker paper (gift wrap stock) so the folds stay sharp after you tie twine.
AvoidDon’t use thin wrapping paper — it wrinkles and makes the bundle look cheap.
14. Navy Lunch Bag, Silver Tissue, Mini "Boo" Potion Kit
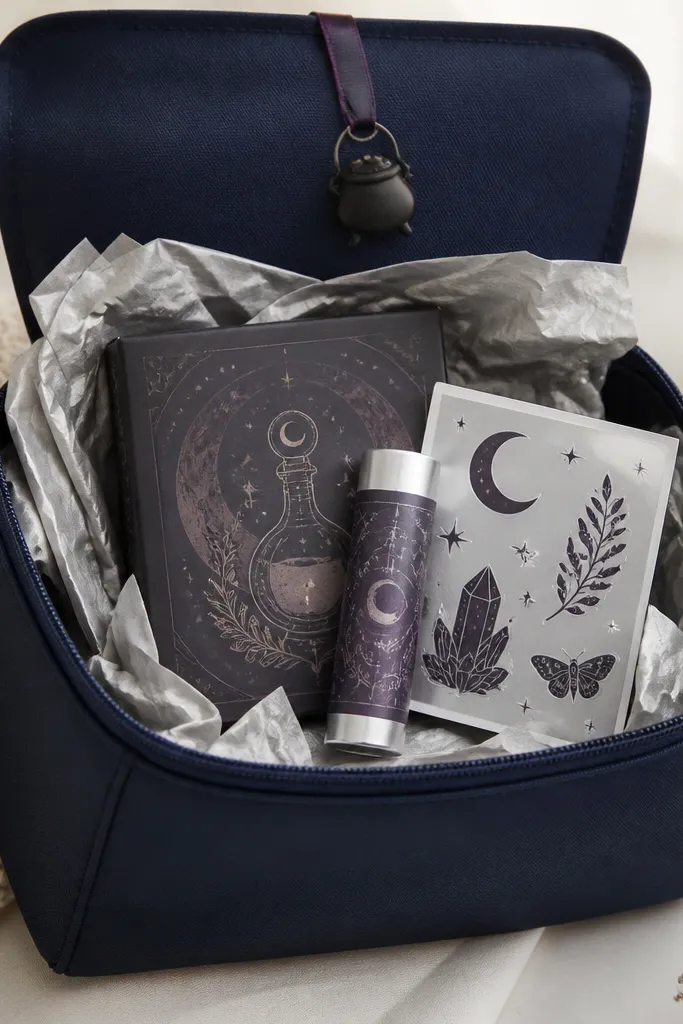
Navy and silver looks modern because it feels like a gift set, not a craft store pile. The silver tissue adds sparkle without being glittery, and dark purple keeps it Halloween. Potion kits feel themed even when the ingredients are simple — kids like the “mix and make” moment. The lunch bag shape also helps you keep the basket from collapsing. This build flatters kids who like darker colors because it doesn’t look childish, it looks cool. It’s also a great choice if you want the basket to survive being carried around all evening.
Start by cutting silver tissue to fit the bottom and sides, then lightly press it so it holds shape. Place the potion kit box flat at the back with the front label facing out. Add the sticker sheet on one side and the lip balm on the other, keeping both items at the same height so the top stays level. Put the tiny cauldron charm on top of the kit so it’s visible when the lunch bag is opened. Tie a small dark purple ribbon loop around the top handle area.
Pro tipKeep the total number of items to 4-6 so the lunch bag stays tidy.
AvoidSkip bright neon tissue — it fights the navy and looks off.
15. White Wooden Crate, Black Stencil Pumpkins, Treat-and-Read Stack
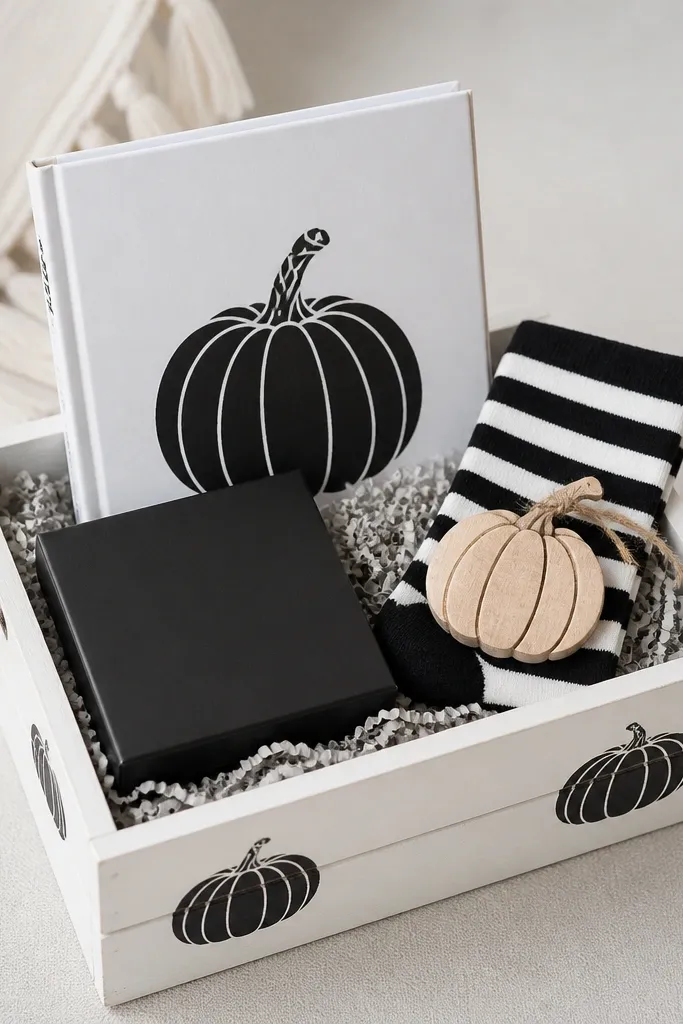
A wooden crate instantly adds structure, and white paint keeps it modern. The black stencil pumpkins tie the theme together without adding a lot of color. I use a treat-and-read stack because it gives you a fun item plus something that can be used after Halloween. Socks are a great minimalist add because they fold neatly and don’t look messy. The wooden ornament on top finishes the look like a topper. This palette works well for kids who like graphic designs — it feels stylish instead of overly cute.
Start by adding light gray shredded paper to the bottom, then pat it down so the crate doesn’t look fluffy. Place the book upright in the back center. Lay the snack box flat in front and slightly to the left so it doesn’t block the book cover. Fold the socks into a tight roll and place them on the right. Set the mini wooden pumpkin on top, centered, and adjust the shredded paper so it peeks from the sides like a frame.
Pro tipChoose a book cover with mostly black and white for the cleanest minimalist look.
AvoidDon’t add loose candy — it ruins the stacked, bookish silhouette.
16. Clear Bag, Black Label Stickers, "Boo-grams" Gift Note Set
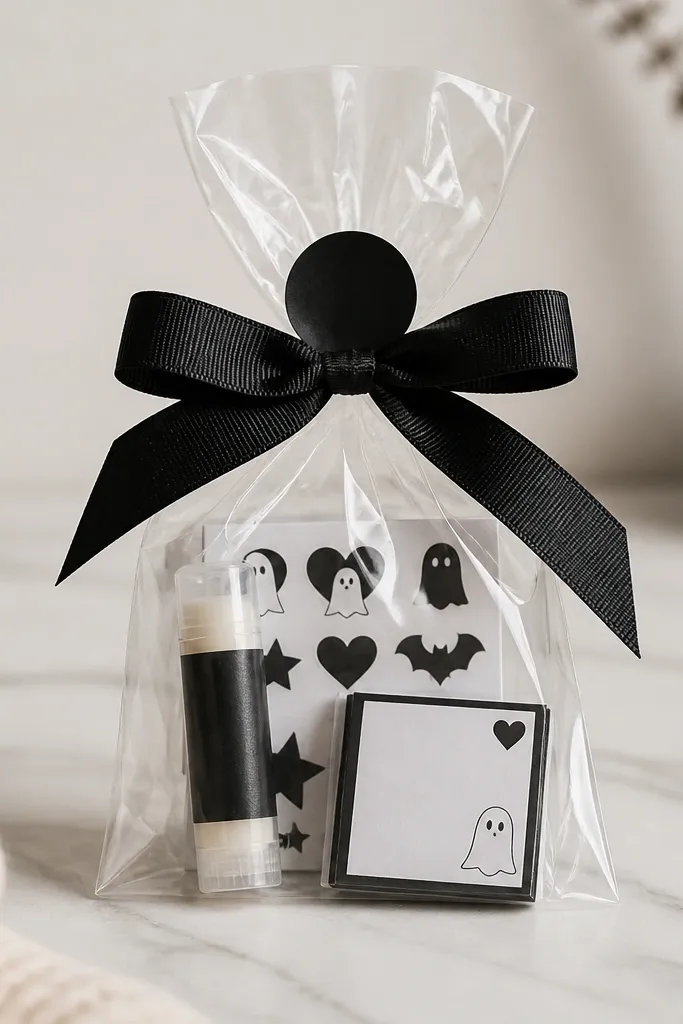
This build looks modern because the clear bag keeps the design honest — you can see the items and their packaging matches. Black label stickers unify everything even if the products are different brands. "Boo-grams" note cards are a sweet alternative to candy piles, and kids love writing or dictating messages. It’s also easy for parents to customize — you can swap note cards based on age. The black ribbon and label sticker give you a clean focal point. This is a great option for kids who are picky about textures and want simple, sealed items.
Start by placing the note card set flat in the bottom of the bag. Add the sticker sheet on top, then place the lip balm roll-on upright so it’s visible through the clear bag. Seal the bag with a thick black ribbon tie at the top, then place a single black label sticker across the knot area like a stamp. Keep the items centered so the bag doesn’t bulge unevenly. Trim the ribbon tails to about 2-3 inches for a tidy look.
Use black-and-white note cards so the bag stays minimalist even when the kids add their own messages.
Skip multiple ribbon colors — clear bags look messy with mixed accents.
17. Pastel Pink Bucket, White Lace Bow, Tiny Hair Clips + Treat
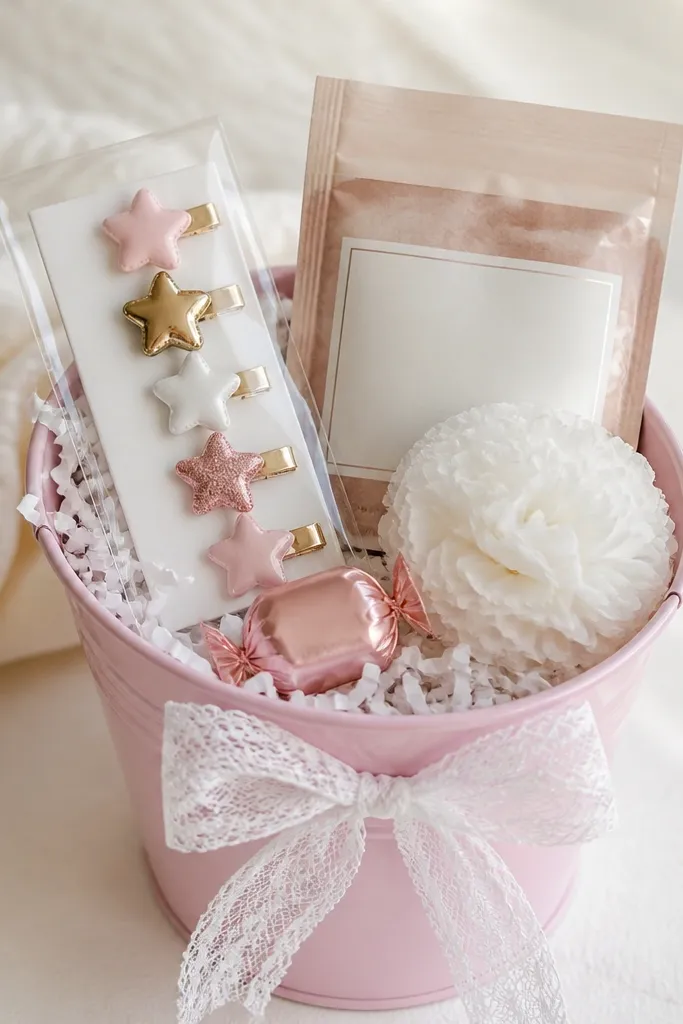
Pink buckets can look modern instead of babyish when you keep the palette light and the bow is crisp. White lace bow adds texture without loud color, and it makes the items feel special. Hair clips are compact and visually neat, which is exactly what minimalist boo baskets need. The tiny hot cocoa packet ties into Halloween comfort. This basket flatters kids who look great in soft colors, and it also works for everyone because the accents are gentle. I like this for girls and boys alike — the stars and soft pink feel playful without being overly themed.
Start by adding white shredded paper up to about 2 inches from the top. Place the hair clips upright at the back center. Add the cocoa packet on the left, label facing forward. Put the pink candy on the right as a small topper, then add a single white tissue flower at the center top. Tie the white lace bow so it sits flat against the bucket front and doesn’t twist. Adjust items until the top looks level when you look from the side.
Pro tipChoose hair clips with matte packaging or clear sleeves so you don’t get shiny glare.
AvoidDon’t add extra pink decorations — the bucket already sets the tone.
18. Gray Felt Bag, Stripe Ribbon, Mini "Boo" Bubbles Set
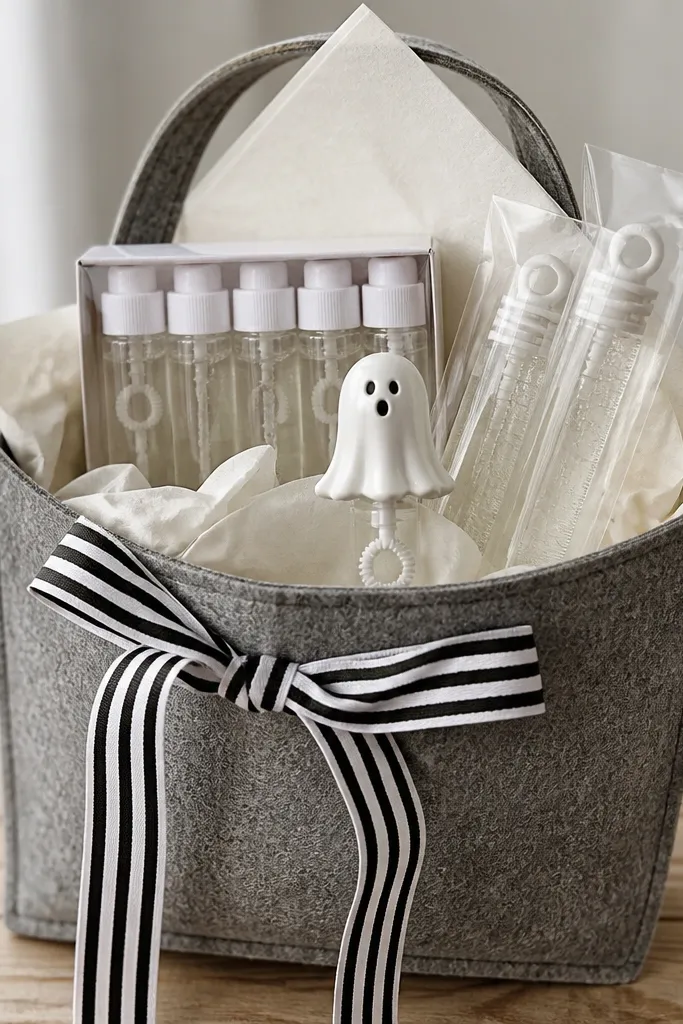
Felt bags plus stripe ribbon look modern because they feel designed, not stuffed. Bubble sets are perfect because the bottles are sealed and don’t leak if you transport carefully. The ghost wand adds a spooky shape that still looks cute and not scary. This build works for outdoor trick-or-treat kids because bubbles are fun even after the candy is gone. The gray felt keeps it neutral, and the black/white stripe ribbon gives the Halloween vibe without using orange. It’s also a good option if you need something that fits in smaller spaces.
Start by lining the felt bag with cream tissue cut to the base size. Place the bubble bottles upright in the back center. Add bubble refills on the right side, keeping them parallel so the bag doesn’t bulge. Put the ghost bubble wand in front, angled slightly outward so it’s visible. Fold a small tissue square and tuck it at the top edge for a clean finish. Tie the striped ribbon around the handles and trim the ends evenly.
Pro tipUse refills in clear sleeves so you can see the quantity without opening everything.
AvoidDon’t include loose bubble liquid — it makes felt bags look stained.
19. Black Paper Wrap, Silver Star Sticker, Mini LEGO-Style Build
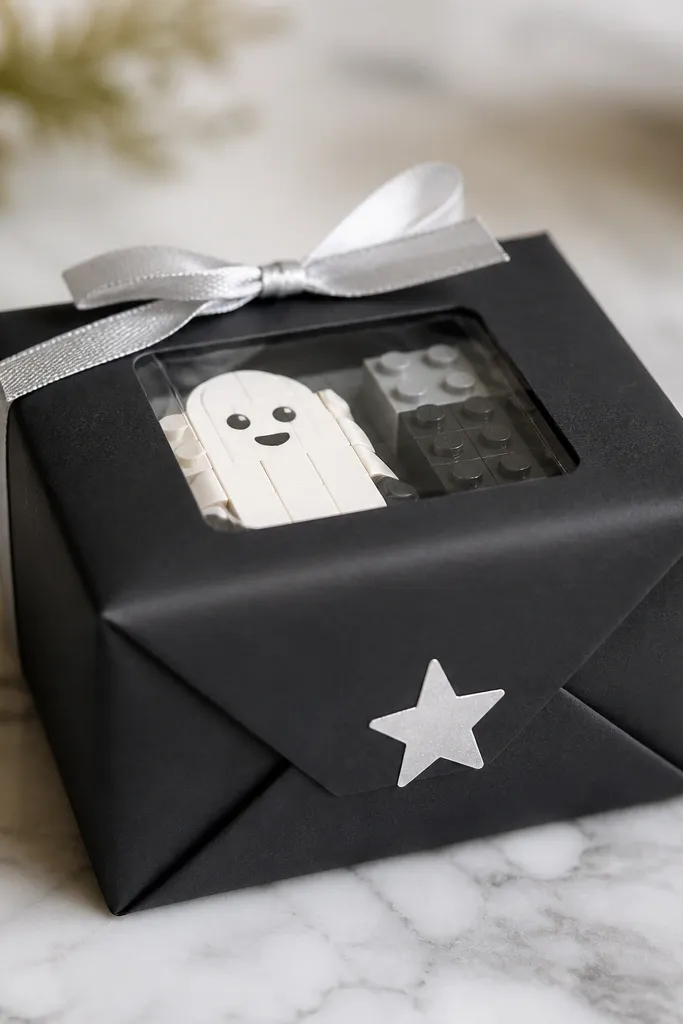
This is minimalist Halloween for kids who love building. Black paper wrap looks sleek and makes the product box look like it belongs in a store. The silver star sticker gives a single, clean accent without turning the wrap into a craft project. Building sets are visually tidy because the box is flat and structured, and the pieces are inside. It’s also a safe bet across ages because you can pick a set size that matches skill level. Silver accents look good on warm and cool skin tones because they’re neutral and reflective.
Start with matte black paper and fold it into a tight box-wrap around the building kit. Place the kit centered so it doesn’t shift as you tie ribbon. Seal the front with a silver star sticker placed exactly over the seam. Tie a short silver ribbon around the middle in a simple knot, then pull the paper tight so the folds stay crisp. Trim ribbon tails to about 1.5 inches and press the paper edges so they don’t flare.
Pro tipPick a building set box with mostly gray/black graphics for the cleanest monochrome look.
AvoidDon’t add multiple stickers — one seal looks intentional.
20. White Tin Pail, Black Chalk Label, Halloween Snack + Fruit
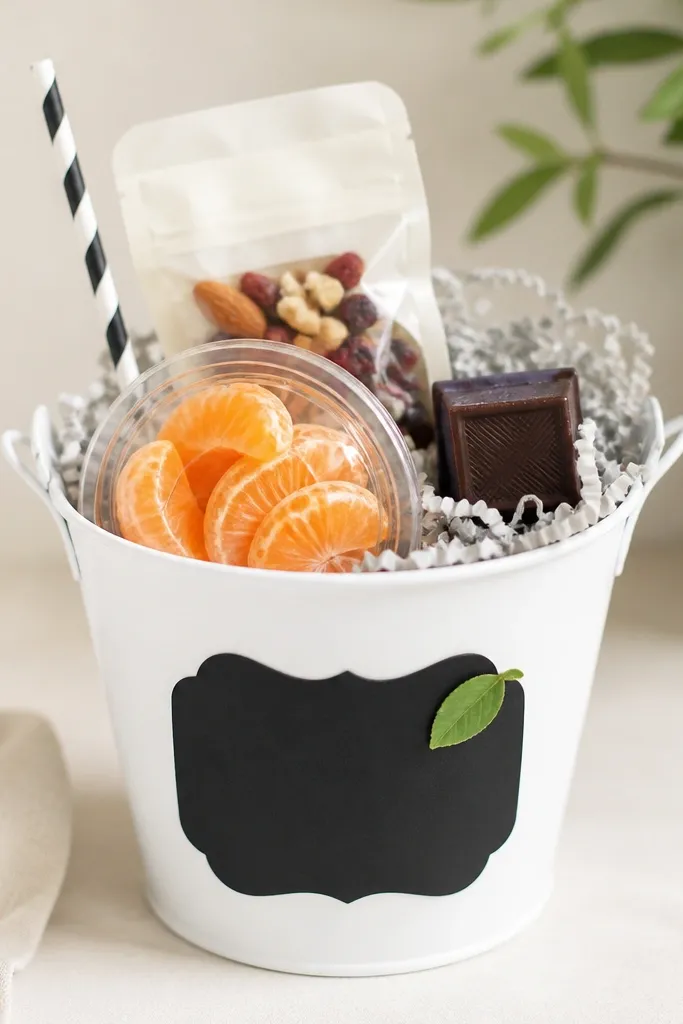
Tin pails look modern when they’re clean and the label is simple. A black chalk label gives you a handwritten look that reads handmade even if you’re working fast. This build is kid-friendly because it mixes a treat with something fresh, and the sealed snack pack keeps it neat. The pale gray shredded paper keeps the contents from sinking and makes the colors look coordinated. It’s also a smart choice for families trying to balance Halloween candy with fruit. The black label pops against white and looks good in photos.
Start by adding pale gray shredded paper until it reaches about 1 inch up the sides of the pail. Place the sealed snack pack in the back center, then tuck the mandarin container on the right so it stays upright. Add the chocolate square on the left, slightly forward so it’s visible. Insert the striped straw into the top at an angle like a flag. Write the chalk label (kid name + “boo snack”) and let it sit dry before you pack the rest.
Pro tipUse a clear container for fruit so it stays fresh and looks tidy in the pail.
AvoidDon’t put open fruit directly on tissue — it stains fast.
21. Teal Mini Basket, White Ribbon, "Monster Mittens" + Treat
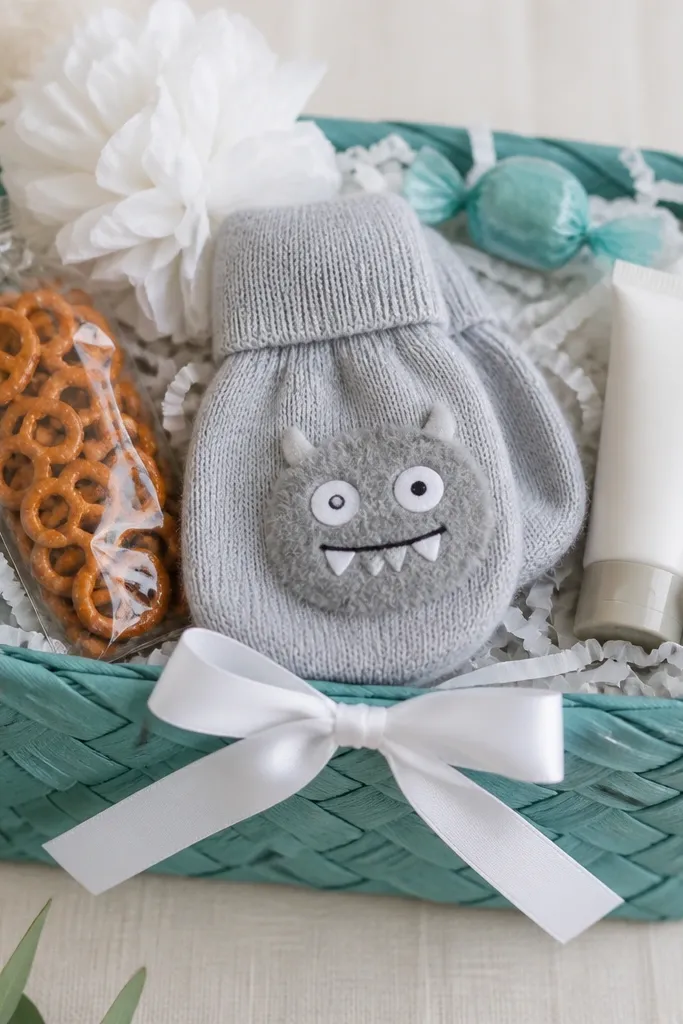
Teal feels modern and it pairs beautifully with gray and white, which is exactly the minimalist formula I trust. Mittens are a clever boo basket item because they’re seasonal without being costume-y, and they stack flat. The monster face patch adds Halloween without cluttering the palette. Hand lotion in a small tube gives practicality, and pretzels add crunch. The white ribbon keeps it clean and bright, and the teal candy gives a single accent. This works great for kids who like cozy gifts and for families who want Halloween to feel seasonal and usable.
Start by lining the basket with a thin piece of white fabric or tissue so the woven texture doesn’t catch. Add shredded paper to about 2 inches high. Place the folded mittens in the center, then tuck the pretzel pack on the left and the lotion tube on the right. Keep all labels facing outward toward the same direction. Add a white tissue rosette at the top center and place the teal candy on the rosette like a small ornament. Tie the white ribbon bow so it sits flat and doesn’t droop.
Match the candy wrap color to the basket color — that one repeat makes the whole basket feel designed.
Don’t add multiple teal items with different shades — it looks mismatched.
22. Matte White Paper Box, Black Border Sticker, Mini "Boo" Candle
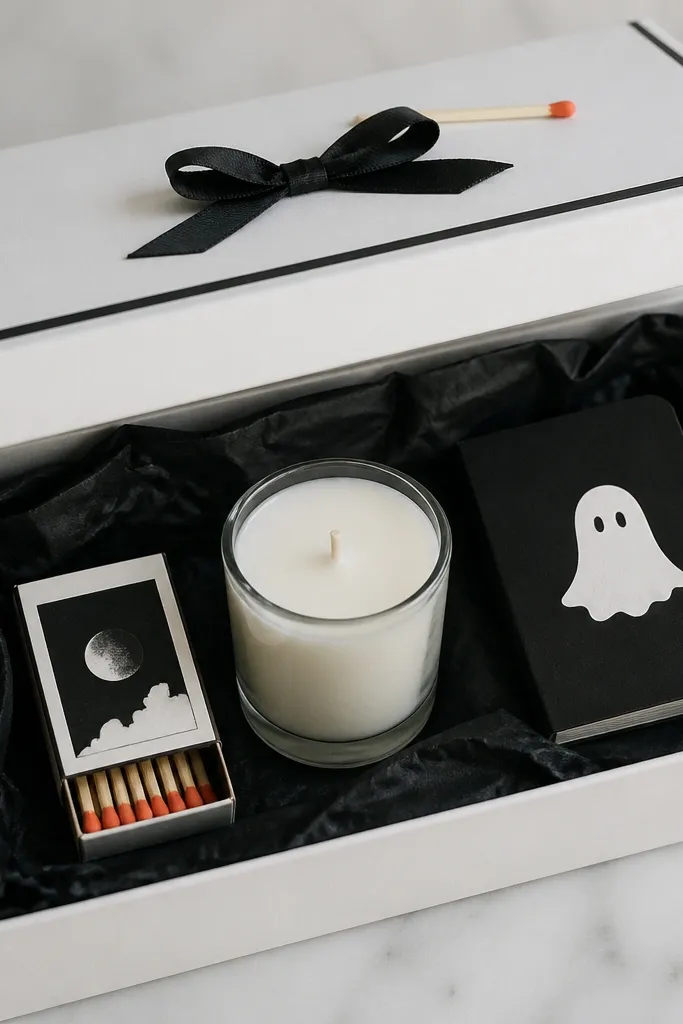
A paper box makes the whole thing look like a subscription product, not a last-minute basket. Matte white keeps it modern and the black border sticker gives a graphic frame. A small candle makes the gift feel grown-up while still being kid-appropriate if you use a flameless LED candle for younger kids. Matches and a mini notebook add that “Halloween kit” feeling. The black tissue makes everything pop, and the orange match tip gives one controlled accent. This is great for kids who like cozy things and for families who want a calmer Halloween gift.
Start by lining the box with black tissue so it covers the sides and bottom. Place the candle jar in the center, then put the matchbook on one side and the mini notebook on the other. Keep the notebook flat so the lid closes cleanly. Add a small black bow on the lid and place a single orange candy or match-shaped sticker near the bow. If you’re using an LED candle, keep the battery tab accessible so it doesn’t get trapped.
Use flameless LED candles for kids and choose a neutral scent like vanilla or cinnamon if you want a cozy vibe.
Don’t use loose wrap around the candle — it looks messy under the lid.
23. Pastel Purple Basket, Neutral Filler, "Witch Hat" Coloring Kit
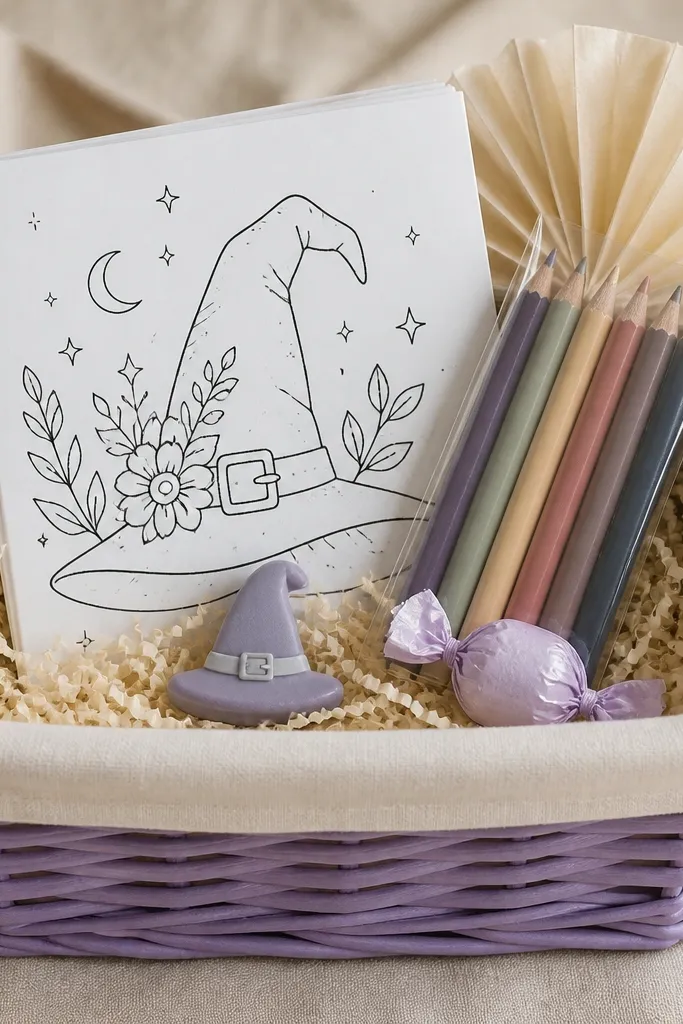
Pastel purple makes a boo basket feel softer, which works well for kids who don’t like scary themes. The minimalist win here is the witch hat coloring book — line art stays graphic and doesn’t fight with colorful packaging. Muted colored pencils keep the palette controlled, and the lavender candy adds a gentle accent instead of a loud orange hit. Beige shredded paper is the secret because it doesn’t compete with purple. This build is great for ages 4 through 9 because coloring kits are easy to use right away. It also looks tidy because the items are flat and come in sleeves.
Start by adding light beige shredded paper up to about 1.5 inches high. Place the coloring book flat at the back with the witch hat cover facing forward. Add the pencils in their clear sleeve on top of the filler so they sit slightly angled, label facing out. Put the hat eraser in front, centered, so it peeks above the pencil tops. Finish with a cream tissue fan at the top and place lavender candy in the center. Keep everything aligned so the purple basket remains the background color.
Choose pencils with muted colors (dusty rose, sage, slate) so the basket stays modern.
Don’t add a full rainbow crayon set — it wrecks the minimalist palette.
24. Black-and-Cream Rope Handle Basket, Minimal Trick-or-Treat Soap
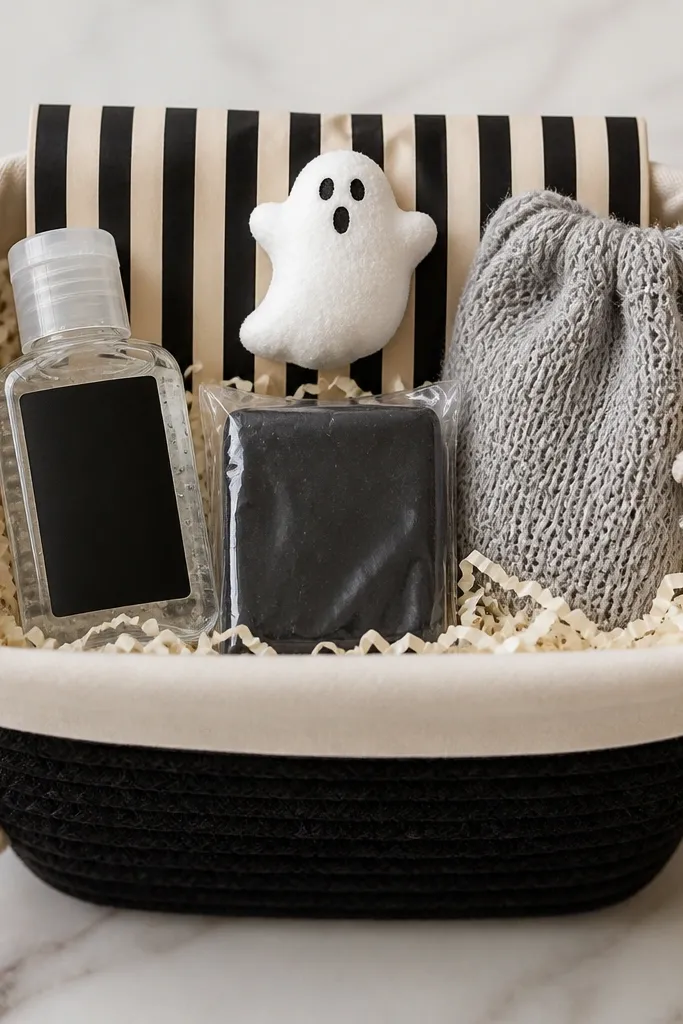
Rope handle baskets look handmade and modern at the same time, especially when the lining is cream and the contents are monochrome. Soap and sanitizer are minimalist wins because they’re sealed, compact, and practical. The black soap bar gives a strong Halloween nod without needing a pile of candy. A light gray loofah pouch adds softness and texture so the basket doesn’t look too flat. This build works for kids who get irritated by sticky candy or parents who want practical items. It also holds up well because nothing leaks if you choose sealed bottles and boxed soap.
Start by placing cream shredded paper in a thin layer, then press it gently against the basket walls for support. Put the black soap bar in the center, clear sleeve facing outward. Add the hand sanitizer on the left and the loofah pouch on the right, keeping both items at similar heights. Wrap a small piece of black-and-cream striped paper around the top area as a frame. Place the foam ghost on top of the frame so it sits above the shredded paper line. Adjust until the rope handles don’t hide the top accent.
Choose soaps with simple labels and no glitter — glitter looks cheap fast on tissue.
Don’t use scented sprays — they can be too strong for kids.
25. Matte Gold Accent Mini Basket, White Candle + Halloween Bookmark
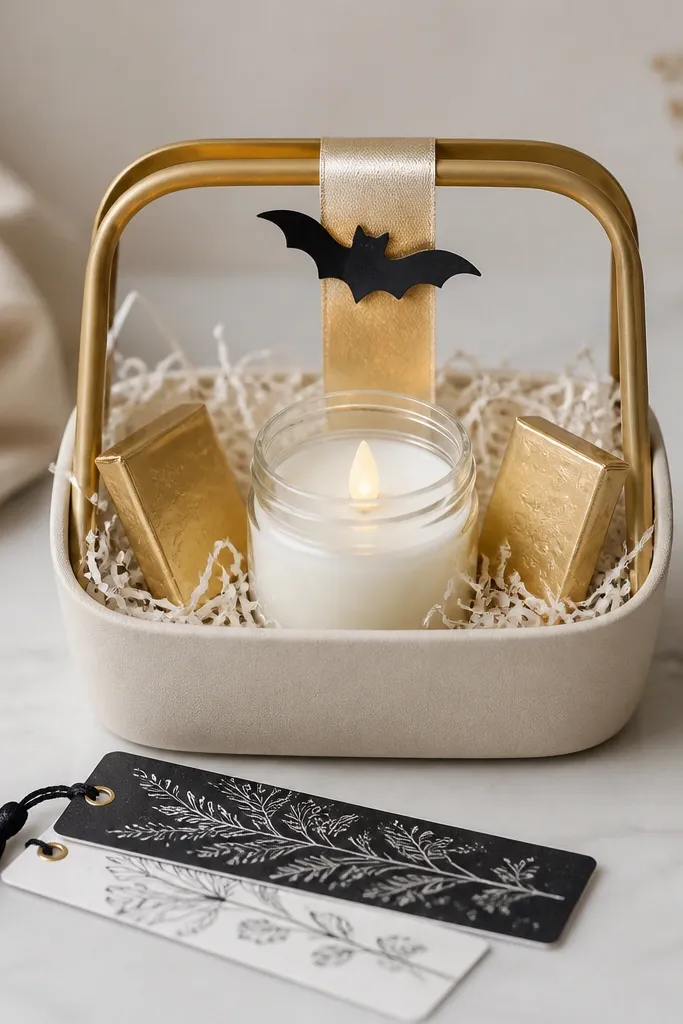
Gold accents make minimalist boo baskets feel special without adding extra color chaos. The palette stays neutral, and the candle gives a clean, glowing focal point. I like pairing a flameless candle with a bookmark because it’s useful after Halloween night. The black-and-white bookmark set brings graphic Halloween energy that doesn’t look messy. This is a great option for kids who like reading and for families who want gifts that last beyond trick-or-treating. The gold detail flatters warm undertones, but the overall design is neutral enough for everyone.
Start by placing white shredded paper only at the bottom so the candle jar sits stable. Put the candle jar in the center first. Lay the bookmark set flat in the front, aligned so the bookmark art faces forward. Add the chocolate bars on the left and right at the same height as the bookmark. Finish by placing a tiny black bat cutout on top and tying a thin gold ribbon strip around the basket handle area. Check the top from two angles so the bat sits centered.
Pro tipUse a flameless candle with a warm white LED for a realistic glow that still looks modern.
AvoidDon’t add gold glitter decorations — they look messy against white tissue.