1. Denim Pocket Key Organizer with Magnet Flap
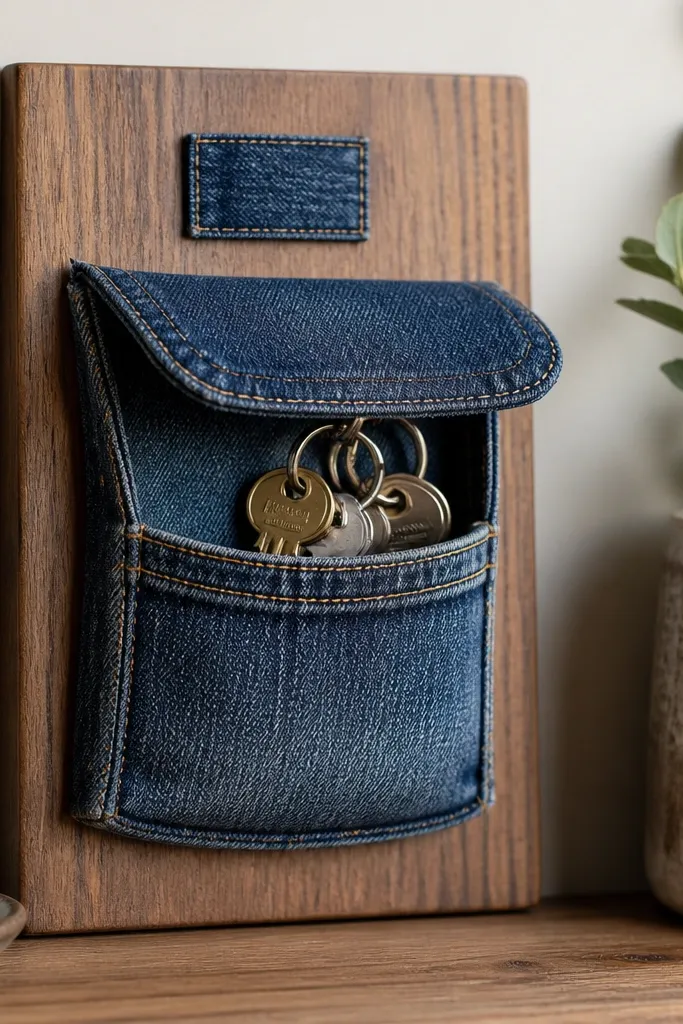
This is the easiest way to make his keys feel like they belong somewhere. I use an old denim pant leg pocket because the fabric is sturdy, and the pocket already has a natural shape for holding keys without them clanging around. The magnet flap keeps it shut during the week, and the denim texture looks better than plain felt because it catches light in a subtle way. It flatters anyone’s style — if he likes rugged or minimal looks, denim still works. Hang it by the door and it stops the “keys on the counter” habit.
Start by cutting a rectangle from a sturdy board (cereal-box cardboard wrapped in packing tape works) to about 8x10 inches. Sew or glue your denim pocket onto the board so the pocket opening faces up, then top-stitch the edges if you want it extra clean. Add two small rare-earth magnets on the flap and the board contact point, or use one magnet on each side for a firm close. Finally, attach a loop of twine or a strip of fabric for hanging, and keep the pocket roomy enough that keys slide in without forcing.
Test the magnet pull with his heaviest key before you glue anything — denim thickness can change how strong it feels.
Avoid leaving raw denim edges inside the pocket opening; they snag keys and make the project look rushed.
2. Cereal-Box Leather-Look Card Case
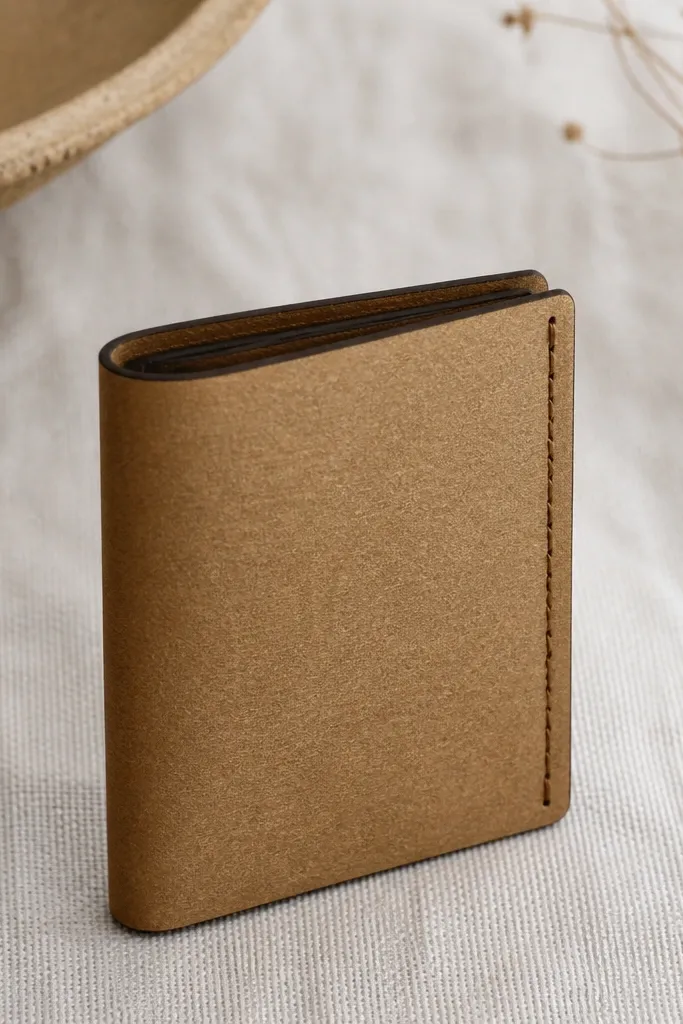
This looks like a real leather card holder because you’re copying the structure, not the material. I build it on thick cardboard and cover it with a textured wrap so the surface has that slight grip when his fingers slide it out. The case is thin enough for a front pocket and stiff enough that it doesn’t collapse and dump cards. It works for guys with minimal wallets who hate bulky folds. If he wears jeans or workwear, the warm brown finish matches everything.
Cut two pieces of thick cereal-box cardboard to about 3.75x4.5 inches each, and one spine piece to 3.75x0.25 inches. Score a line down the middle of the main panels so it folds cleanly, then glue the spine piece between them to create the tri-fold structure. Cover the whole thing with textured paper or faux-leather vinyl, smoothing from the center outward. Press hard under a heavy book for 30 minutes, then fold and run a single line of faux stitching with a paint pen along the edge.
Use a ruler and a dull butter knife to score folds — it prevents the cover from wrinkling.
Don’t skip burnishing the edges; flat, unsealed edges look like craft paper.
3. Old T-Shirt Travel Cable Wrap
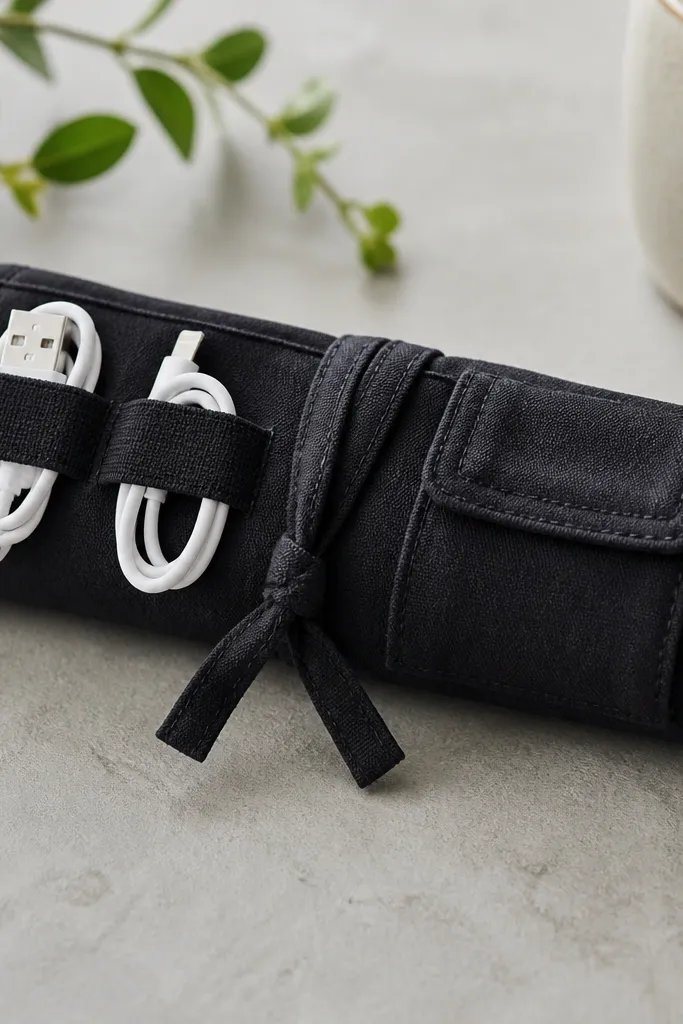
This is the gift he reaches for without thinking. A t-shirt strip is stretchy, so it grips cords instead of fighting them, and the fabric feels good against his hands in a bag. I add elastic loops so the charger and cable don’t tangle, even when he tosses it into a backpack. The look is clean because the fabric is one color — no busy patterns. It’s perfect for students, commuters, and anyone who always has a tangled mess of cables at the bottom of a tote.
Cut a strip from an old t-shirt that’s about 12 inches long and 6 inches wide, then fold it in half lengthwise and stitch or glue the long edge to form a wrap. Sew two small elastic loops on one side — place one loop near the top for a charger brick and one near the middle for the cable. Add a small pocket flap with a simple Velcro dot so he can slide in earbuds or a small adapter. Roll the wrap around the cords, then tie with the remaining fabric strip or close with one Velcro tab.
If he uses a long cable, make the middle elastic loop 1.5 inches wider so the cord slides in without bending.
Avoid using thin, stretchy fabric without a reinforced seam; it stretches out and won’t hold shape.
4. Photo Button Magnet Strip for Fridge or Locker
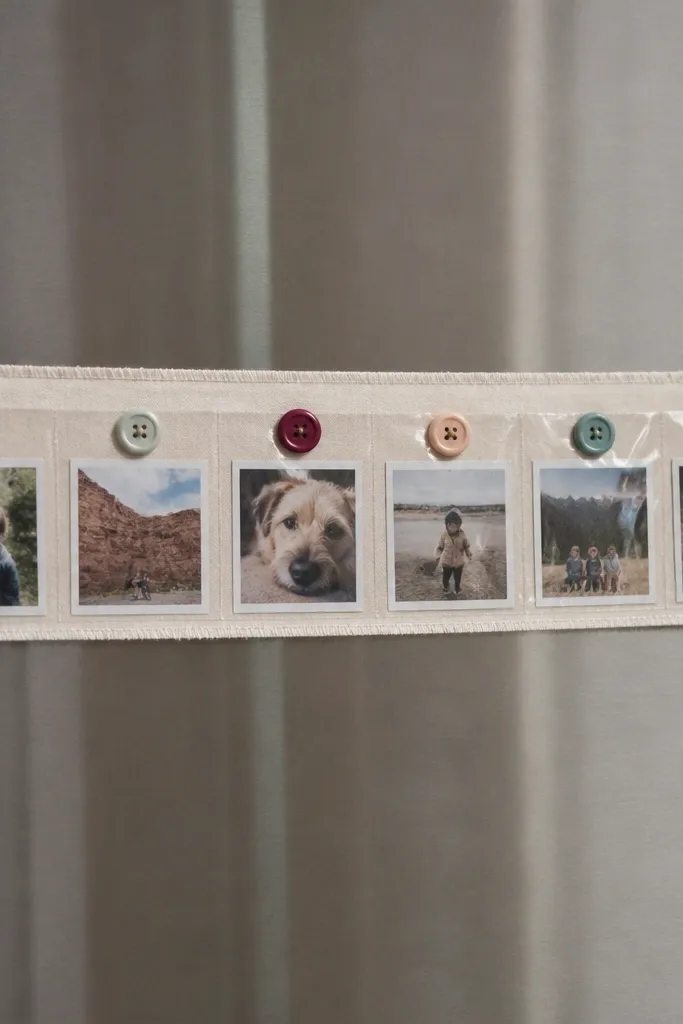
This is a sentimental gift that doesn’t look like a scrapbook exploded. I use a strip of sturdy fabric or denim, then sandwich little photo prints behind clear tape so they stay protected. The button detail gives it a handmade bump, and magnets make it move-friendly — he can swap photos without redoing the whole thing. It suits boyfriends who like photos but hate frames that take up space. The color you choose sets the mood — I like navy fabric with black-and-white photos for a calm look.
Cut fabric into a strip about 10x2.5 inches, then hem the long sides with a simple fold and straight stitch. Print or cut small photos to about 1x1.25 inches, then tape each photo face-up using clear packing tape strips so the surface is smooth. Glue a flat button over the photo corners to hide the tape edges. Attach two to three magnets on the back with hot glue, and test on his fridge/locker before you commit.
Pro tipUse matte photo paper so glare doesn’t wash out the images under kitchen lights.
AvoidDon’t use glossy laminate over inkjet prints; it can peel at the edges if the tape isn’t sealed.
5. Upcycled Frame Message Board with Twine and Binder Clips
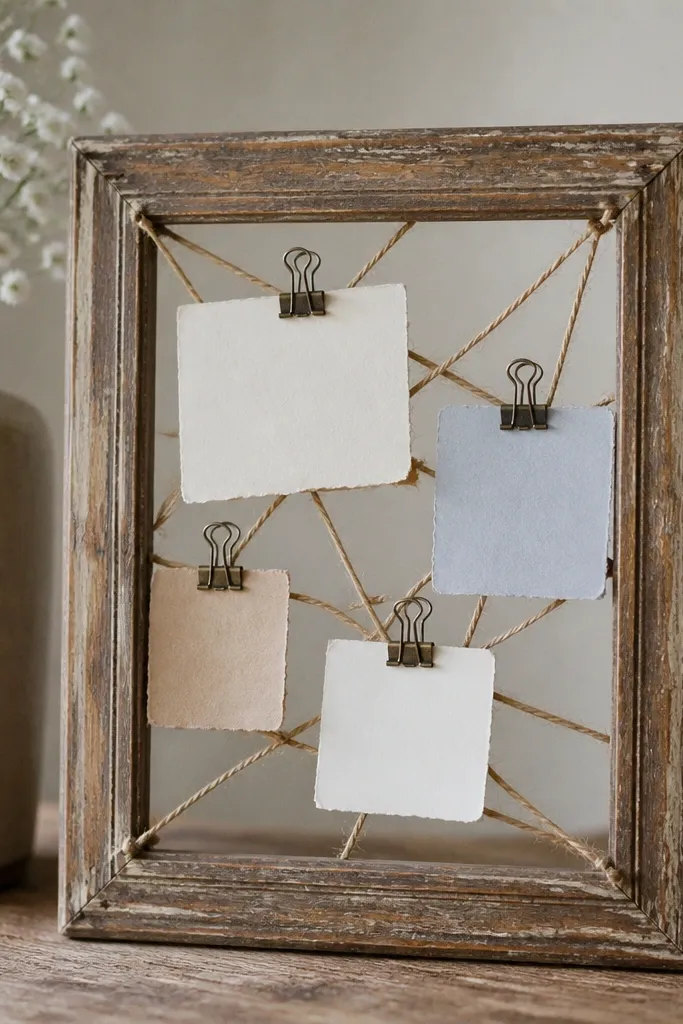
If he’s the type who forgets plans until the last second, this gift actually helps. A cheap frame makes it look intentional, and twine gives you a visible grid for clipping notes and photos. Binder clips are easy to open, so he can swap reminders without messing with tape. It looks good in a bedroom or entryway because the frame gives it structure. I like neutral frames (oak or black) with warm twine so it doesn’t look like a school project.
Remove any old backing from the frame and decide if you want the glass in or out; glass makes writing harder, so I usually remove it. Stretch twine across the inside in a gentle grid and tie it to small nails or push pins at the corners. Cut a piece of craft paper or thin fabric to cover the back so the twine has a clean background. Clip notes, photos, and tiny card messages using binder clips, then hang it with the frame hardware.
Pro tipWrite the reminders on thick cardstock and punch a tiny hole — binder clips hold better than paper alone.
AvoidAvoid leaving twine loose; sagging makes the whole thing look messy fast.
6. Painted Mason Jar Desk Organizer with Upcycled Labels
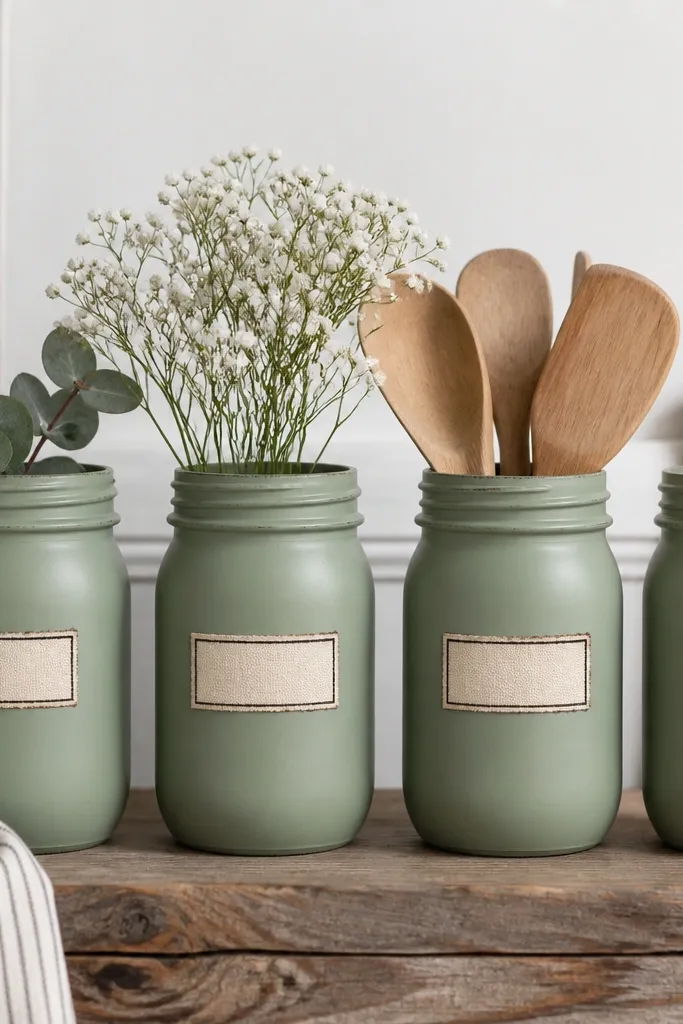
This makes his desk look like he has his life together, even if he doesn’t. Mason jars are heavy enough not to tip, and the wide mouth is perfect for pens, markers, and small tools. I paint them matte because glossy jars reflect light and look more “crafty” than “intentional.” Upcycled labels add personality without adding clutter. This works best for guys who like clean surfaces and keep reaching for supplies.
Clean and dry mason jars, then tape off a horizontal band where you want the paint edge to stop. Spray or brush matte acrylic paint in sage green or deep charcoal, two thin coats. While paint dries, cut label strips from cereal boxes or brown paper bags and seal them with clear tape so ink doesn’t smear. Write a word like “pens” or “tape” with a fine-tip marker, then glue or mod podge the label strip onto the jar.
Pro tipUse painter’s tape for the paint edge; the crisp line is the difference between cute and polished.
AvoidDon’t paint over dust — it causes tiny bumps that make the finish look uneven.
7. Cuff Bracelet from Old Belt with Brass Rivet Look
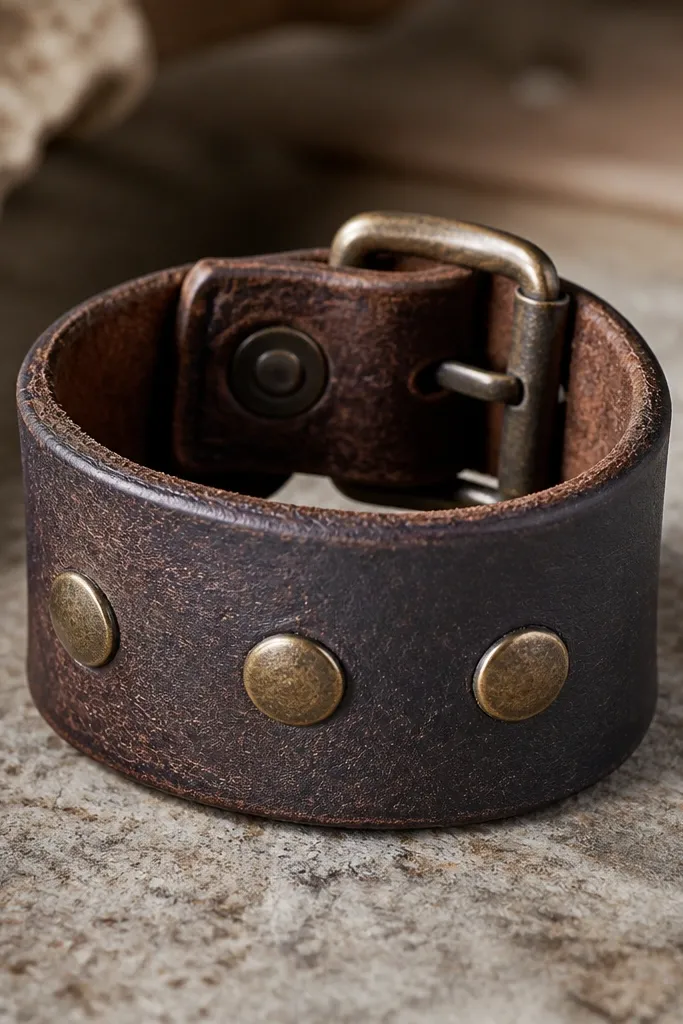
This is the kind of wearable gift that looks like it came from a shop. Belt leather already has structure, so it bends slightly without collapsing, and it holds a clean crease when you form it. I like adding “rivet” details because they make the bracelet look intentional even if it’s a repurpose. It suits guys who like simple accessories and dark neutrals. If his style leans rugged or workwear, this will match his boots and watches.
Cut a belt strip about 1.25 inches wide and long enough to wrap his wrist with 1 inch overlap. Punch a few holes along the overlap for a secure closure, then attach the original belt buckle or use a small snap. Mark three rivet spots and glue small brass-toned buttons or caps on top. Lightly sand the edges so they’re smooth, then seal with clear leather finish or a thin coat of matte varnish.
Pro tipMeasure his wrist with a soft tape and add 0.5 inch for comfort so it doesn’t feel tight after an hour.
AvoidAvoid leaving the belt edge raw; frayed edges make it look old instead of handmade.
8. No-Sew Fleece Throw Keychain Pom Charm
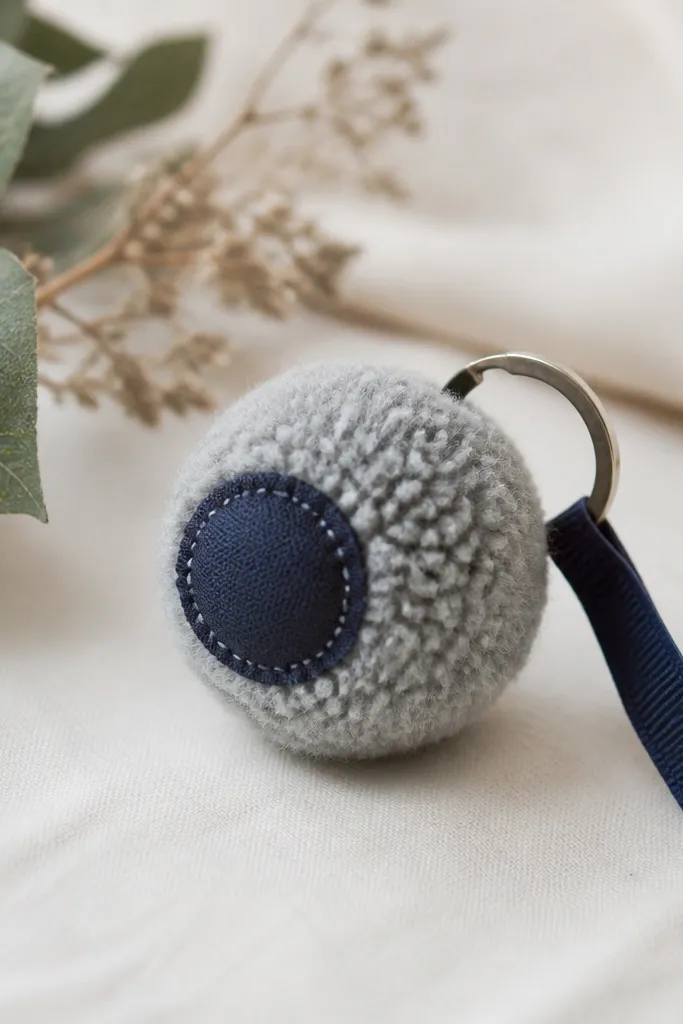
A pom charm is small, but it changes how his keys feel because it’s soft and fun to grab. Fleece holds shape better than thin felt, and it doesn’t shed as much as cheap craft wool. I attach a tiny patch tag so it looks like a “brand” piece, not a random pom. This works for boyfriends who carry keys daily and like tactile items. Choose colors he already wears — heather gray with navy or forest green looks good on most skin tones.
Cut fleece into a circle about 4.5 inches wide, then cut fringe strips about 0.5 inch deep around the edge. Gather the fringe at the center and tie tightly with matching thread or a strip of fleece. Trim the pom into a round shape, then stitch a small fabric patch on top or glue it with fabric glue. Attach to a keyring using a strong loop of thread or a small jump ring.
Pro tipTrim the pom after it’s tied, not before, so the round shape stays even.
AvoidAvoid using too much glue; it stiffens fleece and makes the pom look lumpy.
9. Fabric Coasters from Old Jeans with Heat-Set Top Stitch
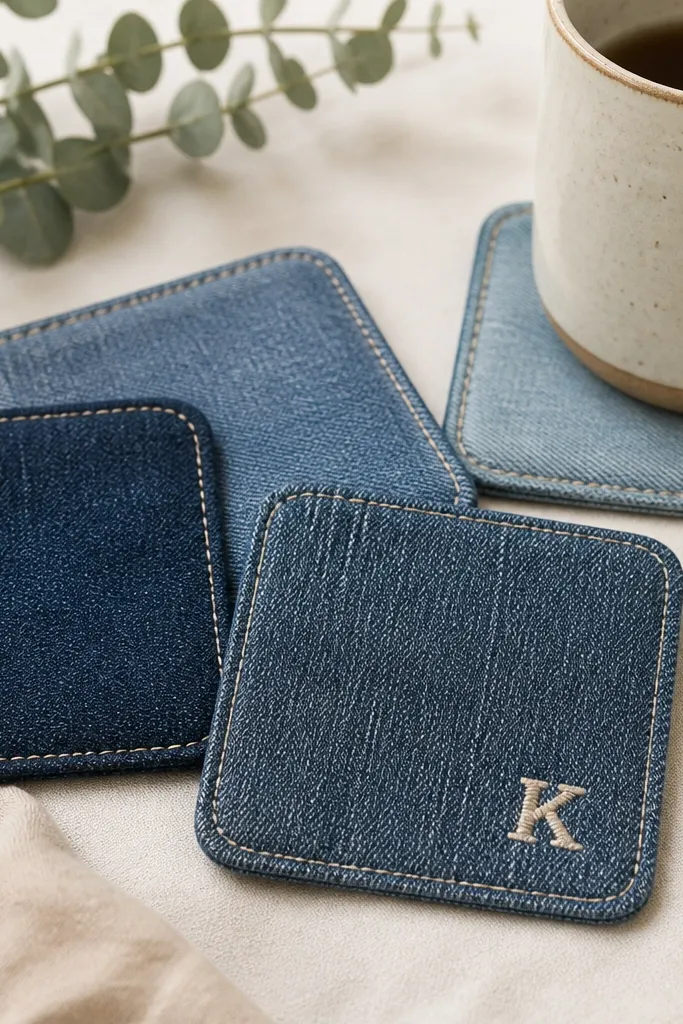
Coasters are the kind of gift that gets used immediately and keeps his coffee table from getting ruined. Denim is thick enough to handle cold condensation and hot mugs without soaking through quickly. I like adding a single embroidered initial because it looks personal without covering the whole coaster. This suits boyfriends who host friends or who keep drinks on their desk. The blue-gray tones also hide stains better than light cotton.
Cut denim squares to 4x4 inches, then cut a backing layer from cotton or felt scraps to about 3.75x3.75 inches. Layer the backing centered behind the denim piece, then fold the denim edges slightly under and stitch around the perimeter with a straight stitch. Add an initial using embroidery thread or a fabric paint pen — keep it small at the top-left corner. Heat-set the top stitch with a warm iron and a pressing cloth so the edges lie flat.
Use a walking foot on a sewing machine if you have one; denim layers feed cleaner.
Avoid coasters that are too thin; they feel flimsy and absorb water too fast.
10. Upcycled Tie Dye Notebook Cover from Cotton Tee
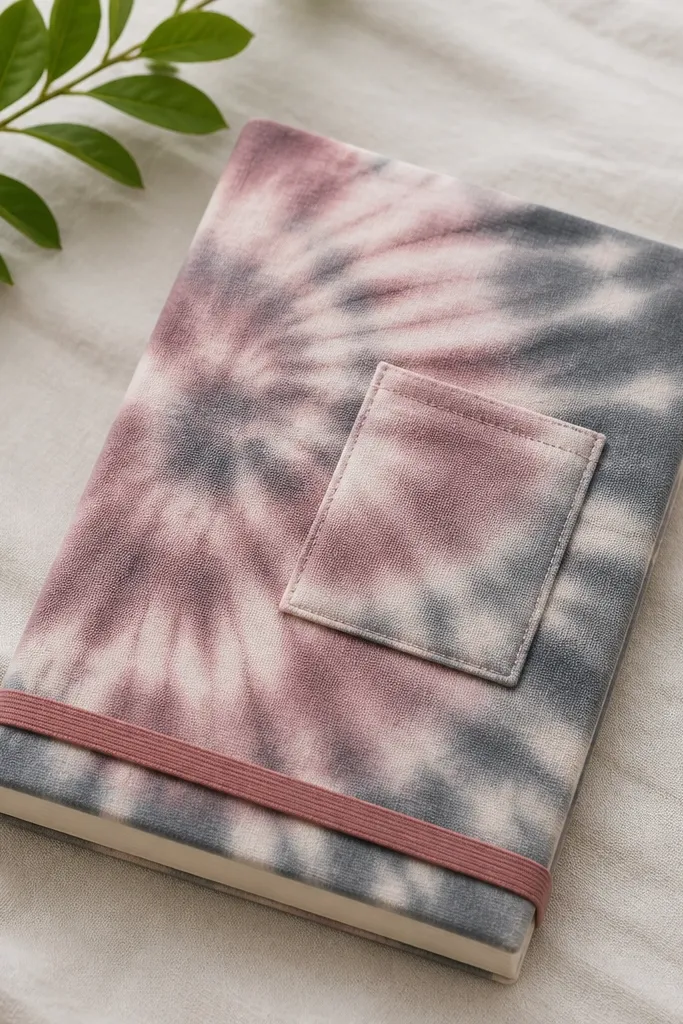
This cover makes his everyday notebook look like it has a personality. Cotton tee fabric stretches slightly, so it hugs the notebook without bulky seams. I keep the design simple: one front pocket for pens and a clean elastic band so it stays shut when he tosses it in a bag. It works for boyfriends who write, sketch, or plan. Bright tee colors also hide wear better than plain paper covers.
Cut a rectangle from a cotton tee that’s wide enough to wrap around the notebook and long enough to cover the front and back with overlap. Sew or glue the side seams, then attach elastic across the bottom edge so it snaps around the notebook corner. Cut a small pocket piece and stitch it to the front — about 3.5 inches tall and 4 inches wide fits pens. Wrap the cover on the notebook and trim any excess so edges sit flush.
Pro tipWash the tee first — pre-shrinking prevents the cover from warping later.
AvoidAvoid stretchy seams that don’t hold; if the pocket sags, it looks unfinished.
11. Leather-Style Key Fob from Old Wallet Corner
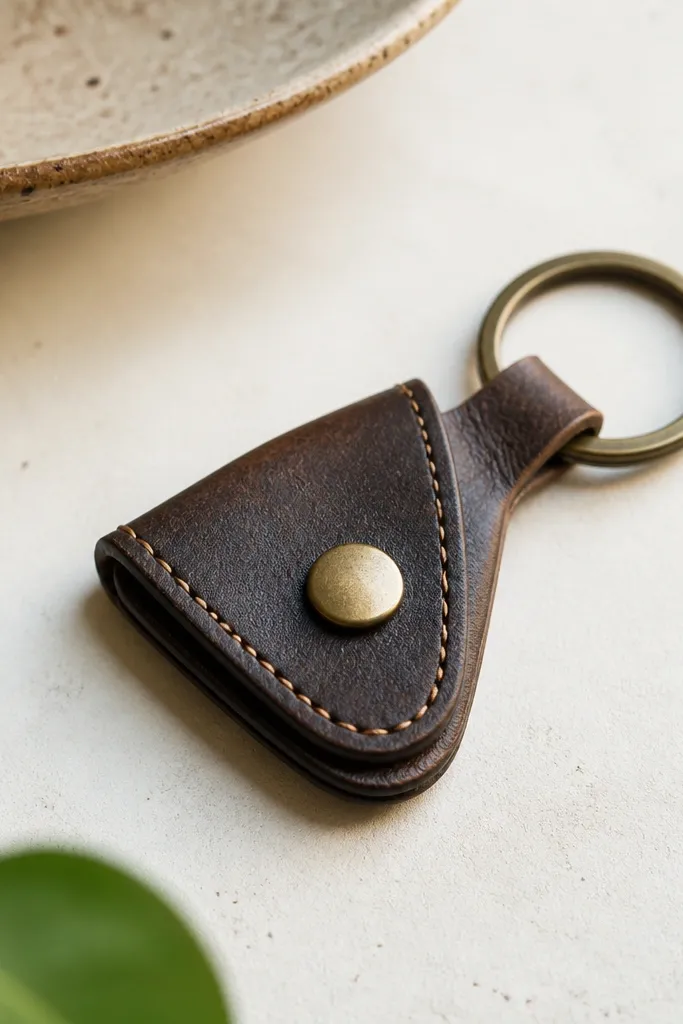
A key fob makes keys feel organized and less scratchy in his pocket. I like using a wallet corner because it already has the right thickness and a smooth surface that wears in nicely. The snap closure keeps it shut so keys don’t fall out when he’s rushing. This suits guys who carry keys in their front pocket and hate jingling. The look is sleek and matches watches and wallet hardware.
Cut the wallet leather (or faux leather) into a rectangle about 2.75x4 inches. Fold it so one side overlaps the other, then mark where the snap will go about 0.75 inches from the fold. Attach a snap using rivet pliers or a snap kit, then punch a hole near the top fold for a keyring loop. Stitch along the edges with waxed thread if you can; if not, glue and clamp for 30 minutes.
Pro tipUse a hole punch instead of tearing the material — clean holes keep snaps aligned.
AvoidAvoid uneven folds; an off-center key fob looks sloppy even if the materials are nice.
12. Upcycled Sunglass Case from Old Denim Pocket
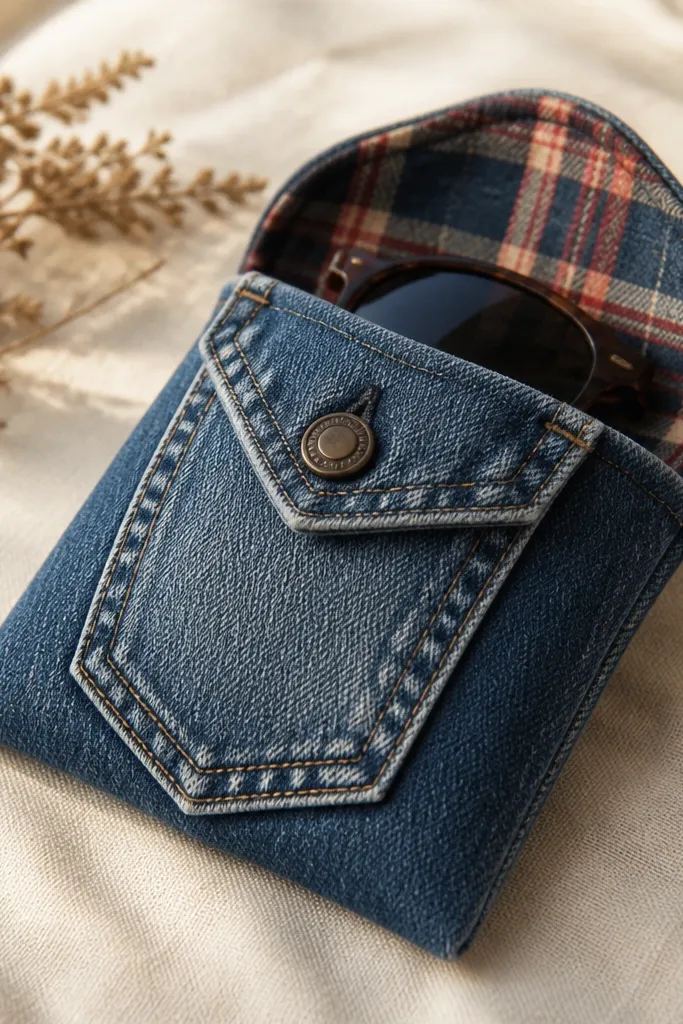
This protects his glasses while also making the case easier to find in a bag. Denim gives structure, and a flannel lining feels gentle on lenses. I keep the flap simple with a button closure so it opens quickly but stays shut. It looks more thoughtful than a store-bought sleeve because you can match the fabric to his wardrobe. Great for anyone who keeps sunglasses in the car or tote.
Cut the denim pocket to the size of the glasses you have, then add a flannel lining piece slightly smaller so it doesn’t bunch. Sew or glue the lining to the inside of the denim, then fold a flap from the denim and attach a button at the front. Add a small elastic loop inside if he tends to drop the case open. Test the fit by sliding the glasses in and closing the flap — adjust the flap length before finishing.
Pro tipIf he has wraparound sunglasses, measure them across the widest point and add 0.5 inch of clearance.
AvoidAvoid fabric lining that sheds lint — fuzzy linings can transfer to lenses.
13. Desk Cable Label Set with Tape + Paint Pen
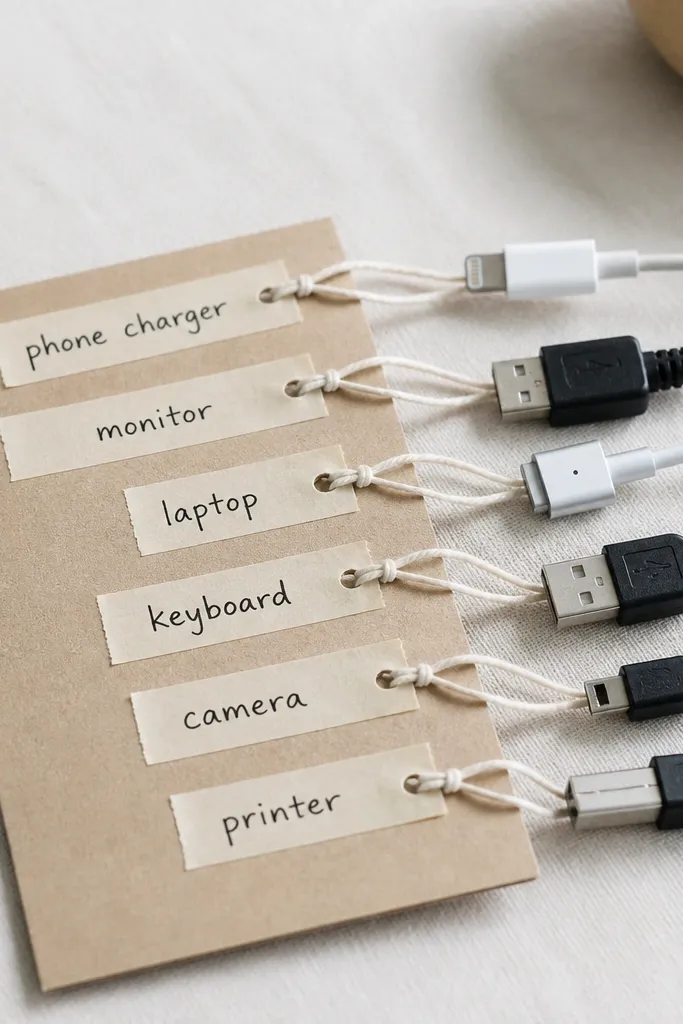
Cable chaos is the fastest way to ruin a clean desk, and labels fix it without buying anything. I use masking tape strips because they stick well and look tidy when you write on them with a paint pen. The key is consistency: same font size, same placement, and same number of tags per cable group. This is a great gift for boyfriends who work from home or game at a desk. It also looks good in photos because the labels are uniform.
Wrap a small strip of masking tape around each cable section where he can see it, then write the label with a fine paint pen. For a cleaner look, cut tape into uniform widths (about 0.75 inch) and use a ruler. Seal the writing with a quick swipe of clear tape over the letters. Tie the cable tags onto the cable with a tiny thread loop if the tape tends to peel in heat.
Write the label on the cable while it’s plugged in — you’ll match the label to the correct device every time.
Don’t use permanent marker directly on dusty cables; the ink grabs inconsistently and smears.
14. Hand-Painted Socks with Simple One-Color Stripe
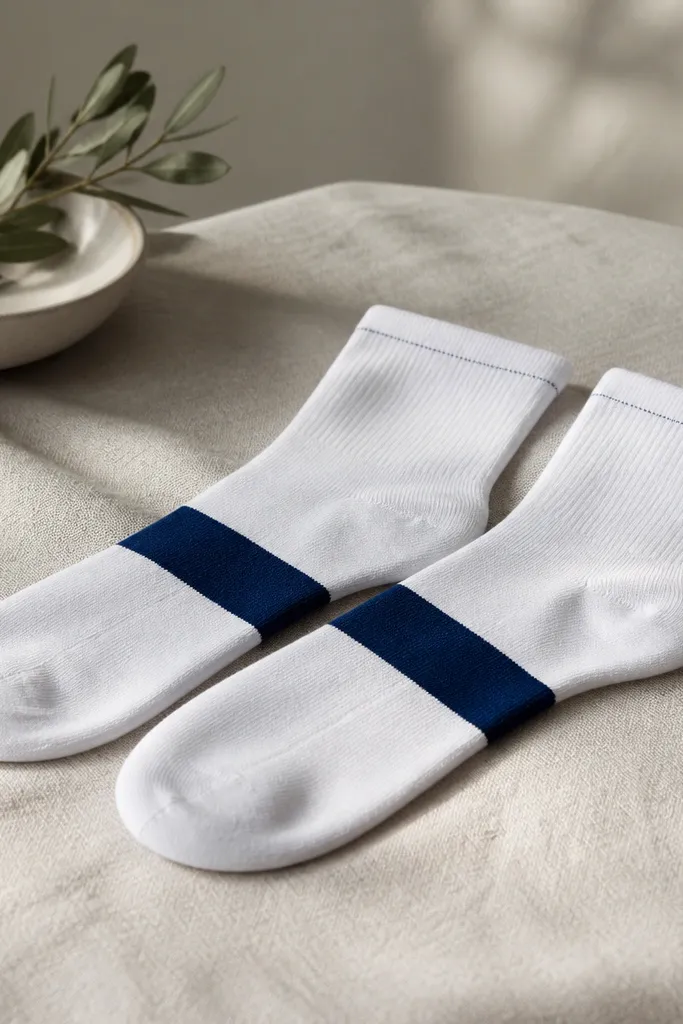
This is the wearable gift that looks bold but stays wearable. I paint on cotton socks with fabric paint and keep the design minimal — one stripe is enough to read from across the room. The stripe also hides minor wear, so the socks don’t look sad after a few washes. This works for boyfriends who like casual outfits and sneakers. Choose a stripe color that matches his hoodie, jacket, or watch band.
Wash socks first so the fabric isn’t oily, then stretch them over a small cardboard form so the paint goes on flat. Use painter’s tape to mask a stripe width of about 1 inch and a second thin line near the ankle if you want detail. Paint with fabric paint, let it dry for 2 hours, then heat set based on your paint instructions. Finally, remove tape and let socks cure overnight before wearing.
Pro tipDo a test stripe on an old sock scrap — fabric paint thickness changes on different cotton blends.
AvoidAvoid painting on bunched fabric; it creates ridges that look messy when the sock stretches.
15. Upcycled Hoodie Drawstring Bracelet with Toggle Knot
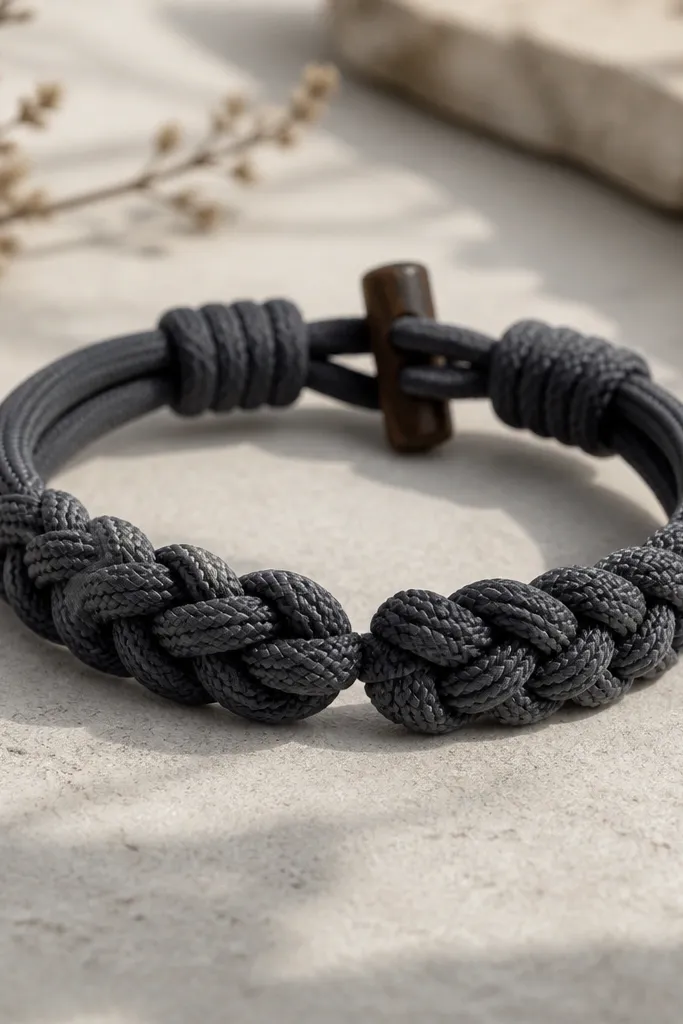
This is a gift that feels personal because it comes from his actual hoodie material. The drawstring cord is already flexible and strong, and it wears in without fraying when you finish the ends. I like the toggle knot because it stays secure but still slides on and off quickly. This suits guys who wear simple bracelets or who like functional accessories. The dark gray tone looks clean with jeans, joggers, or a work jacket.
Cut a drawstring length about 8-10 inches long. Fold it in half and braid loosely for 3 inches, then secure the braid with a few stitches or a dab of fabric glue. For the toggle, use a small wooden bead or a flat wood button — punch two holes and tie the cord through. Finish the ends by melting synthetic fibers lightly with a lighter, then trim — if it’s cotton, wrap the end with thread and stitch.
Use a bead that’s wider than the cord so it doesn’t slip back through the knot.
Avoid gluing the braid too thickly; it stiffens the bracelet and makes it uncomfortable.
16. Reclaimed Wood Photo Clip with Clothespins
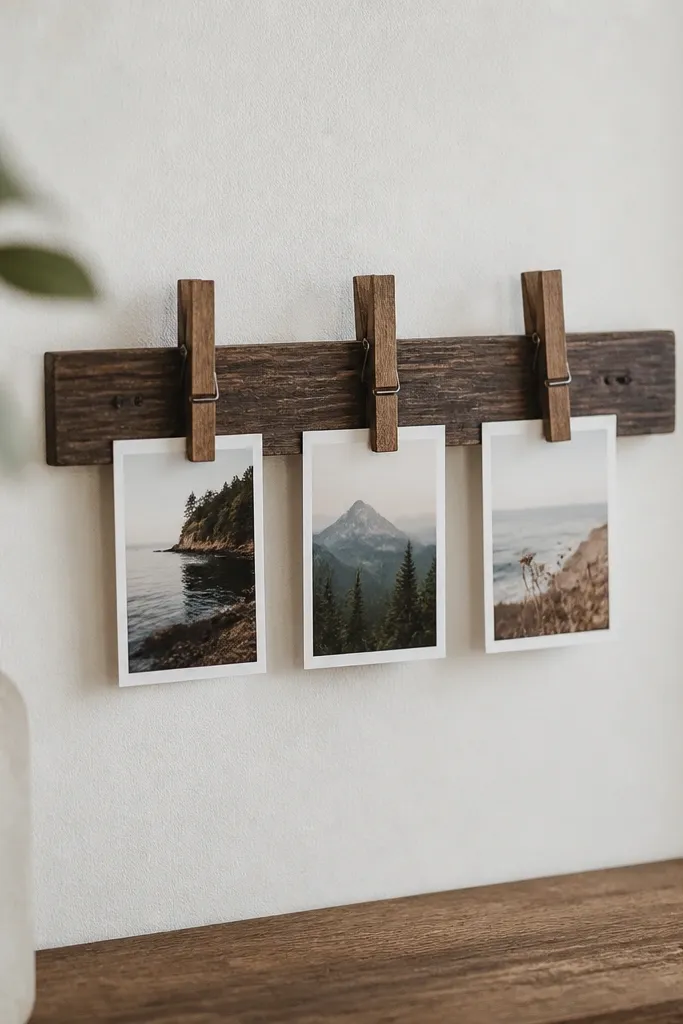
This is a photo gift that doesn’t look like a craft store magnet board. Reclaimed wood has natural texture, and the clothespins let him swap photos as his life changes. I keep the layout symmetrical so it looks tidy, and I choose mini prints so it doesn’t become a clutter wall. It works for boyfriends who like seeing you around but don’t want a full frame on a shelf. Dark wood with light photo paper looks sharp in most rooms.
Sand a small wood strip and stain it dark walnut or paint it flat black, then seal with a matte clear coat. Attach three clothespins evenly spaced along the front — about 2.5 inches apart depending on the strip length. Add a hanging loop on the back using wire or twine. Print photos at about 2x3 inches, then clip them in place and adjust until the spacing looks even.
Use matte photo paper so the wood texture shows and glare stays low.
Avoid glossy varnish on the front; it reflects light and makes photos harder to see.
17. Spoon Rest from Scrapped Wood with Burnt Edge Quote
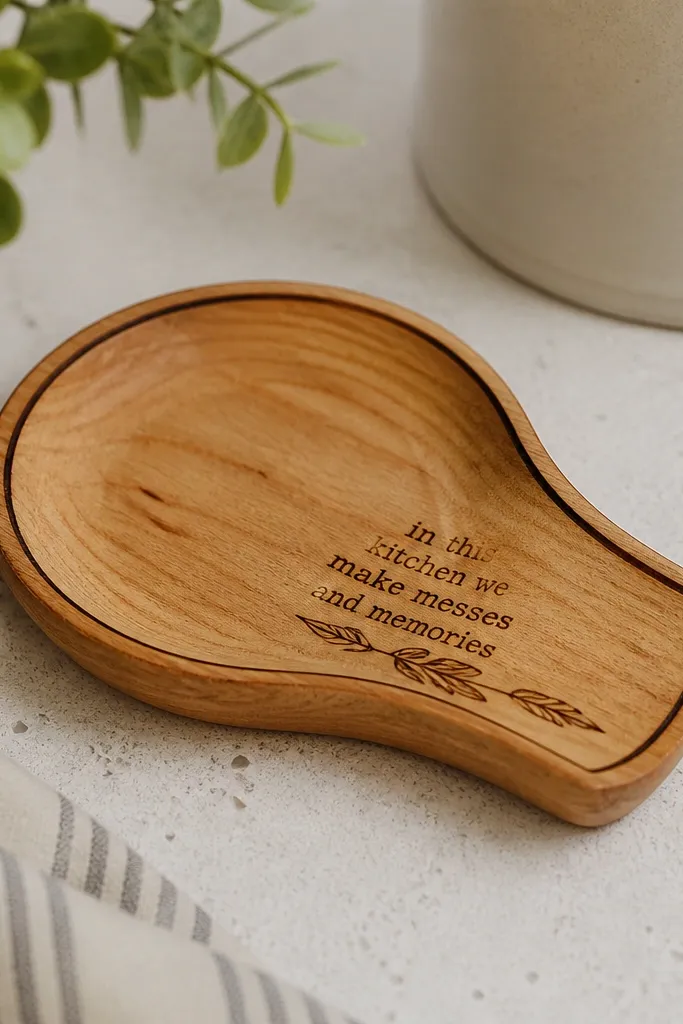
If he cooks, a spoon rest is the kind of gift he uses immediately and forgets he didn’t buy. Scrap wood works great because you’re shaping a small piece, not building furniture. I burn a simple word or date into the wood, then seal it so it wipes clean. It flatters his kitchen because wood warms up stainless steel sinks and dark countertops. Keep the message short and centered so it doesn’t look like graffiti.
Cut a scrap wood piece about 7x3 inches and round the top corners. Sand smooth, then burn a small quote with a wood burner — keep the letters 0.25 to 0.35 inches tall. Seal with food-safe mineral oil or a clear polyurethane made for wood surfaces. Let it cure fully, then rough up the bottom lightly so it doesn’t slide on wet counters. Test by placing it under a spoon for a few minutes — it should stay stable.
Practice the burn on a scrap first; wood darkens fast and you want consistent strokes.
Avoid sealing before the burn cools completely; it can trap soot and look gray.
18. Upcycled Shirt Pocket Watch Strap Keychain
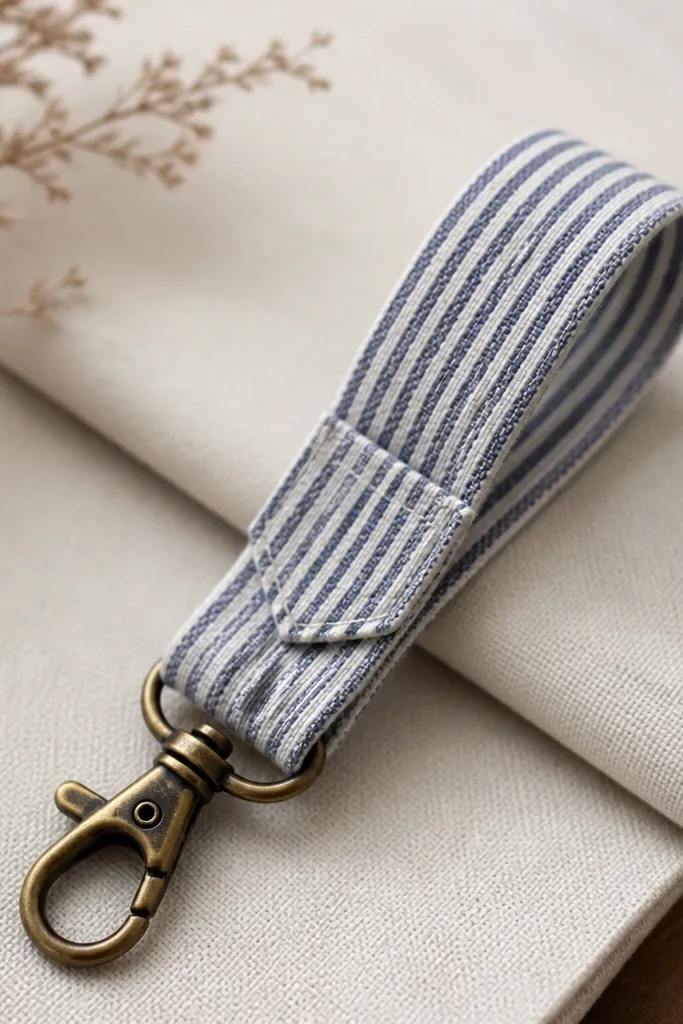
This one looks like a tiny accessory from a vintage store. Using shirt fabric gives you a soft strap, and the metal clasp adds weight so it feels real, not flimsy. I like adding a pocket patch because it ties the piece back to the original shirt and gives a textured focal point. It suits boyfriends who like subtle style details and don’t want loud novelty gifts. The strap also makes keys easier to grab without digging into pockets.
Cut a strip from a button-down shirt about 1 inch wide and 6 inches long. Fold it into a loop and stitch the ends together, leaving a small channel for a metal clasp attachment. Attach a small lobster clasp or swivel hook to the loop using a jump ring. Glue or stitch a tiny pocket patch near the clasp area, then trim loose threads. Finish by pressing the strap flat so it looks crisp when hanging.
Pro tipUse the shirt’s existing seam as one edge — it makes the strap look cleaner instantly.
AvoidAvoid using very thin fabric like flimsy jersey; it twists and makes the clasp sit crooked.
19. No-Sew Felt Phone Stand from Old Blanket
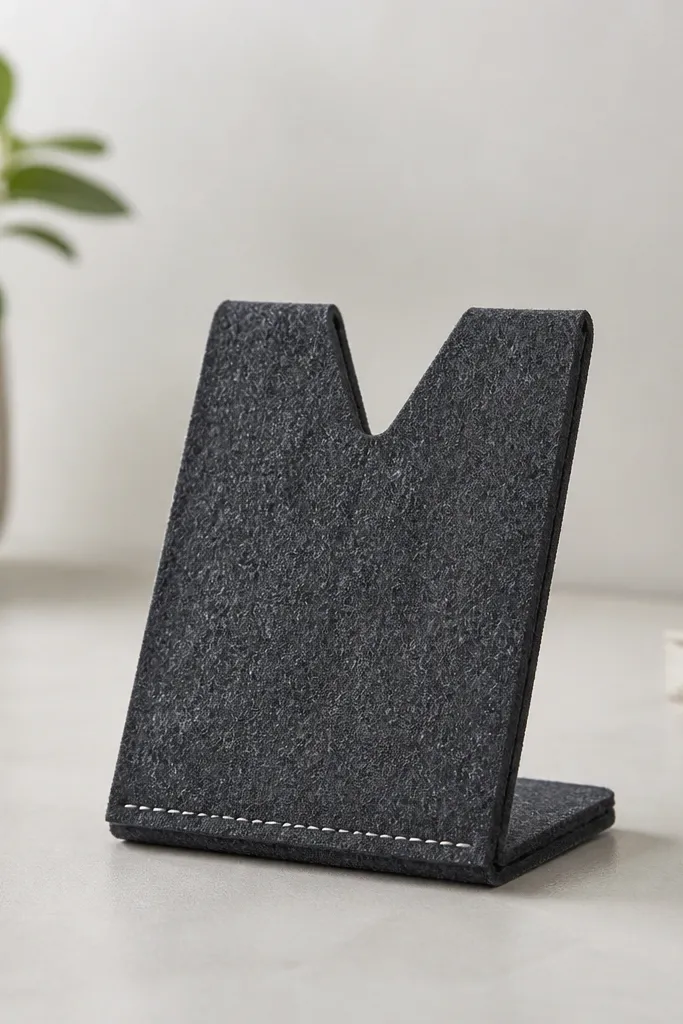
This is the desk helper that makes his phone easier to watch videos and read messages without propping it on random objects. Felt from an old blanket is thick, so it stands stable and doesn’t slide around. I cut a V-notch and add a small fold so the phone rests at a comfortable viewing angle. It looks clean because the stand is one color and the shape does the design work. It suits boyfriends who work on laptops and keep their phone nearby.
Cut felt into a base rectangle about 7x4 inches, then cut a second piece for the back support about 7x2 inches. Mark a center line and cut a V-shaped notch so the phone sits securely — start small and widen if needed. Glue the back support to the base with fabric glue and hold under a heavy book for 20 minutes. Add a tiny stitch line across the bottom edge if you want it extra solid, then test with his phone case on.
Trace the phone outline on paper first, then transfer the notch shape — you’ll get a better fit.
Avoid thin felt; it collapses and the phone falls forward.
20. Bottle Cap Coaster Set with Cork Backing
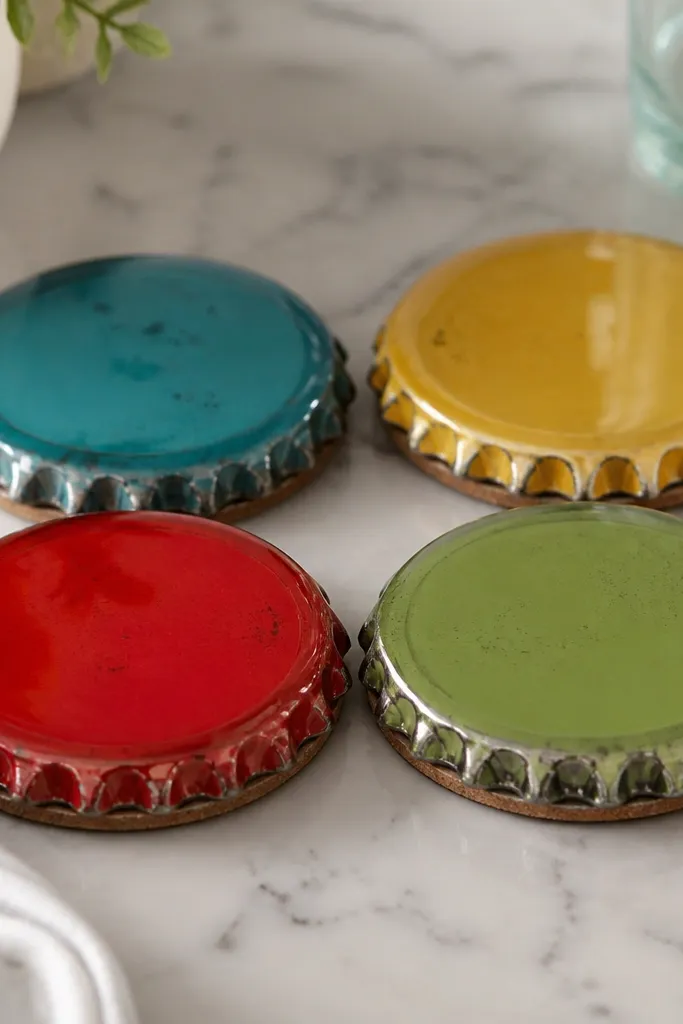
This is a fun gift that still looks intentional if you keep the palette tight. Bottle caps are flat and durable, and cork backing stops scratches on wood tables. I like sealing the caps under clear resin or a thick clear tape layer so the printed artwork stays smooth and wipeable. It suits boyfriends who drink beer/soda and have friends over. Choose one color theme — like red caps with black-and-white labels — so it doesn’t look random.
Clean bottle caps and remove any sticky residue. If you have resin, pour a thin layer into a mold or directly onto the cap and let it level, then add a second thin layer after it sets. Cut cork circles slightly larger than the cap diameter, then glue the cork to the underside. Once cured, wipe the top and set them on his table to confirm they’re level.
Pro tipIf you skip resin, use multiple layers of clear packing tape carefully — press out bubbles so it stays glossy and smooth.
AvoidAvoid leaving the underside unsealed; cork can absorb moisture and loosen the cap.
21. Tie Dye Keychain Tag from Scrap Cotton with Eyelet
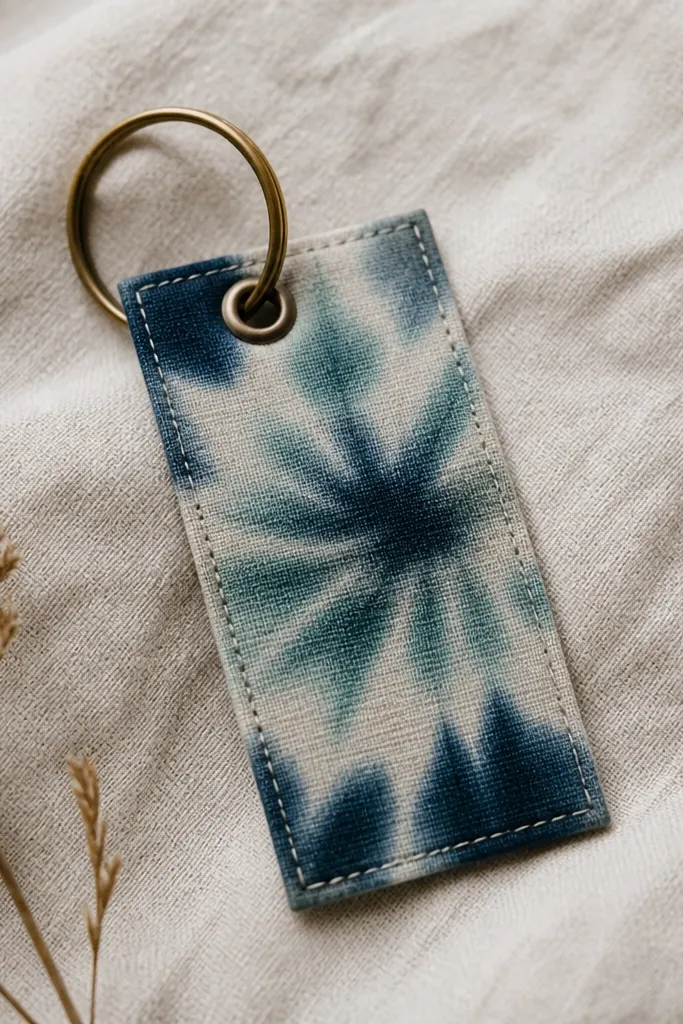
This is a small gift that looks cute on keys without screaming for attention. Scrap cotton is easy to dye, and the tag shape keeps it flat so it doesn’t twist in his pocket. I punch one eyelet and attach a ring so it’s strong and won’t tear at the hole. The dye pattern matters — muted, controlled swirls look more expensive than bright blotches. If your boyfriend wears neutral outfits, a teal-navy tag adds color without clashing.
Cut a rectangle of scrap cotton about 2.5x4 inches, then tie it with string in a simple spiral so the dye stays controlled. Mix dye and soak according to the dye brand instructions, then rinse until water runs clear. Let it dry fully, then iron it flat. Punch a hole near the top and install an eyelet, then attach to a keyring with a jump ring.
Use a single color family for dye so the tag looks cohesive — teal and navy always play nice.
Avoid thick knotted string placement; it leaves ugly white gaps and makes the tag look uneven.
22. Upcycled Wallet Photo Wallet Insert with Clear Sleeve
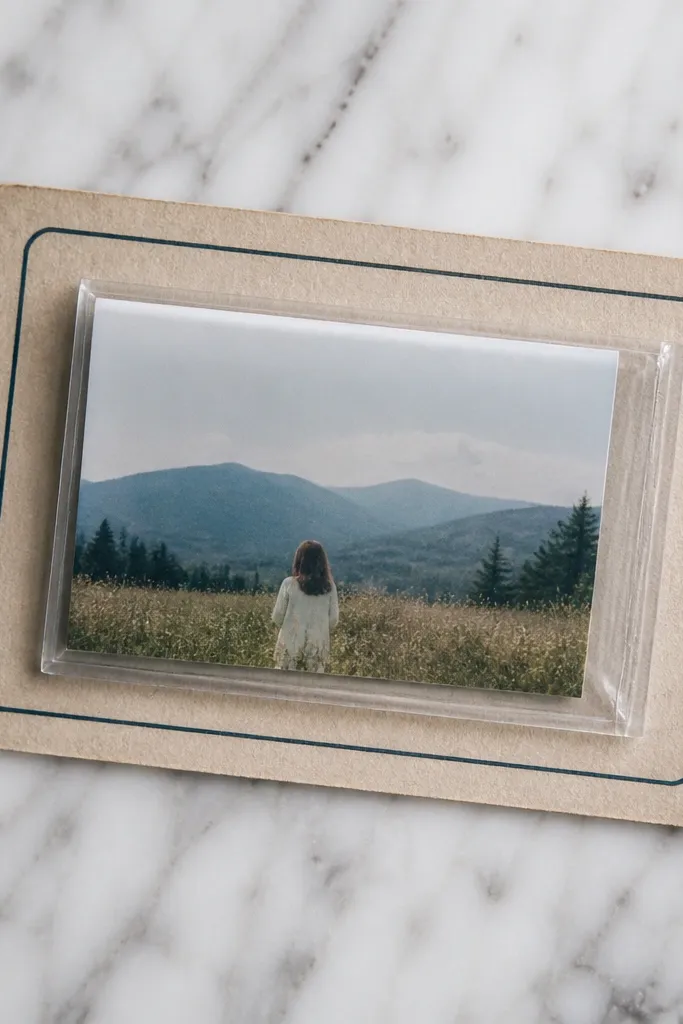
This gift is sentimental but practical, because it lives where he already keeps his everyday cards. I make the insert from a backing card cut to exact credit card size and then seal the photo in a clear sleeve so it doesn’t get bent or smeared. It’s perfect for boyfriends who carry a minimal wallet and don’t want bulky frames. The look is clean because the sleeve edges are trimmed and squared. Choose a photo with strong contrast — black-and-white or one bright subject works best.
Cut a backing card from thick packaging to about 3.375x2.125 inches. Print or cut a photo to fit slightly smaller, then place it into a clear plastic sleeve or sheet protector cut to size. Seal the edges with clear tape so no moisture gets in. Insert into his wallet and check thickness — if it’s too thick, trim the corners of the backing slightly.
Use a photo with high contrast so it stays readable through the clear plastic.
Avoid using thin printer paper without sealing; it creases and looks wrinkled.
23. Old Frame to Key Hook Shelf with Sanded Finish
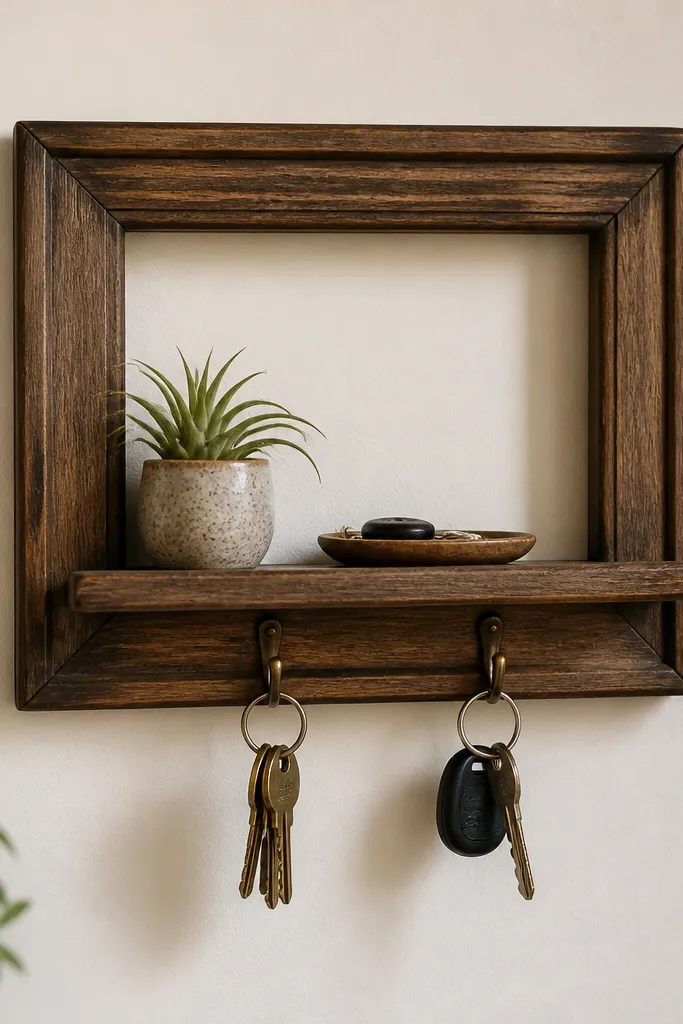
This is a “real furniture” looking gift that hangs by the door and solves the key problem. Using an old frame means you already have a sturdy structure, and the wood grain adds character without extra decoration. Two hooks is the sweet spot — enough for keys and a small lanyard, not so many that it looks like a coat rack. The shelf lip keeps small items like sunglasses or a pocket notebook from sliding off. It fits boyfriends who like practical organization and clean entryways.
Remove the glass and backing from an old frame and keep only the wood. Sand the edges, then stain or paint it and let it dry fully. Screw in two hooks near the top so keys hang freely, and add a small lip by gluing a thin strip of wood under the base. Use the original frame hanging hardware or attach a wire on the back. Mount it at about chest height so he can grab keys without crouching.
Pro tipDrill pilot holes for hooks; it prevents splitting and keeps hooks straight.
AvoidAvoid hanging it too low; keys piled on the floor look worse than keys on the counter.
24. Handmade Beard or Hair Wax Travel Pouch from Cotton Scrap
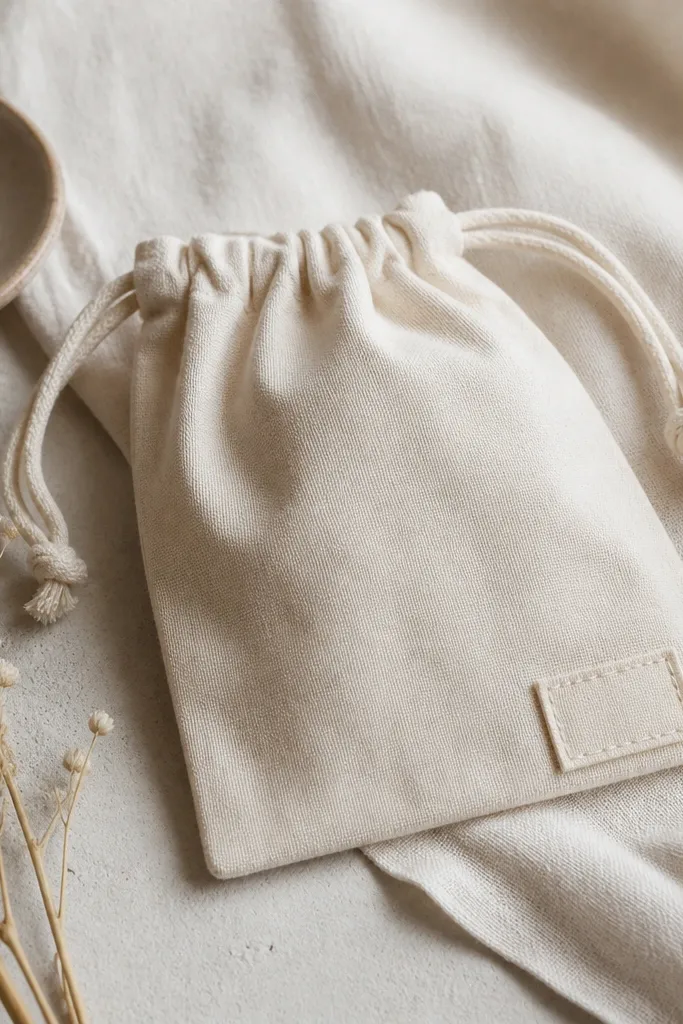
If he uses beard balm, hair wax, or even skincare, this pouch keeps it tidy in a gym bag. Cotton scraps are easy to sew, and a drawstring closure feels better than zippers for small items. I add a small internal pocket so he can separate a comb from balm. This looks clean because the pouch is one fabric color and the stitching is straight. It’s a great fit for boyfriends who travel or hit the gym after work.
Cut two fabric rectangles about 6x8 inches, then cut a small pocket piece about 6x4 inches. Sew the pocket onto one rectangle, right side up, then place the two rectangles together and stitch around the edges leaving the top open for the drawstring channel. Fold the top edge down about 0.75 inch and stitch the channel, then thread a drawstring cord through using a safety pin. Tie the ends and test the opening size with his jar or tin.
Use thick thread and keep seam allowance consistent; small pouches look sloppy when seams wander.
Avoid thin cotton without lining; wax containers leak and soak through.
25. Memory Reduct DIY Scented Drawer Sachet in Old T-Shirt
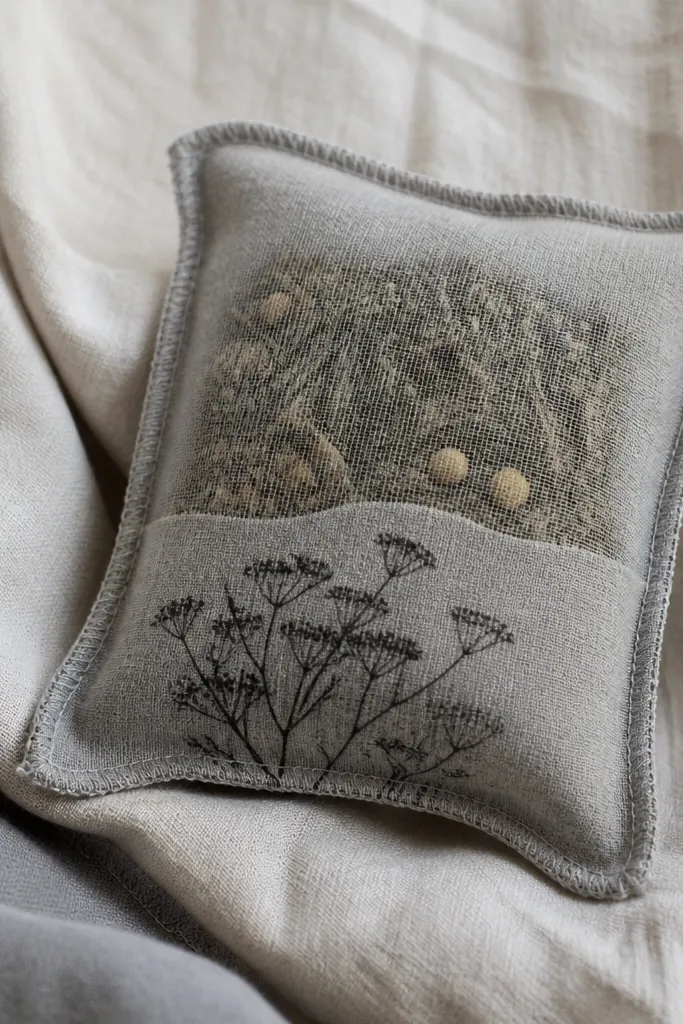
A scented sachet is a quiet gift that still feels thoughtful because he notices it every time he opens a drawer. I use old t-shirt fabric because it’s soft and the knit shape holds the scent blend without looking stiff. The trick is using a breathable inner layer so the scent releases slowly, not all at once. This suits boyfriends who keep hoodies or shirts folded and like a fresh smell without sprays. Choose a scent profile he already likes — clean laundry, cedar, or citrus.
Cut a small pouch outer from a cotton tee, about 4x6 inches, and cut a breathable inner liner from thin cotton or mesh scrap. Sew the inner liner into the outer fabric, then add your scent blend — I use dried lavender buds plus a few drops of essential oil on a small amount of rice or dried herbs. Fill loosely so air can move, then close the top with a tight drawstring or stitched seam. Add a mini label with fabric marker and let it sit overnight so the scent settles.
Pro tipStart with a light scent load; you want a noticeable smell, not a headache smell.
AvoidAvoid sealing scent directly in plastic; it traps the smell and makes it fade unevenly.