
1. Strawberry Jam Pocket Squish
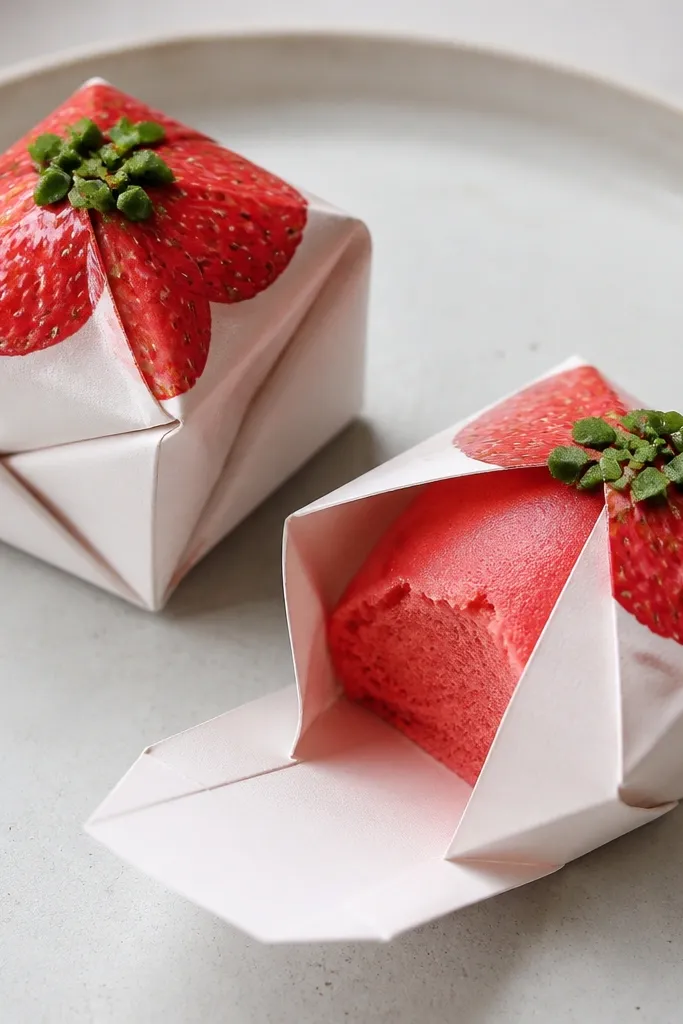
This one looks the most “shop-bought” because the jam label has a clear focal point. I make the outer shell in off-white cardstock, then add a rounded strawberry jam sticker or a hand-cut label shaped like a squat jar. The squishy center is a piece of 2 mm red foam trimmed to fit the pocket, so it puffs slightly when you open it. The off-white shell makes the red pop without turning the whole thing loud. It suits people who like sweet, cozy aesthetics and it looks especially good on warmer skin tones because red reads bright instead of muddy.
Start by cutting an 8 x 5.5 cm pocket insert from off-white cardstock and fold along the center crease so it closes like a book cover. Glue a 7.5 x 5 cm strip of red foam into the middle, leaving 5 mm border on all sides so the foam doesn’t bulge past the edges. Add a jar-shaped label on the front using red paper or a printed label, then glue tiny green leaves at the top like a jam lid. Finish with a thin strip of yellow washi tape at the bottom edge to mimic a jar rim. Finally, close it with a simple paper tab on one side and a matching slit on the other.
Use a matte red label paper and add one clear gel dot on the “jam” area for a wet, sticky shine.
Skip fully glossy cardstock for the whole piece — it reflects light and makes the squish look flatter.
2. Matcha Mochi Mini Blind Bag
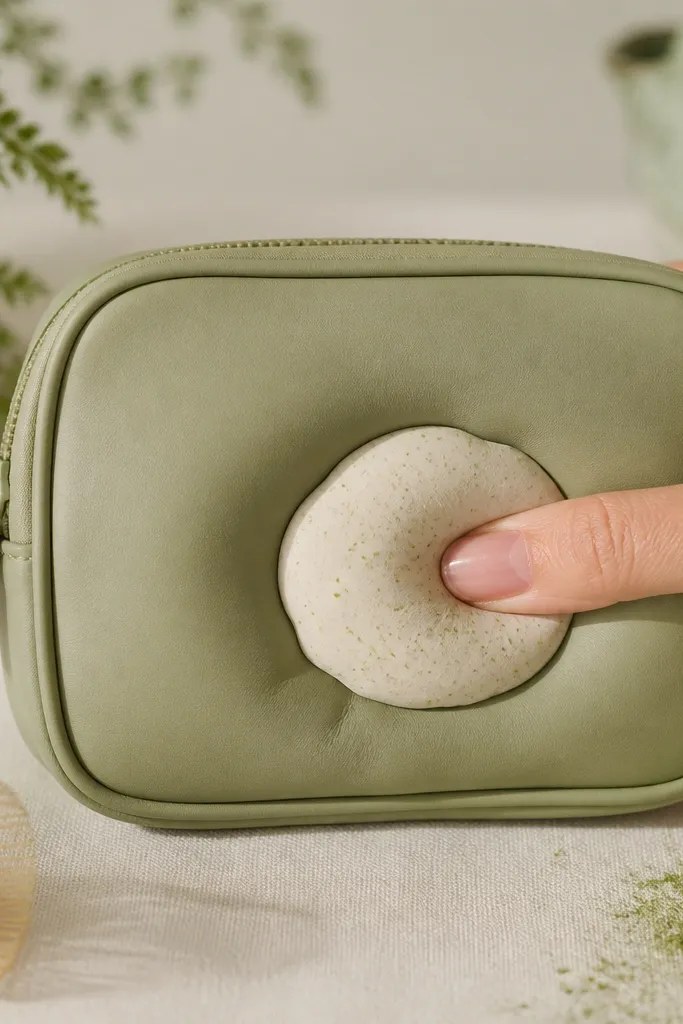
Matcha mochi is my go-to for calm, clean aesthetics. I use sage green for the outside and cream for the mochi center so the color feels gentle instead of neon. The squish center is batting folded into a small rectangle, then pressed into the pocket; it gives a soft, cloud-like bounce. This style flatters anyone because green reads fresh and the cream keeps the piece from looking heavy. It also photographs well because matte sage has low glare.
Cut two pieces: an 8 x 5.5 cm outer pocket in sage cardstock and a 7.5 x 5 cm inner panel in cream cardstock. Fold and glue the pocket edges, leaving the top open for later decoration. Add a batting square about 7 x 4.5 cm, then fold corners slightly so it sits snug in the pocket without pushing out. Decorate the front with a cream mochi label, then add tiny matcha dots using a fine-tip marker or a hole punch spritzed with green paint. Close with a fold-over flap and a small strip of double-sided tape at the sides.
Rub a little powdered pigment (or loose green eyeshadow) onto the mochi label with a dry brush for realistic speckling.
Don’t overfill the pocket with batting — too much bulk makes it look lumpy instead of squishy.
3. Sakura Cloud Cream Puff
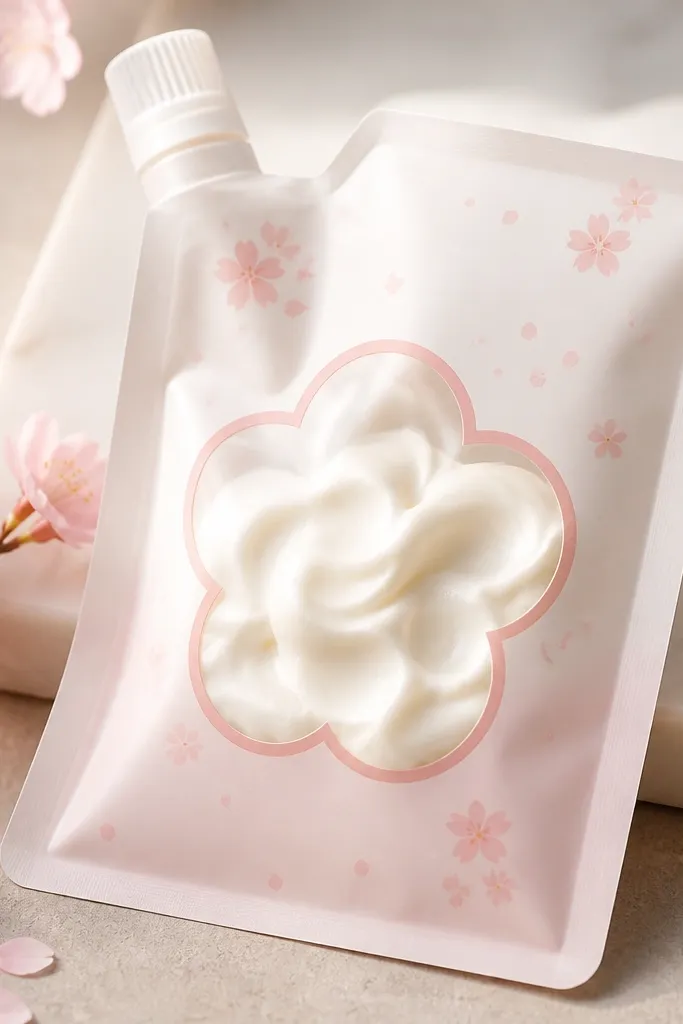
Cut the outer pocket from pale pink cardstock (8 x 5.5 cm) and fold the sides to create a 3 cm deep pocket. Cut a white foam insert about 7.2 x 4.8 cm and round the corners with scissors so the edges look plush, not boxy. Glue the foam into the pocket and keep a 3-4 mm gap around it so it can squish inward. Make a cloud label from white cardstock, then stamp or hand-draw tiny blossom dots using a light pink marker. Add a small “cherry stem” line near the top edge and seal the top with a paper tab closure.
This one is soft-looking from every angle. The outside shell is pale pink cardstock, and the label is white with a cloud outline, like a cream puff menu card. Inside, I use white foam that’s cut into a slightly rounded rectangle so it looks like whipped cream when it compresses. Sakura colors are flattering across a range of skin tones because the pink is light and airy, not deep. It also works great for spring parties, but honestly it looks good year-round because the palette stays gentle.
Pro tipUse a Sakura-style dot pattern: five dots in a cluster with one tiny center dot for each blossom.
4. Tiny Ramen Noodle Pocket
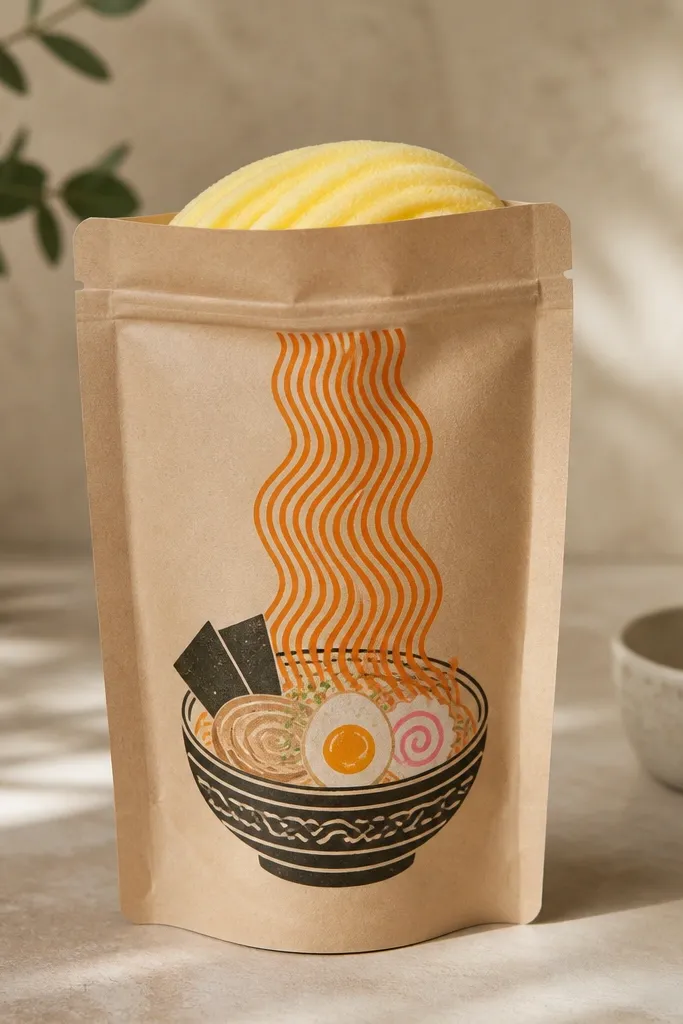
Ramen blind bags are fun because the theme is instantly readable. I build the outer shell from kraft brown cardstock, then draw a small ramen bowl on the front with orange and red accents. The squishy center is a thin yellow foam strip that sits behind the bowl opening, so it looks like noodles when you open the pouch. This design flatters people who like warm, cozy colors and it gives a strong “snack” vibe without needing complicated parts. In photos, kraft paper gives a warm, textured background that makes the noodles look brighter.
Start with an 8 x 5.5 cm kraft pocket, folded so it closes with a top flap. Cut a noodle window opening in the front panel: about 3.5 x 2 cm, leaving a 5 mm border. Glue yellow foam behind the window area and trim so it doesn’t show at the edges. Draw the ramen bowl on the front using a thick black marker, then add orange noodle squiggles and small red chili dots around the bowl. Finish by attaching a folded paper tab on the side so the pouch stays shut in the blind bag.
Add two tiny “steam” lines above the bowl using white gel pen — it pops on kraft paper.
5. Blueberry Cheesecake Blind Bag
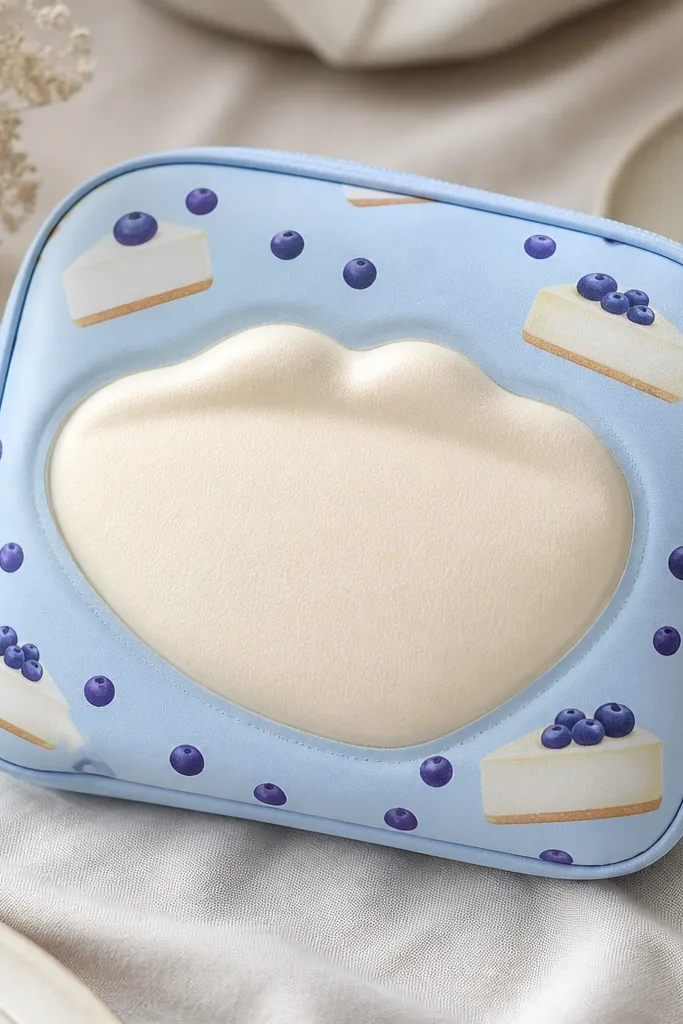
Cut the outer pocket from light blue cardstock and fold it into a pouch with a side tab closure. Cut cream foam into a 7.5 x 4.8 cm insert and score a 5 mm “ridge” line near the top by lightly pressing with a dull knife. Glue the insert so the ridge aligns with the label’s crust area. Make a cheesecake slice label from cream cardstock and outline it with a light brown marker for crust. Add a ring of tiny purple blueberry dots on top and finish with a thin white gel pen drizzle line.
Cheesecake looks fancy even when it’s handmade. I use light sky blue for the outer shell and a cream cardstock label for the slice, then add blueberry dots in deep purple. The squishy center is cream foam with a thin ridge on top made from a folded strip of foam, so it resembles the cheesecake layer. This style flatters because blue and cream are clean and bright; it also looks great on darker outfits because the colors stand out. It’s a strong option if you want “cute but grown-up” energy.
Pro tipUse a brown pencil for crust shading instead of a marker so the texture looks softer.
6. Rainbow Sprinkle Ice Cream Cone
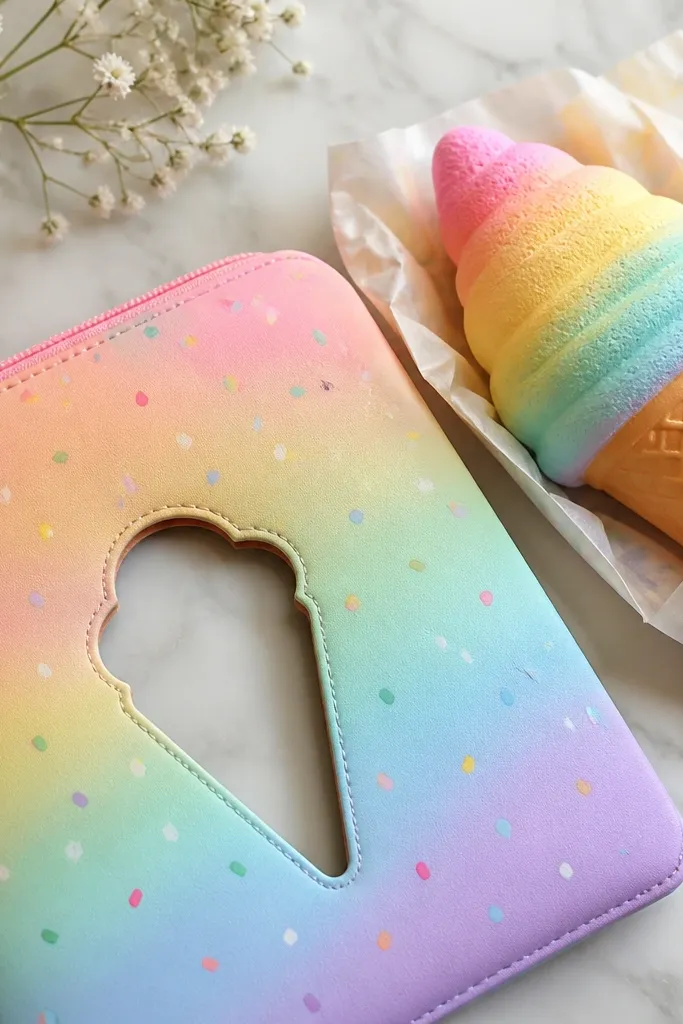
This one is pure fun and it’s easy to make look bright without looking messy. I build the pouch in pastel tones, then put the cone on a cream base so the colors stay readable. The squishy center is a small cone-shaped piece of foam wrapped in cream paper, which makes it feel like ice cream instead of a flat block. For people who love playful aesthetics, rainbow sprinkles are an instant mood boost. It also photographs well because the cone shape creates a clear silhouette.
Cut a 3 cm wide cone template and trace it onto foam, then wrap the cone with cream paper and glue the seam down. Make an outer pocket in pastel cardstock and cut a front window the same width as the cone, leaving 5 mm border. Place the cone behind the window so the tip peeks out slightly when you open the pouch. Decorate the front with a cone outline, then add sprinkle dots using colored markers or sticker dots. Seal the pocket with a fold-over flap and a small piece of double-sided tape on the inside edge.
Stick to 5 sprinkle colors max so the bag reads clean at a glance.
7. Galaxy Night Sky Pocket Charm
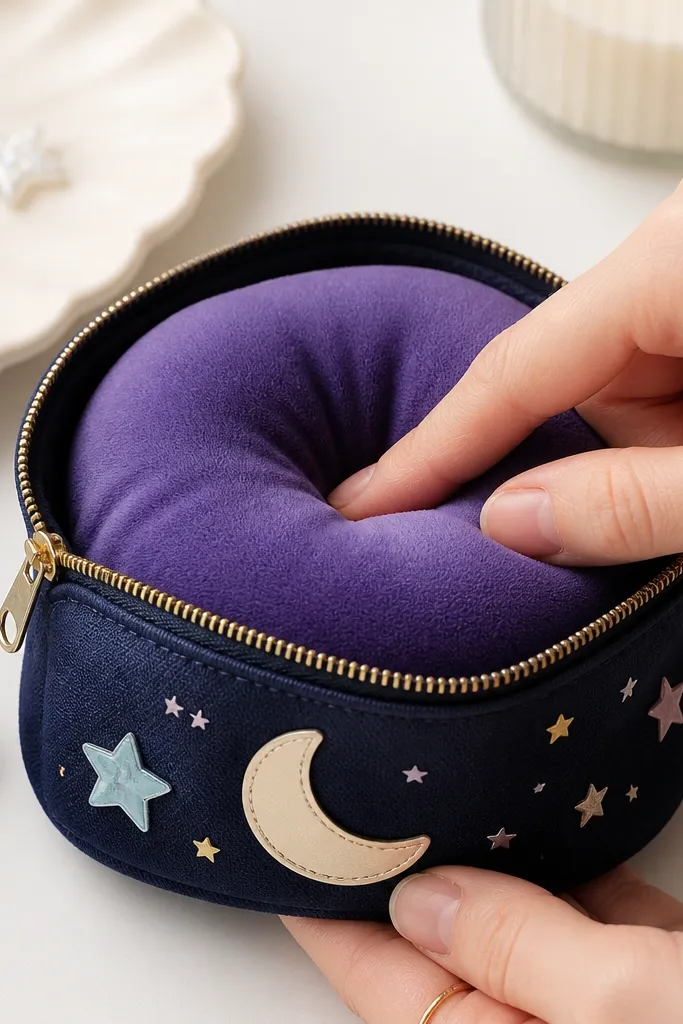
Cut the outer pocket from navy cardstock and fold it into a 8 x 5.5 cm pouch with a side tab closure. Cut a rounded rectangle of deep purple foam about 7.2 x 4.8 cm and glue it behind the opening area. Make a star field by placing small white star stickers or punching tiny circles from silver paper and gluing them randomly. Add a crescent moon label on the front using light gray paper, then draw a few craters with a white gel pen. Close the top with a flap so the foam compresses when the bag is squeezed lightly.
Galaxy squishes look good because you can layer light and dark without needing sewing. I use navy cardstock for the outer shell and a crescent moon cutout in light gray. The squishy center is deep purple foam, cut with rounded corners to mimic a tiny pillow. This one flatters almost everyone because the navy and gray look clean and the purple adds a soft pop. It also works for teen gifts and desk decor because it feels “cool” instead of babyish.
Pro tipAdd one small holographic sticker near the moon for a highlight that shows up in photos.
8. Autumn Pumpkin Spice Pocket
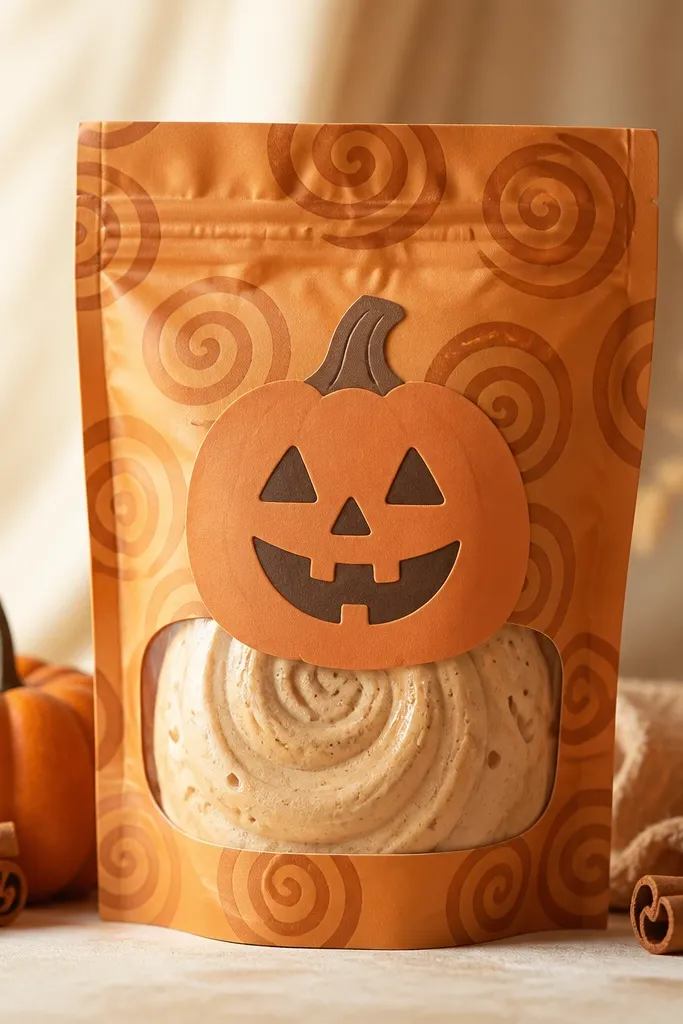
Pumpkin spice blind bags feel cozy even when you make them in July. I use tan cardstock for the base and orange for the pumpkin face, then keep the rest muted so it doesn’t look like costume craft. The squishy center is tan foam, cut into a rounded rectangle so it looks like a soft pumpkin chunk. This design flatters because warm tones work well against both light and dark clothing, and it looks great on wood desks. It also makes a cute little fall gift that doesn’t require seasonal supplies.
Create an outer pocket from tan cardstock and fold it into a small pouch with a top flap. Cut an orange pumpkin face label with a curved top and two eye cutouts; glue it onto the front. Add a cinnamon swirl stripe by drawing a thin wavy line in brown across the lower part of the pocket. For the squish, glue tan foam behind the front label area and round the edges with scissors so it doesn’t show hard corners. Finish with a simple tab closure on the side and add a tiny green paper stem at the top.
Use a brown fine marker to dot the pumpkin cheeks so it looks like spice specks.
9. Minty Lip Balm Squishy Tube
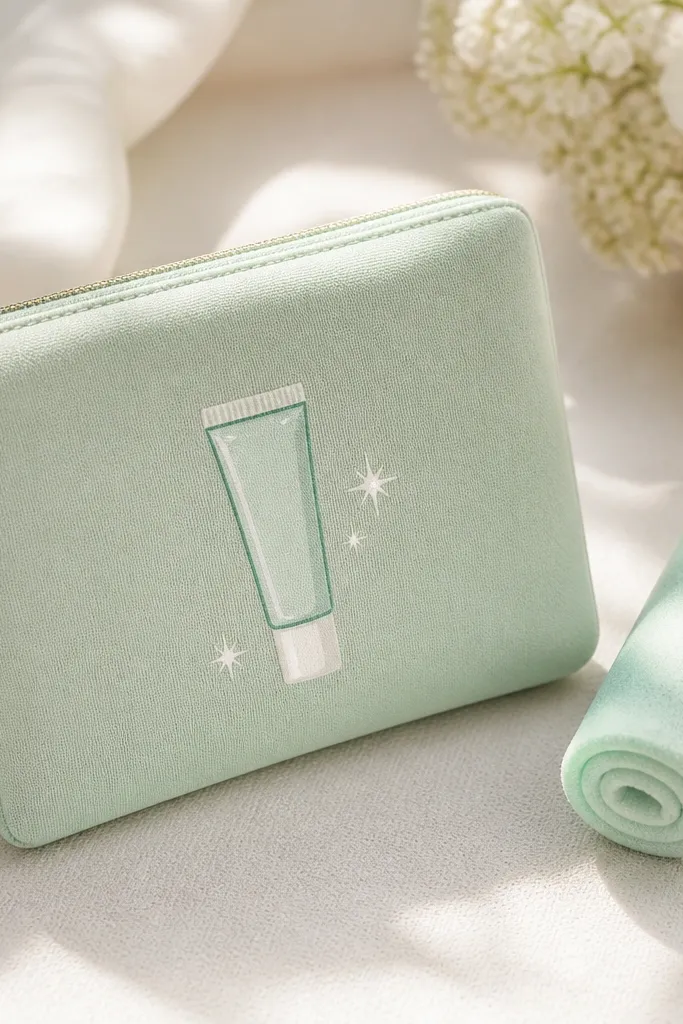
Cut a mint outer pocket (8 x 5.5 cm) and fold it into a pouch with a front window shape sized to a small tube, about 2.8 x 4 cm. Roll a strip of mint foam into a tight cylinder, then wrap it with cream paper and glue the seam. Glue the tube behind the window so it sits centered and doesn’t touch the edges. Draw a white label band on the front and write a fake flavor name in a simple block font using a black marker. Add a tiny cap detail in darker mint paper at the top, then seal the pouch with a fold-over flap closure.
This one looks like a mini product, which is why it feels extra satisfying. The outside is mint green cardstock with a white “brand strip” label area. The squishy center is rolled foam shaped like a tiny tube, wrapped with thin paper to mimic a balm container. This design flatters because mint is clean and the white label keeps it from looking too loud. It’s also good for makeup lovers and small stocking stuffers.
Pro tipAdd a thin white gel highlight line on the tube — it makes the foam look glossy.
10. Chocolate Truffle Mini Pocket
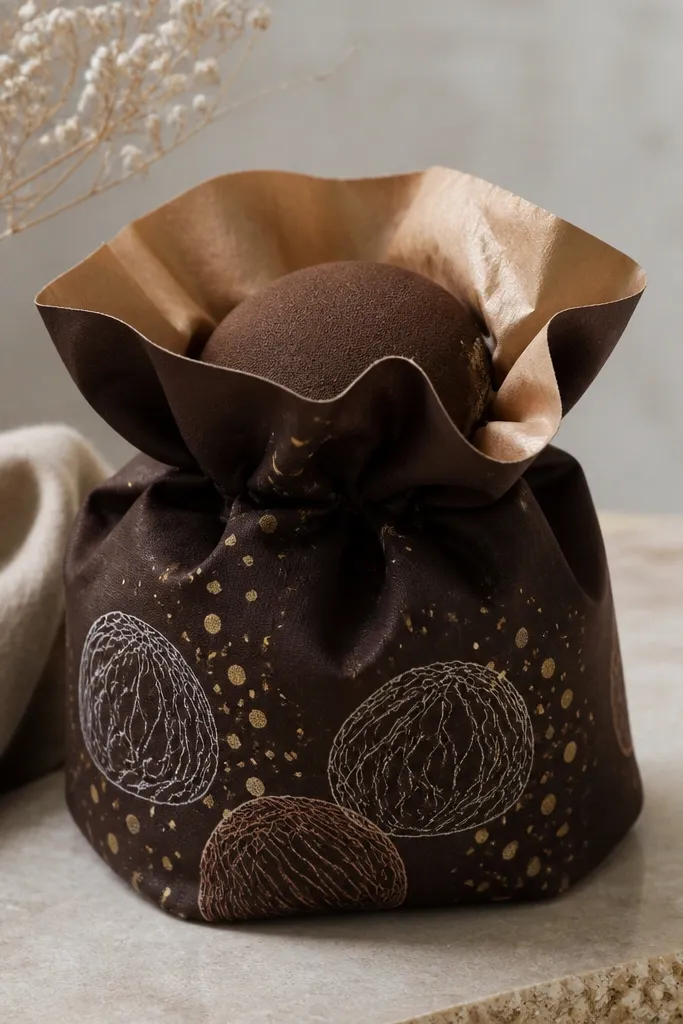
Cut a dark brown outer pocket and fold it into a small pouch with a side tab closure. Cut a foam insert about 7.2 x 4.8 cm and round the corners so it looks like a truffle. Glue the foam inside, then crumple a small piece of brown tissue or thin paper and glue it on top of the foam as a wrapper peak. Create a wrapper label from lighter brown cardstock and add gold dots using a metallic marker or tiny gold stickers. Finish by adding a small ribbon strip in cream paper across the front label.
Chocolate truffles read as “fancy” because of contrast and texture. I use dark brown cardstock for the pouch, then add a lighter brown wrapper label with a gold dot pattern. The squishy center is brown foam with a tiny crumpled paper cap glued on top, so it looks like a wrapped truffle. This design flatters because it looks good against both bright and neutral outfits, and it doesn’t need bright colors to pop. It’s also perfect for adult gifts because it feels like something you’d buy, not just a craft.
Pro tipUse tissue paper for the wrapper peak — it looks wrinkly and soft without thick bulk.
11. Cute Cat Paw Pad Squish
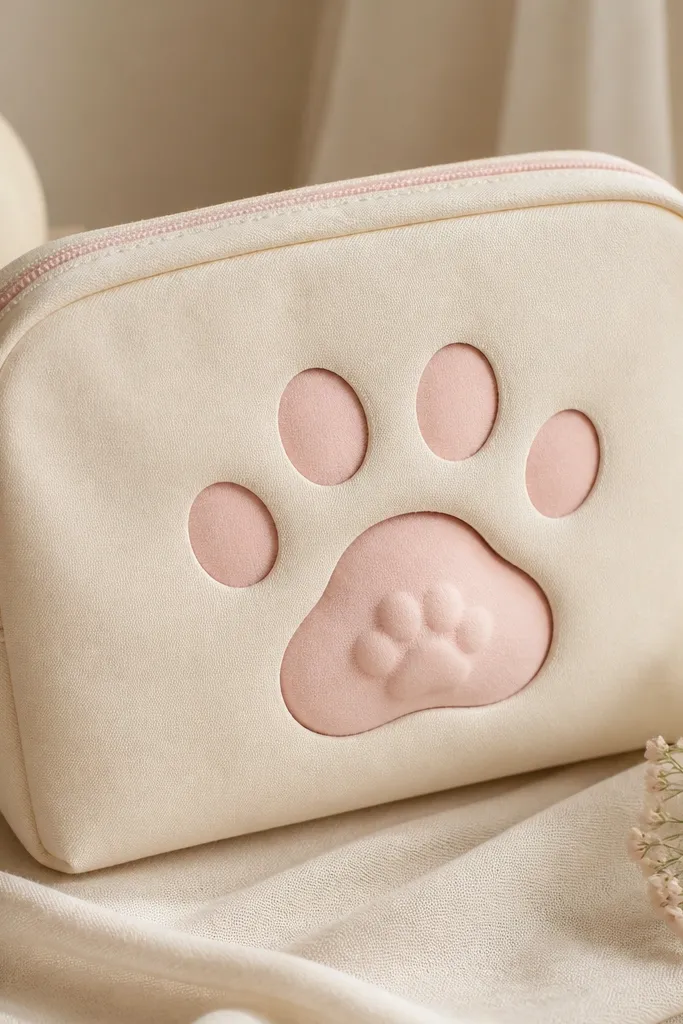
Cut an 8 x 5.5 cm cream pocket and fold it into a pouch with a top flap. Cut a paw window in the front panel, leaving a 5 mm border around it. Carve pink foam into a paw shape with four toe bumps and a rounded center pad, then glue it behind the window. Add a paw print outline on the outside using a fine black marker, then fill each toe with a slightly lighter pink using a pencil. Seal with a tab closure and add tiny whisker dots around the paw for extra cuteness.
Cat paw squishes are adorable because the shape is instantly recognizable. I build the outer shell in cream cardstock and cut a paw print window so you see the squishy center through it. The squishy center is pink foam carved into a paw pad shape with four small bumps, so it compresses in a satisfying way. This style flatters because cream neutralizes the pink and keeps it from looking childish. It also matches a lot of color palettes, so it works for year-round blind bag sets.
Pro tipTrace the paw shape from a printable outline so the toes look balanced.
12. Cherry Soda Pop Can Pocket
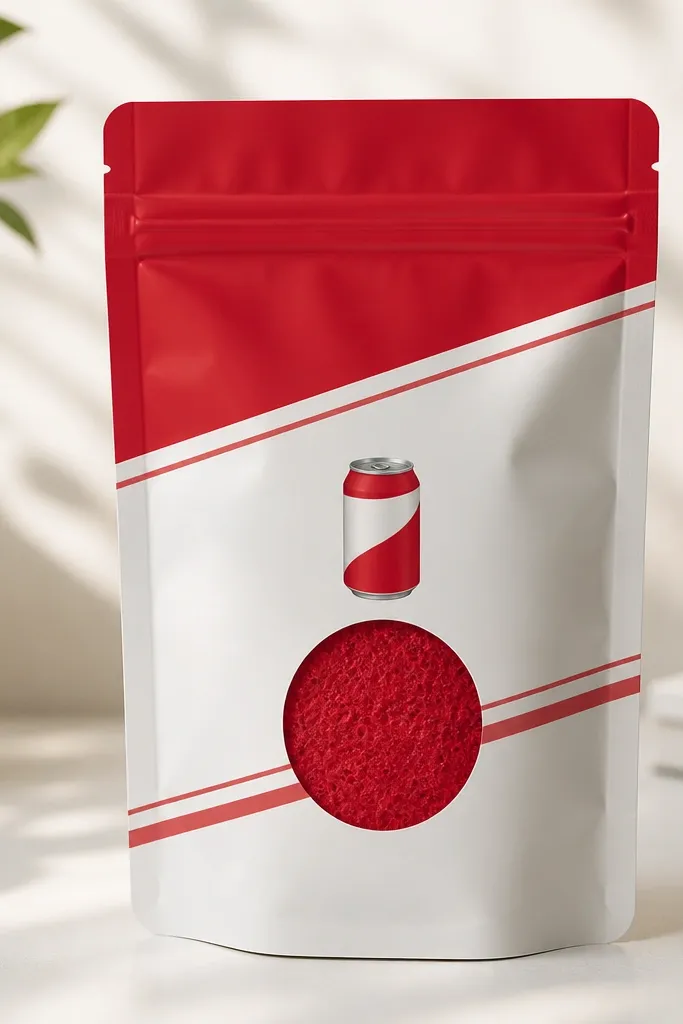
A pop can theme looks crisp because you can use simple stripes and a circular window. I make the outer pouch white with red diagonal stripes, then add a small can illustration centered on the front. The squishy center is a red foam circle behind the circular window so it looks like the can is “squishy” inside. This design flatters because red-white reads clean and the circular window makes the piece easy to understand from a distance. It’s also great for teens and party favors.
Cut the outer pocket from white cardstock and add diagonal red stripes using washi tape or painted strips. Fold into a pouch sized 8 x 5.5 cm. Cut a circular window about 2.5 cm diameter in the front panel and glue a red foam circle behind it, centered with a 2-3 mm gap. Draw the can label band with a red marker and add small “bubbles” dots using white gel pen. Close with a side tab that lines up with a slit so it snaps shut firmly.
Use a metallic red marker for the label text — it makes the can look like real packaging.
13. Sunflower Honey Bun Pocket
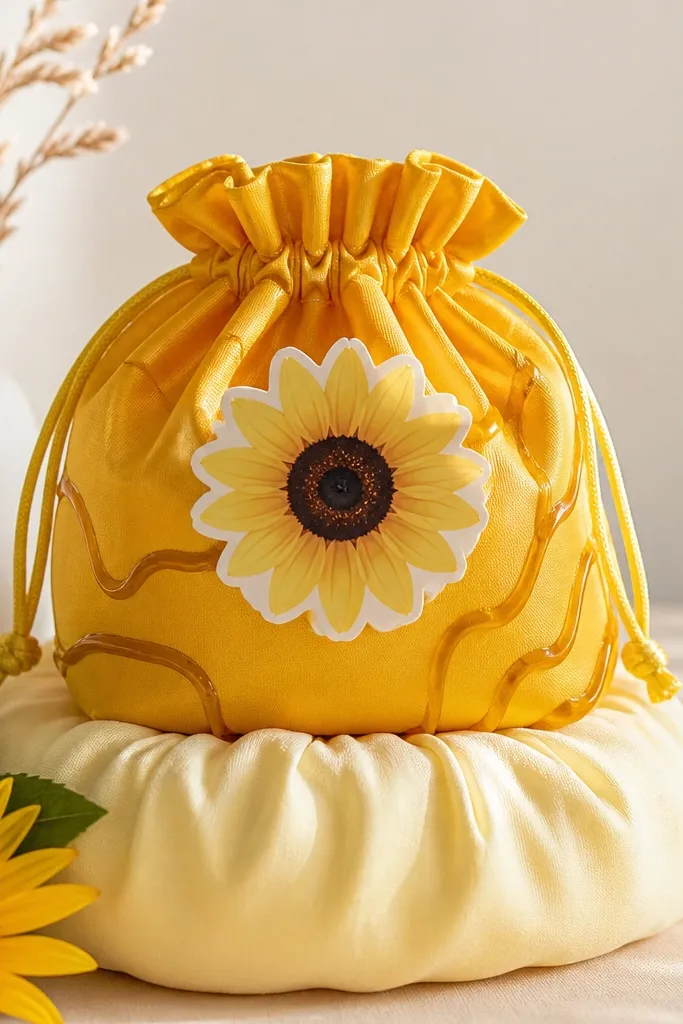
Cut a 8 x 5.5 cm pocket from golden yellow cardstock and fold it into a pouch with a top opening. Cut pale yellow batting into a 7.5 x 4.8 cm rectangle, then fold it once so it sits thicker in the center like a bun. Glue the bun to the back panel so it compresses when the pouch is squeezed. Add a honey drizzle on the front with a brown marker — two wavy lines ending in small dots. Place a sunflower on top and add a small green leaf paper accent at the side.
Sunflower honey buns feel warm and friendly, and they’re one of the easiest themes to make look polished. I use golden yellow cardstock for the pouch and add a sunflower sticker or paper-cut sunflower on the front. The squishy center is pale yellow batting shaped into a slightly flattened bun, so it has that soft, pillowy look. This palette flatters because yellow brightens the whole piece, and it looks great against denim, black, and cream sweaters. In photos, the sunflower gives a clear focal point.
Pro tipLightly shade under the sunflower with a yellow-brown pencil so it looks attached to the pouch, not floating.
14. Pastel Cloud Keychain Squish Pouch
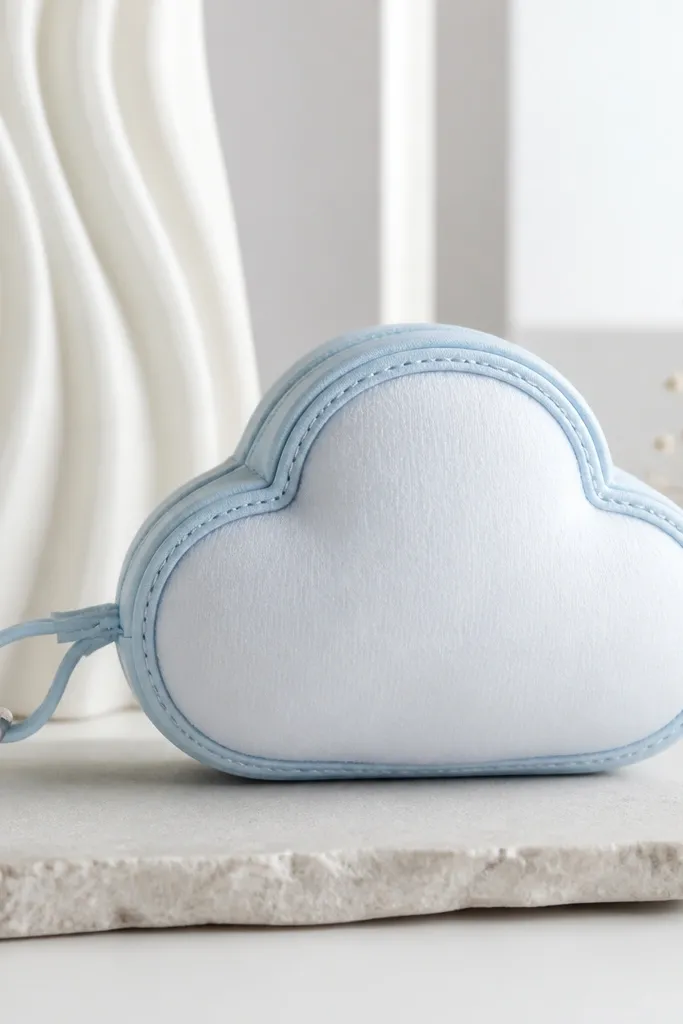
This is the one I make when I want a blind bag item that looks like a real accessory. The outer shell is a cloud-shaped cutout from light blue cardstock, with a small keychain loop glued at the top. The squishy center is white foam cut to match the cloud, so it bulges slightly — that’s what makes it feel tactile. Pastel colors like this flatter most outfits because they’re light and clean, and the cloud silhouette reads cute without extra clutter. It’s also a nice option if you’re giving these as party favors and want something people can actually use.
Cut two cloud shapes from light blue cardstock, each about 9 cm wide, and glue them together around the edges leaving a small side opening. Cut white foam to fit the inside cloud and glue it in place, then seal the opening with a tiny strip of tape or a paper tab. Attach a keychain loop made from a paper strip folded into a small ring and glued between layers at the top. Decorate the front with tiny raindrop dots using a darker blue marker, or add a small star sticker near the top. Finish by adding a thin ribbon strip at the bottom edge so it looks like a charm.
Use a foam insert that’s 1 mm thinner than the outline so it still compresses instead of staying stiff.
15. Mini Birthday Cake Candle Squish
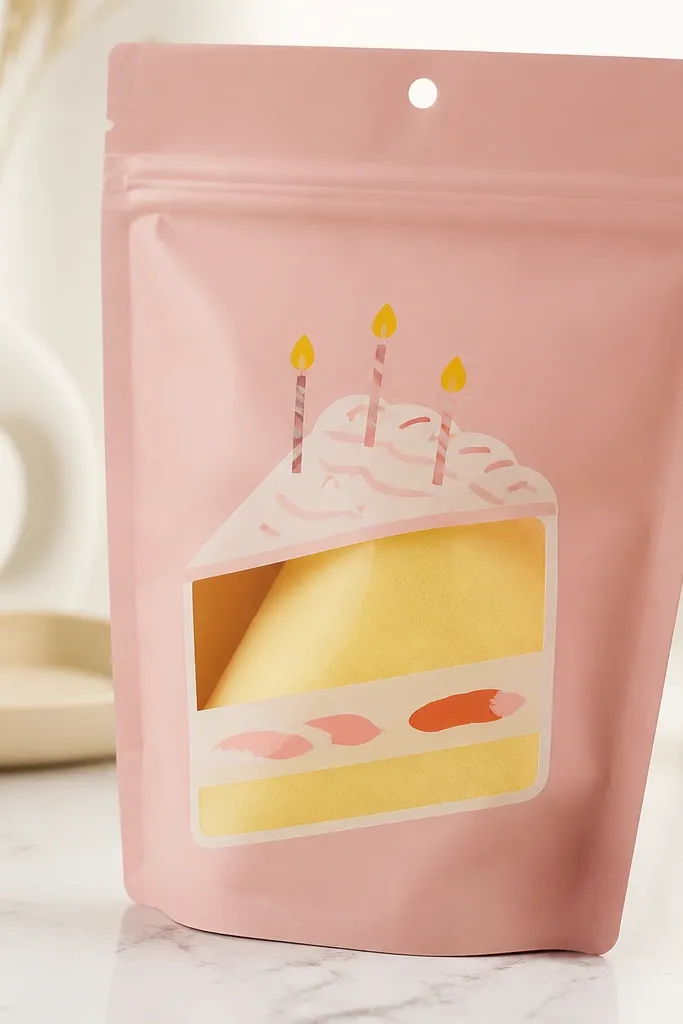
Make a pink outer pocket and fold it into a pouch with a front opening panel. Cut a label window in the front about 4 x 2.5 cm so the squish shows through. Glue a yellow foam insert behind that window, rounded at the corners so it doesn’t look like a block. Draw a cake slice on cream cardstock and place it over the foam, then add candle shapes with tiny rectangles and small flame triangles in marker. Close with a fold-over flap and a small reinforcement tape strip on the inside so it doesn’t tear in a blind bag.
Birthday cake blind bags are instant celebration. I use pink outer cardstock and a cream label panel shaped like a cake slice, then add three candle cutouts in red, yellow, and blue. The squishy center is a yellow foam rectangle tucked behind the label so it peeks through like cake sponge. This one flatters everyone because it’s bright but not neon, and the candle colors read clearly in pictures. It also works for any month because the theme is about the object, not the season.
Pro tipAdd one tiny “drip” line under the cake with a brown marker for a realistic frosting look.



