
1. Embroidered name keychain in her exact thread color
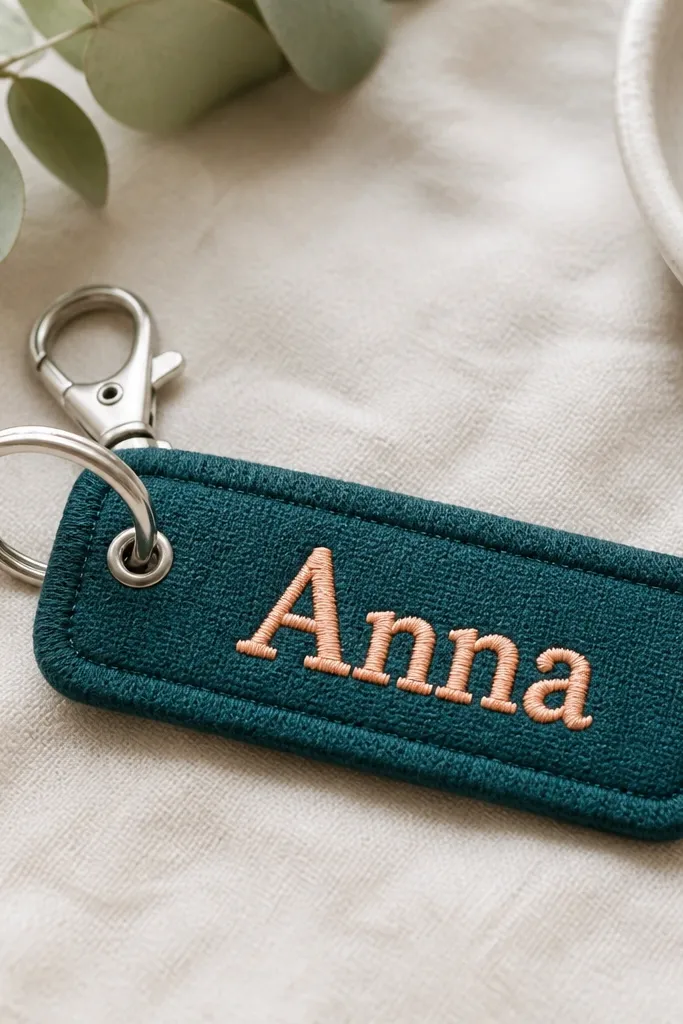
This is the gift I reach for when I need something personal that still feels practical. I’ve made one for a friend who always loses her keys, and she started hanging it on her bag zipper the same day. Use a solid fabric like cotton canvas or sturdy felt in a deep shade (navy, forest green, or charcoal). Embroider her first name or a short nickname in thread that matches something she wears — I’ve matched peach thread to her coral nail polish and it looked intentional instead of random. This flatters anyone because it’s small, clean, and works whether her style is minimal or bold.
Start by cutting a keychain blank about 3.5 x 2 inches, then fold the edges under or sandwich it with a second piece so the back looks finished. Choose embroidery thread color based on one repeat color in her outfits — check her scarf, lipstick, or phone case. Stitch the letters with backstitch or satin stitch, keeping each letter about 1/4 inch tall so it reads from a distance. Finish by attaching a silver split ring and a short strap loop made from 1/4 inch webbing or grosgrain ribbon. Tie it into the ribbon loop with a tight knot and trim tails to about 1 inch.
Pro tipWrite a one-sentence note on the back of the card that uses her exact nickname so the keychain feels like her.
AvoidSkipping a finished back makes it look like a craft fail, even if the front embroidery is perfect.
2. Photo fabric zipper pouch from a single printed panel
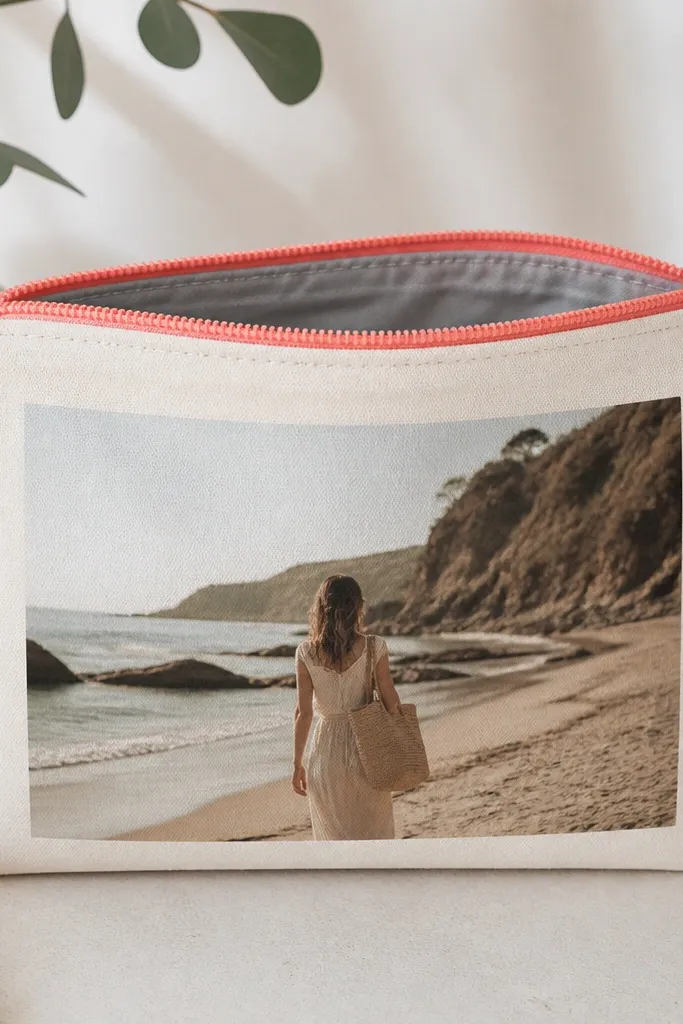
A zipper pouch turns a random photo into something she can actually use every day. I’ve given these to friends for makeup, earbuds, and cable chargers, and the “oh I needed this” reaction is real. The look works best when the photo is centered and framed like a mini poster, not stretched edge-to-edge. Pick a cream or light gray backing so skin tones in the photo stay warm and readable. This flatters friends with any style because the pouch reads as neat and functional, not childish.
Start by choosing one photo that has strong contrast, then print it on fabric-safe transfer paper or use iron-on transfer to a cotton panel. Cut two outer pieces the same size (I like 9 x 7 inches for a medium pouch) and add a zipper between them. Sew with a zipper foot so the stitches sit close to the zipper teeth, then topstitch at about 1/8 inch from the seam. Line the inside with matching cotton (gray or white) and finish the edges by pressing the seams flat before you close the pouch. Keep the zipper length at least 8 inches so it opens wide enough to see everything.
Pro tipUse a coral or teal zipper — it makes the whole thing look designed even when your photo is simple.
AvoidDon’t skip pressing seams; wrinkled fabric around a zipper shows up immediately in photos and in real life.
3. Vinyl-resist painted mug with a clean inside message
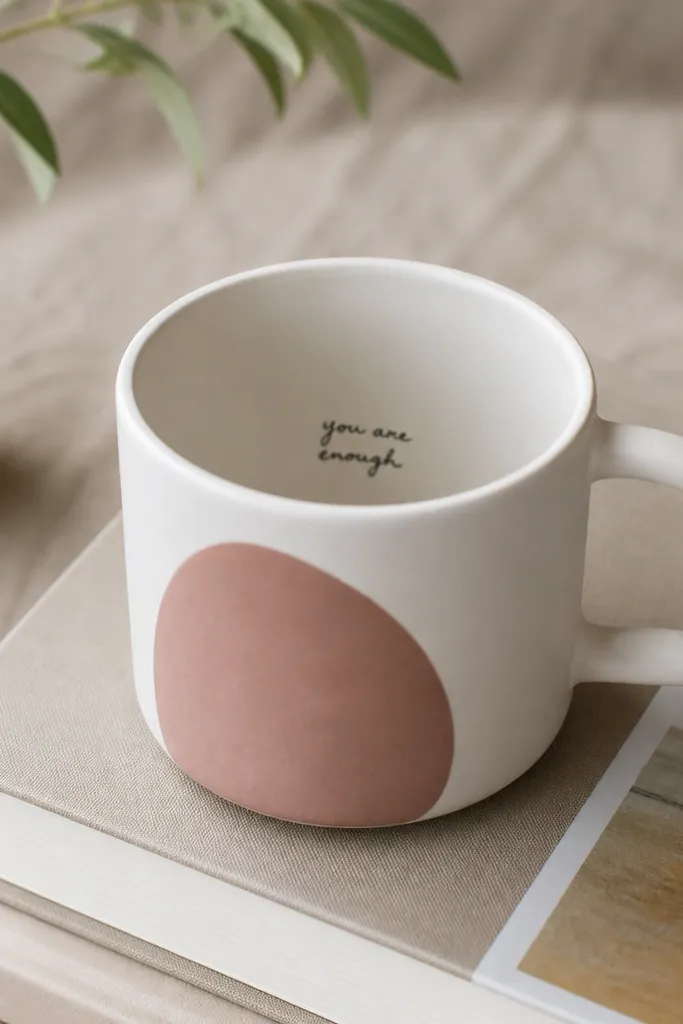
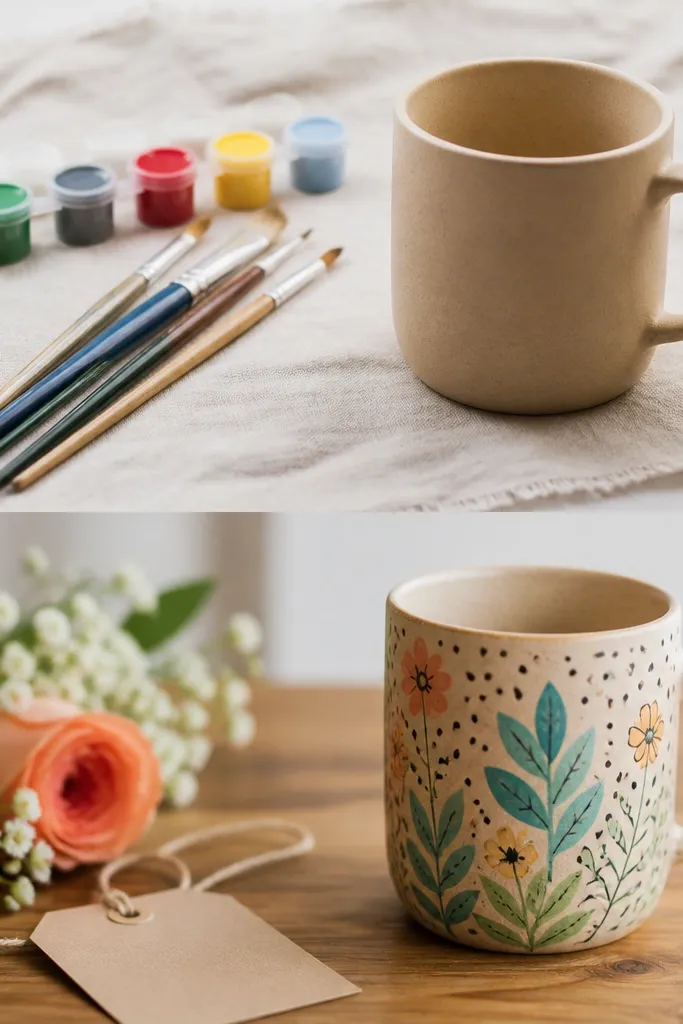
A mug is the easiest way to make a friend feel seen because she sees it every morning. I’ve made mugs for best friends who are picky about aesthetics, and the trick is to keep the outside design simple and put the personal line on the inside where it feels like a secret. The vinyl-resist method gives you crisp edges without bleeding paint. Use acrylic paint made for ceramics or enamel paint and seal it with a heat-safe clear coat. This works for any body type and style because it doesn’t depend on fit — it depends on readability and color balance.
Start by cleaning the mug with rubbing alcohol and letting it dry completely. Cut vinyl shapes (a heart, star, or small icon) and press them onto the mug, then paint over the vinyl with thin coats — two light coats look cleaner than one thick coat. Let it dry fully before you remove the vinyl so you don’t peel paint. For the inside message, use a fine paint marker or stencil, and keep the text small — about 1/4 inch tall letters so it doesn’t look cramped. Seal once with a ceramic-safe clear coat and bake at the temperature listed for your paint brand.
Pro tipChoose one color you know she wears — dusty rose, mustard, or deep green — and repeat it in the gift card too.
AvoidUsing the wrong paint (like craft acrylic without sealing) turns into fading and chipping after a few washes.
4. Soy wax travel tin with a label that matches her perfume notes
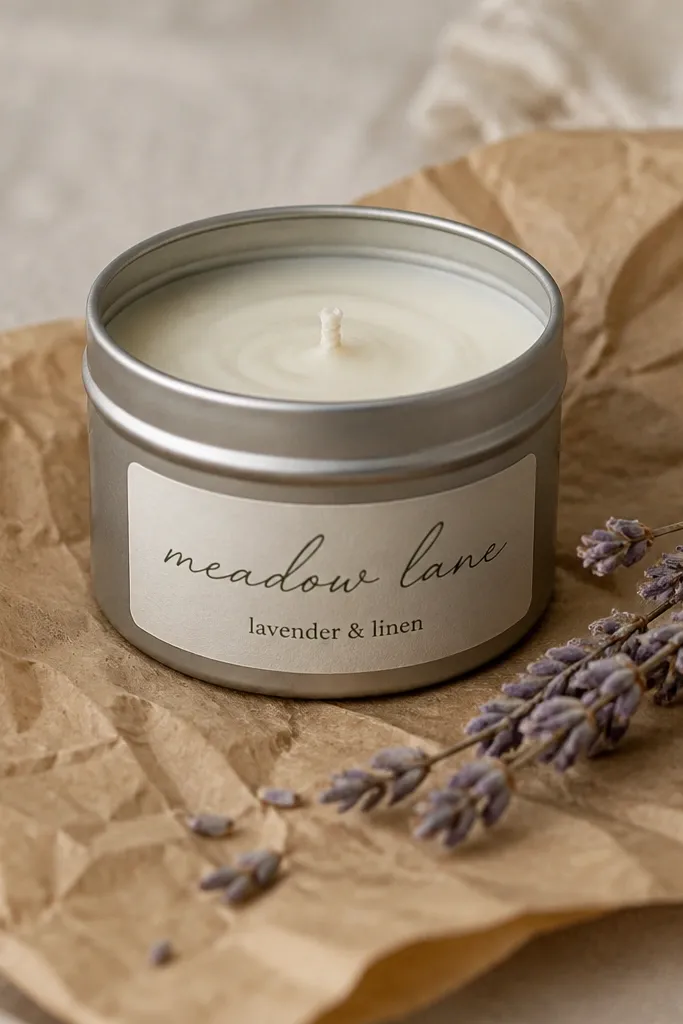
If your friend uses a desk candle or keeps scents in her bag, a travel tin hits hard. The before and after is usually that she starts carrying it or lighting it, not shelving it. I’ve made these with simple scent profiles like vanilla + cedar or lavender + clean linen, and the label is what makes it feel personal instead of generic. Use soy wax for a clean burn and add fragrance oils that match her actual taste, not your guess. This flatters everyone because it’s subtle, portable, and doesn’t require sizing or body fit.
Start by choosing a tin size you like — a 1.5 to 2.5 ounce tin is easy to pour and quick to set. Measure wax by weight, melt it gently, then add fragrance oil at the brand’s recommended percentage. Pour into a pre-warmed tin and place a centered wick — I like to use a wick sticker to keep it steady. Let it cure at least 24 hours before trimming the wick to about 1/4 inch. Print or hand-letter a label with the scent notes and her name, then apply it after the wax top is fully set.
Burn test it yourself once: if the scent is weak cold but strong hot, you guessed the notes right.
Don’t skimp on wick trimming; a long wick smokes and makes the top look ugly.
5. Fabric-backed stitched coaster set in two fabrics, one repeating pattern
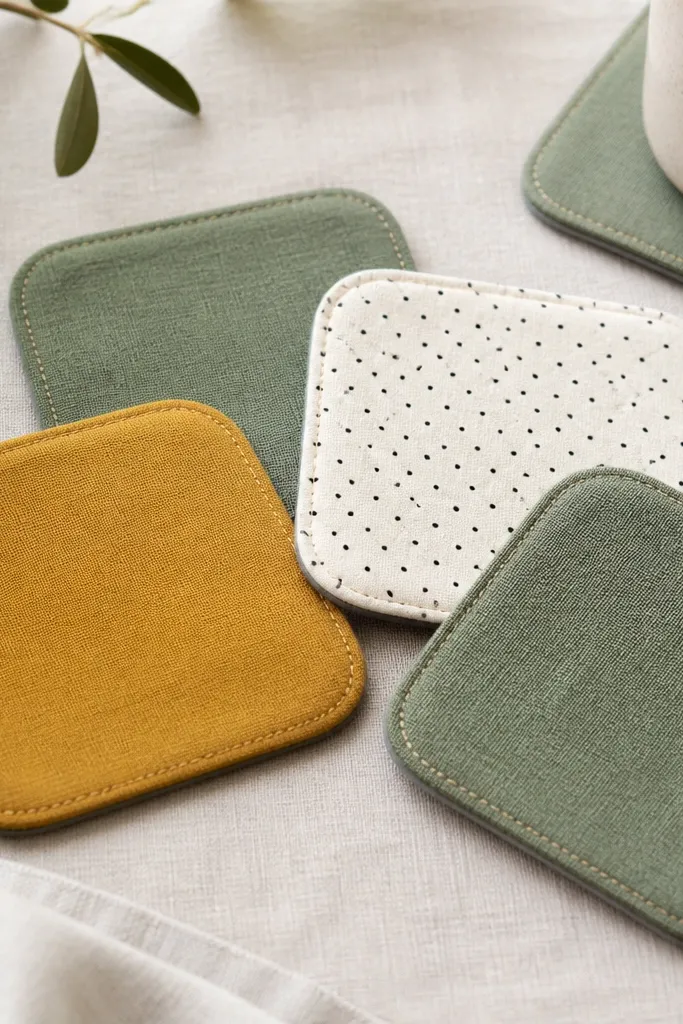
Coasters are one of the few gifts that get used immediately and repeatedly. I’ve given this set to a friend who hosts on weekends, and she kept them in a tray, not in a drawer. The fabric-back trick matters: flannel or felt backing protects surfaces and makes the coasters feel substantial. Pick one repeating pattern (dots or tiny florals) and one solid that repeats in your friend’s wardrobe — mustard for someone who wears warm tones, or dusty blue for cool-toned style. This works for anyone because it’s about texture and color harmony, not a size.
Start by cutting four squares about 4 x 4 inches, then round the corners using a lid or template. Choose two fabrics: a decorative front and a felt or flannel back the same size. Sew around the edge with a 1/4 inch seam allowance, leaving a gap to flip — then press flat and close the gap with a ladder stitch. Topstitch around the outside at about 1/8 inch from the edge for a crisp look. Steam press lightly so the rounded corners hold their shape.
Pro tipMake the set match a real tray or mug color — hold them up next to her coffee mug before you commit.
AvoidDon’t use slippery satin on the front; it frays and the stitching looks uneven.
6. Charm bracelet add-on with one story charm
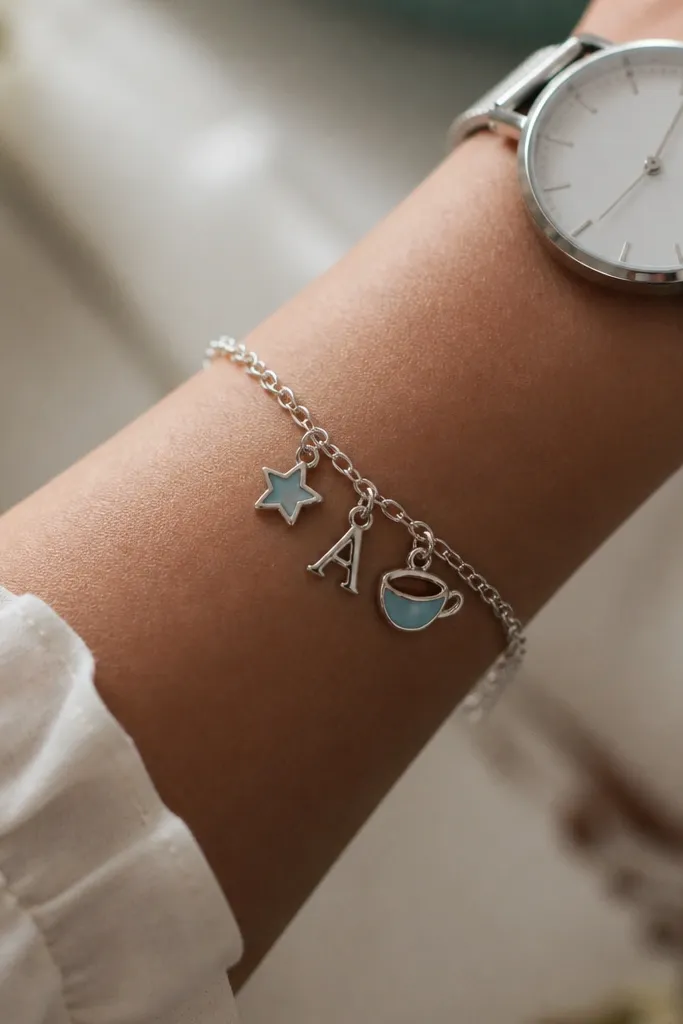
If she already wears a bracelet, an add-on feels personal without requiring you to guess her whole style. I’ve added one charm that references a shared memory, and it’s the kind she keeps reaching for because it’s part of her daily stack. Stick to one metal finish — silver or gold — so it doesn’t look mismatched. Enamel colors look best when they match something she wears, like a consistent red or blue. This flatters small wrists and bigger wrists equally because charms are flexible and the bracelet length is adjustable.
Start by finding her bracelet metal finish. If you can’t tell, compare it to a known item — her watch or necklace chain. Choose one story charm (teacup, tiny camera, star, heart) and one functional charm like a bead spacer or small clasp extender. Add a letter charm only if she actually uses initials in her style. Use jump rings to attach — open them by twisting the ring, not pulling it apart, then close tight with needle-nose pliers.
Pro tipWrite the memory in a short card: one sentence about how you picked the charm.
AvoidAvoid mixing silver and gold finishes; it looks accidental even when the colors are pretty.
7. Macrame plant hanger with a quick 3-knot pattern
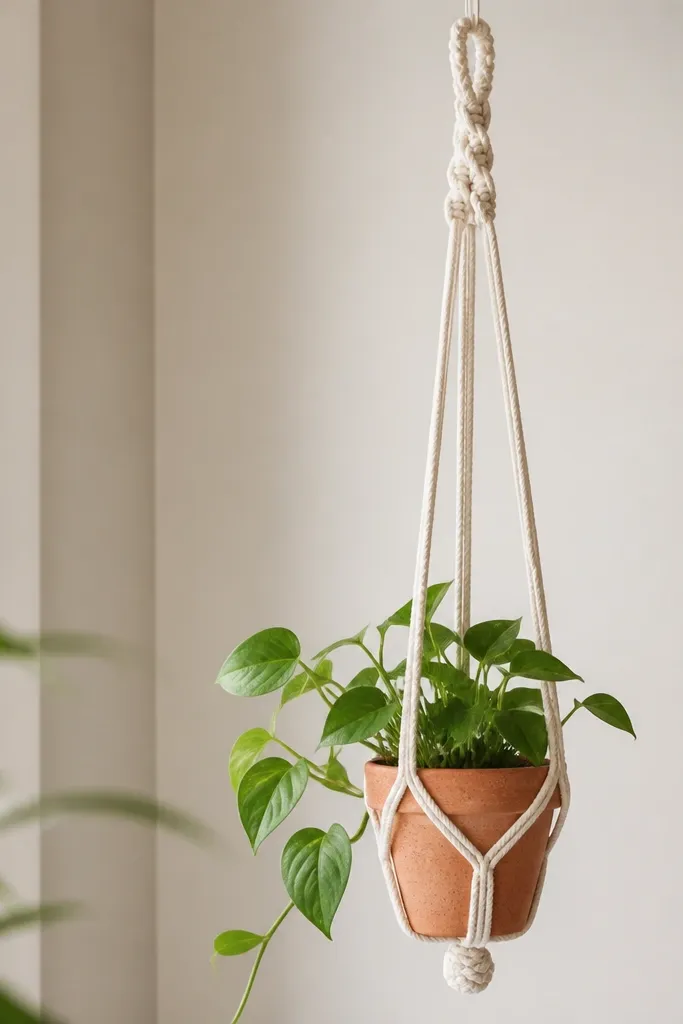
A plant hanger is one of those gifts that looks special in photos and also solves a real problem. I made one for a friend who kept her plant on a shelf — after hanging it, she moved it into the brightest window and it finally looked like it belonged there. Use off-white cotton rope so it looks soft and not plasticky. Keep the pattern simple so it hangs straight and doesn’t twist. This flatters anyone’s home because it creates height and texture without adding bulk.
Start by measuring from the hook to the height you want the pot — I aim for 18 to 24 inches for common houseplants. Cut 4 strands of rope — enough length for your knot spacing plus final hang length. Tie all strands at the top with a braided loop or a secure lark’s head knot. Create even spacing by grouping three cords at the sides and using the same knot distance for each — then tie a bottom knot that supports the pot’s rim. Trim ends after you confirm the pot sits level, then melt frayed rope ends if your rope allows it or tape and hide the ends under the final knots.
Hang it with the pot in place before you trim anything — level matters more than symmetry.
Don’t use super stretchy rope; the hanger sags and the knots loosen as it dries.
8. Knit mini scarf in one strip pattern for an easy win
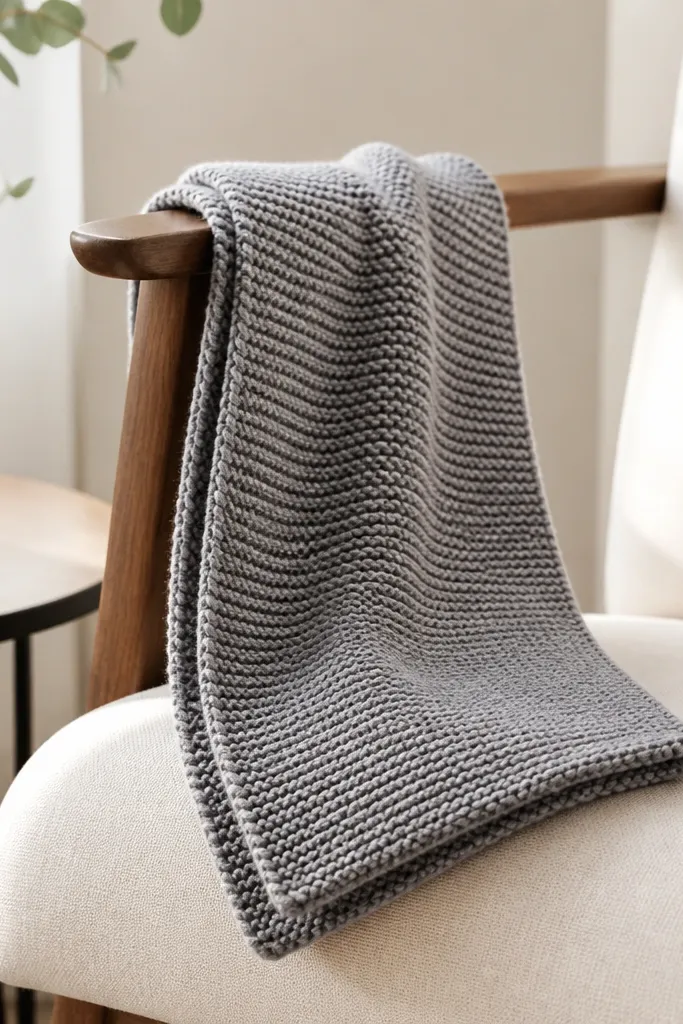
If you want a handmade gift that feels like real effort, a mini scarf does it fast. I’ve made these in one strip — no complicated shaping — and friends wear them immediately because they’re lightweight and easy to style. Choose a yarn that looks good even when it’s knit: a smooth merino blend or a tightly twisted acrylic blend. Color matters here: gray, cream, deep green, and dusty blue look expensive because they pair with everything. This flatters most people because it’s a wrap you can adjust without worrying about fit.
Start by casting on for a width of about 7 to 9 inches, then knit in garter stitch (every row) so it stays simple and thick. Keep your gauge consistent by using the same needle size the yarn label recommends. Knit until you reach about 50 to 60 inches long, then bind off with a loose bind-off so the edge doesn’t pucker. Add a short fringe by cutting matching yarn lengths and attaching them evenly if the yarn is suited for it. Steam lightly and let it dry flat so the texture looks even.
Pro tipMake it look intentional: block it. Even a quick steam press makes knitted edges look clean.
AvoidDon’t knit with uneven tension; it shows as wavy edges in photos and in real wear.
9. Stitched recipe card set with real page protection
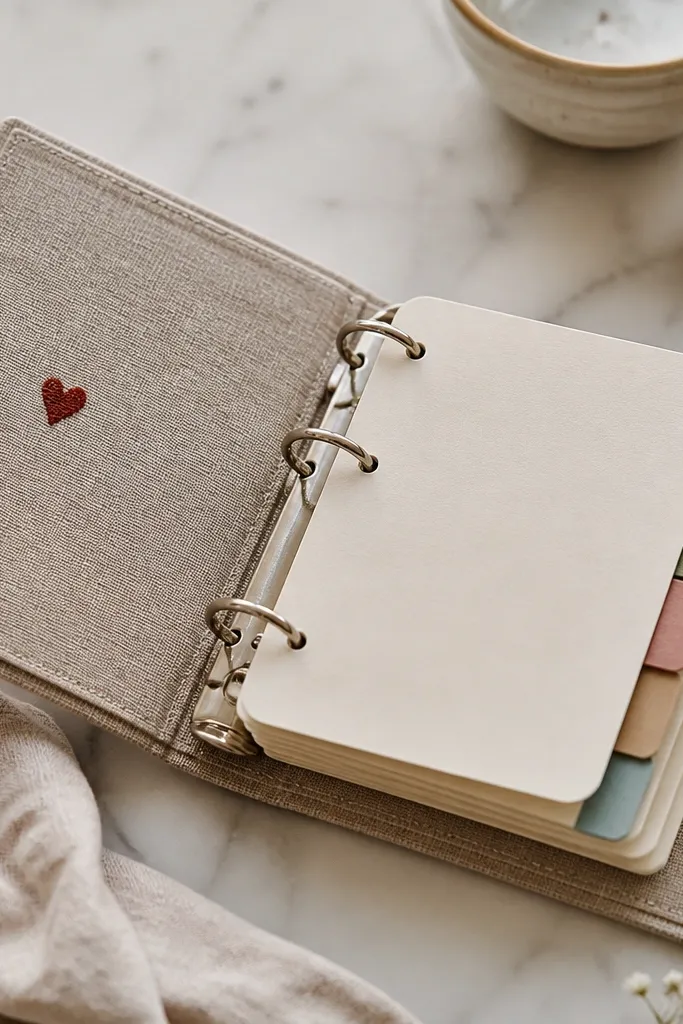
This gift is for the friend who cooks, even casually. I’ve made recipe card sets for two best friends and both times the binder got used within a week, not saved in a drawer. The key is using thick paper or laminated paper so oil splashes don’t ruin it. Stitching the cards into a binder makes it feel handmade, but the binder keeps it practical. Choose a cover fabric that matches her kitchen vibe — black-and-white gingham, dark teal linen, or warm canvas. It flatters anyone because it doesn’t depend on size — it depends on how clearly the recipes are organized.
Start by choosing a binder size: 1 to 2 inch ring binder works well for 6 to 10 cards. Print your recipes on thick cardstock or use heat-resistant lamination sheets if you want wipeable surfaces. Cut tab labels and place them before you punch holes. Create stitched corner binding by sewing through the card corner and cover — I do a simple running stitch with matching thread. Finally, add one blank card for her own recipe and write a note on it saying you want her to fill it.
Pro tipUse a consistent font size on every card so it looks designed, not copied.
AvoidAvoid thin paper; it wrinkles and oils soak in fast.
10. Handmade tote bag with iron-on patch placement map
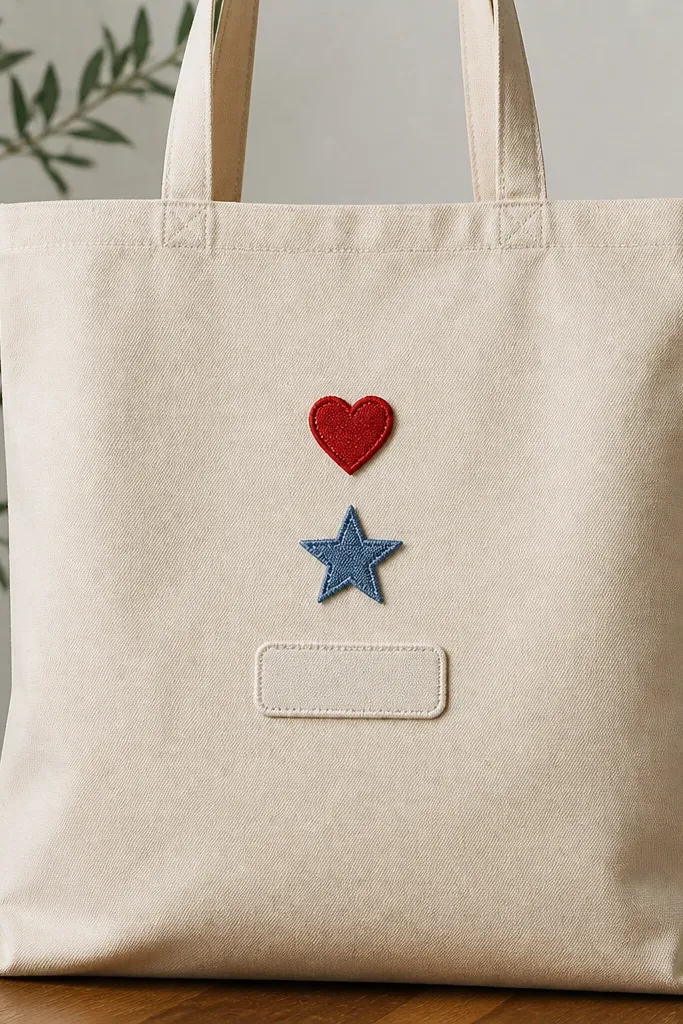
A tote bag is one of the few gifts that keeps showing up in daily life. I’ve seen friends actually carry them to errands and work because they’re sturdy and easy to throw into a car. The before and after comes from placement: patches arranged with a neat grid look intentional, even if the patches are store-bought. Use a natural canvas tote and iron-on patches with heat press or iron plus parchment. This flatters everyone because it’s a bag — no fit issues — and the style can go cute, sporty, or artsy.
Start by washing and drying the tote so it doesn’t shrink after you apply patches. Map your placement with removable chalk or a fabric marker: center the largest patch first, then place smaller patches around it with equal spacing. Cover patches with parchment paper and press with heat according to the patch instructions, usually 20 to 40 seconds per section. Reinforce edges by hand-stitching around the patch perimeter with matching thread if the patch fabric allows it. Add a small name patch at the bottom corner so it reads as personal when she sets the bag down.
Measure patch spacing with a ruler — eyeballing is where DIY tote bags look sloppy.
Don’t iron directly on patches; you’ll scorch the bag or warp the patch backing.
11. Custom bookmark set with laminated edges and corner rounders
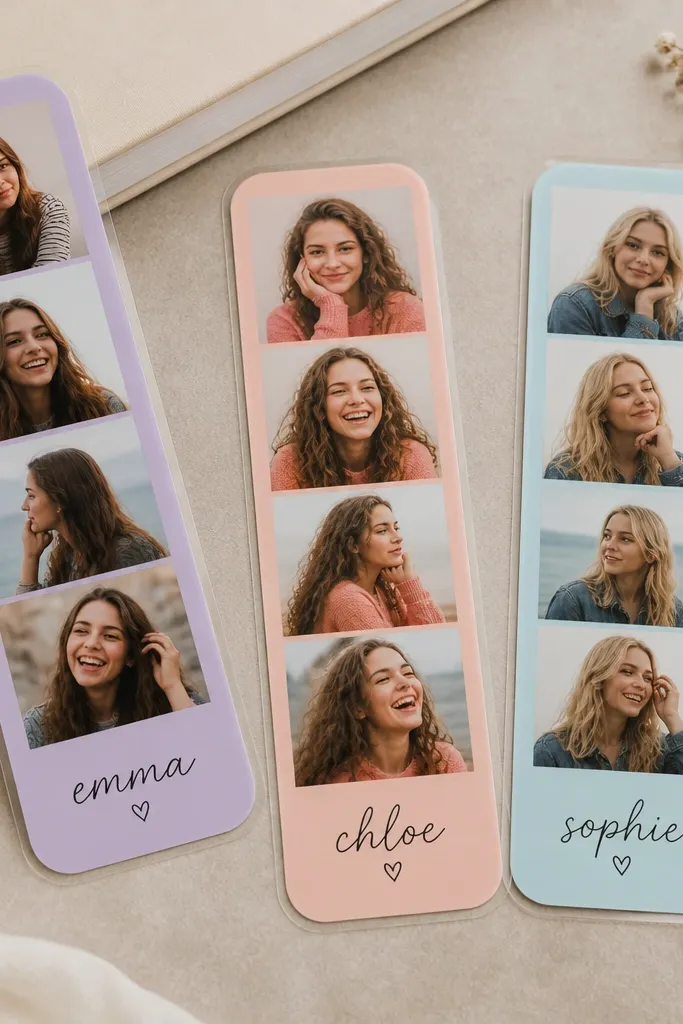
For the reading friend, bookmarks are a gift that stays in use — not in wrapping paper. I’ve made sets with photo strips and short lines, and the best part is the texture: laminated paper feels smooth and holds up to page edges. Pick colors that match her book covers or her tote — maroon, cream, and deep green look great together. Use rounded corners so it doesn’t snag on pages. This flatters anyone because it’s small, light, and works with any reading habit.
Start by cutting cardstock to bookmark size (about 2 x 7 inches). Print photos or design strips, then glue them centered onto the cardstock using a thin layer of glue stick. Laminate with a pouch laminator and trim to the exact shape, then use corner rounders to soften the ends. Add a small hole punch at the top and thread ribbon through — keep ribbon width around 1/8 to 1/4 inch. Write a short line on the back that connects to a shared memory, like a line about the book you both talked about.
Round corners after laminating, not before — it keeps edges cleaner.
Skip thick glue blobs; they make bubbles under lamination.
12. Bought candle upgraded with a custom label and matching ribbon wrap
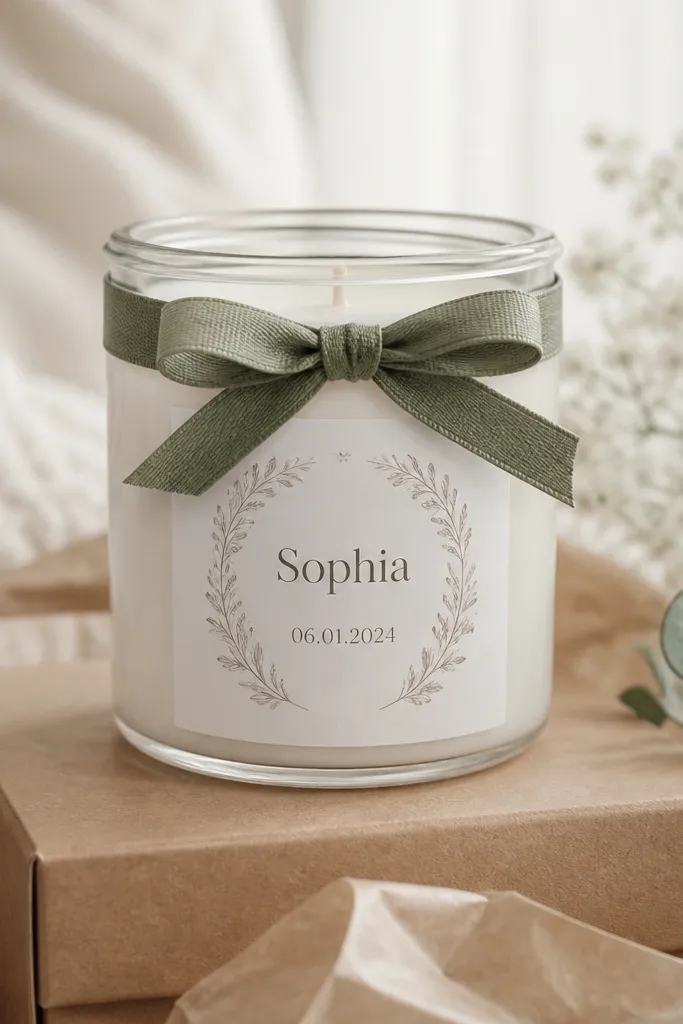
Bought gifts get a bad rap, but I’ve turned plenty of them into something she actually kept. A candle is a good base because the jar and scent are already “nice,” and you only need to add your personal detail. The before and after happens when the label looks like it belongs on the jar and the note sounds like you. Choose a candle scent she already likes — vanilla, cedar, or clean cotton — then match the ribbon color to her wardrobe. This flatters anyone because it doesn’t require skill — it requires good packaging choices.
Start by removing the store label carefully so the glass looks clean. Create a custom label sized to the jar height — measure the jar and print on label paper or thick cardstock with a clear adhesive. Wrap the jar with a ribbon band so it sits straight and doesn’t hide the label edges. Tie a double knot and trim ribbon ends at a diagonal. Write a note that mentions something she does, like “Your desk always smells like clean coffee,” then tape it inside the kraft sleeve.
Pro tipPrint your label on slightly textured paper; glossy labels look cheap on glass.
AvoidAvoid huge fonts and busy clip-art — one clean design beats five decorations.
13. Handmade bath salt jar with measured grain mix and a tight lid seal
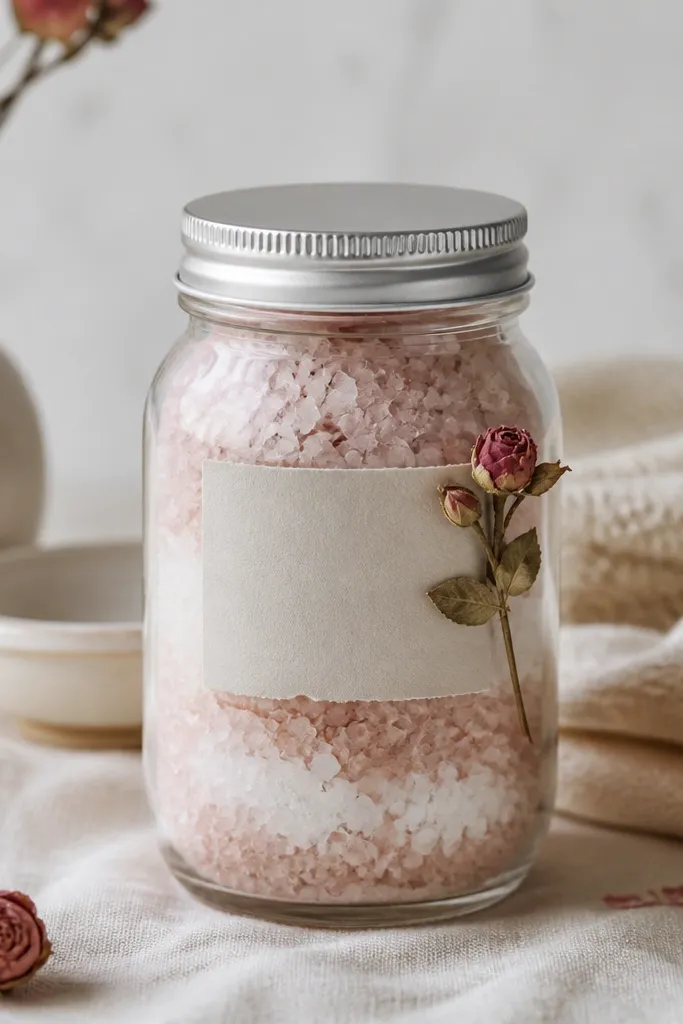
Bath salts feel like a treat, but the gift only lands when it looks like a real product, not a kitchen mix. I’ve made these with layered colors so the jar looks good even without fancy containers. Use a mix that includes Epsom salt for the grainy body and a small amount of fine salts for sparkle. Add fragrance that matches her taste — I’ve used lavender for calm friends and citrus for the high-energy ones. This flatters anyone because it’s universal and the jar size is easy to handle.
Start by choosing a jar size — 8 to 12 ounces looks generous. Mix Epsom salt with a small amount of sea salt, then add fragrance oil at the recommended percentage for your product base. Add a colorant like cosmetic-grade mica or bath-safe dye, but keep it subtle — pastel pink looks better than neon. Layer the mix by pouring half, then the other color, then top off with the first color again. Seal with a tight lid and add a label with the scent name and a usage line like “Add 1/2 cup to warm bath.”
Pro tipPack it slightly tighter than you think; loose salts spill and look messy when opened.
AvoidAvoid using perfume oils not made for skin; they can irritate.
14. Handmade photo magnet set from printed film strips
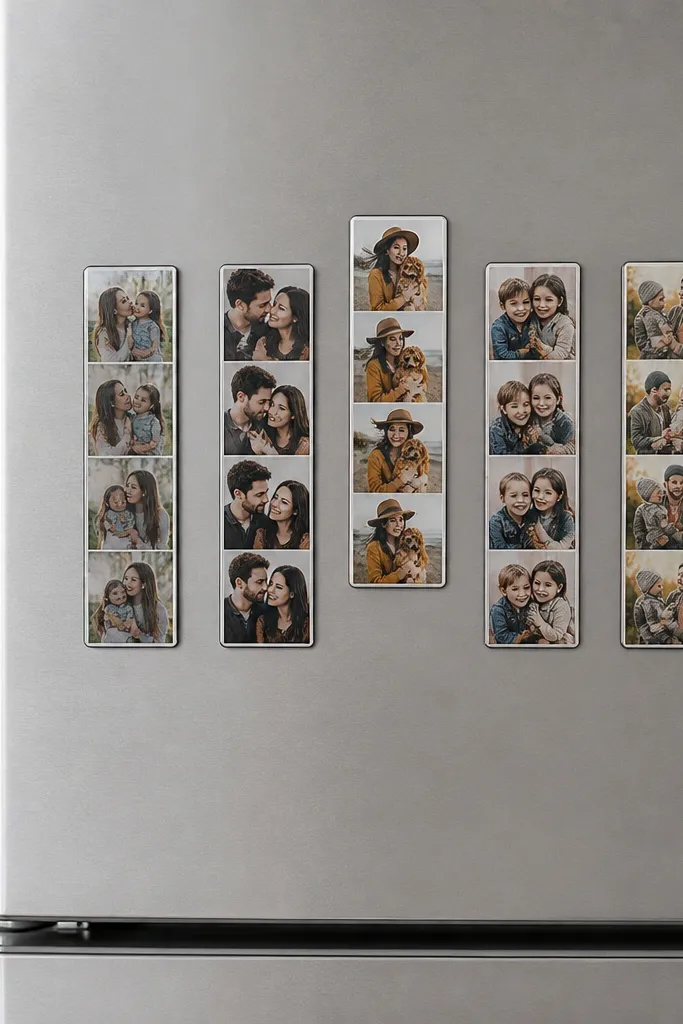
When you want a gift that’s sentimental but still practical, magnets work. I’ve made these for friends who live in small apartments where fridge space is the only wall they actually use. Use photo strips so they look like a mini film roll, and keep the magnets small enough to avoid covering important fridge items. The before and after transformation is real because the photos move from “kept in a phone” to “seen daily.” This flatters anyone because it works for any home layout.
Start by printing photos on glossy sticker paper or photo paper and sealing them with a clear craft sealer. Cut into rectangles about 1.5 x 2.5 inches, then add a thin layer of mod podge if you’re not using sticker paper. Attach small sheet magnets to the back with strong craft glue, then press flat under a book for 30 minutes. Arrange in a row and line up edges so they look uniform. Add a small card with the dates of the photos so she remembers the timeline.
Pro tipWipe the fridge spot with alcohol first; magnets stick better on clean surfaces.
AvoidDon’t skip sealing the photo; moisture and fingerprints make prints fade fast.
15. Stitched keyring pouch that clips to bags
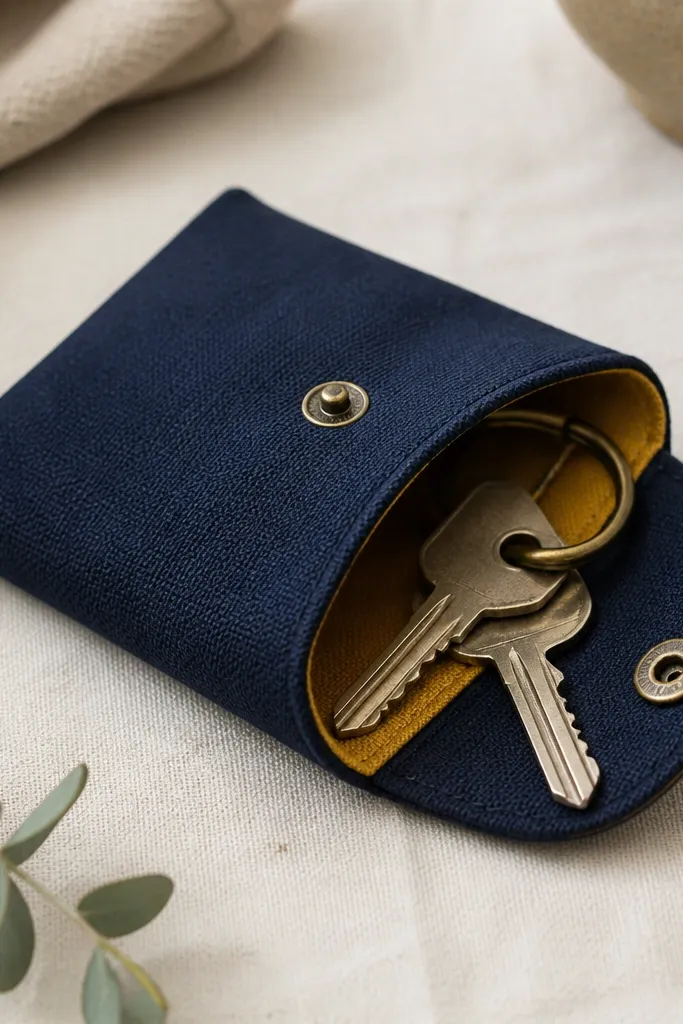
A keyring pouch is the kind of handmade gift that solves a real annoyance: keys jangle, keys get lost, and keychains snag. I made one for a friend who works in a clinic and she uses it to keep her badge keys separate. The look works because you show the lining — a bright mustard inside makes it feel cheerful when she opens it. Use sturdy fabric like canvas so it holds shape and doesn’t collapse. This flatters anyone because it’s a compact accessory that doesn’t depend on clothing size.
Start by cutting a pouch pattern about 4 x 6 inches with a flap extension. Sew the outer fabric to the lining right sides together, then turn and press. Add a snap button on the flap so it closes firmly — place the snap about 1 inch from the edge for a secure hold. Install a key clip inside using a small swivel clip or D-ring, then stitch it down so it can’t twist. Finish with topstitching around the opening and attach a small clip or carabiner clip loop on the back.
Use contrasting lining and keep the flap simple; the lining is your visual “personality.”
Avoid thin quilting cotton as the outer — it collapses and the pouch looks unfinished.
16. Handmade mini desk organizer from a cereal box upgrade
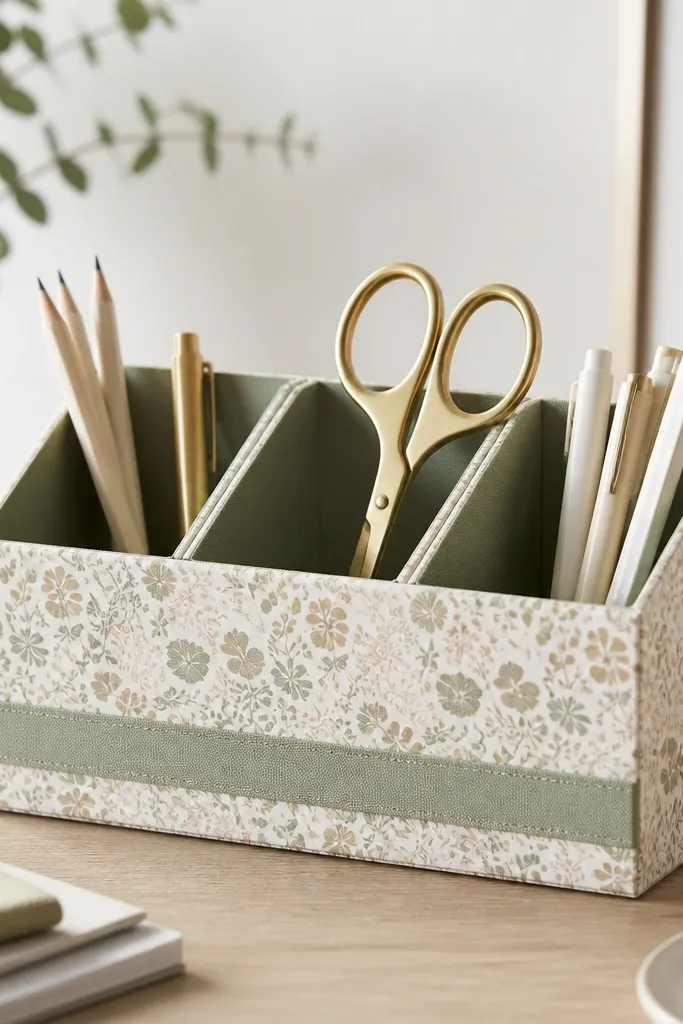
This is the gift I make when the friend doesn’t need more stuff but she does need things to stay put. I’ve upgraded cereal-box cardboard into a tidy organizer and the reaction is always “Oh, you thought about my desk.” It works because you’re giving structure, and structure feels thoughtful. Use matte wrapping paper or bookcloth so it doesn’t look shiny and cheap. This flatters anyone with a desk, kitchen counter, or craft table because it holds small items that always scatter.
Start by choosing a sturdy box and cutting it into a three-compartment organizer. Wrap the base with bookcloth or matte paper using a glue stick for paper and craft glue for cloth. Score fold lines with a ruler so corners stay sharp, then glue the inside seams. Add a thin fabric label strip to one face and write what goes where, like “pens” and “tape.” Seal edges with a thin layer of Mod Podge so the organizer wipes clean.
Pro tipUse a ruler for every fold; straight lines make it look store-bought.
AvoidAvoid glossy paper — it shows wrinkles and doesn’t hide uneven glue.
17. Hand-painted tote tag with her initials and a matching gift note
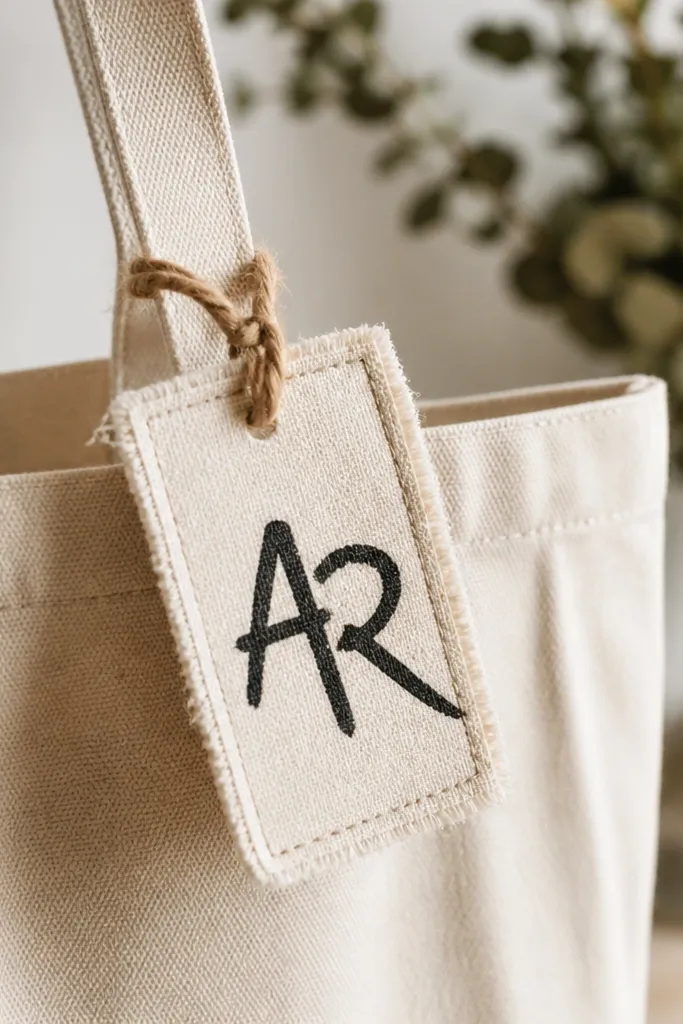
This is a small move that changes the whole gift. I’ve used painted tote tags on store-bought totes and it instantly looks like you made something. The tag is where you put the personality — her initials, a short symbol, or a tiny line like “Always late, always cute.” Use fabric paint or acrylic mixed with a textile medium so it doesn’t crack. This flatters anyone because it’s tiny and doesn’t require body fit — it’s about style and handwriting.
Start by cutting fabric rectangles about 2.5 x 4 inches, then fold edges under and stitch a neat border. Paint initials using a stencil if you want it crisp, and let it dry fully. Heat-set the paint if your fabric paint requires it, or seal with a clear fabric sealant. Tie the tag to a tote handle with twine or ribbon, then attach the note on the inside of the tote so it stays hidden until she opens it. Use a note that matches your handwriting style — one short paragraph beats a long story.
Pro tipUse a stencil for letters; hand-lettering looks better when it’s consistent, not wobbly.
AvoidAvoid painting on unsealed fabric; the paint bleeds and looks fuzzy.
18. Bought gift upgraded with a handmade sleeve and a timed reveal
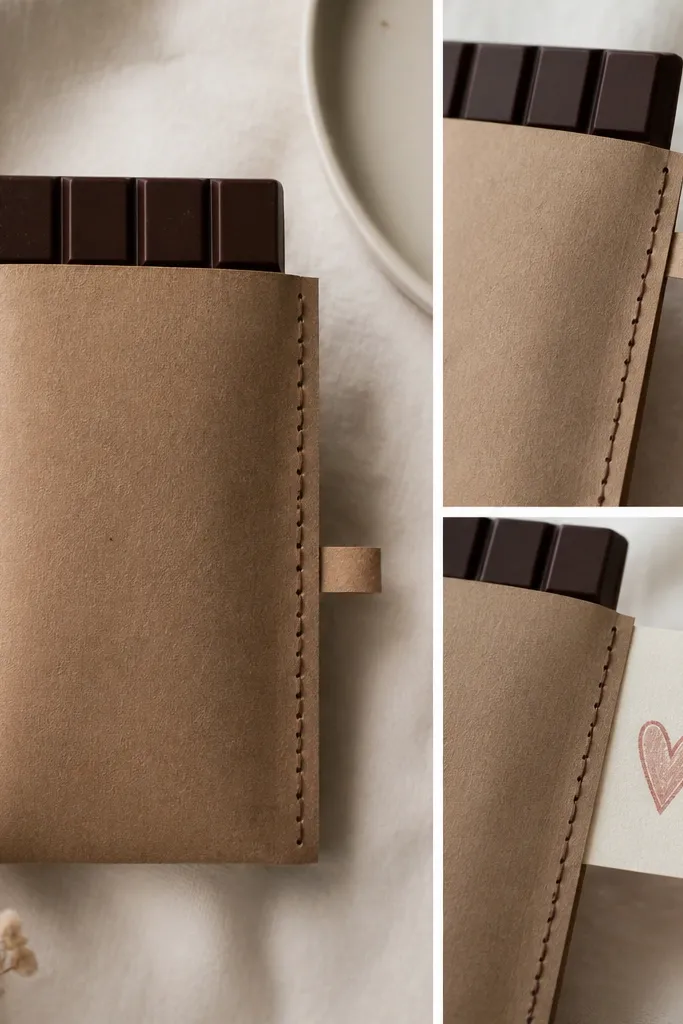
If you’re buying something last minute, you can still make it feel like you put time into it. I’ve done this with a boxed skincare set and a friend still talked about the packaging more than the product because the reveal felt personal. The key is a handmade sleeve that fits the item — snug, no extra gaps. Choose kraft paper or bookcloth and add one simple detail like a stitched seam or a small printed label in your friend’s favorite color. This flatters anyone because the gift stays practical and the effort shows up in the unboxing moment.
Start by measuring the store-bought box and cut kraft paper to wrap with an overlap of about 1/2 inch. Glue or double-sided tape the overlap, then stitch the side seam with a simple running stitch for texture. Add a pull-tab made from ribbon or fabric so she can open it without tearing the sleeve. Write the reveal message on a small cardstock tab and attach it to the pull-tab inside. Wrap the whole thing with a ribbon band and tie it so the knot sits centered.
Pro tipMake the sleeve fit tight — gaps make it look like you covered a box, not made a gift.
AvoidAvoid chunky tape everywhere; it shows through kraft paper and looks messy.



