
1. Web-Grid Vinyl Wrap with Removable Clear Overlay
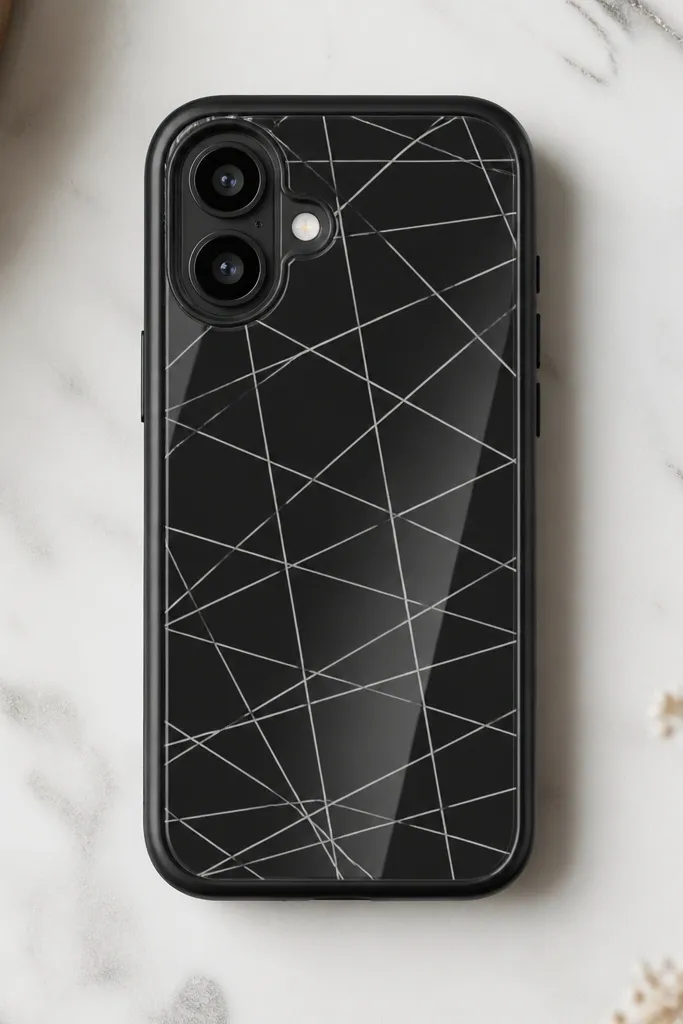
This one is for the clean, graphic Spiderman look. You’ll use matte black vinyl or black adhesive vinyl on top of a plain case, then add white web lines cut from vinyl. The contrast is what makes it look store-bought — white lines stay sharp against black instead of turning gray. It flatters most phone colors because the web pattern does the heavy lifting; even on light cases it reads bold once the black vinyl layer is in place. I like it for everyday wear because the web lines hide small scuffs better than big mask graphics.
Start by cleaning your case with 70% isopropyl alcohol and letting it dry completely. Measure the area you want to cover and cut a black vinyl panel that leaves a 1-2 mm border from each edge so it doesn’t lift. Apply the vinyl using a squeegee or an old gift card, then add white web lines in a diagonal cross pattern, working from the center outward. Finally, cut a clear flexible laminate sheet (like clear adhesive craft film) to cover only the web area and press it down with firm passes along the edges.
If your case has a camera bump, cut the laminate so it stops short of the bump by 1-2 mm for a cleaner edge.
Don’t stretch vinyl while applying — stretched lines look wavy and cheap fast.
2. Spider Emblem Center Panel with Magnet-Back Removability
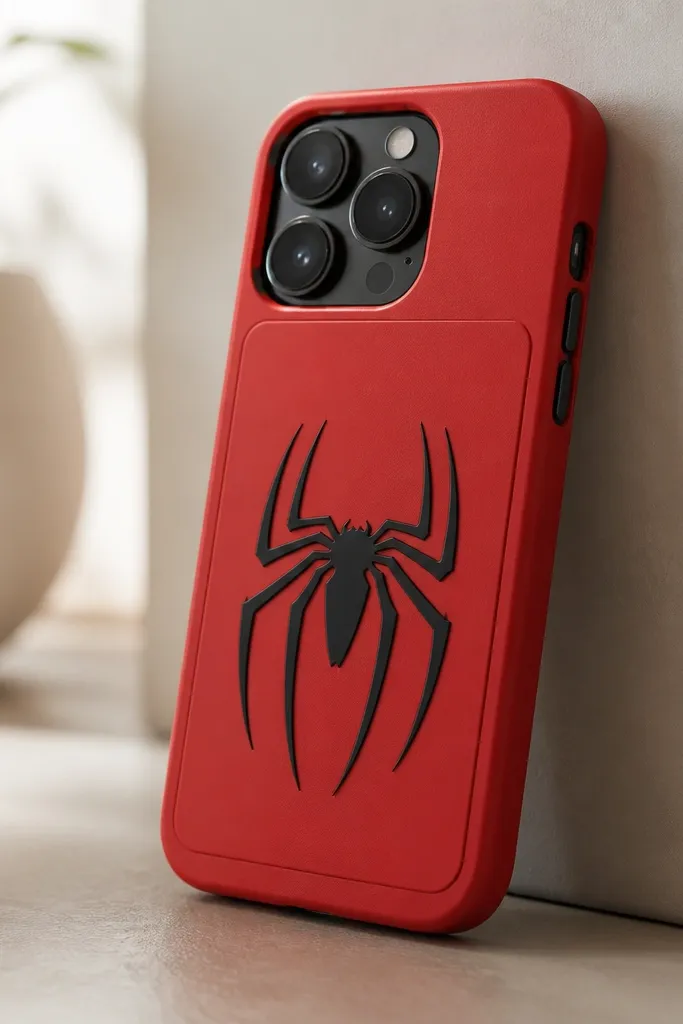
This is the “I want Spiderman, but I don’t want my whole case covered” design. The spider emblem stays crisp because you’re using a layered cutout panel rather than paint. I’ve used black heat-transfer vinyl (HTV) or layered adhesive vinyl for the spider, then mounted it on a thin removable backing so it can pop off. It looks great on red, dark blue, and black cases because the emblem reads instantly. It’s also flattering for anyone who wants a neat look that doesn’t clash with a busy wardrobe.
Start by cutting a removable backing panel from thin craft plastic or a smooth clear acrylic sheet that matches your emblem size. Apply your black spider emblem vinyl to the backing panel first, then press it down with a warm iron if you’re using HTV (follow the vinyl instructions). Position the panel on your phone case back and mark magnet locations at the corners using a pen. Glue small rare-earth magnets to the case back with a tiny dot of strong craft glue, then press the panel on to test alignment before the glue fully cures.
Use two magnets per side (not one) so the panel doesn’t tilt when you pull it off.
Skip super-thick glue blobs — they create bumps that show through and catch on pockets.
3. Heat-Shrink Web Mask Over Clear TPU Sleeve
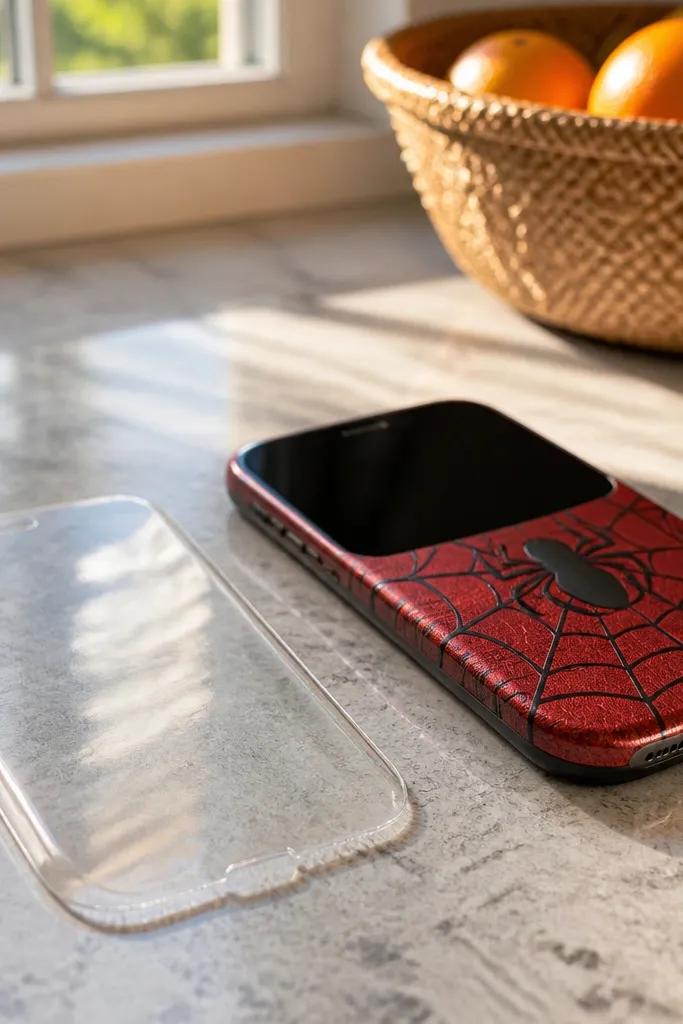
This one looks dimensional without you buying expensive tools. Heat-shrink film tightens when you warm it, giving the mask a slight curve that makes the eyes and web lines pop. I’ve done this on clear TPU and it looks best when the film has a red base with black webbing. The texture hides minor fingerprints, and the curved feel makes it look more “character costume” than flat sticker. It looks especially good on phones with a clear or light base because the red shows through cleanly.
Start with a clear TPU case (or a clear sleeve that covers your phone) so the film can cling evenly. Cut heat-shrink film slightly larger than your back panel area, then place it over the back and smooth it down. Use a hair dryer on medium heat and keep moving, warming the film until it tightens and conforms to the case shape. Trim carefully around the camera ring and flash window with sharp scissors or a craft knife once the film cools.
Do a quick test scrap piece first so you know how fast your hair dryer shrinks the film.
Don’t overheat one spot — it causes bubbles and a shiny patch that looks off.
4. Removable Spiderman Comic Strip Band (Adhesive Corners)
Start by cutting a band panel that fits the middle of your case — I aim for it to be about 45% of the case width and around 30% of the phone height. Print or use a comic strip image on adhesive vinyl or thin photo paper backed with transfer film. Apply the panel to the case back, then add a clear flexible laminate sheet over it, leaving the top and bottom edges sealed but not glued to the camera area. For removability, attach two tiny removable adhesive tabs (like poster mounting tabs) on the back side of the band so you can lift it without tearing.
This is for the comic-book fan who wants motion and story without covering the whole case. A horizontal band makes the design feel intentional because your eyes land on one focal strip, not the entire back. Use comic-style printed paper or pre-printed comic vinyl, then seal it under a clear flexible cover. It flatters most skin tones and outfits because the red/white color combo reads like a graphic tee — loud but balanced. I like it for renters because you can remove the band cleanly and reuse the clear cover.
AvoidDon’t use thick paper — it creates wrinkles and a raised edge that catches lint.
Pro tipPress the laminate edges with a plastic card so pocket friction doesn’t start peeling.
5. Spiderweb Corner Accent with Washi + Clear Tape Seal
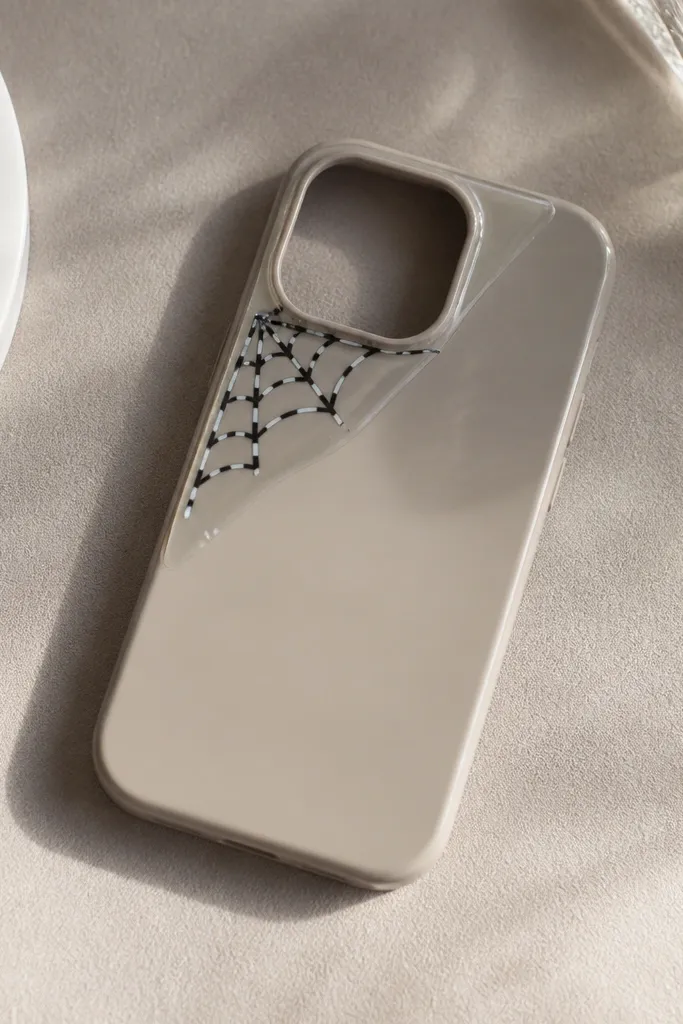
This is the “subtle fan” option that still reads Spiderman. Corner accents look clean because they don’t fight for attention with your camera lenses or brand logo. Use washi tape for the web lines because it’s easy to reposition and remove, which fits renters perfectly. I’ve done this on beige, gray, and even light green cases and it looks intentional because the corner stays small and crisp. The web pattern also looks good with matte finishes since the tape texture adds a little character.
Start by cleaning your case with alcohol so the tape sticks without lifting. Tear small strips of black washi tape and lay them in a radial web pattern from the corner point, then add white strips as cross lines. Build the web in layers — two or three thin lines per segment looks better than one thick strip. Seal the edges with a thin strip of clear tape or clear glossy packing tape cut to size so the corners don’t peel in pockets.
Use a craft knife to trim tape edges along the phone case edge for a razor-clean corner.
Don’t seal the whole case with tape — it turns shiny and cheap-looking fast.
6. Venom-Style Marble Red Panel with Removable Vinyl Skin
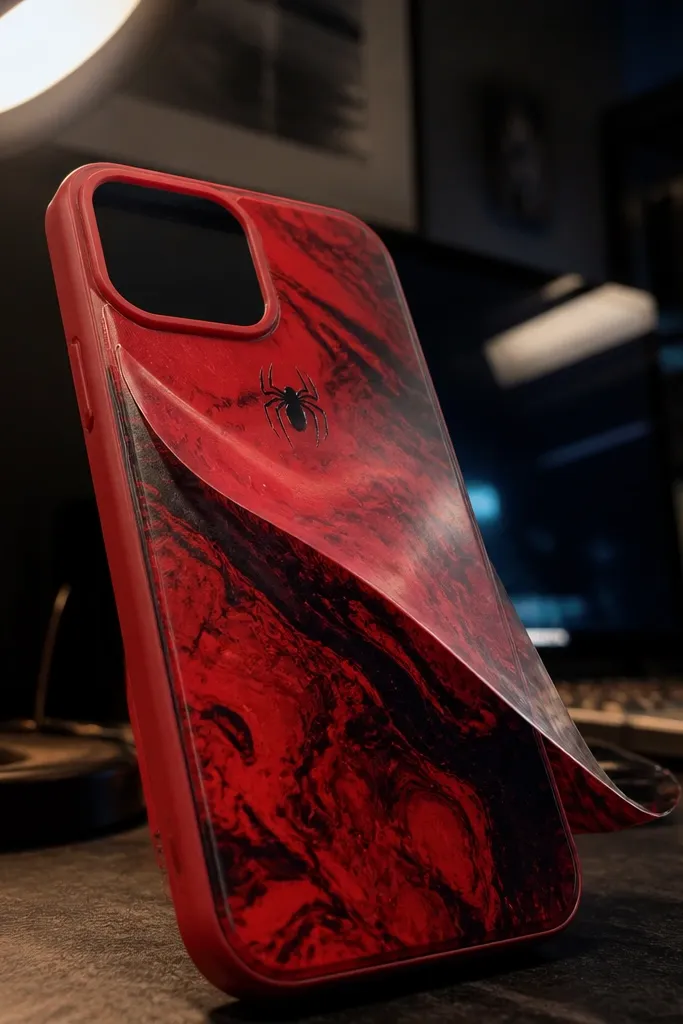
If you like the darker Spiderman vibe, this marble red skin does it without needing hand painting. You’re using a removable vinyl skin that already has the marbling look, then adding a small spider icon for the character tie-in. It looks best on black or deep red cases because the marble blends into the base and doesn’t look like a sticker collage. It flatters anyone who wants a “cool” look that still has one clear Spiderman detail. The finish looks like a custom store case once you apply a clear top layer.
Measure your case back and cut a vinyl skin panel with 1-2 mm edge clearance. Peel and apply the vinyl slowly, smoothing with a plastic squeegee as you go to avoid bubbles. Add a black spider icon vinyl just above the center line, leaving space around it so it doesn’t look cramped. Seal everything with a clear adhesive laminate sheet cut to the same shape, pressing down at edges and around the camera cutout.
Warm the vinyl with a hair dryer for 10-20 seconds so it conforms to slight curves.
Don’t trap dust — one speck under vinyl shows as a gray bubble later.
7. Fabric Comic Patch Panel with Snap-On Removable Frame
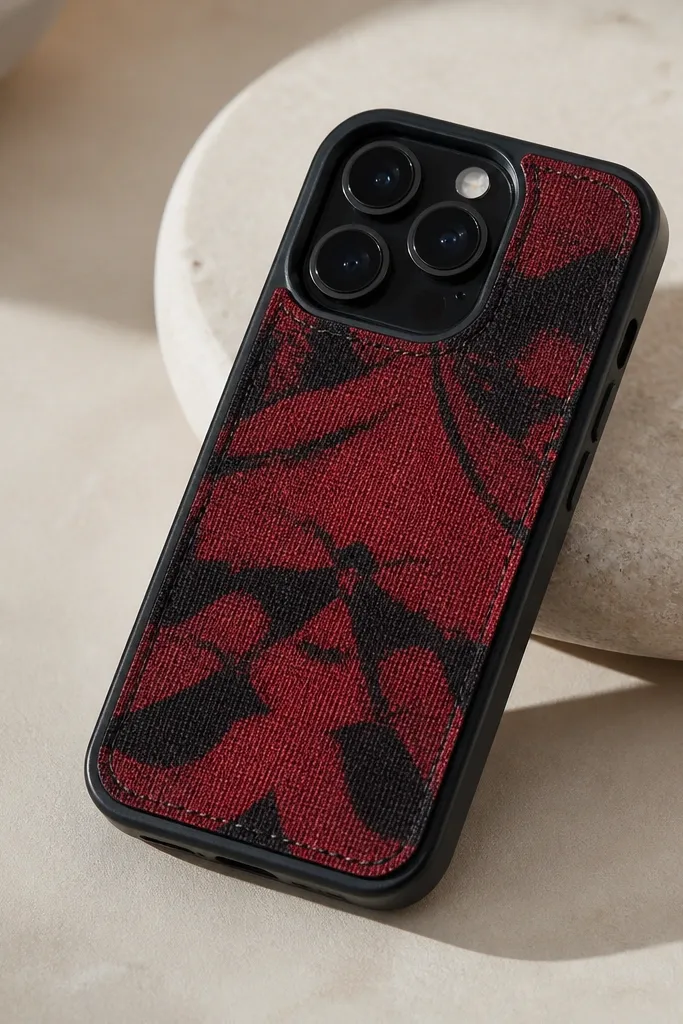
Start by cutting a patch panel from printed fabric, then iron or press it to a thin fusible stabilizer so it holds shape. Add a border effect using fabric paint or a heat-transfer “stitch” line vinyl around the edges. Make a removable snap-on frame from thin plastic sheet by cutting an inner window that fits the patch size and snapping it onto your case edges (use small spring snaps or pre-made snap fasteners). Place the patch inside the frame and test removal several times before final assembly.
This one feels like a real jacket patch. You use printed fabric (or fabric-look vinyl) and back it with a thin stabilizer so it stays flat, then you mount it in a removable snap frame. The tactile texture makes the Spiderman details look more “fan merch” than sticker art. It looks great on matte cases because the fabric texture matches that non-gloss vibe. I’ve used it for events and it still looks good after a long day because the fabric doesn’t show micro-scratches like vinyl does.
AvoidDon’t skip stabilizer — floppy fabric wrinkles and lifts at the corners.
Pro tipSeal the fabric edges with a thin layer of fabric glue to stop fraying where pockets rub.
8. Spiderman Eye Lens Overlay with Removable Dots
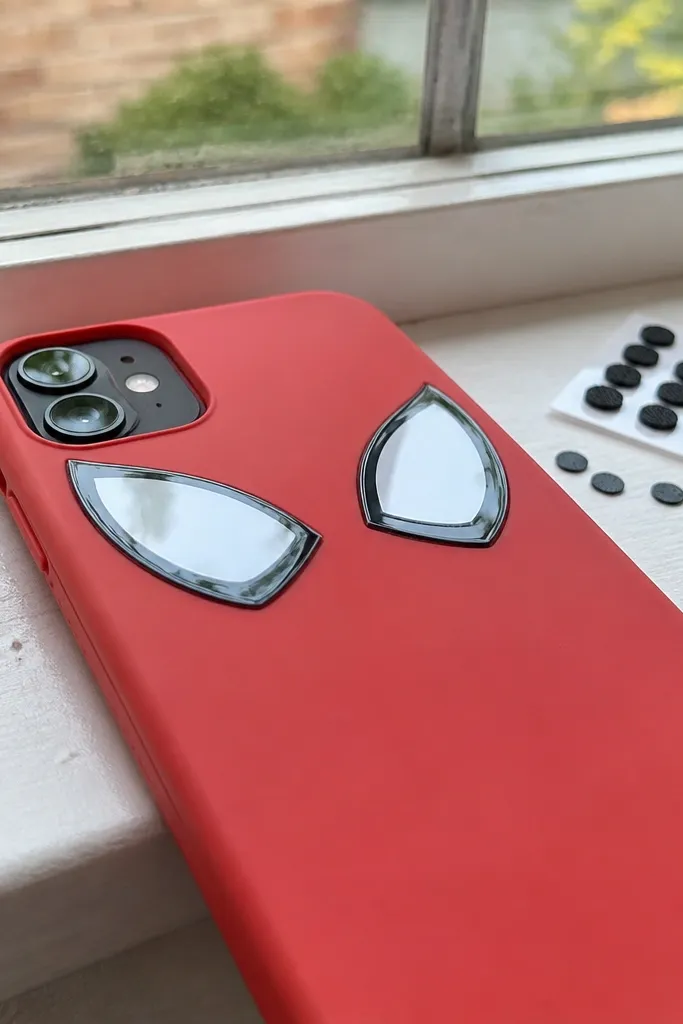
Cut two eye shapes from white adhesive vinyl, then add thin black web lines inside the eyes using a fine vinyl cutter or pre-cut web strip vinyl. Place the eyes near the top center, leaving enough room around the camera cutout so it doesn’t overlap. Cover the eye area with a clear flexible laminate sheet shaped into an oval “lens” for each eye. Attach the lens layer using removable adhesive dots at the corners so you can peel it off without pulling your base art.
This design is playful and instantly recognizable. The eye-lens look works because you build it in layers: white eye shapes, then a clear “lens” layer that adds shine. It flatters almost everyone because it’s near the top of the phone where you see it in selfies and mirrors. I like using it on plain black or red cases because the eyes become the main character. It also stays clean because the eye area is small and you can replace it if it gets scuffed.
AvoidDon’t place the eyes too low — they crowd the camera and look messy.
Pro tipUse removable dots rated for smooth surfaces so you don’t leave residue.
9. Resin-Look Web Drip Effect Using Clear Gel + Vinyl Stencils
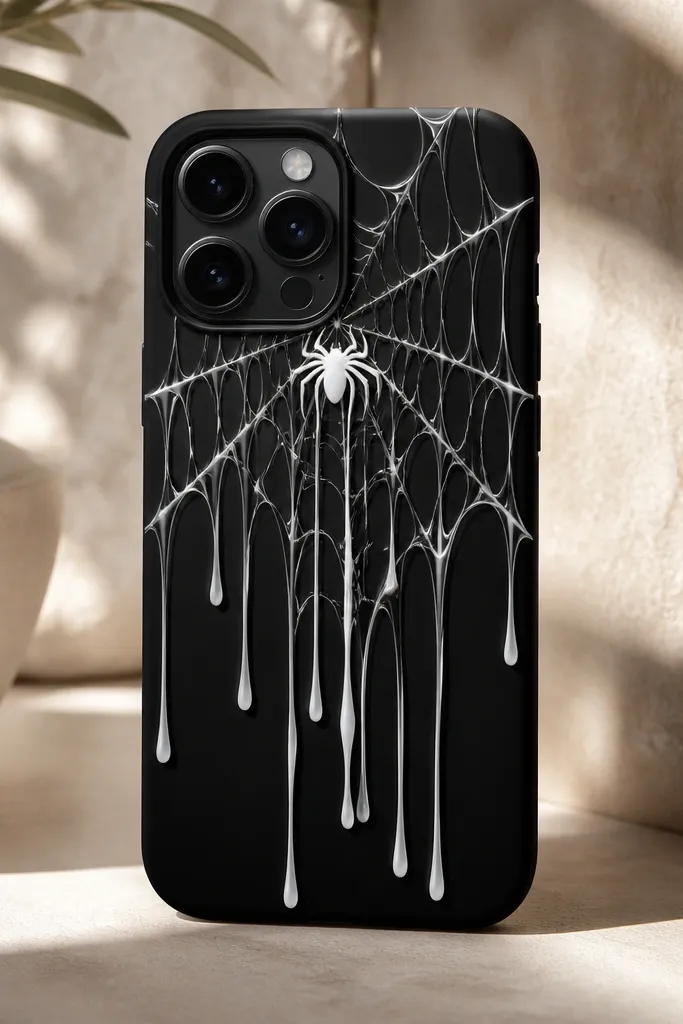
This is the “looks expensive” effect without real resin. You use clear craft gel and vinyl stencils to create glossy drips that catch light. The reason it works is the stencil keeps the edges sharp, and the clear gel gives the thick, candy-like shine. It looks best on matte black or deep navy cases because the white drips pop and the gloss reads like wet web. It flatters people who like a dramatic look but still want a clean layout.
Start by applying a small spider emblem vinyl where you want the drip origin. Cut drip shapes from removable vinyl stencil material and place them over the emblem area, pressing down so gel doesn’t seep. Spread clear craft gel over the stencil with a plastic spreader, building 1-2 mm thickness. Let it cure per product instructions, then peel off the stencil to reveal crisp glossy drips. If you want full removability, seal the whole drip area with a clear removable laminate sheet over the cured gel.
If your gel is too runny, do two thinner layers instead of one thick coat.
Don’t skip stencil pressing — gel will creep and blur the web lines.
10. Spiderman Sticker Mosaic with Removable Spray Seal
Start with a clean case and lay out your sticker placement dry first — I keep the heaviest sticker near the center and smaller ones around it. Press each sticker down firmly, especially around corners, then fill gaps with smaller web icons. Once everything is placed, spray a clear removable seal coat in thin passes from 8-10 inches away, letting it dry between coats. After the final coat cures, test removal of one sticker edge with a fingernail; if it resists, you can still lift the whole sealed layer by starting at the edge.
This is for fans who love lots of little details: tiny web icons, miniature spider faces, and comic text bubbles. A mosaic looks good because your phone back becomes a gallery wall, not one big design block. I’ve done this with store-bought Spiderman sticker sheets and it looks surprisingly cohesive once you seal it. It flatters bold outfits because the case gives you a burst of color without needing matching accessories. It also fits renters because you can use removable sticker adhesive and a seal that you can recoat.
AvoidDon’t overload with thick spray — it turns the surface sticky and attracts pocket lint.
Pro tipUse a lint-free cloth to wipe between coats so dust doesn’t lock in under the seal.
11. Webline Side Strips with Removable Adhesive Film
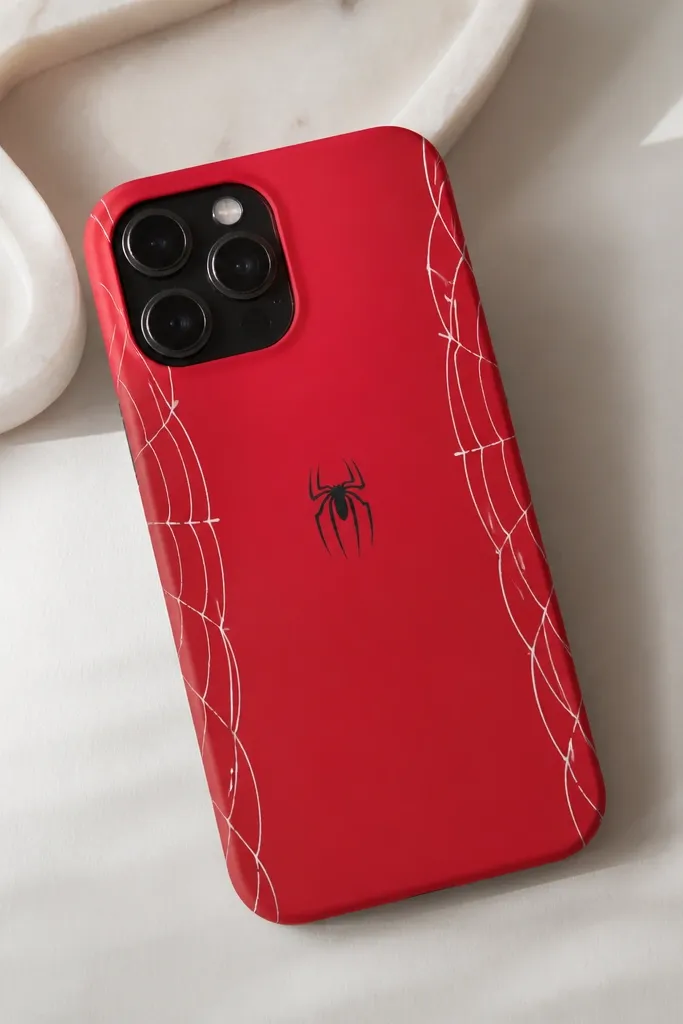
Measure the side panels and cut two webline strips from white adhesive vinyl or pre-cut webline vinyl. Clean the case, then apply the strips on both sides so the top ends align near the power button side. Add a small spider silhouette on the back near the center, sized about 1 inch wide for most phones. Cover only the back spider area with a clear removable laminate so it doesn’t smear, leaving the side strips unsealed if you want easy removal.
Vertical side strips make the phone look longer and sleeker, which I love for smaller phones. You keep the back mostly clean and let the web lines frame the device. The trick is using a removable adhesive film so the strips don’t permanently glue and you can swap them later. This looks best on solid-color cases because the side strips become the pattern. It flatters any outfit because it’s a graphic accent, not a full-face print.
AvoidDon’t place strips too close to the lip — they peel first from pocket friction.
Pro tipUse painter’s tape as alignment guides — it makes the strips straight on curved edges.
12. Glow-in-the-Dark Web Overlay with Removable Corners
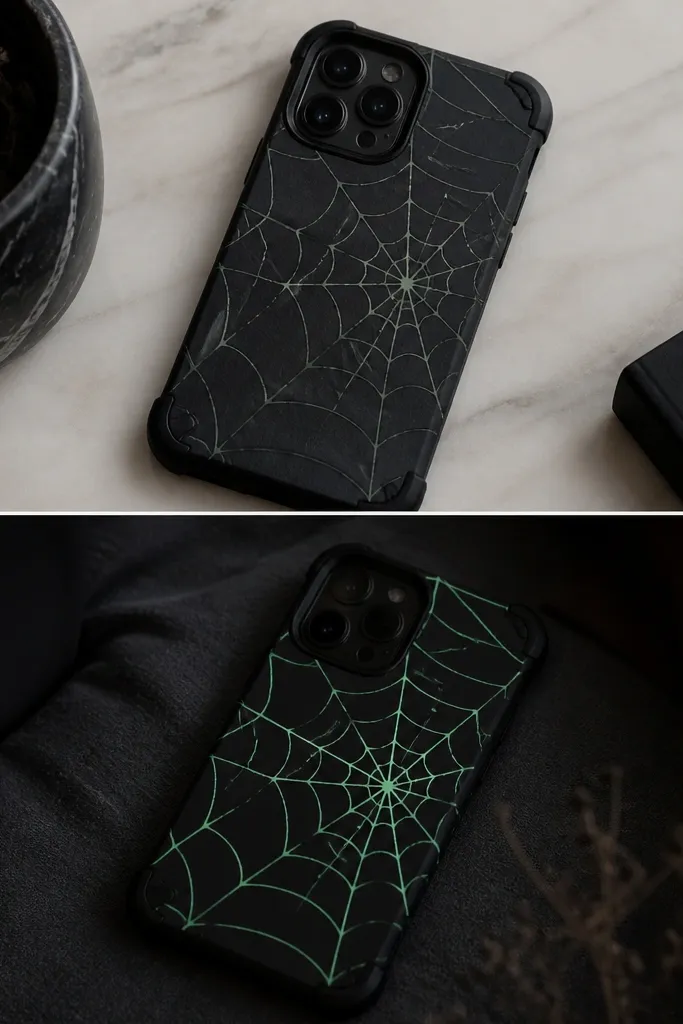
This one is fun at night and still looks good in daylight. Glow web looks best when the base is dark — black or charcoal — because the glow shows as soft neon lines. You’re using glow vinyl or glow heat-transfer film for the web pattern and mounting it with removable corner tabs so renters can remove it. It flatters people who like subtle accessories during the day and a surprise effect at night. The glow also hides tiny wrinkles better than regular vinyl because the surface reads as “light texture.”
Start by cleaning and dry-fitting your web layout on the case back. Cut glow web lines from glow vinyl or use glow heat-transfer film and apply it to a thin clear adhesive carrier sheet. Press the web onto the case back, then add removable adhesive corner tabs at two opposite corners to hold the overlay in place without permanent bonding. Finally, cover the web with a clear flexible laminate sheet to protect the glow lines from scratches.
Charge the glow web under a bright lamp for 10-15 minutes before judging the effect.
Don’t use glow on a light-colored case — the pattern looks dull fast.
13. Spider-Man Logo Frame with Removable Edge Clip
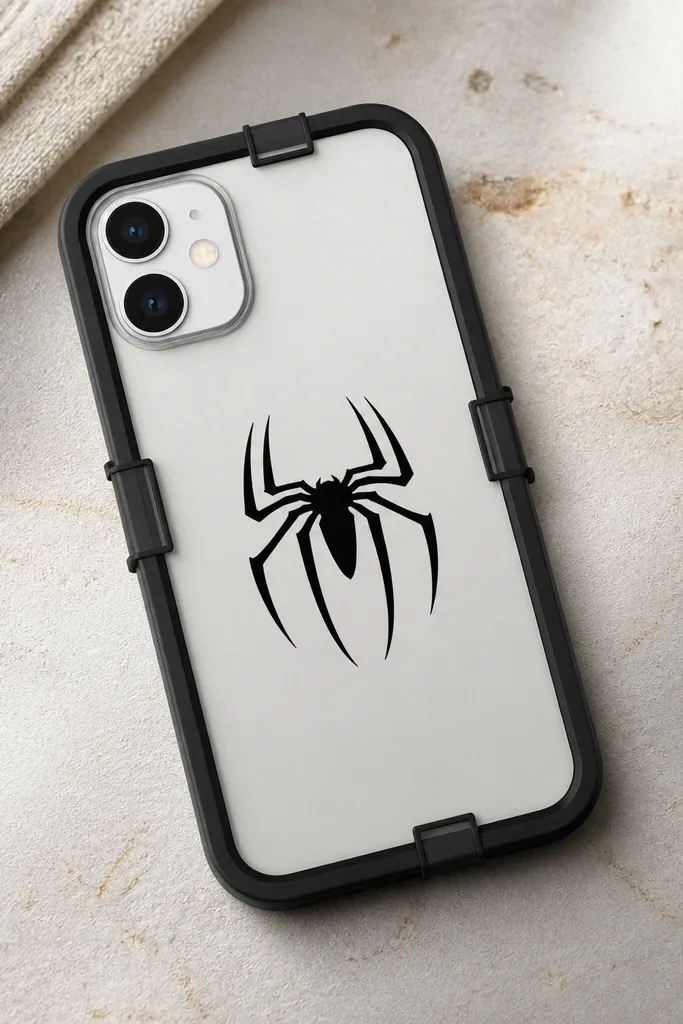
Cut a central logo panel from vinyl or printed vinyl and place it on the case back with a 2-3 mm margin from where the frame will sit. Build a frame from thin black vinyl strips or a thin plastic strip cut to a rectangle, then apply it around the logo so the corners are crisp. Add a removable edge clip system using small spring clips or a snap ring that grips the case sides without drilling. Test the fit by removing and replacing the frame three times before you seal anything with clear laminate.
Frames make everything look more intentional, even if your phone case is plain. This design uses a central Spiderman logo panel, then a thin frame that sits around it like a picture border. I like it because it keeps your artwork away from the most scraped areas — pockets hit edges first. The frame also gives you a clean “gallery” look that works for both casual and office outfits. It flatters slender cases and smaller phones because the logo area stays centered and readable.
AvoidDon’t make the frame too thick — bulky edges catch lint and peel.
Pro tipIf your case has a textured grip, use a plastic frame material that matches the texture so it doesn’t rock.
14. Mask-Pattern Pattern Overlay with Sticky-Back Fabric Felt
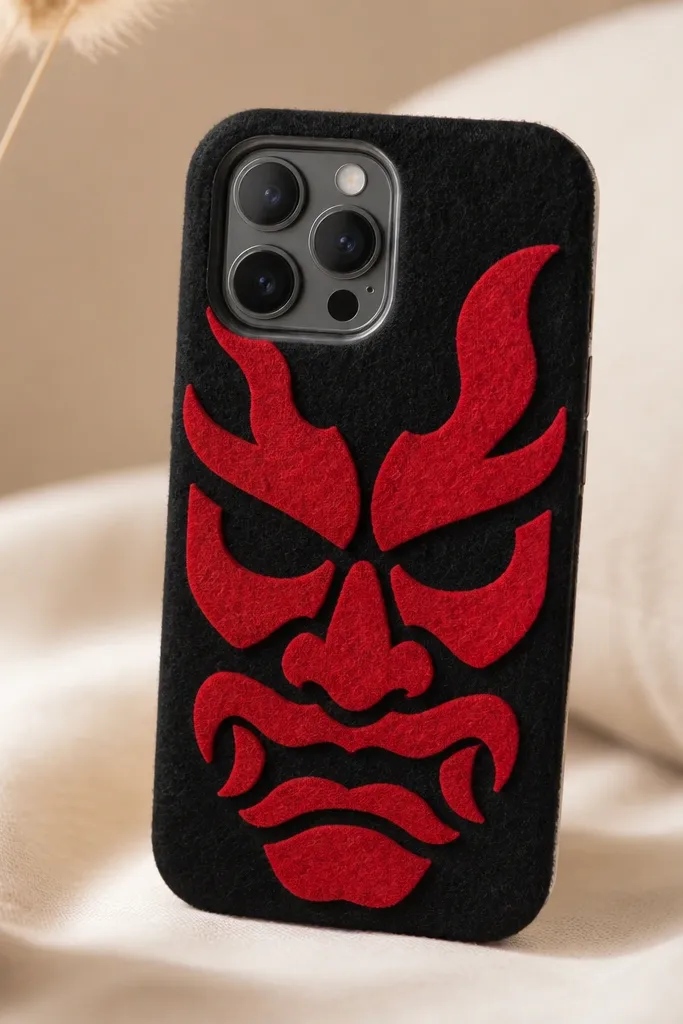
Felt makes the Spiderman pattern look like it belongs on a hoodie. It has a matte surface that hides fingerprints and gives your case a warmer look than glossy vinyl. I use sticky-back felt for the mask pattern because it’s forgiving on small curves and it’s easy to remove later without tearing up the base. This works best on dark cases where the red and black contrast feels like costume fabric. It flatters anyone who wants a cozy, fandom accessory that doesn’t scream “teen craft.”
Clean your case, then cut felt pieces into mask sections: two cheek panels, a forehead panel, and web stripe bands. Apply the felt starting with the bottom sections first so you can tuck edges neatly under the next layer. Use black felt or black adhesive vinyl for the web stripe lines and press them down firmly with a flat tool. Seal only the camera area and the outer edges with a thin clear flexible film so the felt doesn’t pick up pocket lint.
Trim felt edges with a fresh blade — dull blades fray the fibers and make the edges look messy.
Don’t cover the entire case in felt if you hate lint — it attracts it more than smooth materials.
15. Spiderman Web-Swoosh with Removable Side Tabs and Clear Back
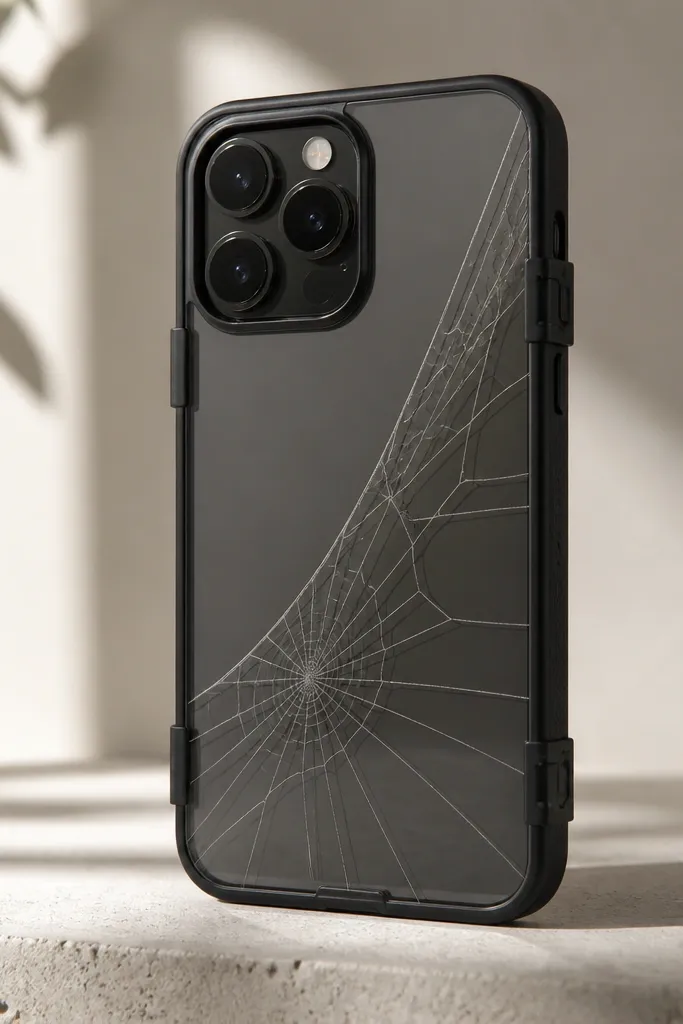
Diagonal swooshes look fast and energetic, like Spiderman is mid-swing. This design works because the diagonal lines pull your eye across the back, and the clear back protector keeps the colors looking saturated. I use a web-swoosh vinyl cutout and mount it under a clear removable protector film so it’s protected from scratches. It flatters most phone colors because the diagonal graphic anchors the look. If you take a lot of mirror selfies, the diagonal pattern shows up nicely without crowding the camera.
Start by cleaning your case and then cut or order a diagonal web-swoosh vinyl panel sized to leave 1-2 mm from all edges. Apply the vinyl to the back, smoothing from the center outward to avoid wrinkles. Place a clear removable back protector film over the vinyl, pressing edges down lightly. Add removable side tabs (small adhesive tabs) on the protector edges where your fingers can grab to lift the protector off later.
Use a ruler and mark two points on the case so the diagonal stays straight even on curved edges.
Don’t seal the vinyl too aggressively at the camera ring — removal gets harder and can tear the art.



