
1. Butterfly wing collage under clear resin
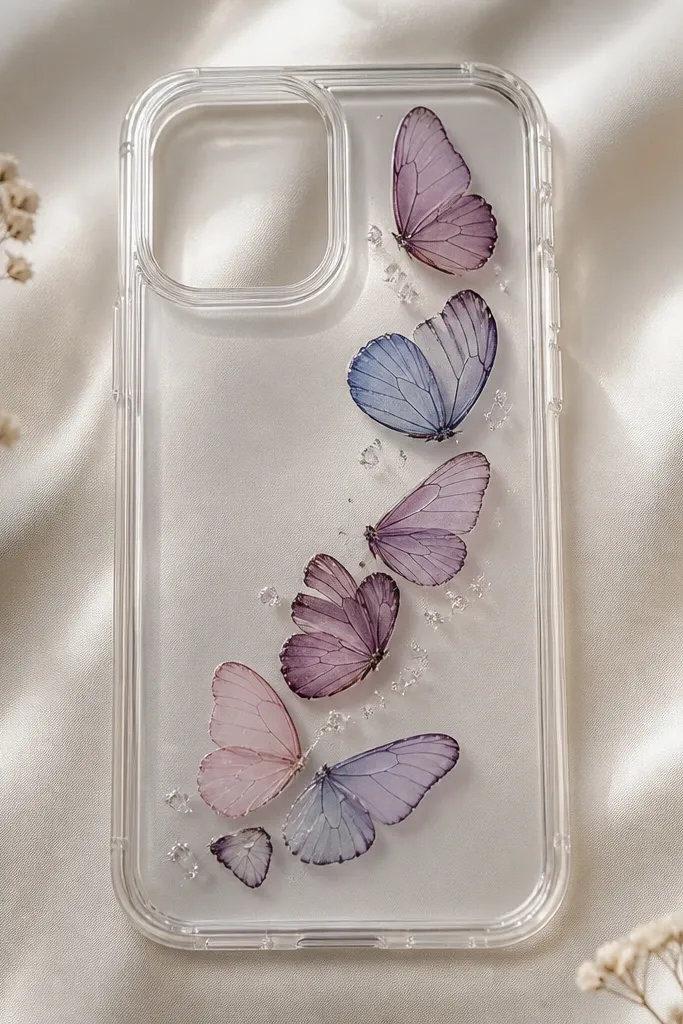
I make this when I want that “pressed specimen” look without the mess of real insects. I use thin butterfly wing paper or printables cut into irregular shapes, then I place them diagonally across the top third so the wings catch light when you tilt the phone. The glossy resin makes the colors pop — especially blues, lilacs, and warm golds — and it looks great on light to medium skin tones because the case reflects soft highlights rather than harsh glare. This style flatters small phones because the diagonal placement keeps the center from feeling crowded.
Pro tipIf you see tiny trapped bubbles, pop them with a toothpick right after pouring and keep the case level while curing.
Start with a clear TPU blank case and test-fit it on your phone so the camera cutout lines up. Cut butterfly wing pieces so they don’t touch the edges, leaving a 1-2 mm gap around the border. Apply a thin layer of clear Mod Podge or clear craft glue only where each piece sits, then press gently and let it dry 20-30 minutes. Mix resin and pour in a thin first layer, just enough to lock the collage down, then let it cure before adding a second layer for the final dome.
AvoidAvoid using thick scrapbook paper — it creates a lumpy top that makes the resin look uneven.
2. Hot pink chrome heart with vinyl outline
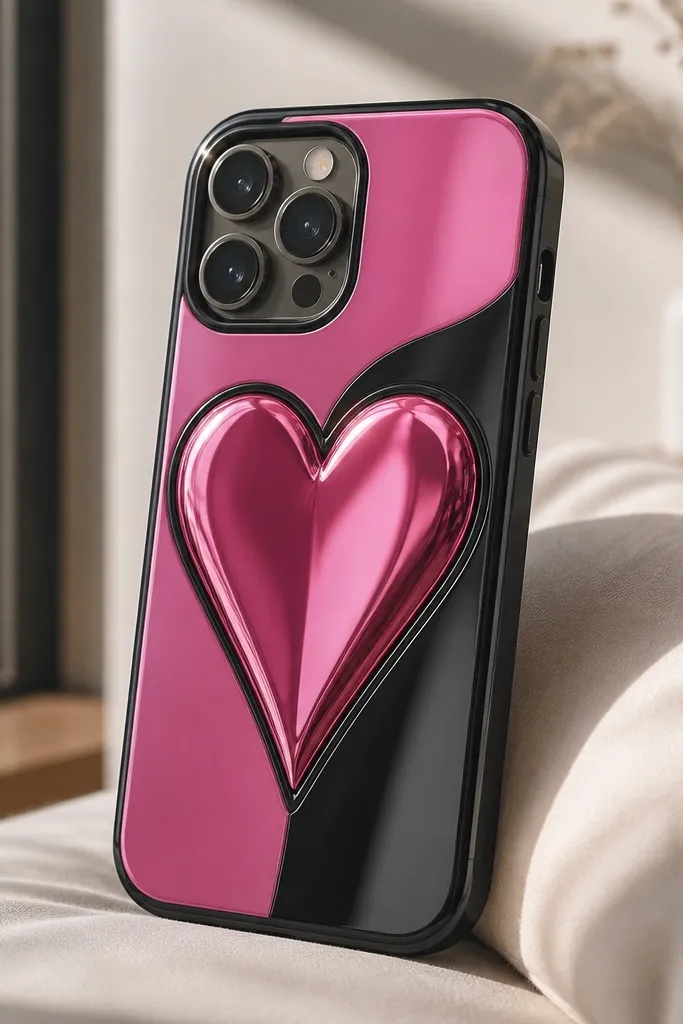
This is my go-to for a bold, girly look that still reads clean. I use chrome hot pink vinyl for the heart and a contrasting black vinyl outline so the edges look crisp even when the phone is in motion. It looks especially good if you wear black, white, or denim a lot because the heart gives strong contrast. If your phone has a larger camera bump, centering the heart slightly above camera level keeps the design from getting visually swallowed.
Pro tipChoose chrome vinyl that says it’s for decals or craft use, not cheap craft glitter vinyl that scratches easily.
Start by wiping the blank case with rubbing alcohol so vinyl sticks. Cut a heart shape in chrome hot pink vinyl, then cut a second heart in black vinyl that is 1-2 mm larger for the outline. Apply the black outline first, then layer the chrome heart on top using transfer tape. Seal with a thin clear gloss topcoat made for vinyl — two light coats, not one heavy one, so it doesn’t wrinkle the edges.
AvoidSkip thick glue under vinyl — it lifts corners and makes the heart look warped.
3. Pearl ombre with faux pearl dots
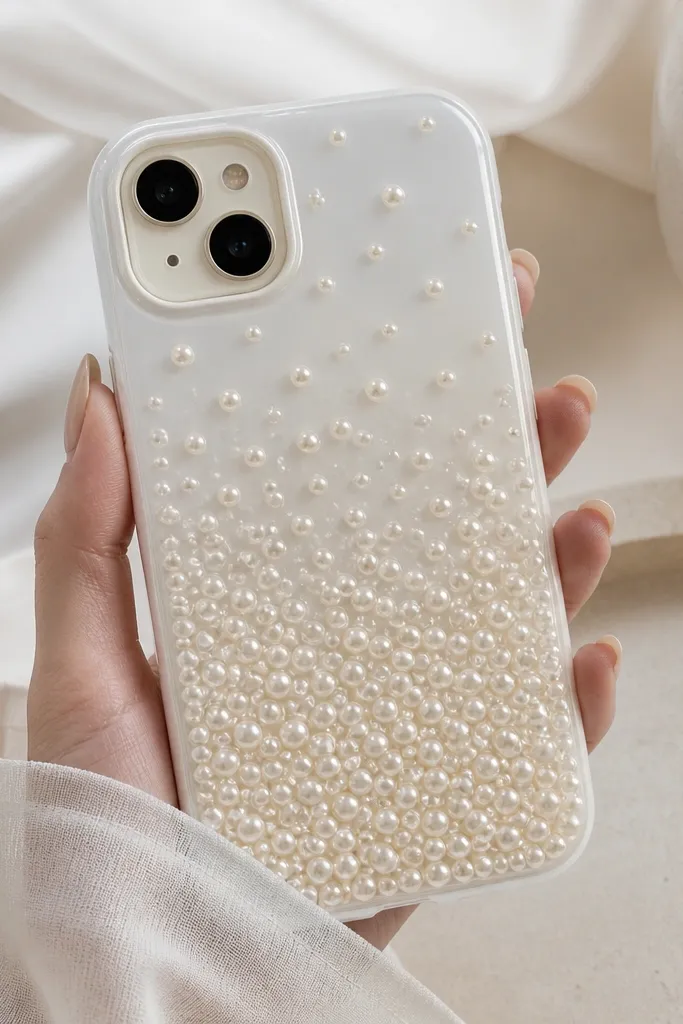
This one makes the phone look like it belongs in a jewelry store window. I build it with an ombre base using white and pale blush acrylic or alcohol ink, then I place faux pearl dots in a loose cluster pattern that gets denser toward the bottom. The finish is soft and flattering on warm undertones because the blush tones reflect skin-like warmth. It also photographs well because the pearls catch highlights without the harsh rainbow glare of glitter.
Pro tipUse a small dotting tool (or the back of a bobby pin) to keep pearl spacing even.
Start by painting a gradient on the blank case using white as the top and pale blush toward the bottom; blend with a makeup sponge so it stays smooth. Let it dry completely, then lightly map where the pearl clusters will sit. Glue faux pearls with a quick-dry clear glue — I do small dots, then press each pearl for 10 seconds. Finish with a satin clear topcoat around the pearls so they stay sealed and don’t snag on fabric.
AvoidDon’t stack pearls too high — the case will snag and the resin/topcoat will crack around raised edges.
4. Pastel marble with dry-brush clouds
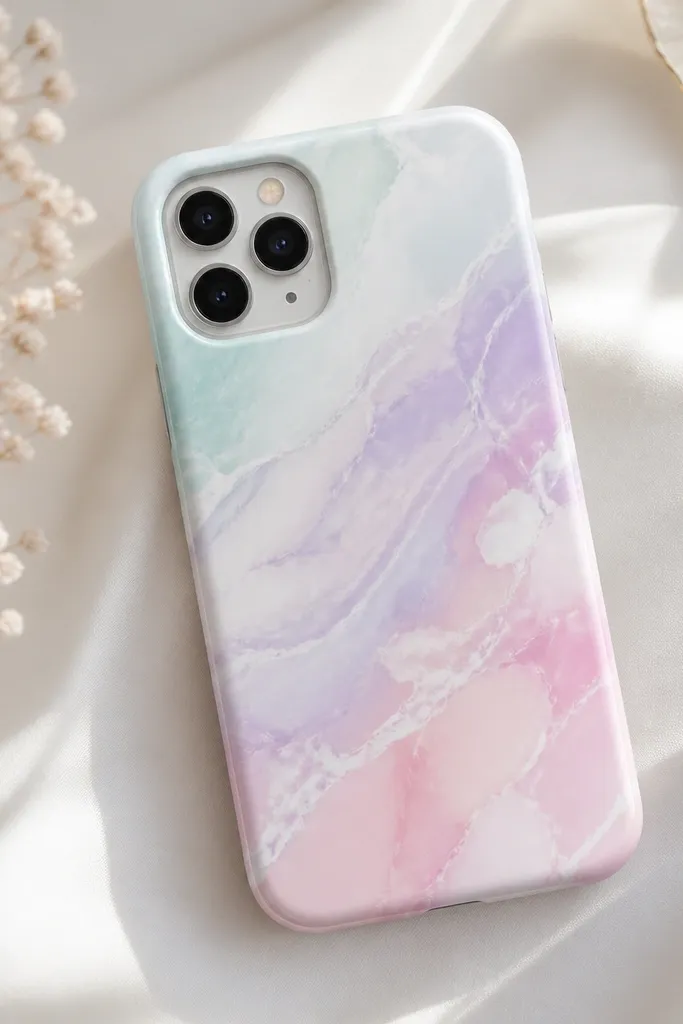
Marble always looks expensive when it’s soft, not streaky. I use alcohol inks or thinned acrylic for mint, lavender, and baby pink, then I add white “cloud” strokes with a dry-brush technique. The result is gentle and dreamy, and it pairs well with silver jewelry and cool-toned outfits. If you have acne-prone skin or you hate harsh reflections, this matte-leaning marble style is easier on the eyes than high-gloss chrome.
Pro tipPractice on scrap first — marble looks best when it’s slightly imperfect.
Start by putting down a base coat of clear or pale white paint on the blank case. Drop alcohol ink colors onto a plastic palette with a few drops of rubbing alcohol, then swirl lightly and dab onto the case using a sponge — stop before it gets too muddy. Use a dry flat brush with white paint to flick tiny cloud streaks over the top. Seal with clear gloss resin or a gloss topcoat in two thin layers so the marble doesn’t dull.
AvoidAvoid overmixing the inks — the colors turn gray fast.
5. Galaxy glitter fade with black base
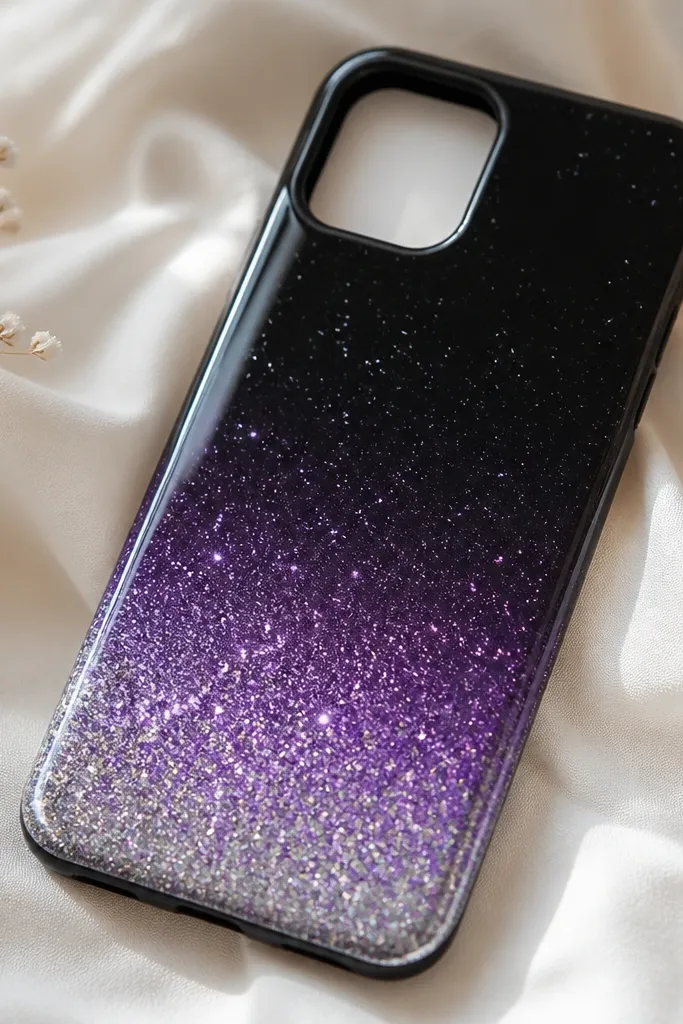
This is the case I made for a night-out week and it still gets compliments. I start with a black base, then blend purple acrylic or ink and press in fine silver and micro purple glitter from mid-case down. The fade makes it feel intentional instead of “random glitter everywhere.” It flatters darker outfits and also looks great with gold rings because the glitter reflects warm highlights.
Start by painting the blank case black and letting it dry fully. Mix a small amount of purple ink with a tiny bit of alcohol or water to make it translucent, then sponge it from the middle down. Add fine glitter by tapping gently with a makeup brush, then shake off excess. Seal with clear resin in one smooth pour or two topcoat coats so the glitter locks in and doesn’t shed.
Use fine glitter labeled for resin or art — chunky glitter feels rough in hand.
Don’t skip sealing — loose glitter will transfer to your pockets in days.
6. Lace + ribbon bow topcoat texture
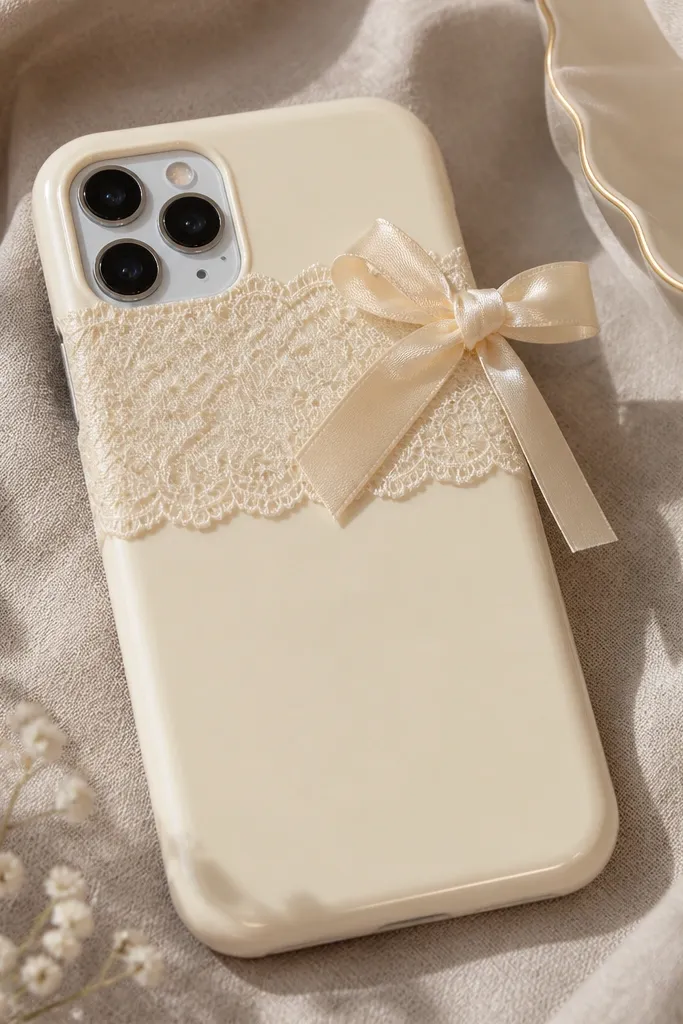
If you want “fancy but not loud,” lace is the answer. I use a small lace strip across the top edge and add a satin ribbon bow to one side so it looks like a gift tag. The cream base and white lace look clean on almost every skin tone, and the texture makes the case feel expensive in photos. It’s especially flattering on phones with slim profiles because the bow detail stays crisp without looking bulky.
Start with a cream or nude blank case, then cut lace so it sits flat without wrinkles. Brush a thin layer of Mod Podge on the case, lay lace down, then seal over it with more Mod Podge. Let it dry, then attach a pre-tied satin bow with a tiny drop of clear glue at the knot. Finish with a clear glossy topcoat so the lace edges don’t fray and the bow stays locked.
Trim lace with sharp scissors and press with a flat tool so the pattern edges sit flush.
Avoid big lace areas — they create bumps and make the case hard to grip.
7. Photo strip + faux film border
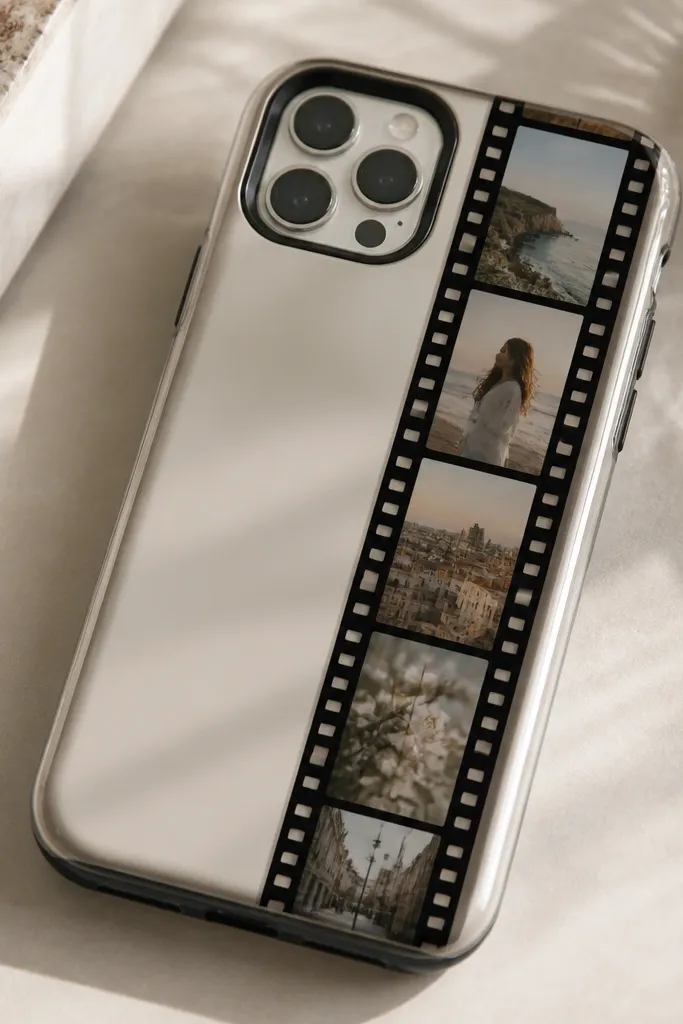
This is the most personal case I’ve made because it looks like you carried a camera roll in your pocket. I print 4-6 tiny photos in black and white or warm sepia, then I frame them with a faux film strip border. The contrast reads clean and graphic, so it’s flattering even if your photos have different lighting. It also holds up well for daily use because the design sits behind a sealed topcoat instead of on raw paper.
Pro tipUse matte photo paper for better color control, then seal glossy on top for a “real photo” feel.
Start by choosing a clear blank case and measure the back area so your photo strip fits the top half. Print photos slightly smaller than the frame, then cut them into rectangles with rounded corners if you want a softer look. Add a printed film border (or draw one with a fine black marker on paper) behind or around the photo strip. Seal with 2-3 thin layers of clear resin/topcoat, letting each layer cure so the surface stays smooth.
AvoidSkip thick photo prints — they make a ridge that catches lint.
8. Sage floral pressed-leaf look
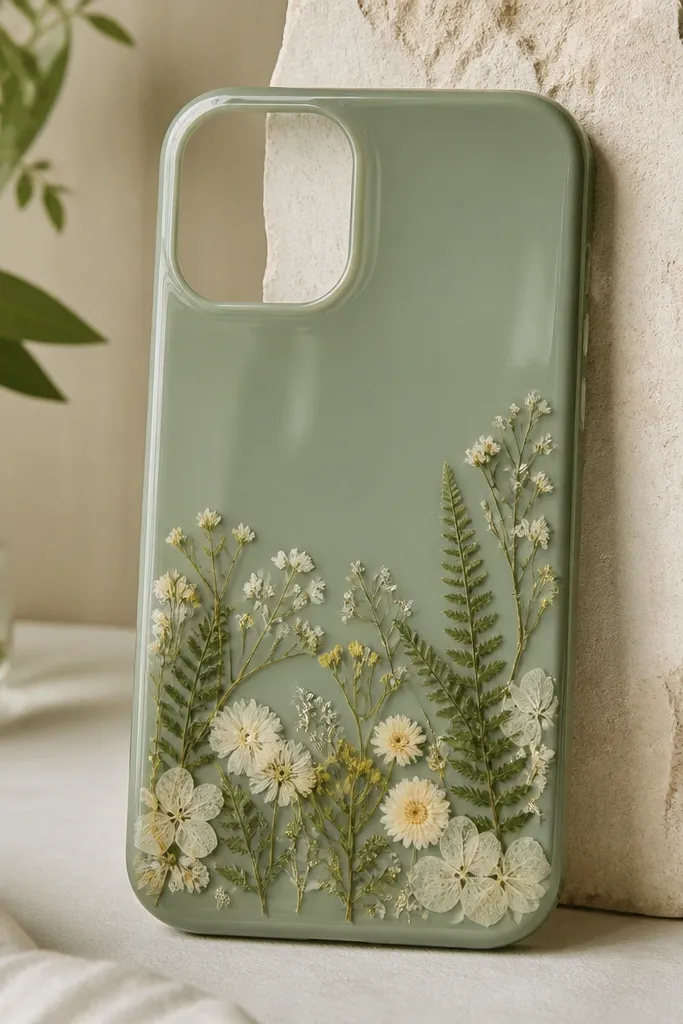
Pressed-leaf styles look calm and expensive when you keep the arrangement small. I use tiny pressed flowers and leaves on a sage background, then cover with clear resin so they look suspended. This tone flatters people who like neutral makeup and silver or rose-gold jewelry because it doesn’t fight warm colors. It also feels less “teen glitter” and more “soft aesthetic,” which is why I reach for it when I’m not in a bold mood.
Pro tipPress flowers longer than you think — 1-2 weeks gives flatter pieces and less bubbling under resin.
Start by painting the blank case sage green and letting it dry. Arrange pressed leaves and tiny flowers in the lower third, then lift them one by one and glue each piece down with clear craft glue. Keep the pieces away from the case edges by about 2 mm. Pour a thin resin layer to lock everything, cure, then add a final layer until the surface is level with the case.
AvoidDon’t use wet plant material — it turns cloudy under resin.
9. Rainbow checkered with micro glitter grid
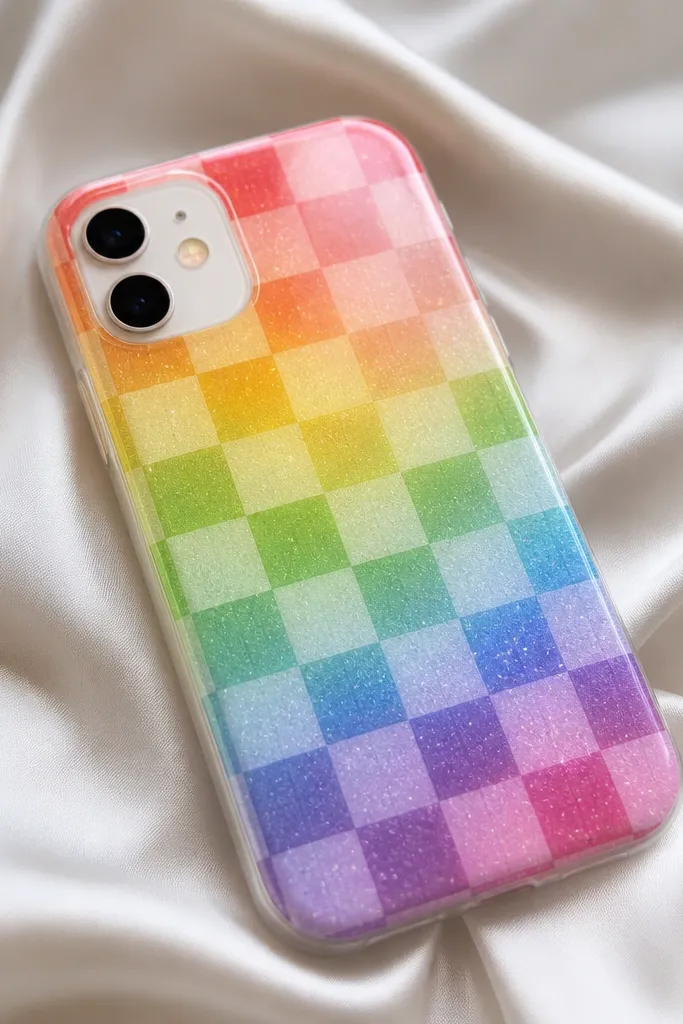
This is the one I make when I want a case that looks fun even from across the room. I build a checkered grid in bright rainbow acrylic or vinyl, then I add micro glitter only at the seams so it looks like light hitting the pattern. The spacing matters — tight squares look sharper and less chaotic. It flatters colorful outfits and also makes plain black tees look intentional.
Start by marking a grid on the case with a light pencil guide, then paint squares in a rainbow order you like. Let the paint dry fully, then go back and add a thin line of clear glue along each seam. Sprinkle micro glitter sparingly along those lines and tap off excess. Seal with a glossy topcoat or resin in thin layers so the glitter doesn’t clump.
Use a ruler and painter’s tape to keep square edges straight before you peel anything off.
Avoid big glitter chunks — they fill the seams and ruin the crisp grid.
10. Pearl chain wrap around the edge
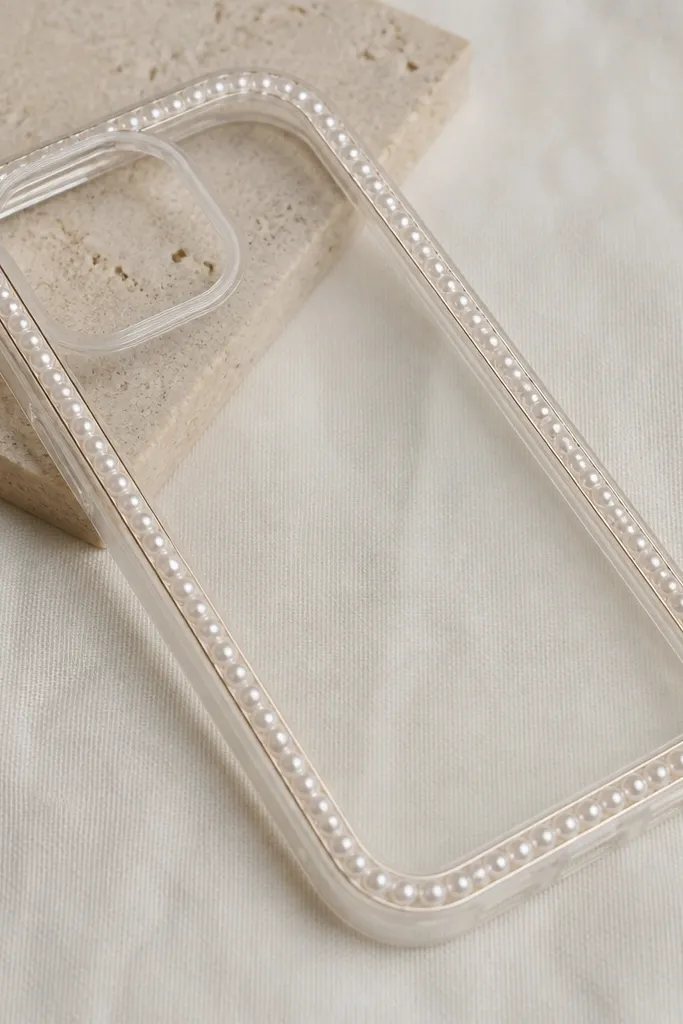
This looks like real jewelry even though it’s easy. I wrap a thin pearl chain along the case edges, leaving the back mostly clear or lightly tinted so it doesn’t feel busy. The effect is elegant and also practical because your grip gets a little texture from the pearls. It flatters warm undertones because the cream pearls reflect golden light, and it pairs well with gold rings and hoop earrings.
Start with a nude or clear blank case so the pearls look like they’re floating. Cut the pearl chain so it matches the perimeter length — test fit around the camera bump area first. Apply clear glue in small sections on the edge, then press the chain down while keeping tension even. After it dries, seal the chain with a thin topcoat so it doesn’t snag on fabric.
Use a toothpick to push glue into tiny gaps without getting it on the back surface.
Don’t glue the chain too close to button cutouts — it will interfere with clicks.
11. Minimal line art face with matte black
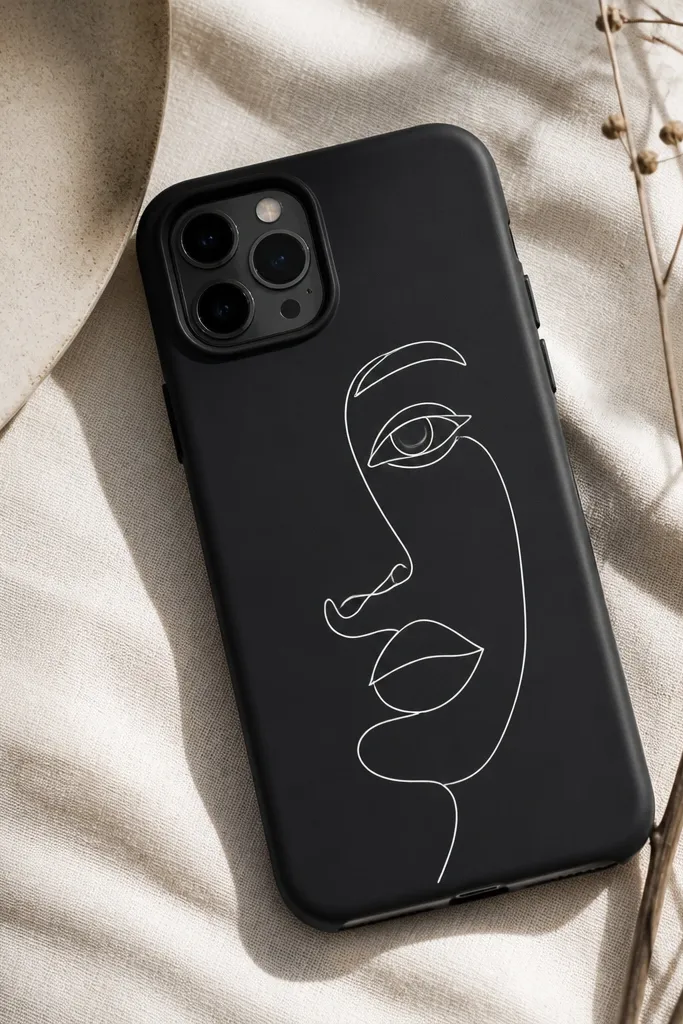
Minimal line art is my favorite “grown” look that still feels personal. I use matte black as the base, then draw or transfer thin white line art of a face, hairline, or profile. Matte hides fingerprints and smudges, which matters if you carry your phone in your hand a lot. This design flatters every outfit because it stays neutral, and it looks especially good with light hair colors because the contrast is clean in photos.
Start by sanding the blank case lightly so transfer vinyl or paint grabs better. Add a matte black base coat and let it dry fully. Transfer or draw your line art using a fine paint pen or white vinyl outline, then seal with a matte clear topcoat. Keep the topcoat thin — heavy coats can blur the line edges.
Use a paint pen with a fine tip (0.5 mm or smaller) for lines that stay sharp.
Skip glossy topcoat — it turns the matte design into a fingerprint magnet.
12. Mushroom cap dots with tiny red specks
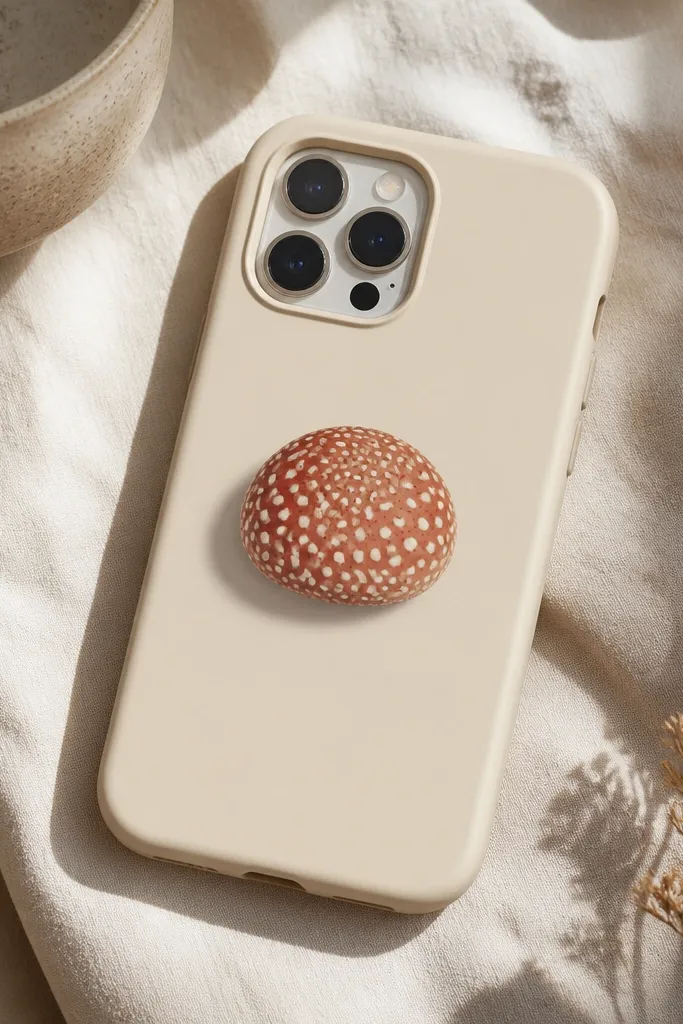
This is cute in a way that doesn’t scream “kid.” I paint a mushroom cap graphic with a creamy background, then add white speckles and tiny red freckles so it feels hand-drawn. The warm cream and red look great against darker bags and denim, and it’s flattering because the color sits on the phone back where it catches light naturally. It also works for gifting because it feels like a mini art piece, not a random sticker.
Pro tipFor uniform dots, dip a toothpick in paint and wipe the excess off on scrap paper first.
Start with a cream blank case and lightly sketch the mushroom cap shape using pencil. Paint the cap with a soft red or terracotta, then add white dots with a dotting tool. Add a tiny darker red shadow under the cap edge so it looks raised. Finish with a clear topcoat in two thin coats so the paint doesn’t scuff.
AvoidDon’t flood the dots — thick paint creates bumps you’ll feel in your pocket.
13. Transparent candy wrapper shaker (no loose glitter)
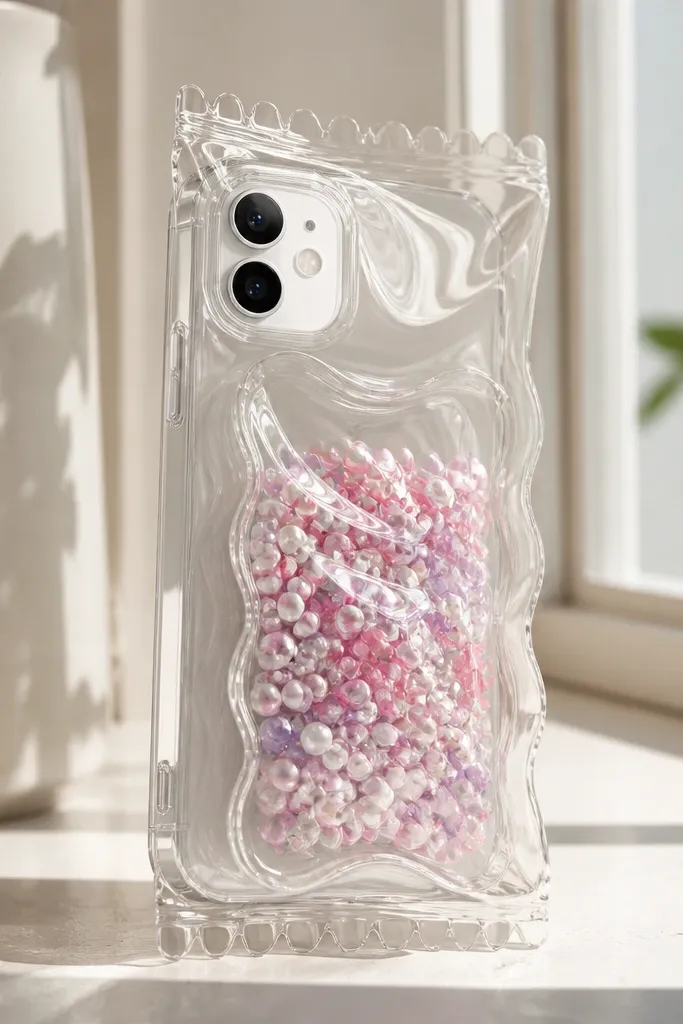
Shaker cases look fun, but most DIY ones turn into a glitter mess. I build mine like a “candy wrapper” with sealed micro beads or tiny sequins inside a window area, so nothing sheds. The wrapper colors are usually pastel — mint, pink, and butter yellow — and they look bright without being loud. This style is great for girls who want movement but don’t want glitter in their hands.
Start with a clear blank case and plan a window area on the back. Cut a backing insert from glossy cardstock or printed candy wrapper paper, then add a clear acetate window on top using strong craft tape or thin double-sided tape. Pour in micro beads or small sequins, then seal the window fully with more tape so nothing leaks. Finally, topcoat the outer surface with a clear gloss so it feels smooth.
Use micro beads meant for crafts — they move nicely and don’t scratch your screen area.
Avoid loose glitter in shakers — it escapes through seams over time.
14. Satin bow in the corner with pearl accents
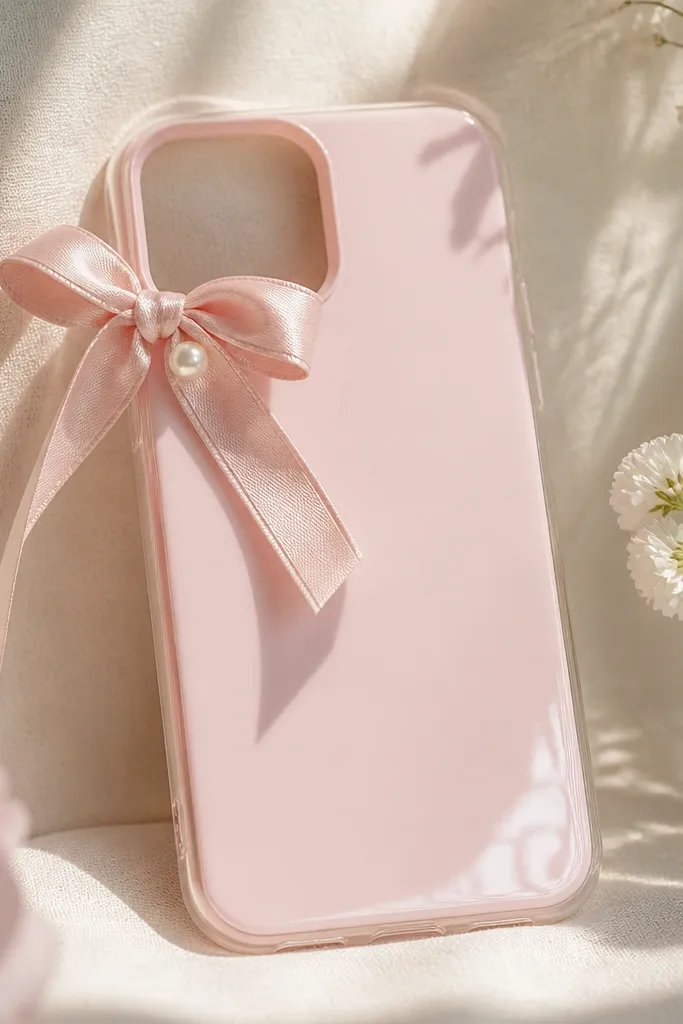
Corner bows look classy because they don’t cover the whole phone back. I use a pastel satin ribbon bow, attach it in the top corner, and add two tiny pearls near the knot for a jewelry-like finish. This flatters small phones because the design stays compact, and it looks great with soft makeup looks and light nail polish. The glossy topcoat makes the satin catch light so it feels “new” longer.
Pro tipSeal with a sponge brush, not a wide flat brush, so you don’t spread glue into ribbon fibers.
Start with a pastel base color like blush pink or powder lilac. Tie or buy a small satin bow and trim the tails to about 8-12 mm so it fits the corner without hitting camera space. Glue the bow knot first, then place two pearls with a tiny dot of clear glue. Seal carefully around the bow with clear topcoat, building in thin layers so the satin doesn’t soak and wrinkle.
AvoidSkip thick resin over satin — it can soak in and dull the ribbon.
15. Neon doodle stickerbomb with safety clear coat
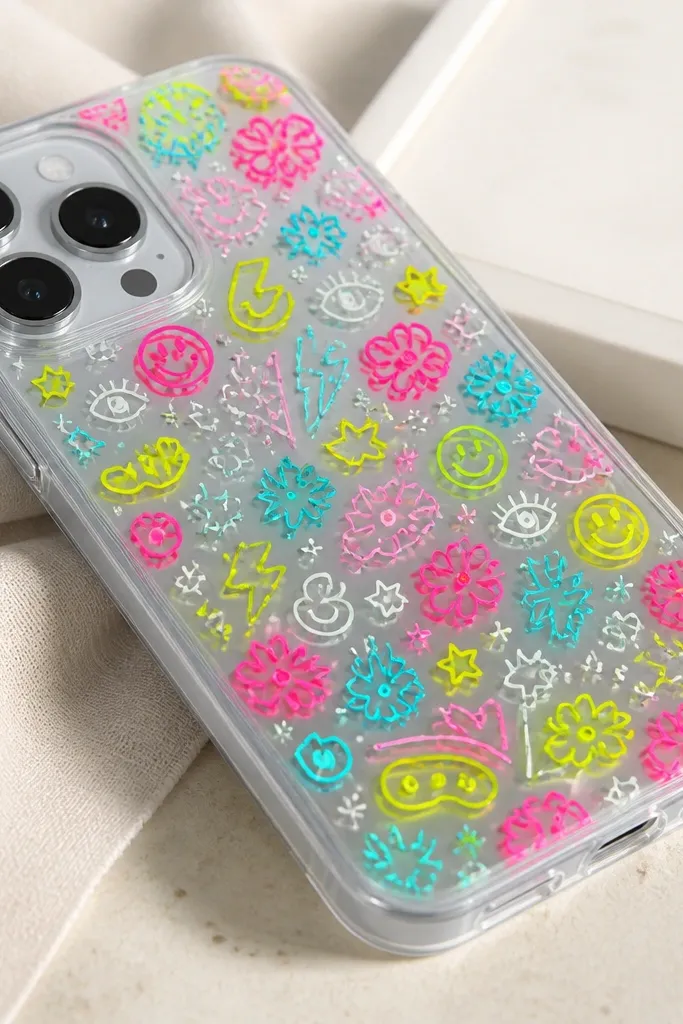
Stickerbomb looks cool, but it only looks good when the surface is smooth. I use neon doodle stickers in lime, cyan, and hot pink, then I press them down tight and seal with a clear coat made for crafts. The neon pops against a clear base, and it looks extra good with black outfits because the colors glow by contrast. It also works for different phone sizes since you’re not locked into a single centered design.
Pro tipLeave the camera cutout area completely sticker-free so your photos stay clean.
Start with a clear TPU blank case. Place stickers first without glue, then pull them up one by one and add a tiny amount of clear glue under each sticker edge. Press flat and let it set for 15 minutes. Seal with clear topcoat in two thin layers, checking for bubbles by tilting the case and popping them with a toothpick right after application.
AvoidAvoid thick stickers — they create ridges that lift and peel at the edges.
16. Soft floral watercolor wash with gold flecks
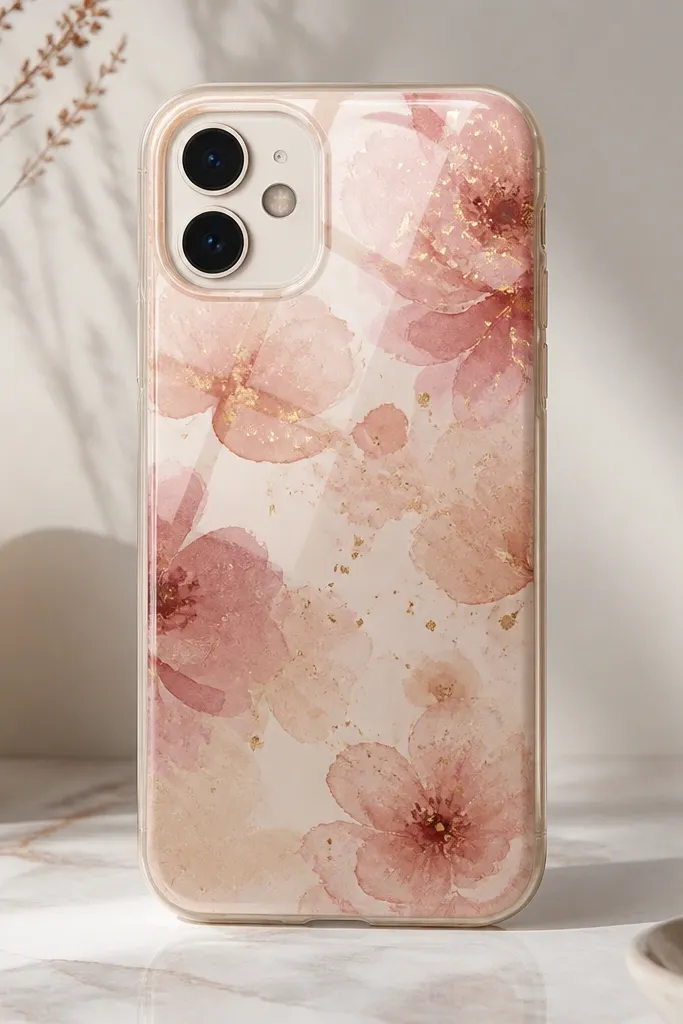
Watercolor florals look best when they’re loose and slightly see-through. I use diluted watercolor paint or alcohol ink to create a soft wash of rose and peach flowers, then add a few gold flecks for sparkle that feels grown. This style flatters fair to medium skin because it has gentle warmth rather than harsh neon. It also looks good with both casual outfits and dressy ones since the palette stays subtle.
Start with a clear or nude blank case so the watercolor looks translucent. Paint loosely with diluted rose and peach, add a few green stems, then let it dry. Dip a tiny brush in gold paint and flick once or twice from a distance to avoid clumps. Seal with a gloss topcoat in two thin layers so the wash doesn’t smear and the gold flecks stay put.
Use fewer gold flecks than you think — the sparse look is what makes it feel intentional.
Don’t use heavy white paint for flowers — it turns chalky under clear coat.
17. Corduroy texture effect with paint and sand
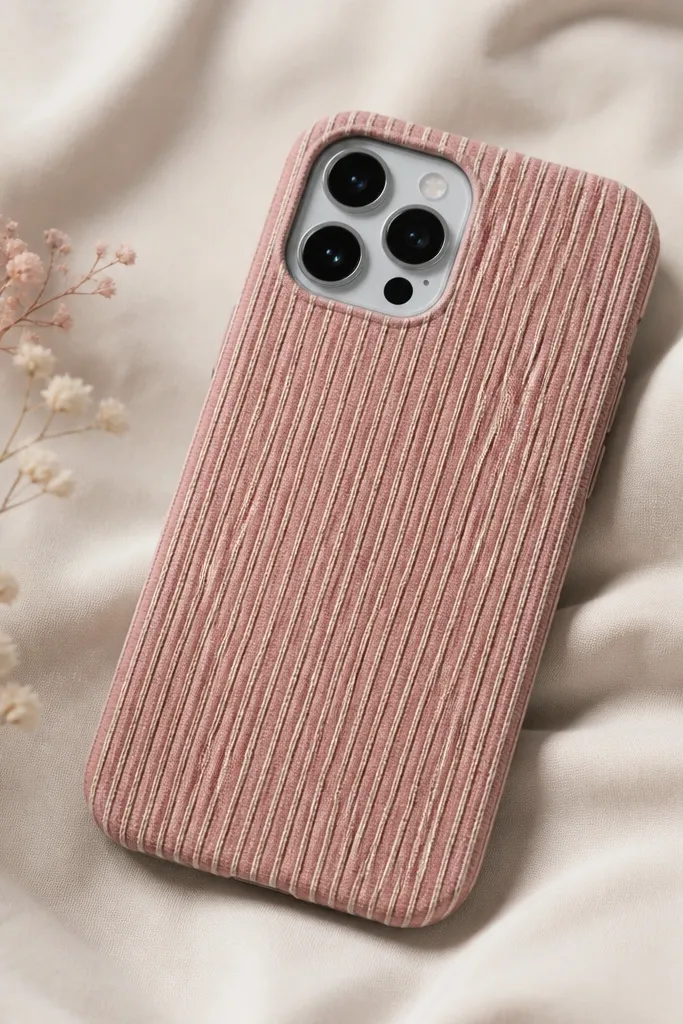
Texture changes how a case feels every time you pick up your phone. I create a faux corduroy effect by painting small horizontal lines and then lightly sanding to soften the peaks, so it feels like fabric. I like dusty rose or oatmeal tones because they look cozy and hide scratches better than bright colors. This is a great choice if you hate slippery cases and want something that grips your hand.
Pro tipDo one test strip on scrap first so you know how much sanding to use.
Start by painting the case a base color like oatmeal. Use painter’s tape as a guide to create parallel horizontal lines with a slightly darker shade, spacing about 1-2 mm apart. Let paint dry, then lightly sand the raised line edges with fine-grit sandpaper so the texture becomes soft instead of sharp. Finish with a matte clear coat so the surface feels velvety.
AvoidAvoid glossy topcoat — it makes the texture feel sticky and looks shiny in a cheap way.
18. Cream tortoise shell with tiny gold dots
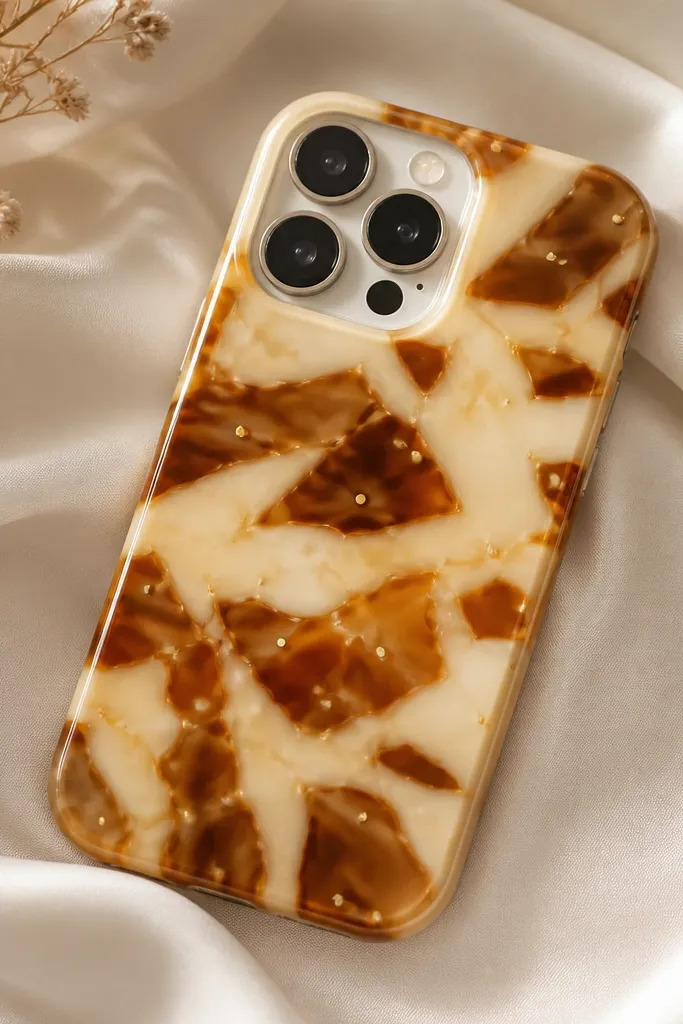
Tortoise shell looks fancy without needing a big character graphic. I build it with a cream base, irregular brown shapes, and a warm amber glaze so it reads like real shell under light. Then I add tiny gold dots sparingly to mimic jewelry highlights. This style flatters people who like neutral outfits and warm metals, and it looks great in car sunlight because the swirls catch warm reflections.
Start with a cream base coat. Paint irregular “shell” shapes in light brown, then add deeper brown around the edges of those shapes for depth. Mix a small amount of amber glaze or diluted golden acrylic and lightly wash over everything. Seal with gloss topcoat or resin in thin layers so the pattern stays smooth and doesn’t chip.
Use a sponge for the brown shapes so the edges look organic, not like cut paper.
Skip perfect symmetry — real tortoise shell never looks evenly spaced.
19. Cherry blossom window with layered petals
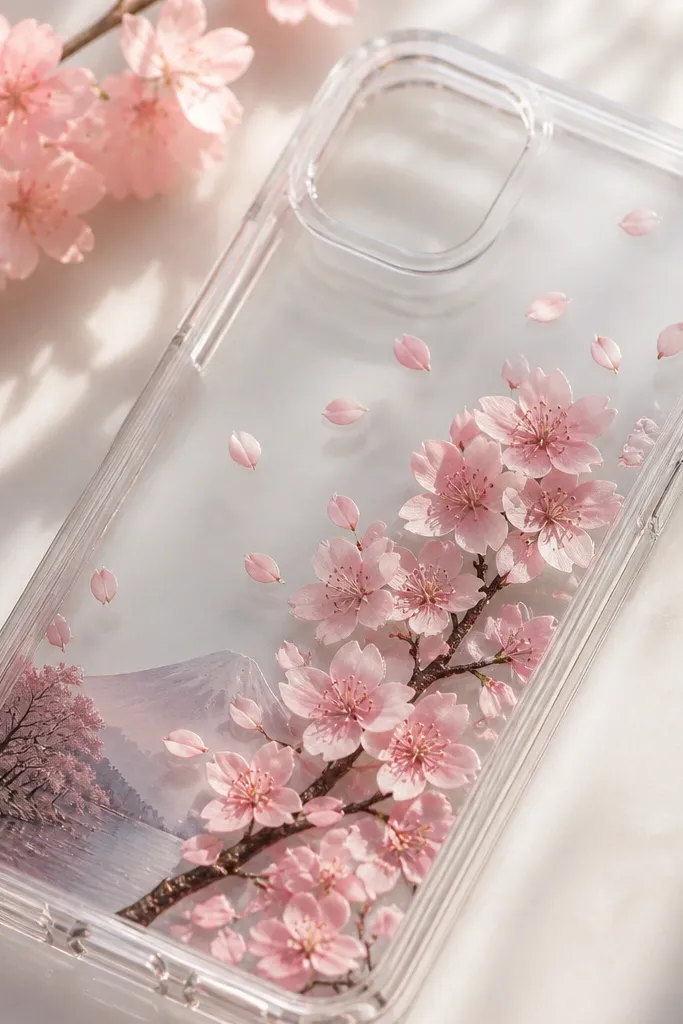
This case feels like a mini diorama. I create a small cherry blossom cluster with layered petal shapes cut from pink paper or vinyl, then I seal it under a clear resin dome so it looks like it’s floating under glass. It flatters soft pink nail polish and silver jewelry because the palette stays gentle. It also photographs well because the dome makes light hit the petals from multiple angles.
Pro tipCut petals with a craft knife on a cutting mat so edges stay clean under resin.
Start with a clear blank case and draw a small circle guide where the blossom will sit. Cut 6-10 petal layers in different shades of pink and slightly different sizes. Glue the smallest petals on top of the larger ones, then place the whole cluster on the case at the top third. Pour a thin resin layer to lock the petals, cure, then pour another layer to form a smooth dome.
AvoidAvoid using paper that soaks glue — it warps and changes petal shape.
20. Monogram sticker with glossy gel pen accents
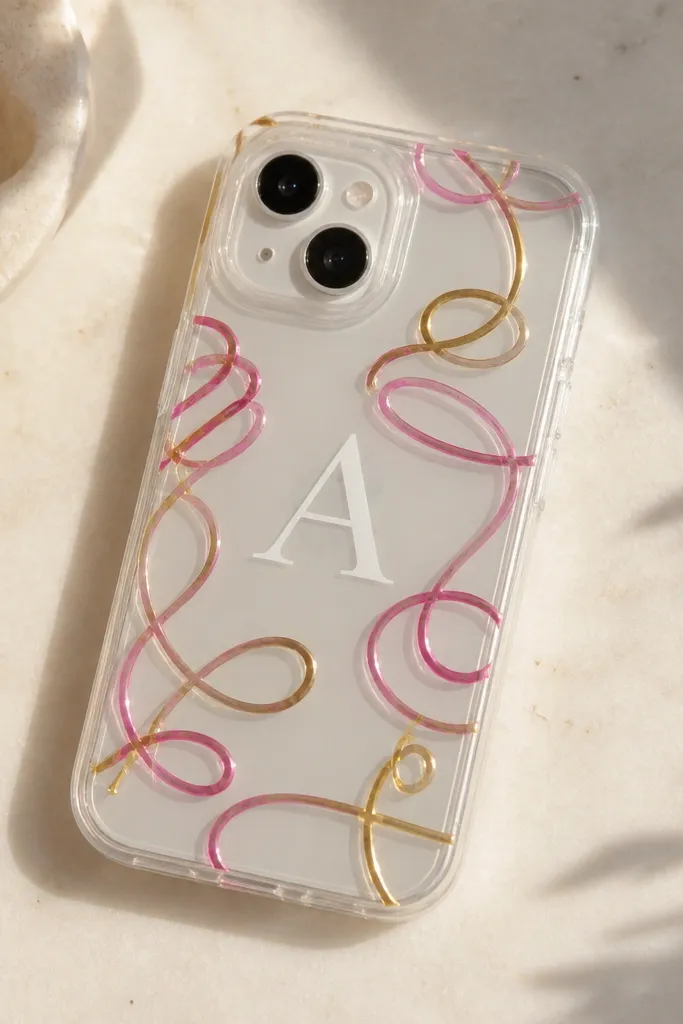
If you want “cute but clean,” monograms win. I use white vinyl for the letters and then add small glossy gel pen accents around it — tiny stars, dots, and curved swirls. The gel pen gives that shiny highlight look without needing resin domes everywhere. It flatters almost any skin tone because the design is simple and high-contrast, and it looks great with both casual and dressy outfits.
Pro tipLet gel pen ink dry fully before topcoat so it doesn’t smear under clear coat.
Start with a clear blank case and wipe it with alcohol. Apply white vinyl monogram letters using transfer tape, then press edges firmly. Use gold and pink gel pens to draw small accents around the letters, keeping them away from the camera area. Seal with a thin gloss topcoat only over the drawn accents so vinyl stays smooth and the pen stays protected.
AvoidDon’t flood the monogram with topcoat — thick clear can cause vinyl edges to lift.



