
1. Custom Pocket Charm Keychain with Matching Thread
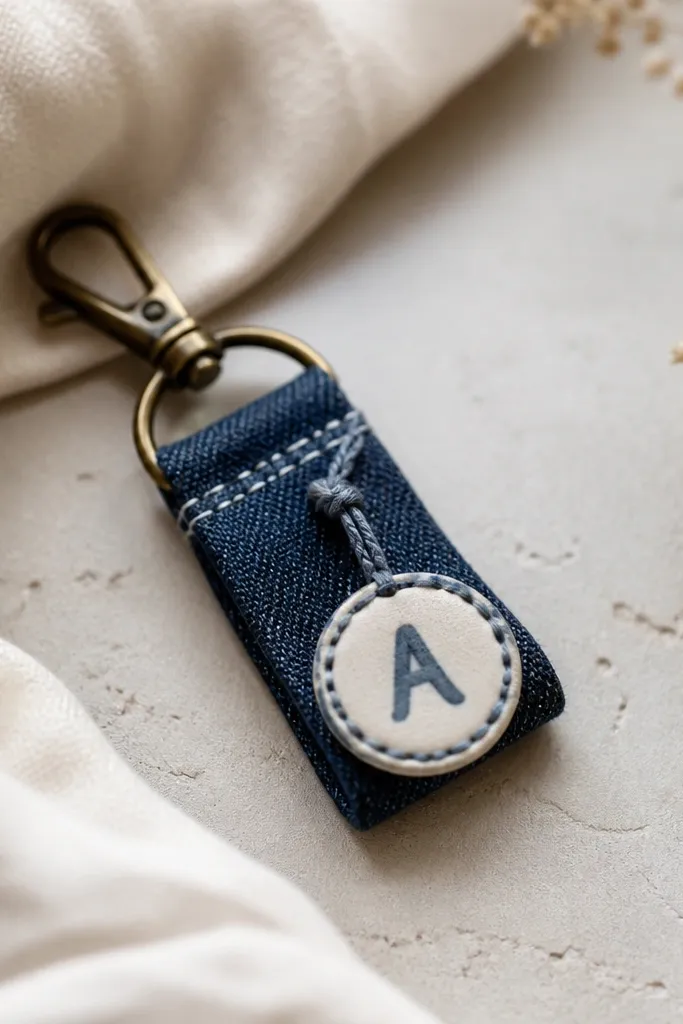
This one works because it looks like it belongs to her, not like it came from a craft table. I make the body from medium-wash denim or heavy cotton canvas and keep the charm small enough to sit flat in her pocket. The color rule is simple: thread matches the nearest color she already wears — if she’s always in navy and cream, use off-white thread on denim. It’s flattering for most skin tones because it’s neutral, and the tiny painted initial gives a personal hit without looking loud. She also gets a practical upgrade since the charm makes her keys easier to grab without hunting.
Cut a rectangle 3.5 x 5 inches from denim or canvas. Fold it in half so the short edges meet, press the fold, then stitch a straight line along the bottom edge about 1/4 inch from the edge. Turn it right-side out, then add a top loop by stitching through both layers where you want the clasp to sit. Paint or decoupage a small 1-inch disc with her initial, seal it with clear acrylic, and attach it to the keyring with a jump ring. Finally, add one decorative stitch line around the charm area so the whole piece reads as “one design,” not separate parts.
Before painting the initial, scuff the disc lightly with fine sandpaper so the paint grips and doesn’t chip at the edges.
Avoid using fuzzy fabric edges or thin thread that frays — it makes the keychain look homemade in a bad way.
2. Everyday Scrunchie Set in Two Fabrics and One Color Theme
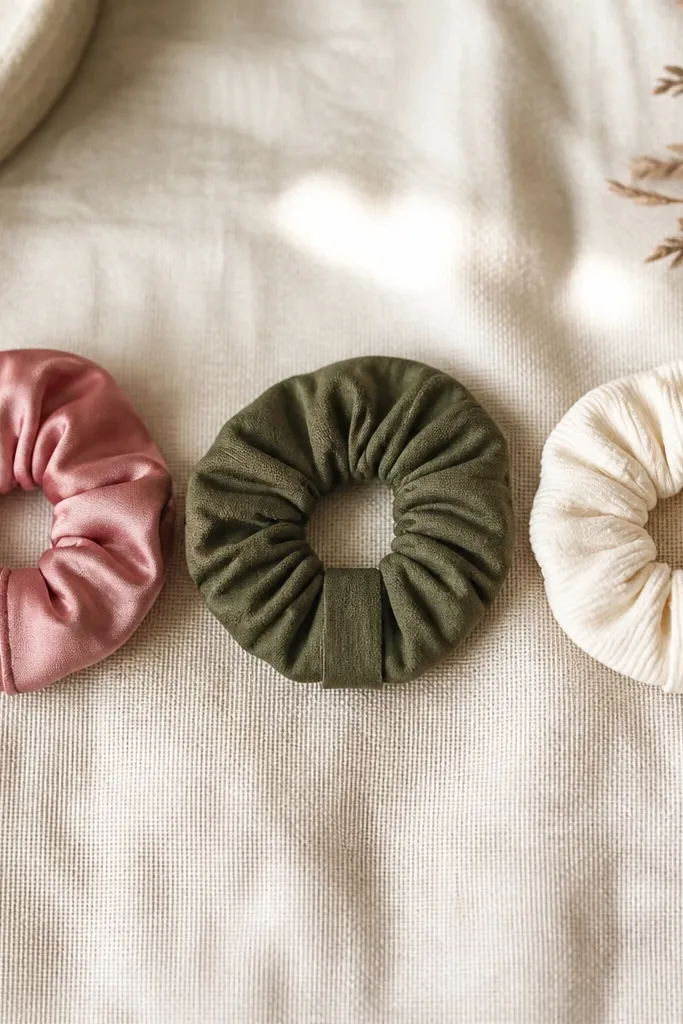
These are my go-to handmade gift ideas for best friend all year because scrunchies get used immediately and they match different outfits. The trick is to mix two textures but keep the same color family so it looks intentional. I pair one smooth fabric (satin or silky poly) for nights out and one cotton or rib knit for everyday wear. Add a cream or off-white scrunchie as a “reset” color — it looks clean against almost any top. If she has fine hair, I use slightly wider fabric so it doesn’t feel too tight; if she has thick hair, use a sturdier cotton knit and keep the seam flat.
Pick three fabrics in one color family: for example olive cotton, dusty rose satin, and off-white rib knit. Cut strips 18 inches long and 3 inches wide, then fold each strip lengthwise with right sides together and sew a 1/4 inch seam. Turn each piece right-side out, then gather one end with a basting stitch and slide in a no-snag elastic hair tie. Stitch the gathered end closed, then lightly press the seam so it sits flatter. Finish by adding a single decorative stitch around the gathered area using thread that matches the dominant fabric.
Wash and dry the fabric first so the scrunchie doesn’t shrink and warp after you gift it.
Avoid stretchy fabric that ripples when sewn — it makes the scrunchie look lumpy and cheap.
3. Painted Travel Mug Sleeve with Her Favorite Quote in Tiny Letters
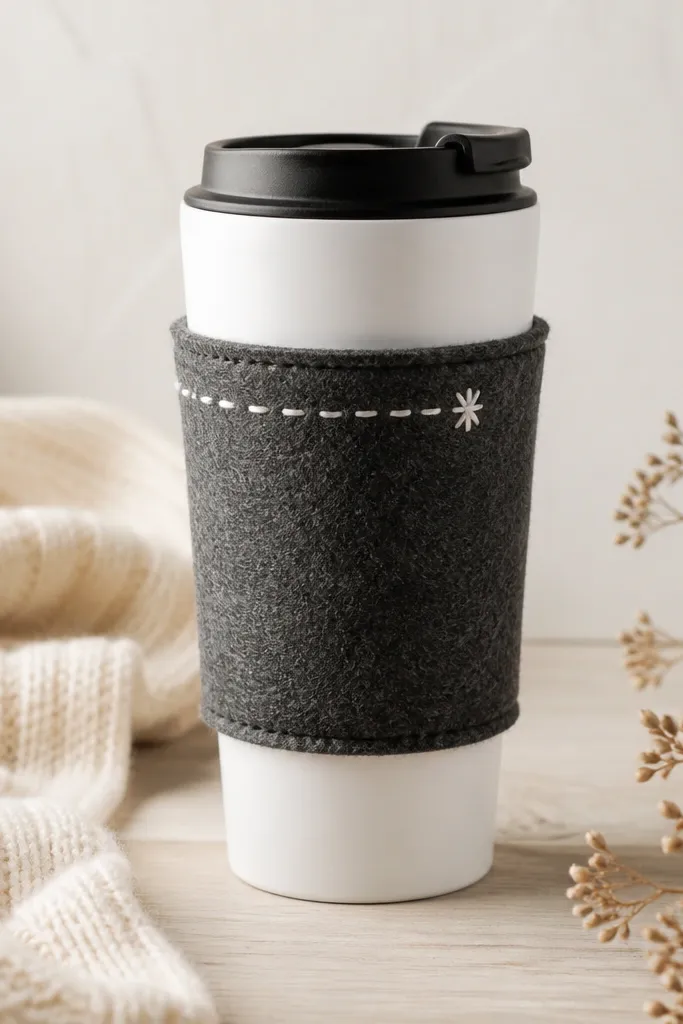
This is a gift she uses on autopilot, and that’s why it feels special. I make sleeves from thick felt or wool-blend felt so the mug doesn’t rattle and the sleeve keeps its shape. The best look is charcoal or deep navy with one white or cream painted line — it reads classy and doesn’t look like a kid’s craft. I add her favorite phrase in tiny letters because it feels personal without taking over the whole sleeve. For styling, pair it with the rest of her vibe: if she’s minimalist, keep the art to one star or one dot cluster; if she likes cute, add a tiny heart next to the text.
Pro tipPractice the lettering on scrap felt first and keep the line height small — tiny text looks hand-done, not messy.
Wrap felt around her travel mug and mark the overlap so you know the exact circumference. Cut the felt panel and a matching inner tab so the sleeve locks and doesn’t twist. Sew the side seam with a simple running stitch or a straight stitch, then test fit it on the mug. Paint the tiny text with acrylic paint and a fine liner brush, and let it cure for at least 24 hours. Finish by sealing with a fabric-safe acrylic sealer so it wipes clean and doesn’t smear into coffee stains.
AvoidAvoid painting directly on thin craft felt — it soaks up paint and the edges look fuzzy.
4. Linen Essential Pouch with a Hidden Zipper Pocket
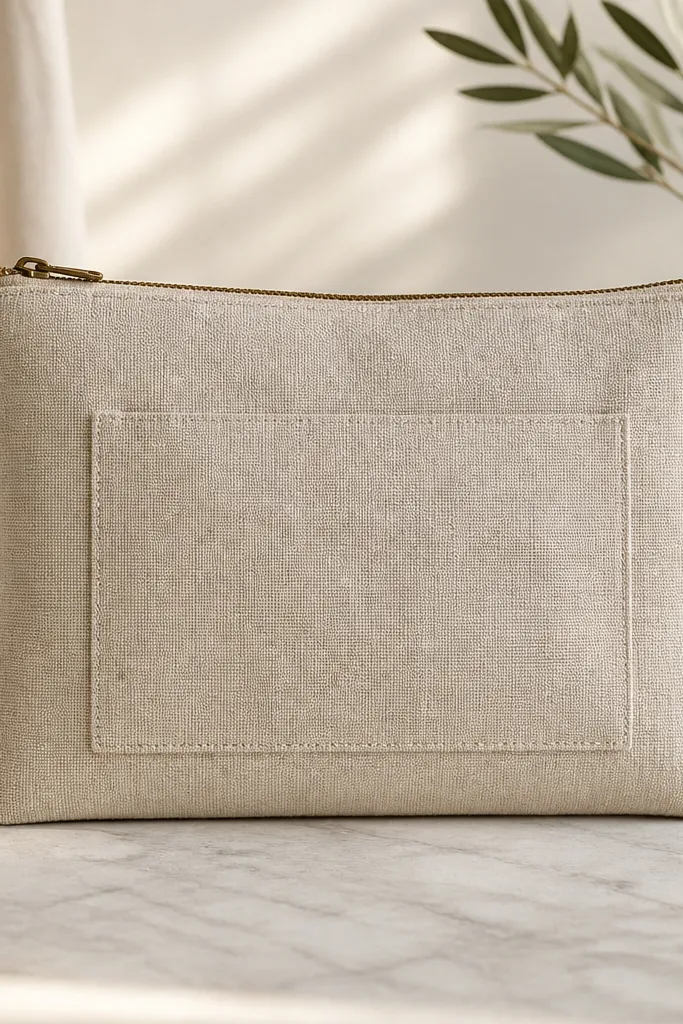
This pouch makes sense for her real life: travel days, gym bags, overnight stays, or desk drawers. Linen looks expensive even when it’s simple, and the brass zipper gives it that warm, polished feel. The hidden zipper pocket is the detail that makes it feel custom — she can stash hair ties, a mini perfume roller, or earbuds without digging. I use light oat or soft gray linen because it flatters most skin tones in photos and it pairs with any bag color. If she’s the type who likes organization, this hits her exact need.
Cut a front and back panel from linen (9 x 11 inches each) and add an inner lining panel of cotton or canvas (same size). Sew a smaller zipper pocket panel to the front lining first, then top-stitch the pocket border so it looks crisp. Assemble outer and lining right sides together, then sew around the edges leaving an opening for turning. Turn it, press the seams flat, then sew the opening closed. Install the zipper across the top, aligning the zipper tape with the fabric edge, and add one top-stitch line 1/8 inch from the zipper for a clean finish.
Use a zipper foot and go slow — linen puckers if you rush, and the top stitch line shows every wobble.
Avoid skipping pressing — unpressed seams make the pouch look lopsided even when the sewing is fine.
5. Heat-Safe Rice Bag for Sore Shoulders (Her Color, Her Size)
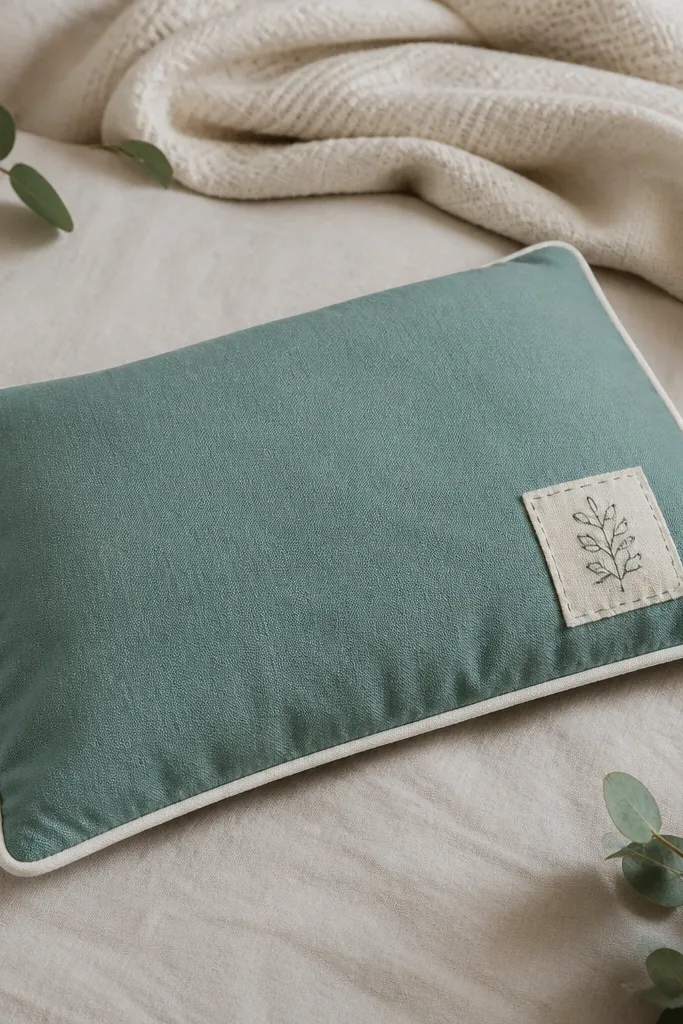
A rice bag sounds plain until you make it the right size and cover it in her color. I use this when someone has desk-sore shoulders or cramps, and it becomes a go-to gift because it’s actually useful. Make it in cotton with a thick inner layer so it holds warmth without feeling flimsy. I choose teal, dusty mauve, or warm mustard based on her everyday palette, and I add piping or a stitched border so it looks finished. This works for everyone because it’s not about skin tone — it’s about comfort. She’ll feel cared for every time she heats it in the microwave.
Cut an outer fabric rectangle 10 x 14 inches and an inner fabric rectangle the same size, plus a second inner layer if you want extra thickness. Sew the inner layer first, then fill with rice (start with about 2.5 to 3 pounds for a 10 x 14 size). Divide the bag with stitching lines if you want it to heat evenly — I add two vertical channels so it doesn’t bunch. Close the outer fabric around the inner bag, then sew a final top border with strong thread. Label the back with a fabric patch that says microwave time (for my bags it’s 60-90 seconds depending on thickness).
Use regular long-grain rice and test heat time with your own bag — don’t guess the first microwave.
Avoid using uncooked beans or too much filling — it cools unevenly and can feel heavy fast.
6. Hand-Stitched Denim Coaster Set with Contrast Thread
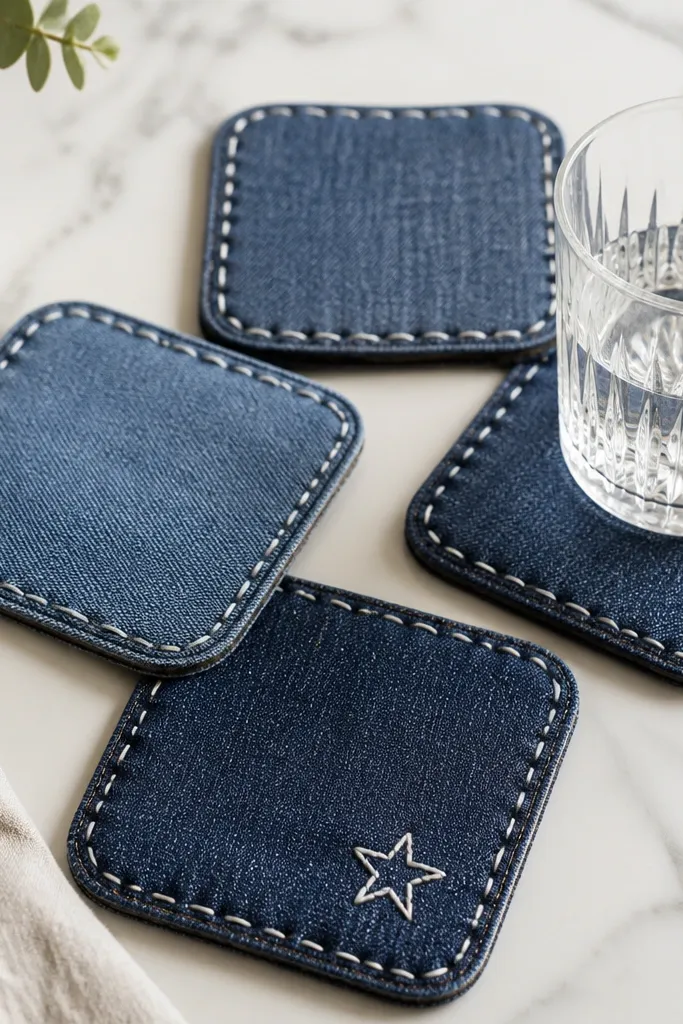
Coasters are one of the few handmade gift ideas that look great on a shelf and get used daily without much effort from her. Denim holds shape and hides minor imperfections, which is why it’s my favorite beginner-friendly fabric. Contrast thread gives the “crafted” look - I use white or cream on dark denim, and light gray on medium-wash. Add one tiny motif on just one coaster so the set feels intentional, not random. If she lives with roommates, this also saves her from water rings and it keeps the table looking tidy.
Pro tipUse two layers of felt if she sets hot mugs down often — it keeps the coaster from getting too warm on the table.
Cut four circles from two layers of denim using a bowl or plate as a template, aiming for 4 inches wide. Cut a thin layer of felt or craft foam for heat protection and place it between the denim layers. Sew the layers together by hand with a whip stitch around the edge, pulling the thread snug but not tight enough to pucker. Add a simple star or initial on one coaster with embroidery floss, then secure the threads on the back. Finally, trim stray fibers and run a quick steam to flatten the stitching line.
AvoidAvoid single-layer fabric coasters — they soak up water and warp the first time she uses them.
7. Mini Herb Planter Keychain with Felt "Soil" Pouch
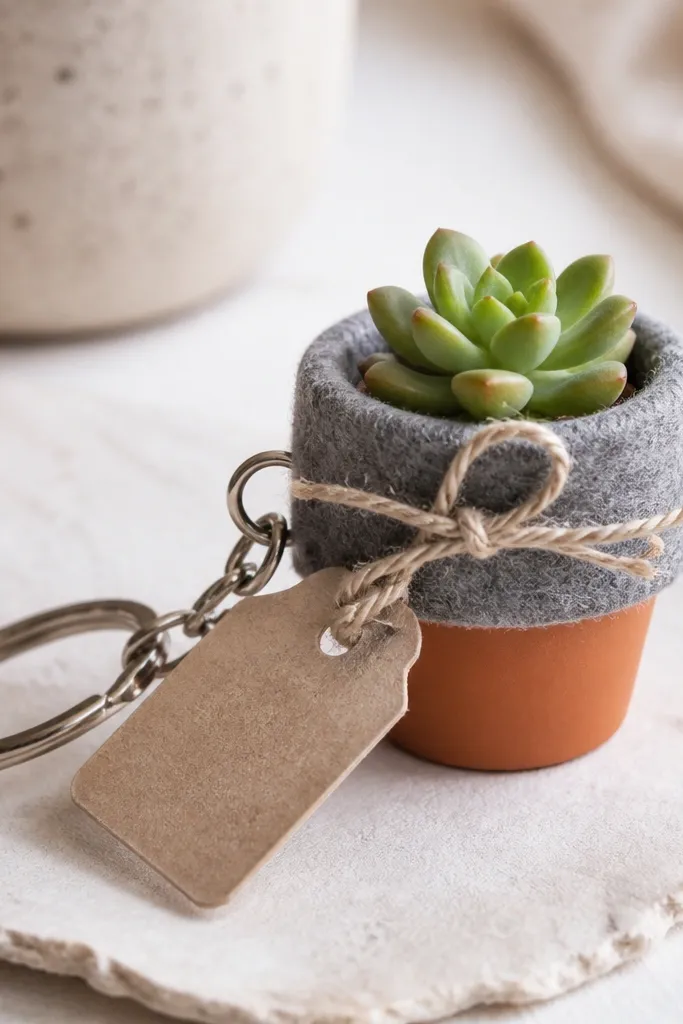
This one is cute and practical because it turns her keys into a tiny reminder to care for something. I use small terracotta pots because they breathe and the plants don’t get waterlogged as fast. The felt “soil” pouch makes it look handmade and protects the twine and metal from moisture. I label the plant type with a tiny paper tag sealed under clear tape so it stays readable. It looks adorable for desk setups, and it’s a good gift for best friends who like plants but forget to water full planters.
Find a tiny terracotta pot around 1.5 to 2 inches wide and let it dry completely. Fill it with potting mix, then plant a fast herb seed like basil or thyme. Wrap the top with felt so it covers the rim and gives you a place to tie a twine knot. Attach the pot to a keychain ring using a small wire loop or a strong adhesive designed for porous surfaces. Tie the label tag with twine and press the felt seam down so it doesn’t snag on keys.
Water the plant once, then let the pot drain fully before gifting so she doesn’t get damp keys immediately.
Avoid shiny plastic planters — they trap moisture and the plant health drops fast.
8. Scented Drawer Sachet with Homemade Fabric Sachet Covers
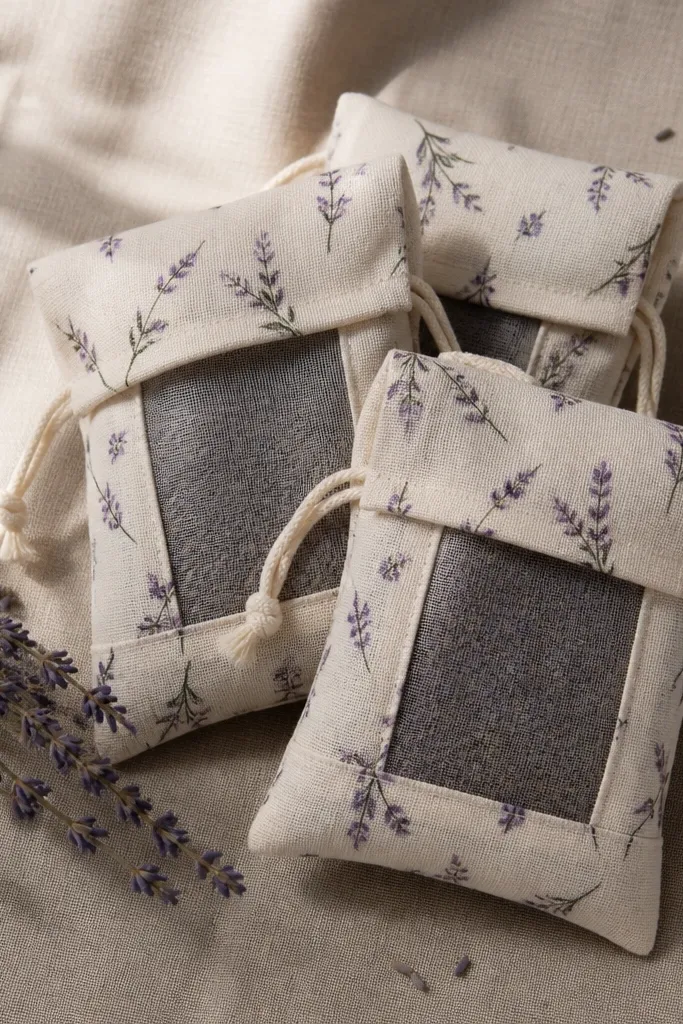
Sachets are one of my favorite handmade gift ideas for best friend all year because they feel personal without needing her to “use” them right away. I make covers from cotton muslin or light linen and keep the inside filled with dried lavender or a blend of dried citrus peel and cinnamon stick. The look stays soft and neutral — I choose oat, chalk white, or pale sage so it blends with her drawers and closet colors. If she wears perfume, match the vibe: lavender goes with floral scents, citrus goes with fresh and clean scents. She’ll notice the smell when she opens her drawers, which means the gift keeps working.
Pro tipStore the sachets in a sealed bag for 24 hours after filling so the scent spreads and feels stronger when she opens it.
Cut two muslin squares 6 x 6 inches and sew them right sides together, leaving one edge open for filling. Fill with dried lavender buds (about 1/3 cup) or a citrus-cinnamon mix (about 1/4 cup citrus peel plus a small cinnamon stick). Sew the opening closed and, if you want a drawstring look, add a simple channel on top with two parallel stitches. Tie a short satin ribbon and trim it so it hangs 2 inches. Label the sachet with a small stitched tag so she knows what scent it is.
AvoidAvoid using wet botanicals — they mold and leave dark stains on fabric.



