
1. Vanilla Macaron Squishie with Satin Edge
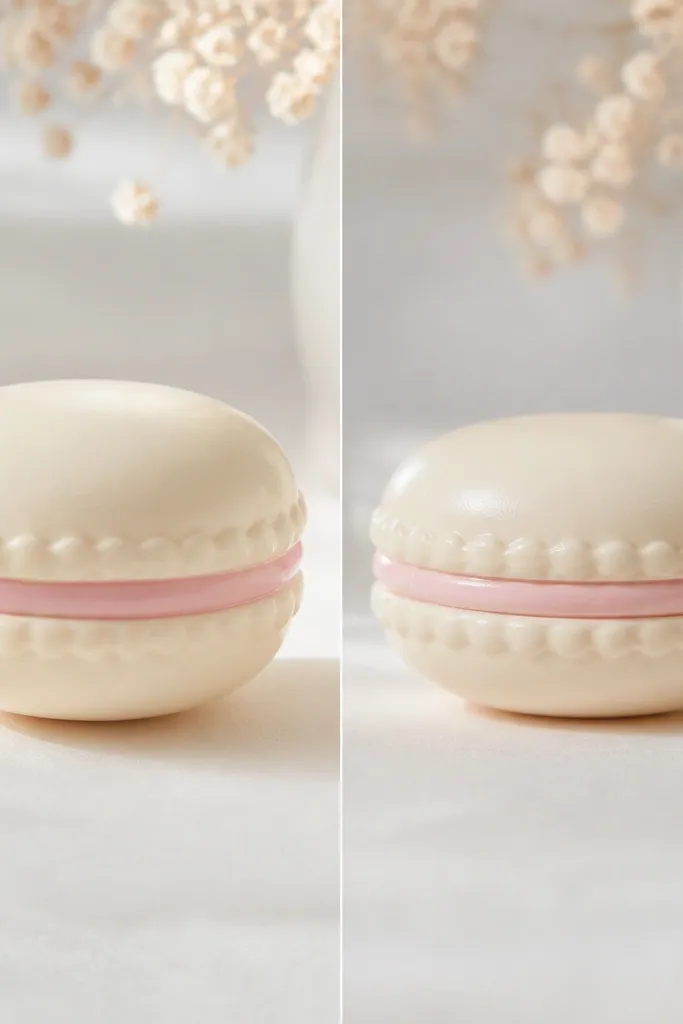
Start with a macaron that looks like it came from a pastry case. Use pale vanilla cardstock (around 200 gsm) for the shell and add a satin-finish outer layer with a very light clear coat. The filling strip should be blush pink or soft peach so it reads as “cream” instead of candy. This design flatters warm skin tones and looks extra good on brown hands because the cream shell makes your fingers look softer by contrast. Keep the top dome slightly higher than the bottom so the squish reads as plush, not flat.
Cut two matching circles for the shell, about 7 cm diameter each. Score a gentle curve line on one circle and fold it slightly so it domes before assembly. Make a thin inner pouch from scrap paper lined with a plastic sheet (like a thin food-safe bag piece) and fill it with a small pinch of fiberfill — just enough to create a slow squish. Glue the domed shell to the inner pouch, then wrap a thin blush-pink strip around the seam like a “filling” band. Finally, seal the outer edge with a thin glue line and press it under a book for 10 minutes, then add a single thin gloss coat to the top only.
Use a cotton swab to apply gloss just on the top dome so the edge stays matte and looks more expensive.
Skipping the press-and-rest step makes the seam wobble and the “filling” band looks crooked.
2. Rose Quartz Heart with Shimmer Vein Paper
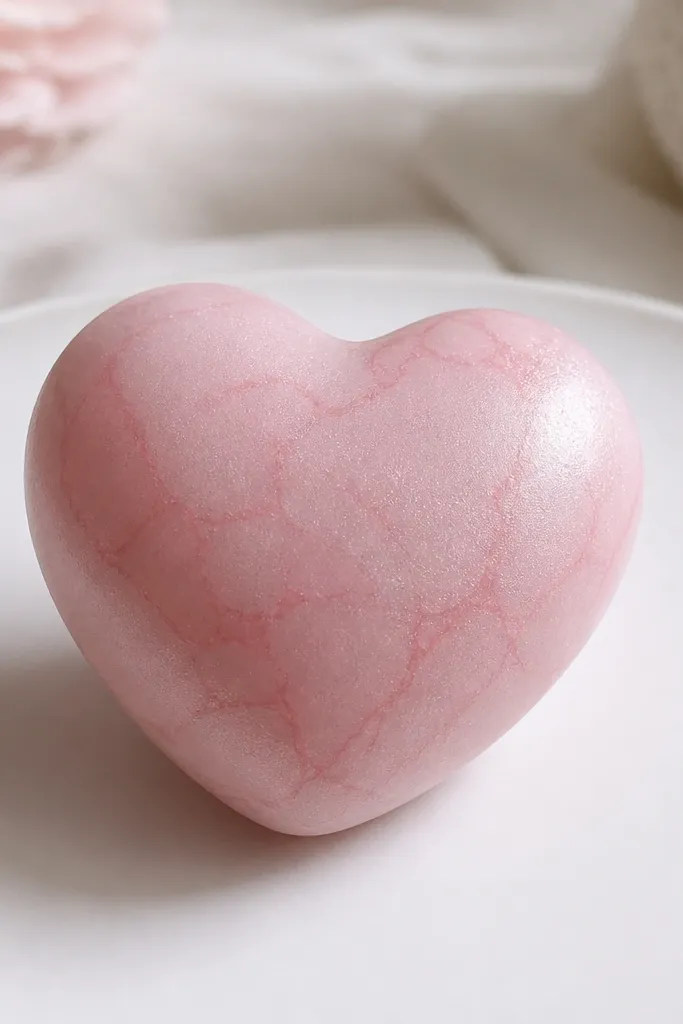
Cut a heart template about 8 cm tall from 180-220 gsm paper. Trace it onto two pieces and add vein lines on the outside of one layer only. Mix pearlescent powder into clear gel medium until it looks like glossy milk, then dab lightly over the veins with a sponge. Build the inner pouch with a double-layer paper lining and fill with fiberfill, then close it so the stuffing sits evenly in the center. Glue the two heart halves together, seal the perimeter, and clamp for 12 minutes. Finish with a thin clear coat over the whole heart so the shimmer looks like it’s under glass.
This one looks luxe because rose quartz has that cloudy softness, not sharp glitter. Use pale blush paper and add marbling by dragging a damp brush with diluted pink watercolor or alcohol ink — keep the veins thin. For shimmer, use a fine pearlescent powder mixed with a tiny amount of clear gel medium, applied with a makeup sponge. It flatters cool undertones because the pink leans toward lavender, and it photographs beautifully under daylight. Shape matters too — a heart with rounded lobes reads more premium than a pointy one.
Pro tipTest your shimmer on scrap first; if it looks speckly, your gel is too thick.
3. Chocolate Truffle with Cocoa Dust Finish
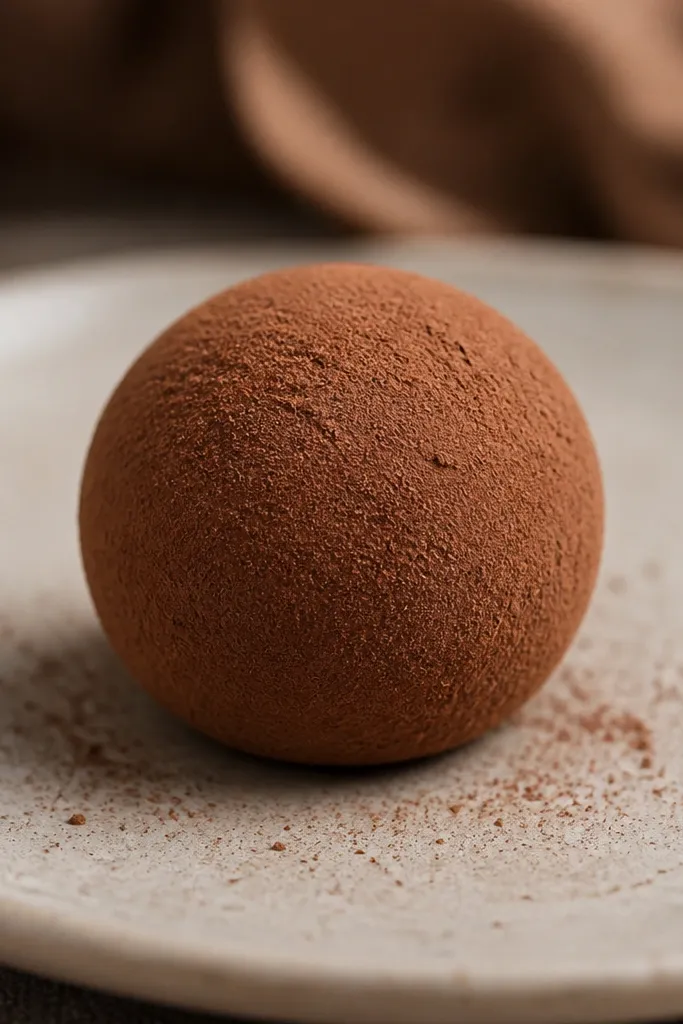
Cut two circles about 6.5 cm diameter from brown paper. Place a lighter chocolate disk (about 2 cm) on one circle and glue it under the top so you see it as a subtle swirl. Build a sealed inner pouch with fiberfill and close it tight so it doesn’t show bulges. Glue the circles together, then run a thin line of glue around the edge and press. Mix fine cocoa powder with a drop of matte gel medium and dab it with a sponge — keep the coating thin. Let it dry flat for 20 minutes, then lightly buff the top with your finger for a velvety look.
Chocolate squishies look high-end when they don’t look glossy. Choose warm milk-chocolate brown cardstock and roughen it slightly with a very light sanding block so the cocoa dust sticks. For the center warmth, add a tiny lighter brown “swirl” patch under the top layer using a thin paper circle. This design flatters olive skin because the brown warms your hands in photos. Make it round and slightly flattened at the bottom so it sits like a truffle, not a ball.
Pro tipUse matte gel medium, not clear gloss, or the cocoa dust will clump.
4. Mint Chocolate Chip with Micro-Foil Confetti
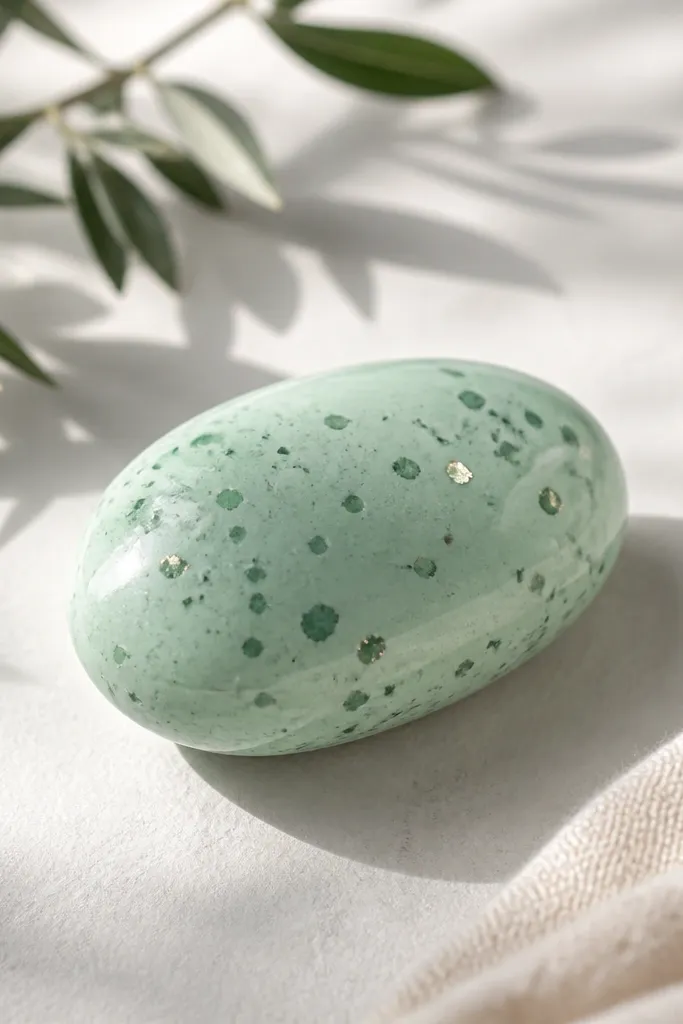
Cut an oval template 8 cm long and 5 cm wide from mint paper, two layers. Cut small chip shapes from dark green paper, about 8-12 pieces, then round the edges with scissors. Glue chips to one oval layer, leaving gaps so the mint shows through. Add tiny bits of micro foil to 3-4 chips with a dot of clear gel, then seal the second oval on top with a thin glue perimeter. Stuff with a small amount of fiberfill and close the seam completely so chips don’t press through. Seal with one light gloss coat over the mint background only.
This is luxe because it uses controlled sparkle, not random glitter. The base should be mint green cardstock with a smooth finish, and the “chips” should be darker green rounded bits that look slightly translucent. Add micro foil confetti to only a few chips so the sparkle feels intentional. This design looks great on both fair and deep skin because mint is a strong contrast color. Keep the oval shape tight — a too-round shape reads like a gummy, not a truffle.
Pro tipIf the foil looks loud, use less glue and press chips flat before sealing.
5. Lavender Eclair with Faux Gloss Piping
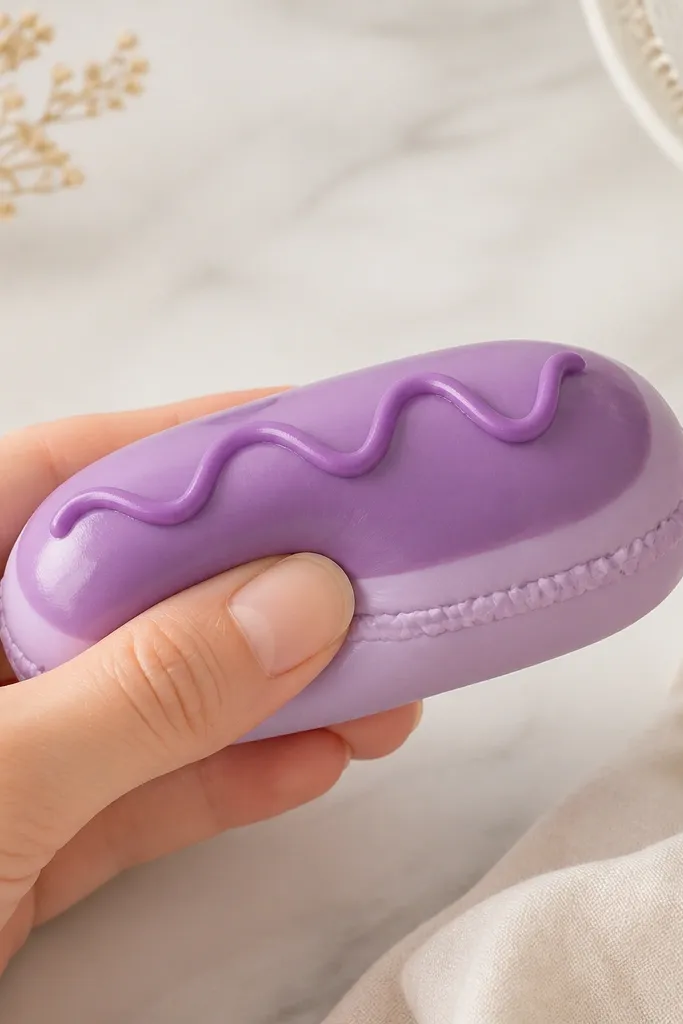
Cut the eclair body from 200 gsm cardstock into a 9 cm long rectangle with rounded ends. Cut a top glaze piece slightly smaller, about 8.2 cm long, from deeper purple paper. Make a sealed inner pouch with a thin plastic liner and fill with fiberfill until the eclair feels springy but not hard. Glue the inner pouch inside the body, then attach the glaze top. For piping, cut a 3 mm wide strip of deep purple and glue it along the center seam, then apply a thin gloss coat over just that strip. Press under a flat weight for 12 minutes so the glaze edge stays straight.
Eclairs look expensive when the glaze line is crisp. Use lavender paper for the body and a slightly deeper purple for the top “chocolate.” For the piping, add a thin strip of darker purple cardstock and glaze it so it reflects light like ganache. This is flattering on hands with neutral or cool undertones because lavender makes fingers look clean and bright. Shape it with a slight taper at the ends — it reads like pastry instead of a rectangle.
Pro tipUse a ruler to place the piping strip; freehand piping is the fastest way to make it look cheap.
6. Pearl White Bunny with Blush Cheeks
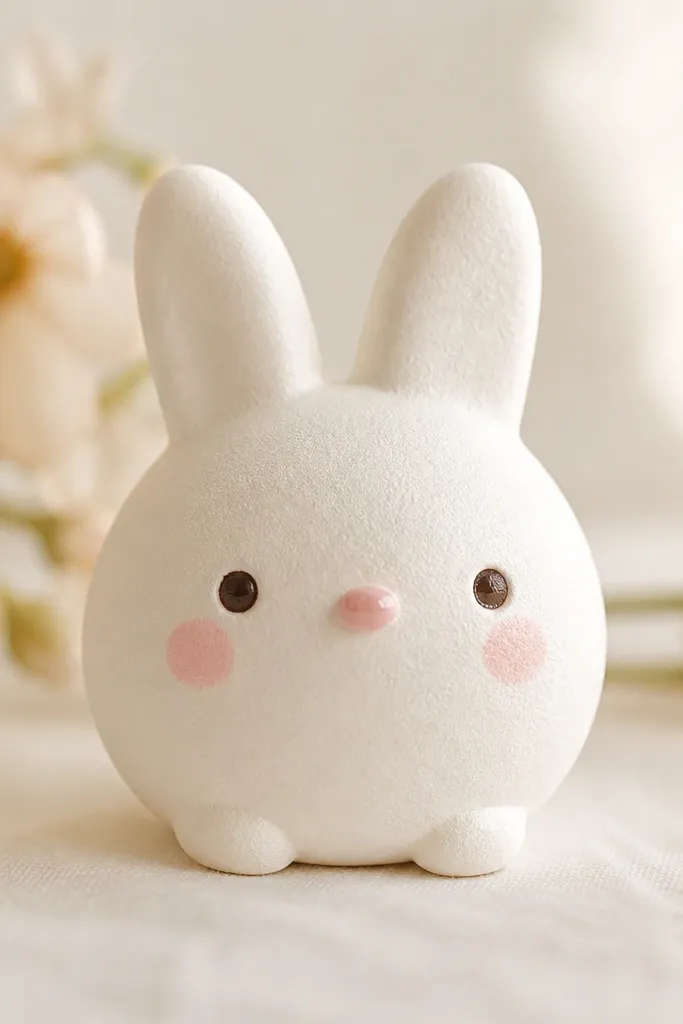
Bunny squishies become luxe when the “fur” looks like soft paper, not glitter. Use pearl white cardstock or cotton paper with a very subtle sheen. Add blush cheeks with a makeup sponge and diluted pink watercolor, keeping the edges feathered. The nose should get a tiny glossy dot so the face looks alive in photos. This design looks great for gifts because it reads cute without leaning childish. The key is proportions — ears should be taller than half the body height.
Cut a bunny body template about 8 cm tall, with two ear pieces per side so you get a thick edge. Create a sealed inner pouch and fill it with fiberfill, then glue it into the body so it sits centered. Glue the ears on first, then assemble the face front using blush cheeks placed 1.5 cm below the ear base. Add a tiny nose circle and glaze it with clear gloss — just a dot. Use a matte-finish clear coat over the rest so it doesn’t look oily. Press the finished bunny under a book for 10-15 minutes to keep the ears from curling.
If your blush looks too sharp, tap it with a clean sponge until the edges fade.
7. Champagne Bottle Mini with Gold Foil Label
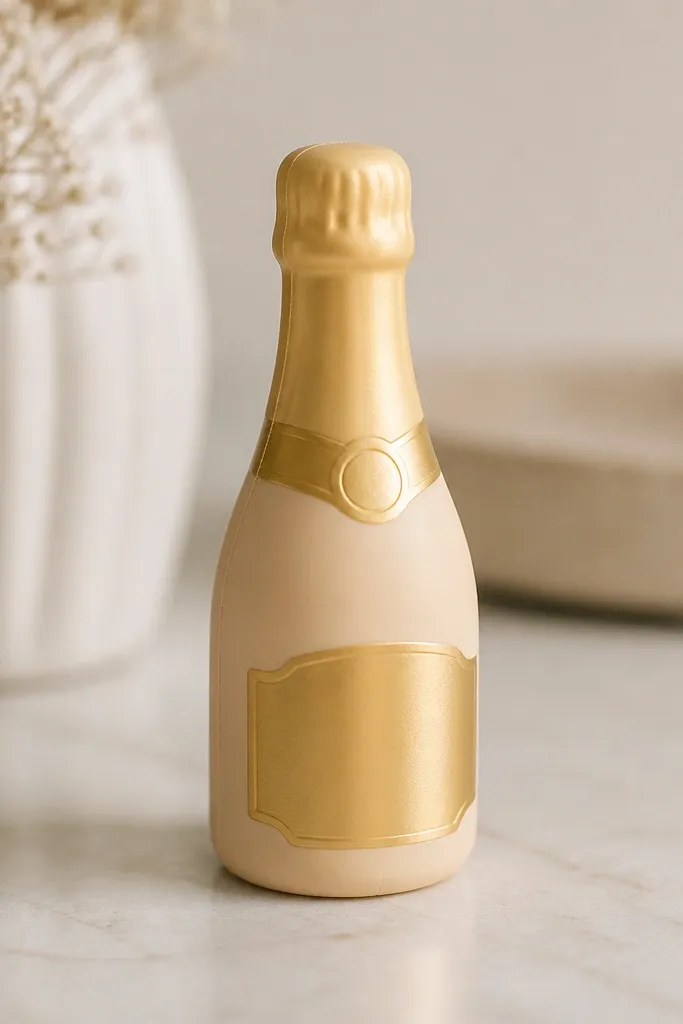
This one screams “giftable” because champagne has a color story: warm beige, pale gold, and a reflective label. Use thick cardstock for the bottle silhouette so it holds without creasing. Add a gold foil label with a thin gloss layer so it looks like it’s printed on premium paper. This design is flattering for photos on dark backgrounds because the beige pops. Make the neck slimmer than the body and keep the base slightly wider so it looks stable.
Cut the bottle shape from 220 gsm cardstock, two identical pieces, about 9 cm tall. Add a pale gold strip for the neck and glue it between layers so it reads as depth. Create an inner pouch from lined paper and fill with fiberfill, then seal the bottle layers around it. Cut a label rectangle about 2.2 cm wide and 4 cm tall from gold foil paper, then glue it centered on the front panel. Apply clear gloss over the label only, and a light matte coat over the beige bottle. Press flat for 12 minutes so the label edge doesn’t lift.
Use a craft knife to cut the label edges — scissors leave a soft wobble that reads cheap.
8. Strawberry Shortcake with Layered Cream Paper
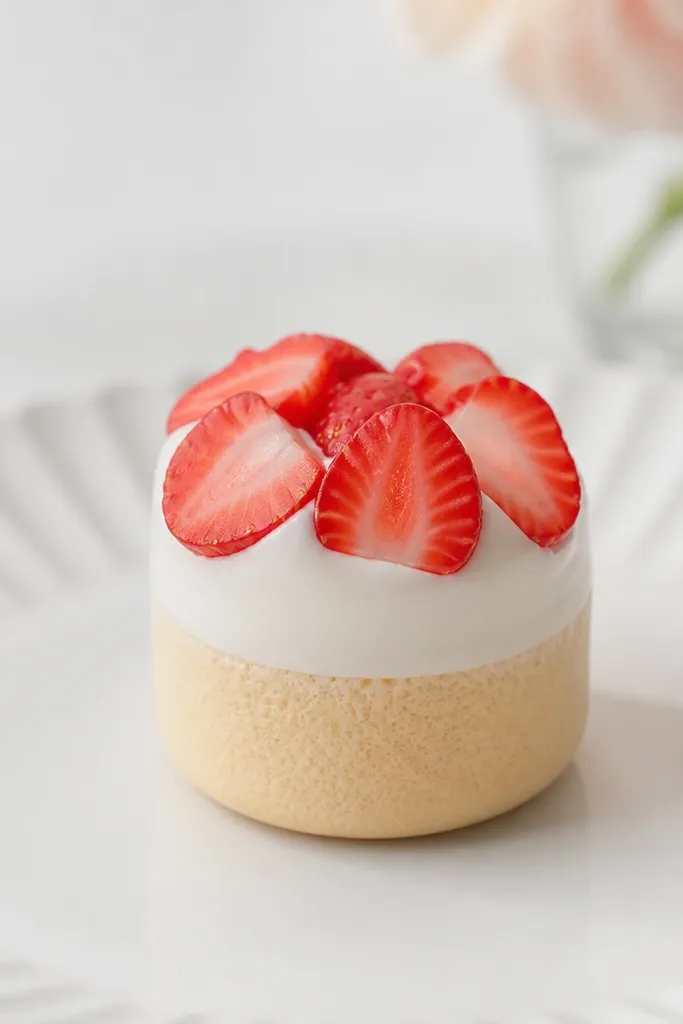
Layering is what makes this one luxe. Build it like a real dessert: sponge base, cream top band, then strawberry “slices” that sit slightly raised. Use warm beige paper for the sponge and a soft off-white for cream, then glaze only the cream band so it catches light. Add tiny seed dots in muted brown — too bright looks like a cartoon. This design flatters light and medium skin tones because the warm beige reads cozy and the red looks fresh. Keep the strawberry pieces thin so they don’t compress and look flat.
Cut a round shortcake base about 7.5 cm diameter from beige cardstock, two layers. For the cream band, cut an off-white ring about 1 cm tall and glue it around the top edge of the inner pouch. Make a sealed inner pouch and fill with fiberfill so the base compresses evenly. Cut 6-8 strawberry slice pieces from red paper and glue them in a fan pattern on the cream band. Add seed dots with a fine marker or paint pen. Seal the outer top, then press under weight for 10-15 minutes. Finish by glazing the cream band only — one thin coat.
If your strawberry slices look too thick, trim them down before gluing so the squish still feels soft.
9. Ocean Blue Whale with Glossy Eye Bubble
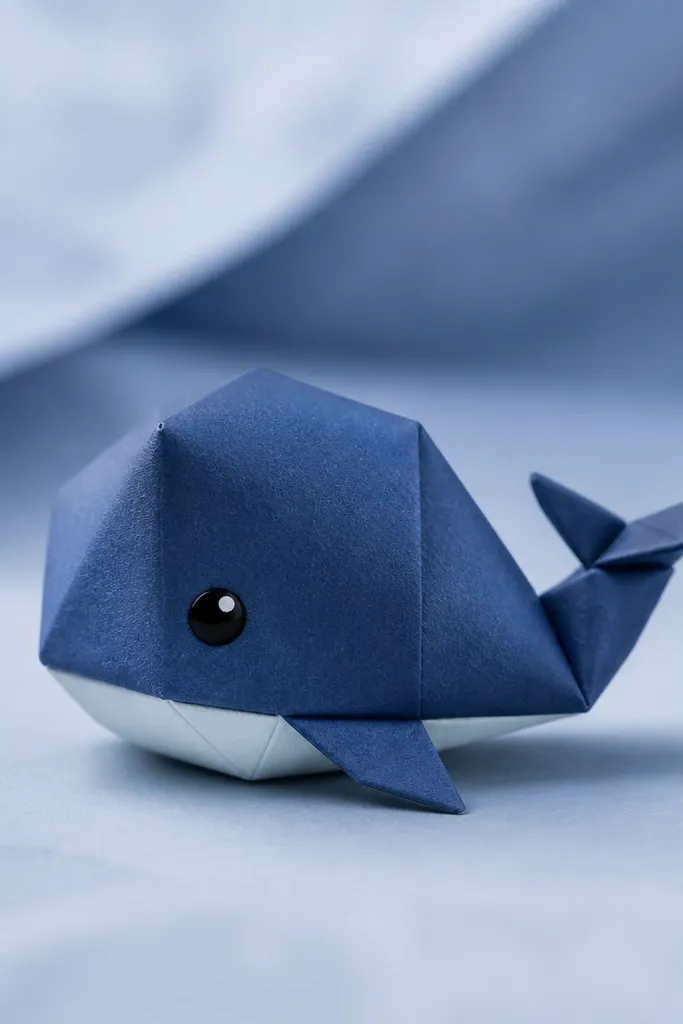
Whale squishies feel luxe when the face looks polished. Use deep ocean blue cardstock for the body and a lighter blue for the belly patch so the shape reads clearly even when squished. The eye should be a raised glossy dot, like a tiny bubble — it makes the whole piece look “finished.” This design is flattering for any skin tone because blues are cool and clean in photos. Keep the belly seam straight and centered; wobbly seams read messy fast.
Cut two whale bodies from 200-220 gsm cardstock using a simple template: body with a rounded tail and a belly patch outline. Glue the belly patch onto one layer first, then build a sealed inner pouch and fill with fiberfill. Place the second layer on top and glue the perimeter, then press for 12 minutes. For the eye, cut a small white circle, glue it as the highlight, then glue a tiny black dot on top and seal with clear gloss so it domes. Add a short smile line with a fine pen. Finish with a matte coat on the body and a gloss-only coat on the eye.
Gloss the eye last so it stays domed and doesn’t dull the paper texture.
10. Gold Star Night Sky Mini with Inked Constellations
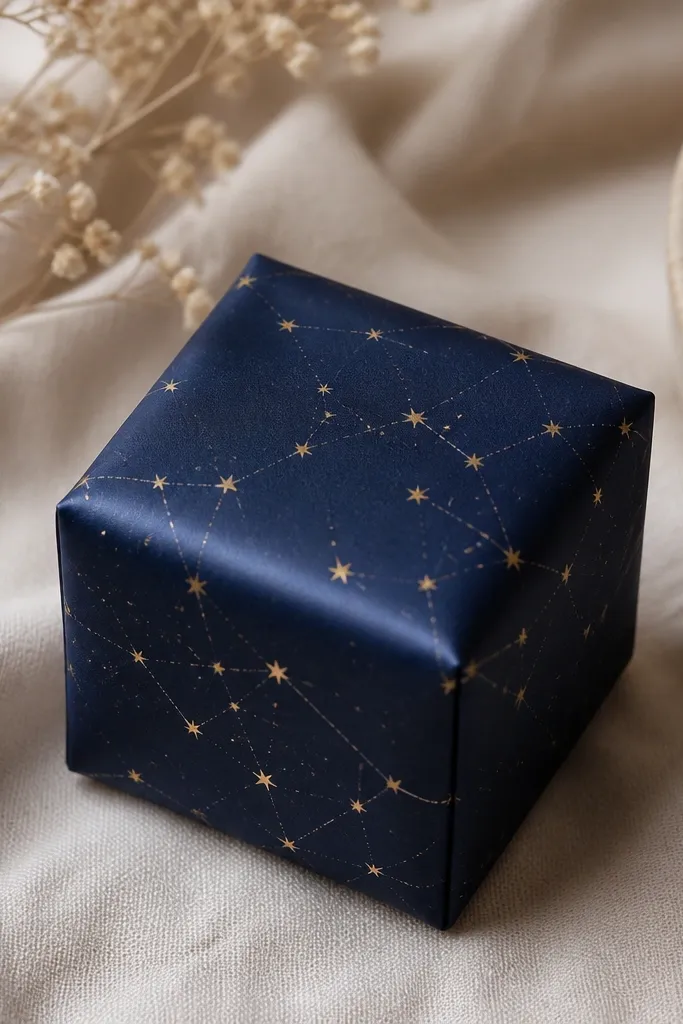
Cut a rounded mini shape (like a 7 cm sphere-like oval) from navy cardstock, two layers. Create an inner pouch with fiberfill and seal it so the stuffing stays even. Glue layers together and press flat. Add gold stars first: dot foil pieces or metallic paint dots across the top half. Then draw 2-3 constellation lines using a fine black or dark gray liner, keeping them delicate. Apply a light satin clear coat over the navy only so the stars stay bright.
Night sky designs look luxe because the contrast is dramatic and the details are controlled. Use deep navy paper and add gold star dots with foil paper or metallic paint. For constellations, use a fine liner and keep the lines thin — thick lines look like kids' art. This design photographs well on light backgrounds and on hands with warm undertones because gold warms the navy. Keep the overall shape smooth and rounded so the “sky” doesn’t kink at seams.
Pro tipIf your gold looks flat, dot a second layer of metallic paint only on the star centers.
11. Tiramisu Mini with Cocoa-Layer Stripes
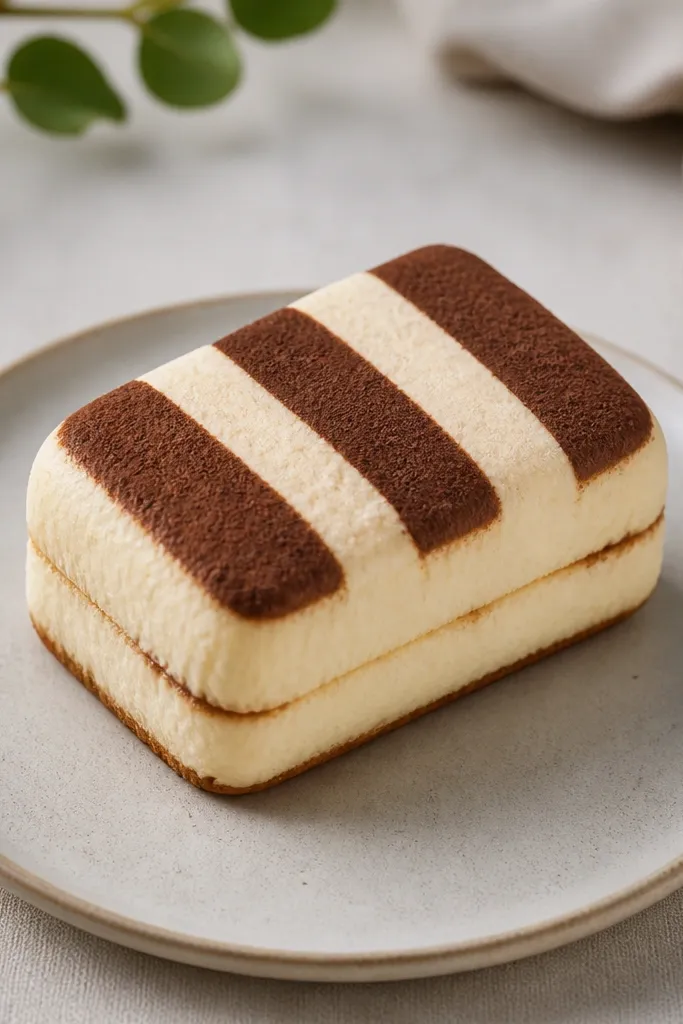
Tiramisu looks high end when the top stripe pattern is straight and the cocoa texture is matte. Use off-white paper for the cream layer and warm brown paper for cocoa stripes. Add a thin cocoa dust finish so it looks like real powder, not paint. This design flatters medium to deep skin tones because the cream contrasts hard and makes the squishy read “clean.” Keep the rectangle edges slightly rounded so it feels soft, not boxy.
Cut a mini rectangle top about 7 cm by 4 cm from cream paper, two layers. On one top layer, mark and cut three thin brown stripes about 5 mm wide each, then glue them in alternating order to create the tiramisu look. Build and seal an inner pouch and fill with fiberfill so the squish gives evenly under pressure. Glue the two layers together around the pouch and press. Dust cocoa powder mixed with matte gel medium lightly over the top stripes, then let it dry flat. Finish with a matte coat so it doesn’t shine like candy.
Use a craft ruler to place stripes; crooked stripes are the fastest cheap tell.
12. Black Licorice Swirl with Clear Gloss Ribbon
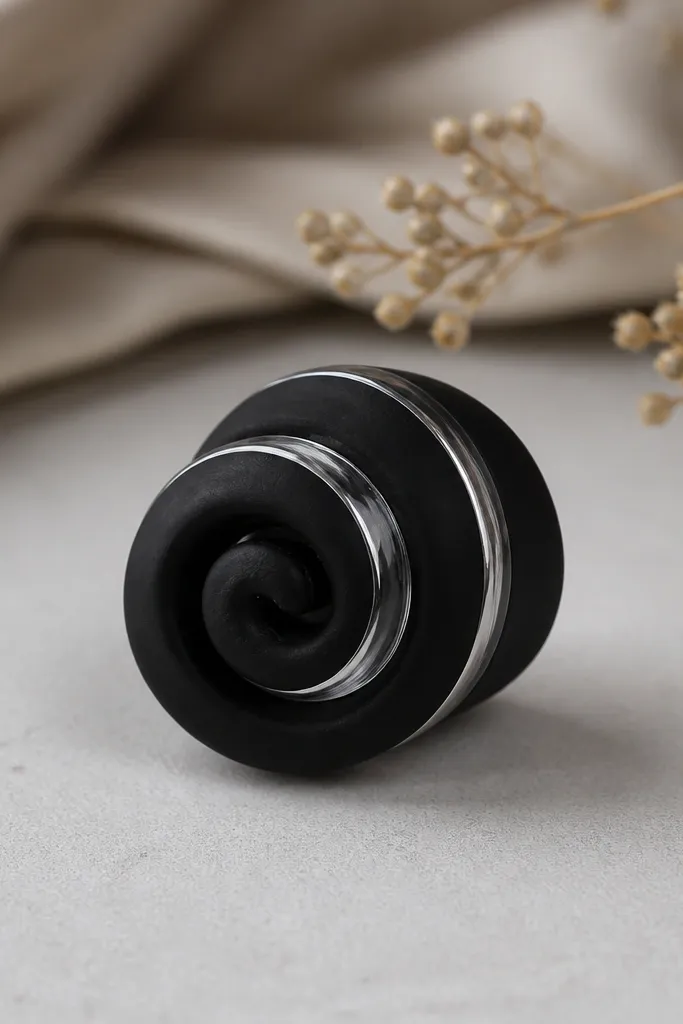
This is luxe because the surface has contrast: matte black body and a glossy ribbon highlight. Use deep black cardstock and avoid glitter so it stays chic. The ribbon stripe should be a thin strip of black paper glazed with clear gloss until it looks like lacquer. This design looks great against light clothing and bright nail polish because the matte black makes the accessories pop. Shape it as a true spiral with even spacing; uneven spacing looks like a scribble.
Cut a spiral template on paper, about 8 cm tall, and trace it onto two pieces of black cardstock. Build a sealed inner pouch that matches the spiral thickness and fill with fiberfill. Glue the two spiral layers together, then press under weight for 12 minutes. Cut a thin strip (about 4 mm wide) of black paper and glue it along the spiral path on top. Apply clear gloss over that strip in two thin coats, letting the first dry for 10 minutes. Keep gloss off the rest of the swirl by using a cotton swab to wipe the edges.
If gloss seeps, your coat is too thick — wipe with a barely damp paper towel and reapply lightly.
13. Peach Pearl Rose with Rolled Petal Effect
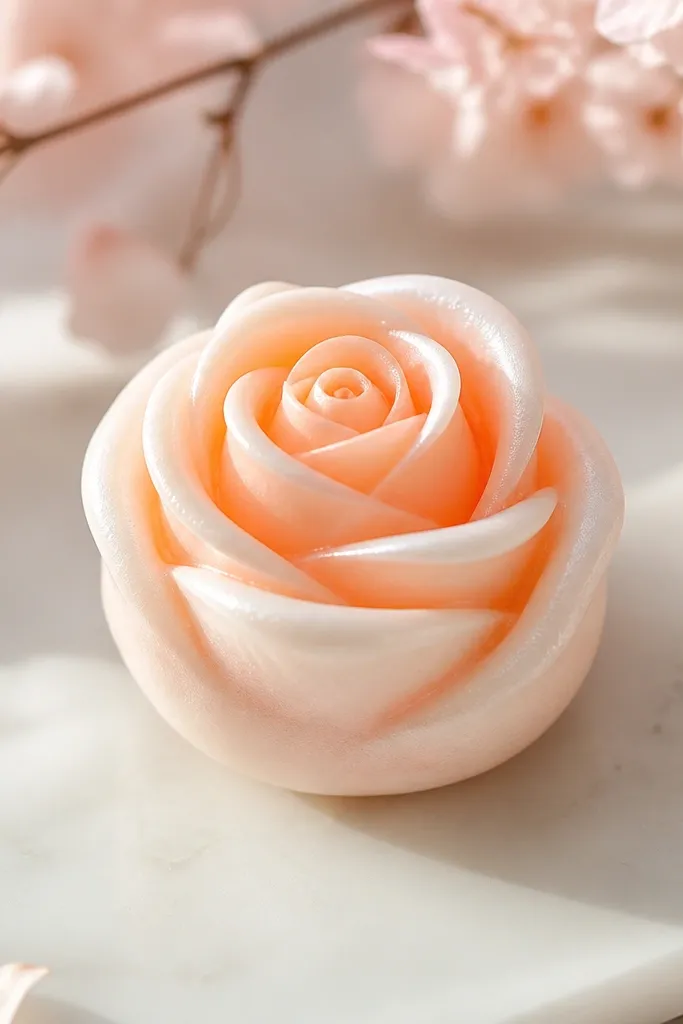
Rolled petals look luxe because you get dimension without bulky stuffing. Use peach paper for the outer petals and soft white for the inner center, then add a pearl finish that sits on top of the paper. The base should be a rounded dome so it reads as a “flower squishy,” not a paper flower. This design flatters fair and warm undertones because peach makes skin look fresh. Keep the rolls tight in the center and looser near the outer edge for a natural gradient.
Cut a small dome base about 7 cm wide from peach cardstock, two layers. Make a sealed inner pouch and fill with fiberfill, then glue the dome layers and press for 12 minutes. For petals, cut thin strips and roll them around a toothpick, then glue the rolled petals onto the top in a spiral pattern. Use soft white for the center 3 rolls and peach for the rest. Dust pearl powder mixed with clear gel medium over the petals lightly with a makeup sponge. Finish with a matte coat on the dome base and a satin coat on petals so the shine focuses on the flower.
Roll petals the same direction so the highlights line up in photos.
14. Coconut Cream Cloud with Micro-Cloud Texture
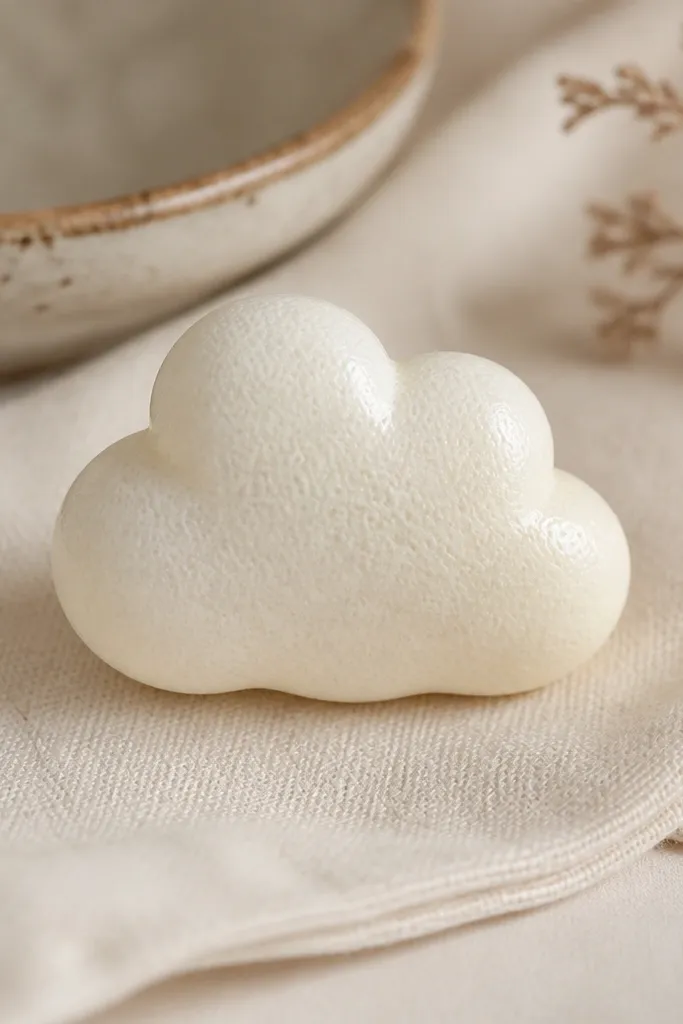
Cloud squishies look expensive when the surface has tiny texture but stays neat. Use warm white paper and add micro texture by tapping a sponge lightly with diluted white gel medium — it creates small cloud puffs. Keep the inside stuffing even so the cloud doesn’t sag on one side. This design is flattering for everyone because warm white looks soft and clean, and it pairs with any nail color. Make the cloud outline rounded and symmetrical; sharp corners kill the cozy vibe.
Cut two cloud shapes about 8 cm wide from warm white 200 gsm paper. Build a sealed inner pouch and fill with fiberfill, then glue the layers together and press under weight for 10-12 minutes. Mix white gel medium with a little water until it’s brushable but not runny. Tap a sponge over the top surface in small sections, then let it dry. Add a single thin gloss coat only along the highest ridges so it looks like light is catching the cloud. Avoid flooding the texture — if it turns shiny everywhere, it looks cheap.
Dry it under a flat book to keep the cloud from puffing unevenly.
15. Emerald Jade Pendant with Faux Gem Cut Edges
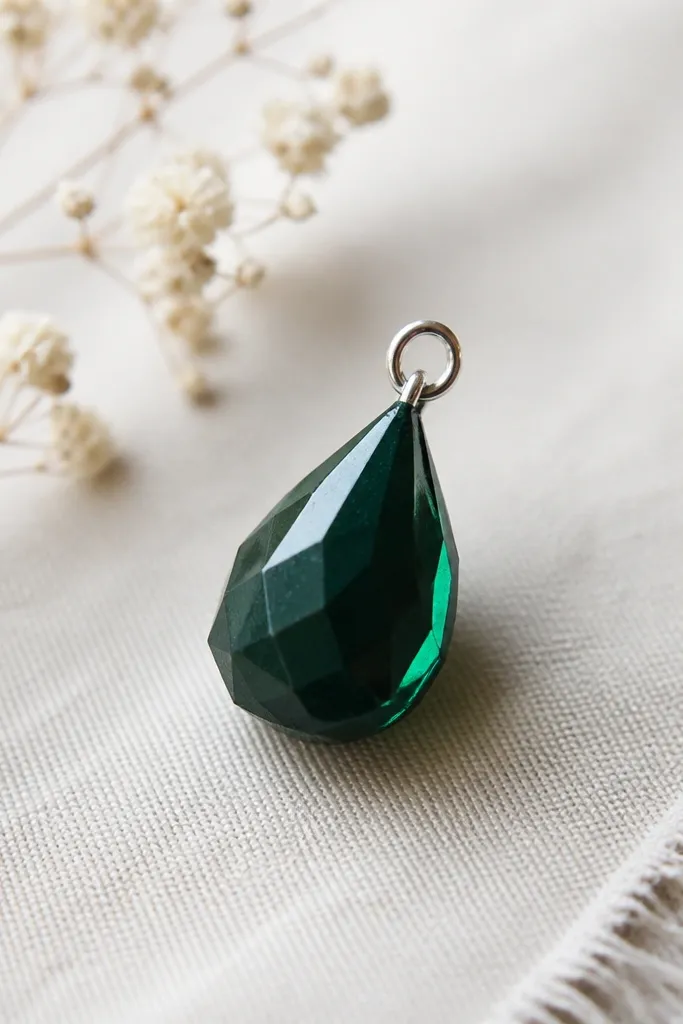
Cut a teardrop pendant template about 9 cm tall with 4-6 faceted edge cuts. Trace onto two emerald paper pieces and glue a lighter green highlight wedge on one piece before assembly. Build a sealed inner pouch with fiberfill and glue layers together around it, keeping the faceted edges crisp. Seal the perimeter seam with thin glue and press flat for 12 minutes. Apply a clear gloss coat over the whole front, then use a cotton swab to clean any gloss that touches the back edge. Add a small paper loop at the top and reinforce it with a tiny strip folded over.
This one reads luxe because it looks like a gem, not a blob. Use deep emerald paper and cut the shape with faceted planes — even simple cuts make it feel jewelry-grade. Add a lighter green highlight plane and glaze it so it reflects light like a cut stone. This design flatters warm and cool undertones because green complements both, especially in photos with neutral backgrounds. Keep the pendant shape slightly longer than wide so it hangs nicely when you clip it to a bag.
Pro tipFacet lines should be shallow — too deep cuts weaken the paper and the squishy collapses.



