
1. Antique Brass Tray With Velvet Ring
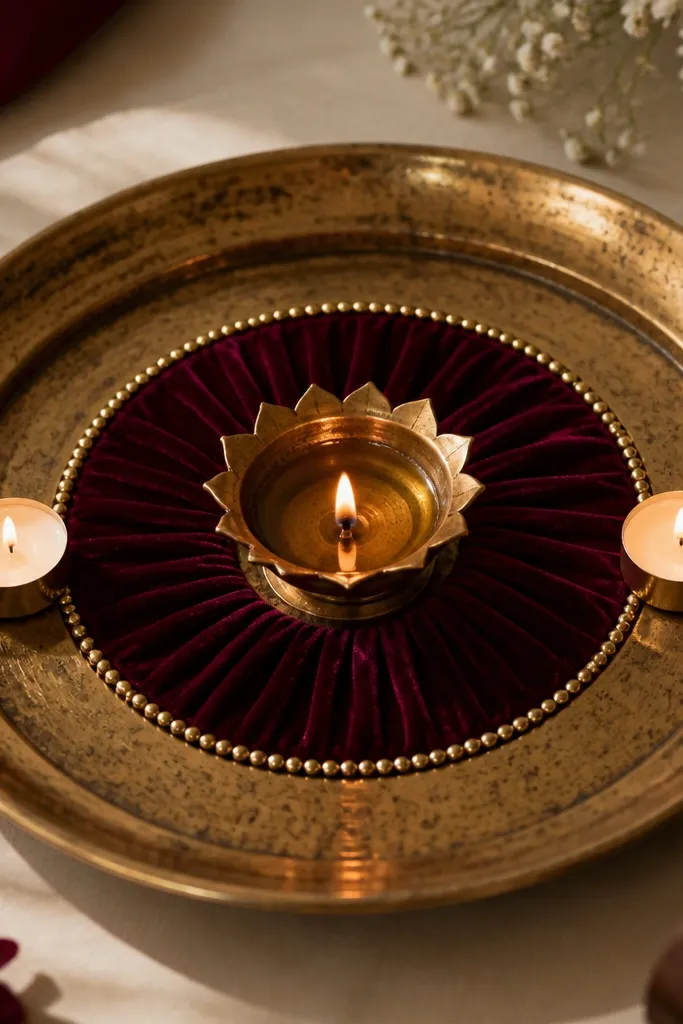
This one looks high end because the diya sits inside a velvet “halo” instead of on bare surface. Use deep maroon velvet or velour for the ring — it eats extra light and makes the flame glow warmer. The antique brass tray ties the whole thing to warm, hotel-style decor, especially if your room lighting is yellow. This design flatters most spaces because the colors are rich without being loud, and the symmetrical setup looks clean even in wide photos. It works best for dining tables and mandir shelves where you can keep the surrounding area uncluttered.
Start by placing a round tray on your work surface and tracing its inner circle onto foam sheet. Cut a ring shape so it sits about 1.5 cm above the tray surface. Wrap the ring with maroon velvet, pulling it taut and gluing the edges underneath. Spray a thin mist of antique-gold metallic paint on a cardboard strip, let it dry, then cut tiny speckles to sprinkle lightly near the tray rim. Finally, set the diya in the center (LED for setup), add a gold bead line around the ring top edge, and place two small tea lights at equal distances.
Pro tipDust a little gold powder only on the tray rim where the flame reflection hits — it looks like aged metal, not craft glitter.
AvoidDon’t use plain felt under the diya; it makes the center look flat and cheap.
2. Pearl Bead Waterfall Glass Jar Diya
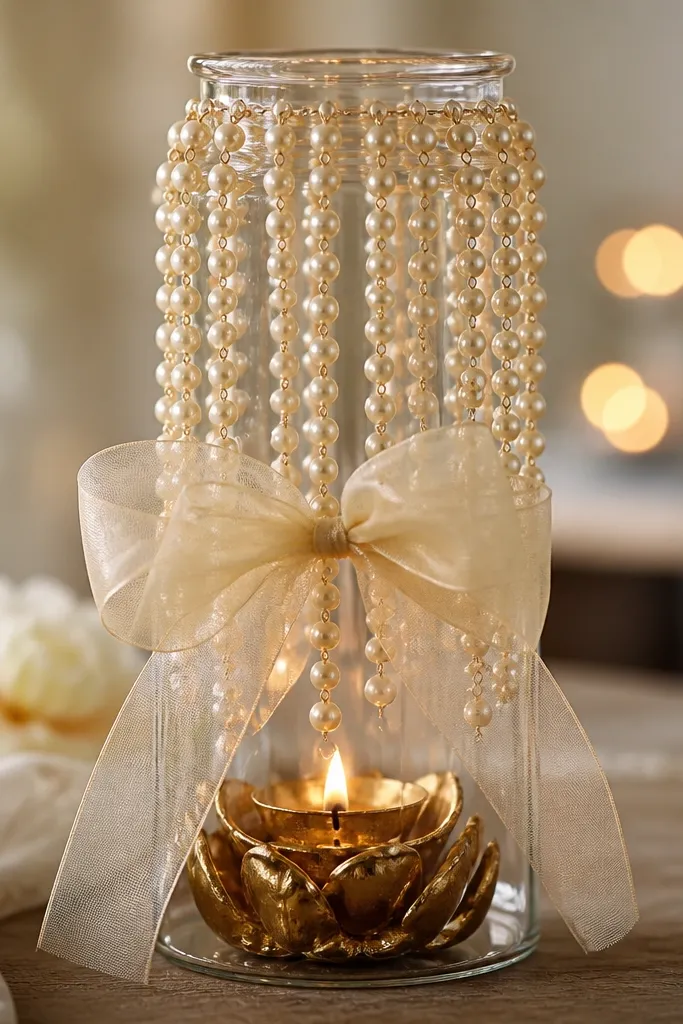
A clear jar instantly gives “luxury” because glass catches light and makes the flame look deeper. Pearl beads create tiny reflections that look expensive even if you buy them from a craft shop. I like cream or champagne pearls with an ivory organza wrap, because warm tones flatter skin when you’re taking photos near the setup. This design works great for entryway tables and side consoles where you want vertical drama. It also hides messy wiring if you use an LED candle inside.
Choose a jar with a straight neck so the beads hang neatly. Wrap the jar middle with a strip of ivory organza and tie a bow on the front, then secure it with hot glue. Thread pearl beads onto a fishing line strand, making 3 lengths: one long, one medium, one short. Glue the top end of each strand inside the jar neck so the pearls fall like a waterfall. Place an LED tea light or small diya base in the jar center, then trim the bead lengths so they stop about 2 cm above the flame top.
Pro tipIf you’re doing this for real diyas, add a small metal cup under the diya so wax doesn’t stain the jar.
AvoidSkip chunky bead garlands that look like store-bought necklaces; use fine beads that create light speckles.
3. Saffron Silk Petal Scallop Bowl
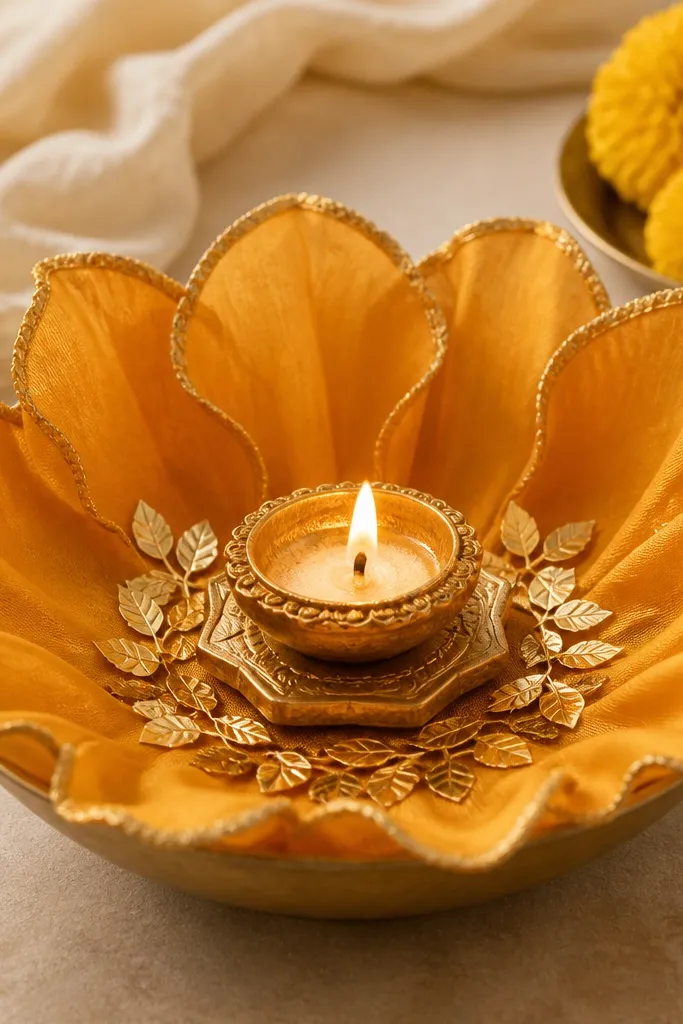
This design reads luxury because silk petals look fluid and expensive, and the scalloped edge gives a designer finish. Saffron with warm gold leaf accents makes the diya glow look richer, not washed out. I’ve used this for pooja evenings and it looks especially good when your walls are off-white, because the petal shadows add depth. It flatters small spaces too since the bowl stays compact but still looks full. If you want something elegant instead of flashy, this is it.
Start with a shallow ceramic or plastic bowl and cut a foam circle to fit inside with a 1 cm height. Cover the foam with satin in saffron or turmeric-orange. Make 24-30 petal shapes from silk fabric or silk-satin, then glue them around the foam in a tight spiral, overlapping slightly. Add tiny golden leaf cutouts (foil craft paper) on every third petal for that “luxury” shimmer. Place a small raised base in the center (a short glass coaster or cut foam pedestal), then set the diya on top and adjust petal curvature by pressing them outward.
Mist the petals lightly with fabric-safe shimmer spray so the gold only shows where the flame flickers.
Don’t glue petals flat; if they don’t curve, the whole bowl looks like a craft project.
4. Rose Gold Window Frame Diya Stand
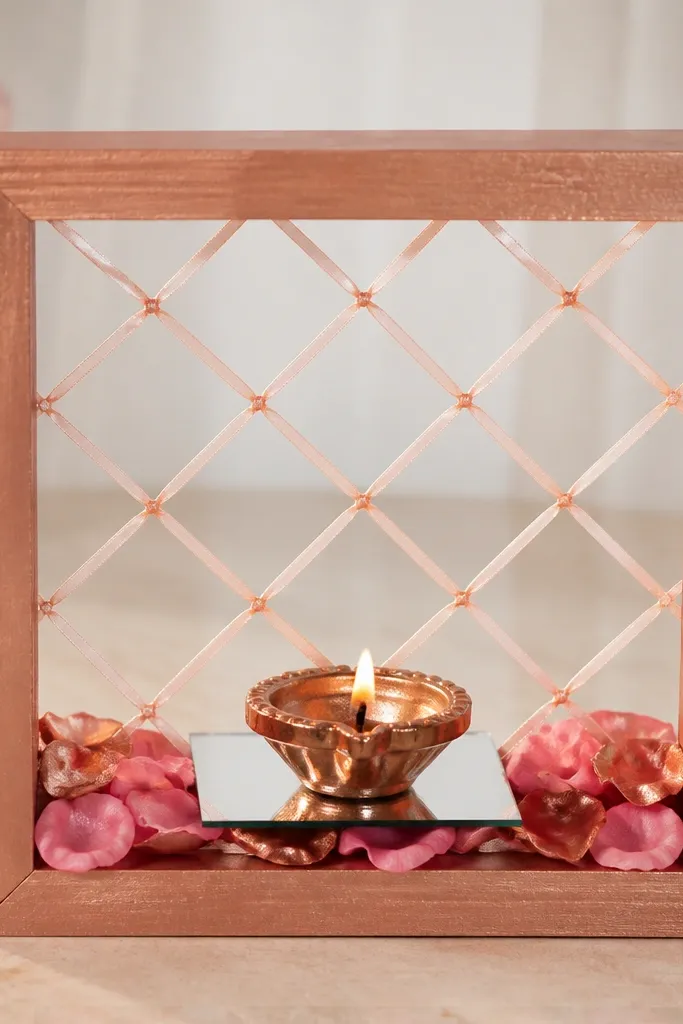
A window-frame shape turns a diya into a “feature,” which is why it looks upscale in photos. Rose gold is the safe luxury color here because it looks warm under indoor lighting and doesn’t clash with most outfits. The mirrored tile underneath the diya adds a second flame reflection, doubling the glow. This design flatters people doing events with pinks, peaches, and warm neutrals because the color family stays consistent. It works best for table centerpieces and small mandir corners where you want a clean architectural look.
Cut a rectangular frame from thick cardboard, then wrap it with thin satin ribbon or cover it with cardstock and spray-paint rose gold. Cut a mirrored tile to fit inside the frame bottom, leaving a 1 cm border. Glue a lattice of thin satin ribbon across the mirror in a crisscross pattern, keeping the intersection points centered. Arrange faux rose petals in a low circle around the diya base, and add a few petals tucked under the ribbon intersections. Finally, set the diya in the center on a small stand, then add 2-3 tiny tea lights behind the mirrored tile for depth.
Use a matte finish rose gold spray on the frame and keep the mirror clean — shine mismatch looks cheap.
Don’t use glossy acrylic paint on the frame; it flakes and looks plasticky after a day.
5. Crystal Cut Rim Floating Diya on Mirror
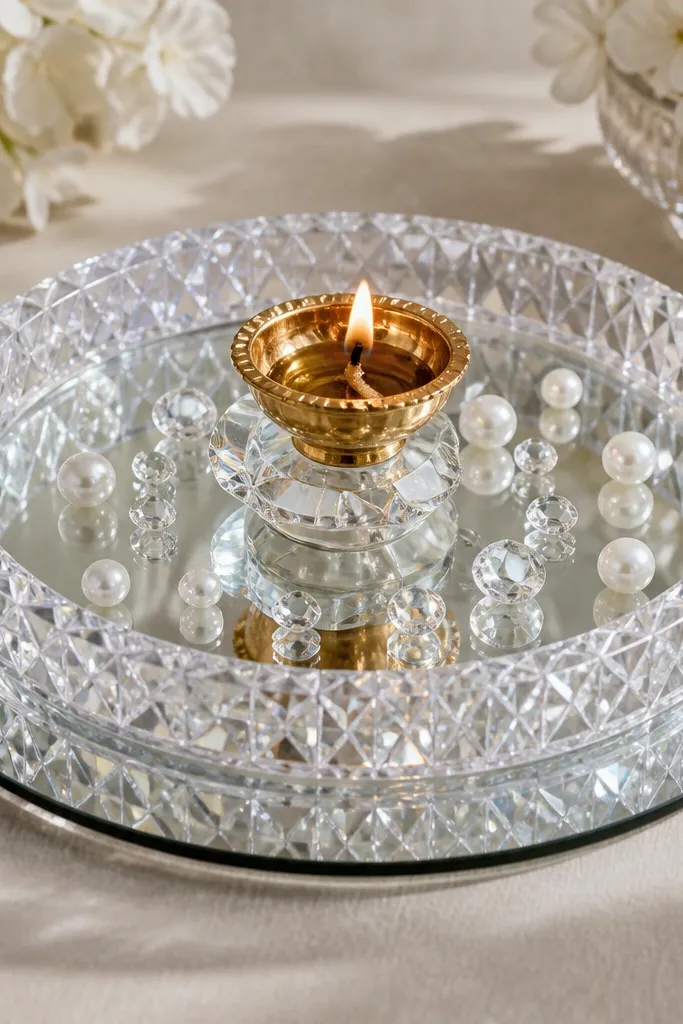
This looks luxury because it makes light bounce in multiple directions. The mirror base reflects the flame sharply, while the clear acrylic ring gives a “crystal tray” vibe without needing real crystal. White pearls and clear crystals keep it elegant instead of messy. This design flatters minimal interiors and works with silver, white, and soft grey themes. It’s also perfect for videos because the reflections move with the flame.
Start with a round mirror on a stable table. Place a thin foam circle under the mirror edge if it slides. Set a clear acrylic ring (or cut a ring from transparent packaging and cover with clear tape) in the center. Put a small glass coaster or acrylic stand in the middle for the diya so it sits 1-2 cm above the mirror surface. Sprinkle clear crystals and a few white pearls around the stand base, spacing them like a pattern. Light with an LED first to check reflections, then swap to real diya if the surface is heat-safe.
Wipe the mirror with microfiber and a tiny bit of glass cleaner — fingerprints ruin the luxury effect.
Don’t use colored stones; they tint the flame and make the whole thing look like a theme park.
6. Gold Foil Geometric Paper Fan Backdrop
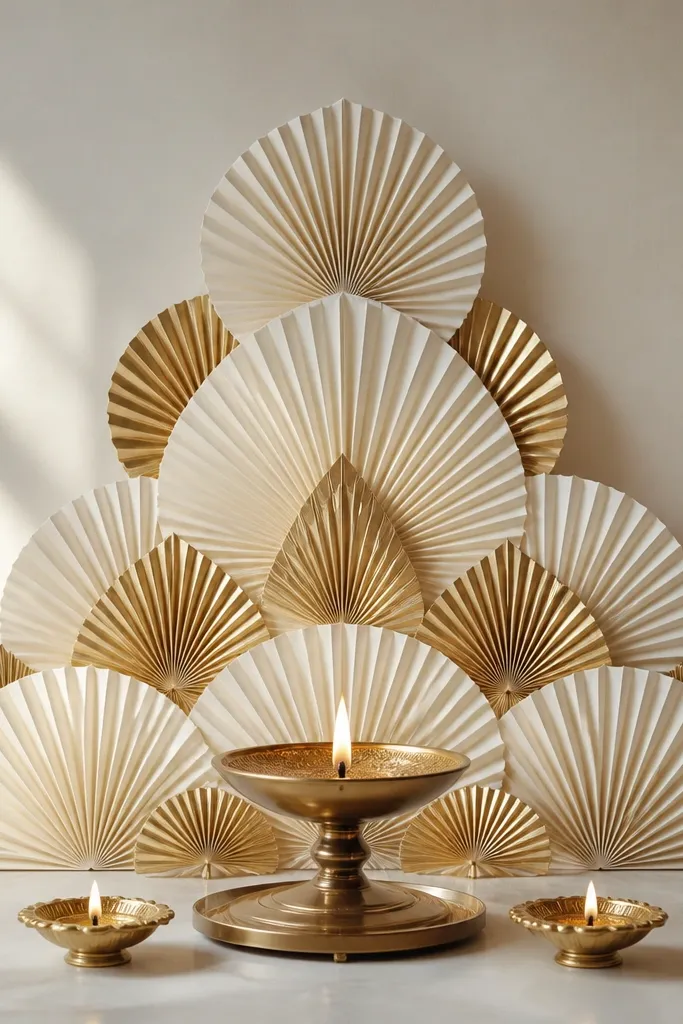
A fan backdrop makes the diya look framed like a stage prop. Gold foil on ivory paper reads expensive because it catches light with crisp edges, not glitter dust. This design is great if you’re decorating a wall or mandir shelf and want height without building a tall stand. It flatters small rooms because the vertical lines pull the eye up. It also photographs well because the fan pattern gives a clean background.
Cut 12-16 strips of ivory craft paper about 10 cm wide and 30 cm tall. Fold each strip accordion-style, then stack them into two sets to form a symmetrical triangle behind the diya. Spray or paint the outer folds with gold foil spray, keeping the center ivory for contrast. Mount the fans on a cardboard backing, then place it against the wall. Put the diya on a small brass plate in front, and add two mini diyas at equal spacing on either side. Adjust the angle of the backdrop so the flame reflects on the gold folds.
Pro tipUse matte ivory paper inside the fans and reserve gold foil only for the outer folds.
AvoidDon’t use thick foam board as the only backdrop; it looks flat and blocks the light reflections.
7. Emerald Velvet Column With Mini Creeper Garland
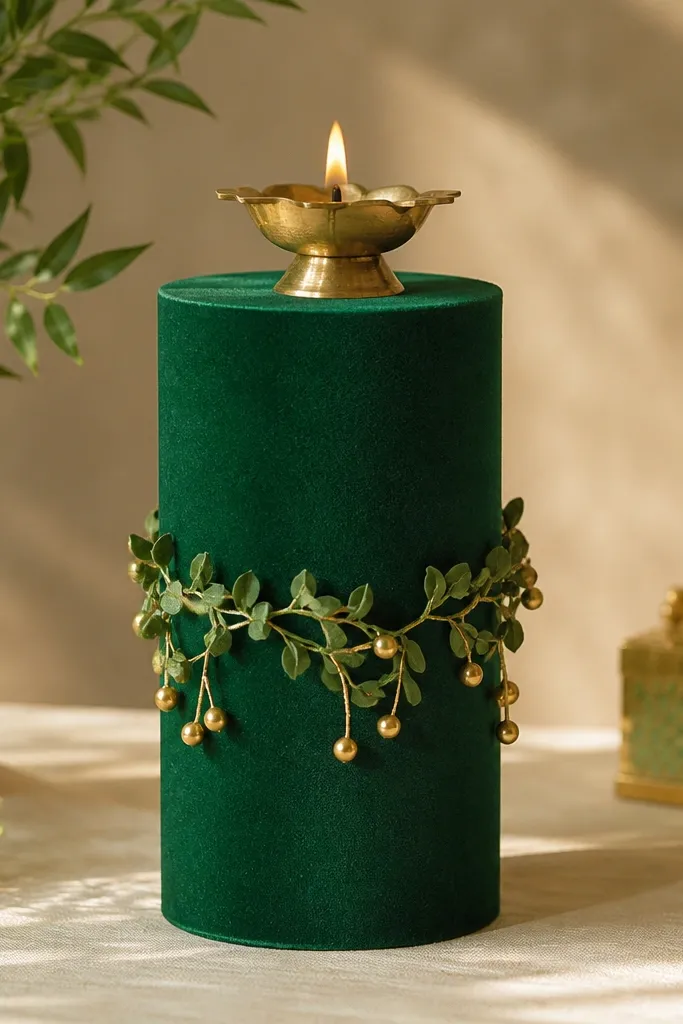
Velvet columns look high end because they have texture that softens harsh light. Emerald green is a strong choice — it makes the flame look warmer and the room look richer, especially with warm-toned bulbs. The mini leaf garland adds a natural luxury feel without turning it into a jungle theme. This design flatters people doing a centerpiece on a stand because the height is narrow and elegant. It works best for pooja nights where you want a vertical focal point.
Wrap a foam cylinder (around 10-12 cm diameter) in emerald velvet, gluing seams on the back. Hot glue a thin gold bead trim around the pedestal about 5 cm from the bottom. Thread a faux mini leaf garland and wrap it around the pedestal, securing with tiny glue dots only at contact points. Cut a round platform top cover from felt or velvet, and place it over the cylinder top. Set a diya in a small metal holder on the top center. Add 3-4 gold bead drops on the front side so the flame reflection hits them.
If you’re using real diyas, keep the holder metallic and leave a 1 cm gap between flame and velvet edge.
Don’t wrap the velvet with glossy adhesive film; it creates shine patches that look cheap.
8. Champagne Champagne-Glass Cluster With LED Candles
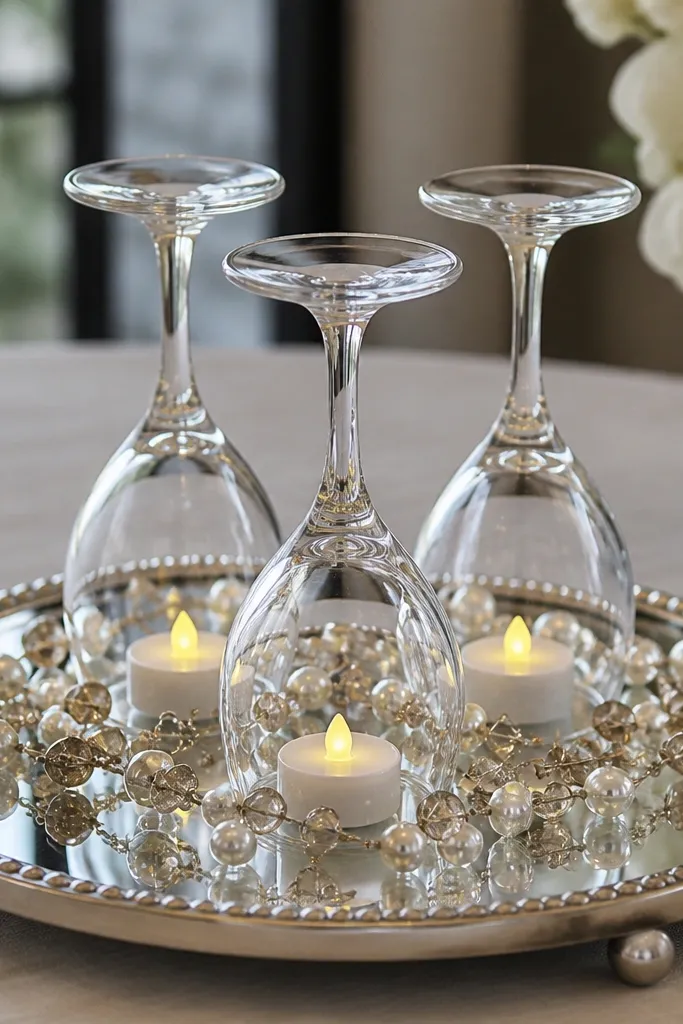
Using a mirrored tray plus glass shapes makes the setup look like table service from a hotel. LED candles inside glasses keep the look consistent for setup and photos without smoke. Champagne beads and white pearls add a soft glow, and the inverted glass arrangement creates multiple reflection points. This design flatters party tables and dessert table corners where you want sparkle but not clutter. It also works for people who hate mess — everything stays contained.
Start with a round mirrored tray. Arrange three small inverted champagne glasses so they form a triangle, leaving a gap of 6-8 cm between them. Put a tiny LED candle or tea light inside each glass base. Sprinkle champagne-colored beads in a thin arc around the glass triangle, then add 10-15 white pearls as accents. Place one small real diya in the center only if you’re sure the tray area is heat-safe; otherwise keep LEDs. Finish by tying a thin champagne satin ribbon around the tray handle area or tray rim using hidden tape.
Pro tipChoose LEDs with warm white 2700K — cool LEDs ruin the champagne look.
AvoidDon’t stack too many glasses; three shapes read luxury, five turns into a craft pile.
9. Black Lacquer Tray With White Marbled Diyas
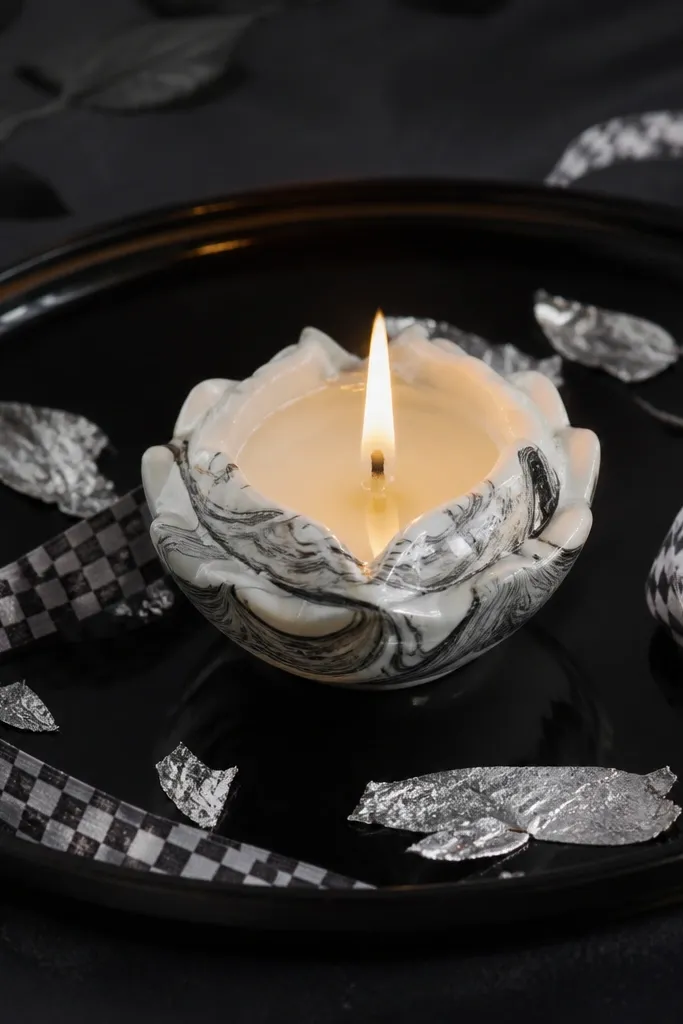
Dark bases look expensive because they create strong contrast. A black lacquer tray makes the flame look brighter and gives a modern, gallery feel. White marbled diyas keep it classy, not spooky, and silver leaf strips add that “high end” shimmer without using too much glitter. This design flatters modern interiors, especially if your decor has black, white, or grey. It also photographs well because the flame edges stay crisp.
Paint a tray with black lacquer spray or glossy black acrylic plus clear coat. Let it cure fully, then wipe lightly with a dry cloth. For the diya, paint a small white ceramic holder with grey marbling using a sponge dab technique, then seal with matte sealer so it doesn’t look like raw paint. Tear silver leaf into thin strips and place them around the diya in a loose ring. Add narrow ribbon accents in black-and-white check, tucked under the leaf strips. Place the diya in the center and space two small tea lights symmetrically near the tray edges.
Pro tipSeal marbling with matte sealer — gloss makes painted diyas look like plastic.
AvoidDon’t use bright neon colors on the tray; contrast turns the whole thing into party decor.
10. Pastel Organza Bubble Halo With Floating Tea Lights
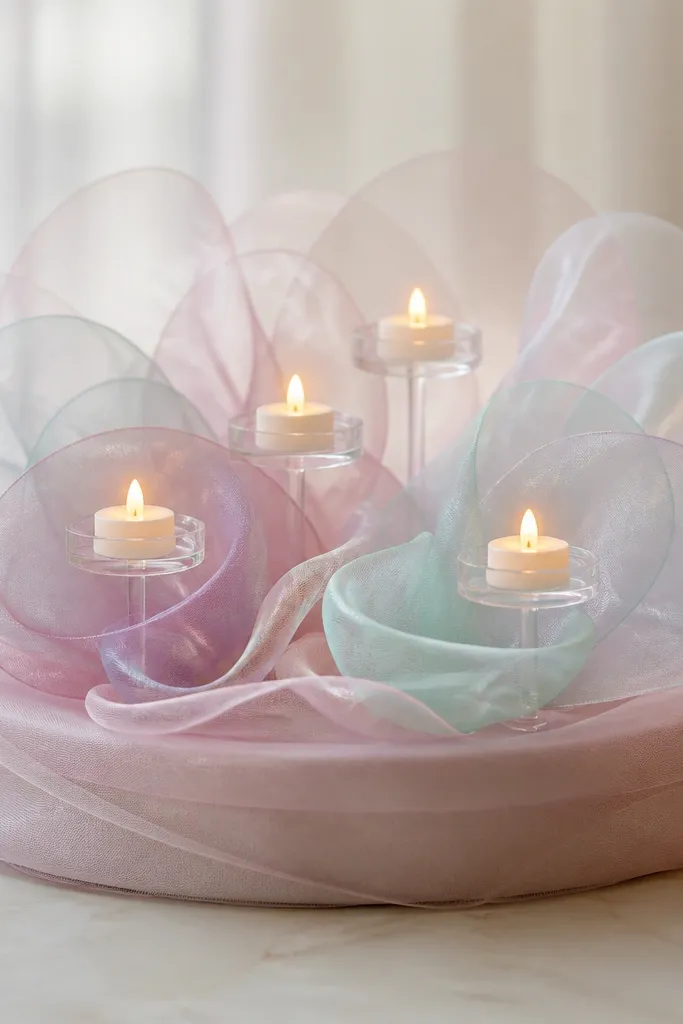
Organza bubbles look luxury because they are sheer and catch light like soft fabric smoke. Pastel shades — blush pink, powder blue, and pale mint — create a gentle glow that still reads “designed.” The floating effect comes from clear acrylic discs, which keep the tea lights visually light. This design flatters outdoor evening setups and calm interiors where you want a romantic look without gold. It also works for birthdays and housewarmings because it feels festive but not loud.
Cut a round foam base about 20 cm wide and cover it with a thin layer of white satin. Cut organza squares and tie them into small loops, then glue those loops around the base top edge to form a halo. Keep the loops uneven by 1-2 cm so it looks airy, not manufactured. Place clear acrylic discs on top in a circle, then set LED tea lights on each disc. Add one larger central diya or LED in the middle for hierarchy. Finish with a few loose organza strands draped between loops for movement.
Pro tipUse one main pastel and one accent pastel, not five colors, or it looks like party confetti.
AvoidDon’t crowd the halo with too many loops; density kills the airy luxury effect.
11. Teak Wood Slice Base With Marigold Thread Border
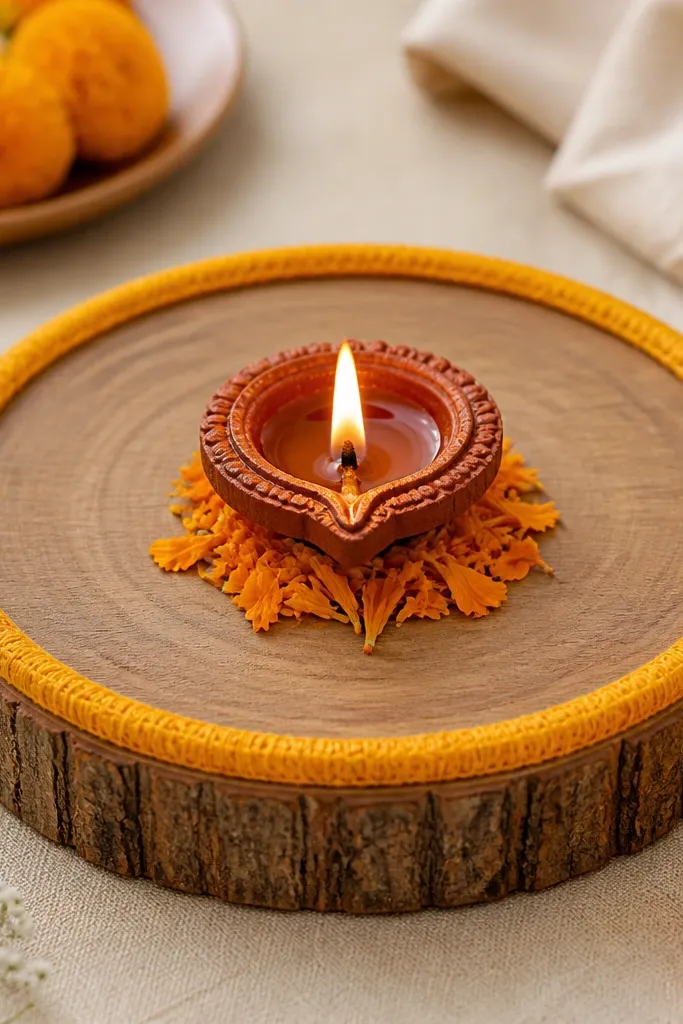
Natural wood slices look upscale when the finish is clean and the border is controlled. The marigold thread ring gives a warm, traditional color punch that still reads neat. This design flatters rustic-modern homes and looks amazing under warm indoor lights because wood texture adds realism. It also works if you want a diya centerpiece that doesn’t feel overly decorative — it’s grounded. Great for verandas and dining tables where you want warmth without heavy glitter.
Sand a teak or wood slice lightly, then wipe it clean. Seal with a clear matte wood sealer so it doesn’t look raw. Trace the inner circle where you’ll place the diya and cut a small foam or cardboard ring to keep the diya base level. Wrap a marigold-yellow jute or thread tightly around an outer ring of thin cardboard, then glue it around the wood slice edge. Place the diya in the center on a small heat-safe metal cup. Add 6-8 real marigold petals around the diya base, spaced like a small crown.
Pro tipUse a metal cup under the diya even on wood — it saves your base from soot stains.
AvoidDon’t leave the wood unsealed; soot and oil soak in and ruin the “luxury” finish.
12. Gold Leaf Rangoli-Inspired Triangle With Diyas
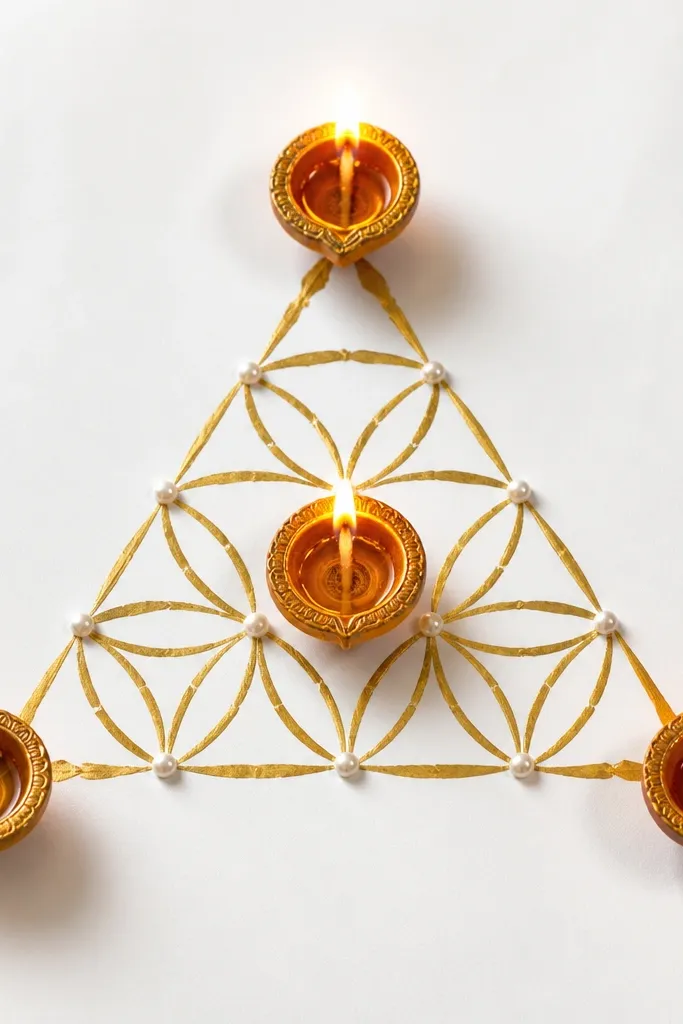
This one looks expensive because it borrows the structure of rangoli but uses gold leaf and pearls instead of messy powders. The triangle shape creates instant symmetry, and symmetry reads “planned” in photos. Gold leaf lines are crisp, and pearl dots add that tiny highlight effect when the flame flickers. It flatters bright rooms and white floors because the gold pops without needing extra color. Use it when you want a clean luxury look that still feels festive.
Cut a white foam board or thick paper sheet into a triangle base. Use a pencil to mark a symmetrical triangle grid with 3-4 interior lines. Trace those lines with craft glue in a thin bead, then press gold leaf pieces along the glue path. Add pearl beads at line intersections and along the outer triangle edges. Place three diyas at the triangle corners and one in the center, each on a small heat-safe saucer. Keep the diya heights consistent by using the same type of holder for all four.
Pro tipPress gold leaf with a soft makeup brush so it sticks only where glue is — messy edges look cheap.
AvoidDon’t use loose glitter powder as the main “gold line”; it smears and kills the clean geometry.
13. Ivory Lace Runner Diya Center With Satin Bow
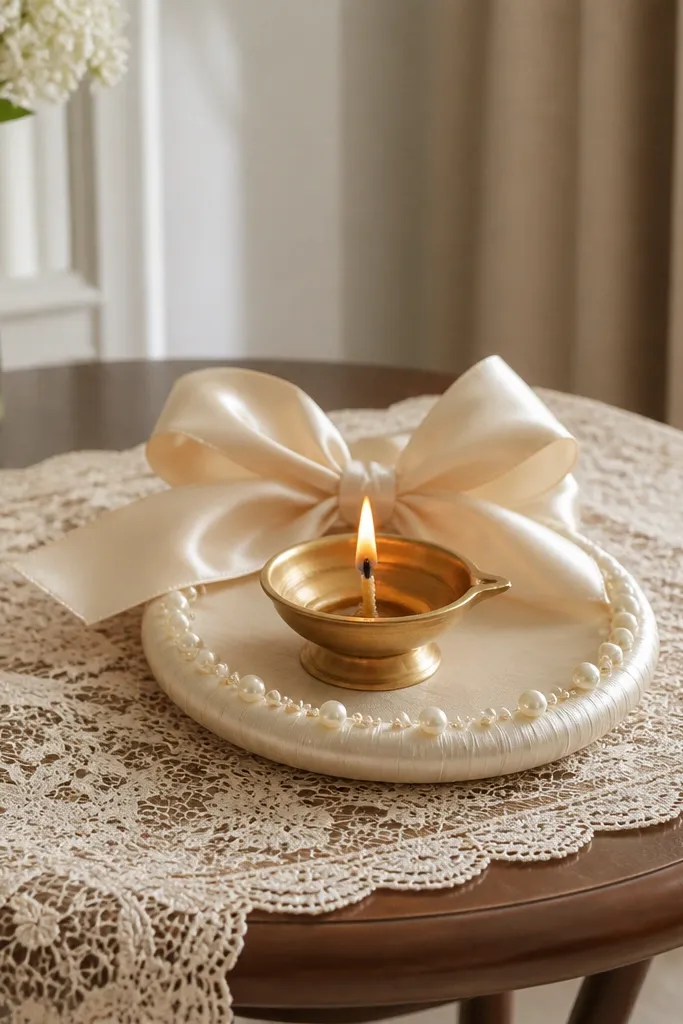
Lace looks high end when it’s used as a backdrop, not as a random overlay. This setup uses an ivory lace runner to soften the scene and make the diya look like it belongs in a formal dinner. The satin bow behind the diya frames the flame and stops the center from blending into the table. Faux pearls add subtle sparkle that doesn’t look costume-y. This works best for dinner tables and mandir shelves where you have fabric already in your decor. It also flatters people because the color stays warm and neutral.
Lay an ivory lace runner across the table and center a small round tray on top. Wrap the tray edge with cream satin ribbon, overlapping the seam at the back. Tie a satin bow and glue it lightly to the back of the tray so it forms a “halo” shape behind the diya. Place the diya on a small heat-safe holder in the tray center. Add faux pearls around the tray edge in a thin ring, leaving gaps so it doesn’t look crowded. If you’re adding two side tea lights, keep them outside the pearl ring so the center stays the focus.
Pro tipUse lace with a visible pattern, not netting — the pattern creates texture that reads luxury on camera.
AvoidDon’t cover the tray completely with lace; too much fabric makes it look like a doily craft.
14. Terracotta Clay Planter With Copper Wire Vines
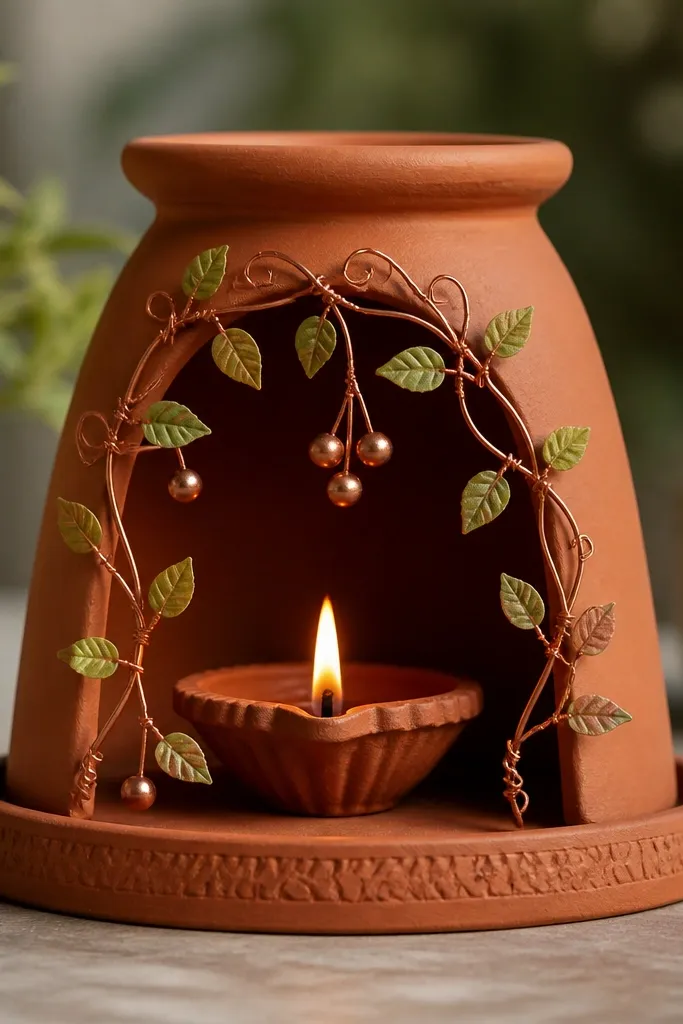
A terracotta planter gives weight and realism, and copper wire adds a handcrafted luxury vibe. When copper is warmed against the flame, it looks like antique decor instead of craft metal. This design flatters outdoor setups and earthy home styles — it also works for guests who like rustic but polished. The wire vines create movement lines that guide the eye to the diya. It’s a good pick if you want something different from beads and glitter-heavy decor.
Start by turning a terracotta planter upside down and placing it on a heat-safe metal base (a small round plate). Secure a small foam or cardboard insert inside the planter opening so the diya sits centered and stable. Shape copper wire into 3-4 vine arcs, then wrap the wire ends around the planter rim for grip. Add tiny faux leaves by twisting them onto the wire at intervals, then glue copper beads at two points so they catch flame reflection. Place the diya in the center opening and adjust vine angles so they don’t block the flame. Finish with a light dusting of copper paint on wire nodes where the flame reflection hits.
Roughen the copper wire slightly with sandpaper so paint and glue hold better.
Don’t let vines touch the flame; keep at least 2-3 cm clearance.
15. Black Cherry Candle Tray With Cranberry Bead Bands
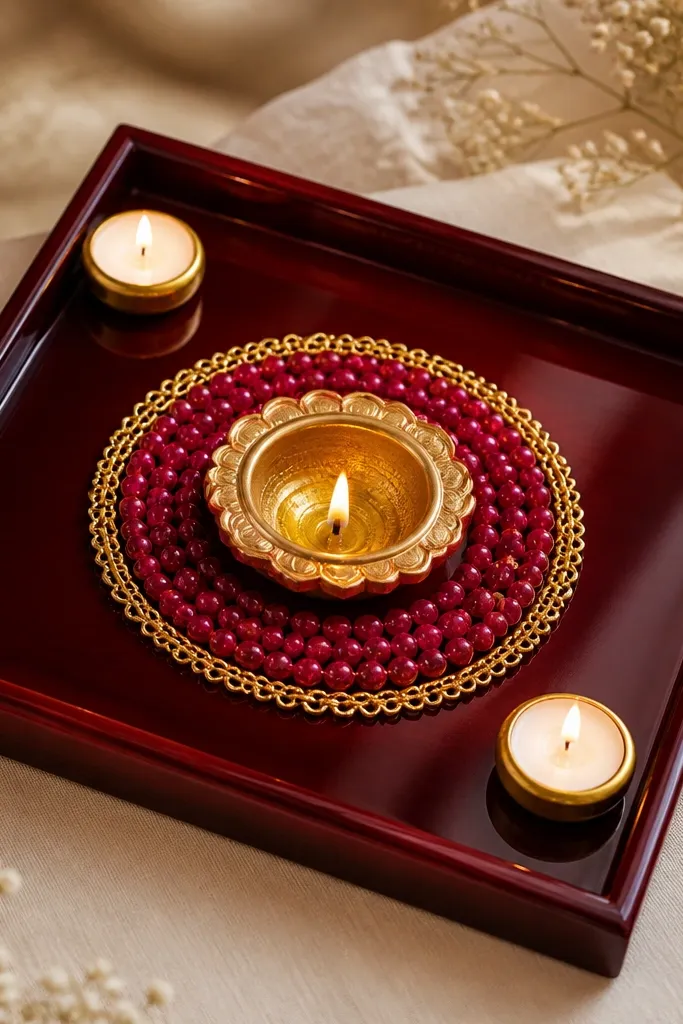
Deep cherry tones look luxury because they read like stained glass warmth on camera. Cranberry beads add a jewel effect without needing gemstones. The key is keeping the design tight: one center diya, one bead band, two corner lights. This flatters spaces with dark wood or neutral walls because the color has depth. It’s also a great option when you want to avoid gold leaf mess but still want that “fancy” glow.
Paint or buy a shallow tray in deep cherry — glossy finish helps, but matte works if you add shine through beads. Create a bead band by looping cranberry beads onto fishing line and forming a ring that sits about 2 cm away from the diya holder. Glue the ring to the tray using small dots so it stays even. Add a thin gold chain segment as an accent line across the front, anchored with hot glue. Place the diya in the center on a small metal saucer. Put two tea lights at opposite corners, turned so their flames face inward.
Pro tipUse warm white LEDs for setup and check the bead ring from the camera angle before you light real diyas.
AvoidDon’t mix cranberry with bright red ribbon; it looks cheap under warm lighting.



