
1. Stamped Canvas Nameplate with Thread Border
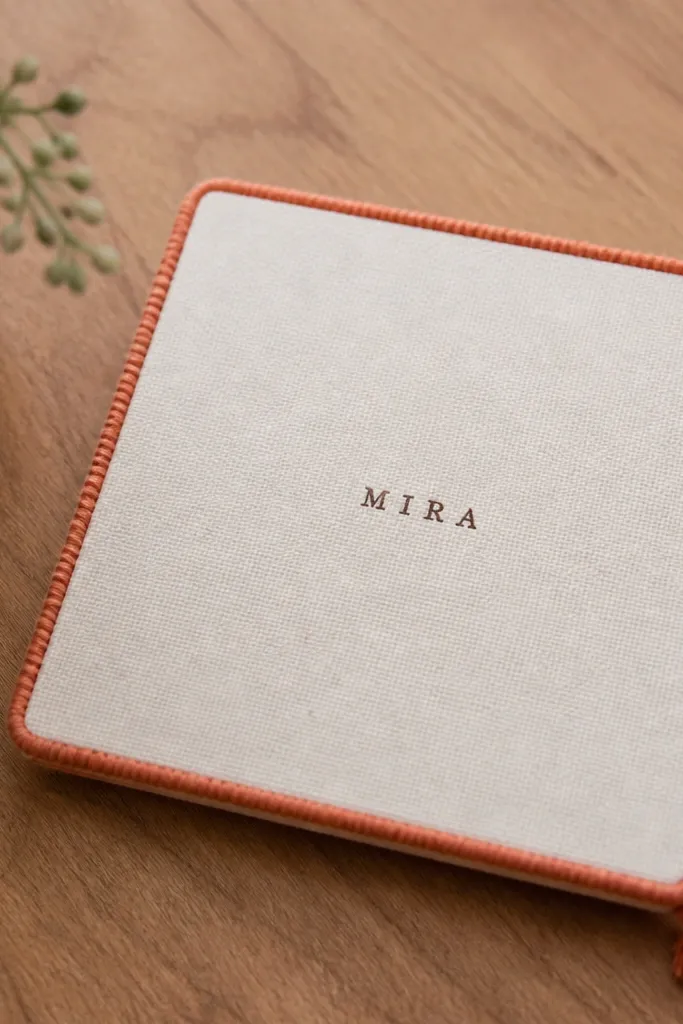
This gift works because it feels personal without needing a big painting. You make a compact canvas nameplate sized about 5x7 inches, then anchor it with a stamped name in consistent ink. I like dark brown for most skin tones and home decor — it reads warm and not harsh. The thread border gives it texture you can feel, and it looks intentional even from across the room. It’s best for a best friend who likes desk or shelf styling, since it looks good leaning against books or standing in a small frame.
Start by priming or lightly sanding the canvas panel if it’s glossy, then tape off a clean rectangle in the center using painter’s tape. Stamp the name with a firm hand using a stamp ink pad (dark brown or charcoal), letting it dry flat. Wrap embroidery thread around the canvas edge in even passes and tie off at the back so the front stays neat. Add one small tassel from the same thread color and glue it at the bottom edge with hot glue. Finish by removing the tape slowly to reveal crisp borders.
Use painter’s tape for the center window even if you freehand it — the straight edges make it look store-bought.
Skipping a drying step for the stamp ink makes the name smear when you add thread.
2. Fabric Scrap Bookmark Set with Heat-Seal Edges
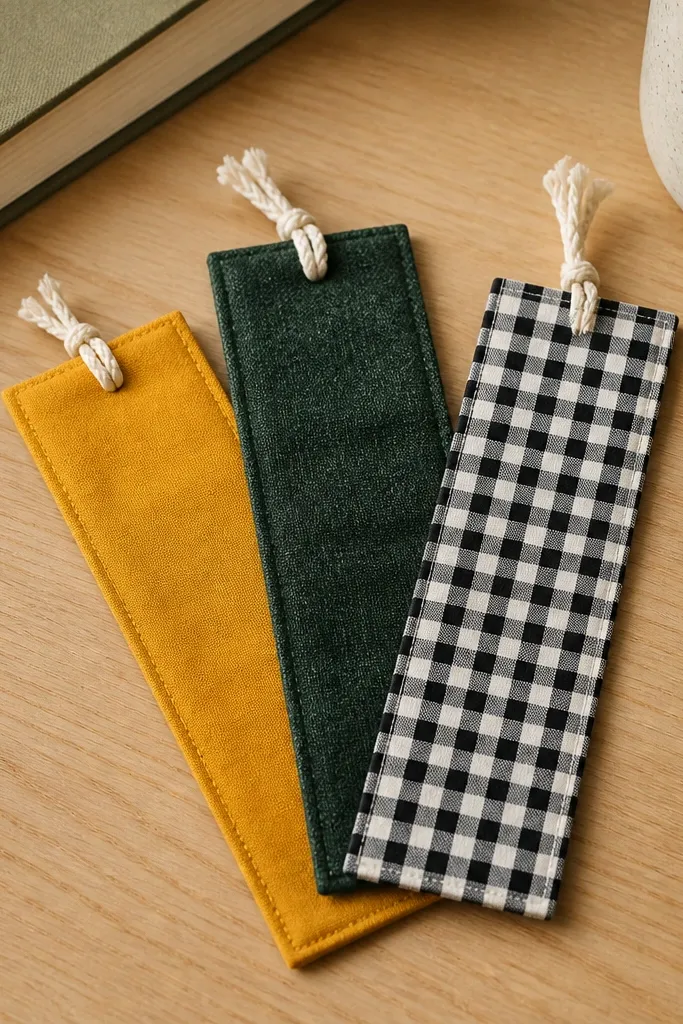
Bookmarks are the easiest “daily use” handmade gift because your friend uses them immediately. This set looks special because the fabrics feel curated — even if they’re scraps. Heat-sealing the edges gives a tidy finish that doesn’t fray after a few weeks. I pair colors that match how people actually decorate: one warm tone (mustard), one grounded tone (green), and one graphic (gingham). If your best friend reads in bed or hauls books in a tote, this is a sweet win that doesn’t clutter her house.
Cut three bookmark strips from fabric scraps, each about 2 inches wide and 7 inches long. Layer each strip with a thin fusible interfacing or iron-on backing, then press according to the product instructions. Heat-seal the raw edge with a low-heat iron so it stays crisp, then trim any uneven ends. Fold the top 1/2 inch over and glue or stitch a small cord loop for a tie. Tie a short cotton cord bow to each bookmark so the top looks intentional, not random.
Pro tipChoose fabrics with a clear pattern scale — small checks and medium stripes look best at bookmark size.
AvoidUsing stretchy knit scraps without backing makes the bookmark curl after a day.
3. Mini Photo Strip in a Handmade Clothespin Frame
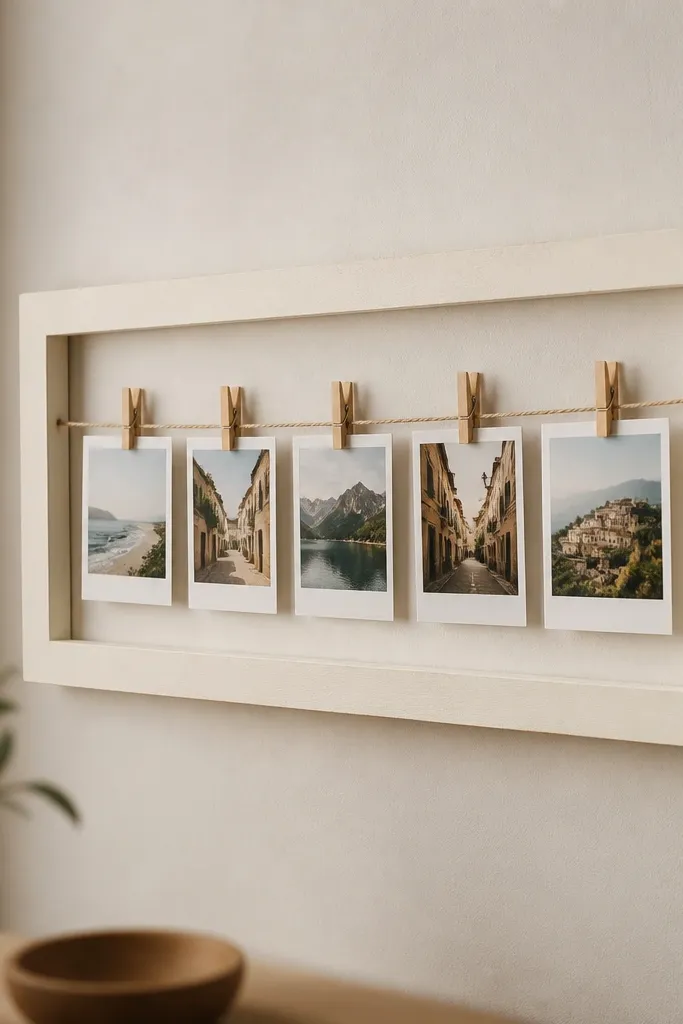
This is a fast way to make a sentimental gift that still looks modern. You’re not making a bulky scrapbook; you’re giving a small display piece your friend can hang in her room. Mini photos print about 2x3 inches, and the clothespins add a handmade, playful vibe. I keep the frame neutral — matte cream or light gray — so skin tones in the photos look warm and not washed out. This fits best friends who like seeing photos around their space, not hiding them in a phone.
Start by painting a small wooden frame or scrap wood rectangle matte cream, then let it dry fully. Stretch a thin string across the back using small screws or sturdy eyelets at the sides. Clip five mini photos to the string using clothespins spaced evenly from left to right. If your photos have mixed lighting, group them by warmth: warm photos together, cooler photos together. Tie a thin ribbon around one clothespin as a visual anchor, then hang the frame with a small picture hook.
Pick photos that match in color temperature; mixed lighting makes the set look messy even when it’s sweet.
Using glossy photo paper causes glare when it’s hanging near a lamp.
4. Scented Drawer Sachets with Label Tags
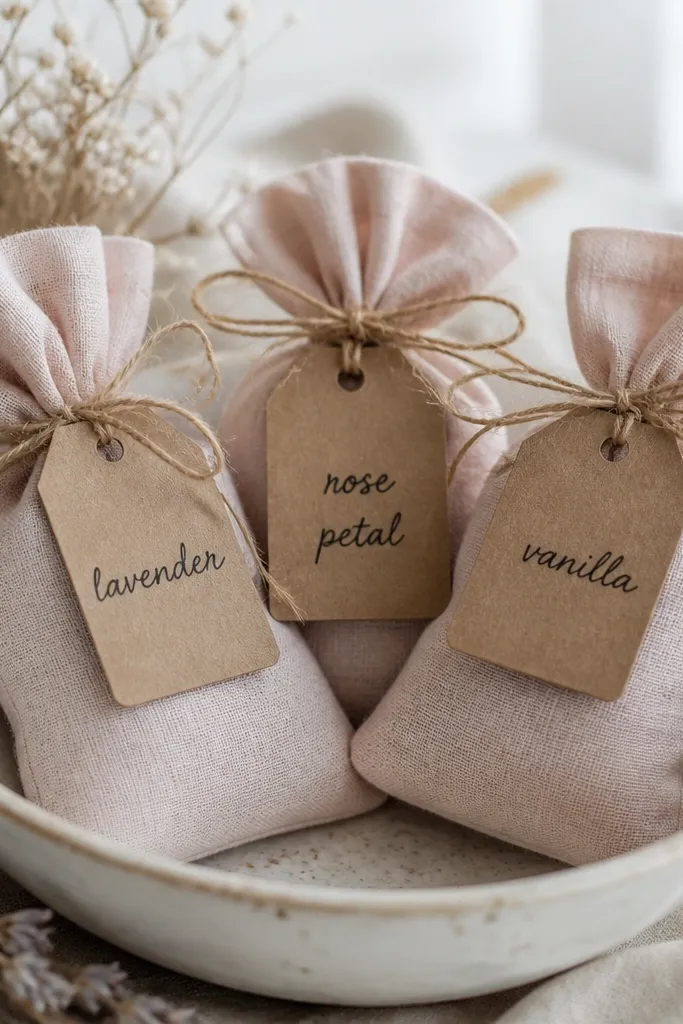
Scented sachets feel thoughtful because they change how a space smells every time your friend opens a drawer. Linen or cotton bags look soft and match real home decor. I like pale blush or oatmeal because it photographs well and doesn’t compete with clothing colors. Fill them with a simple blend: dried lavender plus a pinch of dried rosemary or cedar shavings. This is a great gift for best friends who love cozy clothes, linen closets, or who complain about “that drawer smell.”
Cut small fabric squares, about 5x7 inches, and sew or glue two sides leaving the top open. Turn the bags right-side out so the seam sits inside and the front looks clean. Fill each bag with 1/3 cup dried lavender and a small amount of rosemary or cedar shavings. Tie the top with twine and attach a kraft label tag using a tiny hole punch. Write the scent name and one personal line on the label with a fine-tip pen.
Refresh the scent after a month by gently rubbing the lavender between your fingers.
Overfilling makes the bag look lumpy and cheap in photos.
5. Ribbon-Wrapped Mason Jar Candle Label
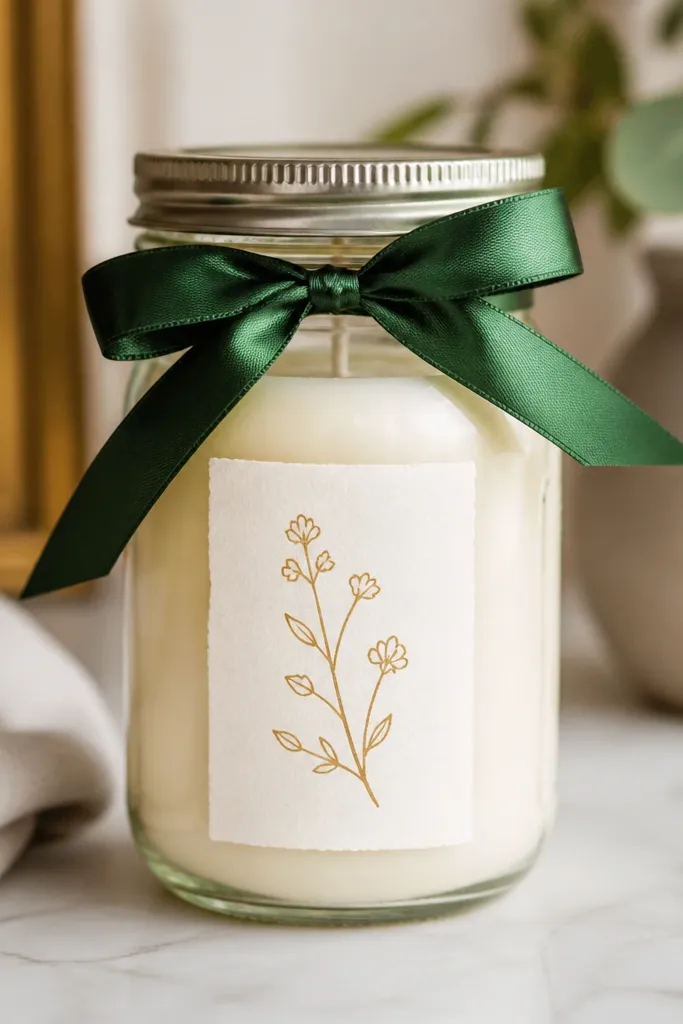
This idea is for the best friend who lights candles and actually burns them. Instead of making the candle from scratch, you personalize a basic jar candle with a label and ribbon. The ribbon hides any messy lid edges and instantly makes it look gift-ready. I use deep green, burnt orange, or black satin because it makes the flame look warmer. It flatters any decor style because the label gives it a personal touch while the jar stays neutral.
Pick a candle jar you can’t see through too much — frosted glass or a clear jar with a printed sleeve works best. Wrap a 1-inch satin ribbon around the lid and tie a tight bow, trimming ends to about 2 inches. Cut a label from thick cardstock and write a short message plus your friend’s name in gold paint pen. Add one small simple icon like a star or heart at the corner. Secure the label with double-sided tape so it sits flat and doesn’t peel when the jar warms.
Pro tipUse a glue stick on the label edges first, then tape — it helps the paper stay smooth on a curved lid.
AvoidHot glue on the ribbon can harden into bumps that snag hair and clothing.
6. Beaded Keychain with Two-Color Charm Stack
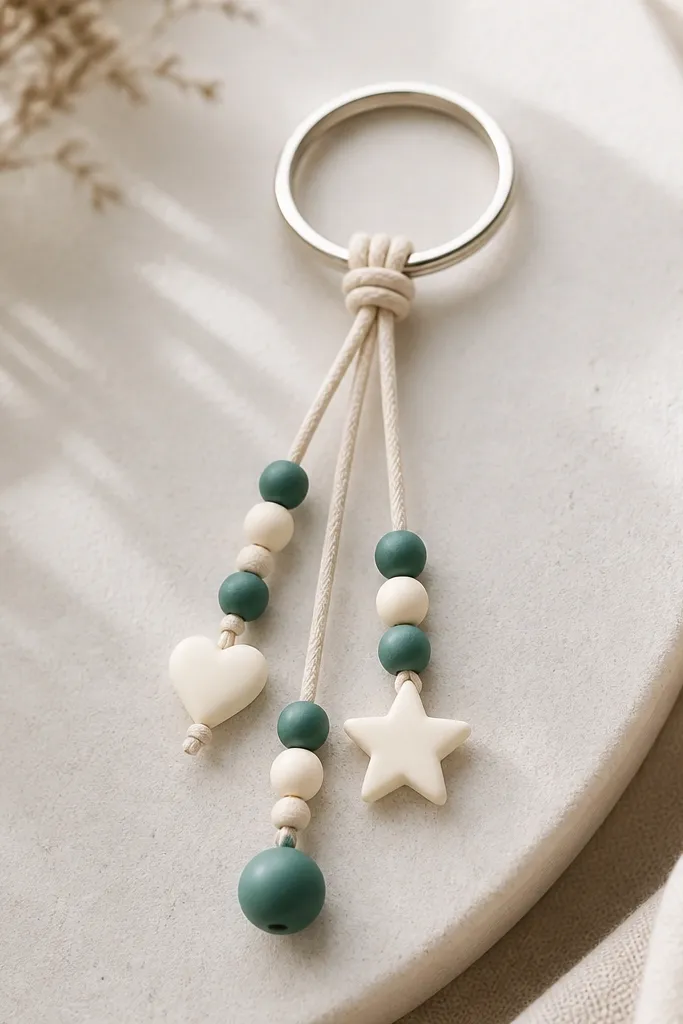
Keychains are small, but they hit the “handmade” feeling every day. This one looks styled because the charms stack at different heights, not all in a straight line. I keep the bead palette to two colors so it looks intentional, not random. Matte cream beads with muted teal gives a clean, calm look that works with most jacket colors. It’s perfect for a best friend who loses keys or carries a lanyard and actually appreciates cute accessories.
Start with a split ring and a short keychain cord or thin wire strand. Thread beads in an alternating pattern, stopping to add a charm between bead groups so it hangs at a different level. Use a small crimp bead or knotting method to secure the last bead tightly. Add one charm at the top (like a small heart) and one at the bottom (like a star) for a balanced stack. Finish by attaching a small jump ring between the last charm and the split ring.
If your friend has a lot of metal hardware, match charm metal color to her bag hardware so it looks cohesive.
Using too many charm types makes it look like a souvenir rack.
7. No-Sew Felt Phone Charm with Button Closure
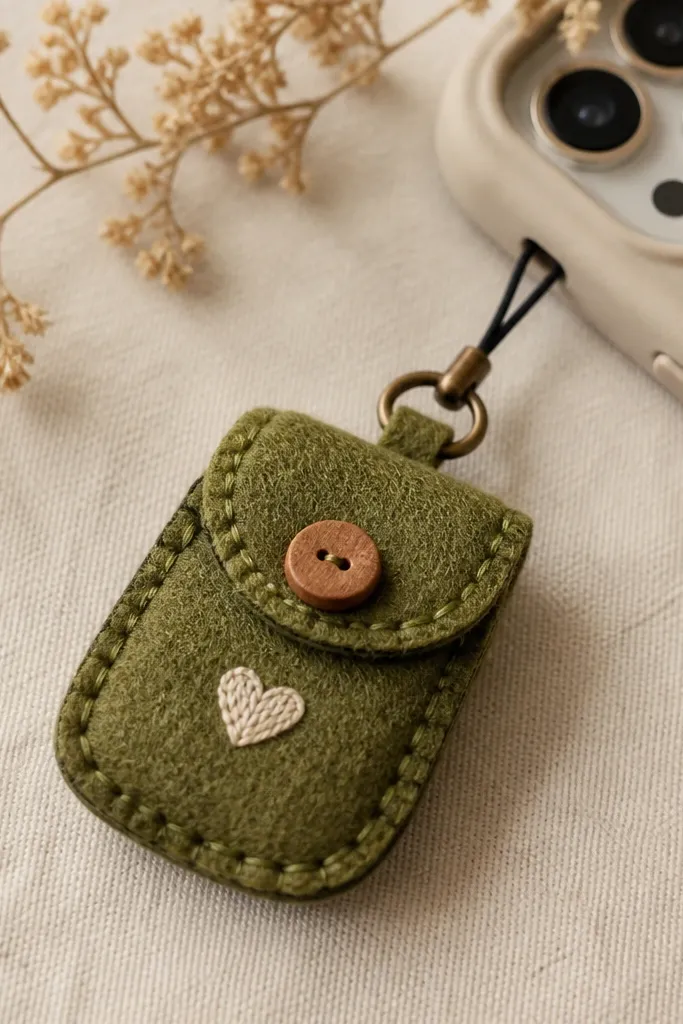
Felt phone charms are cute, practical, and fast because you don’t need a full sewing machine setup. The button closure keeps it from flapping open, and it makes the charm feel “finished” instead of flimsy. I like olive, mustard, or dusty pink felt because it looks soft and warm next to skin and phone cases. The loop attachment lets your friend clip it to her case or strap. This is a good fit if your best friend uses her phone constantly and likes small accessories that don’t weigh much.
Cut two felt rectangles, about 3 inches wide and 4.5 inches tall, plus a small front flap piece if you want a pouch look. Glue the pieces together with fabric glue, then press under a heavy book for 20 minutes. Cut a small loop strip and glue it at the top inside seam so it hangs centered. Add a wooden button on the front and glue a matching felt tab behind it for the closure. Finish with a simple embroidery-style line using embroidery thread and a running stitch effect on the edges.
Use fabric glue, not school glue — felt holds better and looks cleaner at the seam.
Skipping the press time leaves glue ridges that show through felt.
8. Paint-Pour Style Mug Wrap with Washi Tape Borders
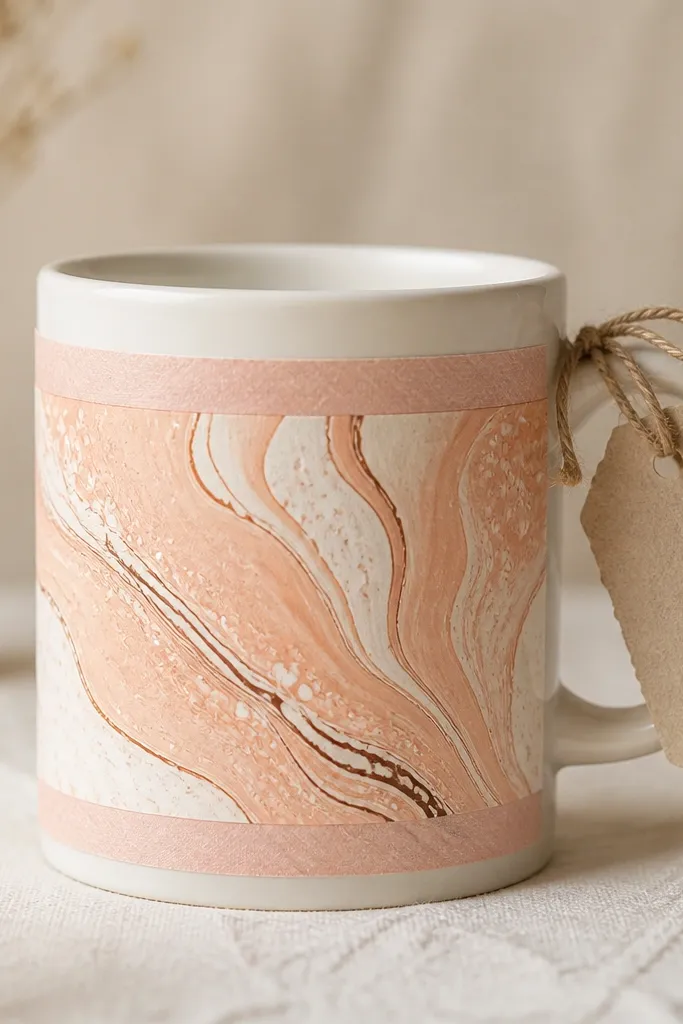
This gift makes a cheap mug look like a custom design without you needing pottery skills. The mug wrap is paper, so it’s light and fast, and it still reads as art. Washi tape borders keep the edges crisp and give it that gallery-style framing. I like peach + cream + dark brown because it looks warm on camera and matches a lot of home interiors. It fits best friends who drink tea, keep a desk mug, or love cozy aesthetic stuff.
Wrap kraft or watercolor paper around the mug to measure the height and circumference, then cut a strip with a 1/2 inch overlap. Create a paint-pour look with diluted acrylics in peach and cream, then add a thin dark brown line with a brush for definition. Let the paper dry flat for at least 30 minutes, then tape the top and bottom edges with washi tape. Fold the overlap neatly and secure it with a small piece of double-sided tape. Tie a small tag to the handle with twine and write a short message in a fine black pen.
Use painter’s tape to hold the paper while painting so the pattern stays smooth and not streaky.
Using wet paper directly on a warm mug wrinkles the wrap.
9. Handmade Bath Salt Jar with Citrus + Vanilla Label
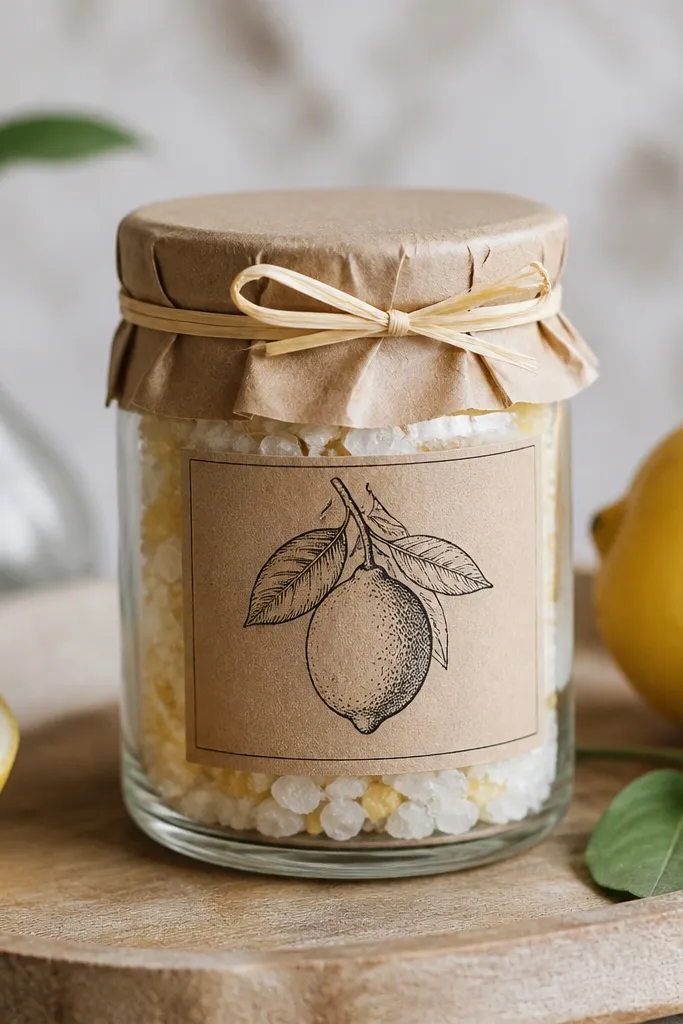
Bath salt jars feel luxurious even when you make them in a short session. The jar looks pretty on a shelf, and the label makes it feel like a real product. I like a citrus + vanilla vibe because it smells comforting without going too “perfume-y.” Chunky sea salt crystals look great in photos, and the pale yellow tint reads warm. This works for best friends who love self-care nights, take baths, or keep a guest bathroom stocked.
Mix 1 cup Epsom salt with 1/2 cup sea salt in a bowl. Add a few drops of lemon essential oil and one pinch of vanilla powder or a small amount of vanilla fragrance made for skin-safe products. Stir until the scent is even, then optionally tint with a tiny amount of cosmetic-safe colorant for a pale yellow look. Spoon the mix into a clean jar and pack it lightly so it doesn’t spill. Make a kraft label, wrap a thin ribbon around the lid, and tie a bow at the front.
Wear gloves when adding fragrance — it keeps your hands from smelling like the jar for days.
Adding too much essential oil can irritate skin and makes the jar smell harsh.
10. Hand-Lettered Bookmark Card with Pressed Leaf Accent
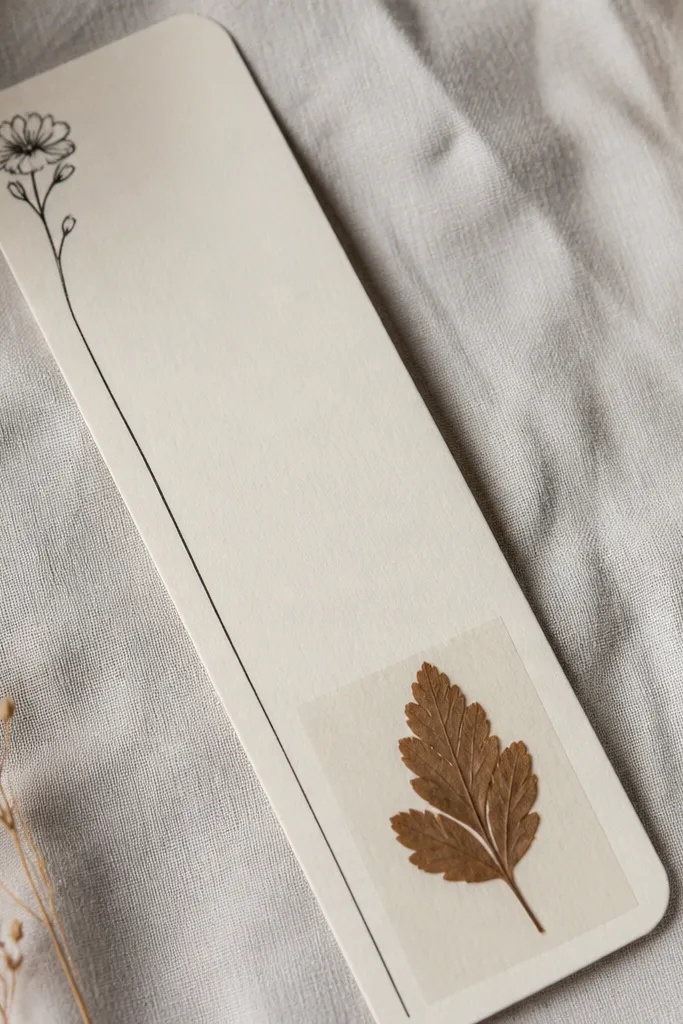
This is a sentimental bookmark that also looks refined. Pressed leaves give a real texture you can see up close, and the hand lettering makes it feel like you sat down and wrote something just for her. I keep the design simple: one leaf, a short quote or inside joke, and a tiny doodle. The cream cardstock and dark ink combo looks good on all skin tones when you hand it over. It suits a best friend who likes nature touches or who keeps cards and notes.
Press a small leaf for at least a week between book pages, then trim it to fit your bookmark area. Cut thick cardstock into a bookmark shape about 2.25 inches wide and 7.5 inches tall. Write your message in black gel pen, then place the leaf near the bottom corner. Seal the leaf with a small piece of clear tape or a clear adhesive sheet so it doesn’t curl. Add one small doodle line next to the leaf and punch a small hole at the top if you want ribbon attachment.
Pro tipPress leaves flat by placing a sheet of parchment between layers so they don’t stick.
AvoidUsing wet leaves makes them turn brown and brittle fast.
11. Mini Lined Journal from a Single Sheet and Corner Binding
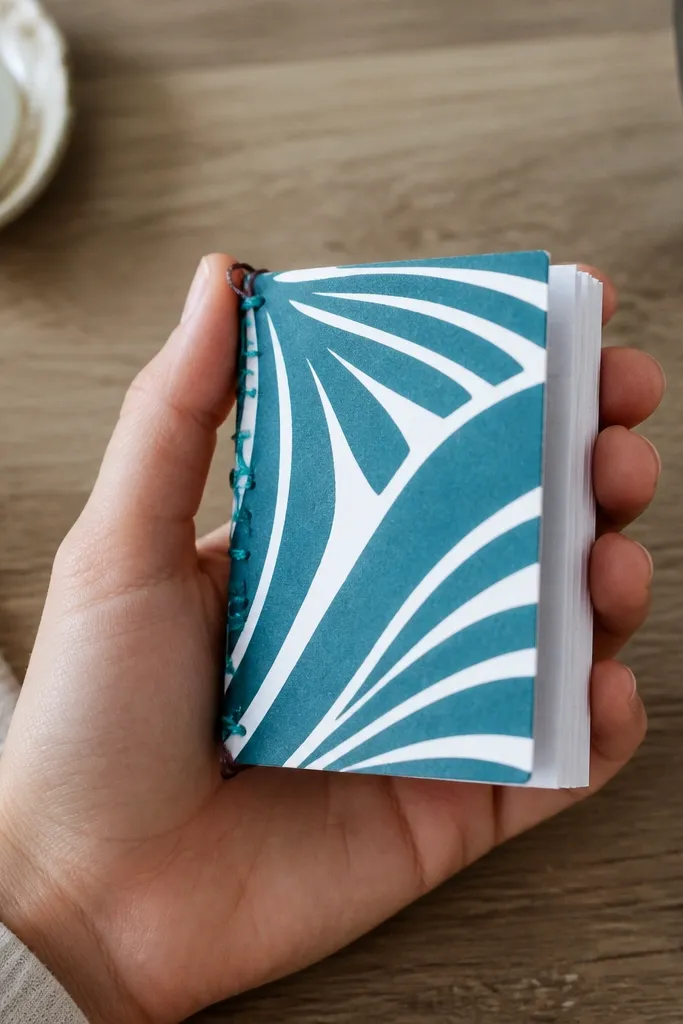
A mini journal is a gift that keeps giving because your best friend can write in it right away. The reason this one looks good is the corner binding — it gives a visible handmade spine without bulky supplies. I like using a single patterned sheet for the cover because it makes the journal look designed, not assembled from random paper. The lined pages help if your friend uses journals for lists, gratitude notes, or meal planning. It’s also small enough to toss in a bag without taking space.
Choose a cover sheet with a strong pattern and cut it to about 6x9 inches. Create lined pages by using notebook paper or printing lines on white paper, then cut the same size. Fold the pages in half to make a booklet stack, then align edges carefully. For the corner binding, make a small hole near the spine corners and thread waxed cotton through, tying a tight knot on the inside. Wrap the cover around the pages and tape or glue the spine edges so the booklet closes flat.
Use a bone folder to sharpen the fold — it makes the spine look crisp.
Skipping alignment makes the pages fan out and look messy.
12. Kraft Paper Gift Tags with Watercolor Wash Background
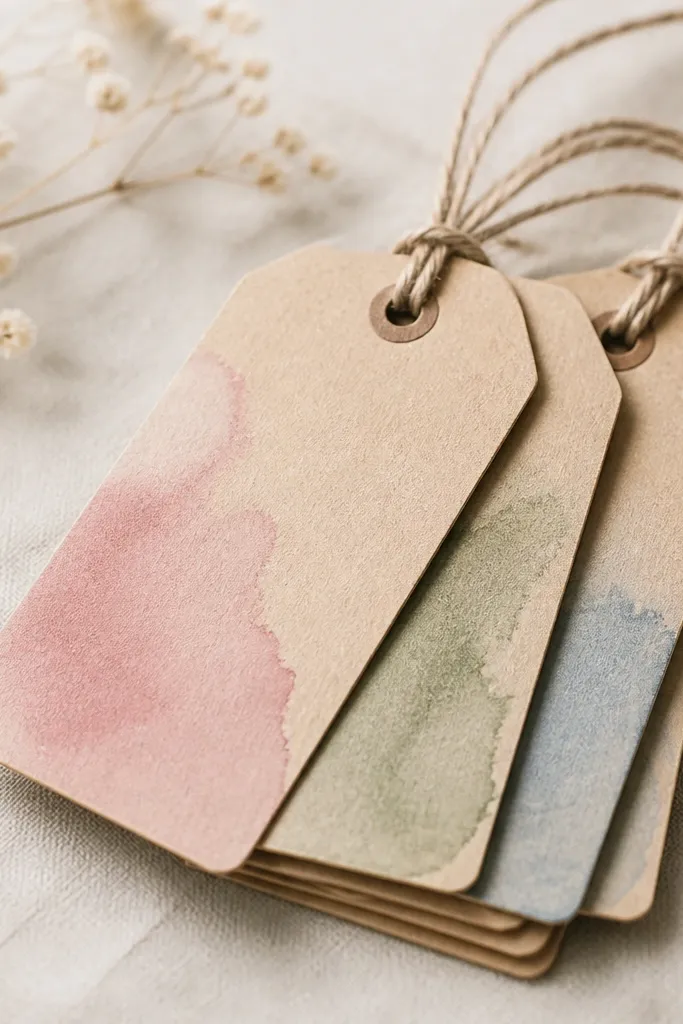
This is for when you need a gift fast but still want it to look artsy. The tags are the “face” of the present, and watercolor washes make kraft paper look expensive. I’ve used these when I wrapped a store-bought candle or soap and wanted it to feel handmade. The color palette matters: muted pink, sage, and pale blue look calm and match most outfits and decor. If your friend loves stationery, she’ll keep the tags even after the gift is opened.
Cut kraft paper into tag shapes about 3x5 inches and punch a hole at the top. Apply watercolor wash with a flat brush, using very watery paint so you get soft edges instead of hard blocks. Let tags dry completely, then write your friend’s name with a fine black pen. Add a tiny line drawing icon like a leaf or star near the bottom corner. Thread twine through the hole and tie a small bow.
Pro tipPaint one side only at first so you can place the tag flat while drying without warping.
AvoidUsing thick watercolor paint layers creates streaks and makes the tag look uneven.
13. No-Mess Heatless Hair Curl Ribbon Scrunchie Set
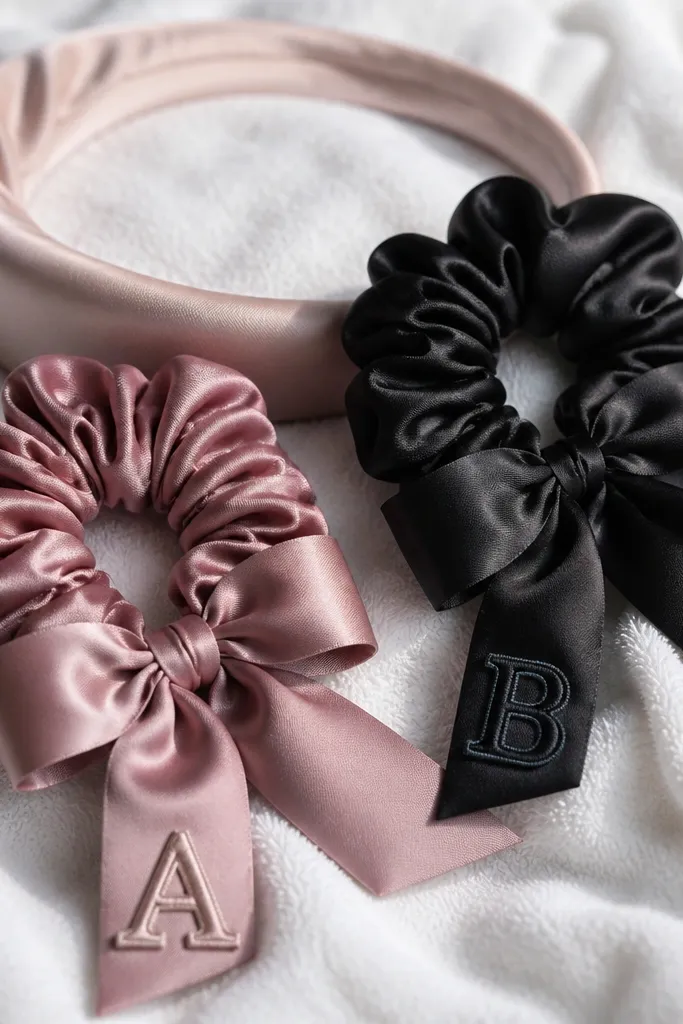
If your best friend likes hair styling but hates heat, ribbon curl scrunchies are a thoughtful gift. The set is handmade-looking because you’re choosing fabric and finishing details, not buying a generic pack. Satin tails shine slightly and look pretty in bathroom lighting. I stick to two colors that work together: black for contrast and dusty rose for softness. This fits best friends who take care of their hair and like quick routines.
Cut satin ribbon into strips about 12 inches long for the curl pieces and 8 inches for the scrunchie loop. Fold the ribbon into a loop and stitch or use fabric glue to secure the ends so the loop holds shape. Make a small scrunchie band from elastic and cover it with fabric if you want a more finished look, then attach ribbon tails around it. Add tiny embroidered patches on the front — one letter or a simple icon — and secure with a few hand stitches. Test the hold by tying it on your own wrist first, then pack it into a small gift bag.
Pro tipUse elastic that snaps back, not stretchy craft elastic, so it holds hair without slipping.
AvoidUsing slippery polyester ribbons without securing the ends makes them slide off hair.
14. Concrete-Look Planter Paperweight with Painted Pebble Base
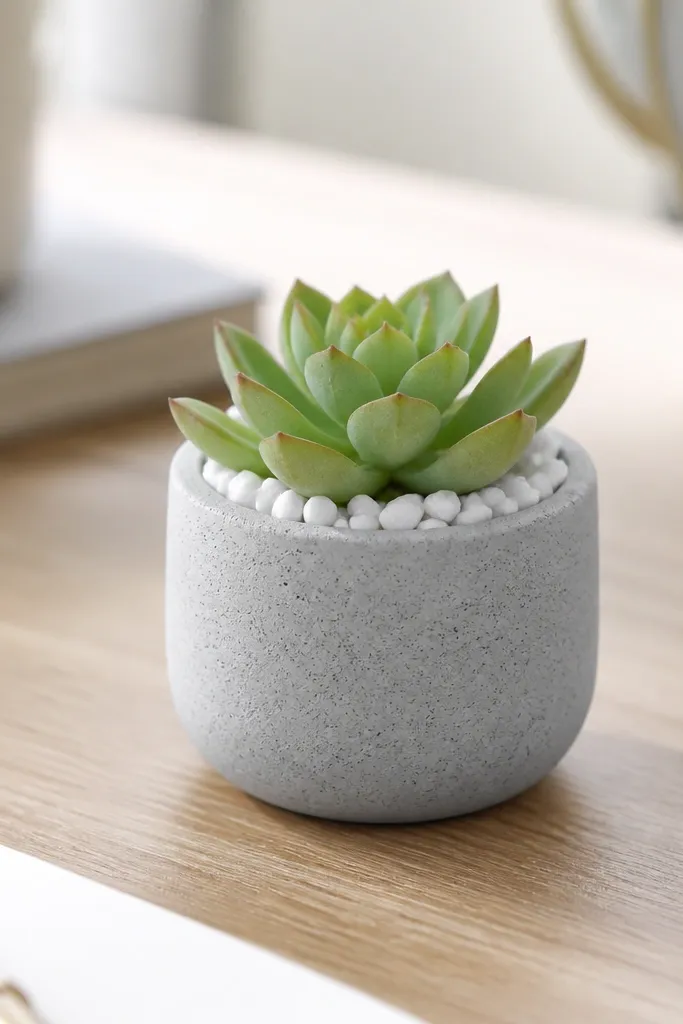
This looks artsy even when it’s simple. You’re making a desk paperweight that also carries a little plant vibe, which is exactly what a lot of best friends want on their workspace. The concrete-look paint gives it that modern texture, and the pebbled base makes it feel grounded. I use a tiny faux succulent because it survives gift-giving and doesn’t require watering schedules. It’s perfect for a friend who works at home or has a cluttered desk and likes small decor that stays put.
Start with a small plastic or foam planter shape, then paint it with gray acrylic mixed with a touch of white for a soft concrete tone. Add speckling by tapping a stiff brush with lighter gray paint onto the surface. Paint the pebbles around the base with white and gray, leaving tiny gaps for a natural look. Glue the pebbles onto the bottom edge with hot glue, then attach a tiny faux succulent to the top using a hot glue dot. Finish by sealing with a clear matte varnish so it doesn’t chip on a desk.
If your friend likes minimal decor, keep the succulent green only and skip extra flowers or glitter.
Skipping matte sealer makes the paint look wet and cheap under desk lights.
15. Handmade Friendship Bracelet Keyring with Braided Cord
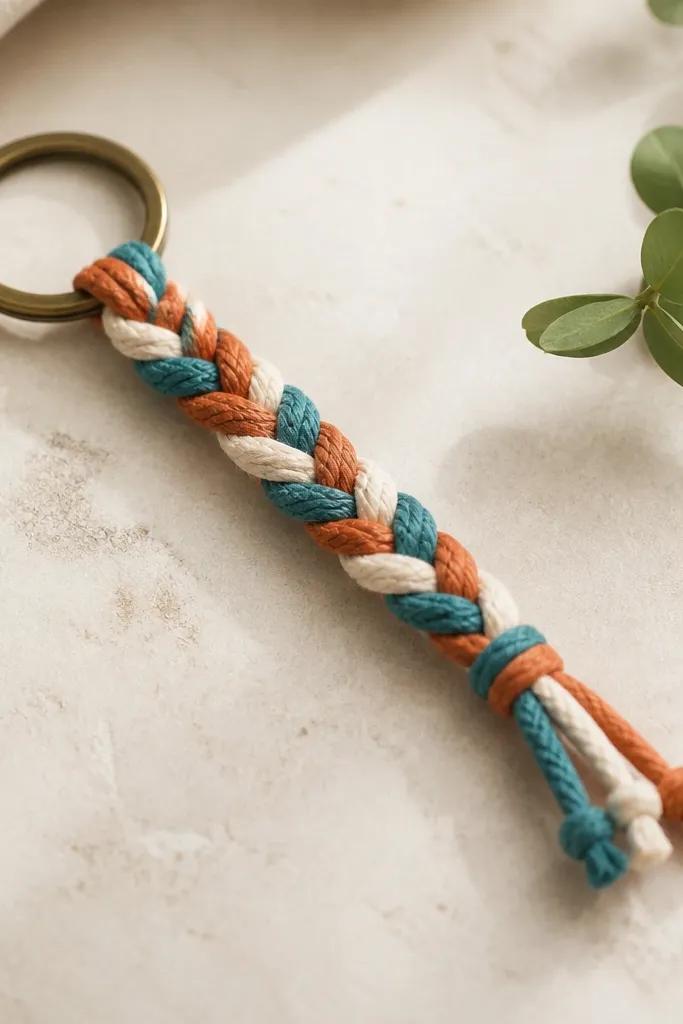
This gift takes a classic friendship bracelet idea and makes it practical. The keyring is the difference: your friend keeps it on her keys, so the bracelet doesn’t end up in a drawer. The braid looks clean because you keep tension even and choose cords that don’t fray. I’ve made these with waxed cotton because it stays firm and doesn’t twist as you braid. It works for best friends of any age because the color combo can match her style, from sporty to artsy.
Cut three lengths of braided-cord material, each about 30 inches long, and tape the ends to a table so they don’t slip. Braid in a simple three-strand pattern, keeping tension consistent so the braid stays uniform. When you reach the length you want, tie a tight knot and trim frayed ends. Attach a metal keyring to one end by opening a small jump ring and threading the braid end through. Finish by wrapping the end with a small piece of cord and gluing it to hide the knot.
Pro tipPick colors your friend already wears — I use her favorite hoodie drawstring color when I’m stuck.
AvoidBraiding with uneven tension creates a twisted braid that looks homemade in a bad way.



