
1. Corded Photo Clip Wall Garland (No-Drill)
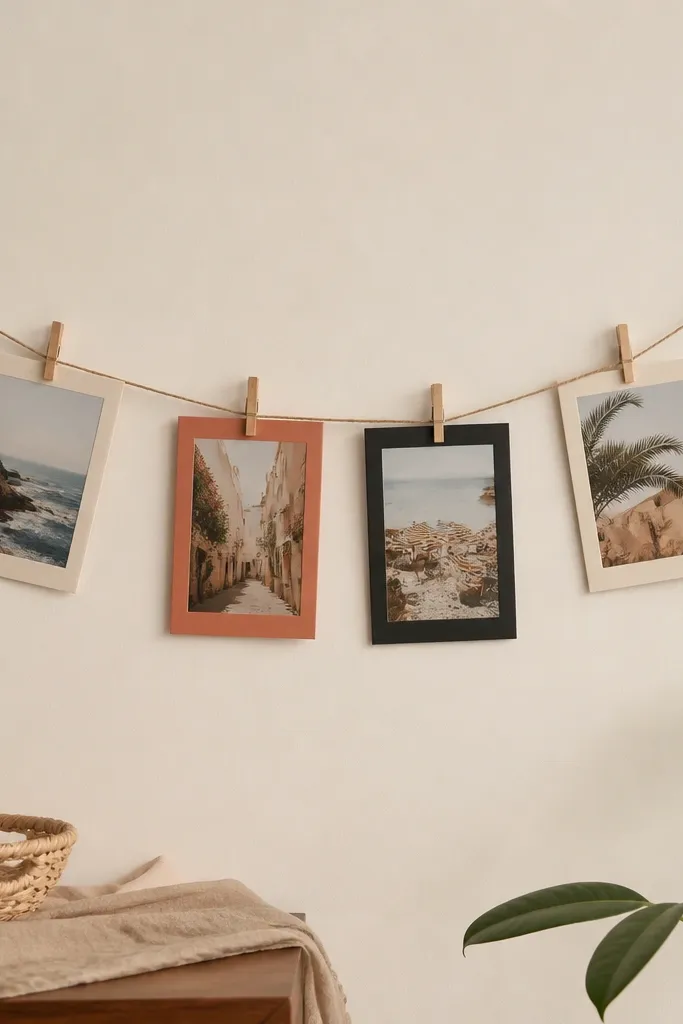
Start by choosing two spots at the same height and measuring the span — I aim for 28 to 34 inches for a small wall. Stick two removable hooks using the manufacturer’s prep wipe, then let them sit the full cure time before adding weight. Cut your cord to length, tie it to the hooks with a simple overhand knot, and add a third loop knot in the middle if you want slight sag. Attach clothespins every 4 to 5 inches, then clip photos in a staggered pattern: one centered, two slightly angled, and the rest alternating left-right for rhythm.
This is the kind of removable no drill handmade gift idea for best friend that gets used because it’s interactive. I make the garland with medium-weight cotton cord so it holds shape without looking stiff, and I use small clothespins painted matte black or left natural wood. It looks great in rooms with warm neutrals because the cord reads cozy instead of “craft store.” It also flatters anyone’s space — dorms, apartments, and rental houses — because the photos hang without drilling. Style it with photos that have similar tones (cream backgrounds, warm skin tones, and a couple of darker frames) so the whole line looks intentional.
AvoidAvoid heavy wood frames on this setup — they’ll pull the cord line down.
Pro tipUse clothespins with lighter springs so your friend can swap photos without fighting the clips.
2. Magnetic Spell-Out Fridge Magnet Set
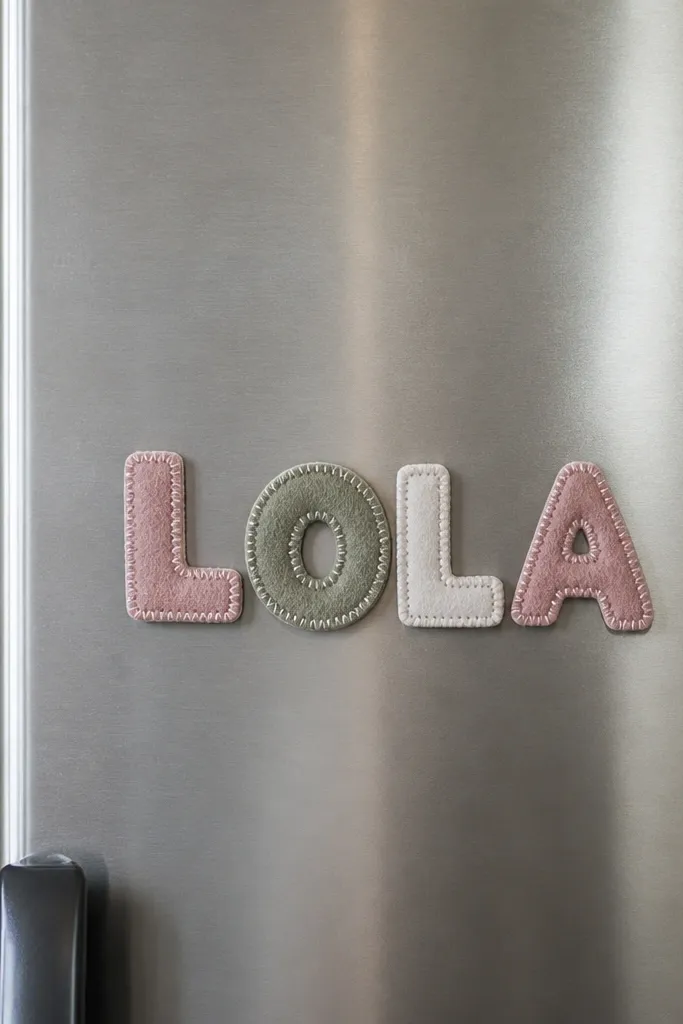
Start by choosing a short phrase or nickname that’s 5 to 9 letters long so it stays readable. Cut letters from felt about 1/4 inch thick, then add a stitched edge using contrasting thread (I like cream thread on rose felt). Trace each letter onto a thin magnetic sheet, cut slightly smaller, and glue it to the back with strong craft glue. Press under a book for 10 minutes, then test magnet strength by sticking one letter to the fridge and lifting straight up. Arrange the final set in a straight line on the fridge, leaving a small gap between letters for easy reading.
This gift is small but it gets daily use, which is why I keep making it. Felt letters look soft and friendly, and the magnetic backing keeps them stuck even when the fridge door gets slammed. I’ve made sets for friends with both warm and cool undertones, and dusty rose + sage always flatters because it adds color without turning loud. If your friend has a busy kitchen, this gives them a calm visual anchor. It also works for anyone — it’s cute for college apartments and adult kitchens alike.
AvoidAvoid thin felt that feels floppy — it makes the letters look flimsy.
Pro tipPick thread colors that match the felt undertone, not the bright “primary” shades, for a more finished look.
3. Removable No-Drill Door Hook for a Scarf + Keys
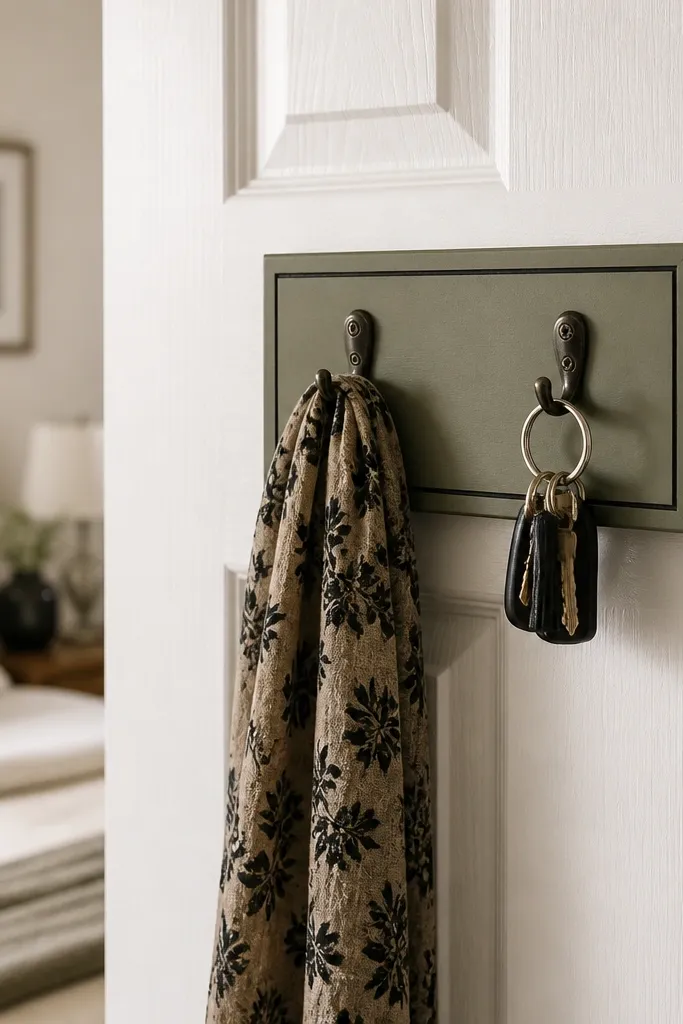
If your friend always loses keys, this is the handmade gift that fixes a real problem without messing up their door. I use a slim wood or MDF board with a painted finish and metal cup hooks, then attach it with removable mounting squares so it can come off clean. The result looks like something they’d buy, not something someone made with hot glue. Olive + cream is my go-to color combo because it hides dust and looks calm next to most door colors. This works for anyone who has a door with a smooth finish — apartments, shared housing, and family homes.
Start with a board about 8 inches wide and 3 to 4 inches tall, then sand edges and paint with a satin finish. Mark two hook locations spaced 3 inches apart, pre-drill tiny pilot holes, and screw in the cup hooks. Attach 4 to 6 removable mounting squares to the back — I place them near the corners and along the center to spread weight. Press firmly for the full recommended time, then hang the scarf and keys to test stability before you give it. For styling, add one small fabric loop (a ribbon tie) so the scarf doesn’t slide.
Use satin paint instead of matte — it wipes clean when the door gets smudged.
Avoid heavy hooks with lots of leverage on flimsy boards — they loosen over time.
4. Felt Desk Organizer with Removable Velcro Base
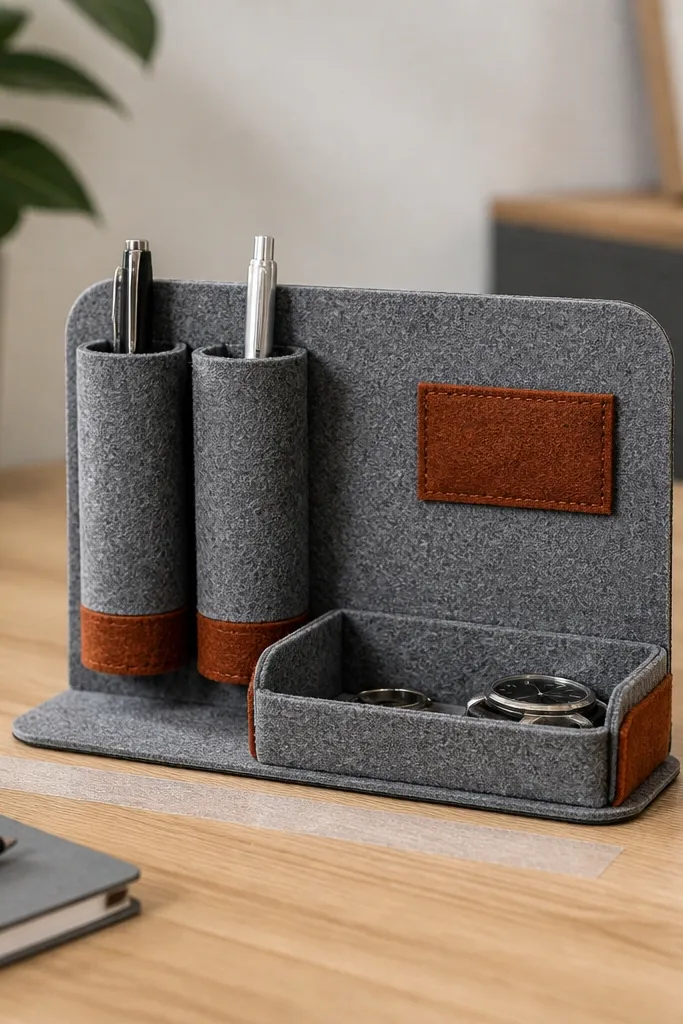
This is a desk gift that looks cozy and stays useful, and the removable part matters because desks get moved or cleaned. I make the organizer from dense felt so it stands up without sagging, and I add a removable Velcro base strip so it doesn’t slide. The heather gray keeps it neutral, while rust accents make it feel handmade. It works for friends who do homework, work from a laptop, or keep craft supplies on their desk. It also flatters small spaces because it organizes without bulk.
Start by cutting felt panels 1/8 to 1/4 inch thick so the organizer has structure. Sew or glue the pen sleeves first, then stitch the front tray so the edges look crisp. Add a Velcro strip to the bottom center — if your desk is smooth, use the hook-and-loop type that grips lightly but releases cleanly. Stick the matching strip to the desk only after you test a corner with gentle pressure. Arrange pens and scissors so weight stays balanced, and keep the tallest items in the back sleeve.
Use thick thread and a simple straight stitch pattern along edges — it hides small uneven cuts.
Avoid thin craft felt — it collapses and makes the organizer look sad fast.
5. Cork Coaster Set with Removable Label Tabs
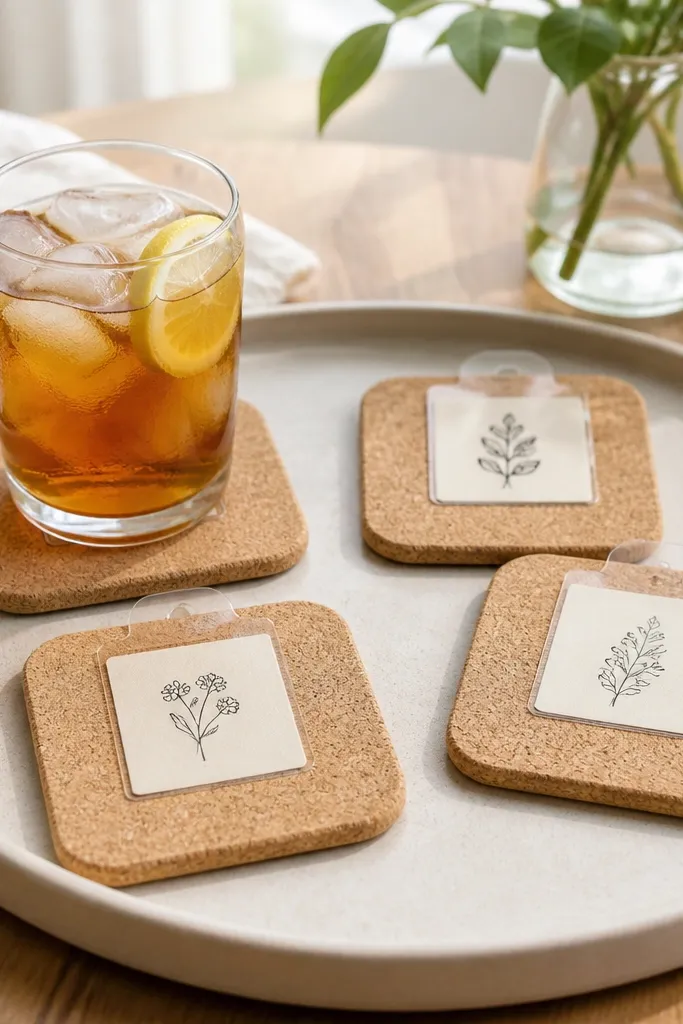
This one is for the friend who hosts or just drinks something cold by their desk. Cork coasters protect surfaces, and the removable label tabs make the set feel personalized without permanent glue stains. I keep the labels simple — one word each like “coffee,” “tea,” “water,” “sparkle” — and print them on thick cardstock so they look intentional. Cork also looks good with warm wood furniture and neutral decor, so it doesn’t clash with their style. The removable part means they can swap label cards seasonally or for different rooms.
Start by buying cork coasters with a smooth top, then sand the edges lightly so the corners feel soft. Cut small rectangles of clear vinyl and glue them to a card tab that wraps around each coaster edge — leave the top open so the card can slide. Print or hand-write label cards on 110 lb cardstock, then cut to match the tab opening. Slide each card into the vinyl tab, then place coasters on a tray to check spacing. For gifting, wrap the set in a ribbon and include a mini envelope with extra blank label cards.
Use a gel pen for handwritten labels so the ink sits glossy on the cardstock.
Avoid permanent tape on cork — it leaves residue when your friend tries to remove it.
6. Removable No-Drill Fabric Wall Pocket for Plants or Stationery
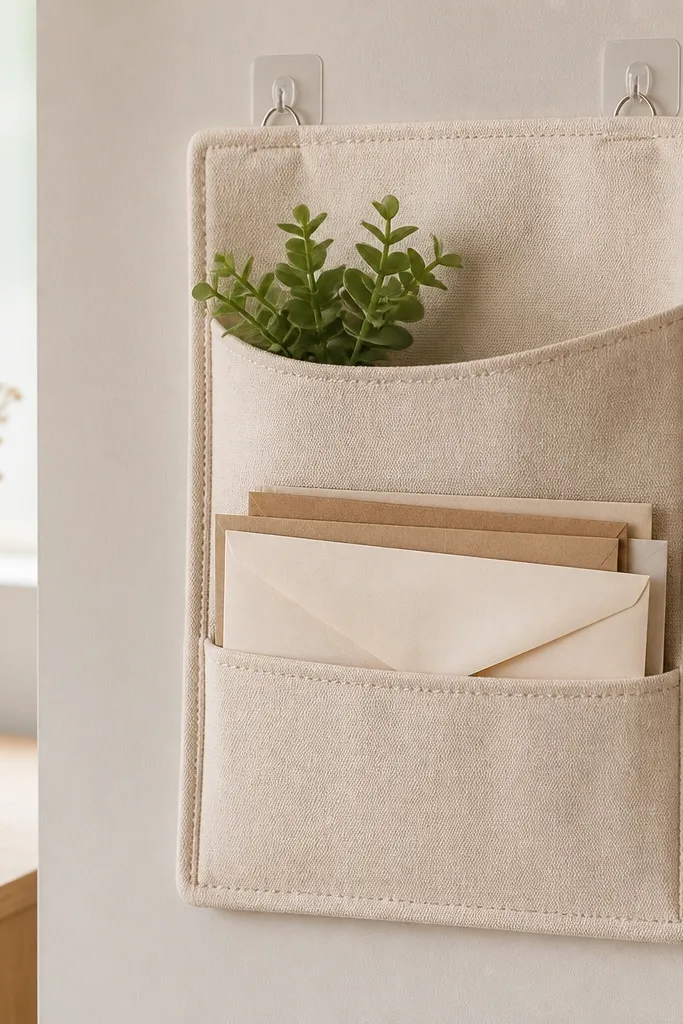
Start by cutting a pocket body about 10 inches wide and 14 inches tall, then add a divider panel if you want two sections. Sew a top casing for a dowel or a stiff strip so the pocket mouth stays open. Attach the removable adhesive strips to the back corners of the casing area, not the bottom, so the fabric hangs straight. Press the backing onto the wall and wait the full cure time. Put lightweight items in first — envelopes, small notebooks, or a small plant pot — then load heavier items only after the pocket holds steady for a day.
This is one of those gifts that makes a wall look styled without making your friend commit to anything. I sew pockets from canvas or duck cloth because it holds its shape and doesn’t wrinkle like thin cotton. The pocket is attached with removable adhesive strips, and the backing fabric spreads weight so it stays flat. Cream fabric with a black stitch border looks sharp in most rooms, and the pocket can hold stationery, small plants, or even makeup wipes. If your friend has a narrow entryway, this is a lifesaver for “where do I put this?” items.
AvoidAvoid stuffing it full before the adhesive sets — it will pull the pocket crooked.
Pro tipAdd a fabric loop at the back so you can rehang it on a hook later if they move rooms.
7. Hand-Painted Mug Cozy Sleeve with Snap Closure
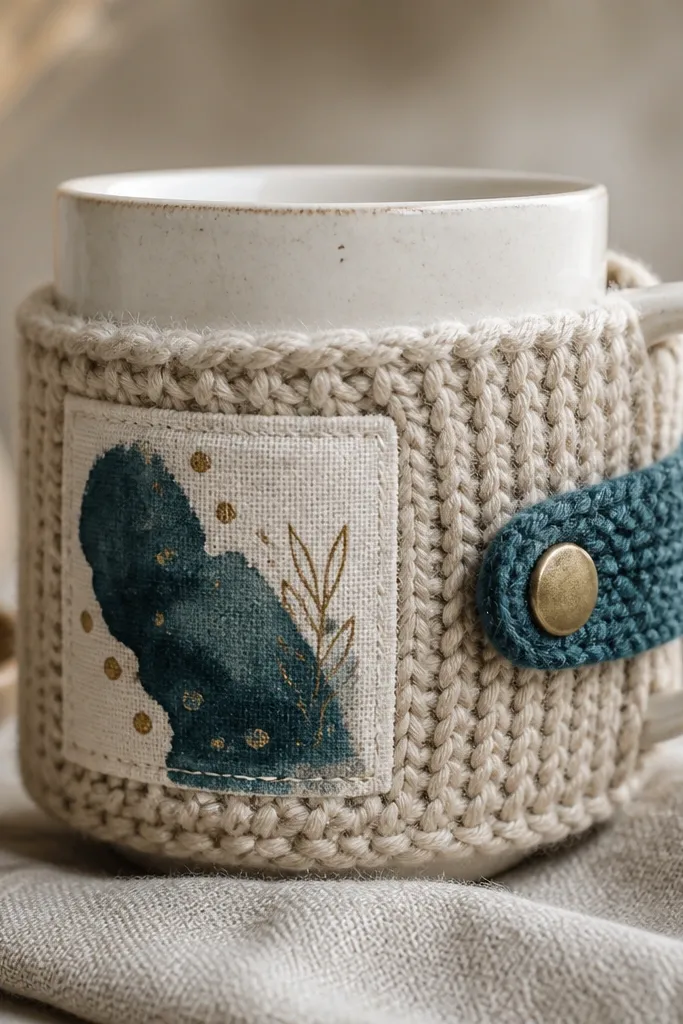
A cozy sleeve is one of the most personal handmade gifts because it’s tied to their daily routine. I use a knit sleeve (or thick cotton crochet) with a snap closure so it stays removable and doesn’t stretch out. The hand-painted patch is where you add personality — I do simple motifs like tiny stars or a single-line quote in teal and gold. Oatmeal base with deep teal suits most skin tones in photos and looks good on counters. This works best for friends who drink tea, coffee, or hot cocoa often and have mugs they actually keep using.
Start by measuring their mug height and circumference, then knit or crochet a sleeve that’s about 1 inch longer than the mug’s body. Sew or glue a fabric patch onto the side patch area and seal it with fabric medium so paint doesn’t smear. Install two small snaps on opposite sides of the sleeve, placing them so the snap sits near the handle. Wrap the sleeve around the mug and close the snaps to test fit, then adjust if the sleeve gaps. Style it with a ribbon tied around the mug handle — not tight — so it looks gift-ready but still easy to remove.
Use fabric medium over paint even if it looks dry — it keeps the design from cracking after washing.
Avoid closures that rely on glue only — snaps hold up after repeated use.
8. Removable Frame Mat Garland for Desk Photos
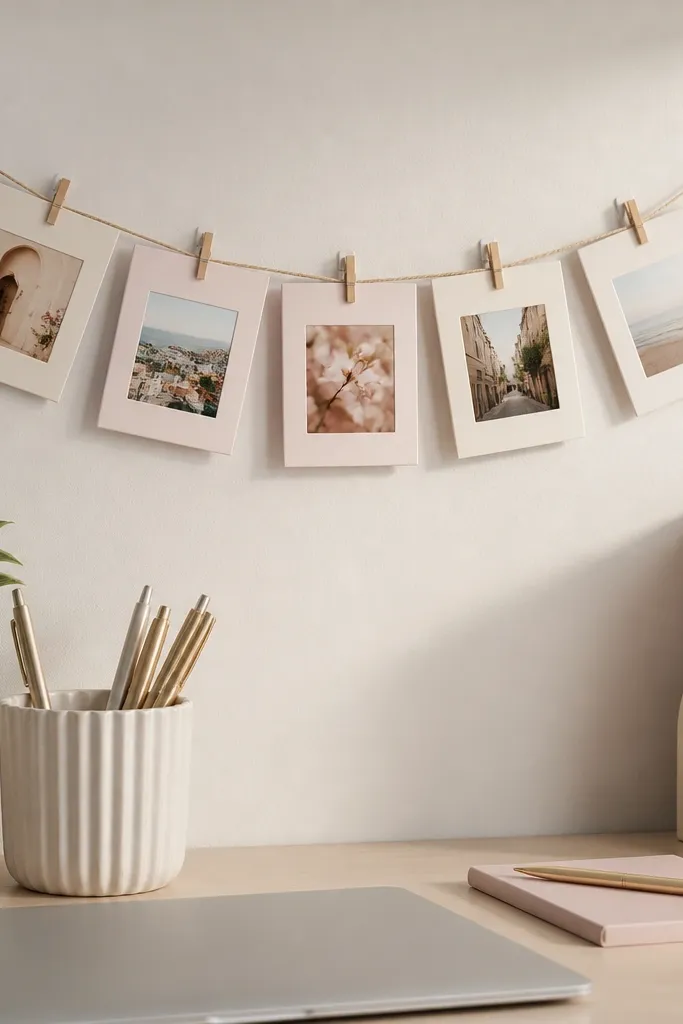
Start by cutting mat windows for four to six photos, each window about 2.5 x 3.5 inches so they’re readable. Punch two holes near the top corners of each mat and thread ribbon through to tie them onto the string. Attach adhesive strips to a wall or desk edge spaced 10 to 14 inches apart, then tie your string between them. Keep the top mat centered, then space the rest with uneven gaps for a natural look. Finally, use a tiny piece of removable tape behind each photo to secure it inside the mat window.
This is a “looks like a gallery” gift without the heavy frames. I use mini frame mats (thick cardstock or lightweight foam board) because they hold crisp edges and make photos look clean. The removable attachment is done with adhesive strips that hold the string tension, so the whole thing can come down without tearing paper. Cream + blush mats make photos look softer, which is flattering for portraits and everyday snapshots. It works great for desk corners, dorm rooms, and renters who can’t hang art permanently.
AvoidAvoid glossy cardstock — it reflects harsh light and makes the photos harder to see.
Pro tipMat the photos with one consistent border color so the garland looks planned, not random.
9. Linen Key Pouch with Button Loop (Door-Ready)
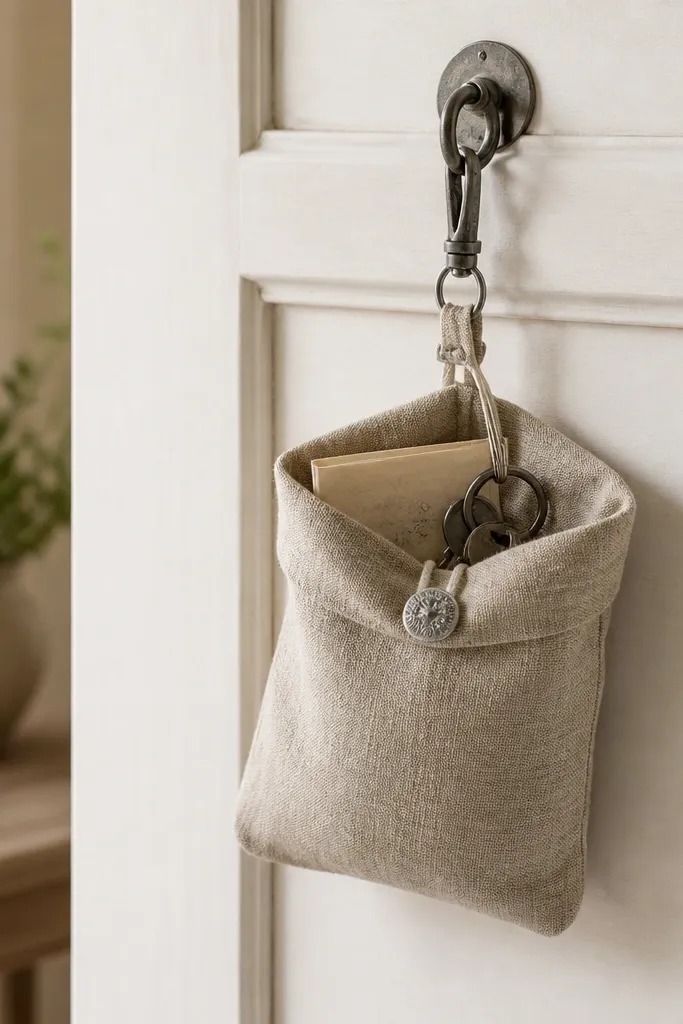
Start by cutting linen into a pouch shape about 7 inches tall and 5 inches wide, then sew the side seams using a 1/4 inch seam allowance. Fold the top edge down to create a casing for a small strip of interfacing so the opening stays neat. Sew a button at one side of the top seam and attach a fabric loop on the other side so it closes snugly. Hang it from a removable hook on the inside of their door or on a closet rod using an extra loop sewn to the back. Test with a full key ring so it doesn’t flop forward.
If your friend’s keys live in their bag, this pouch makes them feel cared for every day. Linen looks better over time than shiny fabric because it picks up soft creases instead of looking cheap. The button loop closure keeps it secure but still quick to open with one hand. I like natural linen with a darker thread border because it hides slight uneven stitching. This gift flatters anyone with chaotic pockets or small entryways because it gives keys a home without drilling anything.
AvoidAvoid thick bulky hardware inside the pouch — it stretches the linen and warps the closure.
Pro tipAdd a small fabric label inside the pouch for a “found keys” note — people love that when they misplace stuff.
10. Removable No-Drill Wall Shelf Note Holder (Mini Clipboard)
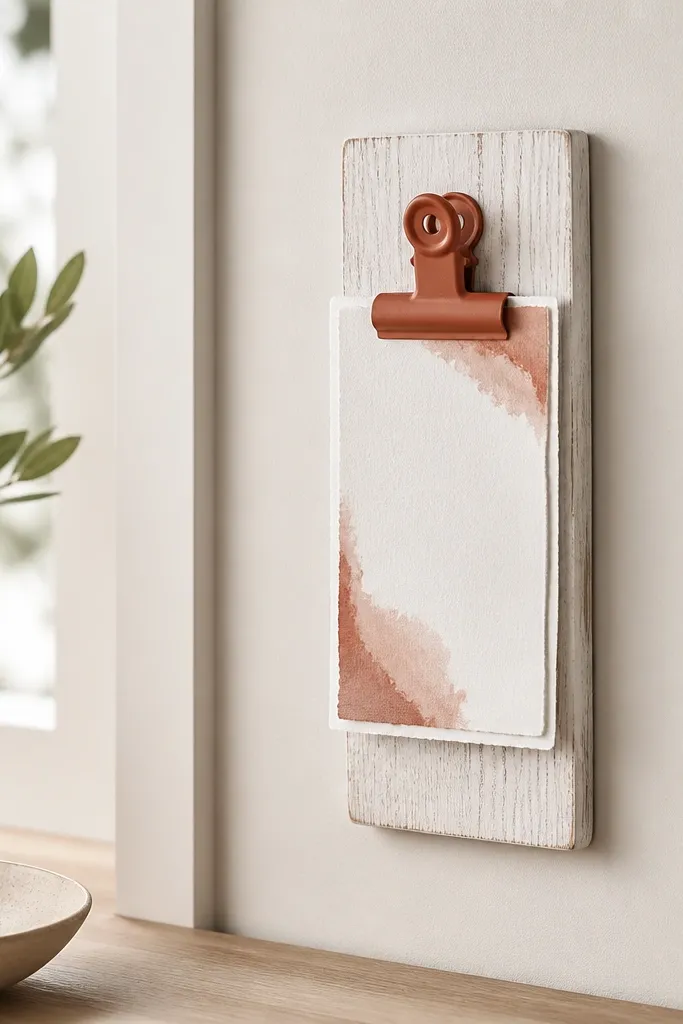
This is a practical handmade gift that keeps your friend from losing “to-do” notes under a phone. I build it with a thin wood base so it looks clean, then add a metal clip so papers don’t curl. The removable adhesive pads let your friend move it to a new spot later, and the base spreads weight so it doesn’t sag. Whitewashed wood with terracotta accents looks good in kitchens and offices, and it pairs well with both warm and cool decor. It’s great for friends who run on sticky notes and never remember where they put them.
Start with a wood strip about 10 inches long and sand it smooth, then apply a light stain or paint wash. Attach a metal clip centered near the top using screws and pre-drilled pilot holes. On the back, place 4 removable mounting pads — two near each end and two near the middle. Press it onto the wall and hold for 30 seconds, then leave it alone for the full cure time. Add a set of 3 x 5 notes and clip them on, then write one pre-made prompt like “Buy milk” or “Call back” in your friend’s preferred style.
Use painter’s tape to mark your final placement before you peel the backing off the adhesive pads.
Avoid flimsy foam backing under the clip — it makes the clip wobble and looks cheap.
11. Handmade Bookmark Set with Magnetic Ends for Books + Planners
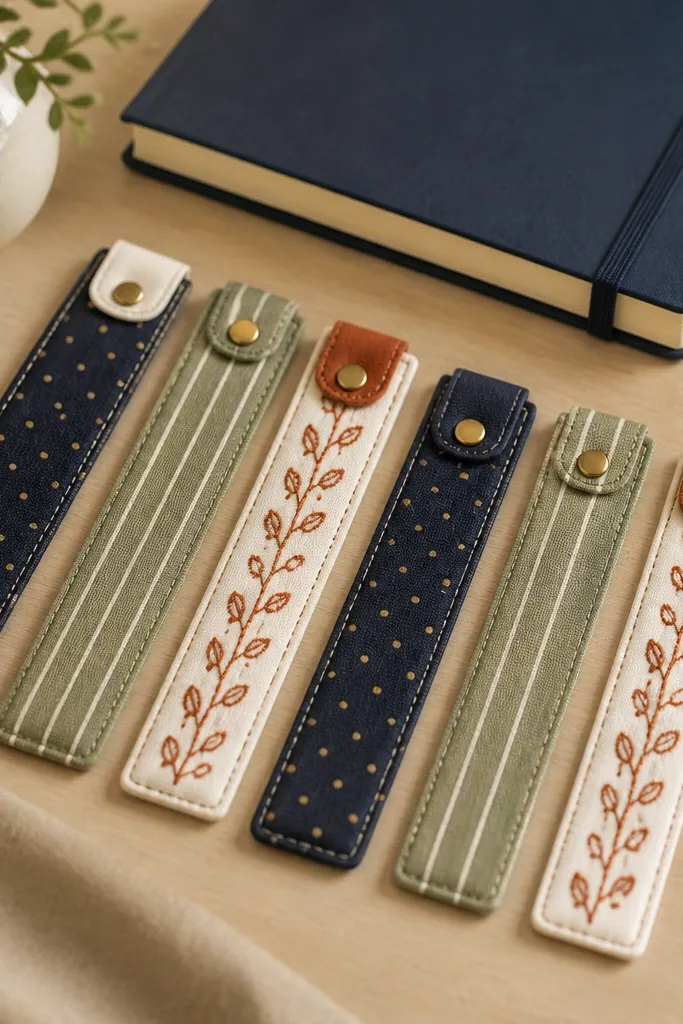
This is a gift your friend uses every single time they open a book or planner, and the magnetic ends keep it from slipping. I use fabric strips about 2.5 inches wide because they lie flat and don’t bunch like thin paper. The magnet makes the bookmark behave like a clip, so it works even with thick pages or spiral notebooks. I keep the set coordinated — three patterns and three solids — so it looks like a thoughtful bundle, not random scraps. It flatters readers who highlight a lot because the bookmark stays put while they flip pages.
Start by cutting fabric strips 2.5 inches wide and 9 to 10 inches long, then fold and sew along the edges for a clean finish. Add a thin interfacing layer if you want extra structure. Glue or stitch a small magnetic strip inside a folded top pocket, then test closure by closing the magnet on itself. Package each bookmark with a short card that tells your friend what to match it with (like “Use with reading pages”). When you gift, place the bookmarks in a small clear sleeve so the magnets don’t pick up lint.
Use small rare-earth magnets — they grip firmly without making the bookmark bulky.
Avoid oversized magnets — they twist and can snag on planner bindings.
12. Removable No-Drill Hanging Planter Sleeve with Clip Top
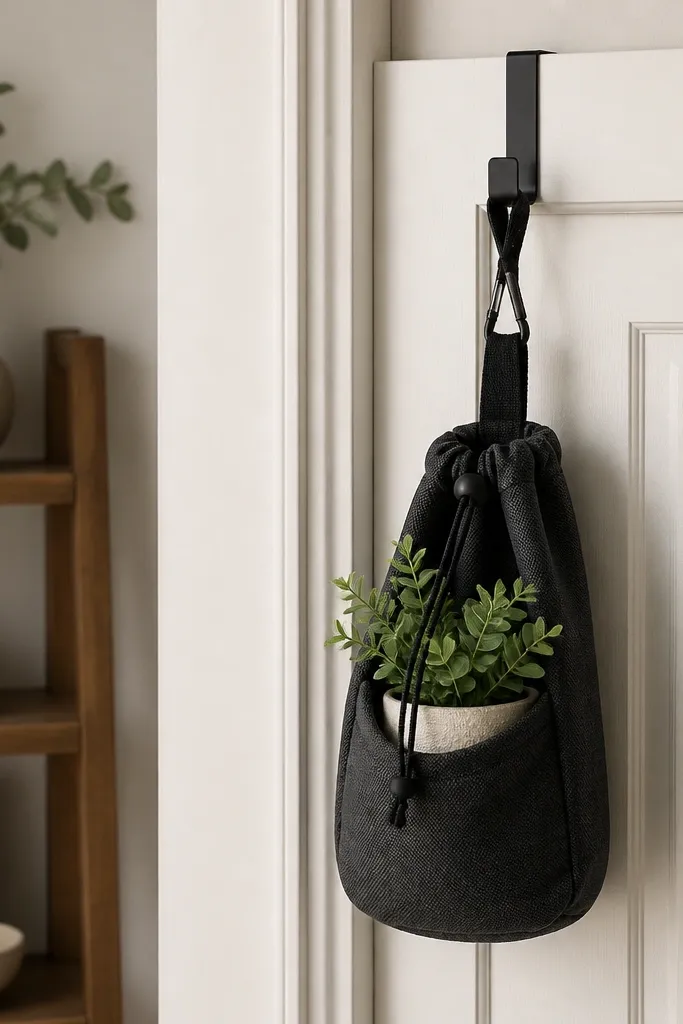
Start by choosing a sleeve size that fits a 4 to 6 inch pot, then cut canvas about 11 inches tall with a 1.5 inch extra hem. Sew the sides, then add a top casing for the drawstring. If you want a neater opening, sew a small row of reinforcement stitches around the casing. Hang the sleeve using a removable over-door hook, then place the plant pot inside and pull the drawstring tight. Tie the drawstring ends so they don’t hang down, and add a small fabric label on the outside with the plant name.
This is for your friend who likes plants but can’t commit to heavy planters or messy installations. A fabric sleeve hides the pot and looks clean, and the drawstring keeps everything snug. I attach it with an over-door hook or a removable wall hook — no drilling — and the fabric spreads any slight movement so it doesn’t swing wildly. Charcoal + cream gives a modern look and hides dust on the fabric. It’s especially good for renters because it feels intentional without leaving marks.
AvoidAvoid thin novelty fabric — it collapses and the pot shows through.
Pro tipUse faux plants for this one if your friend travels — the fabric sleeve makes real soil mess more annoying.
13. Leather-Look Keychain with Removable Charm Tag
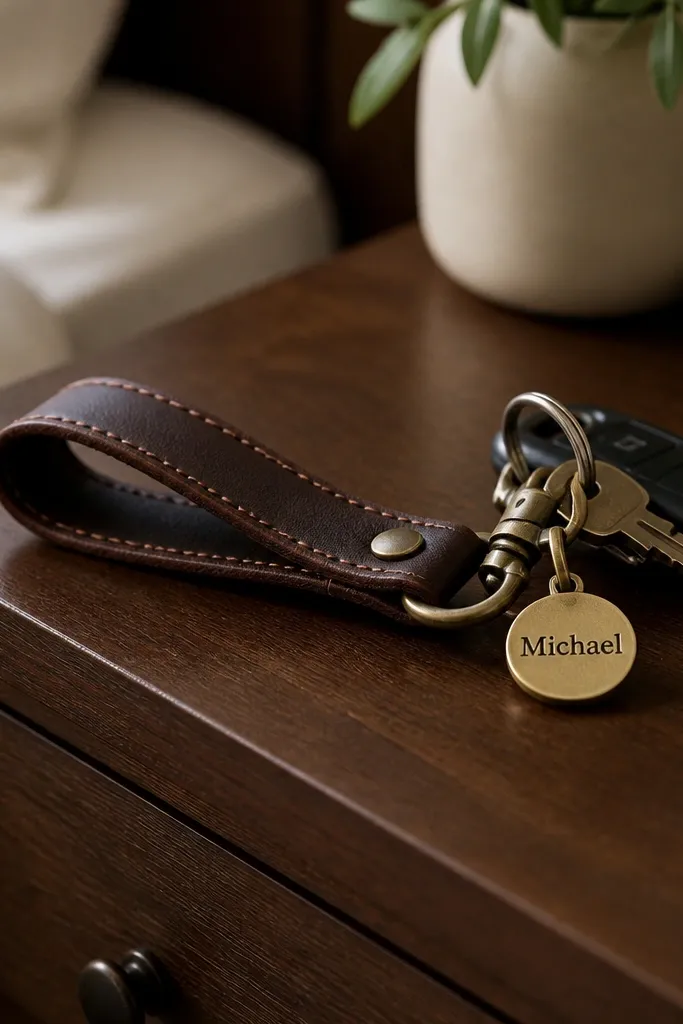
Start by cutting a strap piece about 1 inch wide and 5.5 inches long, then punch a hole near one end for the key ring. Stitch around the edges using waxed thread, then attach a metal key ring. For the removable charm, use a small split ring or a small clip so the tag can come off without unthreading the strap. Make the charm tag from thin acrylic or cardstock sealed under clear vinyl so it doesn’t bend. Add the removable tag last so it doesn’t get scratched during assembly.
This gift feels personal because it’s easy to use and easy to customize later. I use leather-look vinyl or thin faux leather because it takes stitching cleanly and wipes off if it gets scuffed in a bag. The removable charm tag lets your friend swap the tag if they move jobs, change a nickname, or want a different vibe. Dark brown with cream stitching looks classy in almost every home. It’s great for best friends who carry a lot of keys and need something that doesn’t fray or fall apart.
AvoidAvoid glue-only construction — it peels when the strap flexes.
Pro tipUse waxed thread — it tightens the stitch and makes the edges look cleaner than regular cotton thread.
14. Embroidery Hoop Trinket Display with Magnetic Back
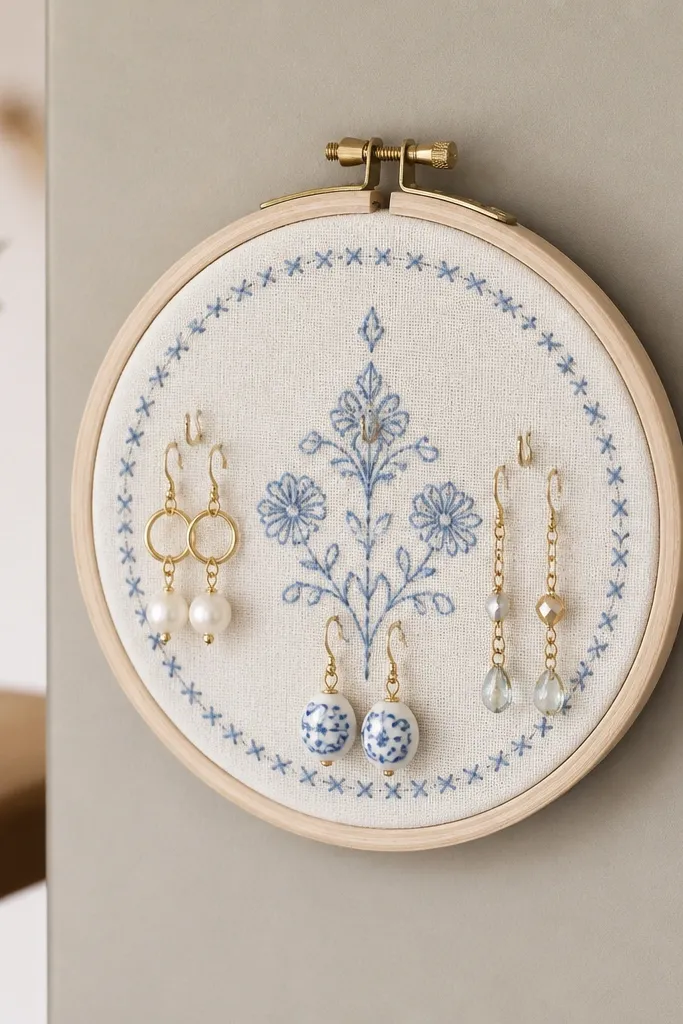
This is a “cute and organized” gift that works for jewelry, hair ties, and tiny keepsakes. I use a small embroidery hoop because it frames everything and looks like decor, not a craft. The magnetic back is what makes it removable — your friend can move it from a fridge to a metal cabinet without drilling. Off-white fabric keeps it bright, and a soft blue thread detail adds a calm accent. It flatters friends who wear earrings or keep their everyday items in one spot.
Start with a hoop size around 5 to 7 inches so it doesn’t look bulky. Cover the back with fabric and tack it down with glue at the edges only, then add a couple of small hooks or loops inside the hoop. Cut a magnetic sheet to the hoop’s back shape and glue it in place, then press under weight to set. Test on your friend’s metal surface before you finish the front so you know the magnet holds. Style it by hanging 2 to 3 items only — enough to look intentional, not cluttered.
If the hoop tips, add a second magnet piece on the opposite side of the back for balance.
Avoid heavy metal charm pieces in the hoop — magnets struggle and the hoop pulls forward.
15. Removable No-Drill Lace Curtain Tiebacks (Set of 2)
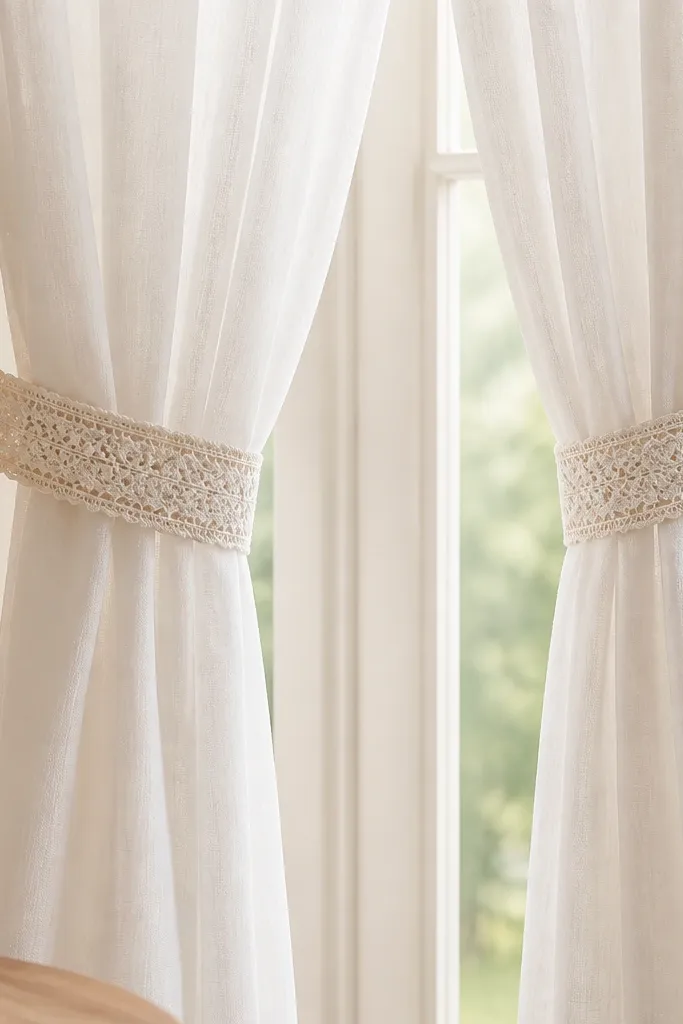
Start by measuring how far you want the curtain to gather — I aim for 8 to 10 inches from the window when tied. Cut two lengths of lace ribbon about 20 inches long and line the back with satin ribbon so it doesn’t stretch. Attach a small snap or loop closure at the end of each tieback so it clicks onto a removable hook. Stick two removable adhesive hooks to the wall near the window — press and hold, then wait for cure. Gather the curtain, wrap the tieback around the gathered fabric, and snap it onto the hook.
Curtains change a room more than people admit, and these tiebacks make it easy without installing hardware. I craft them with lace ribbon and a satin backing so they look soft in daylight but still hold a neat gather. The removable hook method means your friend can place them exactly where their curtain rod sits, then remove them later when they move. Cream lace with a hint of champagne satin reads expensive in photos. This works for friends who live with sheer curtains, dorm rooms with basic setups, or apartments where they can’t drill anything above the window.
AvoidAvoid heavy beads on lace — they weigh the tieback down and it looks messy.
Pro tipUse a fabric steamer on the curtains after tying — the gather looks sharper and calmer.



