
1. Mini Bow Tie Band with Blush Satin
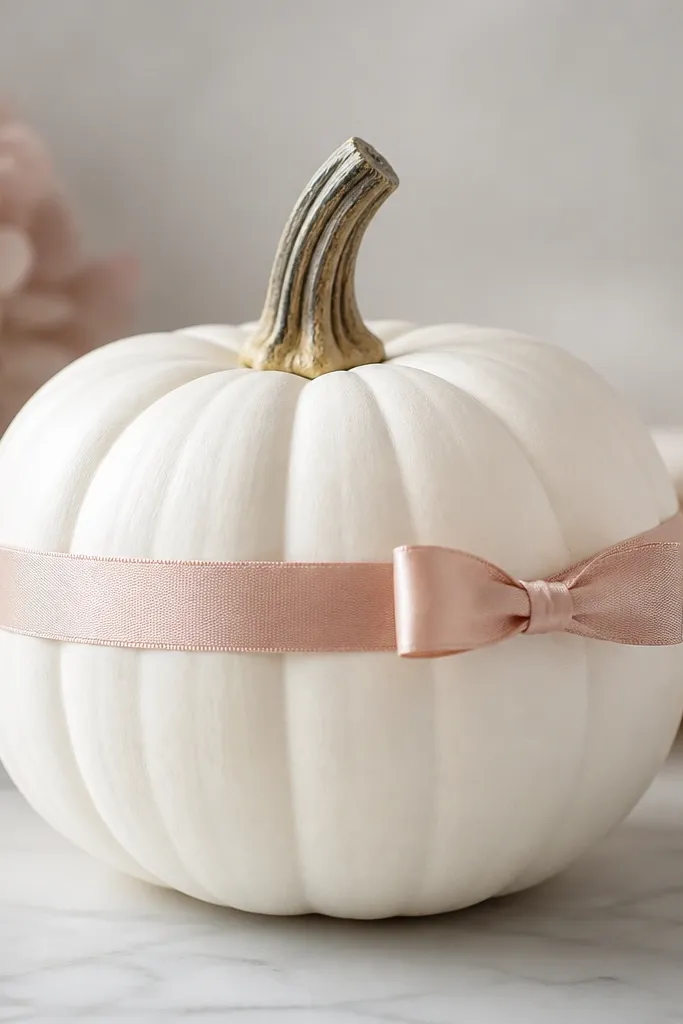
This one looks polished because the ribbon creates a clean horizontal line, and the blush tone adds warmth without turning the pumpkin into a loud decoration. I use a single satin ribbon about 1 inch wide so it stays smooth and doesn’t wrinkle in the middle. The bow sits on the right side of the pumpkin so the face area feels intentional even from across the room. It flatters small-to-medium pumpkins best, and it looks great for kids because it’s simple and fast to place.
Start by cutting a piece of blush satin ribbon long enough to wrap the pumpkin once plus 6 inches for tying. Wrap it around the widest point of the pumpkin and mark where it meets so the line stays level. Tie a tight bow on the right side, then trim the tails to about 3 inches each. Finish by adding two tiny glue dots under the ribbon edges so it doesn’t slide when kids carry it. If the pumpkin has a slightly uneven curve, gently press the ribbon down in small sections so it hugs the shape.
Pro tipUse double-sided fabric tape where the ribbon meets the pumpkin to avoid squeeze-out glue that shows shiny spots.
AvoidSkip wide satin if it keeps puckering — puckers read messy up close.
2. Gold Leaf Stem Cap with Matte White Base
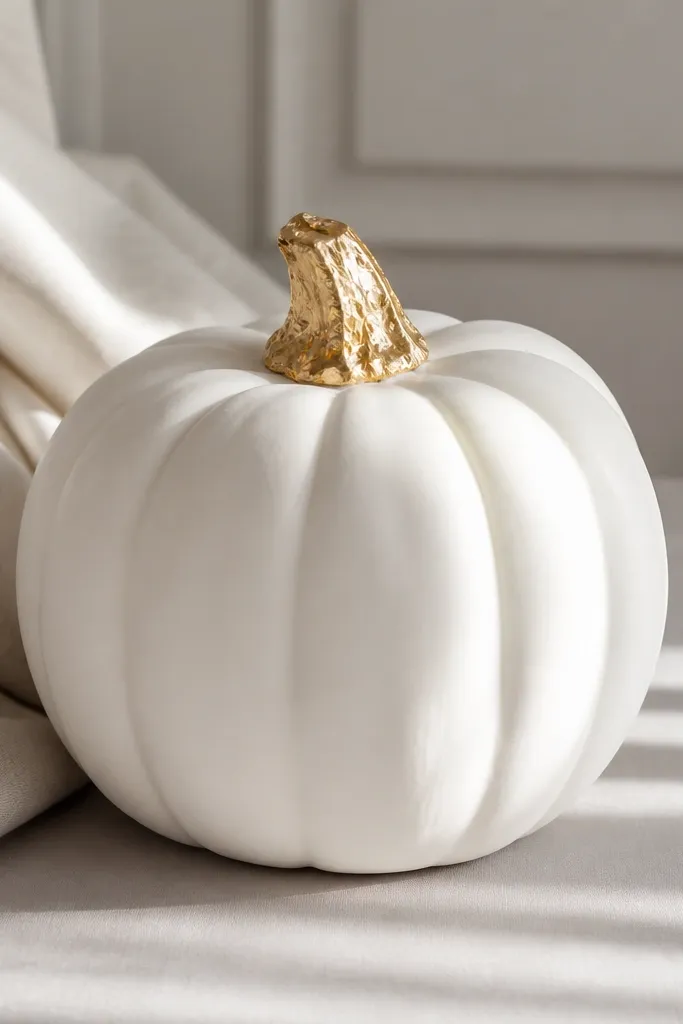
This design is minimal on purpose. The gold leaf only goes on the stem area, so it looks intentional instead of costume-y. Because white pumpkins already have a soft, neutral look, the metallic pops in a way that reads “decor” even when kids keep the body plain. It works beautifully for families who want something that looks good in photos without a ton of craft clutter. I like it most on slightly smaller pumpkins because the stem detail feels proportionate.
Start with a fully matte white pumpkin. If you’re painting an orange pumpkin, prime first, paint with matte acrylic, and let it dry overnight. Tear gold leaf into small pieces and press them onto a thin layer of craft leaf adhesive only on the stem and the top ridge where stem meets body. Press gently with your fingertips or a foam brush so it conforms without tearing. Let it dry 10-20 minutes, then lightly brush away loose flakes with a dry makeup brush.
Do this outdoors or over a tray — gold leaf flakes travel farther than you think.
Don’t seal gold leaf with a glossy coat — it turns the metallic flat and less delicate.
3. Yarn Fringe Halo Around the Middle
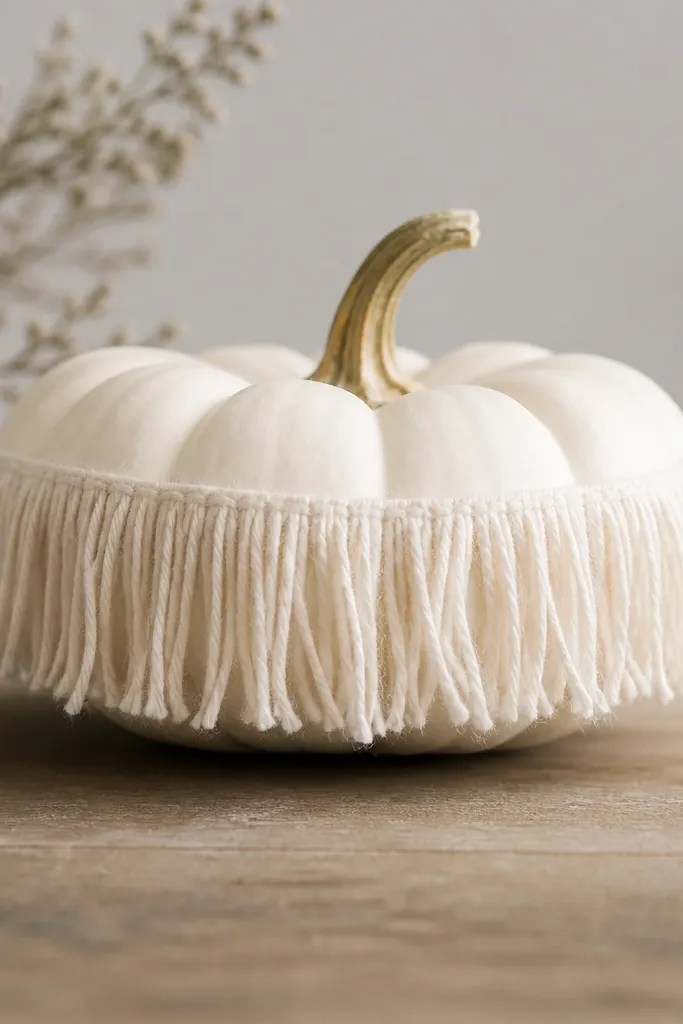
Yarn looks cozy and reads texture from a distance, which is why it feels “aesthetic” instead of random. A fringe halo around the middle gives the pumpkin a defined shape line, and it hides any small unevenness from painting. I use off-white or light cream yarn because it blends with the base and makes the fringe feel like part of the pumpkin, not an add-on. This is also the most forgiving craft for kids since yarn is stretchy and forgiving when pieces aren’t perfectly straight.
Wrap a strip of double-sided tape or hot glue line around the pumpkin’s widest point. Cut yarn into 1.5 to 2 inch lengths so the fringe is consistent. Press the yarn ends into the adhesive so they point outward and hang down evenly. Leave a tiny gap at the top of the band so the yarn doesn’t cover the stem area. Finally, fluff the fringe with your fingers and trim any long strands that poke out.
Pro tipUse a hair comb to align fringe — it makes the ring look even in photos.
AvoidSkip thick novelty yarn; bulky strands make the band look heavy and uneven.
4. Felt Leaf Cluster with Sage Green
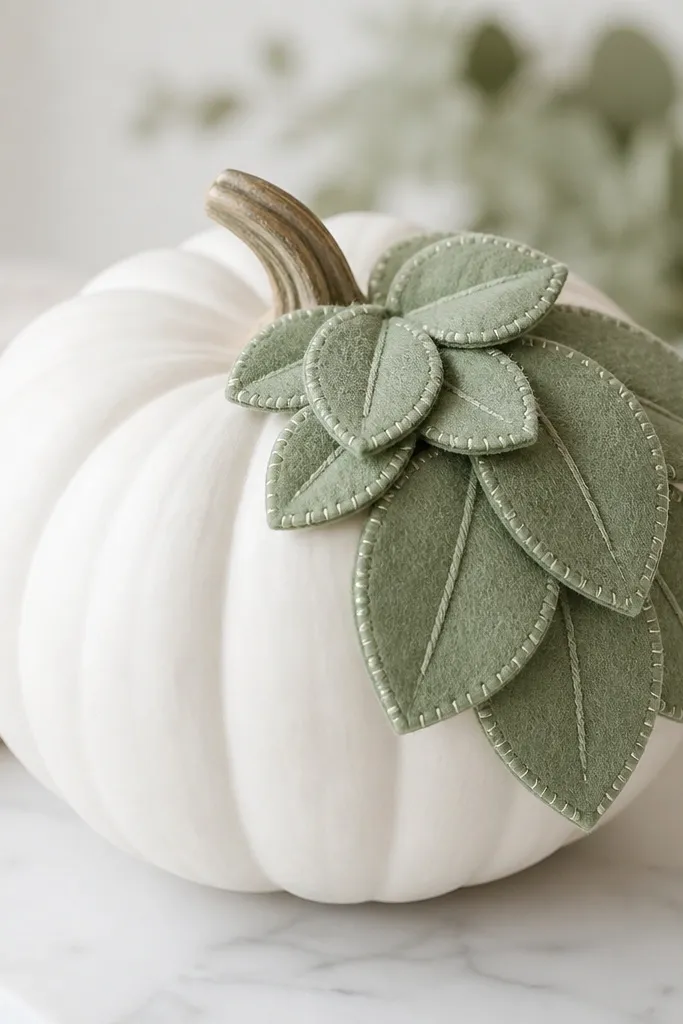
Felt leaves look like they belong to fall decor because the texture reads handmade and soft. Sage green gives a muted, grown-up color that still feels kid-friendly. I place the cluster on one side instead of across the whole pumpkin so the design looks like a deliberate arrangement. This works great for kids because felt is easy to cut and doesn’t fray. If you’re decorating for a family dinner table or a porch shelf, this one makes the white pumpkin feel styled, not blank.
Trace 5 leaf shapes onto sage felt using a leaf stencil or a simple teardrop template, then cut them out. Layer the leaves from largest to smallest and glue the base of each leaf so they overlap slightly. Attach the whole cluster on the pumpkin’s upper right side, just under the stem, using tacky glue for kid-friendly bonding. If you want extra hold, add one small glue dot at the center overlap where the leaves meet. Finish by trimming one leaf tip to be about 1 inch longer than the rest so the cluster has a focal point.
Pro tipUse a thin black marker to add a light vein line on the top leaf — it makes felt look sharper without extra supplies.
AvoidDon’t cover the stem — keeping the stem visible makes the pumpkin look more natural.
5. Lace Collar with Tiny Pearl Dots
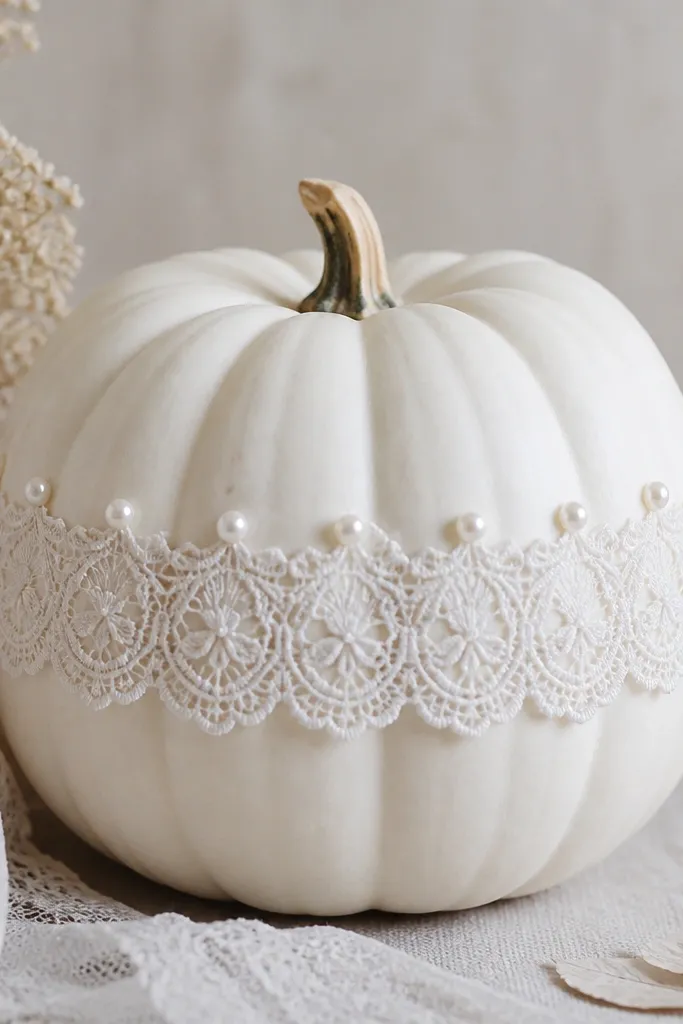
A lace collar is the fastest way to make a white pumpkin look “dressed up” for Halloween or a fall party. The lace pattern adds detail without needing bright colors, and the tiny pearl dots catch light softly. I use white lace that’s 1 inch wide and has a repeating scallop edge because it frames the pumpkin nicely. This design flatters larger pumpkins because the collar has space to look intentional. Kids like it because it feels fancy but the placement is simple.
Cut a lace strip long enough to wrap around the pumpkin’s widest point with a 1-inch overlap. Apply craft glue to the back of the overlap area only, then press it down and hold for 30-60 seconds. Create a top line of pearl dots by adding glue dots along the upper edge of the lace and placing tiny faux pearls. Space pearls about 1 inch apart so it looks like a pattern, not random glitter. Let it dry completely before moving the pumpkin so the lace doesn’t shift.
Pro tipUse a toothpick to place pearls — it keeps glue from smearing onto the lace.
AvoidSkip chunky pearls; large beads make the collar look too heavy for a white base.
6. Paper Rosette Pinwheel Bloom
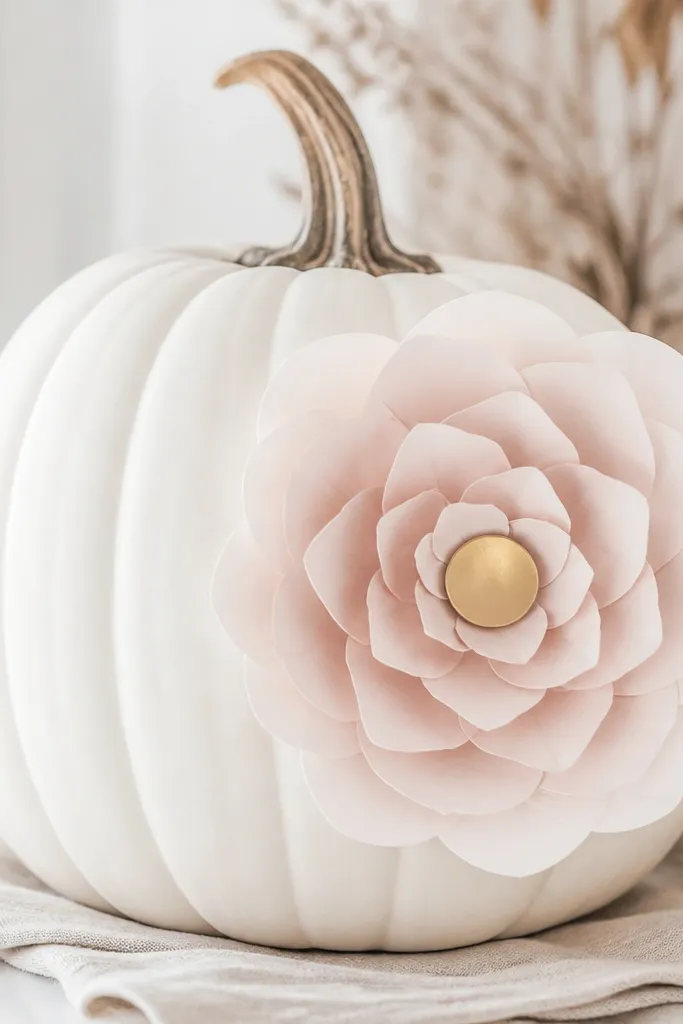
Paper rosettes add a clean, graphic look, and they photograph beautifully against matte white. Keep the palette tight: soft white and pale blush petals with a small gold center. I attach the bloom on the upper left side so it feels like a statement piece rather than decoration everywhere. It works best on medium pumpkins because the rosette needs enough surface to sit flat. Kids can help by folding and stacking the rosette layers, which is fun and not too fiddly.
Start by cutting 6-8 circles from cardstock or craft paper using a cup or small bowl template. Fold each circle accordion-style, then pinch the folds together and glue the back so it holds a rosette shape. Layer the rosettes from smallest to largest on a paper backing circle. Glue a small gold circle in the center. Attach the finished rosette to the pumpkin with craft glue at the rosette base so it sits flush, then press for 1 minute.
Pro tipUse a bone folder to sharpen the folds — it makes the rosette look crisp instead of wobbly.
AvoidDon’t make petals too thick; bulky paper makes the flower lift off the pumpkin.
7. Fabric Pumpkin Face with Embroidery Thread Smile
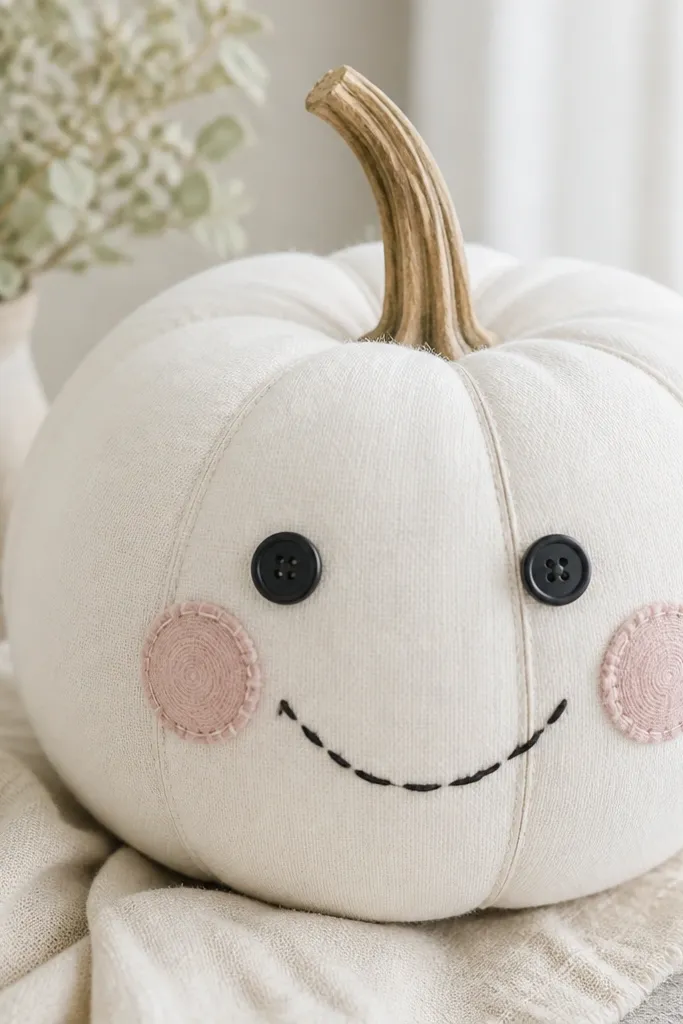
This is the one I reach for when kids want a “character” pumpkin without paint mess. White pumpkins make the face look cute and readable, and embroidery thread gives visible texture that feels handmade. I keep the face minimal: two eyes and one smile, plus tiny cheek fabric. The contrast is controlled — black for eyes, blush for cheeks. It flatters kids' creativity while still looking tidy on a shelf or mantel.
Cut two small eye circles from black felt or use tiny black buttons. Glue them in place slightly above the pumpkin’s center. Cut a small blush triangle or heart for each cheek and glue under the eyes, angled outward. Thread a needle with embroidery thread and stitch a short curved smile using 6-8 small stitches. Knot the thread on the inside of the pumpkin or secure with a dab of glue at the back of the stitch line.
Pro tipPre-punch the smile stitch holes with a needle so kids can pull thread through without frustration.
AvoidSkip big googly eyes; they look cheap fast on a white base.
8. Chalk Mark Pumpkin with Soft Gray Lines
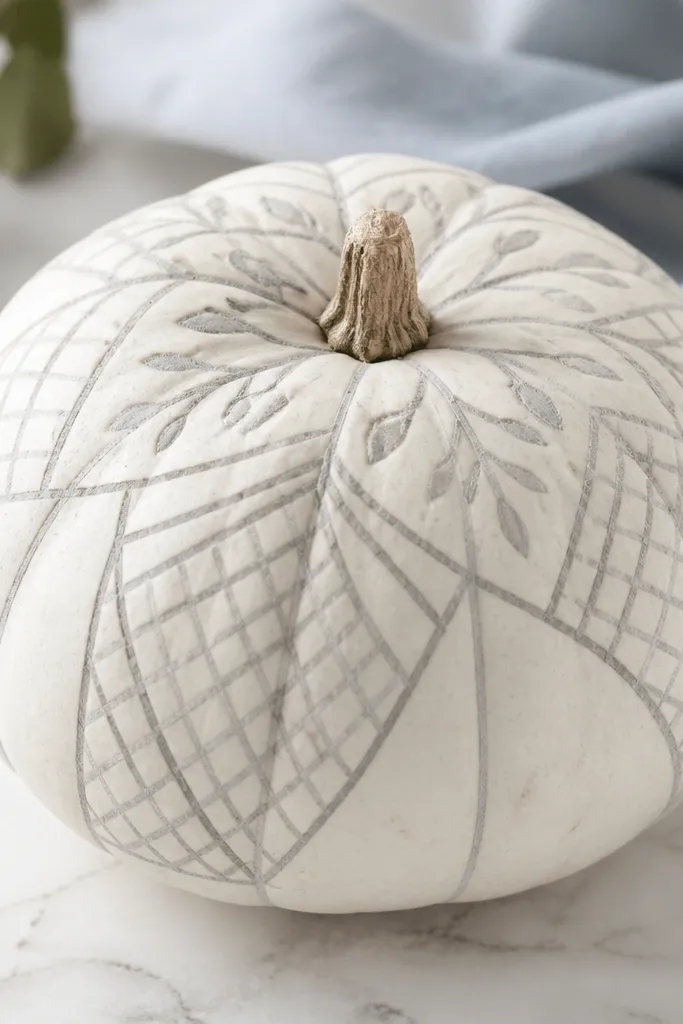
Chalk lines look clean because they sit on the surface instead of soaking in. Gray marks are gentler than black, so the pumpkin stays soft and aesthetic. I do this when I want a kid craft that still looks like decor. It works on white pumpkins best because the drawing shows clearly without needing thick paint. Keep the pattern simple — small crosshatches and one leaf — and it will look intentional.
Start with a dry matte white pumpkin. Use chalk or chalk markers to lightly sketch a leaf near the stem and small sections of crosshatching around the midline. Press lightly at first — you can erase chalk with a damp cloth before sealing. Once the drawing looks right, seal with a light matte clear coat sprayed from 10-12 inches away. Let it dry fully before display so the chalk doesn’t smear.
Pro tipPractice the leaf on paper first; the shape transfers better than freehanding.
AvoidDon’t draw too dark or thick; heavy lines turn chalk art into a smudged blob.
9. Black and White Stripe Wrap with Micro-Gold Specks
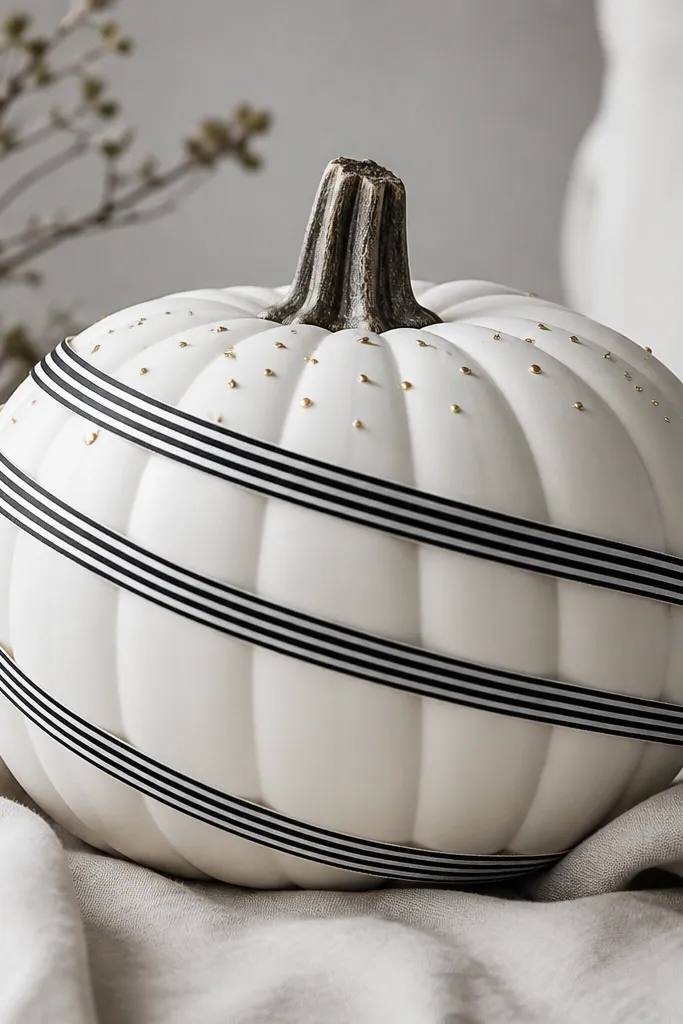
The striped wrap gives you instant graphic style, and it looks great with white because the stripes create strong structure. I add micro-gold specks so it still feels fall without switching into warm orange tones. This works best for kids who like patterns because they can help line up ribbon spacing. It also looks good on larger pumpkins because the spiral has room to show. The final effect is modern, not cutesy.
Cut a thin striped ribbon (about 1/4 to 3/8 inch wide) long enough for a spiral wrap. Starting near the stem, glue the ribbon at the top with a small dot of craft glue, then wrap down in a gentle spiral with even spacing. Secure every 3-4 inches with small glue spots so it doesn’t slide. Add gold specks by tapping a gold paint pen or diluted gold acrylic with a toothbrush onto the top third only. Let everything dry flat for at least 2 hours.
Pro tipKeep ribbon tension light; tight spirals look warped on curved pumpkins.
AvoidDon’t use thick ribbon — the spiral gets bulky and hides the pumpkin shape.
10. Mini Pinecone Texture Patch with Cinnamon Brown
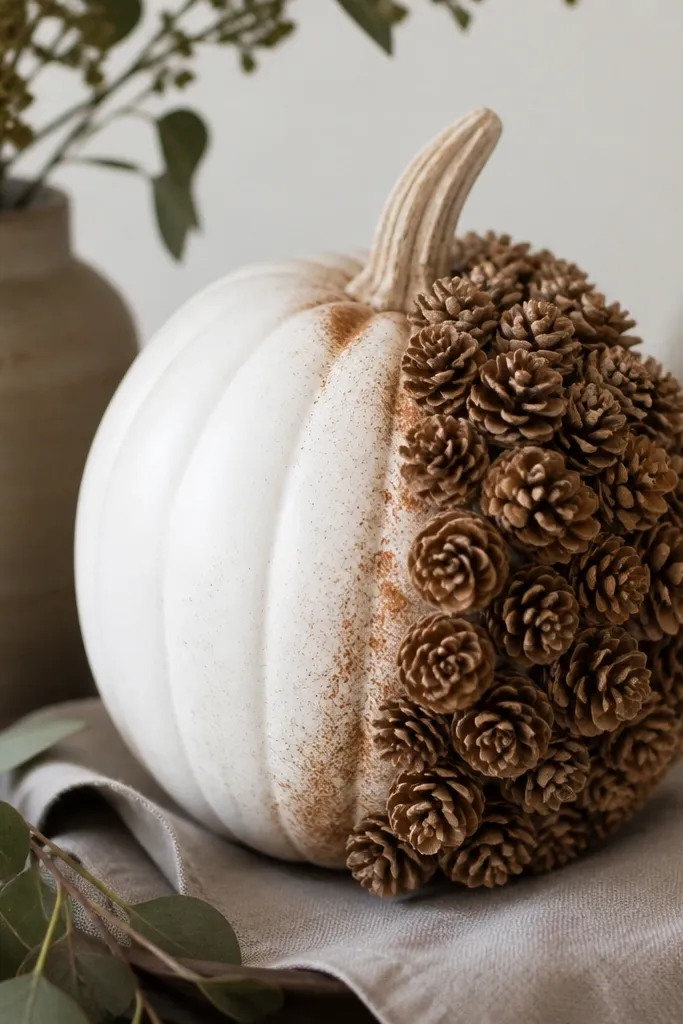
Texture beats glitter every time for an aesthetic look. Pinecones read like real fall decor, and the cinnamon-brown dusting makes the white pumpkin feel grounded. I glue pinecones only in a patch near the top so it doesn’t look like a landscaping project. This design is great for kids who like “nature crafts” and don’t mind gluing. It also photographs well because the shadows from pinecone scales add depth.
Start by selecting small pinecones that are roughly 1 to 2 inches tall. Sand lightly if they’re super glossy so glue grips better. Paint one side of the pumpkin with a thin layer of matte cinnamon-brown craft paint where the pinecones will go. While paint is still slightly tacky, glue pinecones in an overlapping cluster using hot glue for adult handling. Finish by dusting a little extra cinnamon-brown around the pinecone edges with a dry brush so gaps look intentional.
Pro tipUse a muffin tin or tray to hold pinecones while glue sets — it keeps them from rolling.
AvoidSkip large pinecones; big ones overwhelm the white and look heavy.
11. White Pumpkin with Sequin Scallop Edge Trim
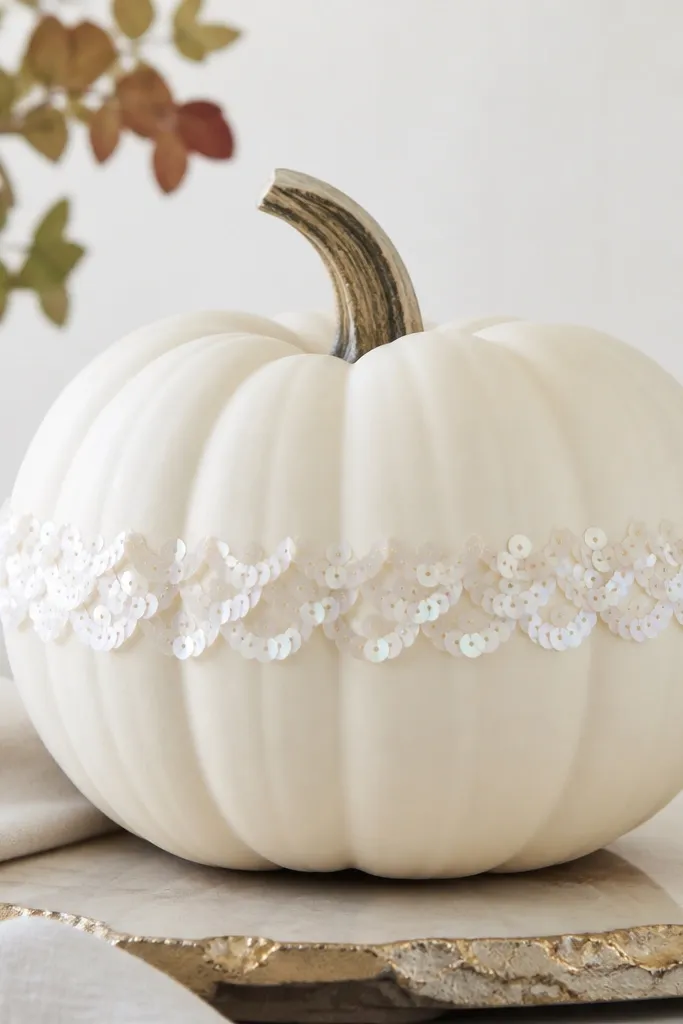
Sequins can look classy on white if you use them as an edge trim, not a full covering. The scalloped band gives a defined “fashion” line around the pumpkin, and the rest stays matte so it doesn’t look like a craft explosion. I use small white sequins on a flexible trim strip, which keeps placement easy for kids. This one looks great for indoor fall events and photos because the sequins sparkle softly rather than blinding. It flatters medium pumpkins where the band width looks proportional.
Cut a sequin trim strip to the pumpkin’s circumference at the widest point. Apply craft glue along the back of the trim strip, then press it around the middle, starting at the seam. Hold in place for 30-60 seconds so the trim bonds. Add one tiny white faux pearl at the center of the band seam to hide the join. Let it dry face-up so glue doesn’t smear onto the sequins.
Choose a trim with white backing; dark backing shows through at the edges.
Don’t glue sequins directly onto glossy paint; the bond weakens and pieces lift.
12. Photo-Transfer Monogram on White Pumpkin
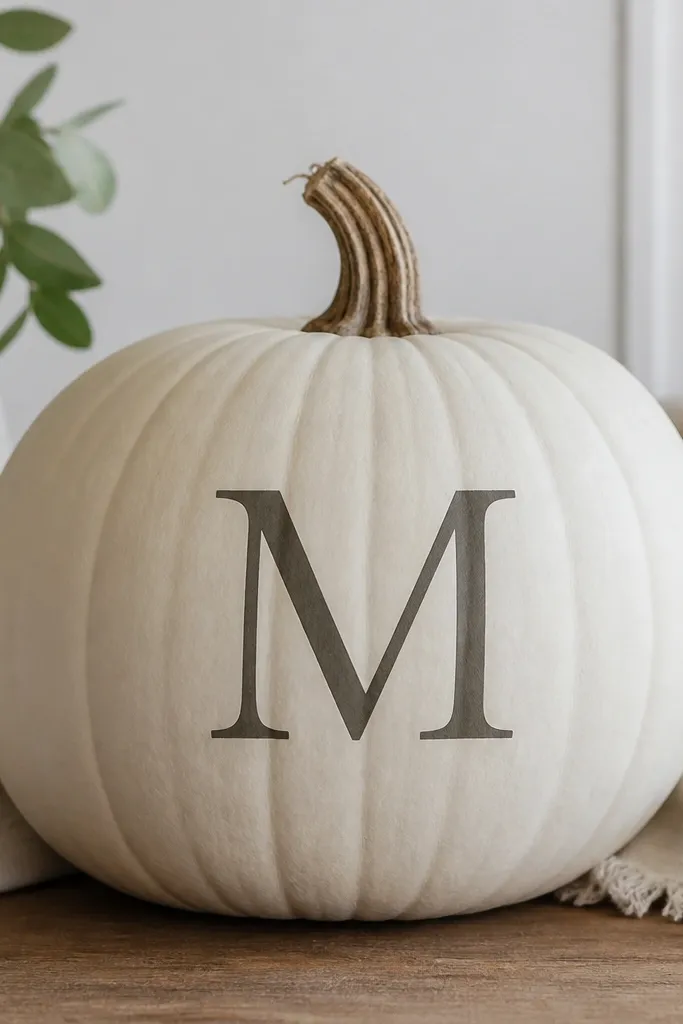
If you want an aesthetic white pumpkin that looks store-bought, transfer printing is the shortcut I trust. A simple monogram in dark gray looks sharp and doesn’t fight the white base. I’ve used this for kids' names too, but I keep it to one letter so it stays clean. The transfer sits on the surface texture, so it reads more like decor than a craft label. It also works well for any skin tone or color theme because it’s neutral and controlled.
Print your letter on plain printer paper using a dark gray font (size 120-160 depending on pumpkin size). Tape the transfer face-down onto the pumpkin where you want it, then rub firmly with a spoon or burnishing tool. If you’re using a photo transfer medium, apply it per the product directions and let it dry, then peel back the paper slowly. Seal with matte clear coat so it doesn’t smear when kids touch it. Position the monogram slightly above the center so the pumpkin looks balanced.
Pro tipUse dark gray instead of black for a softer look on white.
AvoidDon’t use glitter letters; the transfer edges look jagged and cheap.
13. White Pumpkin with Mini Pom-Pom Topiary Accent
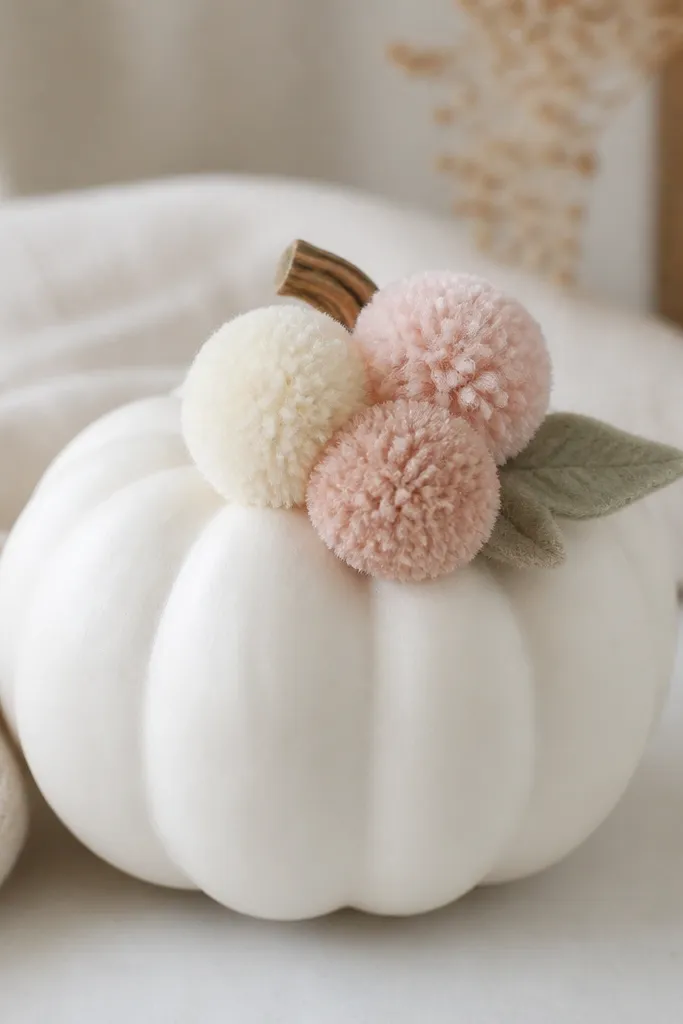
Pom-poms add playful softness, and on white they look like a mini winter garden rather than random craft fluff. I keep the cluster small — three pom-poms — so it looks intentional. Cream and blush pom-poms blend with the base and still give color. This works well for kids because pom-poms are easy to glue and forgiving if they’re not perfectly centered. It’s also great for smaller pumpkins where a big decoration would crowd the shape.
Pick three pom-poms: one cream (about 1.25 inches), one blush (about 1 inch), and one cream mini (about 0.75 inch). Glue a tiny felt leaf behind the cluster so it sticks slightly upward like a plant top. Attach the largest pom-pom first near the top center of the pumpkin, then layer the medium and small pom-poms slightly offset so they look stacked, not pasted. Add a thin dab of glue around each pom-pom base to prevent sagging. Let it dry upright so gravity doesn’t pull the cluster sideways.
Pro tipTrim any long felt leaf edges so it looks crisp, not ragged.
AvoidSkip a huge pom-pom pile; too many balls look like stuffing instead of decor.
14. Rope Wrap with Small Twine Bow at Stem
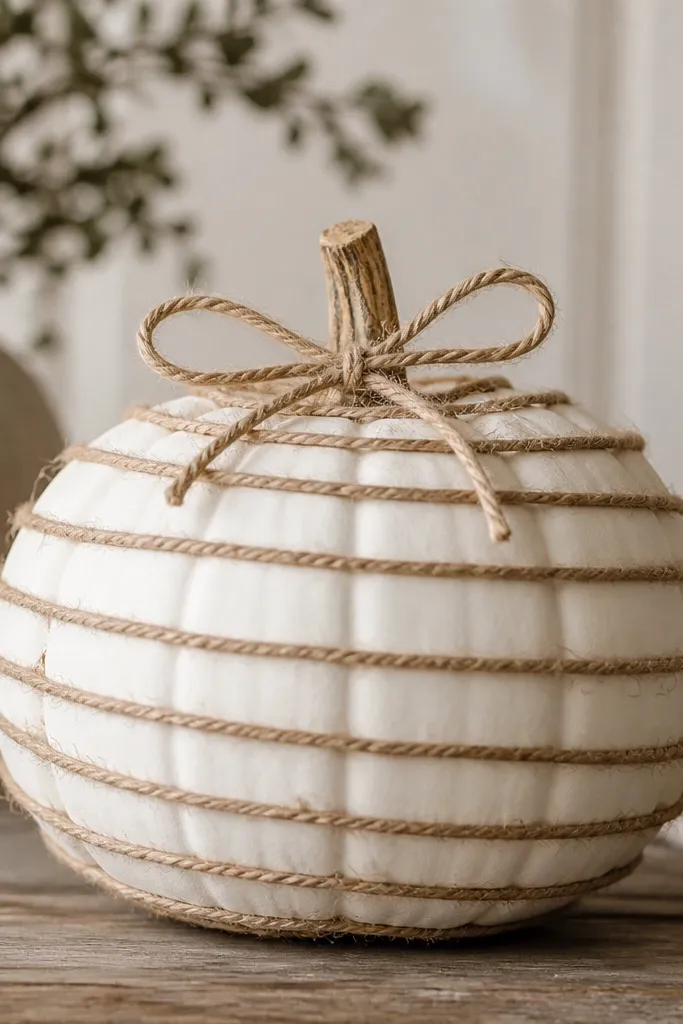
Rope wrapping makes a white pumpkin feel rustic without turning it orange and loud. Natural jute is beige and textured, so it looks good against white even in daylight. The twine bow at the stem is a small finishing touch that makes the whole thing feel styled. This is one of my go-to kid crafts because rope is easy to handle and kids love winding. It also holds up well on porches since it’s not paint-heavy.
Cut jute rope into a few lengths so you can wrap in tidy bands. Start at the top near the stem and glue one band around, then place the next band slightly below with a small gap. Keep the gaps consistent so the rope pattern looks even. Wrap the stem area with a short piece of twine and tie a small bow. If the rope frays, dab the ends with a tiny amount of craft glue so it doesn’t shed.
Pro tipUse a ruler mark on the pumpkin with pencil so bands land at the same height.
AvoidDon’t use glossy twine; shine makes the rustic look cheap.
15. White Pumpkin with Beaded Snowflake Cutout Frame
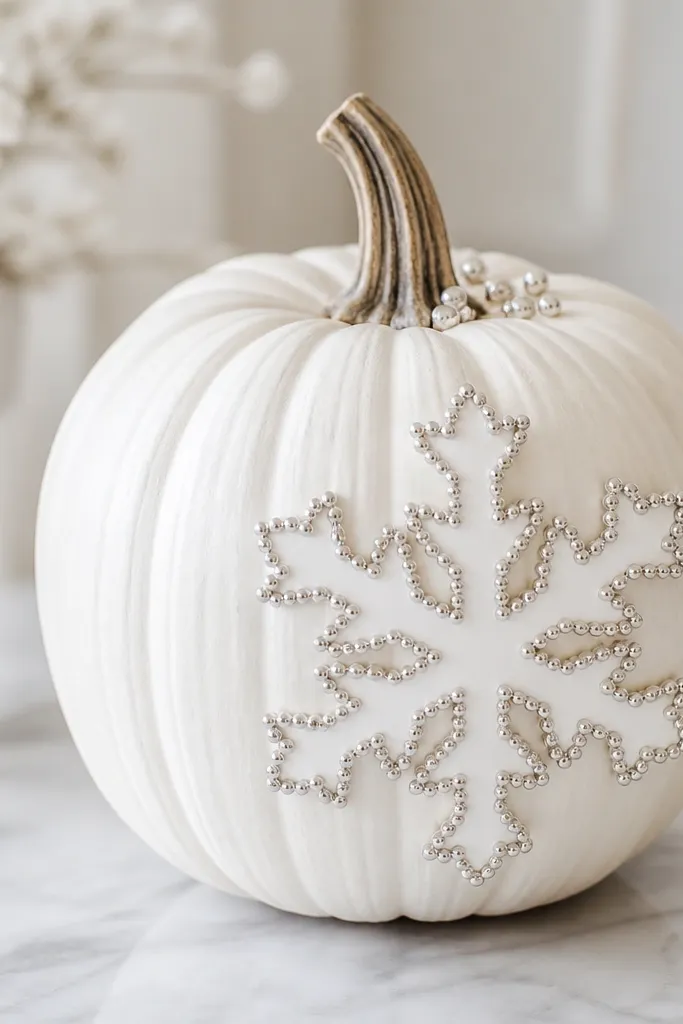
This one gives winter vibes without changing the whole pumpkin theme. The snowflake cutout is clean and graphic, and the bead outline adds sparkle while staying controlled. Silver beads on white look like frost instead of glitter. I place it on one side so the pumpkin still reads as a pumpkin first, decoration second. Kids like this because it’s a clear shape with a defined boundary.
Cut a snowflake from cardstock and place it on the pumpkin where you want it. Outline the snowflake shape with a thin line of glue (craft glue works well). Pour or place tiny silver beads along the glue line, then shake off excess into a tray. Let it dry completely so beads set firmly. Optional: add two or three beads near the stem area to echo the snowflake sparkle without covering the whole pumpkin.
Pro tipUse a tray lined with paper to catch beads so cleanup takes minutes, not an hour.
AvoidAvoid hot glue for bead placement; it strings and leaves thick ridges that look messy.



