
1. Spider Web Treat Basket with Glossy Orange Pops
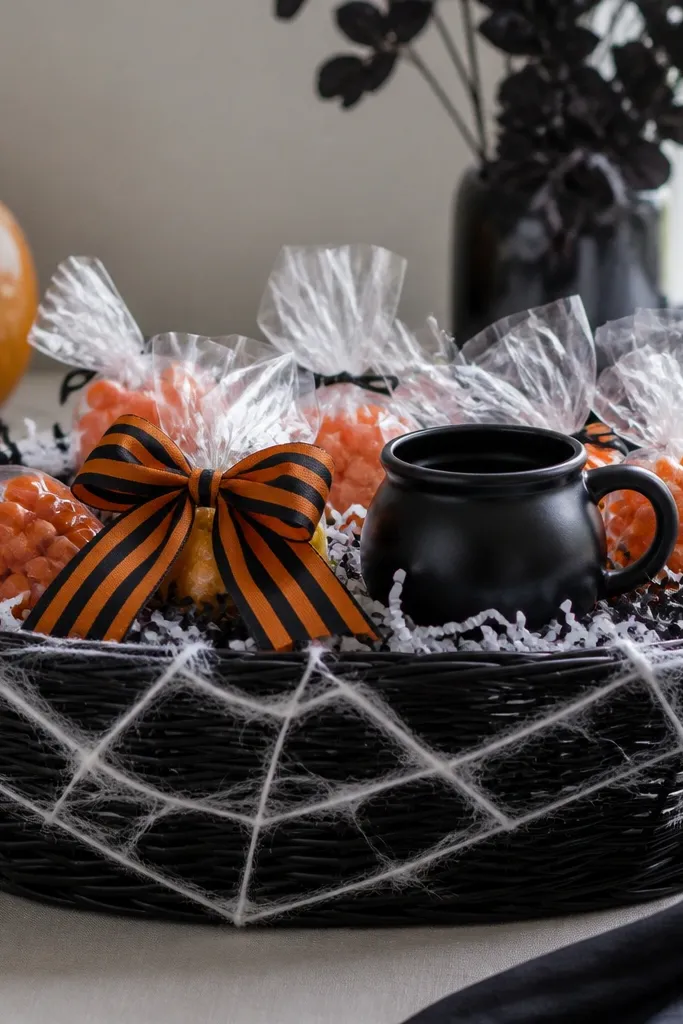
Start by placing shredded black tissue around the sides and crumpled kraft paper in the center so you get a raised mound. Lay the faux spider web netting across the top, then tuck the edges under the tissue so it looks anchored, not floating. Add your hero item first — a mini black cauldron mug or a small candy jar — then nestle orange cellophane bags around it. Finish with a black-and-orange ribbon bow on the handle side and wrap the whole basket in clear cellophane, tucking the seams under the base.
This one looks like you planned it because the web netting gives instant texture and the orange candy creates color contrast against the black base. I build it for people who like bold, high-contrast looks — it photographs great on light skin and darker skin alike because the orange catches the camera. The basket stays cute without feeling childish because the netting is neutral white and the orange is controlled in small doses. The styling principle is one strong visual element (the web) plus a single bright color family (orange) repeated across the treats.
AvoidDon’t use random multicolor candy — it breaks the theme and reads cheap fast.
Pro tipPick orange treats with a gloss finish (candy-coated or clear-wrapped) so they look shiny under flash.
2. Witchy Purple Cauldron Basket with Silver Labels
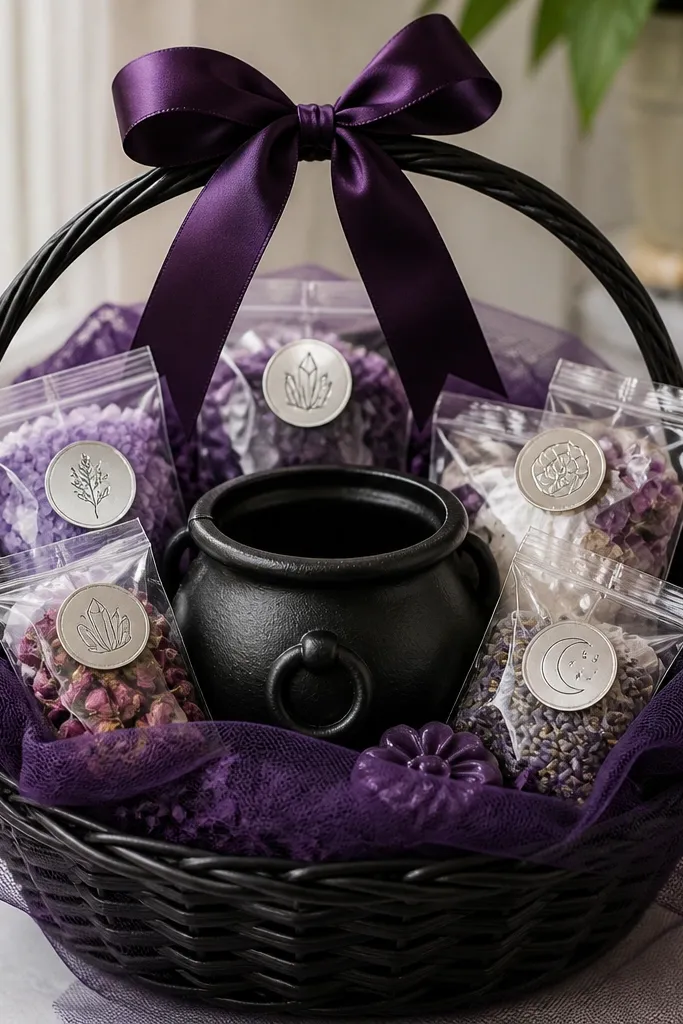
Start with a black basket and line it with purple tulle, pulling it up around the sides like ruffles. Place the faux cauldron mug or mini pot in the center, then fill behind it with purple tissue so you don’t see the basket walls. Bag each treat in clear cellophane, then stick a small silver label sticker on the front with a marker. Add a dark purple ribbon bow at the top and tie a short length of silver ribbon around the cauldron handle area.
Purple reads witchy without needing a loud costume, and silver labels make it feel put-together even if the contents are simple. I like this for indoor parties because the purple tulle catches warm room light and looks soft instead of harsh. It works especially well for guests who wear purple or silver jewelry — the basket matches their outfit and looks intentional. The principle is controlled sparkle: one metallic element (silver) repeated on every packaged item.
AvoidDon’t skip labeling — unlabeled items look like leftovers.
Pro tipWrite labels in thin, all-caps using a silver or white paint pen for a crisp look.
3. Spooky Apothecary Basket with Green Glass Bottles
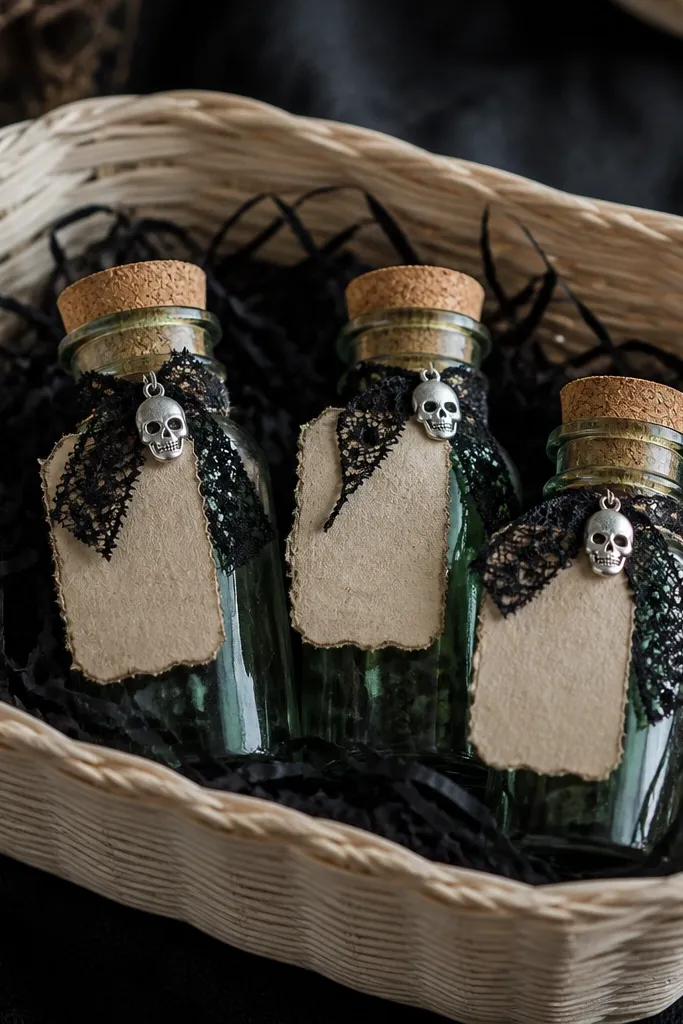
This is my go-to when someone loves decor more than candy. Green glass looks high-end because it’s visually interesting even when the bottle is small, and it reads “apothecary” instantly. I’ve made this for coworkers and it works because it feels like a gift, not a trick-or-treat pile. The principle is texture and craft: glass, lace, paper tags, and corks create a story without needing fancy items.
Start by lining the basket with shredded black paper, then add a thin layer of crumpled kraft paper in the center to raise the height. Place two to three small green glass bottles with corks upright; if you don’t have bottles, use clear mini jars and tint them with green craft paint on the glass exterior. Tie black lace ribbon around one bottle neck, then add handwritten tags to the others with twine. Nestle small “potion” items around the bottles like herbal tea sachets, bath salts, or individually wrapped cookies, then cover the top with a short black lace strip.
Use a white paint pen on brown kraft tags; the contrast makes it look custom.
Don’t use bright neon green — it looks like craft store slime.
4. Monochrome Ghost Basket with White Faux Fur
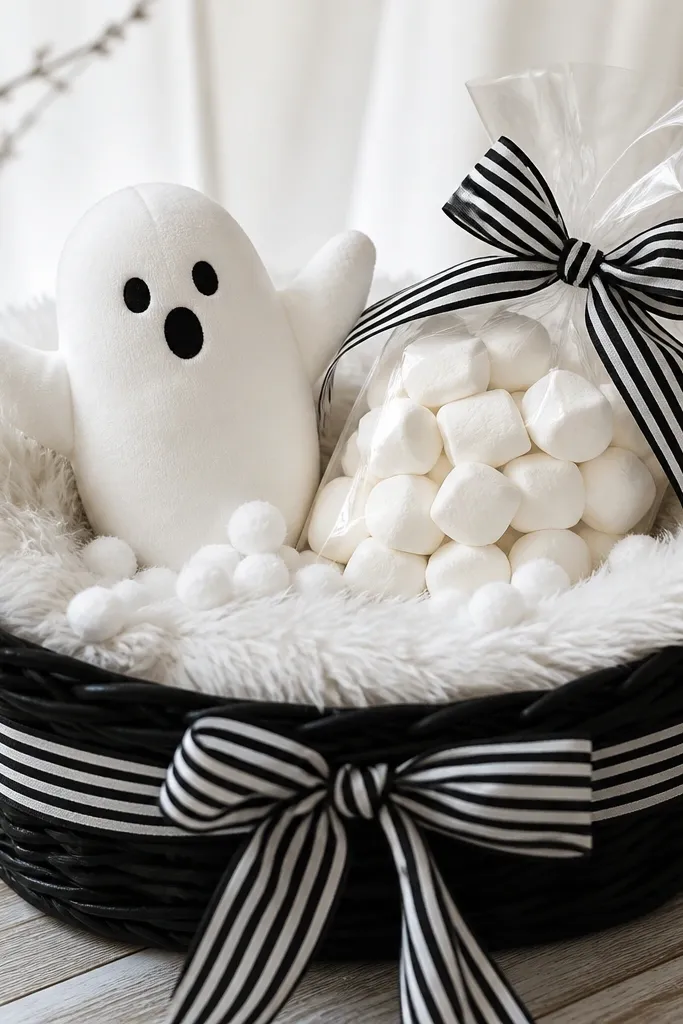
Monochrome ghost baskets always look expensive because the materials match. White faux fur gives instant softness and makes even plain treats look like part of a themed set. I’ve given this to kids and adults and it lands with both because it’s cute but not messy. The styling principle is a single color palette with one tactile element (fur) that makes the basket feel cozy.
Start with a black basket and line the bottom with white faux fur pieces, cutting them to cover the sides so no basket weave shows. Add a few cotton balls around the center for “cloud” effect, then place your ghost plush on top. Put marshmallows or hot cocoa packets in clear bags so the contents are visible, then tuck them behind the plush so they don’t flatten. Tie a black-and-white striped ribbon bow at the front and wrap the basket in clear cellophane if you want a clean finish.
Fan the faux fur upward around the ghost so it looks like the ghost is emerging.
Don’t overstuff — fur mats down and the basket turns into one flat ball.
5. Candy Corn Classic Basket with Tri-Color Layers
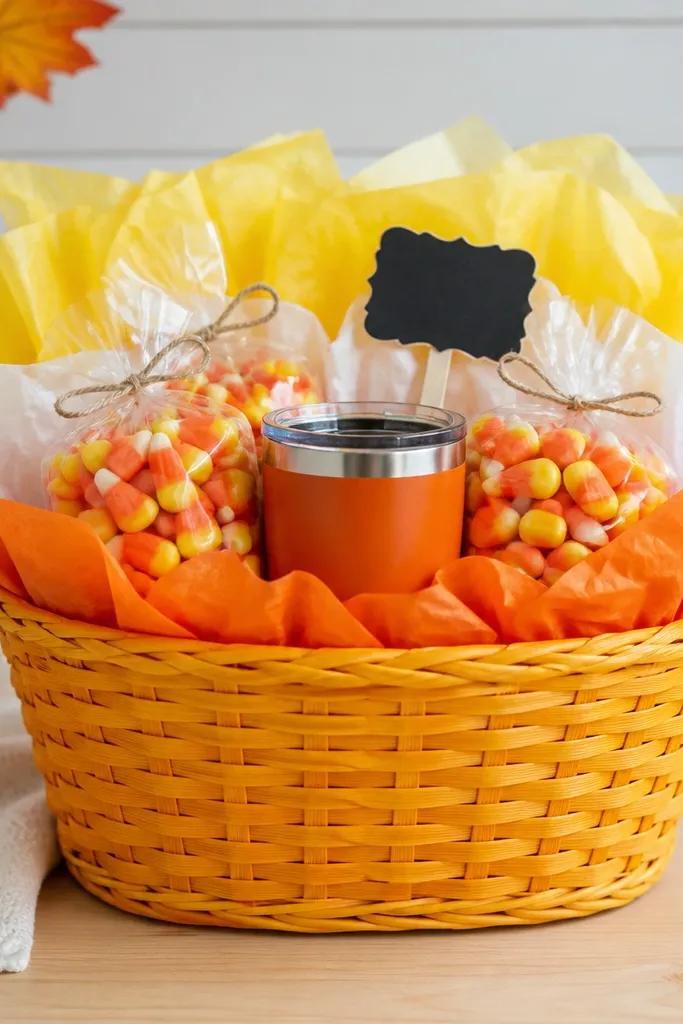
Candy corn is playful, but you can make it look stylish by layering colors like a cake instead of dumping it all in. This is great for school parties where you need something cheerful but still “designed.” I made one for a Halloween office exchange and it looked instantly coordinated because every item echoed the orange-white-yellow palette. The principle is repeating the same three colors in the filler and the packaged items.
Start by lining the basket with orange tissue paper at the bottom, then add a layer of white tissue right in the center, and finish with yellow tissue on top. Place a small orange tumbler or mini candy jar upright in the middle, then surround it with candy corn bags. Add one black accent like a mini sign or a marker-style tag so the palette doesn’t feel too sweet. Tie a thin black ribbon bow and place a single “Happy Boo” sign at the front, angled slightly upward.
Use clear bags for candy corn so the colors stay bright and readable.
Don’t mix in unrelated colors like green or blue — it makes the theme look random.
6. Black Rose Boo Basket with Velvet Ribbon
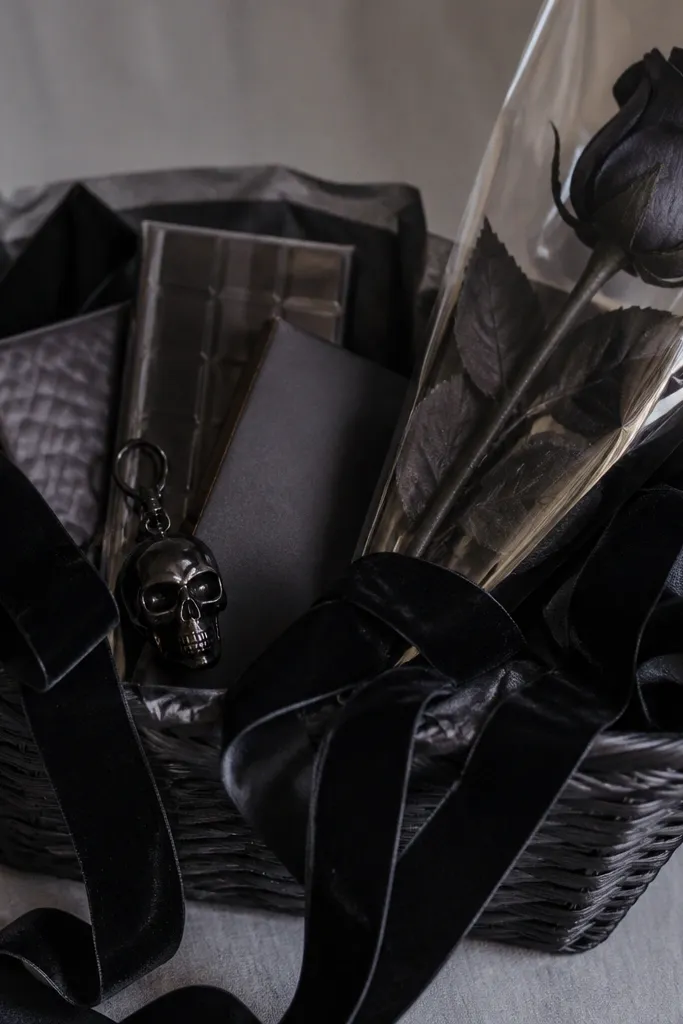
If you want “romantic spooky,” this is it. Black roses and velvet ribbon look like you spent way more than you did, and dark chocolate keeps the vibe classy. I’ve made this for girlfriends and it lands because it feels personal, not generic. The styling principle is one dramatic focal point (the rose) plus a tight color family with minimalist packaging.
Start with black tissue as your base and tuck it high up the sides so the basket looks deep. Add the faux black rose in the center, then wrap it with a small square of clear cellophane so it looks gift-ready. Place dark chocolate bars around the base, keeping labels facing outward. Drape velvet ribbon in two loops across the top, then tie a small knot at the front and add a skull keychain near the rose.
Choose velvet ribbon that’s at least 1 inch wide; thinner ribbon looks flimsy.
Don’t use cheap glitter decorations — they shed and look messy.
7. Mini Movie Night Boo Basket with Popcorn Tower
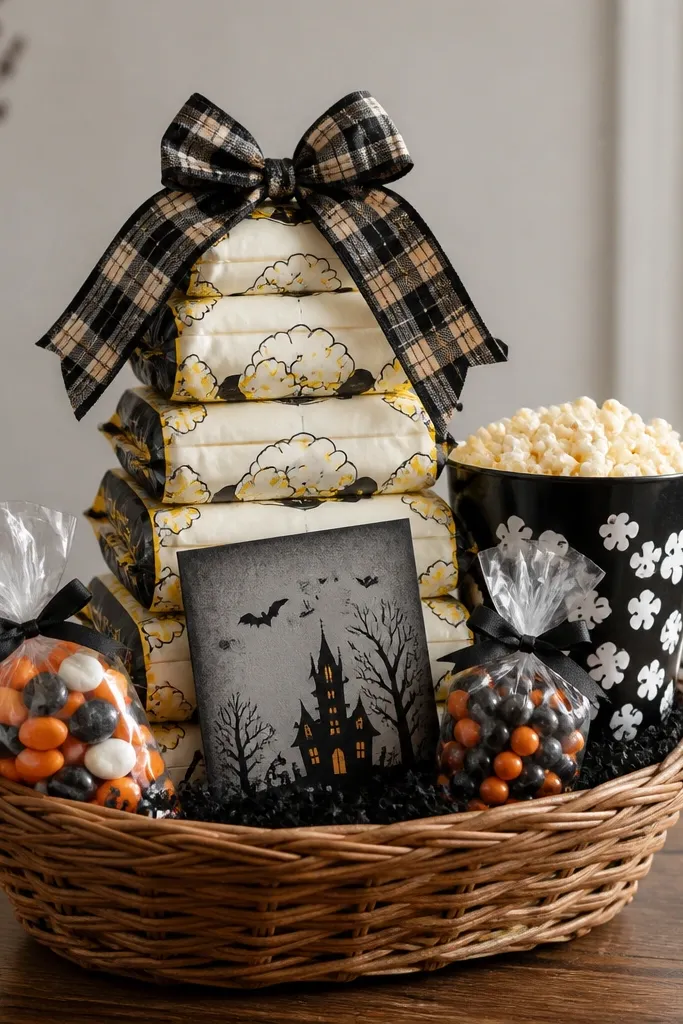
This basket works because it has a clear purpose: movie night. People love gifts that suggest a plan, and popcorn stacks give you instant height without spending on fancy decor. I’ve done versions of this for neighbors and it always gets a “this is actually fun” reaction. The principle is stacking for height and using one printed prop (a movie list card) to tie everything together.
Start by creating a base layer with crumpled kraft paper, then place a small black popcorn bucket in the center. Stack microwave popcorn bags around it, using two or three layers so the top bag sits above the ribbon line. Add clear bags of candy on the sides, then tuck a printed “Spooky Movie Picks” card under the handle or ribbon. Tie a plaid ribbon bow at the front and wrap in clear cellophane only if you can keep it smooth over the stacks.
Use a black marker to write the movie list title directly on the card for a homemade look.
Don’t flatten the stacks — the basket looks like a pile when the top item isn’t higher than the sides.
8. Skull & Stripe Boo Basket with Monogram Tag
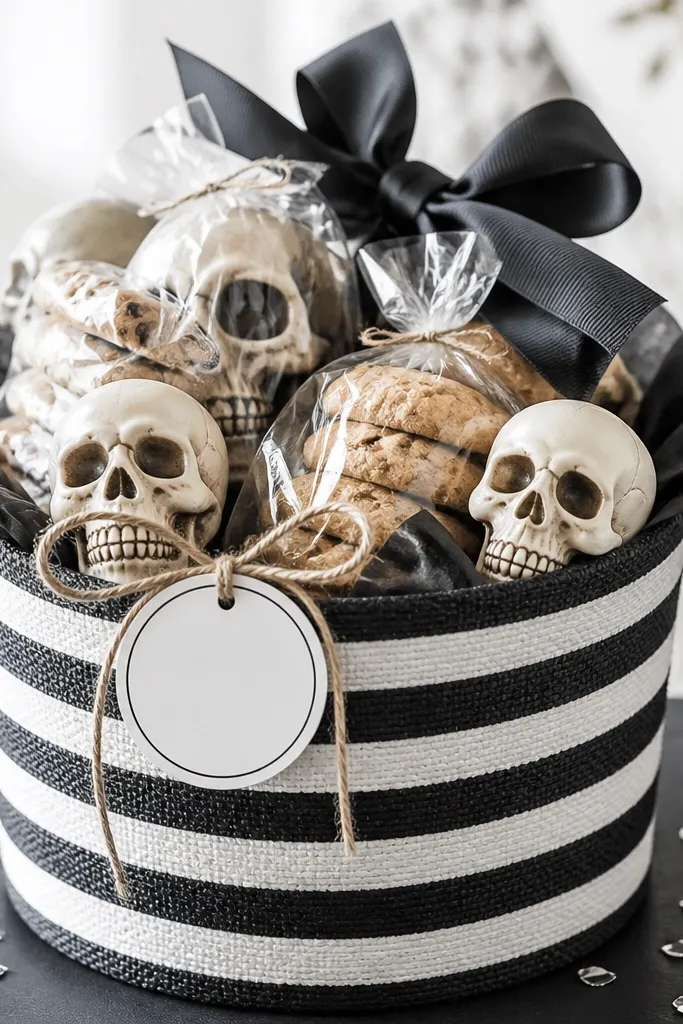
This one looks graphic and clean, which makes it feel more “gift” than “candy grab.” Black-and-white stripes also photograph well because the contrast doesn’t wash out. I like it for adults because it looks like Halloween decor, not a kids craft. The principle is repeating one pattern (stripes) and keeping everything else simple.
Start with a basket that already has stripes or wrap a plain basket with black-and-white striped paper. Line with black tissue, then place skull ornaments around the edges like bookends. Add cookies or candy in clear bags so the shape is visible, then tie a monogram tag on the front using twine. Add silver confetti in small pinches near the top, then finish with a black ribbon bow.
If you don’t have skull ornaments, use small plastic skulls and keep them to two or three — too many looks cluttered.
Don’t add random colored confetti — it ruins the monochrome look.
9. Pumpkin Spice Boo Basket with Brown Paper Wrap
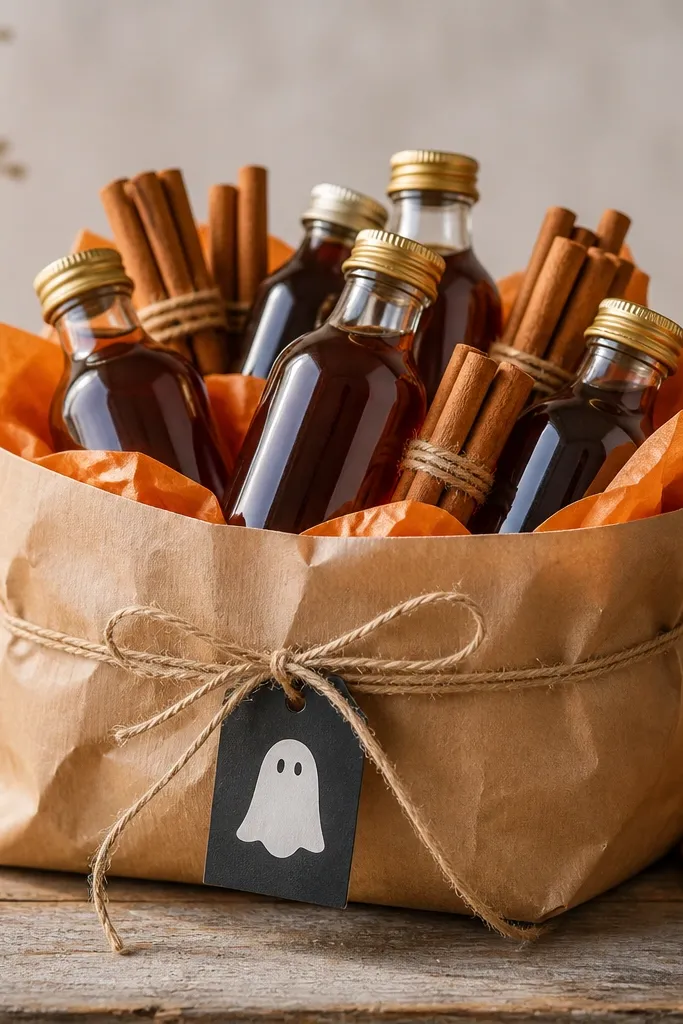
Start by filling the basket with crumpled kraft paper so you get height. Place mini jars or sachets of pumpkin spice in the center, then add cinnamon sticks angled outward like spokes. Add orange tissue at the back so it peeks above the jars. Wrap the basket in brown kraft paper, fold the top edges tight, then tie with twine and attach an orange-and-black “boo” tag.
This is Halloween that smells like fall. Pumpkin spice items look cohesive because the packaging usually has warm neutrals, and the brown paper wrap makes it feel handmade. I made one for a coworker and it looked better than the candy baskets because it didn’t scream “cheap filler.” The principle is warm neutrals plus one orange accent so it feels seasonal without going full costume.
AvoidDon’t use bright Halloween plastic pumpkins — they clash with the warm paper look.
Pro tipUse cinnamon sticks instead of fake “spice” decor — they smell amazing for days.
10. Skeleton Hand Candy Basket with Black Lace
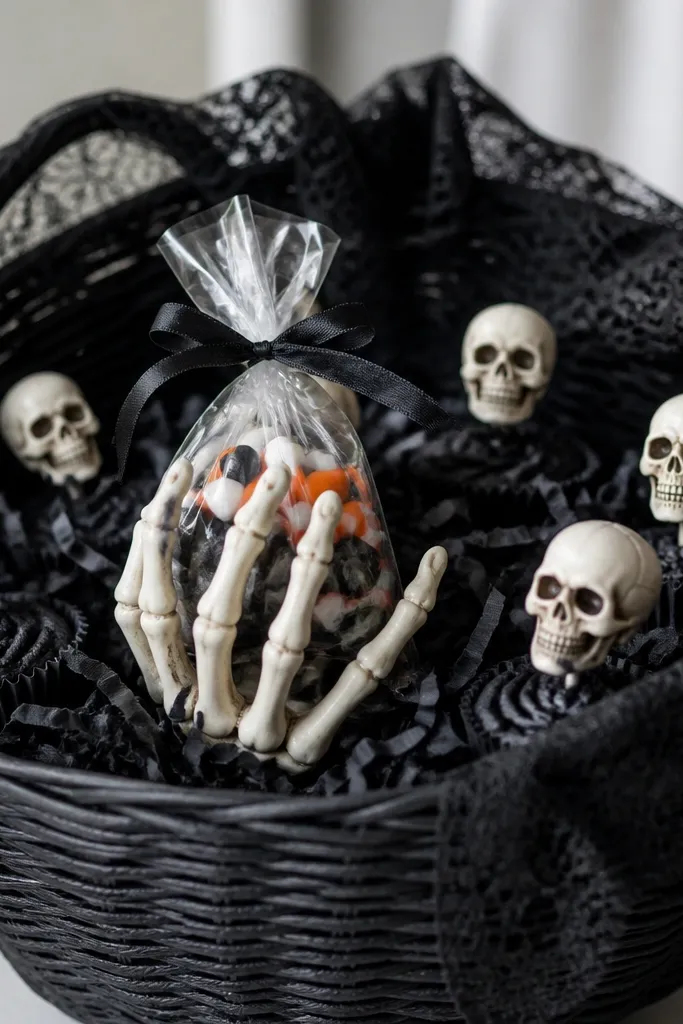
Start by packing the basket with black tissue and a little kraft paper in the middle. Place the skeleton hand upright in the center — if it won’t stand, wedge it with crumpled paper around the base. Drape black lace across the top and tuck the ends under the tissue. Add mini skull toppers or small skull candies around the lace edge, then fill the remaining space with individually wrapped treats in clear bags so they look clean.
The skeleton hand is a cheat code for height and drama. It makes the basket look like a prop from a haunted set, even if the treats are simple. I like this for Halloween parties where people want something funny and a little creepy. The styling principle is using one “character” item and framing it with lace so the rest stays tidy.
AvoidDon’t let the lace bunch — smooth it into a gentle curve.
Pro tipHot glue a small felt pad to the hand base if it wobbles — it fixes the “cheap” look instantly.
11. Treat Yo' Self Boo Basket with Mini Skincare
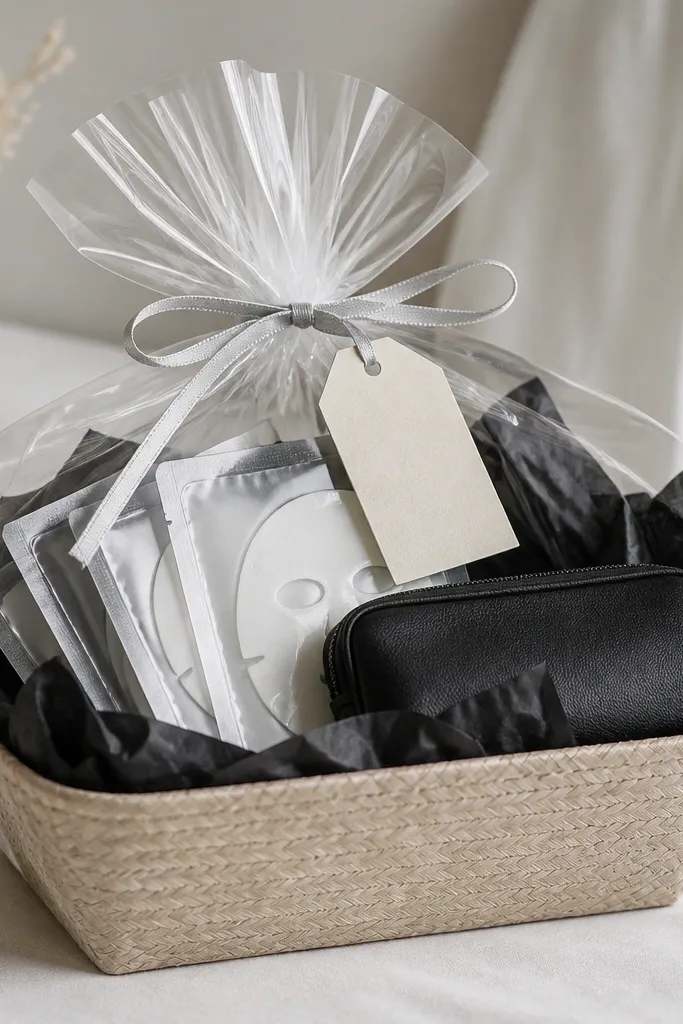
This one is for adults who don’t want more candy. Mini skincare looks expensive because the bottles and boxes are already designed, and the black tissue gives contrast. I’ve done this for birthdays in October and it always feels thoughtful instead of last-minute. The principle is mixing one indulgent item (masks or lip balm) with one practical accessory (mini makeup bag).
Start with a beige or tan basket and line it with black tissue. Place a small black makeup bag in the center, then tuck facial masks around it so they stand upright. Add a lip balm or hand cream in a clear bag on top, and write a simple label tag like “Boo, treat yourself” tied with silver ribbon. Finish by wrapping the basket in clear cellophane and pulling the ribbon tight so it looks crisp.
Use a glossy black tissue or thicker paper so the basket looks smooth under wrapping.
Don’t include skincare without a label — people hesitate to use unlabeled items.
12. Dark Chocolate & Red Ribbon Boo Basket
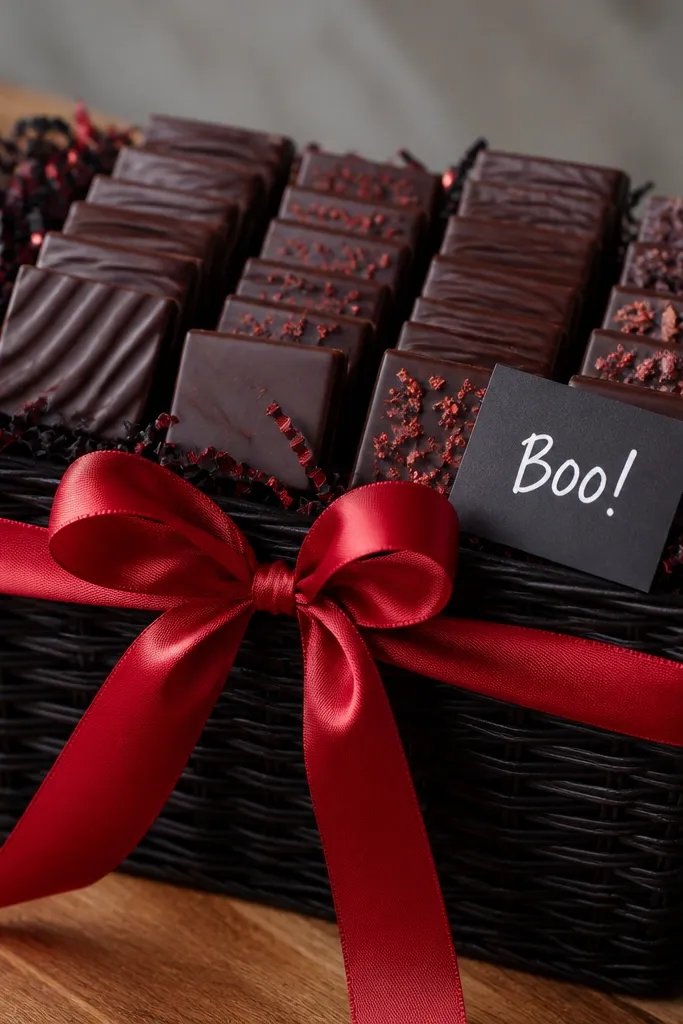
Red and black is Halloween without the cartoon vibe. Dark chocolate bars look premium when you align them and keep the packaging facing outward. I made one for my neighbor and they asked where I bought it because it looked like a bakery gift. The principle is symmetry: stack items in straight lines and keep the decorations minimal.
Start by lining the basket with black tissue, leaving a flat center space. Place dark chocolate bars in a vertical fan or neat row so labels face forward. Add one “hero” chocolate bar at the top center, then tie a deep red satin ribbon bow across the front. Put a small white “boo” card under the ribbon and add a tiny amount of red glitter paper shred at the sides so it stays controlled.
Use satin ribbon with a matte black base; glossy ribbon alone can look cheap under flash.
Don’t scatter chocolate — a random pile always reads low budget.
13. Candy Cane Spook Basket with Peppermint Swirl
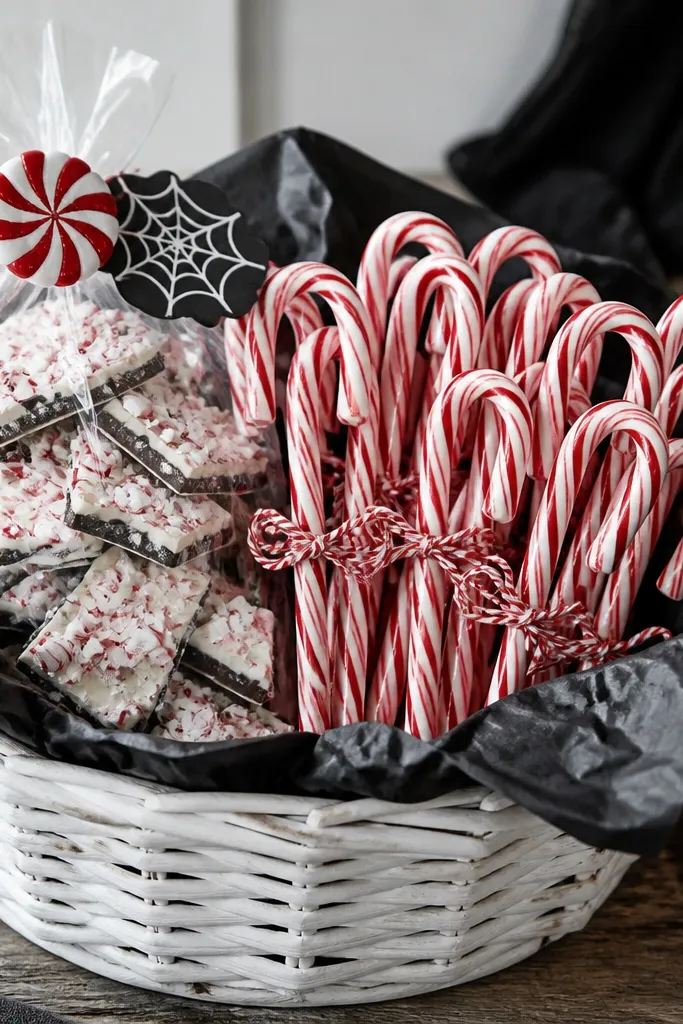
Peppermint bark and candy canes bring a winter vibe, and Halloween baskets can handle that if you keep the palette strict. The red twine and candy cane stripes create rhythm, which makes the basket look designed even with a few items. I like this for adults because it tastes good and doesn’t feel like a kid costume basket. The principle is pairing one winter candy with Halloween colors — black and red — to bridge the season.
Start by lining a white basket with black tissue and pulling it up slightly at the edges. Tie candy canes in pairs with red twine, then place them upright around the center like a wreath. Add peppermint bark or mint cookies in clear bags and place them where they’re visible between the canes. Finish with a small peppermint swirl decoration at the top and attach a tag with red marker on white cardstock.
Cut a small piece of cardboard into a circle and place it under the canes to keep them standing.
Don’t add green candies — it clashes with the peppermint red-and-black plan.
14. Haunted Hot Cocoa Basket with Marshmallow Cloud
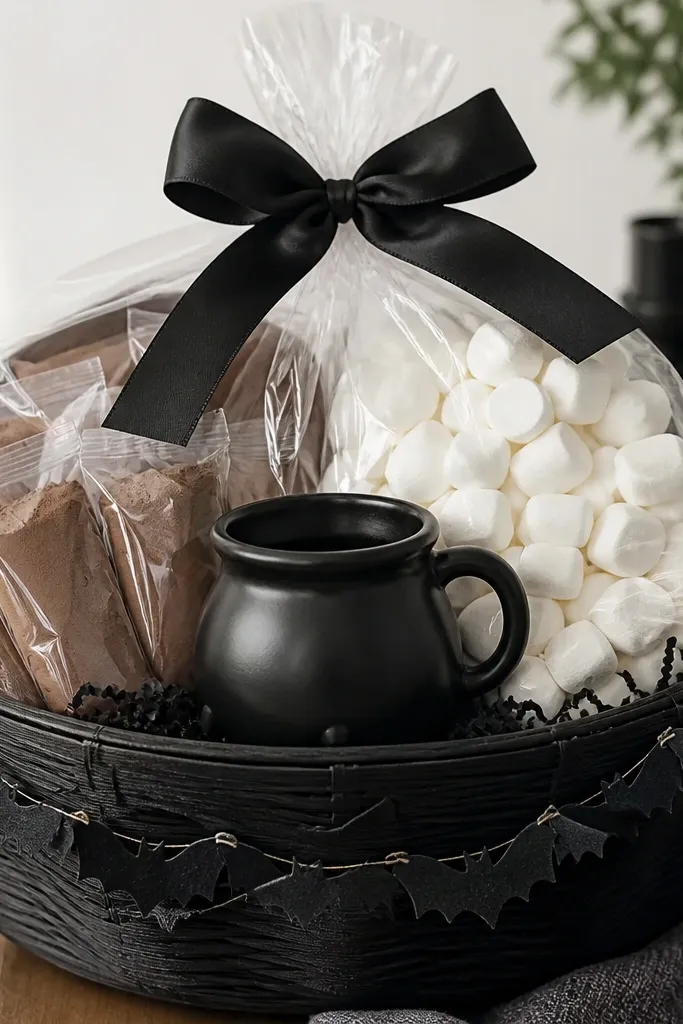
Hot cocoa baskets look thoughtful because they’re an experience, not just snacks. The marshmallow “cloud” effect is also an easy way to make a cheap cocoa kit look like a centerpiece. I’ve made these for classroom parties and it’s the one gift that disappears fast and gets used right away. The principle is using one edible texture (marshmallows) as the visual hero.
Start with a black basket and line the bottom with crumpled kraft paper. Place a cauldron mug in the center and tuck hot cocoa packets in clear bags around it. Add marshmallows on top in a loose mound so they look fluffy, not packed. If you want extra structure, wrap the top loosely with clear cellophane and tie a black ribbon around the rim. Attach a mini “brew instructions” card behind the mug handle.
Write the brew instructions in big handwriting on a small card so it feels handmade.
Don’t pack marshmallows down — they melt visually into a flat blob.
15. Glitter Skull Trinket Basket with Clear Organza
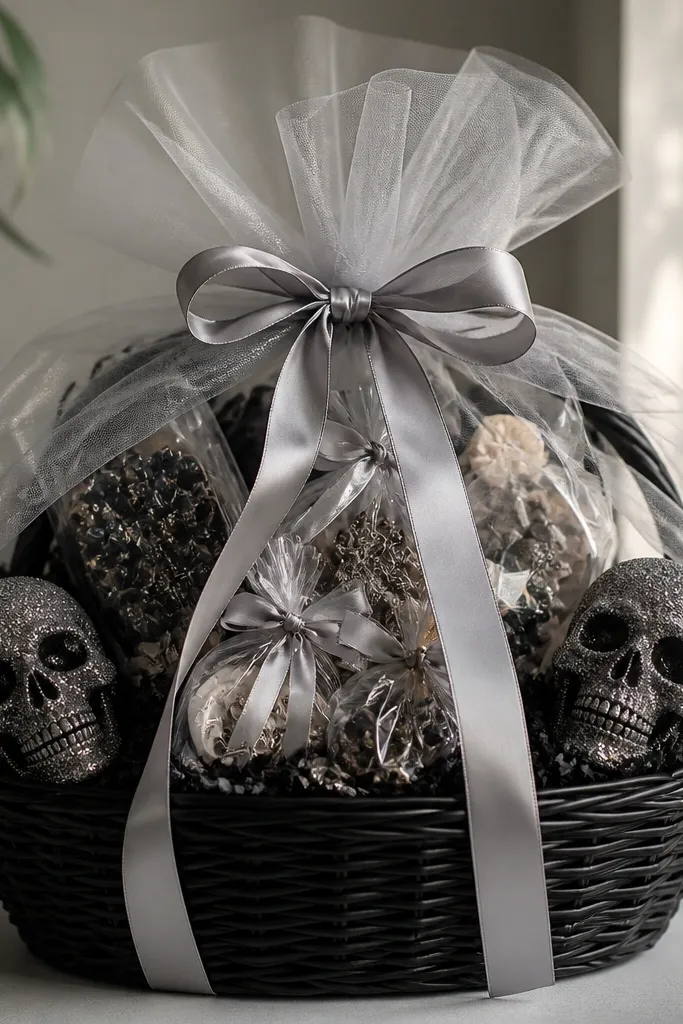
Start by lining the basket with black tissue and placing two small glitter skull figurines at the front corners. Lay organza fabric over the top like a shawl, then tuck edges under the tissue to hold it in place. Put trinkets (mini lotion, keychain, hair ties) in clear bags and arrange them so the labels face out. Tie silver ribbon around the basket rim, then add one tiny skull charm on the ribbon knot.
This basket is for people who like cute desk items. Clear organza makes everything look airy and intentional, and glitter skulls add sparkle without needing a ton of decor. I’ve used this for office exchanges and it still looks good after the party because it becomes a “small things” container. The principle is transparency and sparkle control: let the bags show contents, then add one metallic accent.
AvoidDon’t overload glitter figurines — too many looks like a craft bin.
Pro tipChoose organza that’s not wrinkly — smooth fabric makes the whole basket look cleaner.
16. Tombstone Tag Boo Basket with Black & White Paper
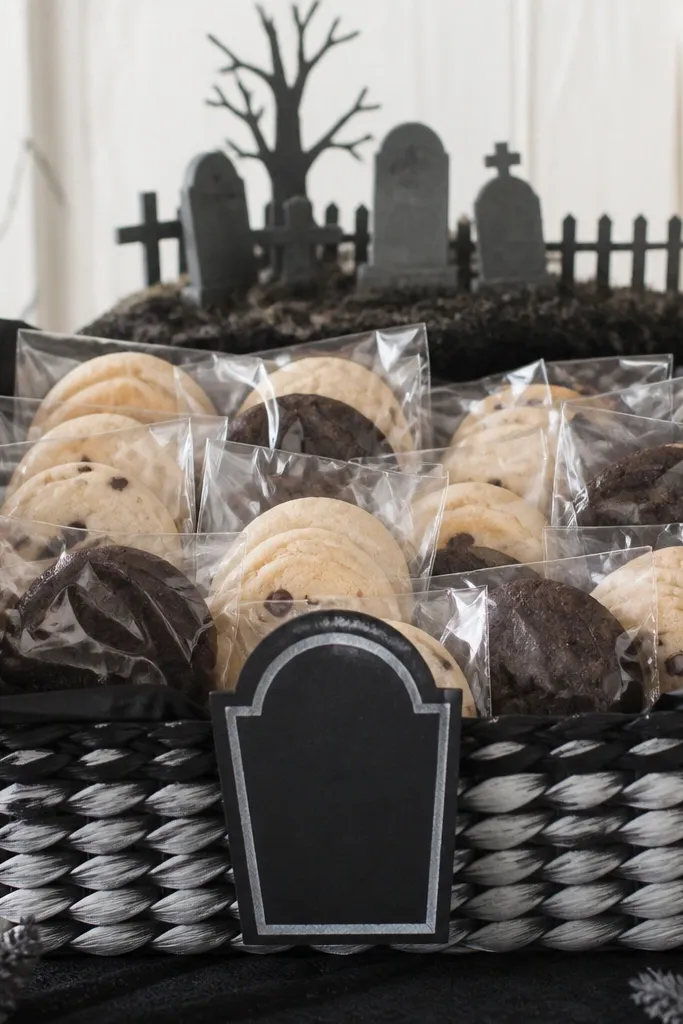
Start by lining the basket with black tissue and placing cookies or brownies in clear bags so the shapes stay visible. Cut a tombstone tag from white cardstock, add black “BOO” lettering, then attach it with black twine to the front handle area. Place a small faux graveyard sign or mini tombstone at the top center between two packaged items. Tie black-and-white ribbon around the basket and keep the filler tight so the paper props don’t sink.
Paper props make this basket look like Halloween decor instead of a bag of stuff. Tombstone tags also give you a place to personalize, which is why it feels nicer than cheap baskets where everyone gets the same items. I like this for family gifts because it looks fun and still readable for older relatives. The principle is using one strong paper shape and keeping everything else monochrome.
AvoidDon’t use thin printer paper — it bends and looks cheap fast.
Pro tipUse thick cardstock (at least 110 lb) so the tombstone tag holds its shape.
17. Mini Campfire Boo Basket with S'mores Kit
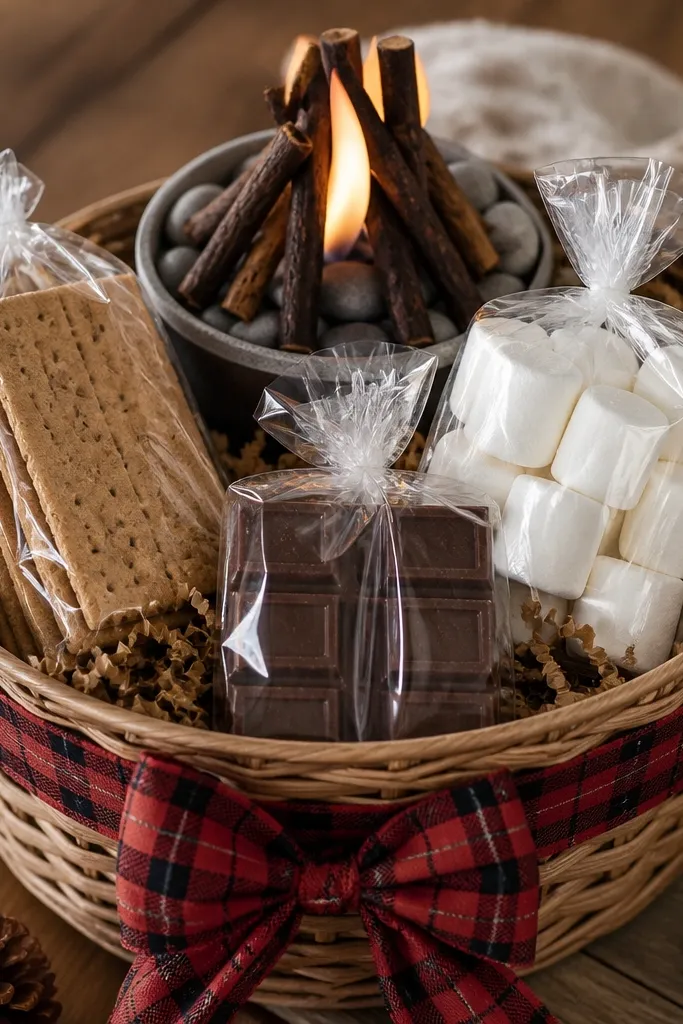
Start with brown kraft paper filler and shape it into a gentle mound. Place a small faux campfire decoration at the top center; tuck the base into the filler so it doesn’t tip. Add graham crackers, chocolate squares, and marshmallows in clear bags around the campfire. Tie a red plaid ribbon bow on the front and slide a small card that says “Roast + assemble” under the ribbon.
S’mores kits are a Halloween win because they feel cozy, not spooky for the sake of it. The campfire prop gives you a strong focal point and makes the basket look themed without needing complicated crafts. I’ve used this for outdoor Halloween gatherings and it fits the vibe instantly. The principle is combining a seasonal prop (campfire) with a simple edible set that already comes in matching packaging.
AvoidDon’t use loose candy in bags that leak — s’mores ingredients make a mess if they sweat.
Pro tipIf you can, use mini marshmallows — they look cuter and don’t spill as much.
18. Black Cat Boo Basket with Catnip and Cookies
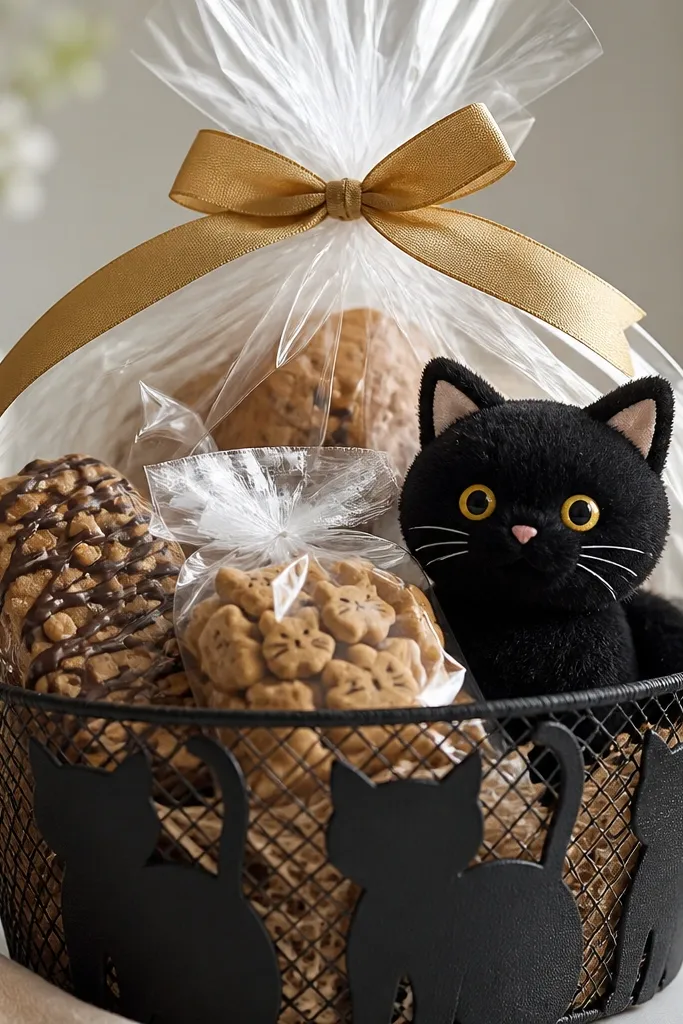
This one is a double gift: it works for pet lovers and it feels personal. A black cat plush and cat treats create the Halloween theme without relying on candy. I’ve made these for friends with pets and they love that I included something for their animal, not just the person. The principle is split the basket into two zones — pet items on one side, human treats on the other — so it looks intentional.
Start with a black basket and line with black tissue. Put a black cat plush on one side of the center, then place catnip or cat treats in clear bags at the base of the plush. On the opposite side, add cookies or chocolate in clear bags so the two zones are visually separated. Add a gold ribbon bow at the front and place a small “Happy Boo” tag near the center so it ties both sides together.
Use gold accents sparingly — one gold ribbon bow is enough for a finished look.
Don’t mix pet items and human items in the same clear bag — it looks careless.
19. Orange Tulle Boo Basket with Candy Jars
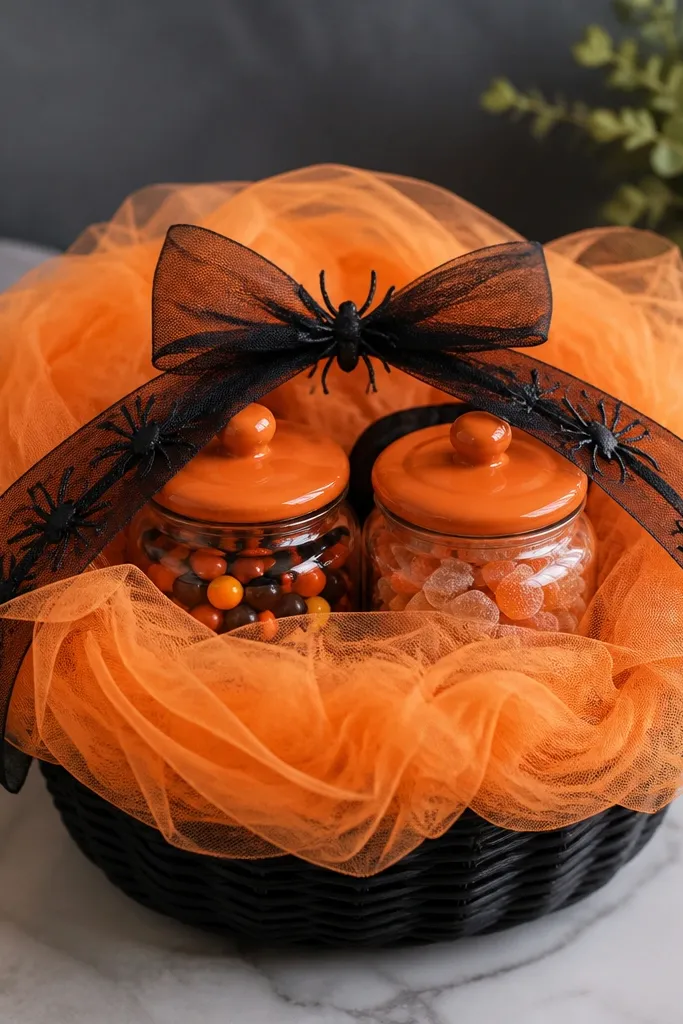
Orange tulle makes the whole basket feel like a party decoration, even if your items are basic. Candy jars look clean because glass and lids hide the mess of loose wrappers. This works for adults because the look is more “Halloween decor” than “trick-or-treat.” The principle is a fabric canopy: tulle creates height and hides gaps while jars keep everything neat.
Start with a black basket and tuck orange tulle under the rim so it drapes down the sides in two layers. Place two small glass jars in the center, then fill around them with tissue so the basket walls don’t show. Add small wrapped candies inside clear bags and tuck them behind the tulle edge. Cross a black ribbon or spider-themed ribbon over the top like a sash, then tie a bow at the front.
Cut tulle into strips about 18 inches long so it drapes without looking flat.
Don’t use tulle that’s too sheer — cheap thin fabric wrinkles and looks weak.
20. Pumpkin Patch Boo Basket with Mini Pumpkins
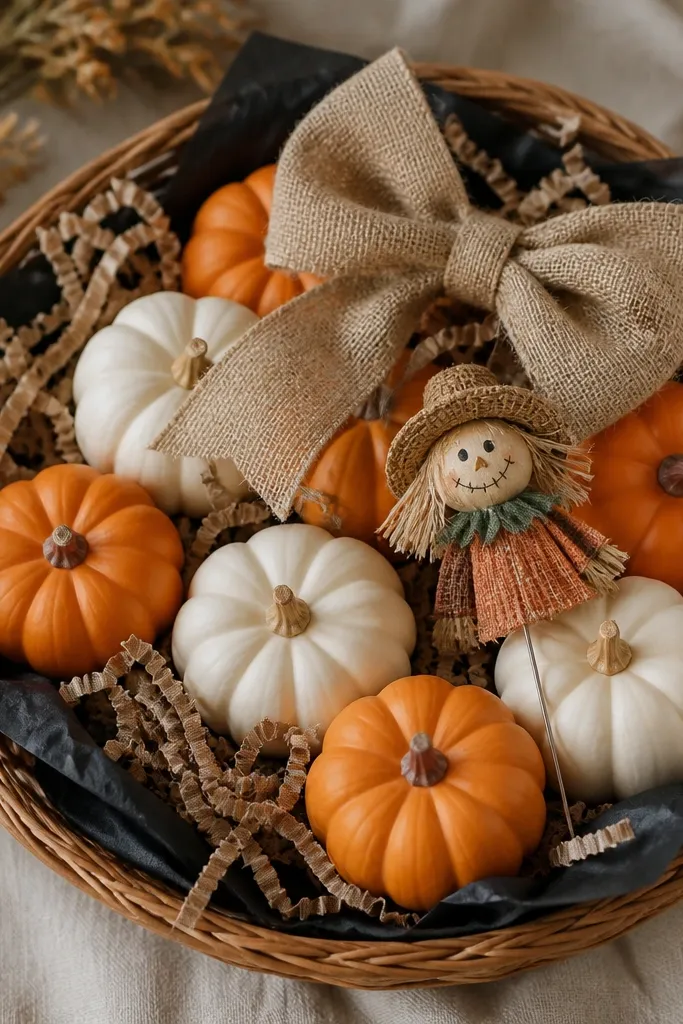
Mini pumpkins make the basket look like a miniature scene, which is why it rarely reads cheap. Burlap and burlap-like ribbon add texture that camera flash loves, and the orange/cream combo keeps it warm instead of spooky-sad. I used this for a family gift exchange and it looked like something you’d buy from a craft market. The principle is building a scene: props first, then treats that fit the colors.
Start by lining the basket with black tissue and adding burlap shreds around the sides. Place three mini pumpkins — two orange and one cream — in a triangle on top of the filler. Add a small scarecrow pin or tiny “patch” sign at the front, then tuck treats (cookies, caramel apples, cider packets) around the pumpkins. Finish with a burlap bow and wrap in clear cellophane only if the tulle or burlap doesn’t bunch.
Use a hot glue dot to anchor pumpkins so they don’t shift during transport.
Don’t pick pumpkins with shiny plastic faces — matte looks more realistic.
21. Skeleton Key Boo Basket with Aged-Label Look
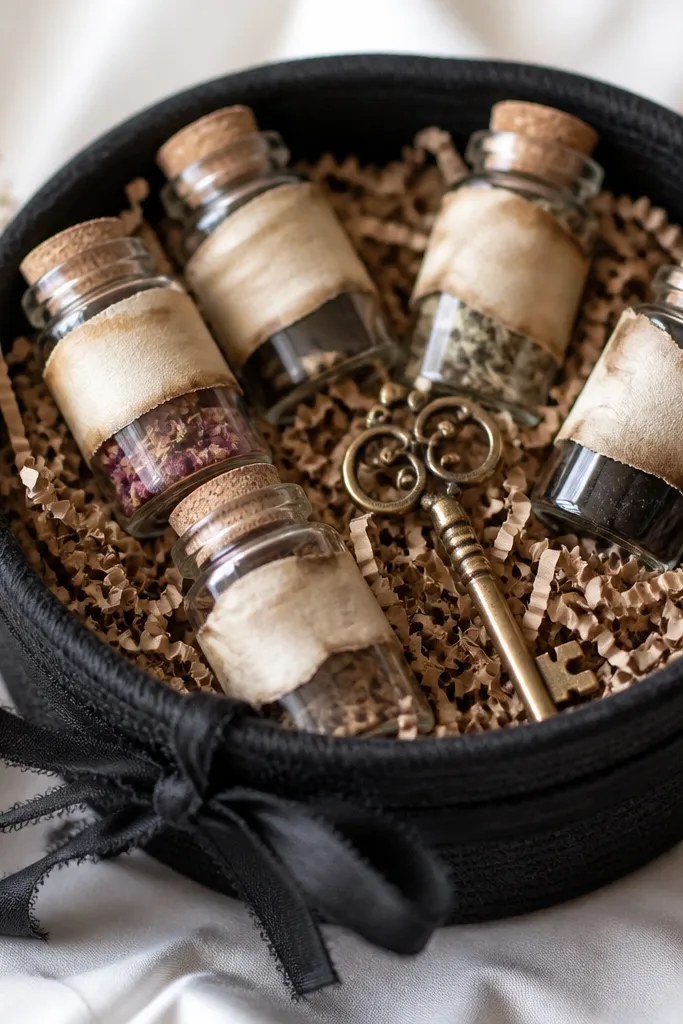
A skeleton key gives you that haunted-house vibe without turning the basket into party clutter. Kraft paper filler and aged labels make the whole thing look vintage, which reads more thoughtful than cheap candy baskets. I’ve made this for adults and it always feels like a “real gift” because the labels look custom. The principle is using one metallic prop (key) plus paper aging technique on the packaging.
Start with kraft paper filler and tear small strips of brown paper for label backgrounds. Make labels by writing on the torn paper with black ink, then lightly dab the edges with a tea bag or brown ink pad for an aged look. Place a gold skeleton key charm in the center on top of the filler. Put mini jars or snacks in clear bags, then attach the aged labels with twine. Tie a thin black ribbon around the basket rim and keep the rest of the decor minimal so the key stays the focal point.
Let the tea-dab labels dry fully before tying so they don’t smear on the ribbon.
Don’t use bright white printer labels — aged labels are the whole point.
22. Haunted Library Boo Basket with Bookish Props
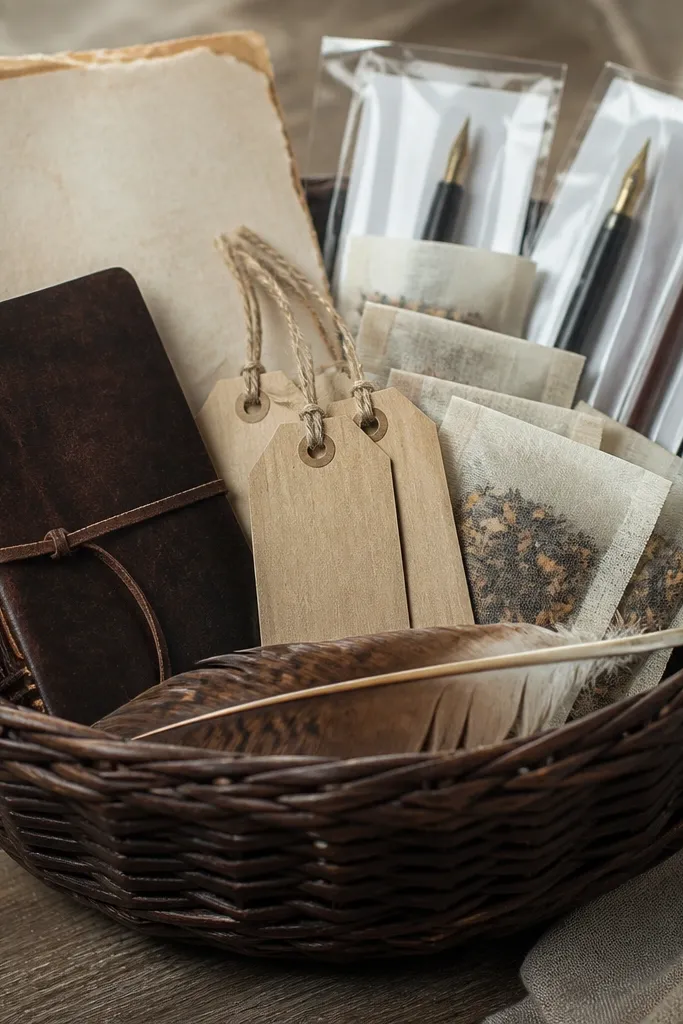
Start by lining the basket with dark brown paper and crumpled kraft at the center. Place a leather-look notebook or small journal in the center with a “spell” tag tied to the spine. Add tea bags in clear cellophane bags on one side and ink pens or gel pens on the other, keeping labels facing out. Top with a small feather quill decoration and tie a black ribbon bow across the front.
This basket feels smart and spooky, which is why it’s a hit for book lovers. Faux aged paper and a leather-look notebook make it look like you assembled a mini haunted study kit. I’ve done this for teachers and it always lands because it’s useful, not just decorative. The principle is pairing writing tools with a cozy item (tea) and keeping the palette dark brown, cream, and black.
AvoidDon’t add bright neon stickers — they ruin the library mood.
Pro tipWrite one line on the spell tag by hand — short text looks more authentic than printed quotes.
23. Halloween Bake-Off Boo Basket with Cookie Decorating Kit
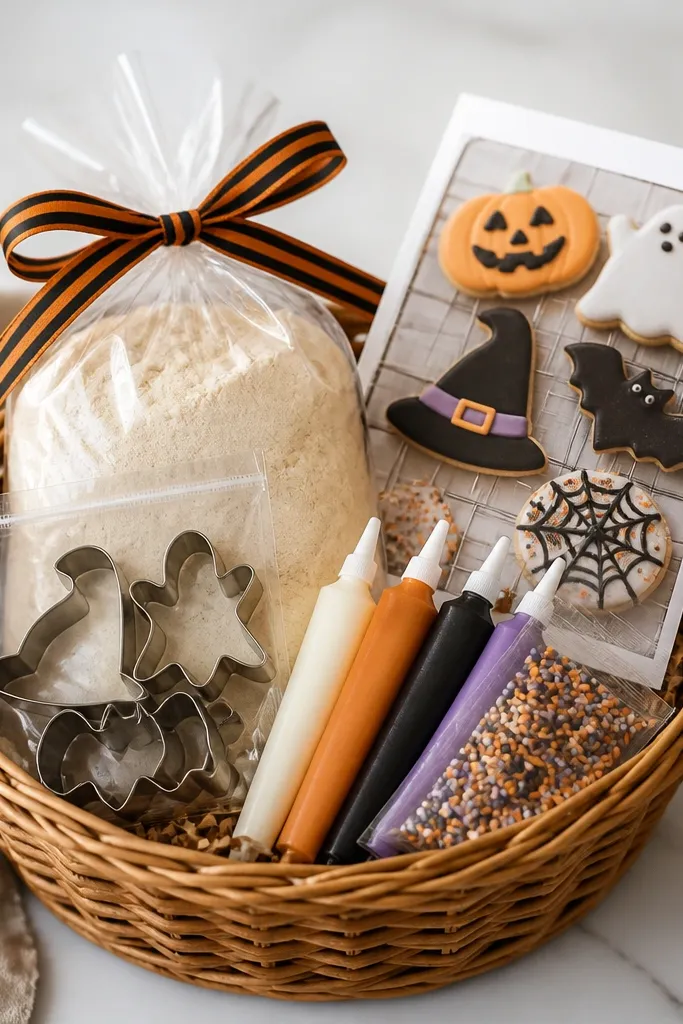
Start with a basket lined with black tissue and a flat “tray” area in the center using a folded piece of cardstock. Place cookie cutters in a small clear pouch so the shapes are visible, then add icing tubes laid horizontally around them. Add cookie mix in a clear bag and tuck a printed recipe card under the ribbon. Finish with Halloween sprinkles in a small clear jar at the top center and tie a black-and-orange ribbon bow.
If you want a basket that looks like an activity, this is the one. Cookie decorating kits look cohesive because the items match in function and color, and they photograph well because you can see the sprinkles. I’ve made these for friends who love baking and they appreciate the “we can do this together” angle. The principle is giving people tools, not just treats, so the basket feels complete.
AvoidDon’t throw in loose sprinkles without a container — they spill and immediately look cheap.
Pro tipPut the recipe card on thick cardstock and write the cook time with a black marker so it looks custom.
24. Boo Basket for Teens with Matte Black + Neon Orange
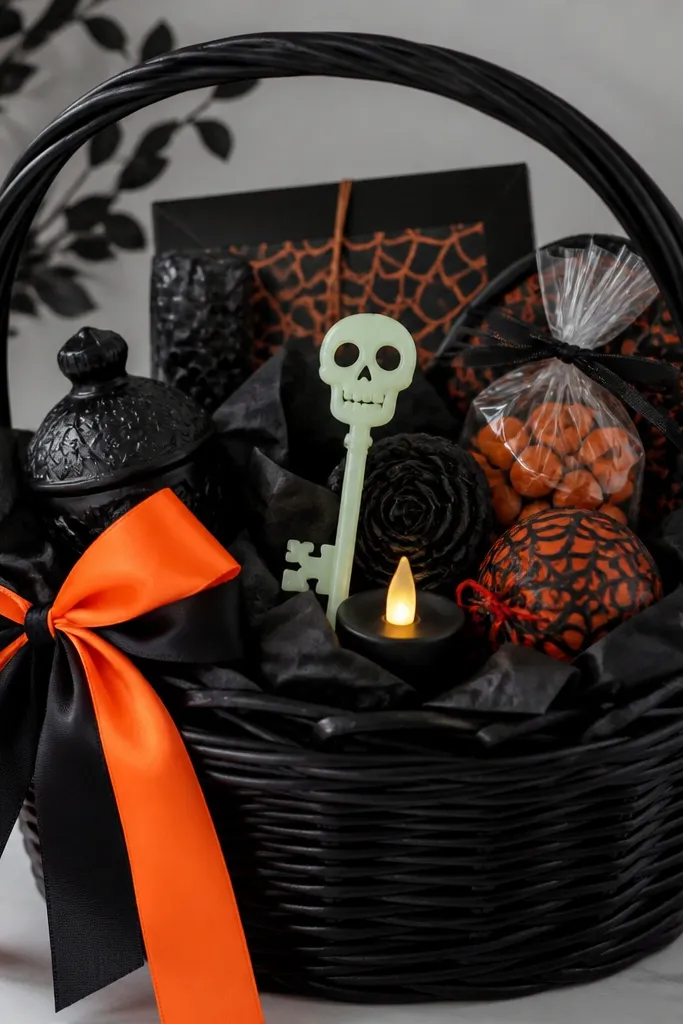
Start with a black basket and line it with matte black tissue for a smooth background. Place a glow-in-the-dark skeleton key or a small LED flicker candle in the center so it stands out. Add neon orange items like candy bags, orange lip balm, or a small drink mix in clear bags, keeping labels facing outward. Layer neon orange ribbon on top of matte black ribbon, then wrap the basket loosely in clear cellophane so the accents stay visible.
Teens hate “baby Halloween.” Matte black tissue with neon orange accents hits the sweet spot — it looks modern, not costume-y. I’ve made this for my cousin’s 16th birthday exchange and it felt cooler than candy baskets because it includes a practical vibe (glow light) plus a treat. The principle is using one neon pop and keeping everything else dark and clean.
AvoidDon’t mix too many neon colors — one neon orange accent is enough.
Pro tipIf you add an LED candle, test it first and put it near the top so it doesn’t get crushed.
25. Classic Boo Basket with Dollar-Store Upgrade Formula
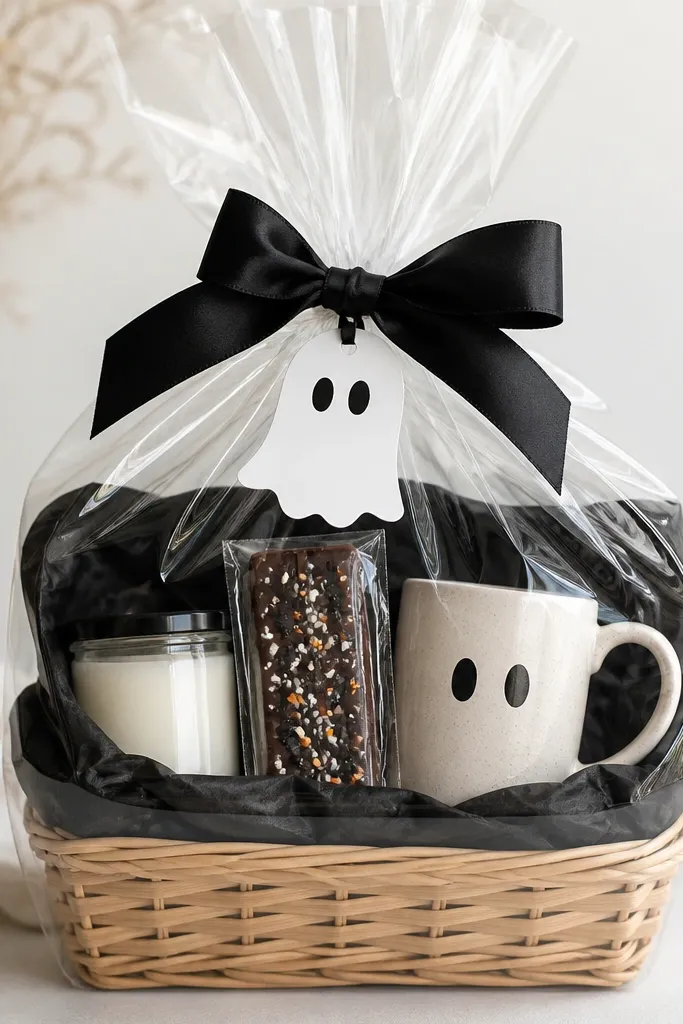
Start by picking one hero item like a mini candle or small mug and place it dead center on top of a mound of tissue. Then take your other items and put them in clear cellophane bags so labels look consistent and nothing looks loose. Choose one ribbon color like black, orange, or purple and tie it around the basket rim with a bow at the front. Add a “Boo for You” tag and wrap the basket in clear cellophane, tucking the seams under the base.
This is the “best boo basket ideas vs cheap” truth: you can use inexpensive items and still make them look high-end if you control presentation. I use the upgrade formula every time I’m on a budget — clear bag packaging, one matching ribbon, and a single hero item placed at the height of the ribbon. The basket looks intentional because the eye sees consistency, not price tags. The principle is packaging uniformity and height control.
AvoidDon’t use mixed wrapping styles like tissue + foil + loose items — it looks unplanned.
Pro tipRemove any store price labels from items before bagging — that one detail screams cheap.



