
1. Sassy googly-eyed witch hat pumpkin
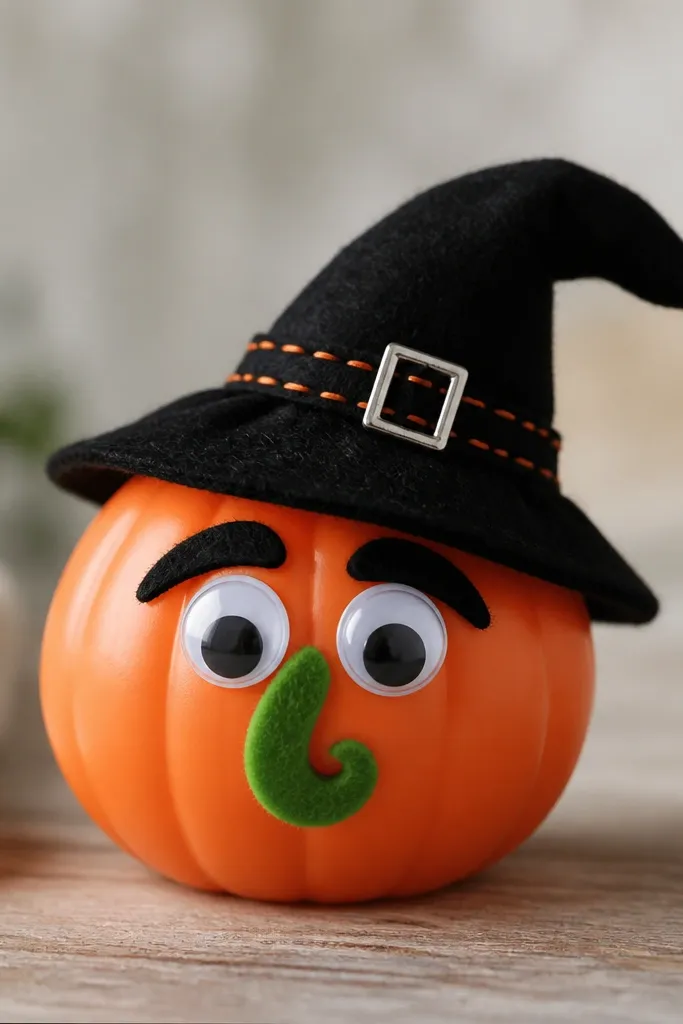
This one looks funny because the eyes are oversized and the hat is slightly cocked, like the pumpkin is judging everyone. I use black felt for the hat because it hides glue seams and stays matte, which keeps the face from looking shiny and plastic. The green nose and thick brows add contrast against the orange shell, so it reads clearly from a few feet away. It flatters most porch lighting because the matte felt swallows glare while the googly eyes catch it just enough to look alive.
Start by scuffing the pumpkin with 220 grit and spray-primering it if the surface is glossy. Cut a witch hat from black felt: a 5-inch tall cone and a 1.5-inch brim ring, then glue the brim to the base of the cone. Place the eyes first — I set the googly eyes 2 inches apart and slightly above the center, then trace around them with a marker so they stay aligned. Finally, glue on the eyebrows (thin strips of felt) and a small green felt nose, then seal the whole face with a matte clear spray once the glue cures.
If the googly eyes wobble, hot glue a small felt pad behind each one so they stop spinning when the pumpkin gets bumped.
Avoid using clear hot glue on felt edges — it can turn cloudy and show through on dark colors.
2. Pixel face with sticky foam squares
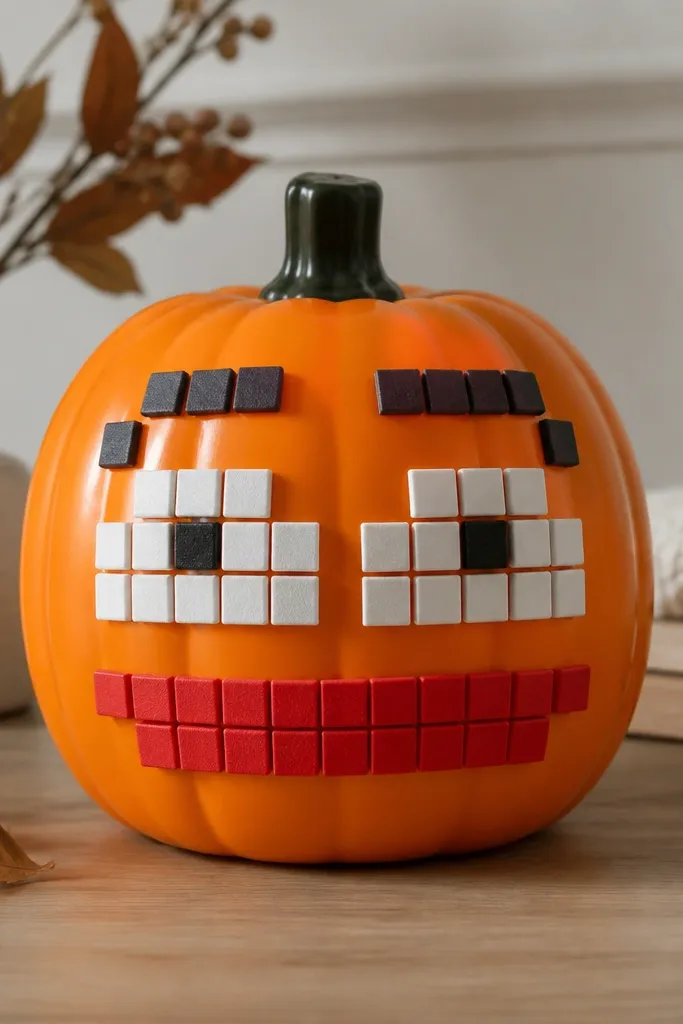
Pixel faces look funny because they’re obviously “wrong” in a charming way — like a retro video game character escaped. I like using craft foam squares because they sit on top of the plastic without needing paint to adhere perfectly everywhere. The raised blocks create shadow, which makes the eyes and mouth pop even under porch lights. This works especially well for neutral skin tones on guests because the colors are bold and clean, not muddy; it’s basically color-blocking for your pumpkin.
Scuff the pumpkin lightly and wipe it with rubbing alcohol so the foam adhesive actually grips. Cut or buy 1/2-inch craft foam squares in white, black, red, and dark brown for brows. Build the face layout on paper first: 4 squares for each eye, 3 for the nose area, and a 6-square mouth row. Then press squares in place starting with the eyes, then brows, then mouth, and add small foam “cheek” blocks if you want. Seal with matte clear spray from 10-12 inches away so the foam doesn’t get shiny.
Pro tipUse a ruler to keep the squares aligned — one crooked eye makes the whole pixel face look like it’s melting.
3. Bowtie and mustache old-timey gentleman pumpkin
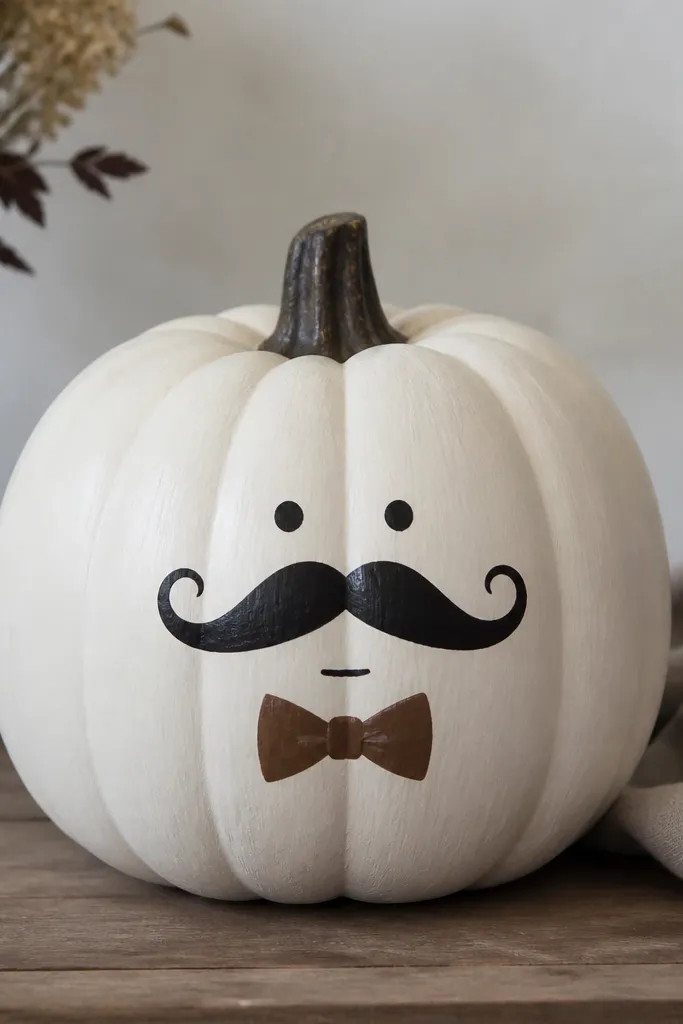
This is funny because it puts “formal” accessories on something that’s literally an orange Halloween prop. I paint the pumpkin off-white so the black facial details look sharp instead of blending into orange. The curled mustache looks best when it’s thick and slightly dimensional, so I use felt or craft foam strips that I curl with scissors. The bowtie reads as classy, and the tiny mouth makes it look like the pumpkin is trying to be polite about being spooky.
Prime and paint the pumpkin off-white using matte acrylic spray or a foam-safe primer plus acrylic. While it dries, cut a mustache from black felt: two long strips with a gentle upward curl on each end. Glue the mustache above the mouth line and add a small mouth using a thin black felt strip. For the bowtie, cut two triangles from brown felt, glue them into an X shape, then add a tiny center knot in black. Seal everything with matte clear spray, then let it sit overnight before handling.
Pro tipMake the mustache ends curl the same direction or it looks like a costume mishap.
4. Goofy "spray-painted" drips with tape resist
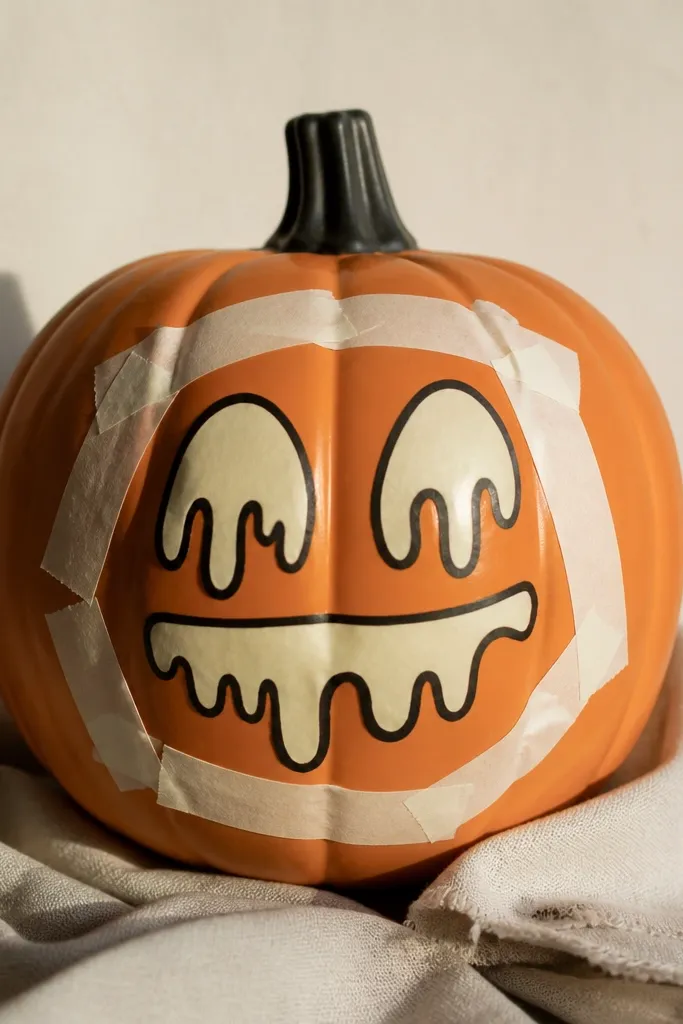
This one gives you funny expression without fragile tiny details. The trick is tape resist: you lay tape where you want clean lines, spray the drip color, and peel tape off for crisp edges. The result looks like street-art drips, and the exaggerated shapes make the face look goofy. It also hides minor scuffs on the plastic because the drip pattern covers uneven spots.
Scuff and prime the pumpkin. Use painter’s tape to map a face: two big eye shapes and a wide mouth, plus “drip” paths that fall from the mouth corners. Spray an off-white or cream acrylic spray over the taped areas in light coats, letting it tack between coats. Once dry to the touch, peel the tape slowly at a low angle. Outline the eyes and mouth with black paint or a black fine-tip paint marker, then seal with matte clear spray.
Peel tape while the paint is slightly firm, not fully cured, so you don’t lift the paint underneath.
5. Mini skateboard tongue-out pumpkin
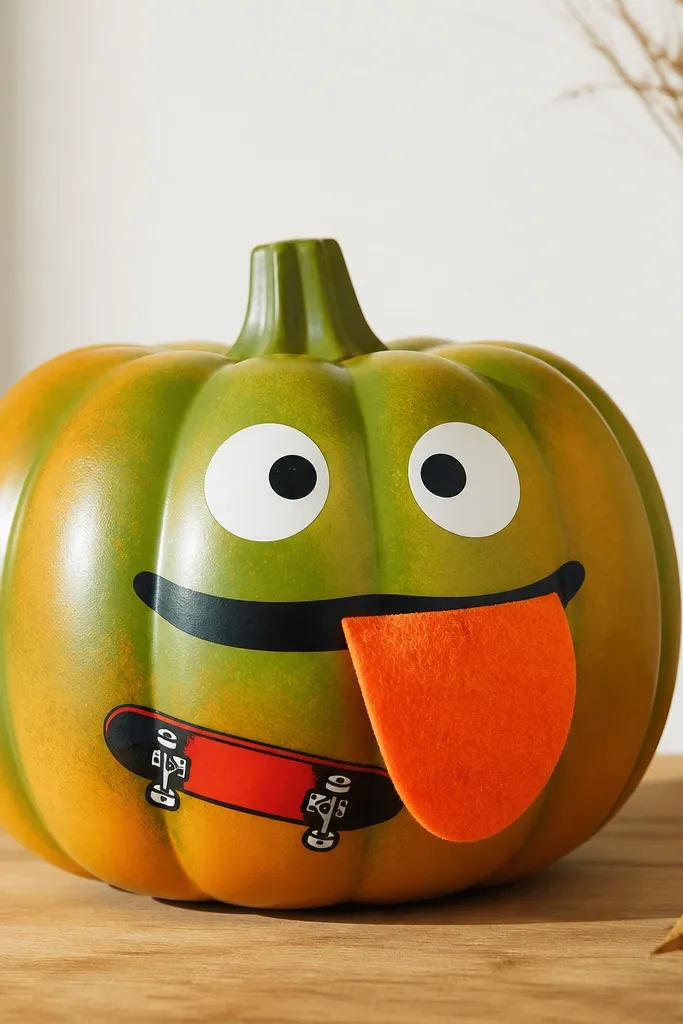
This is funny because it looks like the pumpkin is mid-trick, tongue out like it’s too cool to care. The skateboard graphic adds motion and story without you having to paint a whole background. I use felt for the tongue because it looks soft and reads as “real” texture against plastic. The bright mouth area gives you the contrast that makes the face work at a distance.
Prime and lightly scuff the pumpkin, then paint the face area if you want the tongue to pop more (I use a thin coat of matte peach over orange). Cut a tongue from bright orange felt about 2.5 inches long and 1 inch wide, rounded at the tip. For the mouth, draw a thick black line with paint marker so the tongue has a clear border. Add the skateboard graphic: print or cut a small vinyl sticker and place it slightly above the mouth so it looks like the pumpkin is “holding” the joke. Seal with a clear matte spray, keeping the nozzle aimed away from the tongue edges.
Pro tipIf the felt tongue catches dust, dab it with a lint roller once it’s fully dry.
6. Spooky librarian glasses and bookmark spine
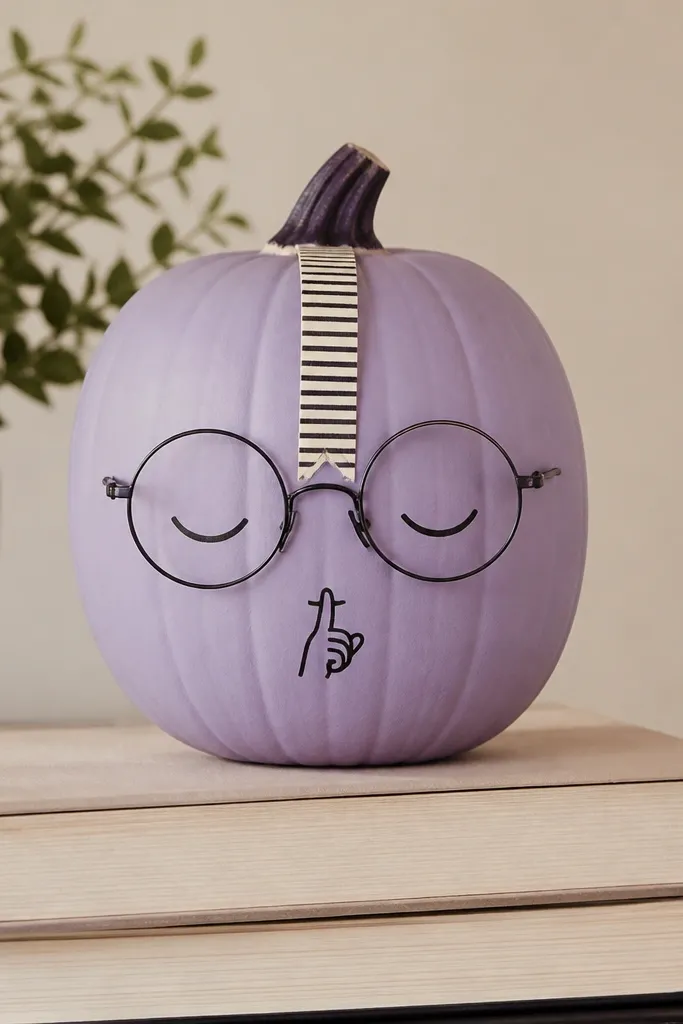
This one is funny because it combines Halloween with the strictest vibe I know — the librarian who shushes you. The glasses make the face look expressive with minimal effort, and the bookmark “spine” adds a vertical detail that reads as clever. I use matte paint on the pumpkin so the glasses don’t look like they’re floating on glossy plastic. The purple also makes the black lines look crisp and not smoky.
Scuff and prime the pumpkin, then spray with matte lavender paint. Make glasses from thin craft wire or use pre-made doll glasses; if you make them, wrap wire into two circles and connect with a small bridge. Glue the glasses with clear-drying craft glue, not hot glue, so you don’t fog the plastic. Add a bookmark spine: cut a 6-inch strip of patterned paper or cardstock, fold a 1-inch top tab, and glue it at the pumpkin’s top. Draw a small mouth with a black paint marker and seal the painted areas with matte clear spray.
Pro tipIf you use paper for the bookmark, seal it with a quick coat of Mod Podge or clear acrylic before attaching.
7. Tacky holiday sweater pattern with puff paint
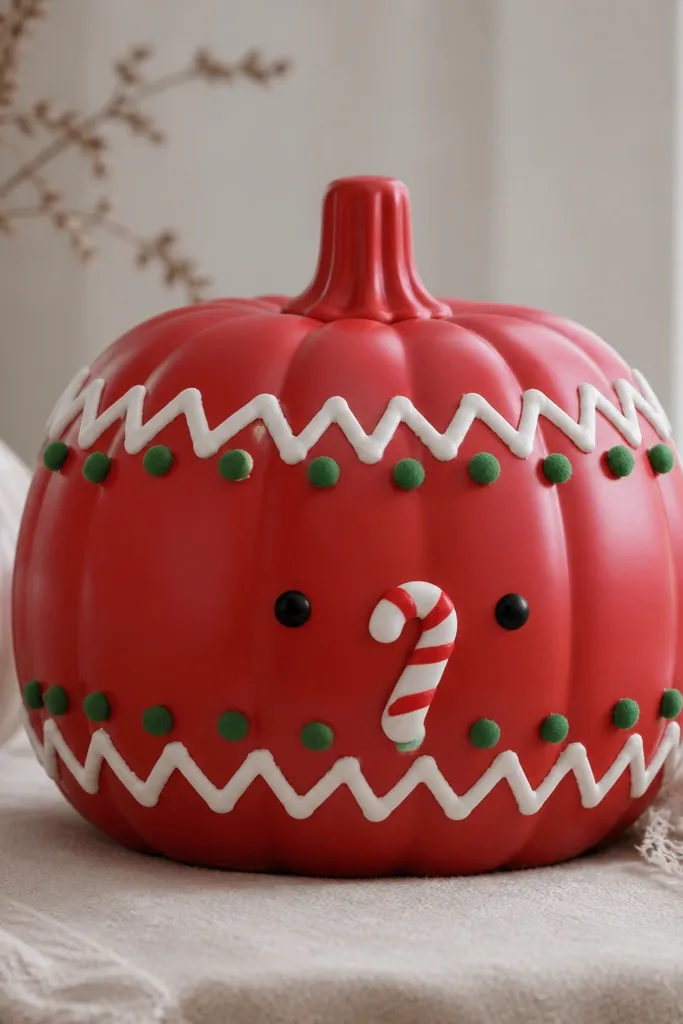
This idea is funny because it turns your pumpkin into a worn-in holiday sweater, right down to the raised texture. Puff paint creates dimension so the pattern looks knitted, even if you don’t knit a thing. I stick to red and cream because that’s the classic sweater combo that reads instantly. It also works well for winter displays because matte yarn-like texture absorbs light and keeps the pumpkin from looking like a plastic prop.
Scuff and prime the pumpkin, then paint it a matte red. Use painter’s tape to mask a sweater grid: 1.5-inch bands for zigzags and a center stripe. Apply puff paint for the zigzags and candy-cane stripe, then remove tape carefully while the paint is still slightly tacky. Add a simple face with black acrylic dots for eyes and a short line mouth. Once everything cures fully (puff paint needs time), seal with a matte clear spray in two light coats.
Don’t overfill puff paint lines — thick blobs crack when the pumpkin cools.
8. Off-center comedy face with foam cheek circles
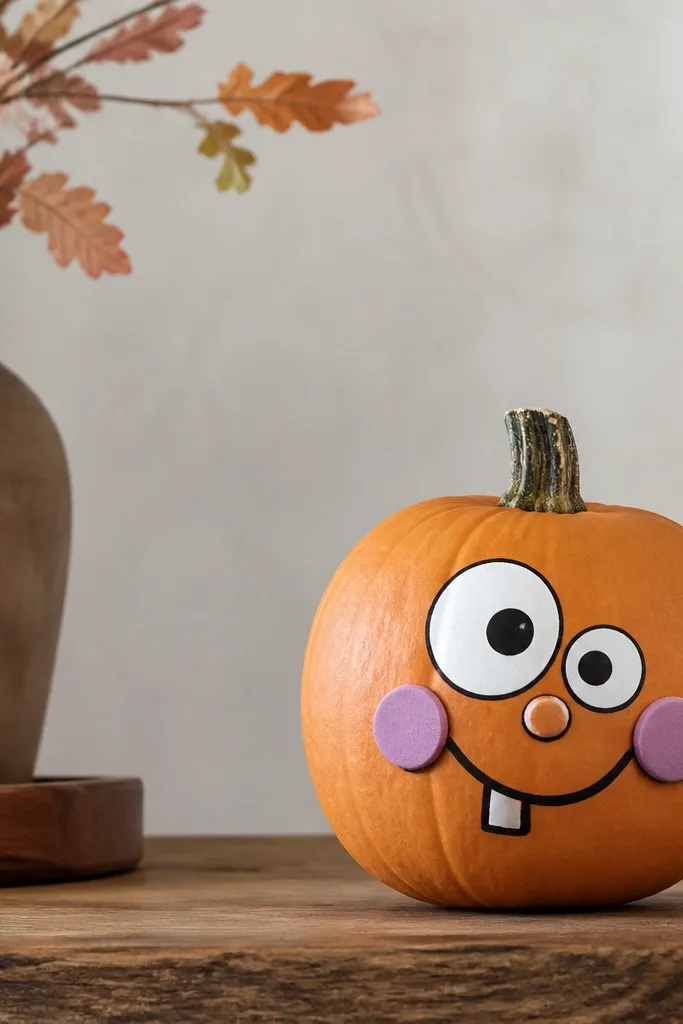
Asymmetry is what makes this funny. When the eyes don’t match and the mouth leans, it looks like the pumpkin is reacting to something. Foam cheek circles add a “blushing” effect that looks cute without needing paint gradients. I keep the face on one side because it makes the pumpkin look expressive even when it’s turned on a shelf. This is the easiest way to get a joke expression without complicated stencil work.
Scuff and prime the pumpkin, then paint it matte orange if it’s glossy. Cut two foam circles for cheeks in pale pink or peach, about 1 inch each, and set them with tape first to find the best placement. Draw the outline for the eye and mouth with a black paint marker, then fill eyes with white foam or white craft paper circles. Glue the cheeks after the eyes so the cheeks don’t cover the outline. Seal with matte clear spray, and keep the face details away from the stem so they don’t snag during storage.
Use a stencil for the outline, then break it with one crooked line for the comedy effect.
9. Clown nose and button eyes using bottle caps
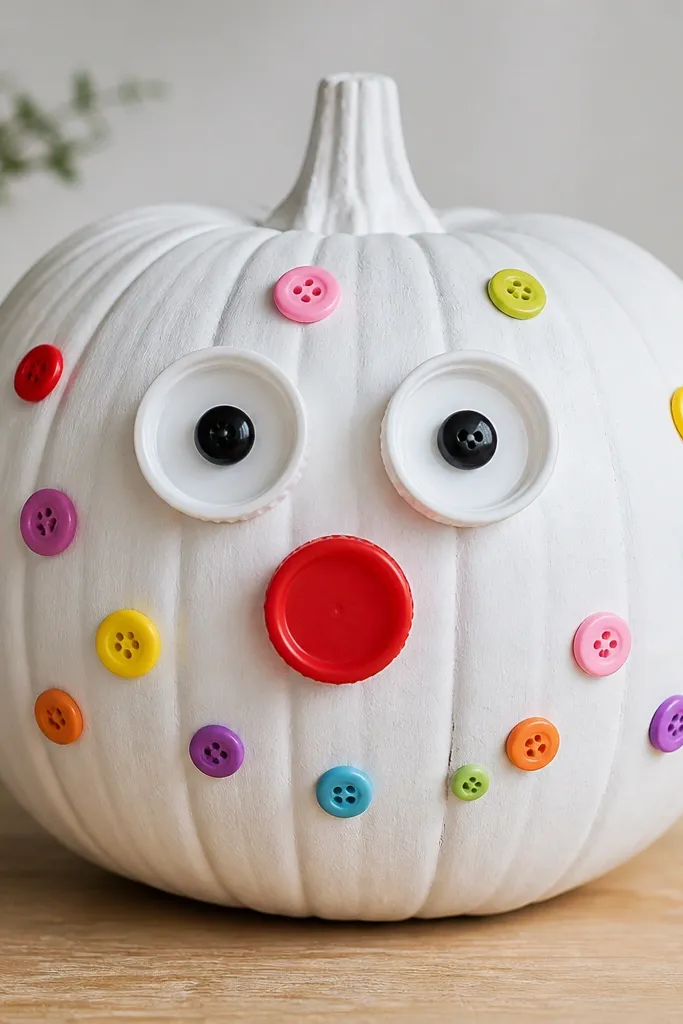
Bottle caps make this funny because they look like actual carnival hardware stuck onto a pumpkin. The weight also makes the eyes feel more “real” than flat stickers. I paint the pumpkin white first so the cap colors don’t fight the orange shell. This design reads well in group displays because the eyes and nose are round and reflective, even when you’re not up close.
Prime the pumpkin and paint it matte white. Clean two bottle caps and remove any sharp edges. Paint the caps: white for eye base, add small black pupils in the center, then let them dry. Glue the caps where you want eyes — I place them about 2.5 inches apart and slightly above the center line. Use a red bottle cap for the nose and add small craft buttons around the face with hot glue. Seal everything with a clear matte spray, but apply lightly around the caps so the details stay sharp.
Pro tipRough up the underside of each cap with sandpaper so adhesive grabs instead of sliding.
10. Tape-and-vinyl "mummy wrap" with fake bandage face
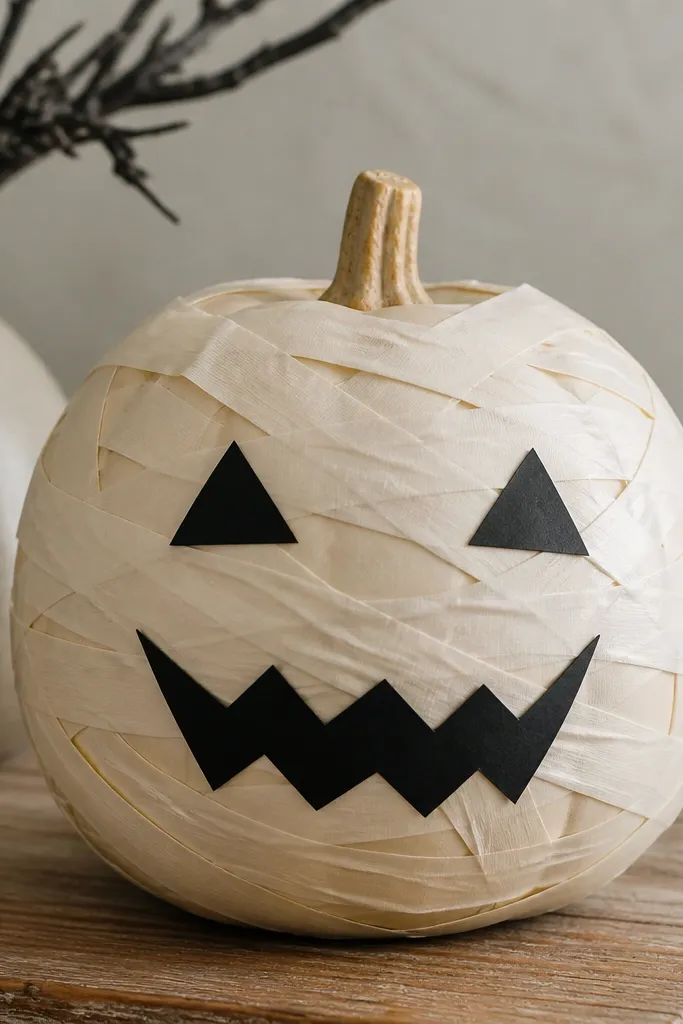
This one is funny because the pumpkin looks like it’s wrapped up in DIY bandages that don’t know when to stop. Vinyl tape gives you clean edges and a slightly shiny bandage look, and it sticks better to plastic than paper. The black vinyl face stays bold and graphic, like a cartoon mummy. It also hides scuffs from storage because the wrap covers the whole body.
Scuff the pumpkin and wipe it with rubbing alcohol. Wrap off-white vinyl tape in horizontal and diagonal strips, overlapping by about 1/2 inch. Leave a face area mostly uncovered for crisp placement. Cut a cartoon face from black vinyl: triangular eyes and a jagged mouth, then press it down firmly. Add extra tape strips around the face for a messy border. Seal with a clear spray made for vinyl or acrylic painted surfaces — do two light coats.
If tape edges lift, press them with the back of a spoon for 10 seconds each spot.
11. Magnet-backed fridge-kid "sticker" pumpkin
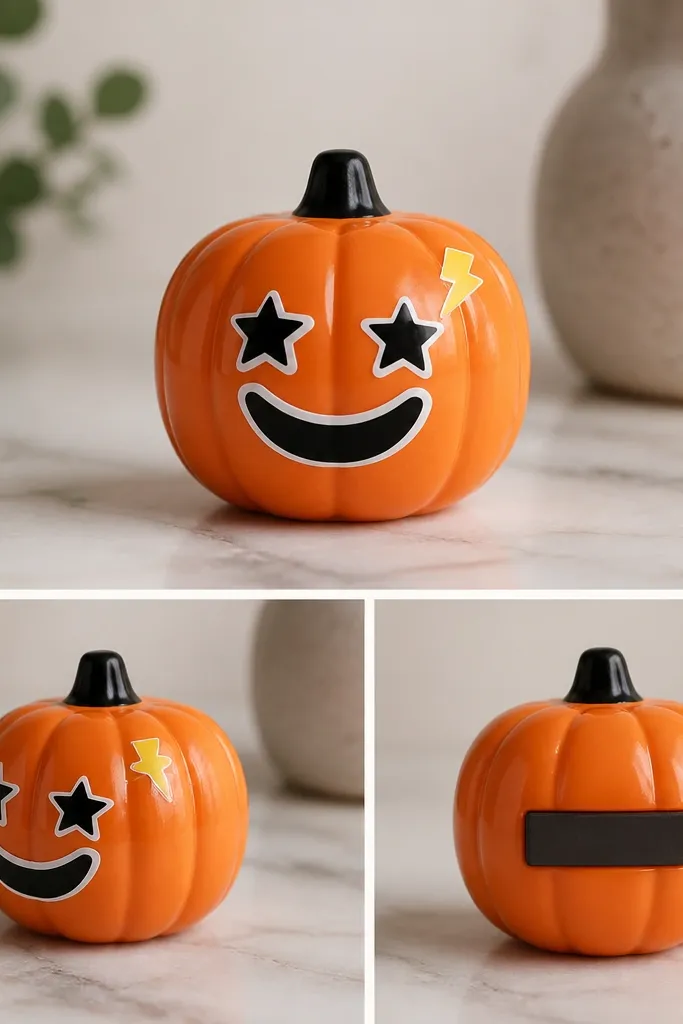
This is funny because it looks like a sticker sheet came to life and got stuck on a pumpkin. The magnet trick matters because plastic pumpkins are annoying to store; magnets let you attach it to a metal plant stand or cabinet during the season. I use glossy craft vinyl for the “sticker” pieces because it looks like printed decals and holds up to handling. The bright star and lightning details keep it playful without needing a complicated paint job.
Prime the pumpkin lightly and paint a smooth base if it’s glossy. Cut sticker shapes from glossy craft vinyl or use pre-made vinyl stickers, then arrange a face: two eyes, a smile, and one “extra” detail like a lightning bolt. Seal the vinyl pieces with a clear acrylic spray so the edges don’t peel. For magnet backing, glue a thin magnetic sheet to the back of the pumpkin using a strong craft adhesive, then cover the seam with a small piece of felt. Let it cure fully before you test on metal so the adhesive doesn’t slide.
Pro tipUse thin magnets, not thick ones, so the pumpkin still sits flat and doesn’t wobble.
12. Foil fringe ghost mouth with silver paint pen
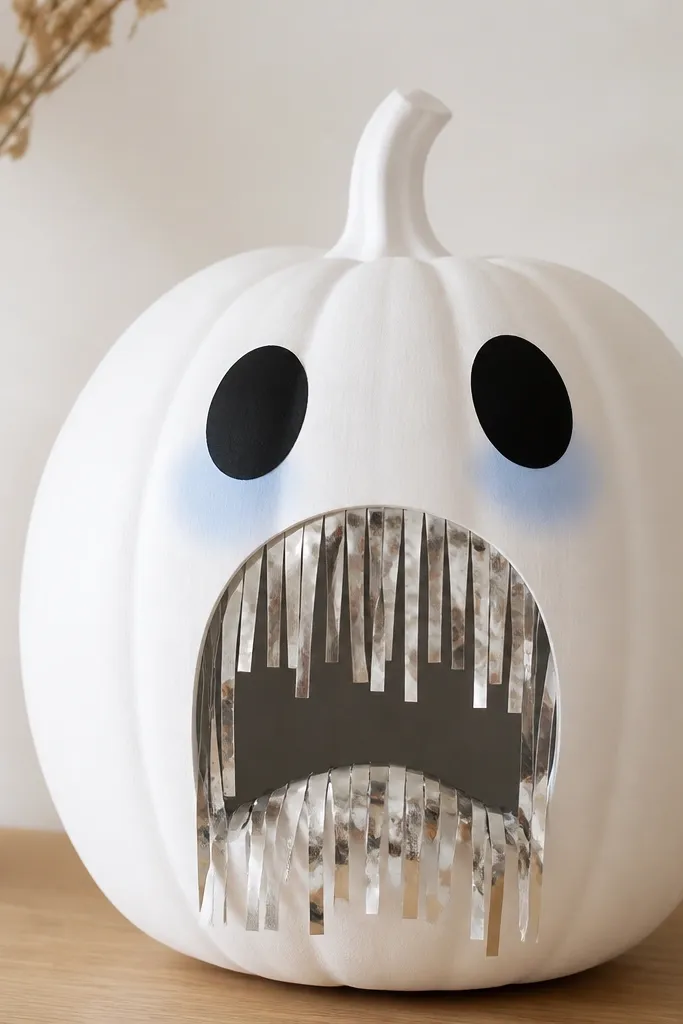
This is funny because it’s a ghost that looks like it’s wearing a disco grin. Silver foil fringe reads as “hairy scary” but in a playful way, and it moves when air hits it outdoors. I paint the pumpkin white to keep the ghost vibe clean, then use a silver paint pen for extra highlights around the mouth. The black ovals for eyes keep it cartoon-simple, which makes it look intentional and not like a craft mistake.
Scuff and prime the pumpkin, then paint it matte white. Cut a mouth shape from black felt or craft foam — a wide oval with jagged edges. Glue the mouth first, then layer silver foil fringe around the opening so it frames the face. Add two black oval eyes and small blue cheek dots with a tiny sponge, then seal with matte clear spray. If you want fringe to stay flat, lightly seal the fringe from the back only so the front stays crinkly.
Pro tipTrim fringe with sharp scissors — uneven lengths make it look sloppy instead of comedic.
13. Candy corn stripes with black licorice outline
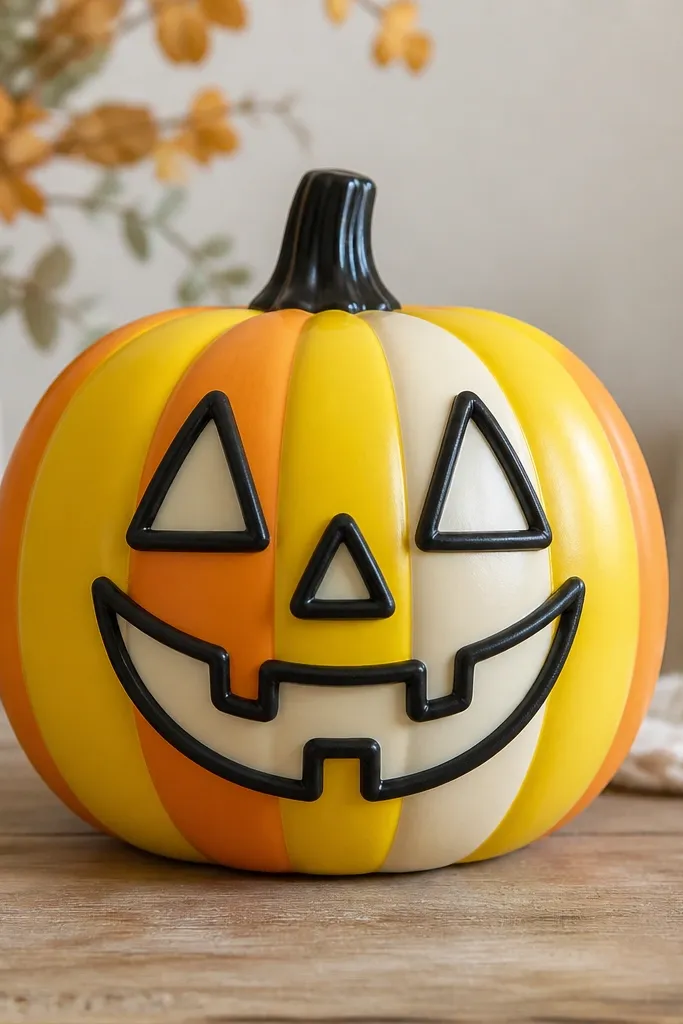
Candy corn stripes are funny because they’re already a joke food, and the pumpkin turns that candy energy into a face. I paint the body in clean vertical bands so it looks like candy panels, then I outline the face like you’re drawing with black licorice. This works great for people who want “cute funny” without googly eyes or big props. The high contrast (yellow/cream against black lines) makes it pop in photos and in low light.
Scuff and prime the pumpkin. Mask vertical stripes with painter’s tape: three bands, about 2.5 inches each depending on pumpkin size. Paint cream for one band, then yellow, then orange, letting each layer dry before painting the next. Remove tape to reveal crisp edges. Draw the face with a black paint pen: thick outlines for eyes and a grin that reaches close to the stripe edges. Seal with matte clear spray so the candy colors don’t turn glossy and cheap.
Pro tipUse a paint pen for the outline — marker bleed makes cheap-looking halos.
14. Mini "receipt" mustache and angry red stamp cheeks
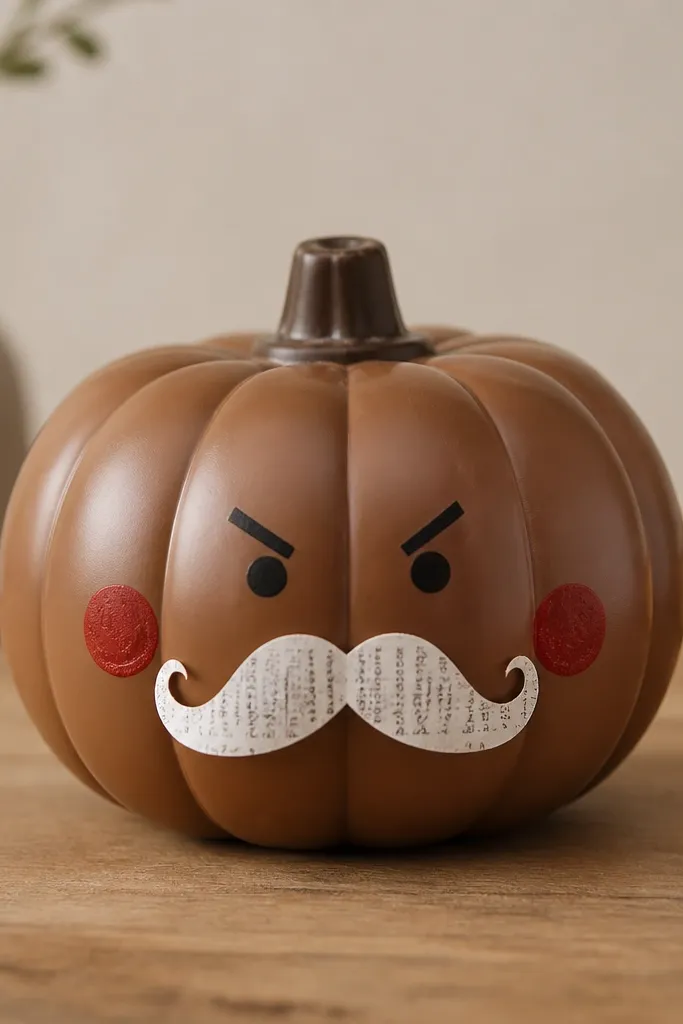
This is funny because it uses office humor — receipt mustache and stamp cheeks — which reads like a punchline. Paper textures look good on plastic when you seal them, and the mustache turns into a dimensional prop instead of a flat drawing. I use a brown base so the receipt paper looks warm and aged. The angry brows and stamped cheeks keep it expressive without needing a full painted face.
Prime the pumpkin and paint it a matte warm brown. Cut a mustache from receipt paper or printed faux receipt strip about 3 inches wide, then crinkle it lightly so it looks like it came from a register. Glue the mustache with a thin layer of decoupage or craft glue, then seal it with Mod Podge so it doesn’t warp. Create cheeks using a red stamp pad on a small foam stamp or use red craft paper circles with a slightly messy edge. Add brows and eyes with a black paint marker, then seal everything with a final matte clear coat.
Pro tipSeal the paper mustache twice — once before it dries fully, then again after it cures.
15. Monster hands and sticker bolts on a black base
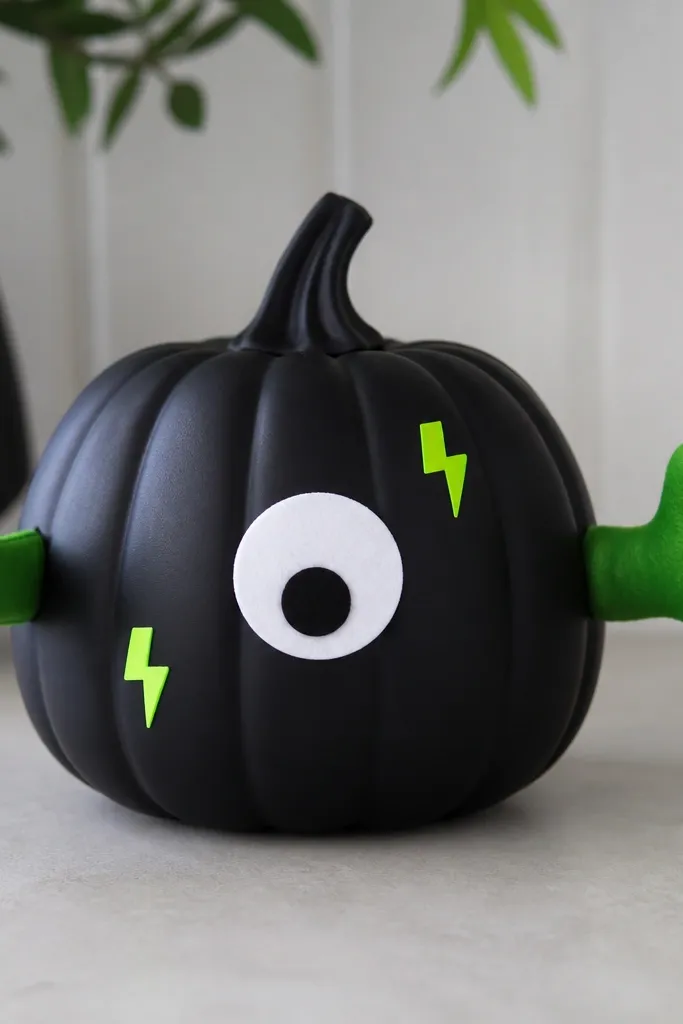
This looks funny because it breaks the pumpkin’s “face only” rule. The monster hands create the joke — the pumpkin is reaching for trouble. A matte black base makes neon stickers and green felt pop without looking like Halloween glitter overload. I do one or two big sticker bolts instead of a swarm, because spacing keeps it from turning into visual noise. This works for both kid-friendly displays and adult parties since the expression is bold but not gory.
Scuff and prime the pumpkin, then paint matte black. Cut two felt hand shapes from green felt, then add small finger lines with a darker green marker. Glue hands on the sides so they extend toward the center, about 1 inch from the front edge. Add a face: one big white eye circle with a black pupil and a small mouth line. Finish with neon bolt stickers placed around the eye area, then seal the painted surface with matte clear spray while keeping sticker edges protected with a light coat.
Pro tipIf you worry about hands snapping off, stitch around the base with a couple of loops using green thread after gluing.



