
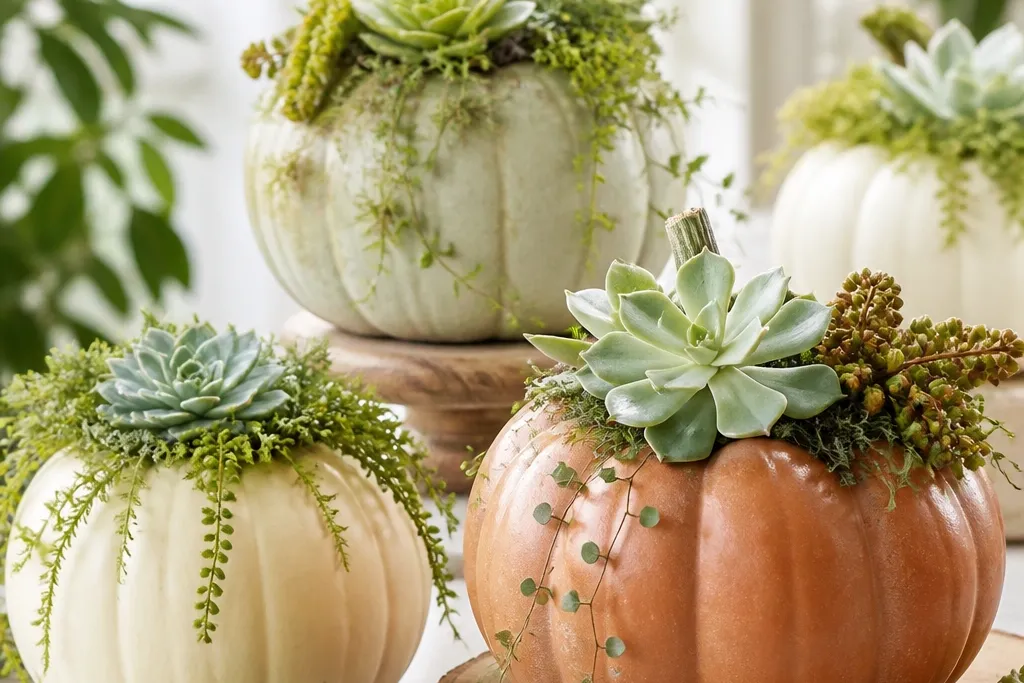
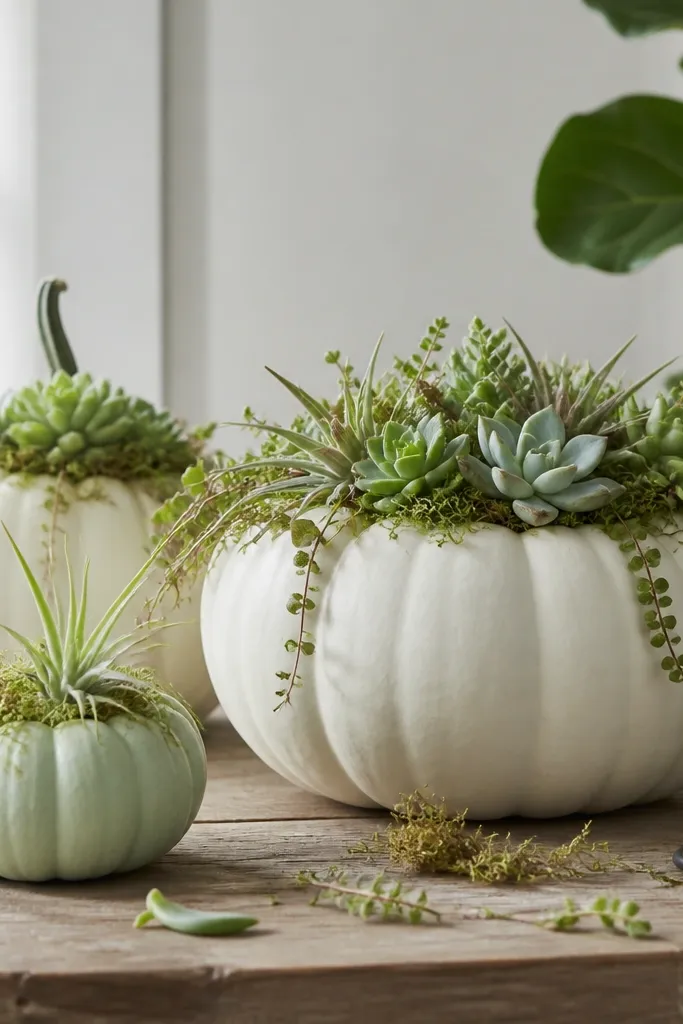
1. Chalk-White Trio with Rosemary Fans
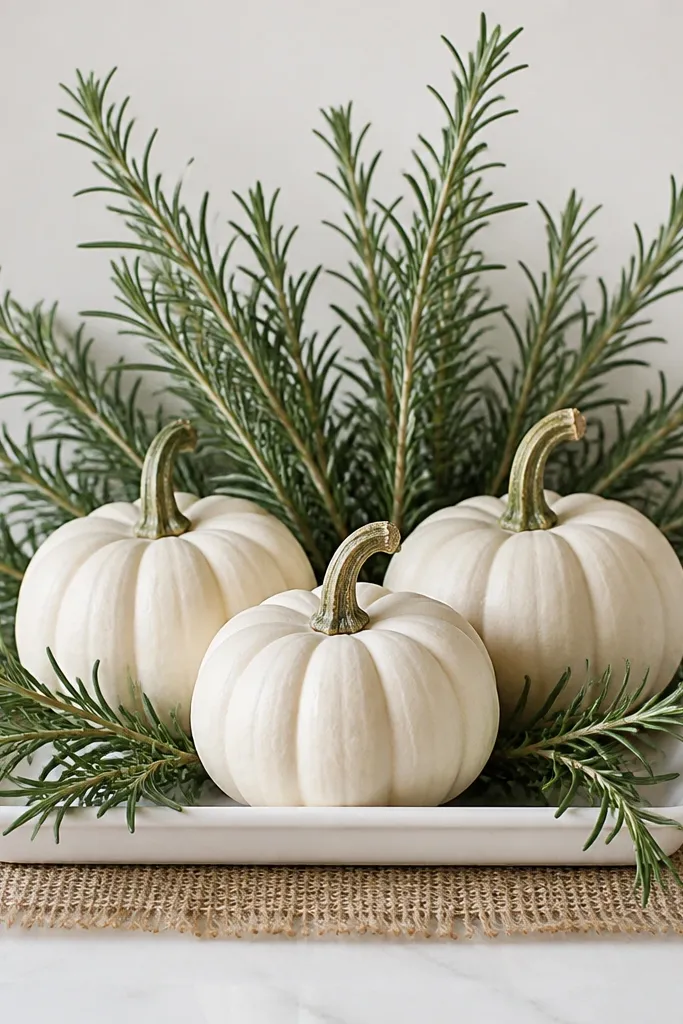
This one looks expensive because the rosemary gives you direction. The pumpkins are off-white and matte, so the green reads rich instead of neon. I use three sizes — small, medium, and a slightly larger one — so your eye moves in a triangle instead of lining up flat. This works great for medium and warm skin tones in photos because the green and cream contrast feels balanced rather than stark. It also flatters most porch setups because it doesn’t spill everywhere; the rosemary stays mostly upright and controlled.
Start by painting or choosing matte off-white pumpkins, then set them on a shallow tray (about 12-14 inches wide). Arrange the pumpkins in a triangle with the tallest one on the back-right. Take rosemary sprigs and bundle them, then “fan” the bundle behind the pumpkins so the tips rise 2-3 inches above the highest pumpkin. Lay a thin burlap strip under the tray for texture, and tuck 2-3 rosemary ends over the front rim so it looks anchored instead of floating.
Mist rosemary with a little water before styling so the needles look less dry and more glossy.
Don’t use glossy white pumpkins here — the shine fights the rosemary and makes the whole thing look like a craft-store prop.
2. White Pumpkin Planter with Mini Boxwood Clumps
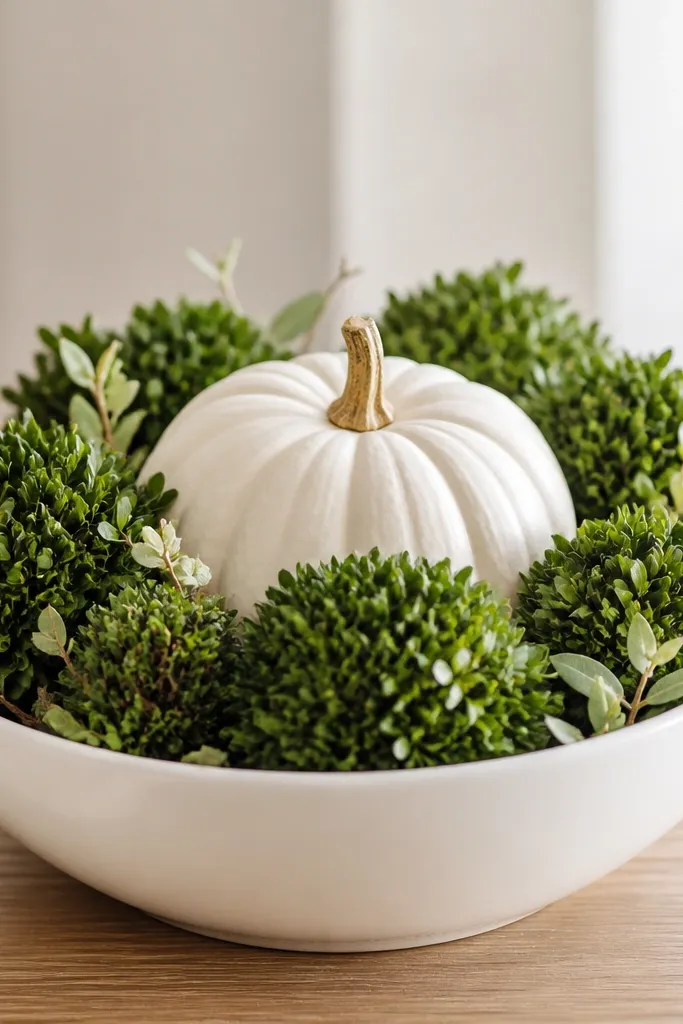
This setup reads like a living centerpiece even when you use faux. Mini boxwood clumps create neat spheres, which makes the pumpkin look intentional instead of random. The off-white pumpkin contrasts with the deeper green so you get that clean, chic look. It flatters kitchens and dining tables because it stays compact and tidy, and it looks good from every angle. If your space is small or you’re styling a narrow console, this is one of the easiest ways to get height without tall stands.
Start with a wide ceramic bowl or planter base, about 10-14 inches across, filled with florist foam or a tight layer of damp floral moss. Place a single off-white pumpkin in the center and secure it with a few hidden skewers or a foam pin. Add mini boxwood clumps around the base, pressing them into foam so you can see rounded tops but not stems. Finish by tucking a few pale green stems between clumps to bridge gaps and make the texture feel continuous.
If you want it to look extra realistic, choose boxwood with mixed leaf sizes instead of uniform tiny leaves.
Skip long, skinny stems that poke out — they make the arrangement look messy instead of sculpted.
3. Wreath-Backed White Pumpkins and Eucalyptus Sprays
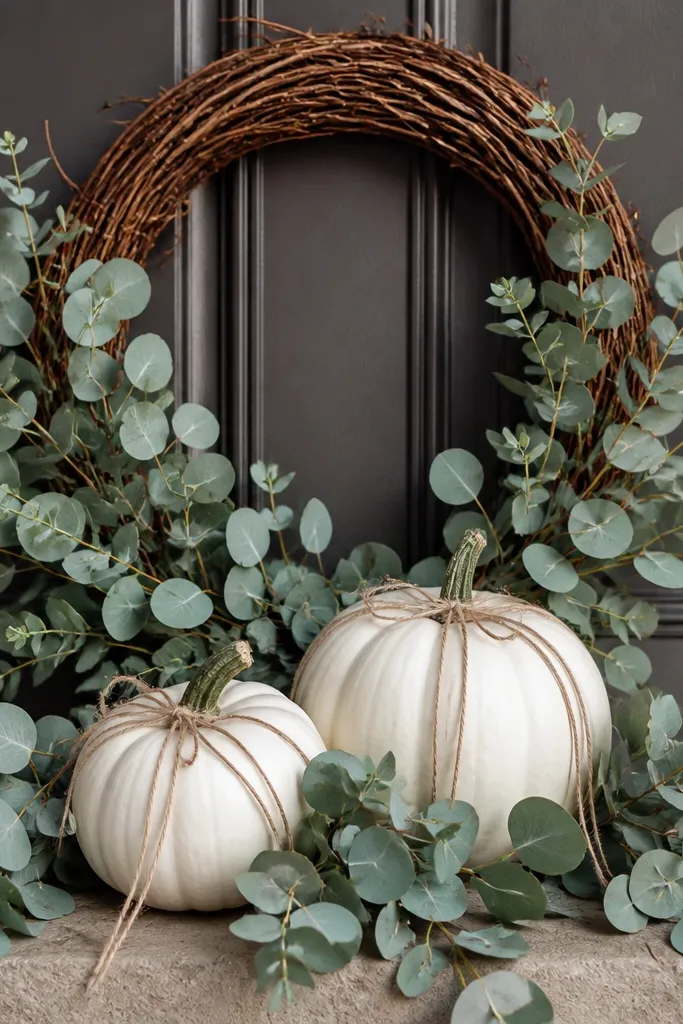
The wreath gives you built-in structure, and eucalyptus gives you movement. The silvery tones in eucalyptus make white pumpkins look softer and more natural, especially in daylight. I like this for entry doors because it frames your face when you open the door — the greenery creates an easy “look at me” halo. It also photographs well because the wreath texture adds depth behind the matte pumpkin surface. If your porch decor is minimal, the grapevine tone keeps everything grounded.
Pro tipUse wire-edged eucalyptus so you can bend the drape into shape without it springing back.
Start by hanging a grapevine wreath (16-20 inches) at chest height. Place two white pumpkins in front — one medium and one smaller — and secure each with a couple of zip ties hidden behind the vine. Add eucalyptus sprays by tucking the stems under the pumpkin twine and letting the leaves drape down the sides. Wrap one spray across the top so the silvery leaves arc outward, then trim any ends so the longest drape hits about mid-door height.
AvoidDon’t skip the wreath texture behind it — placing pumpkins alone on the door looks flat and cheap.
4. White Pumpkins on a Galvanized Tray with Sage Stems
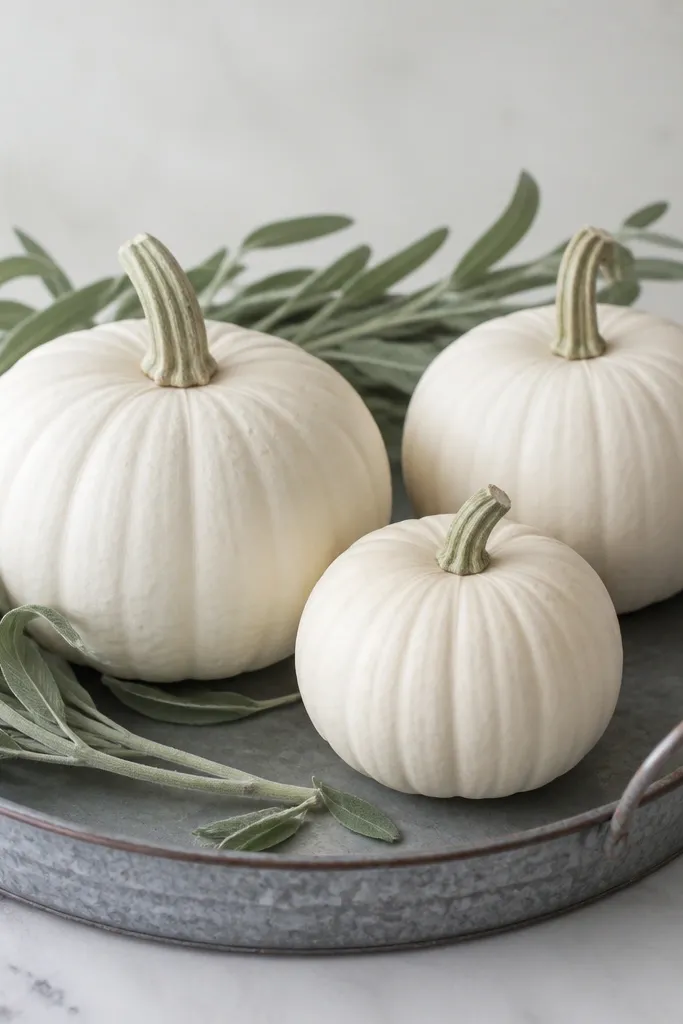
Sage is the secret weapon because its gray-green reads modern against white. On a galvanized tray, the cool metal adds industrial contrast that makes the whole thing feel intentional. This look flatters farmhouse-to-modern spaces because it bridges styles with one simple material switch. The sage stems also create clean curves, which keeps the arrangement from looking like a pile of pumpkins. I’ve used this on front steps where people walk by close, and the gray-green tones never look harsh in direct sun.
Pro tipIf your sage looks limp, soak stems in cool water for 20 minutes, then dry with a paper towel before styling.
Start with a galvanized tray (around 18x12 inches) and set three matte white pumpkins across it, spacing them evenly. Lay sage stems across the tray in an S-curve — one curve across the front and one behind — so the leaves partially cover the tray surface. Tuck the ends under the pumpkins so they don’t slide. Add 2-3 dried sage leaves near the front edge for a layered look, then adjust until the highest sage tip is about 1-2 inches above the tallest pumpkin.
AvoidDon’t use bright neon-green greenery here — it clashes with the galvanized metal and makes the palette look off.
5. Tall White Pumpkin Stack with Curly Willow Vines
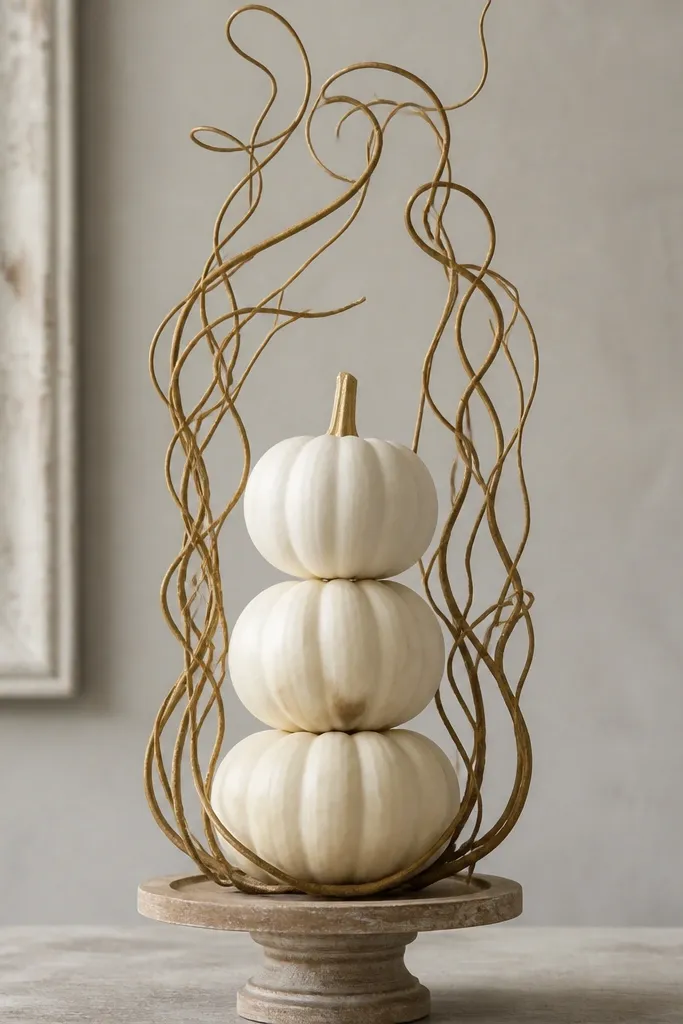
Curly willow is dramatic without looking fussy. The spirals add vertical energy, so even small white pumpkins look like a sculptural centerpiece. This is the look I use when I want something that doesn’t depend on paint tricks or fancy carving. It flatters narrow entry tables because it creates a tall silhouette without needing a lot of width. In photos, the curls catch light and make the white pumpkins look more dimensional.
Pro tipWear gloves when cutting willow — the edges snag easily.
Start with a stable riser or cake stand, then stack three small matte white pumpkins in a vertical line (use a small round board between layers if you need grip). Wrap curly willow vines around the stack, starting low and spiraling up so the curls frame the pumpkins. Secure with floral wire hidden behind the pumpkins. Keep the top vine tips 3-5 inches above the highest pumpkin for that intentional height, then trim any extra ends with wire cutters.
AvoidDon’t overstuff with too many curls; if the vines cover all the pumpkin ridges, you lose the white texture.
6. White Pumpkin Runner with Trailing Stringy Herbs
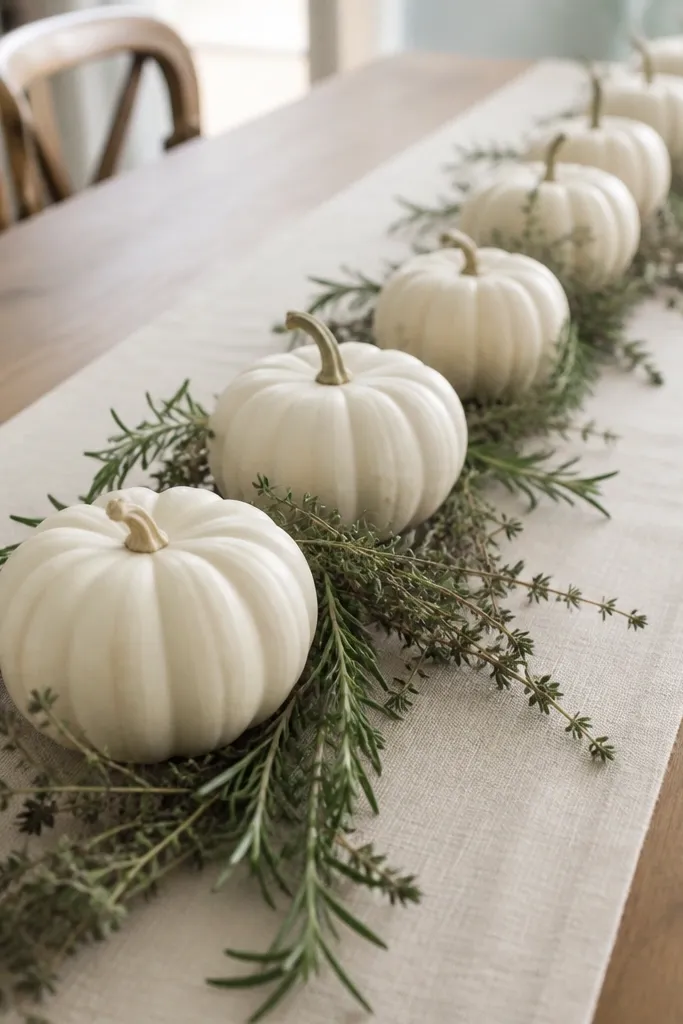
A runner turns pumpkin decorating into a controlled design instead of scattered decor. Trailing herbs like thyme and rosemary create a soft spill that looks natural, not taped down. I like small white pumpkins here because they read as “clusters” and the herbs do the heavy lifting visually. This works on dining tables, sideboards, and even a buffet for holiday brunch. If your home runs warm and bright, the pale whites keep everything airy while the herbs add contrast.
Pro tipUse two different herb lengths — short sprigs between pumpkins and long sprigs at the edges — for a more realistic spill.
Start by laying a cream runner (cotton or linen) on the table and placing a strip of floral tape along the center line. Set 5-7 small matte white pumpkins in a staggered row with gaps of 3-4 inches between them. Tuck thyme and rosemary sprigs into the gaps so they arch slightly upward, then pull a few sprigs to trail over the runner edges. Adjust the lengths so the longest trailing ends hang about 2-3 inches below the table line.
AvoidDon’t use stiff plastic vines with a runner; they look flat and don’t drape like live herbs.
7. White Pumpkins in a Basket with Live Moss and Ferns
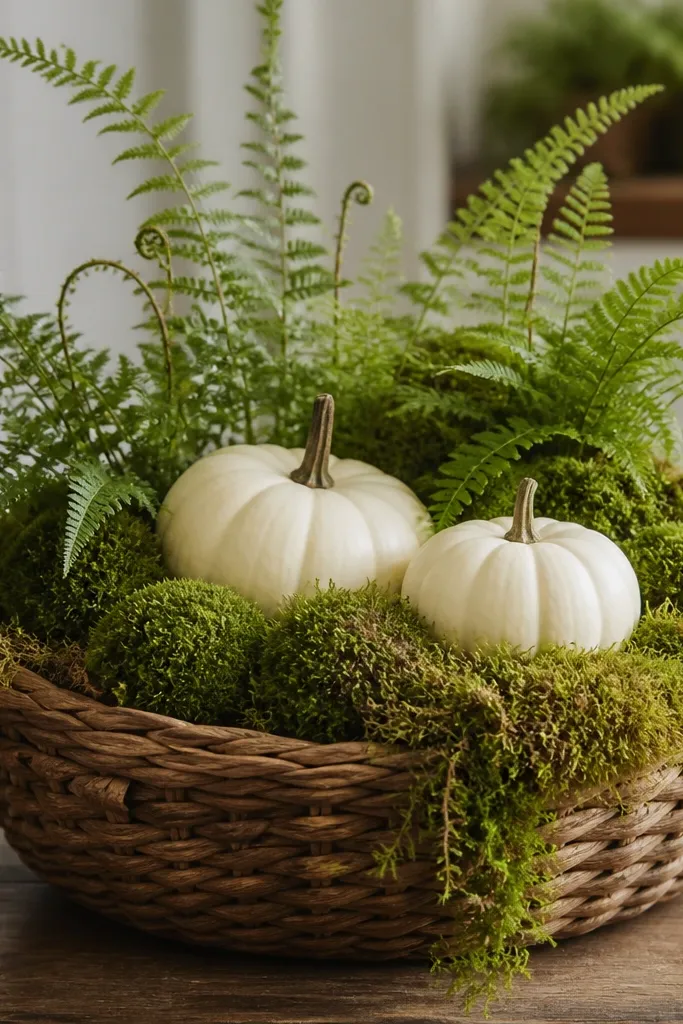
Live moss makes white pumpkins look like they belong outdoors, not on a craft table. Fern fronds add layered texture that feels airy and old-fashioned in a good way. This is a strong choice if you want pumpkin decorating ideas with plants that looks lush while staying grounded in earthy tones. The basket also contains everything, so the arrangement looks intentional even if a leaf or two shifts. It flatters rustic porches and also looks surprisingly good in modern spaces because the contrast is natural rather than themed.
Pro tipMist the moss lightly once a day for the first 2 days, then every other day if your home is dry.
Start by lining a woven basket with damp floral moss, pushing it up the sides so the white pumpkins don’t look “floating.” Place two matte off-white pumpkins on the moss, then tuck small fern fronds between them and into moss gaps. Add more moss around the base of the pumpkins to hide any foam or support. Keep the fern tips angled outward so you get a fan shape, not a flat layer.
AvoidDon’t overpack the basket — if everything is buried, you can’t see the pumpkin shape and the look turns muddy.
8. White Pumpkins with Olive Branches and Linen Twine
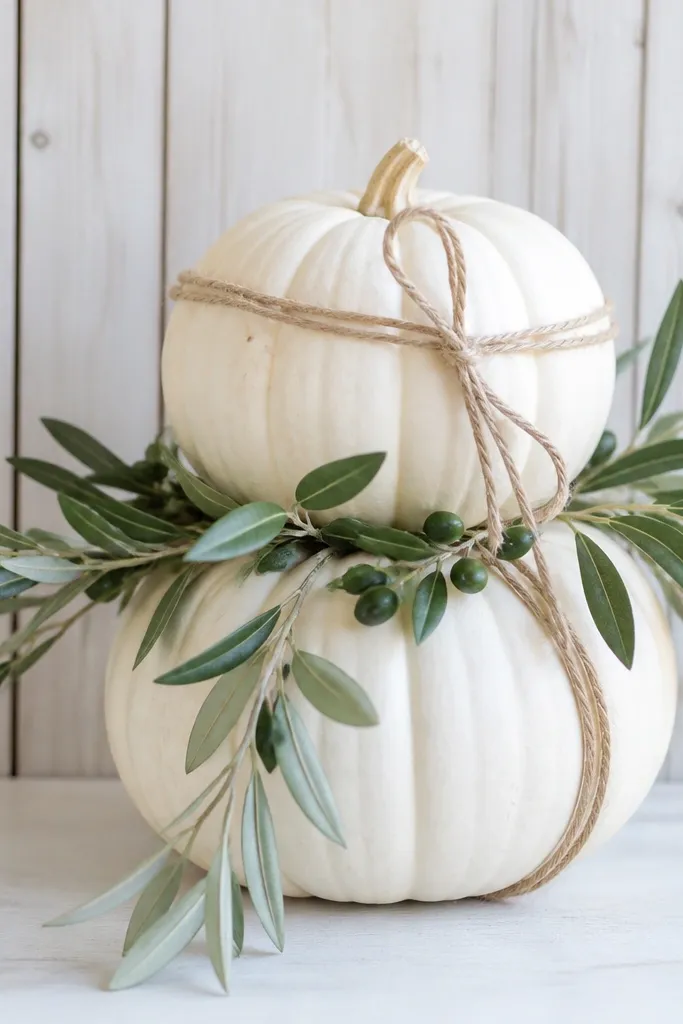
Olive branches give you long, narrow leaves that look Mediterranean and clean. Linen twine ties the white pumpkins into the plant styling, so nothing looks separate. This pairing looks chic on entryways and mantels because the palette stays neutral: white, gray-green, and warm tan. It also flatters people who like a calm look — no bright reds or orange clutter. I’ve used this when I want pumpkin decor that doesn’t scream Halloween and still looks “done.”
Pro tipUse waxed olive branch picks if you want them to stay in place without constant readjusting.
Start with two matte white pumpkins, one slightly larger than the other. Wrap linen twine around each pumpkin in a loose X pattern, then tie off at the back. Tuck olive branches under the twine bands so the leaves sit on the sides and drape slightly in front. Arrange the pumpkins close enough that the olive branches overlap, then adjust so the longest drape ends sit at about the same level on both pumpkins.
AvoidDon’t use thick craft ribbon here — it hides the natural leaf lines and looks costume-y.
9. White Pumpkins with Caladium-Style Tropical Leaves
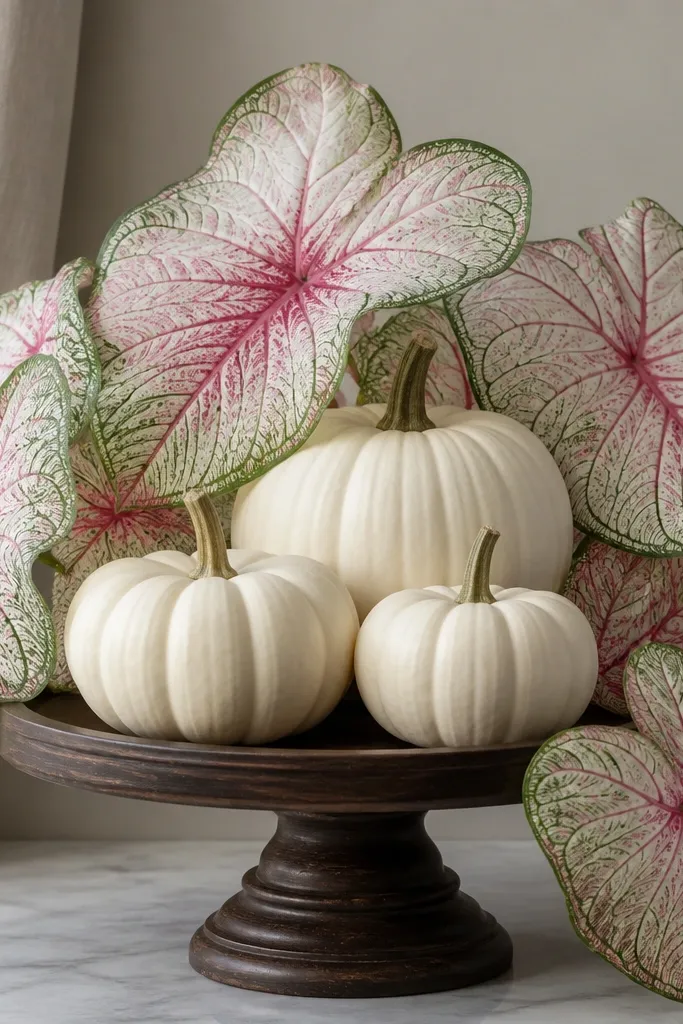
This is for the person who wants pumpkin decorating ideas with plants that don’t look like every other porch. Caladium-style leaves have big surfaces and speckled patterns, which makes the white pumpkins look like part of a curated color story. The pale pink veins soften the white and add warmth without turning the arrangement into orange-and-brown. It flatters rooms with neutral walls because the leaves bring color at the edges instead of everywhere. If you’re styling a dining table for friends, this one gets compliments because it looks intentional, not generic.
Pro tipPick leaves with one dominant pale color (pink or cream) so the white pumpkins don’t compete with multiple loud tones.
Start with three matte white pumpkins of different heights placed on a dark pedestal or tray. Position the largest leaf behind the back pumpkin so its widest point sits above the pumpkin’s crown. Add two more leaves on the sides, tilting them so the veins angle downward toward the pumpkins. Place one small leaf in front to bridge the gap, then trim leaf stems so the bottom edges don’t hang too low.
AvoidDon’t mix too many different leaf patterns; two is enough before it looks busy.
10. White Pumpkin Bottomiary with Small Topiary Balls
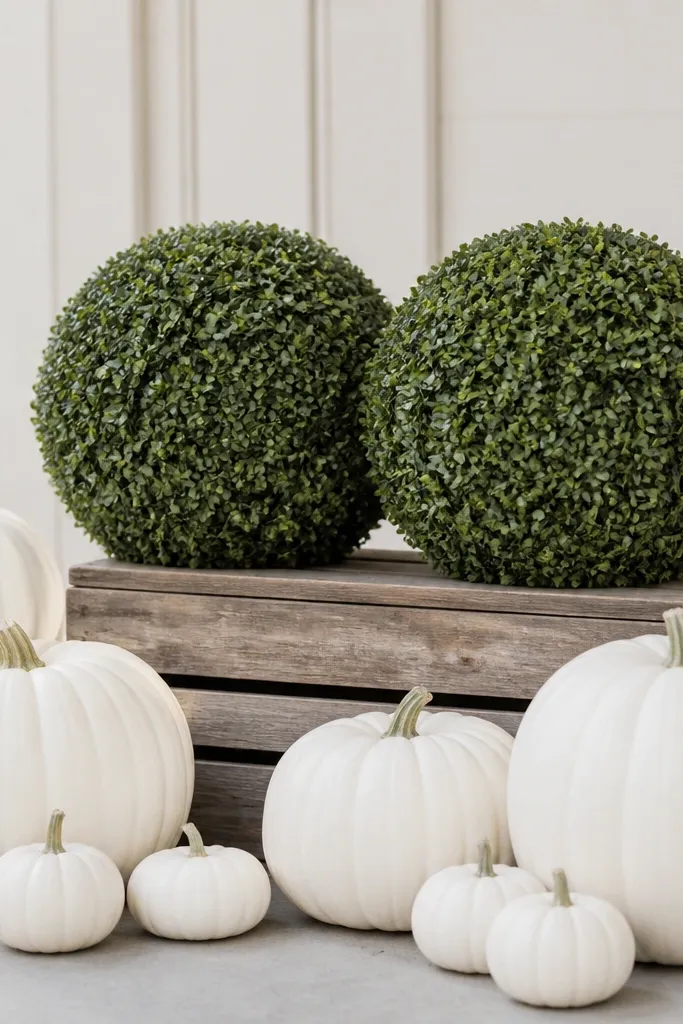
Topiary balls make white pumpkins look styled because they give you a clean geometry. The uniform circles contrast with the pumpkins' ridged curves, and that contrast reads chic. I like this for porches where you want structure — it looks neat even after a few days. It flatters people who like minimal decor because there’s no clutter, just shape and texture. In bright fall sun, the matte white keeps the scene calm while the topiary stays crisp.
Pro tipIf your topiary balls look too shiny, dust them lightly with a tiny bit of matte spray from far away.
Start by placing a low wooden crate or tray on your porch or in your entry. Set two small topiary balls (about 6 inches wide each) at the left and right edges. Place one matte white pumpkin between and slightly forward of each topiary so the pumpkins “hug” the spheres. Add one more small pumpkin at the back center, then tuck a few short boxwood stems at the base to hide any gaps between crate and greenery.
AvoidDon’t place the topiaries too far apart — if you can see lots of empty space, it looks like separate items.
11. White Pumpkin Candle Tray with Rosemary Rings
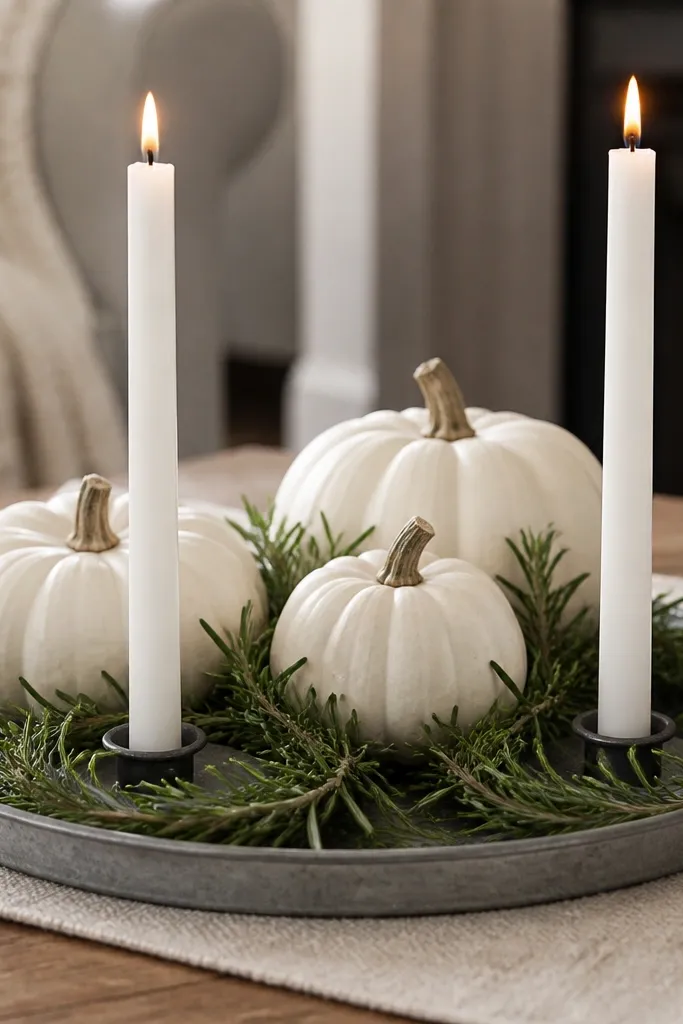
This is plant decorating that also earns its keep because it supports candles. Rosemary rings create a “frame” around the light, and the scent reads instantly if you’re using real stems. White pumpkins keep the palette soft, while the candle flames add movement. It flatters evening gatherings because the composition looks intentional under warm lighting, not washed out. I’ve used this on kitchen counters where people pass by at night and the rosemary smell keeps the scene feeling fresh.
Pro tipTrim rosemary ends with scissors before you start, then keep the ring ends hidden under pumpkins for a clean line.
Start with a sturdy metal tray about 14-16 inches wide. Place two white taper candles in the tray holders and set three matte white pumpkins around them in a shallow triangle. Bundle rosemary sprigs and shape them into two rings — one around each candle base — then tuck the ends under pumpkin edges so they stay put. Keep the rosemary ring height just a little below the candle tops so the flame stays unobstructed.
AvoidDon’t let rosemary touch the candle flame — keep at least 2 inches of clearance.
12. White Pumpkins with Hanging Ivy from a Wall Sconce
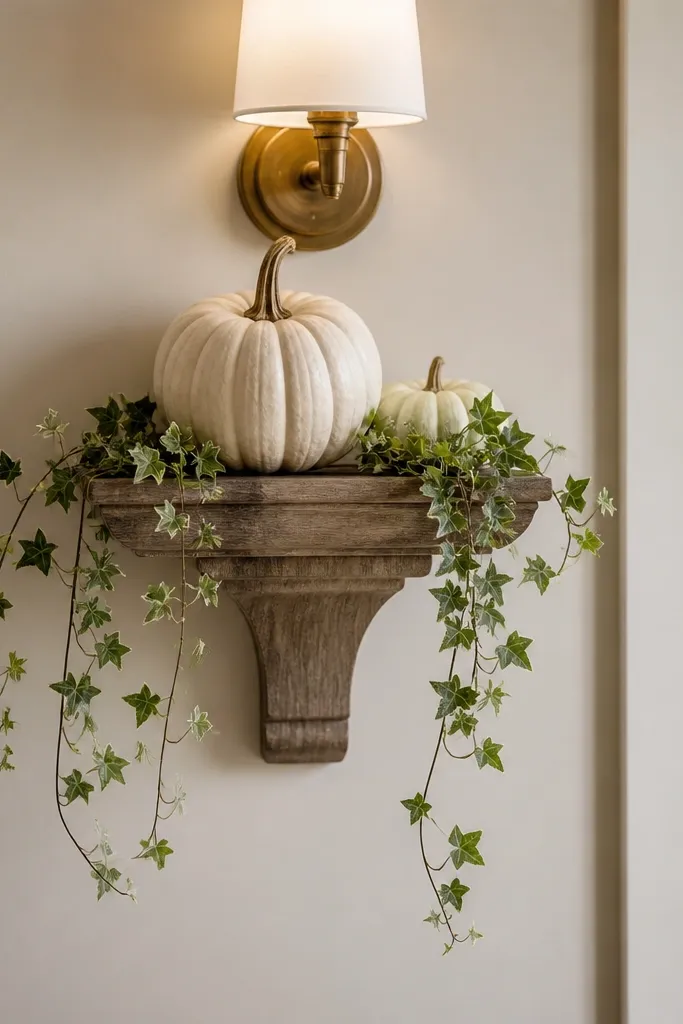
Hanging ivy gives you vertical drama without making the pumpkins taller. When white pumpkins sit near a wall, the ivy creates a natural cascade that makes the whole corner look styled. I like this when you have a small entry wall shelf or a tight porch nook because it uses space you already have. The gray-green ivy looks chic and calm, especially when you keep the leaves matte or slightly dusty. It also flatters smaller rooms because the cascade draws the eye up and down instead of widening the space.
Pro tipUse a wire-edged ivy so you can bend each strand slightly for a more organic fall.
Start by placing your white pumpkins on a wall shelf — one medium in front and one smaller behind for depth. Attach faux or real ivy (wire stem makes this easy) to the underside back edge of the shelf with zip ties or florist wire. Let 4-6 ivy strands hang down in uneven lengths so it looks natural, not like a curtain rod. Tuck a couple ivy leaves behind the front pumpkin so the cascade looks connected to the pumpkins, then trim the lowest ends so they stop about 4-6 inches below the shelf.
AvoidDon’t use one long ivy strand only — it looks like a single string, not a cascade.
13. White Pumpkin Cluster with Hydrangea-Style Foliage Sprays
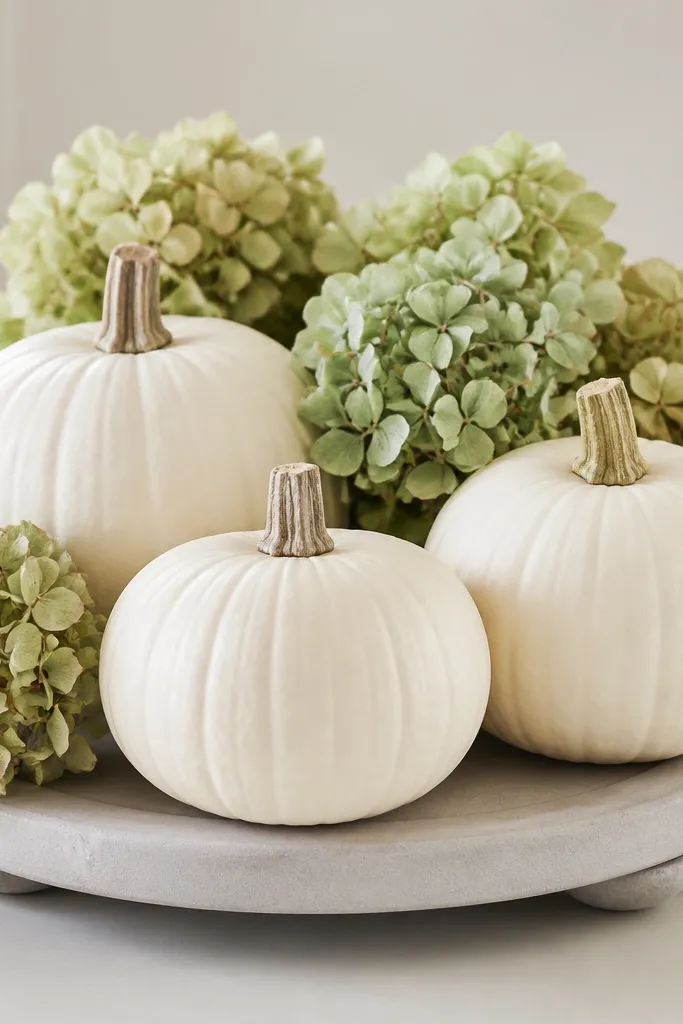
Hydrangea-style foliage sprays make white pumpkins look fuller without adding bulky volume. The layered leaf pads create a soft backdrop that makes the pumpkins feel like part of a larger bouquet. This works well for porch steps where you want something that looks lush but stays controlled. The soft gray-green and cream tones also keep it chic if your home leans neutral. I’ve used this for a small front porch where the lighting is harsh — the layered foliage diffuses the light and keeps the white pumpkins from looking glaring.
Start with a round riser or cake stand about 12-14 inches wide. Place three matte white pumpkins close together, leaving small gaps where foliage will go. Insert hydrangea-style foliage sprays behind the cluster first — aim the tallest leaf pad above the top pumpkin by 2 inches. Then push smaller foliage pads between the pumpkins to fill gaps and create puffed layers. Finally, adjust until you can see the pumpkins' ridges in front while foliage stays mostly behind.
If the sprays are too long, cut the stems and wire them back into the gaps so the pads sit at the right depth.
Don’t cover the pumpkins completely — you should still see their ridges and stem tops.
14. White Pumpkins with Pampas Grass Feathers and Boxwood Base
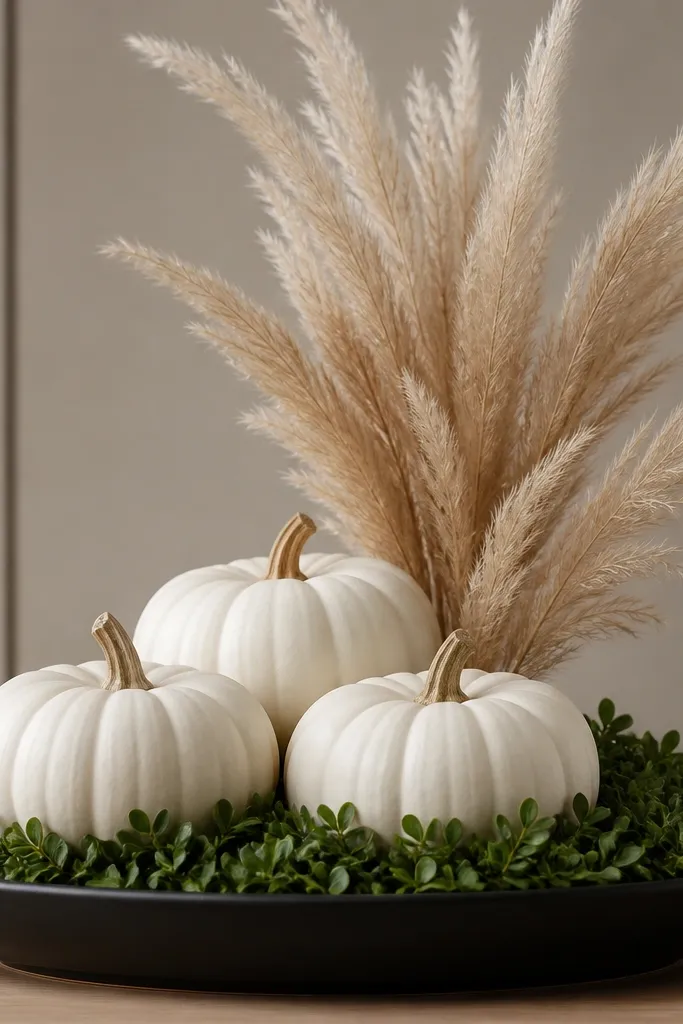
Pampas grass plumes are the fastest way to make a pumpkin setup look styled because they add airy height and soft texture. Pairing them with a boxwood base keeps the look grounded and tidy, so it doesn’t turn into a fluffy mess. This is the decor choice I use for a modern mantel because the black tray + matte white pumpkin combo makes the plants feel intentional. It flatters people who want contrast — the crisp lines of boxwood and the feathery plumes look good against each other. In photos, pampas plumes also soften shadows and make the scene feel warmer.
Start with a black shallow tray and create a base using boxwood picks or a small boxwood mat. Place three matte white pumpkins on the base, with the tallest one slightly left of center. Insert pampas grass plumes behind the pumpkins, angling them so one plume leans left and one leans right. Secure stems with floral wire into the boxwood so they don’t slide, then trim the plume tips so they rise 4-6 inches above the pumpkins. Add one small boxwood sprig in front of the tallest pumpkin to hide any wire.
Cut pampas plumes at an angle and fluff them with your hands after trimming so the feather texture stays full.
Don’t use pampas that’s shedding everywhere — if the plumes shed when you shake them, it will look messy by day two.
15. White Pumpkins with Mossy Succulent Rosettes
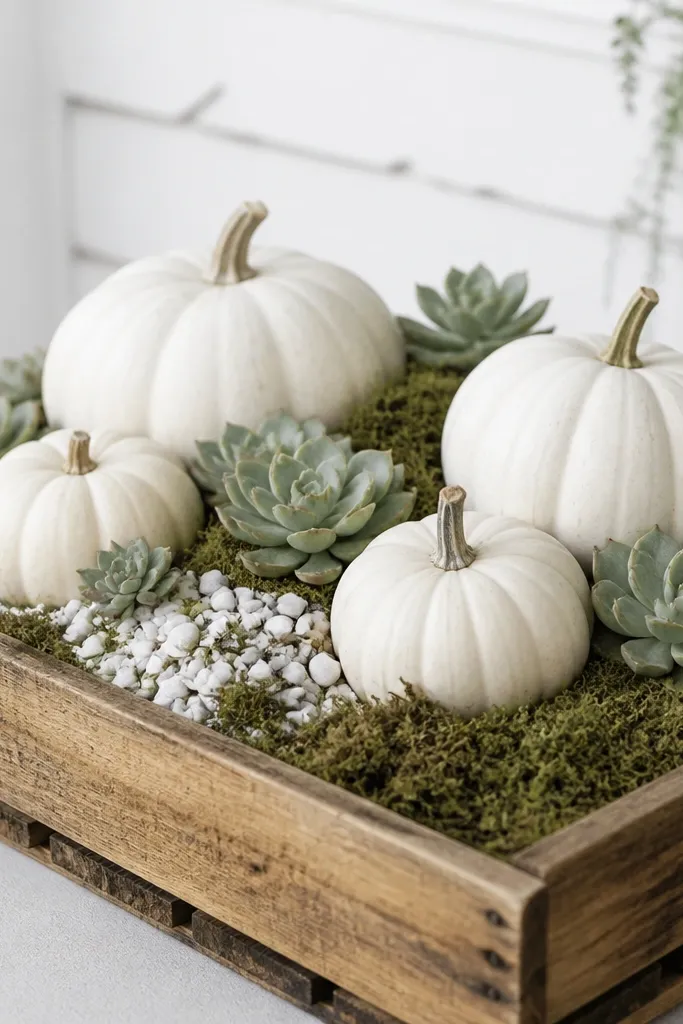
Succulent rosettes look chic because they’re tidy and graphic, and they make white pumpkins feel like part of a modern garden display. Moss adds a soft, natural grounding layer so the rosettes don’t look stuck-on. This combination is a great fit for people who want pumpkin decorating ideas with plants that last — succulents (real or faux) keep their shape longer than leafy herbs. It flatters neutral interiors because the color palette stays controlled: cream, green, and a little gray from moss. I’ve done this on a coffee table for a weeklong fall dinner and it stayed good-looking the whole time.
Pro tipIf you’re using real succulents, keep them near a bright window and mist the moss lightly instead of soaking the plants.
Start with a low wooden crate and line it with damp floral moss. Place two to three matte white pumpkins on top, then tuck succulent rosettes into moss gaps so only the rosette faces show. Add tiny white pebbles in a few patches to mimic garden soil and hide any uneven moss. Keep the rosettes at different angles so they look like they’re growing from the same base, then adjust until the highest rosette sits no more than 2 inches above the tallest pumpkin.
AvoidDon’t bury the pumpkins — leave the stem tops visible so the white pumpkin shape stays the star.



