
1. Denim Patchwork Sleeve with Topstitch Lines
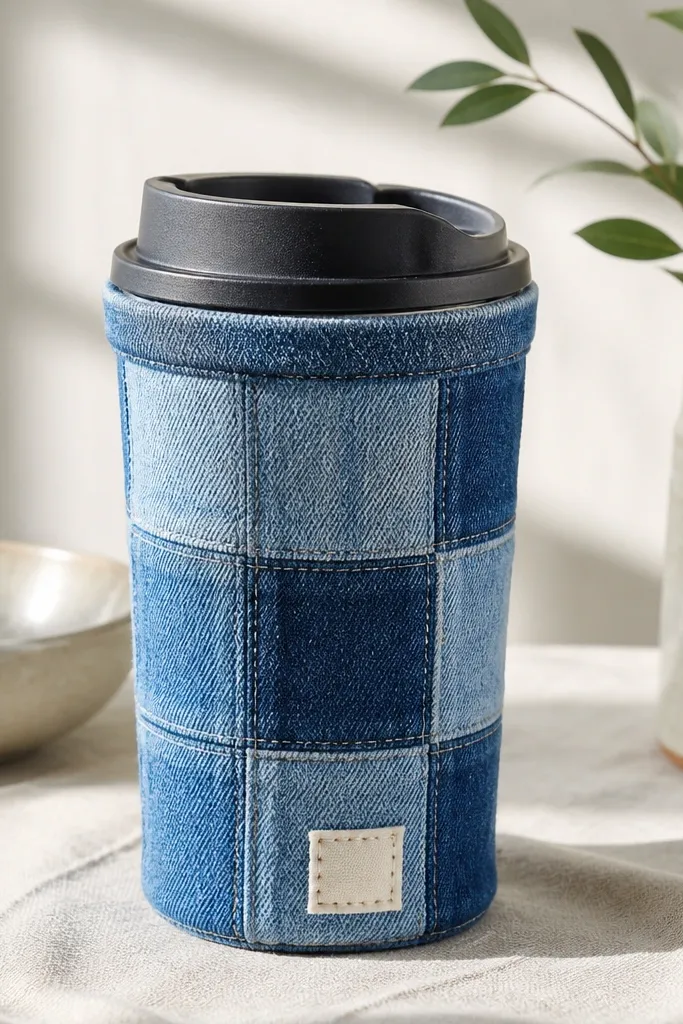
This one looks like you stole it from a small workshop, but it’s built from thrifted jeans you already have. The mix of indigo and medium wash denim gives a real “commuter uniform” vibe, and the double layers around the mug base keep your hand from feeling the cold metal. I like it for people with narrow wrists because the cuff makes the grip feel thicker without adding bulk. The straight topstitch lines make the mug look taller and slimmer, which helps on shorter mugs. It also hides small dents or scuffs on a plain stainless tumbler.
Start by cutting a rectangle of denim long enough to wrap around the mug with a 1-inch overlap for the seam. Cut a second rectangle for the bottom band, about 2 inches tall, and stitch it to the main panel so the seam lines don’t line up. Position your overlap on the non-grip side, then tape it in place with double-sided fabric tape. Stitch the seam through both layers, then fold the top edge down 1/2 inch and stitch a cuff. Finally, trim any fraying edges and run a quick iron over the topstitch seams so they lie flat.
Use a contrast thread color like off-white or warm gray so the lines read from across the room.
Skipping a cuff makes the top edge flare and makes the whole mug look like a quick wrap job.
2. Cork Coaster Wrap with Leather Tie
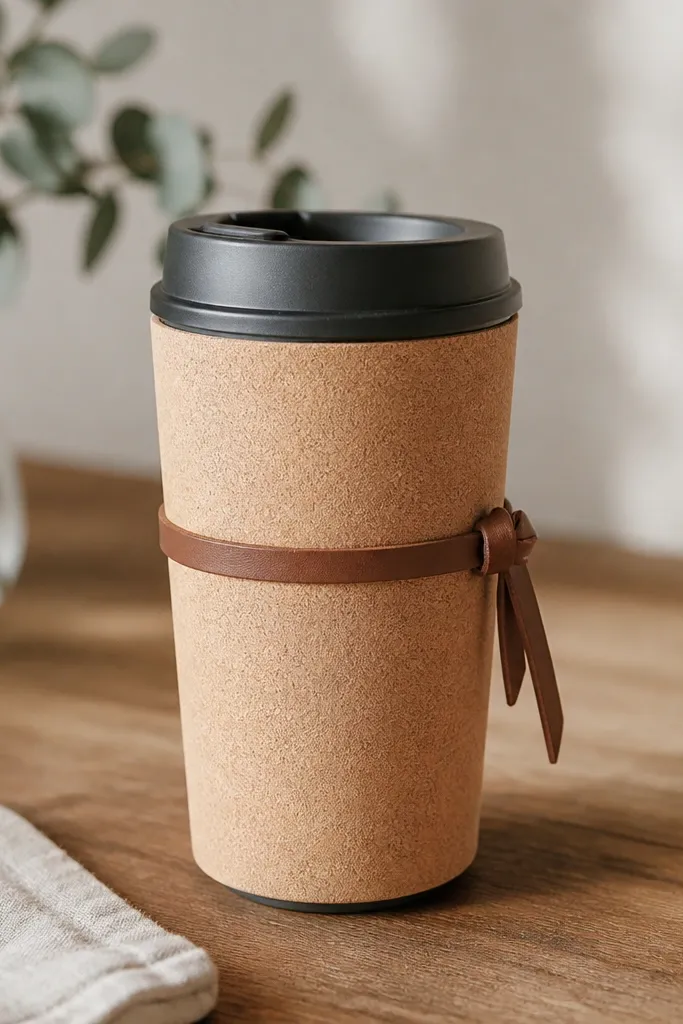
Start by wrapping a cork sheet around the mug and marking a seam line where the tie will sit. Cut a strip about 1/4 inch wider than your measurement so you can tuck the edges under. Glue the seam edge with contact cement or strong fabric glue, then clamp with clothespins while it sets. Cut a leather strip long enough to wrap around twice, then punch a small hole at one end for the knot. Tie it on the side opposite your grip, so the knot doesn’t interfere with holding the mug.
Cork is the material I reach for when I want insulation without bulk. The tan cork surface looks clean and modern, and the leather tie gives it that “intentional accessory” feel instead of a plain sleeve. This works especially well for medium to deeper skin tones because the warm tan and chocolate brown look sharp against your hand. It also looks good on both matte black and brushed steel mugs since cork has a natural texture that hides fingerprints. The tie lets you tighten the sleeve for a snug fit in car cup holders.
AvoidUsing a slippery tie without a tight wrap makes the sleeve slide when you drive.
Pro tipSeal cork with a thin coat of matte clear sealer so it wipes clean after coffee spills.
3. Felted Wool Sleeve with Pom-Pom Corner
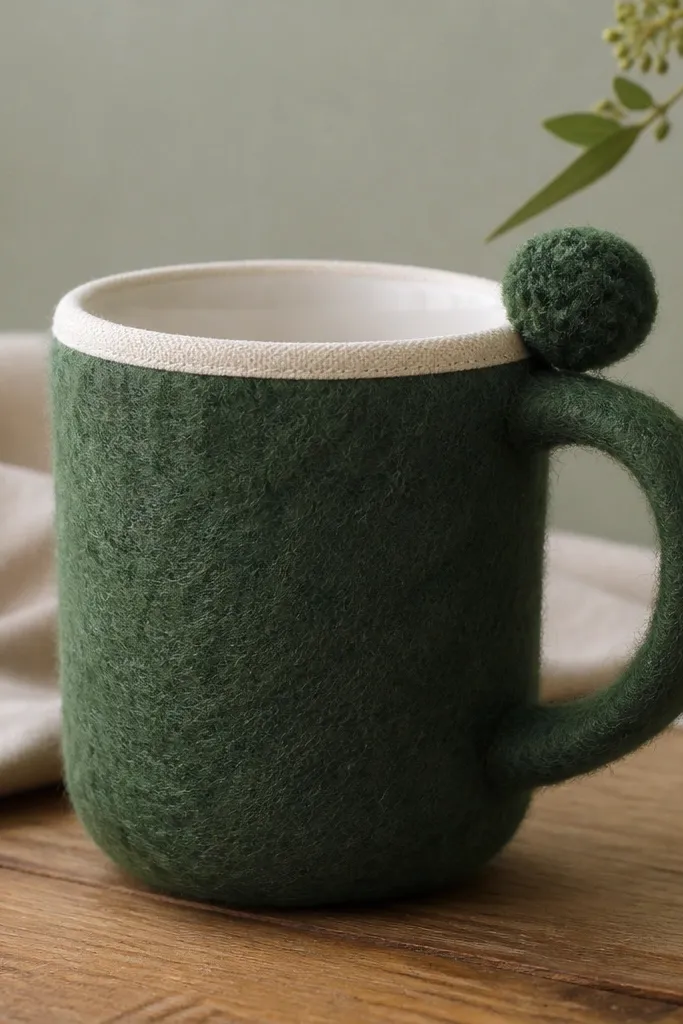
Start by cutting a wool felt rectangle that wraps around the mug with a 1/2-inch overlap. Cut a 1-inch-wide binding strip in cream cotton, then glue or stitch it along the top edge so it doesn’t stretch out. Fold the overlap to the inside and secure with fabric glue, then press flat under a heavy book for 20 minutes. Attach a pom-pom to one lower corner using a few stitches through the felt and knot the thread inside. Finish by trimming the bottom edge so it sits level, not uneven.
Felted wool makes the mug feel warm even when the drink is hot, and it looks cozy without looking childish. The trick is to use a thick wool felt sheet so it holds shape and doesn’t sag. I like this for people who prefer a softer grip — the felt texture gives you friction, which is great when your hands are cold. Forest green looks especially good with silver rings and a cool-toned wardrobe. The pom-pom corner adds personality while staying small enough for a commute bag.
AvoidCutting felt too thin — it flops, and the mug looks homemade instead of finished.
Pro tipUse a water-soluble fabric marker to draw your overlap line so your seam is straight.
4. Upcycled T-Shirt Sleeve with Rolled Cuff
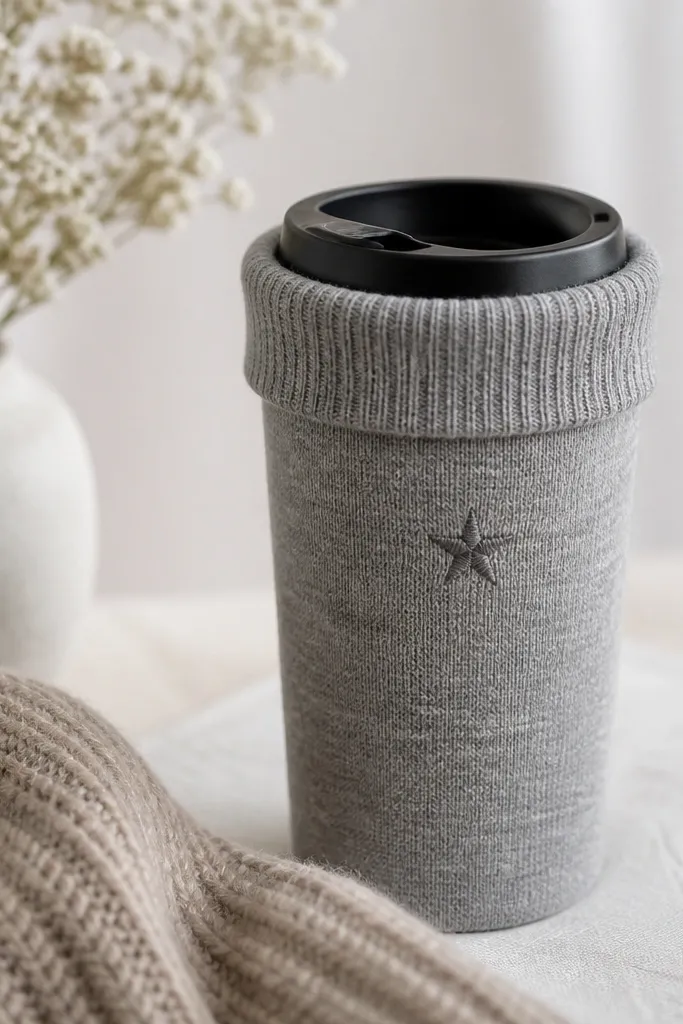
This is the quickest quick easy handmade travel mug idea I’ve done on a busy Saturday. Knit from a worn t-shirt stretches just enough to grip the mug, and the rolled cuff looks casual but neat. I recommend heather gray or black because the knit hides tiny wrinkles that show up after washing. This works for lighter and medium skin tones because the fabric doesn’t fight your hand color. It also looks good in office settings since the design stays minimal.
Start by cutting a strip from the t-shirt that’s long enough to wrap and wide enough to cover the height you want, usually 6 to 7 inches. Stretch the fabric slightly as you measure so it lays flat when relaxed. Wrap it around the mug, align the seam on the back, and pin in place. Sew the seam with a stretch stitch or zigzag, then roll the top edge down 1 inch and stitch only the rolled section to keep it from unrolling. Add a small patch or stitched icon near the front if you want a focal point.
Use a ballpoint needle on knit so you don’t get skipped stitches.
Skipping a stitched cuff — the roll collapses and the mug looks sloppy.
5. Leather Scrap Wrap with Burnished Edge
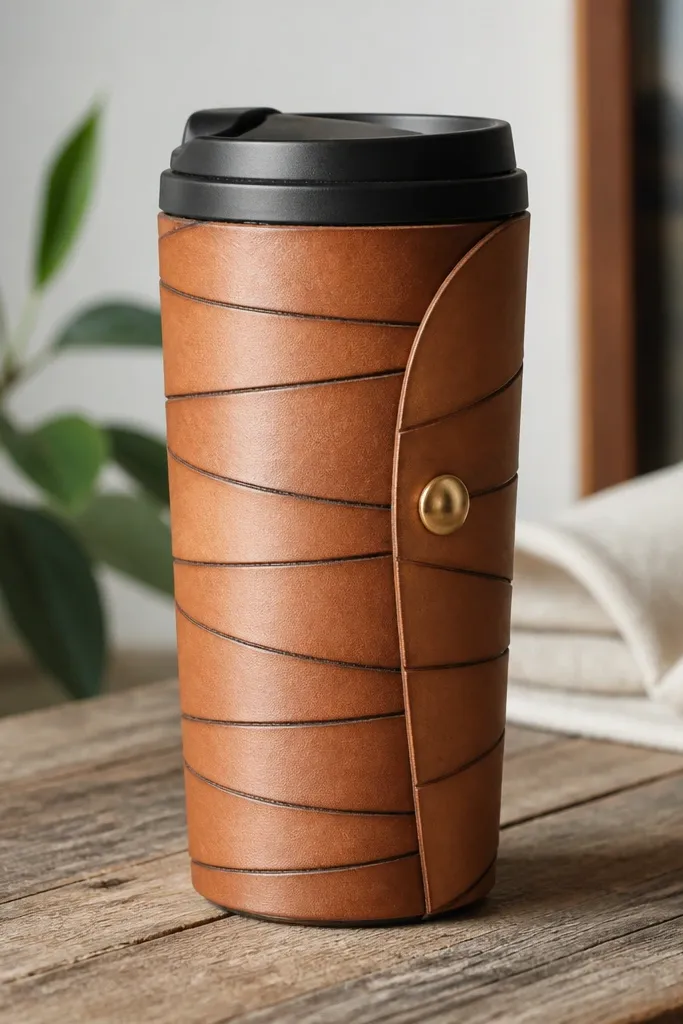
Start by cutting a strip of thin leather that wraps around the mug with a 3/4-inch overlap. Rough up the overlap area lightly with fine sandpaper so glue sticks better. Apply contact cement to both surfaces, wait until tacky, then press together firmly. Burnish the cut edges with a cotton cloth and edge slicker or even a little beeswax, then buff. Install a brass snap or magnetic snap on the overlap so you can remove the wrap later for cleaning.
Leather scrap wraps look expensive because the material reads as “real.” Even thin leather adds grip and keeps the mug from sliding in your hand. Tan with a burnished edge is my favorite combo because it looks warm and hides minor scuffs. This works best on stainless or black mugs; the leather texture makes the mug look like a custom accessory. If you have broader hands, the overlapping strips create a thicker hold without needing a bulky sleeve.
AvoidCutting leather too short — it leaves gaps that catch your eye every time you pick up the mug.
Pro tipIf you don’t want to buy leather tools, use painter’s tape to mask the edge and keep burnishing clean.
6. Washi Tape Grid Wrap with Cork Backing
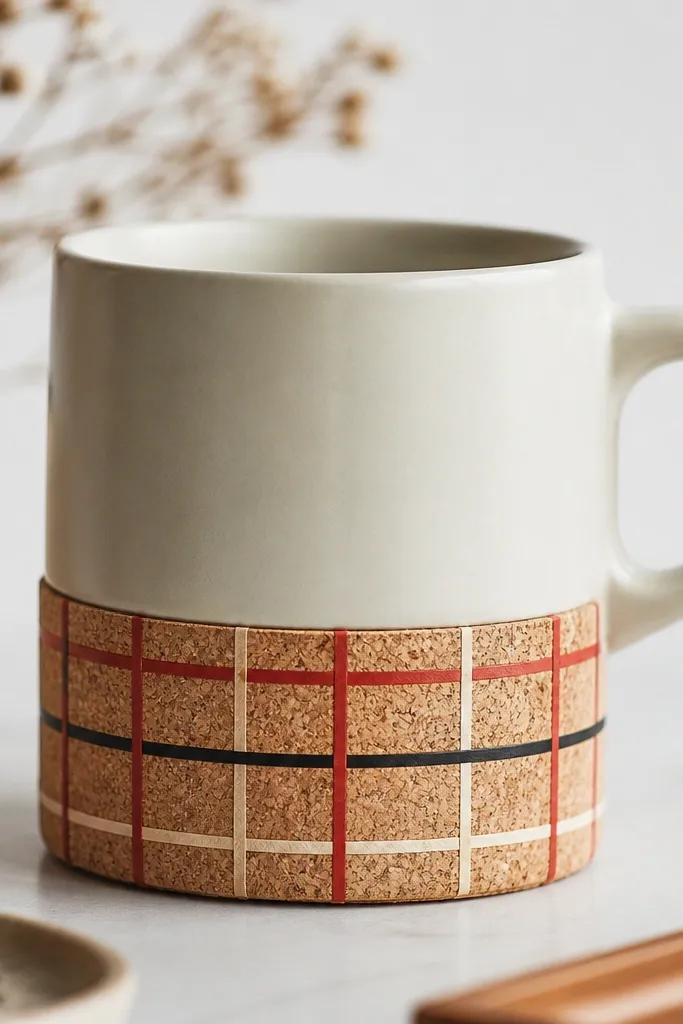
Start by cutting a cork strip that matches your mug height and circumference, then wrap it around and mark the seam. Glue the cork seam with a thin layer of contact cement and clamp. Tear washi tape into consistent widths, about 1/4 inch, and start laying vertical strips first with slight overlap. Then add horizontal strips to form a grid, keeping the tape edges aligned with a ruler or masking tape guide. Seal the whole surface with a clear matte tape sealant or a thin clear coat made for paper crafts.
Washi tape is the fastest way to get that tidy, graphic look, and cork keeps it from looking fragile. The muted palette — cream, muted red, and black — makes the mug look grown-up rather than party craft. I like this for commuters who wear neutrals because the grid pattern gives you a focal point without clashing. It also works for desk life since the cork backing keeps the tape from curling at the edges. The result feels like a stationery item, not a random sticker job.
AvoidPutting tape directly on a slick metal tumbler — it lifts at the edges.
Pro tipPress each strip with a plastic scraper so the corners stay crisp.
7. Macrame Knot Handle Loop for One-Hand Carry
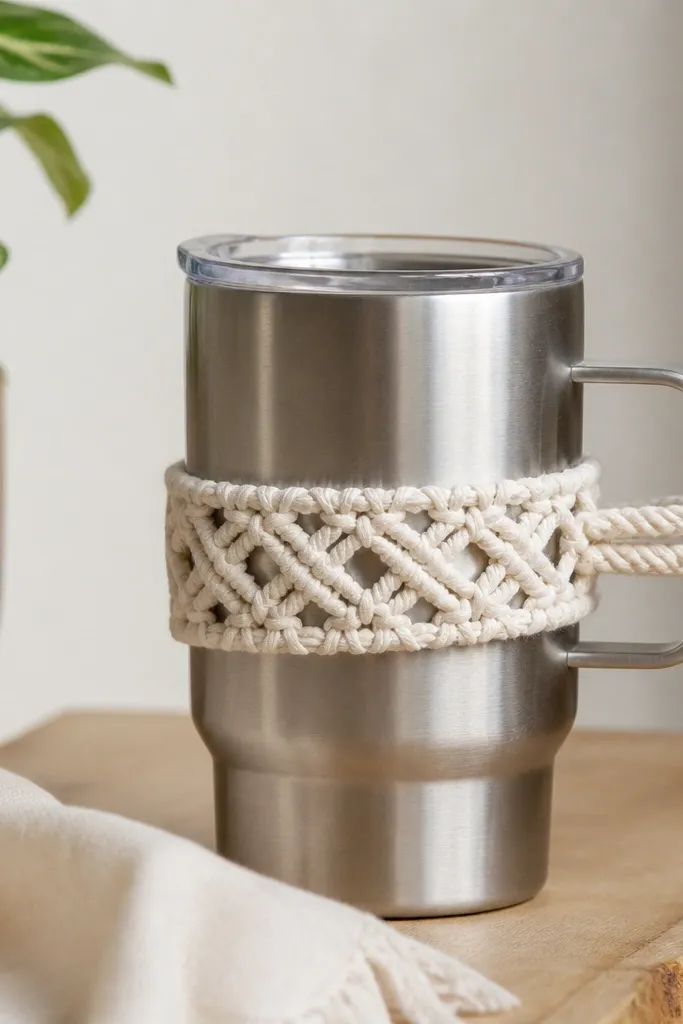
If your commute is the kind where you juggle keys, phone, and a door handle, a macrame loop is a life-saver. It gives you a controlled grip without adding a thick sleeve. Off-white cord looks clean and works with almost any outfit color. I like this for people with shorter forearms because the loop sits at mid-height and lets you carry the mug at a relaxed angle. It also looks good on cylindrical tumblers because the rope texture adds warmth to plain metal.
Start by wrapping the cord around the mug circumference to estimate length, then cut 6 strands about 24 inches each. Tie a temporary knot bundle around the mug at the height you want the loop, then slide it off and finish knots on a flat surface. Use alternating square knots to build a small braided section, then tie the ends into a tight knot. Re-wrap the loop around the mug and secure with a small piece of fabric tape underneath. Finally, trim frayed ends and tuck them into the knot bundle so it looks intentional.
Use waxed cotton cord so the knots hold their shape and don’t unravel during travel.
Making the loop too long — it swings and smacks your hand when you walk.
8. Book Page Decoupage with Matte Sealer
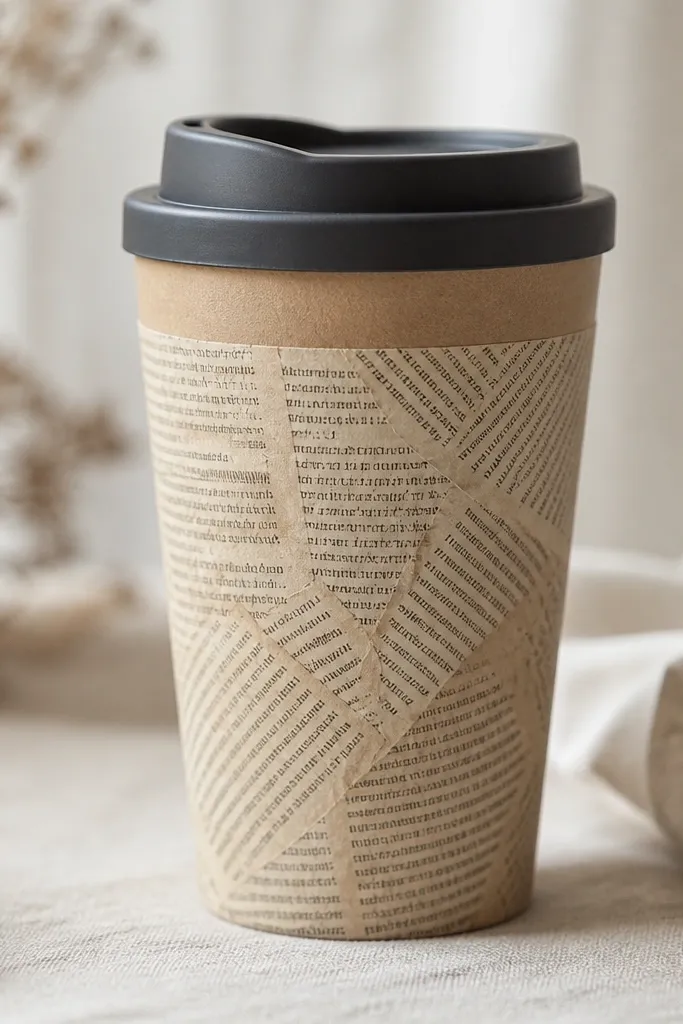
This is the “I want my mug to look like art on my desk” option. Book page decoupage gives you a layered paper look, and the matte sealer keeps it from looking like a craft disaster. I love it on light-colored mugs because sepia text pops against the base. It also flatters warm skin tones since the whole palette is earthy. If you hate shiny surfaces that show fingerprints, matte is the win.
Start by cleaning the mug with rubbing alcohol and letting it fully dry. Tear book pages into irregular strips about 1 inch wide, and mix decoupage glue (or watered PVA glue) in a small cup. Brush a thin layer on a small section, lay the paper strip, then smooth outward with your fingers. Overlap strips until the surface is covered, leaving a 1/4-inch gap at the top edge so it doesn’t peel. Seal with two to three matte coats, letting it dry between coats, then add a paper band around the top edge for a crisp finish.
Use a foam brush so you don’t leave streaks in the glue.
Skipping the alcohol wipe — paper won’t bond and you’ll get bubbles.
9. Vintage Scarf Wrap with Bias Binding Top
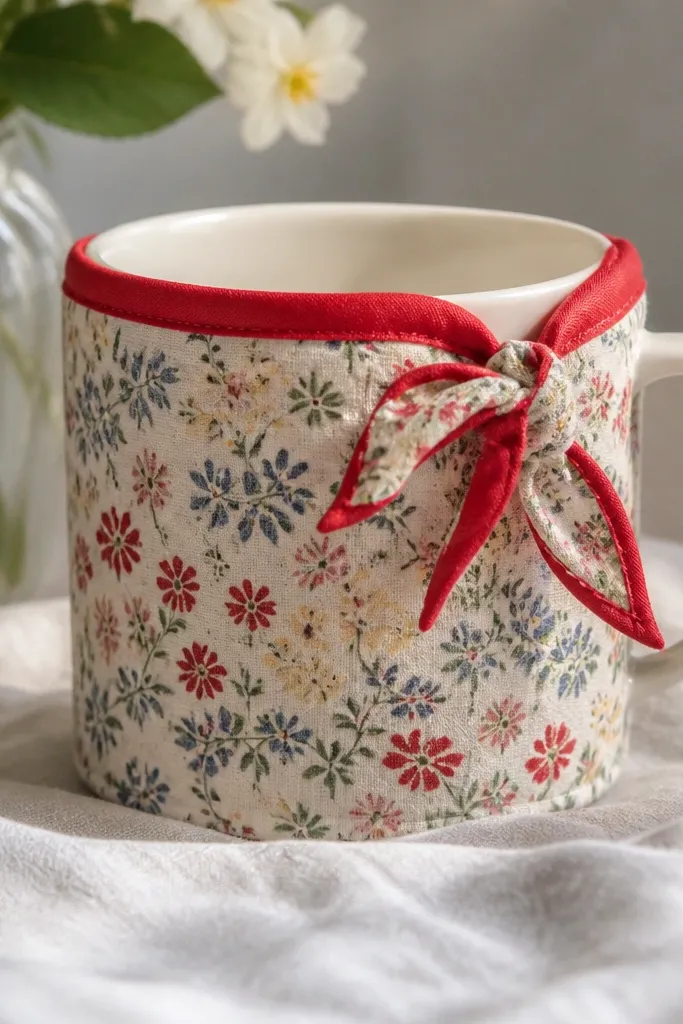
Start by cutting a scarf strip wide enough to wrap the mug with a 1-inch overlap, and cut it so the seam lands on the back. Use double-sided tape to hold the overlap for positioning, then remove and glue the overlap with fabric glue. Add bias binding along the top edge: pin it in place first, then glue or stitch to secure. For the closure, tie a small knot from the scarf fabric at the side seam so you don’t need hardware. Trim the bottom so it sits even and doesn’t flare.
A vintage scarf print gives you instant personality, and bias binding makes it look professionally finished. The scarf fabric drapes softly, so it feels good in your hand and doesn’t feel like a hard sleeve. I like small-scale prints because they don’t look busy when wrapped around a curved surface. This is a great fit for people who want their mug to match earrings or a scarf they already wear. It also looks good in photos because the binding creates a clean line.
AvoidUsing a stretchy scarf that rolls — it twists and the binding ends up uneven.
Pro tipChoose a scarf with a tight weave so it doesn’t fray and shed threads.
10. Crochet Shell Sleeve in Two-Tone Cream and Terracotta
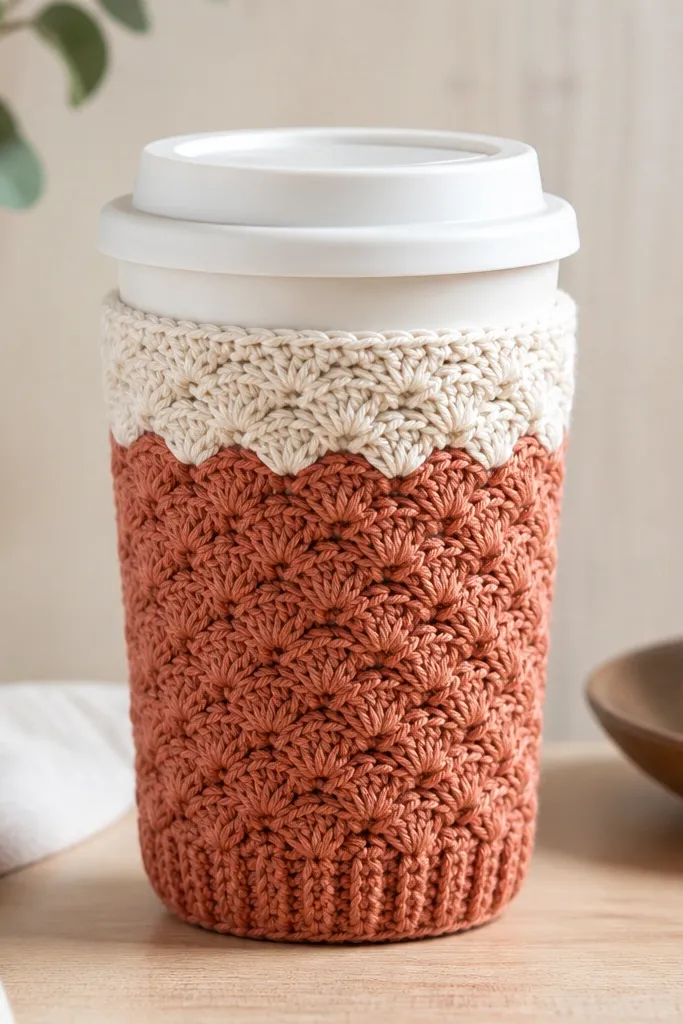
Crochet looks handmade in the best way when the stitches are tight and the edges are finished. Two-tone cream and terracotta reads warm and modern, not granny-core. This sleeve is great for fall and spring because the open shell stitch breathes, so your hand doesn’t feel sweaty. I recommend it for people who like a textural grip; the raised stitches give you traction even if your skin is slightly damp. It also makes plain mugs look like a small accessory set with your bag.
Start by measuring your mug circumference and test a small swatch so the stitch count fits snugly. Crochet the sleeve in a shell stitch pattern, keeping rows even so it doesn’t twist. Use cream for the first 1.5 inches at the top, then switch to terracotta for the main body. Add a ribbed band at the bottom using single crochet or slip stitches so the sleeve doesn’t slide. Finish by sewing the seam invisibly and adding a simple button closure if you want it removable.
Block the sleeve lightly with steam so it holds a smooth curve around the mug.
Making it too loose — it sags and looks like a cover pulled off a couch.
11. Heat-Safe Silicone Mat Wrap with Fabric Overlayer
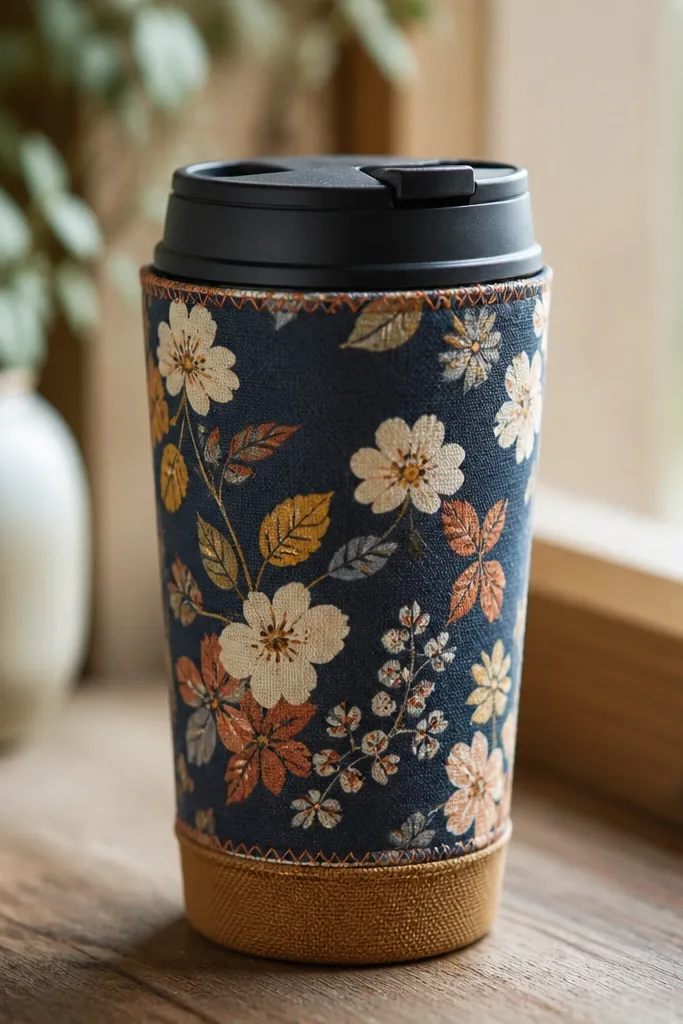
Start by cutting a silicone mat strip to the mug circumference and height, then trim it so it overlaps 1/2 inch. Cut a matching fabric piece from cotton with the same dimensions plus 1/2 inch for seam allowance. Glue the fabric to the silicone using a heat-safe adhesive or stitch through the fabric only, keeping glue off areas that need flexibility. Wrap around the mug with the seam on the back, then stitch the seam closed through the fabric layer. Finish the top edge with a narrow fold and stitch so it lays flat and doesn’t roll.
If you drink hot coffee in a hurry, you need insulation without a bulky sweater sleeve. A heat-safe silicone mat layer under fabric gives you a stable thermal barrier and makes the wrap grip the mug. I like patterned cotton for the outside because it hides tiny stains from commute spills. This works for anyone with limited hand strength since the wrap doesn’t slide. It also looks clean enough for an office because the outside fabric is stitched, not just glued.
AvoidUsing hot glue directly on silicone — it peels off after a few uses.
Pro tipDo a quick test with a warm mug before you commit — you want the silicone to feel grippy, not slippery.
12. Painted Geometric Chevron on Mason Jar Sleeve Style
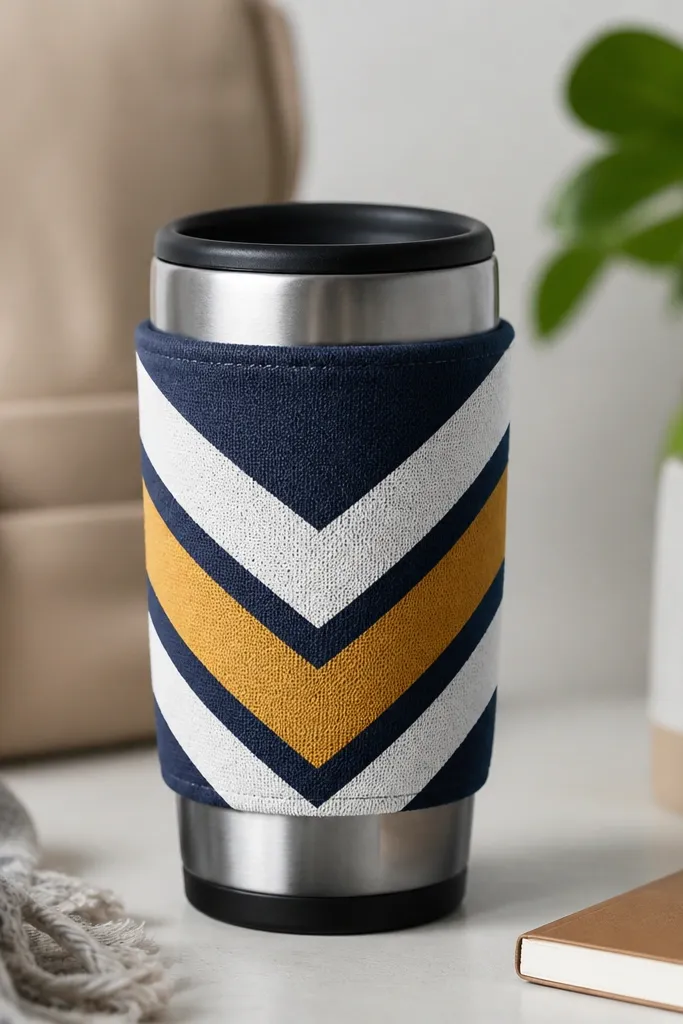
Painted geometry looks crisp and modern, and it hides wear better than you’d think. I’ve done chevrons on navy fabric because the mustard pops without looking loud. This style fits people who like clean lines and minimal accessories. It also works on bigger mugs because the pattern can stretch across the circumference and still look balanced. The painted look is also forgiving — small chips look like part of the design instead of damage.
Start with a navy canvas or denim sleeve base, cut to wrap the mug with a seam on the back. Tape off a chevron pattern with painter’s tape, using a ruler to keep the angles consistent. Mix fabric paint and apply in two thin coats, letting it dry fully between coats. Peel tape while the paint is still slightly tacky so edges stay sharp. Seal with a fabric paint sealer or heat-set per the paint label, then stitch the top cuff and bottom edge so the sleeve holds shape.
Use painter’s tape, not masking tape — masking tape bleeds on textured fabric.
Painting directly onto a loose knit — the pattern cracks when the fabric stretches.
13. Braided Towel Wrap with Buttoned Side Closure
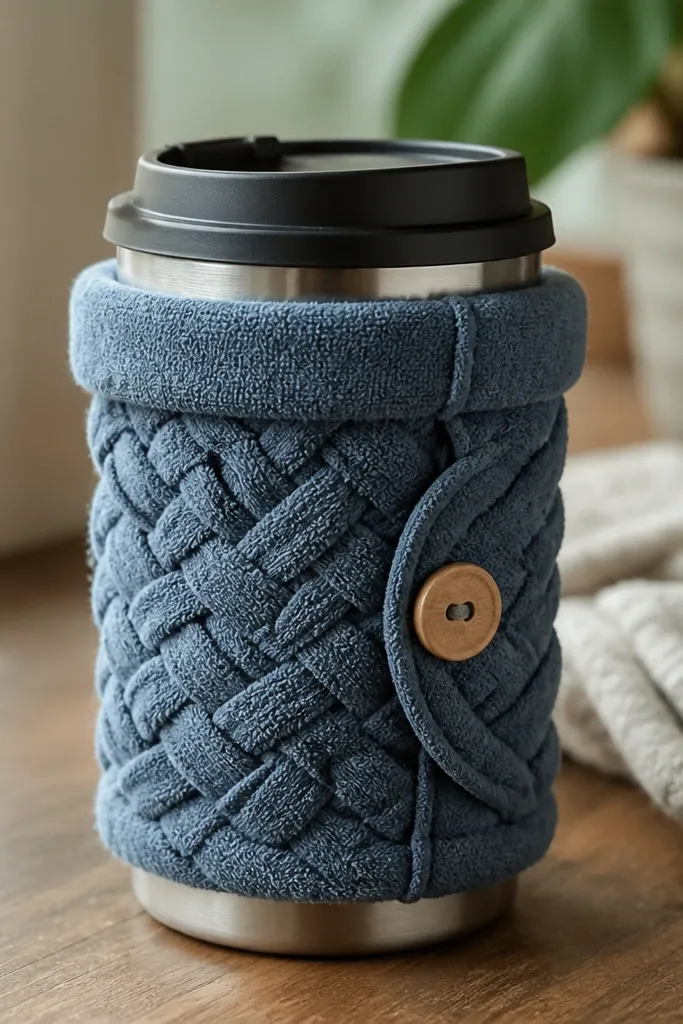
This one feels like a spa towel but for your commute. A braided towel strip gives grip and a soft surface that doesn’t feel cold through your hand. I like it on people who hate slick sleeves because the towel texture holds onto your skin. The side button closure keeps it snug without a bulky tie. It also looks good with warm neutrals like beige, tan, and olive because towels pick up dye nicely.
Start by cutting a towel into long strips about 1 inch wide, then braid 3 strips tightly. Wrap the braid around the mug and mark where the ends meet on the back side. Sew the braid ends to each other loosely so it can flex, then stitch a simple cuff from the same towel fabric on the top edge. Install a small button and loop at the side so you can adjust the snugness. Finally, trim any stray towel fibers and run a fabric shaver over the surface if it looks fuzzy.
Choose a towel with a tight weave so the braid stays neat instead of fraying.
Skipping a cuff — the braided edge rolls down and looks uneven.
14. Reclaimed Leather Belt Strap Wrap
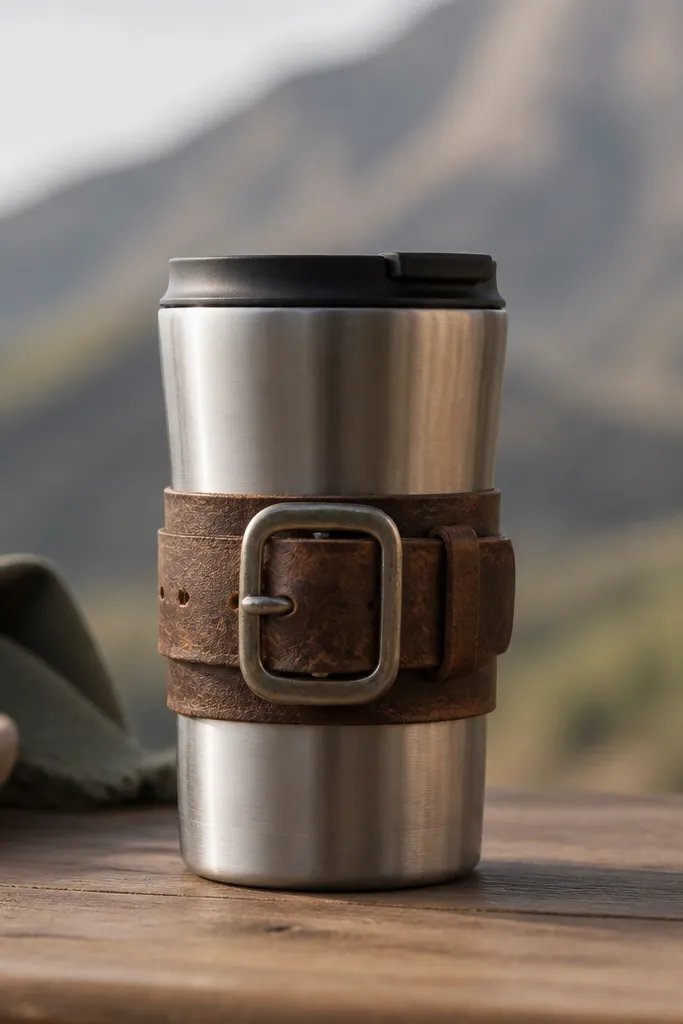
Start by cutting a belt strap strip to the mug height, usually 3.5 to 4 inches. Wrap it around the mug and mark where the buckle sits — center it on the front. Punch a few holes so you can tighten it, then secure the strap by threading the buckle through the strap end. If the belt is too wide, trim the edges so the strap sits flat and doesn’t overlap awkwardly. Add a thin fabric liner strip inside if the leather edge feels sharp.
This is the quickest way to make a plain mug look like a custom accessory. The belt leather is thick enough to hold structure, and the buckle gives you a focal point that reads “intentional” from across a room. I like it for darker mugs and for outfits with belts or boots because the materials match your wardrobe. The buckle also makes it easy to adjust the fit, which matters if your cup holder is tight. It’s especially flattering for hands that like a firm grip — leather feels secure.
AvoidUsing a strap that’s too thin — it curls and the buckle ends up off-center.
Pro tipUse a leather conditioner wipe before you glue anything so it stays flexible.
15. Sew-On Ribbon Rosette Sleeve
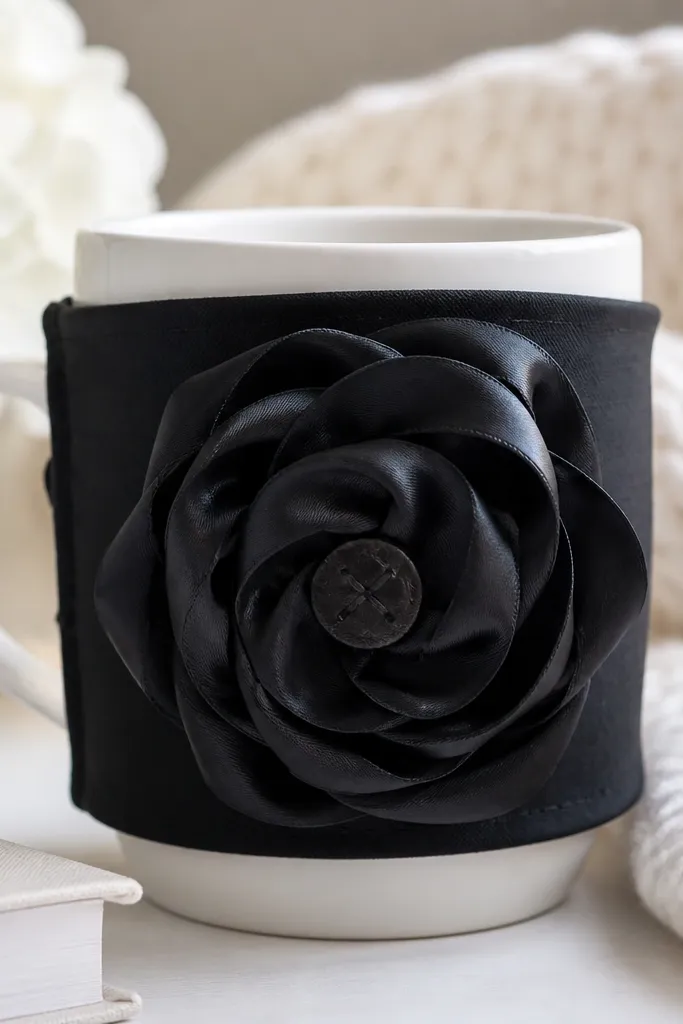
This one is for days when you want your commute mug to feel like a gift. A ribbon rosette looks fancy, but it only works if the base sleeve is plain and the rosette sits flat. I recommend a black or deep navy sleeve because it makes the ribbon colors look crisp. This style flatters people with warm undertones because satin in coral, rose, or cranberry looks extra flattering near your hand. Keep the rosette on the front side so it doesn’t get crushed in the cup holder.
Start with a simple sleeve base in cotton or canvas, cut to wrap the mug and stitch the seam on the back. Make the rosette from 3 ribbon lengths, each about 18 inches, and layer them by hand-stitching around the edge to form a spiral. Sew the rosette onto the front of the sleeve at mid-height. Add a small covered button or faux pearl in the center for a clean finish. Finally, reinforce the rosette attachment with a second round of stitches so it doesn’t wobble.
Use fabric glue only as a temporary hold, then stitch — it lasts longer on a commute mug.
Making the rosette too big — it catches in bags and looks messy fast.
16. Tied Eyelet Lace Sleeve with Cotton Lining
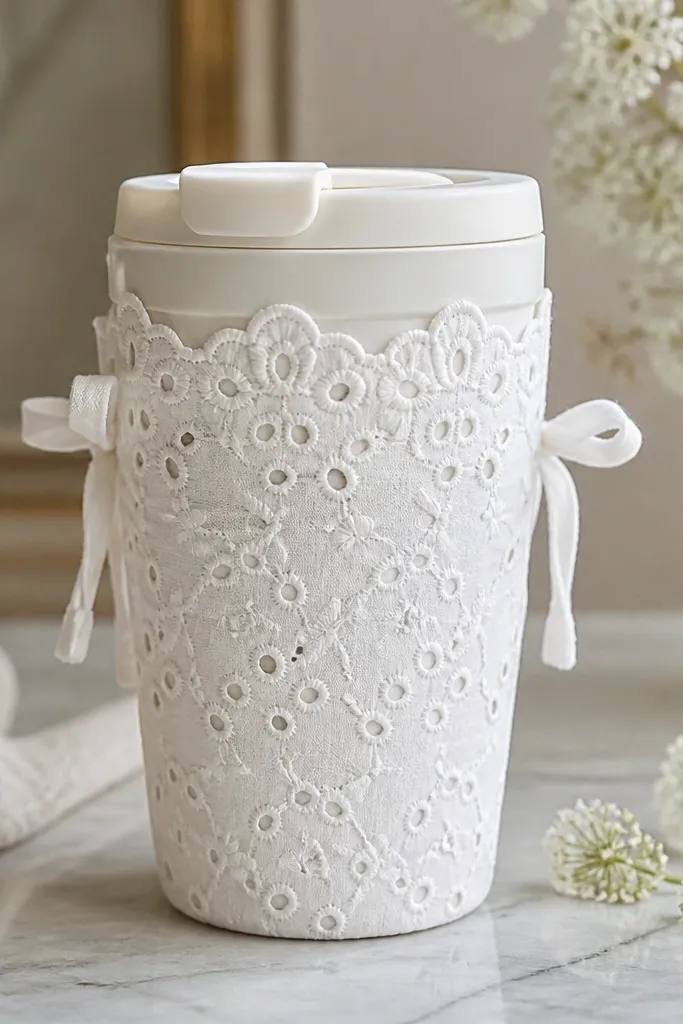
Start by cutting a lace outer panel and a cotton lining panel to the same size, with extra seam allowance. Stitch them together along the sides and bottom, then turn right-side out and press. Cut two small tie strips and sew them into the side seams so they hang evenly. Wrap the sleeve around the mug and tie the sides at the back, where the seam sits. Finish the top edge with a narrow fold-over hem or scalloped lace edge so it doesn’t curl.
Eyelet lace makes a travel mug look delicate, but it only works when you add a cotton lining. The lining keeps the sleeve from looking see-through and fragile, and it also prevents your hand from feeling cold metal. White and cream lace looks best on darker mugs, and it gives a “clean morning” look. I like this for spring commutes and for people who wear gold jewelry because the lace texture makes gold look brighter. The side ties keep the sleeve snug and easy to remove for washing the lining.
AvoidSkipping lining — lace stretches and the mug looks baggy after a week.
Pro tipHand-wash the lining only and keep the lace dry — it stays crisp longer than machine cycles.
17. Spray-Painted Patterned Straw Wrap with Clear Coat
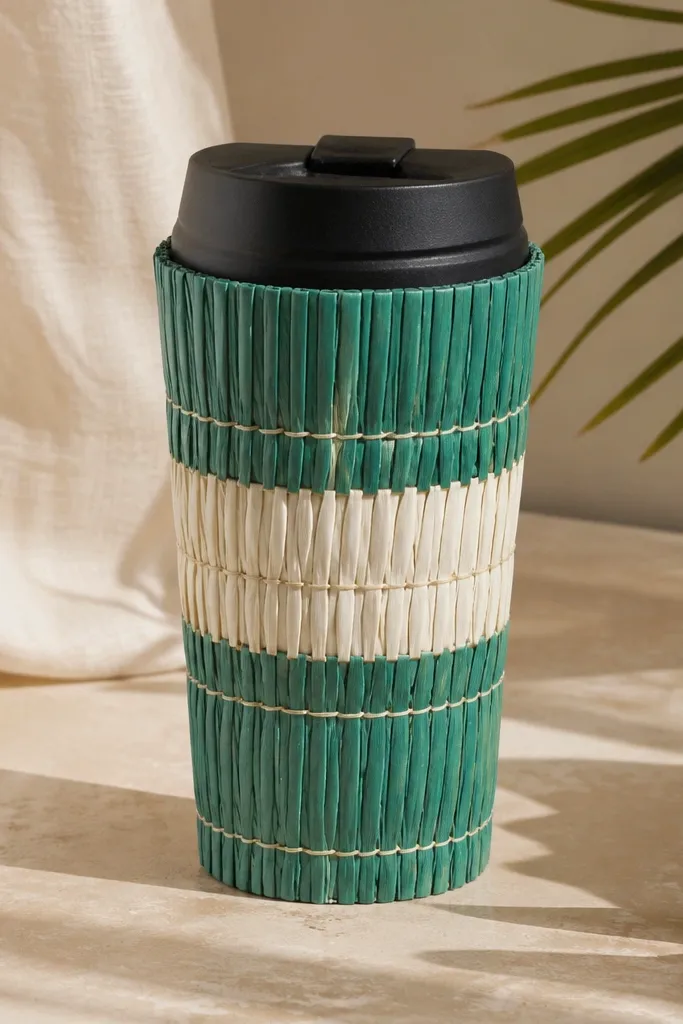
This is a weird one, and it works when you keep it controlled. A straw or raffia wrap looks summery, and painting bands makes it look intentional instead of rustic. I like teal and white because it matches a lot of commuter wardrobes and looks clean in daylight. The clear coat is what stops the paint from smudging and keeps the wrap from fraying too quickly. This style is best if your mug sits in your hand or desk more than it bounces around in a bag.
Start by wrapping raffia or thick straw cord around the mug in tight bands, then secure with thread or thin wire at the top and bottom. Remove it carefully, then tape off areas for painted stripes. Spray paint in light coats, letting each coat dry fully so the raffia doesn’t soak and warp. Seal with a clear coat made for craft materials, two thin layers, then let it cure longer than the label says if you can. Re-wrap and tie the ends, keeping the seam on the back.
Paint before you re-wrap so you can control edges and avoid drips on your finished mug.
Heavy paint layers — they make raffia stiff and the wrap cracks.
18. Rubber Stamp Background on Kraft Paper Sleeve
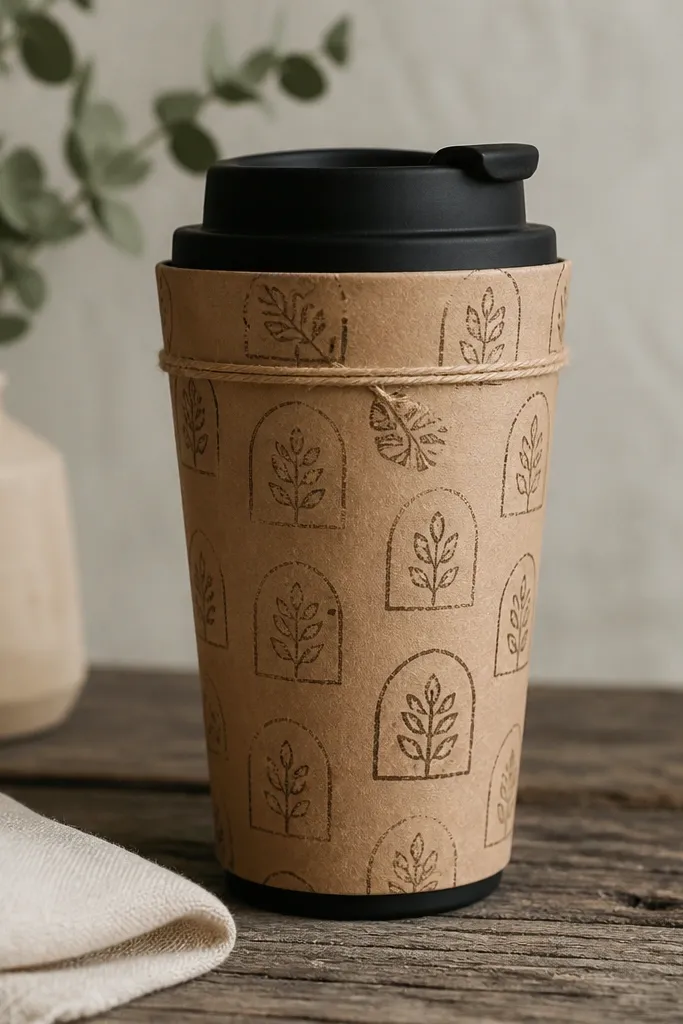
Start by cutting a kraft paper rectangle to wrap around the mug with a 1-inch overlap. Stamp a repeating pattern using a foam stamp and stamp ink, leaving a 1/2-inch blank margin on the overlap side. Wrap the paper around the mug and secure the overlap with double-sided tape. Fold the top edge down 1/2 inch and wrap twine around the fold, tying at the back. Seal the outside with a matte spray sealer so it resists condensation and small spills.
This looks like stationery and it hides small imperfections in the paper. Kraft paper has a warm tone that makes your mug feel grounded, and the stamp pattern gives it a handmade rhythm. It’s great for commuters who like neutral outfits and want a mug that doesn’t scream color. I also like it because it’s forgiving — if your stamp shifts slightly, it looks like part of the print. The twine closure keeps it adjustable and easy to remove for wiping.
AvoidSkipping sealing — condensation turns kraft paper soft and it wrinkles fast.
Pro tipUse pigment ink for stamps so the pattern doesn’t bleed when sealed.
19. Rope Cord Wrap with Heat-Proof Inner Sleeve
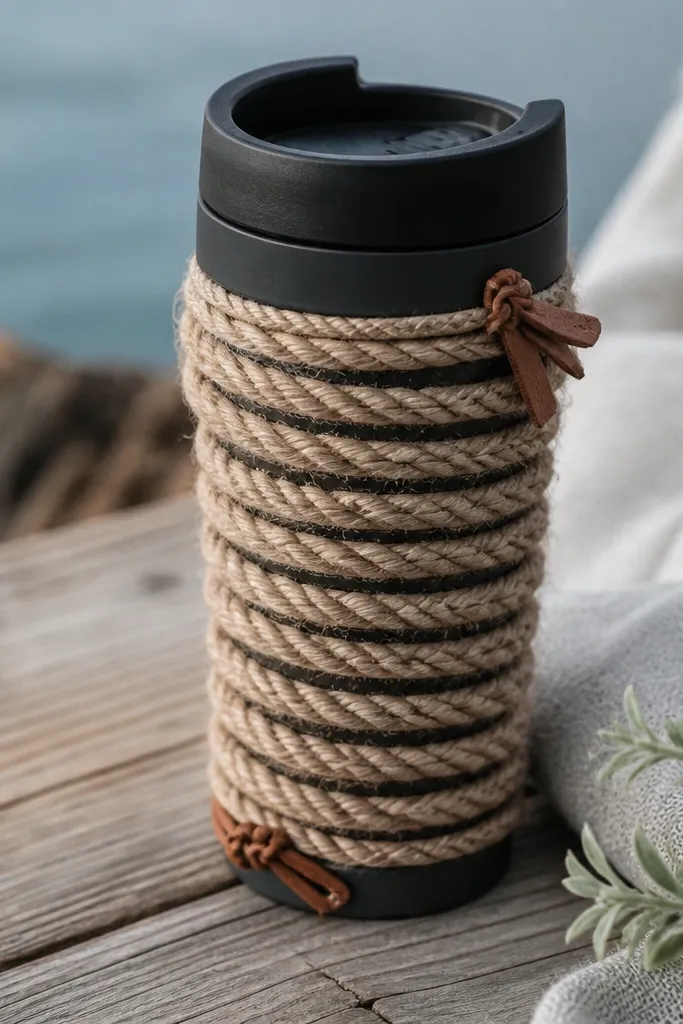
Start by wrapping a heat-proof inner sleeve around the mug, like a neoprene or silicone mat strip, and secure the seam. Then wrap rope around the outside in tight spirals, starting at the bottom so the coils stack neatly upward. Glue or stitch the rope ends at the back seam only, so the rest stays flexible. Use a thin strip of leather to tie the rope ends into knots at the top and bottom. Trim any frayed rope ends and burnish the knot areas with a little wax so they look clean.
Rope wraps give a strong grip without needing a bulky fabric sleeve, and the spiral pattern looks like you meant to build it. I like jute or coarse cotton rope because it holds shape and doesn’t flatten too quickly. This is a great option for people who drink from larger mugs and want a secure hold even when the drink is hot. The heat-proof inner sleeve protects your hand and keeps the rope from drying out from condensation. It also looks great with casual coats and work boots.
AvoidGluing rope all the way around — it turns the mug into a rigid block and looks clunky.
Pro tipChoose rope thickness that matches your grip — too thin feels scratchy, too thick makes it hard to fit in cup holders.
20. Sewed Patch Band with Iron-On Letters
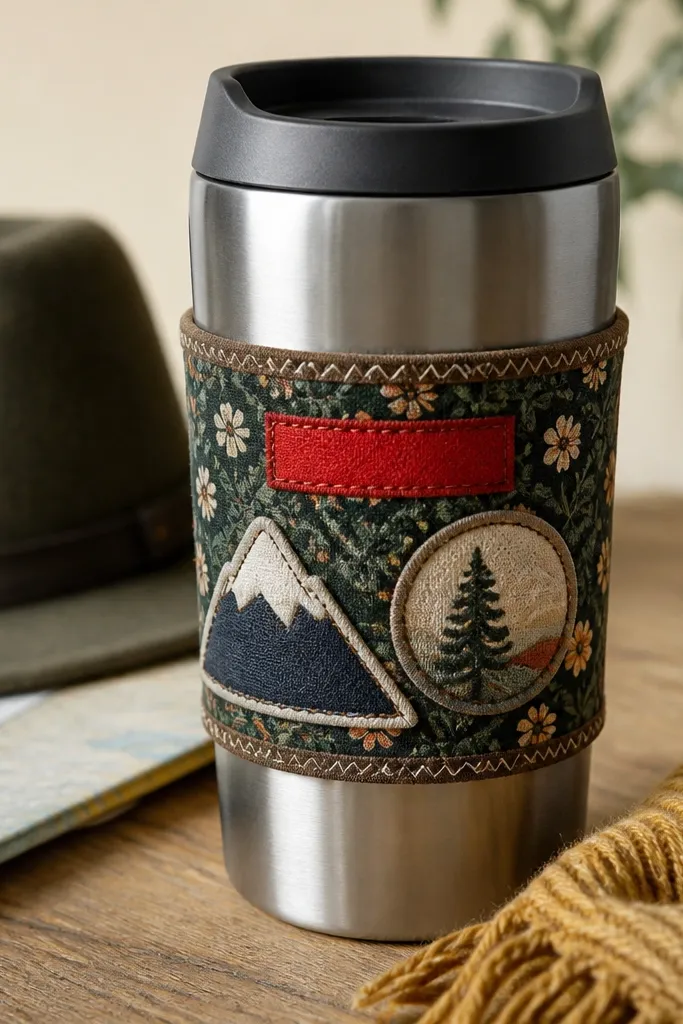
Start with a plain sleeve base in solid black or denim, cut to wrap the mug and stitched at the back seam. Cut a patch band rectangle about 4 inches tall and long enough to wrap with a 1-inch overlap. Sew the band onto the sleeve first so you have a stable surface. Iron on letters to a small fabric rectangle, then stitch the rectangle onto the band. Add two or three patches around the letters and stitch their edges to lock them in.
Patch bands look great because they create a single focal area instead of decorating every inch. Iron-on letters add a personal touch fast, and sewing the patches keeps them from peeling off after the mug gets tossed in a bag. I like this for commuters who want to show a name, a favorite line, or a team without going full character costume. The band also makes the mug look intentional even if your base sleeve is plain. This works well for most skin tones because the colors sit away from your hand grip.
AvoidIroning letters directly onto knit without stabilizer — they peel and bubble.
Pro tipStitch around patch edges with matching thread — it makes store-bought patches look hand-made.



