
1. Terracotta Ladder Tray With Two Brass Diyas
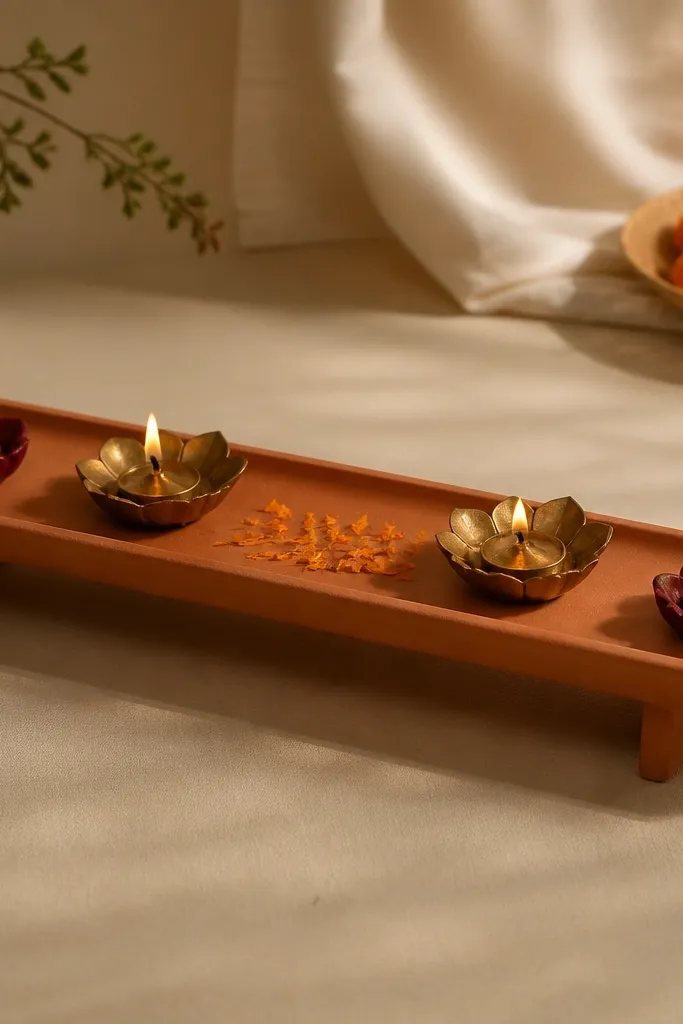
Start with a ladder tray about 12-16 inches wide, then place it on a flat surface away from drafts. Set the taller brass diya in the exact center and the second diya about 3-4 inches to the right, aligning both rims at the same height. Add maroon tea-light cups on the left and right edges, then scatter a thin line of marigold petals between the center diya and each cup. Finally, add one small pinch of dried green leaves near the front edge so the flame has a natural backdrop.
This look works when you want cozy warmth without clutter. I use a terracotta tray because it soaks up extra shine and makes brass look deeper, almost like antique. Put two brass diyas — one slightly taller than the other — so your eye has a rhythm. Maroon tea-light cups frame the flame and keep the glow from washing out. This setup looks great in living rooms with warm beige or walnut tones and it photographs well because the tray gives a clear shape behind the light.
AvoidDon’t crowd the tray with too many pieces; more than five items beside the diyas starts to look like a craft pile.
Pro tipDust the brass with a dry cloth before you place it — fingerprints make the brass look dull in daylight.
2. Matte White Plate Halo With Floating Flower Diyas
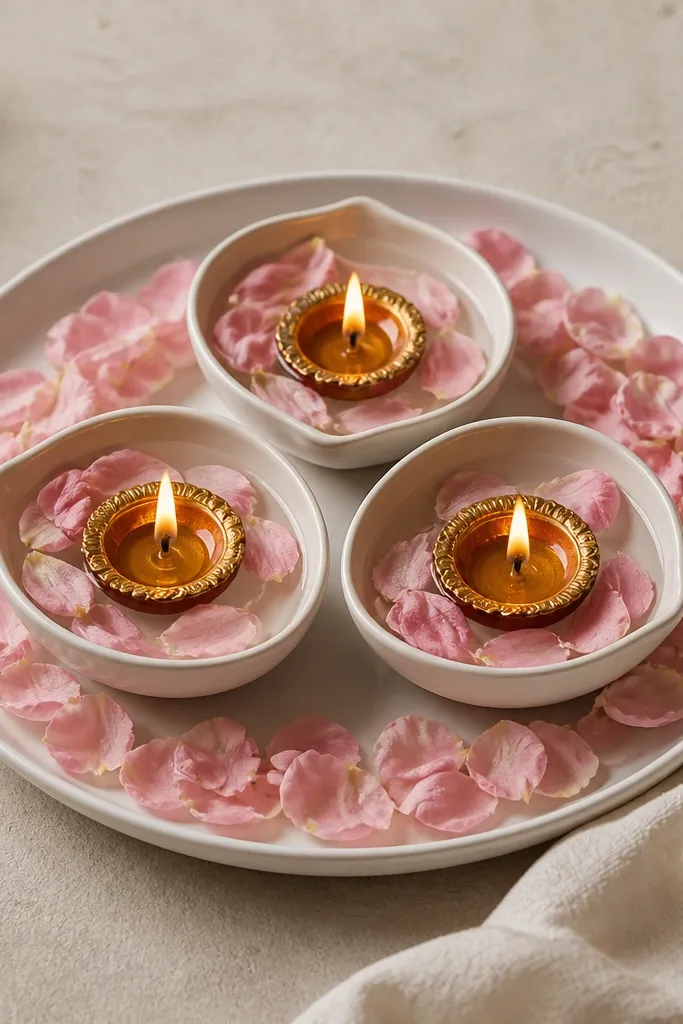
Place a matte white plate on a tablecloth or runner, then set three shallow bowls in a triangle around the center. Pour a thin layer of water into each bowl and float a small diya in each one, keeping the wicks trimmed to about 1/4 inch. Create a ring of pale pink rose petals around the plate edge, leaving a clear gap in the middle so the flames stay visible. Finally, add one tiny tea-light size diya at the center if you want extra brightness, but keep it lower than the floating ones.
If your space feels dim or grey, matte white is the quickest fix I’ve found. The white plate makes the flame look brighter and cleaner, and water reflections add a soft halo that looks expensive. I use floating diyas — small, shallow ones — so the light stays centered and doesn’t overpower the petals. Pale pink rose petals create a gentle contrast that works on warm skin tones for photos because the glow doesn’t fight with strong reds. This is a great setup for dining tables and sideboards where you want calm, not loud.
AvoidAvoid using bright red petals with white if you want a soft halo; it turns the look harsh in photos.
Pro tipTrim wicks to reduce smoke — a clean flame makes the reflection look sharper.
3. Jute Runner With Centered Single Diya and Fringe Frame
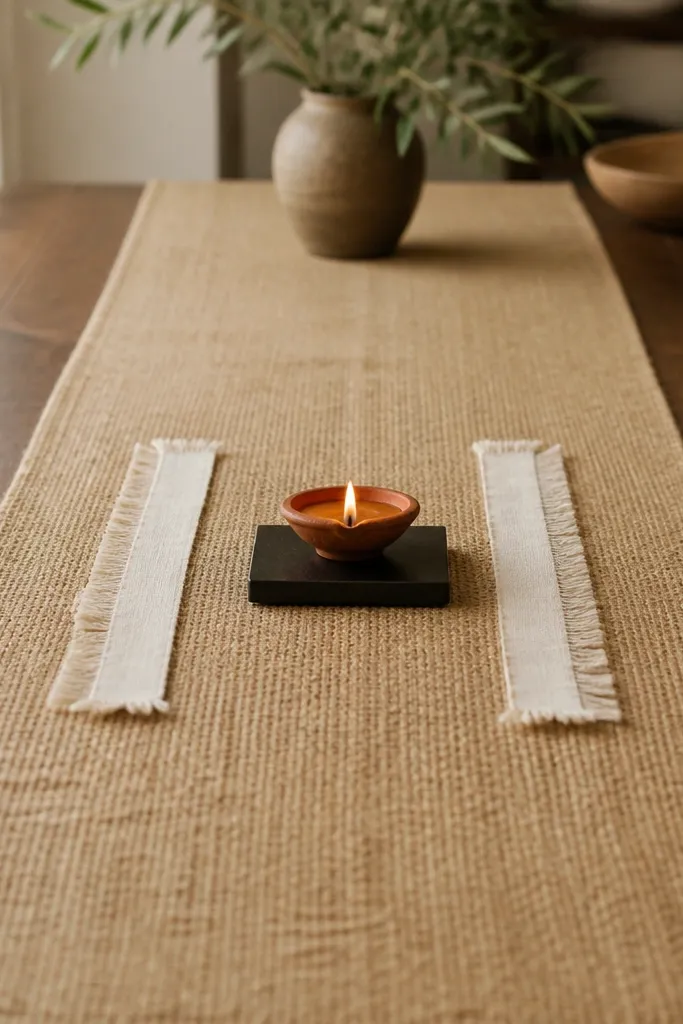
This is my go-to when I want “cozy” without stacking ten decorations. Jute has texture that catches light in a slow, warm way, and it hides small imperfections on tables. A single diya keeps the look modern and calm, while the fringe fabric adds motion and softness around the flame. I like black or dark brown for the diya base because it anchors the glow and prevents the flame from blending into the jute. This setup looks best in rooms with neutral walls and it flatters warm-toned decor because jute doesn’t fight with beige, cream, or wood.
Lay a jute runner lengthwise and center it so the ends hang evenly. Place a small black diya holder or metal cup in the exact center of the runner, then set one diya on top. Cut two fabric strips from a darker solid — about 8-10 inches wide each — and fold them into soft fans on the left and right of the diya. Add a thin line of dried eucalyptus or bay leaves behind the diya so the flame has a vertical backdrop, then keep everything else off the runner.
Use fabric fray scissors on the ends so the fringe looks intentional, not cut straight.
Don’t place the diya too far forward; if the flame sits near the table edge, it looks accidental and feels unsafe.
4. Mirror Tray With Brass Candlestick Diyas
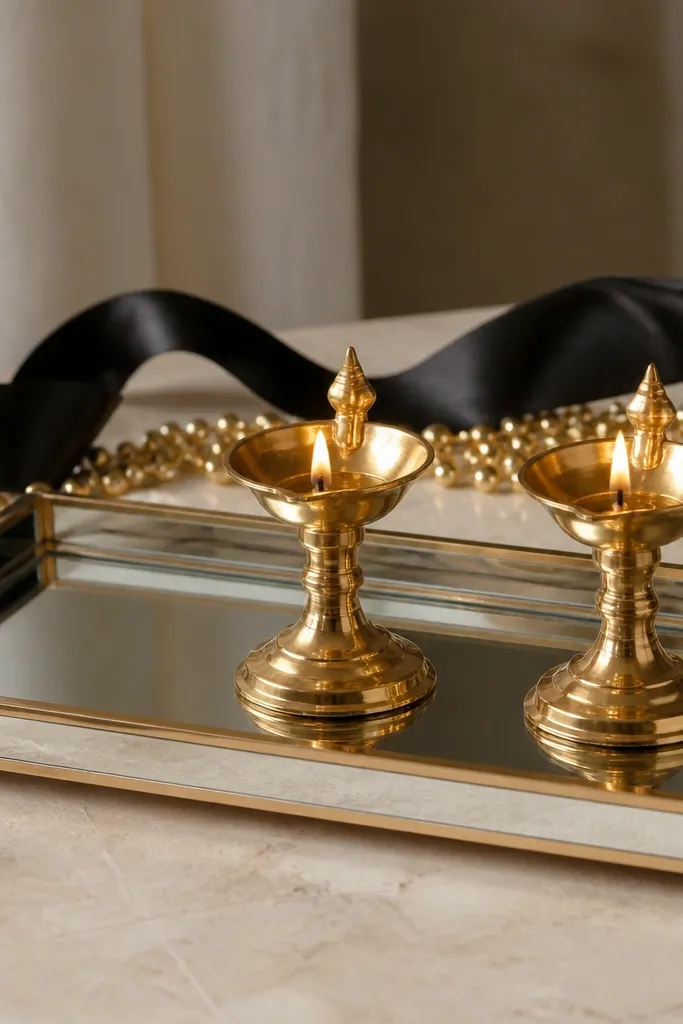
Start with a rectangular mirror tray, then wipe it clean so you don’t get smudges. Place a strip of black satin along the back edge, leaving a gap in front for the flames. Set two brass candlestick diyas about 6-8 inches apart and center them along the tray’s width. Scatter gold beads lightly in the front corners — just a few clusters — and add a thin line of dried leaves between the satin and the diyas. Keep the diya wicks trimmed so the flame stays steady and bright.
Mirror trays are the fastest way I’ve found to make diya light look fuller in a room. The mirror reflects the flame and turns two diyas into a richer glow without adding more candles. I use brass candlestick diyas because their vertical lines make the reflections look clean instead of messy. A strip of black satin at the back adds contrast so the mirror doesn’t make everything look washed out. This looks great in entryways and dining spaces where you want a little drama, but still cozy.
AvoidDon’t add lots of loose glitter; it sticks to the mirror and looks messy under warm light.
Pro tipKeep the mirror dry — condensation makes the reflections cloudy and kills the effect.
5. Banana Leaf Base With Oil Lamp Cluster
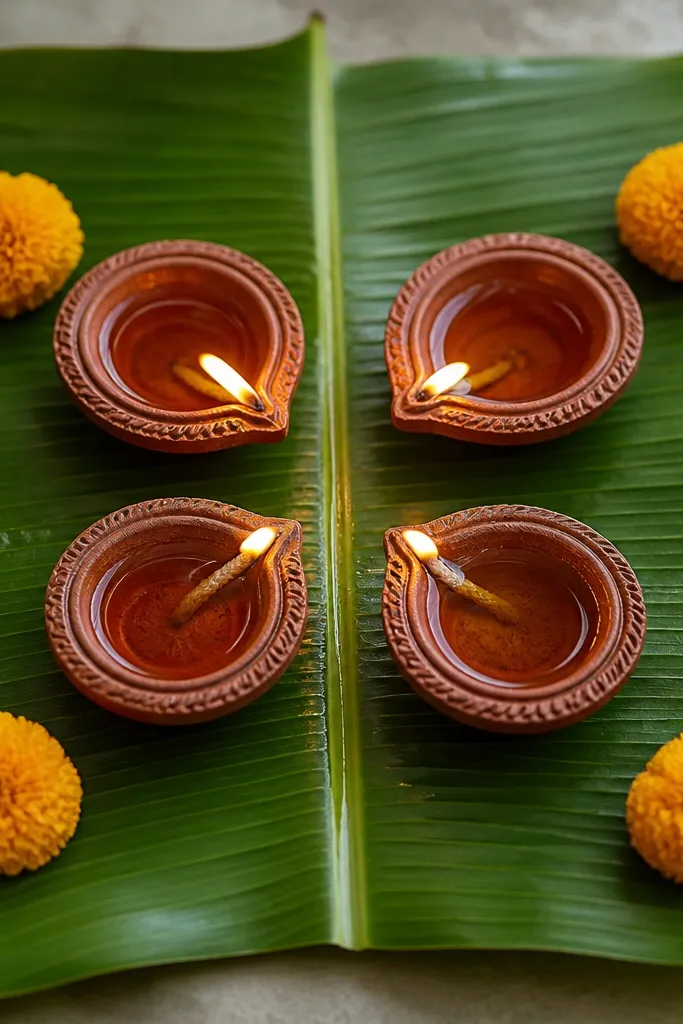
Flatten a banana leaf and place it on a heat-safe tray or directly on a protected surface. Arrange four small oil lamps in a square, keeping equal spacing — about 2-3 inches between rims. Add one marigold blossom near each corner of the square, not touching the flames. Sprinkle a few small green leaves around the edges of the banana leaf so the base looks full. Trim wicks to about 1/4 inch and test the placement so nothing drips onto the leaf.
Banana leaf gives you an instant organic backdrop, and it makes flame color look warmer. I’ve used it for Diwali and for simple weekday dinners when I wanted the table to feel special without buying a new centerpiece. Four oil lamps in a square arrangement reads balanced, especially if your table is symmetrical. Marigold blossoms at the corners make the light feel intentional and festive. This works best when your home decor is wood, cane, or earthy neutrals because the leaf blends naturally.
AvoidDon’t use too much loose flower confetti; it can drift into the flame area.
Pro tipIf the leaf curls, mist the back side lightly with water and weigh it for 10 minutes before styling.
6. Pink Ombre Rangoli Paper Under Glass Diyas
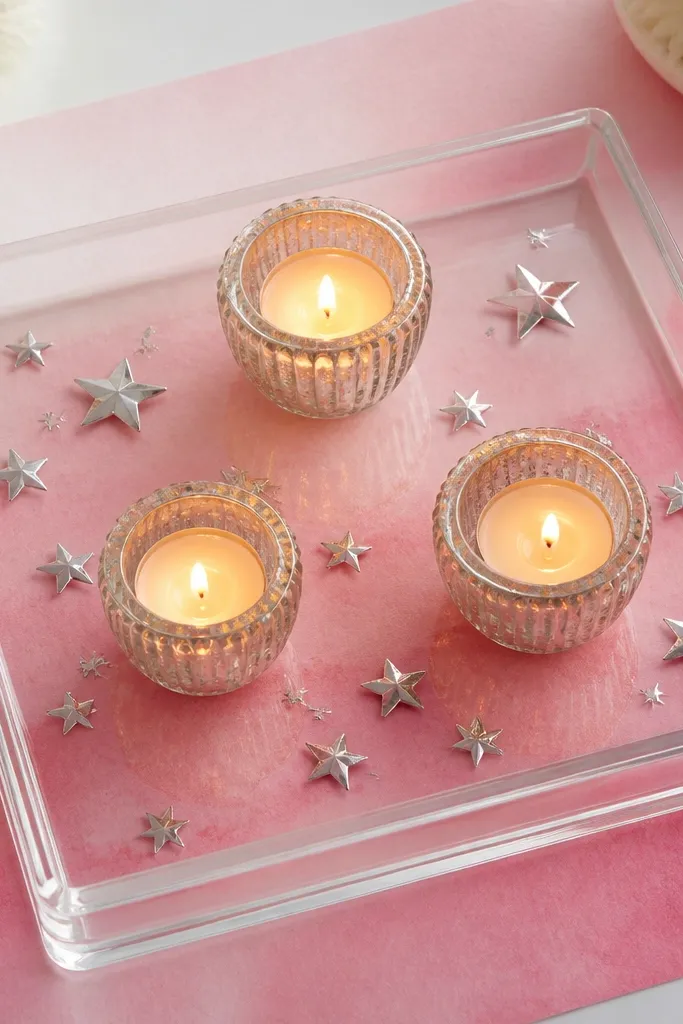
Cut a piece of rangoli paper to fit inside a clear glass tray, leaving about 1/2 inch border. Place the paper at the bottom and press it flat. Set three small diyas inside glass holders in a triangle arrangement, keeping equal spacing so the glow stays balanced. Add tiny silver star stickers or small foil confetti at the corners — keep it away from the wicks. Light the diyas and check from above; adjust the holders so reflections line up with the center of the ombre.
This is a photo-friendly trick I learned the hard way after my first diya setup looked flat from above. A printed or hand-drawn rangoli paper underneath gives you a layered “floor” for the flame. Pink ombre is forgiving because it doesn’t overpower the orange-gold flame color. Clear glass holders keep the flames centered and add a crisp outline, so your diyas look intentional even from a distance. Use this when you want a cute, soft look for birthdays, housewarmings, or spring evenings.
AvoidAvoid placing diyas too close together; the flames will fight and smoke more.
Pro tipUse matte paper, not glossy — glossy reflections can create harsh glare.
7. Cedar Wood Slab With One Tall Diya and Side Tealights
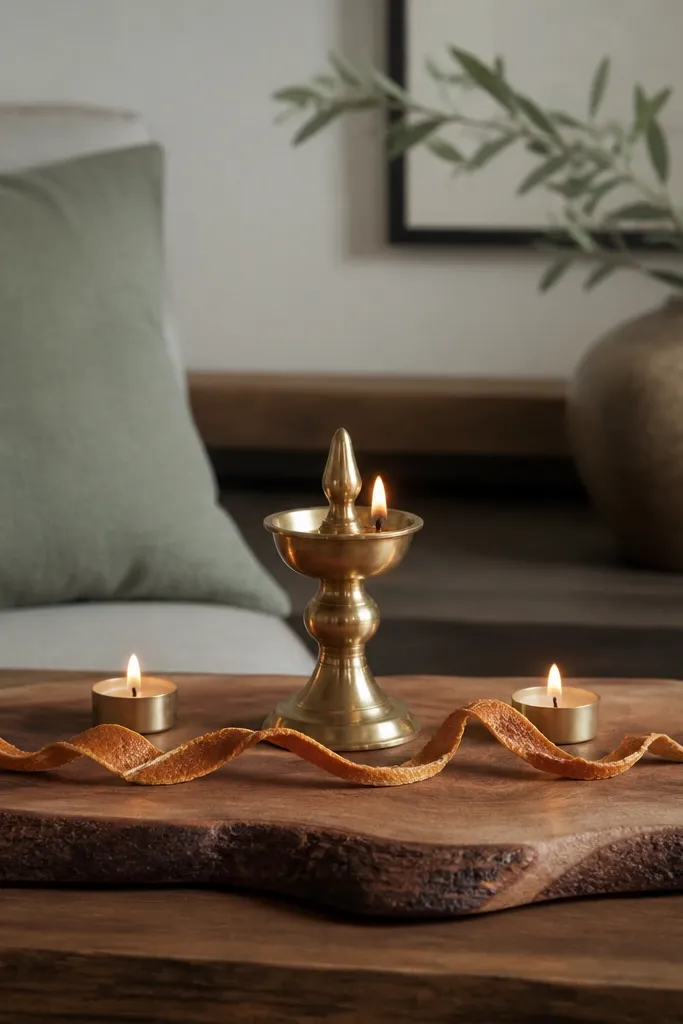
This one is for people who like clean lines. A cedar slab makes the center diya look grounded, and the tall flame creates a vertical focal point that feels elegant without extra decor. Side tealights fill the space around the tall diya so it doesn’t look lonely. Dried orange peel adds a warm color accent and smells great when it catches a little heat. This setup looks especially good in rooms with dark wood furniture or black accents.
Place a cedar wood slab about 16-20 inches long on a heat-safe mat. Put one tall diya in the center, aligned with the slab’s grain direction. Add two tealights about 6 inches left and right, keeping them lower than the tall diya so the tall one stays the hero. Wrap a thin ribbon of dried orange peel along the front edge of the slab, then tuck one small pinch of cinnamon sticks behind the diya base. Light everything and wait 2 minutes to see how the peel color warms under flame.
Wipe the slab dry before lighting — cedar oils can smoke if they’re wet.
Don’t use synthetic “potpourri” blends with unknown oils; they can burn unevenly.
8. Deep Green Velvet Tray With Gold Foil Leaf Diyas
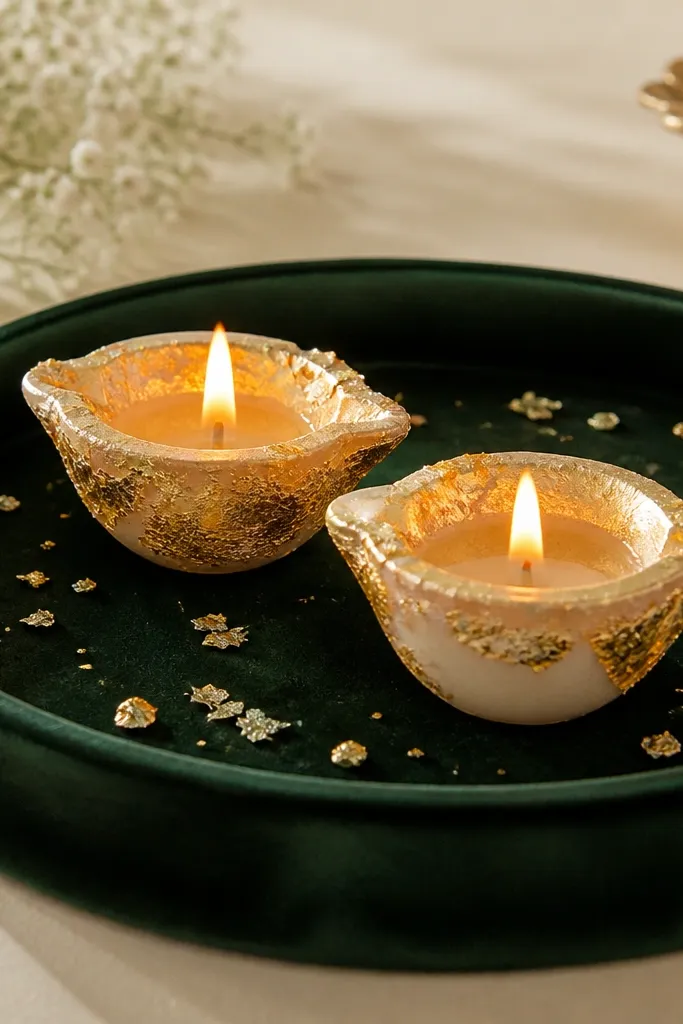
Line a shallow tray with deep green velvet — leave the edges smooth, no wrinkles. Place two diyas about 8 inches apart, centered on the tray, and keep their wicks trimmed. Add gold foil leaf pieces behind and slightly to the sides of each diya so the foil peeks out from the back. Sprinkle gold flecks lightly near the front edge, then stop — you want a few points, not a full layer. Turn off overhead lights for 10 minutes and check how the velvet deepens the glow.
Velvet makes diya decor look expensive because it absorbs stray light and frames the flame. Deep green is my favorite because it’s dramatic without turning the room into a holiday theme. Gold foil leaf accents catch the flame glow and make the light look warmer and more dimensional. I like two diyas here because the velvet background makes them read as a pair. This is a strong choice for living rooms with dark curtains, navy cushions, or brass picture frames.
AvoidAvoid cheap glitter; it sheds and looks dusty on velvet.
Pro tipUse fabric-safe glue on the foil leaf so it doesn’t shift when you move the tray.
9. Coir Mat With Floating Diyas in Glass Bowls
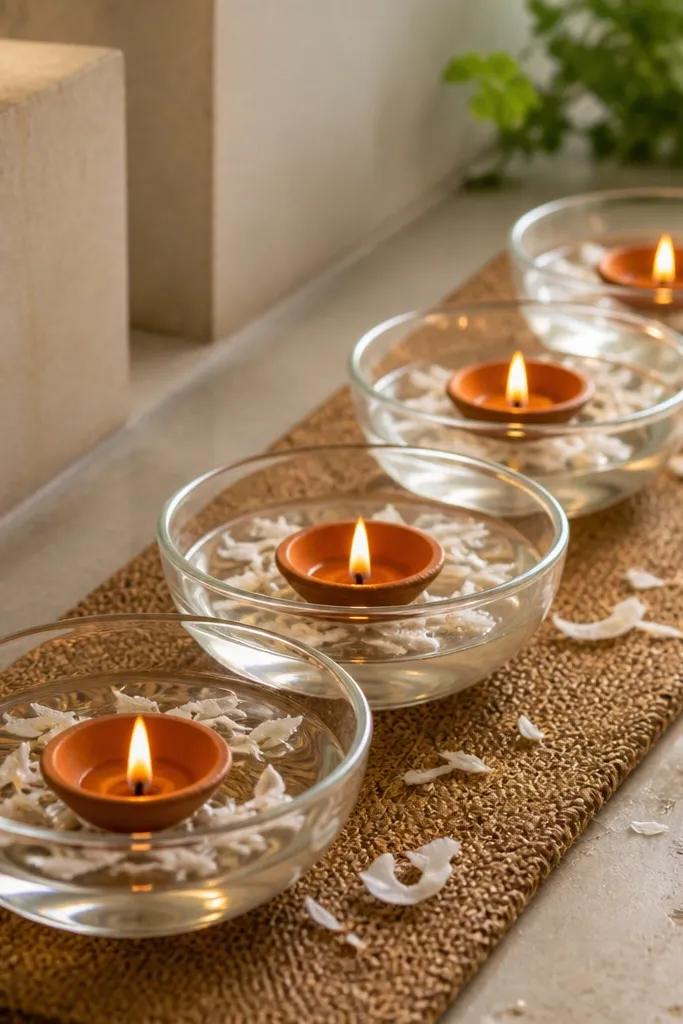
Coir has a rough texture that makes the flame look softer and more grounded. This look is great for coastal homes or anyone who likes natural fibers. Floating diyas keep the flame stable and stop it from tipping, and glass bowls make the water reflection visible. Coconut shavings add a warm beige accent that pairs well with gold and terracotta. It’s also practical — you can reuse most parts year after year.
Cut a coir mat piece to fit under a line of glass bowls, then place it on a stable tray or table. Pour shallow water into each bowl and place a small floating diya in the center. Arrange three or four bowls in a straight line, spacing them 3-4 inches apart. Scatter a few coconut shavings around the coir mat edges, keeping them away from the bowl rims. Turn on a warm lamp nearby to reduce harsh contrast and check that the reflection shows up.
If the floating diya drifts, use a slightly smaller bowl so it sits closer to the center.
Don’t fill the bowls too high — water spills ruin the coir look fast.
10. Terracotta Pot Feet With Mini Diyas on a Wood Round
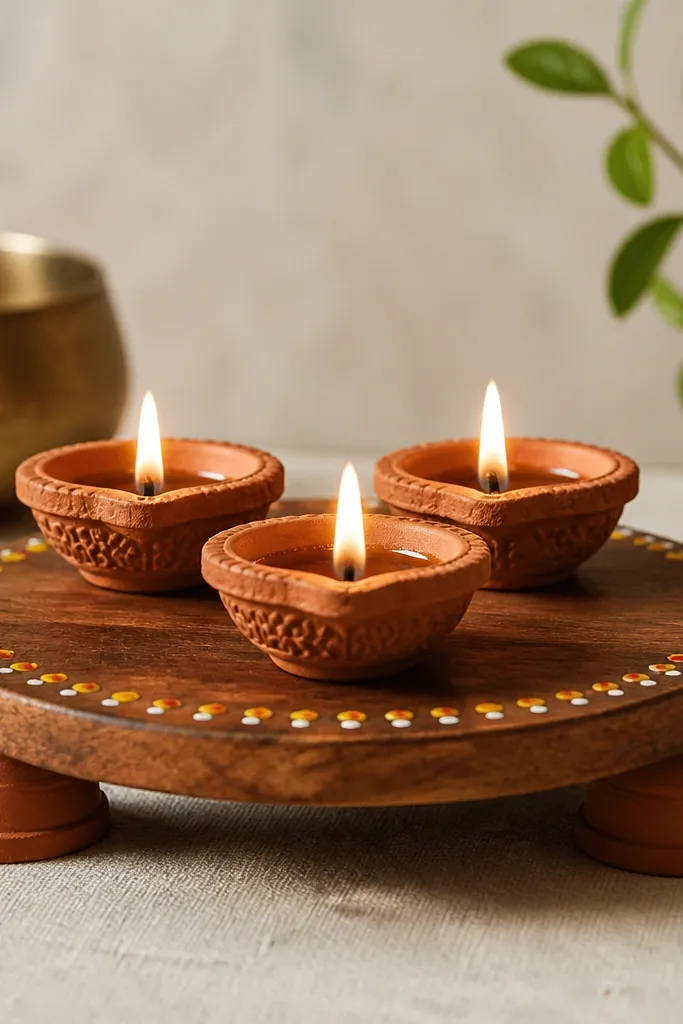
Start with a round wood board 10-12 inches wide and sand the top lightly if it’s rough. Place three terracotta pot feet in a triangle pattern, then put a mini diya on each foot. Keep the flames evenly spaced so the triangle reads clearly. Paint tiny dots or small dashes around the outer edge of the wood board and let them dry fully before lighting. Light the diyas and adjust the angle so each mini flame faces the room.
This one is playful but still tidy. Using terracotta pot feet as risers creates height variation without building a complicated structure. Mini diyas look cute here because the risers keep them from sinking visually into the wood. Painted dots — even simple white paint — give a handcrafted vibe that feels intentional. It works well for kids' rooms during festivals and for small apartment corners where you don’t have space for a tall centerpiece.
AvoidAvoid glossy paint; it looks like craft store sticker dots under warm flame.
Pro tipUse a matte white acrylic for the dots so they don’t reflect glare.
11. Black Stone Slab With Single Diya and White Pebble Ring
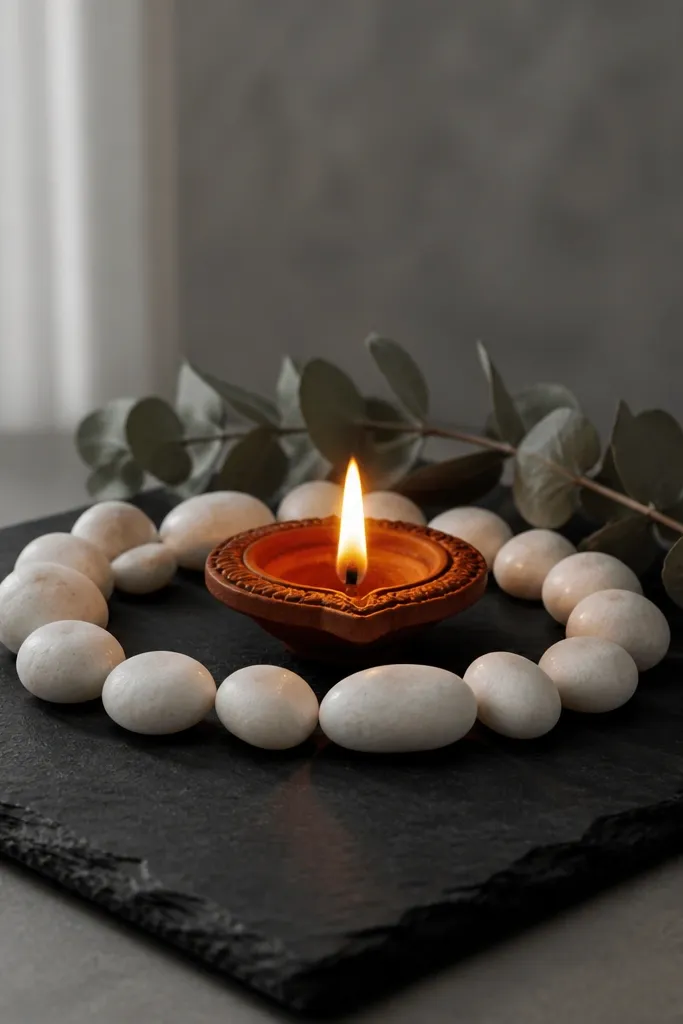
This is the clean, modern version of diya decor. A black stone slab makes the flame pop, and the white pebble ring gives a crisp outline that reads from across the room. I keep it to one diya because the contrast does the heavy lifting. Gray leaves in the back add softness without adding clutter. This look flatters minimalist homes and it looks sharp in photos because the pebble ring creates a clear frame around the flame.
Place a black stone slab on a heat-safe base and wipe it dry. Center one diya in a small metal cup on the slab. Arrange a circle of smooth white pebbles around the diya, leaving a 1-2 inch gap so the flame stays clear. Tuck two or three gray eucalyptus leaves behind the diya so they peek out from the top of the pebble ring. Light the diya and step back — the ring should look even, not lopsided.
Choose pebbles with similar sizes so the ring looks uniform.
Don’t use tiny jagged gravel; it looks messy and sheds dust onto the flame area.
12. Rose Gold Tray With Three Votives and Dusty Pink Fabric Wrap
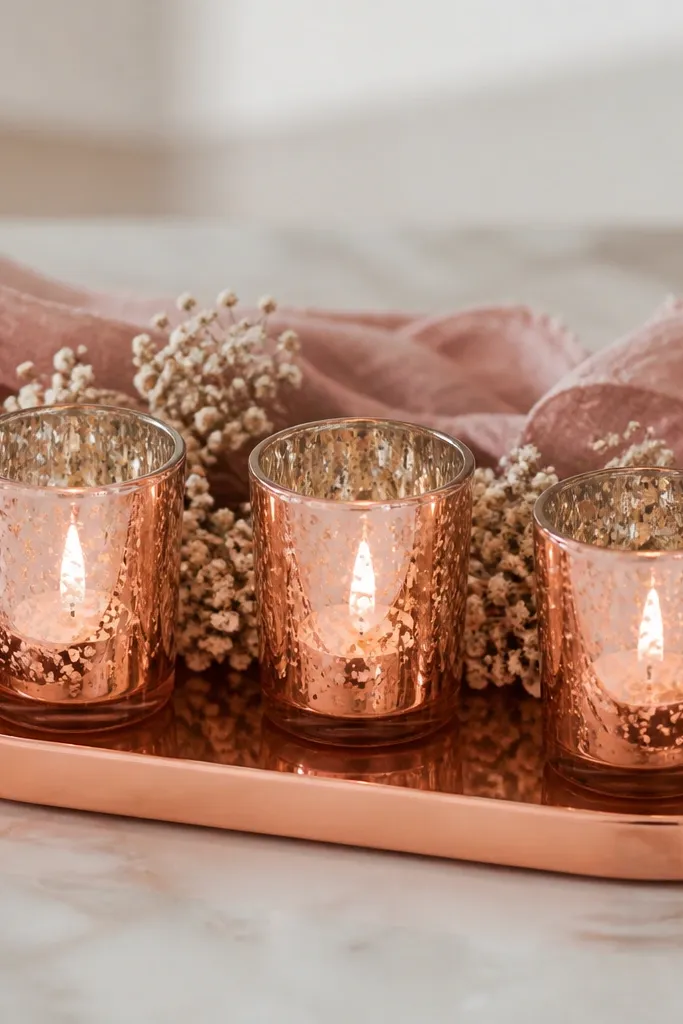
Place a rose gold tray on a dresser and wipe it so it’s mirror-clean. Wrap dusty pink fabric strips along the back edge of the tray, letting the ends drape down about 1-2 inches. Set three votive cups in a row, evenly spaced, and keep the center cup slightly higher if you have risers. Tuck dried baby’s breath between the center and side cups, not directly under the flames. Light the votives and check that the fabric doesn’t touch the heat stream.
Rose gold + dusty pink is a combo that looks romantic without turning childish. The rose gold tray warms the flame color and makes the votives look coordinated. Three votives in a line create a simple rhythm that looks neat on a console or dresser. I add dried baby’s breath because it’s airy and doesn’t fight the flame — it stays delicate in the glow. This setup works beautifully for a bedroom corner, a small entry shelf, or a dinner table with pink or blush accents.
AvoidDon’t use satin; it reflects too much and makes the glow look uneven.
Pro tipUse fabric that’s cotton or linen — it holds drape without melting or curling.
13. Candle-Grade Spices Tray With Cinnamon Sticks and Diyas
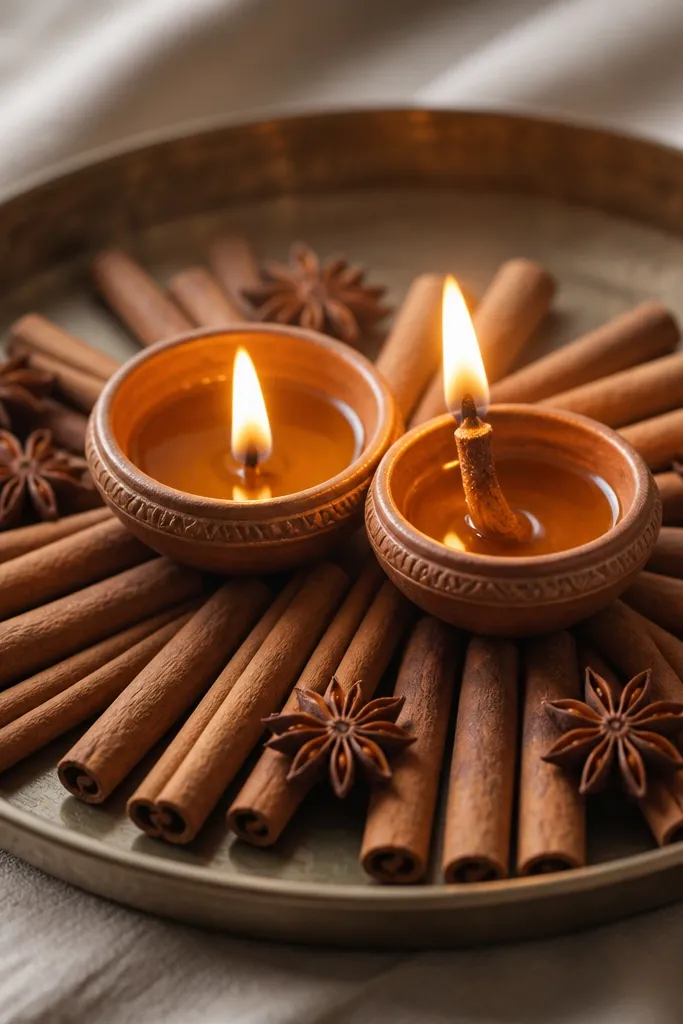
Use a shallow metal tray about 14-18 inches wide and line it with a thin, heat-safe layer like parchment paper. Place two diyas in the center, spaced 4-5 inches apart. Arrange cinnamon sticks around them in a loose fan, with tips facing outward. Add 2-3 star anise pods at the front corners so they catch the glow. Light the diyas and keep cinnamon sticks at least 2-3 inches away from wicks so they don’t scorch.
This diya setup smells like you planned it. Cinnamon sticks create a warm brown frame, and star anise adds one dark focal point that makes flames look richer. I use a shallow metal tray because it conducts heat and wipes clean if anything spills. Two diyas in the center keep the look balanced and not overcrowded. This is perfect for winter nights when you want your home to feel cozy before guests even step inside.
AvoidAvoid using ground spices directly around the flame; they blow around and look dusty.
Pro tipBreak cinnamon sticks in half if they’re too long — long sticks can look like clutter in photos.
14. White Lace Runner With Gold Bead Edge Diyas
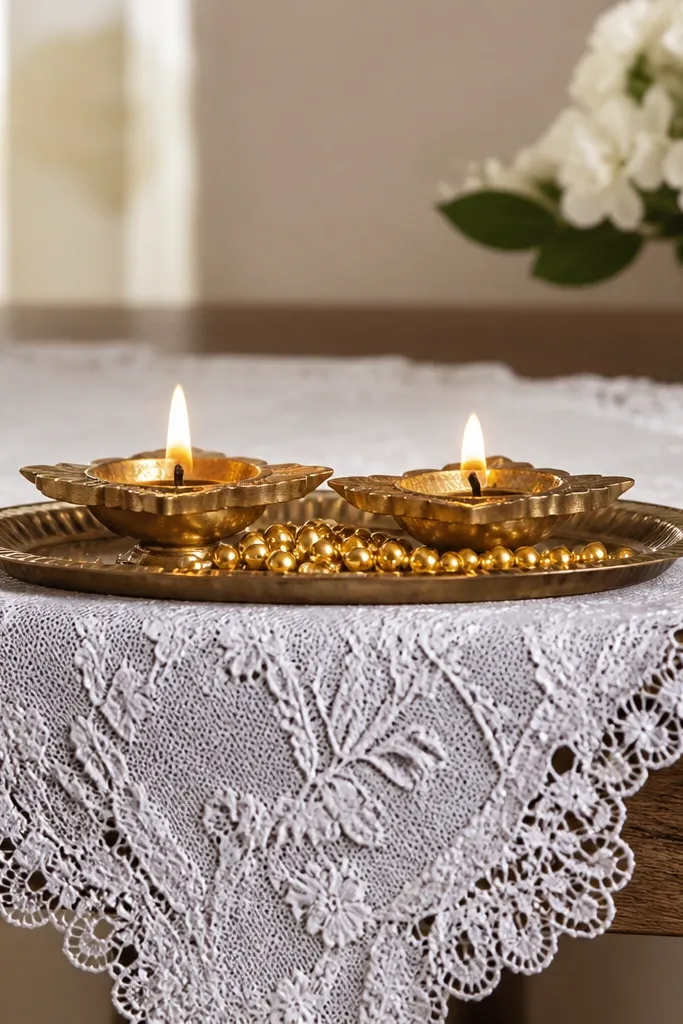
Place a white lace runner across the table edge and fold it neatly so it doesn’t bunch. Set a small metal tray on top and keep it centered. Put two diyas in the middle, spaced 5-6 inches apart, and ensure both wicks are trimmed. Sprinkle gold beads in a thin line along the front edge of the tray only, then tuck a small sprig of greenery behind the tray. Light the diyas and check that the beads don’t roll into the flame area.
Lace makes diya decor feel soft and airy, and it’s the easiest way to make a simple diya look styled. A white lace runner with a small tray keeps the look delicate instead of messy. Gold beads at the tray edge add sparkle without needing glitter. I use two diyas so you get symmetry and a fuller glow. This looks best in bright rooms with cream curtains or light walls because the lace shows up clearly during both day and night.
AvoidDon’t drape lace directly near open flames; keep fabric at least several inches away.
Pro tipUse a shallow tray with raised edges so beads stay put when you move the table.
15. Monochrome Black-and-White Diyas With Stenciled Paper Backdrop
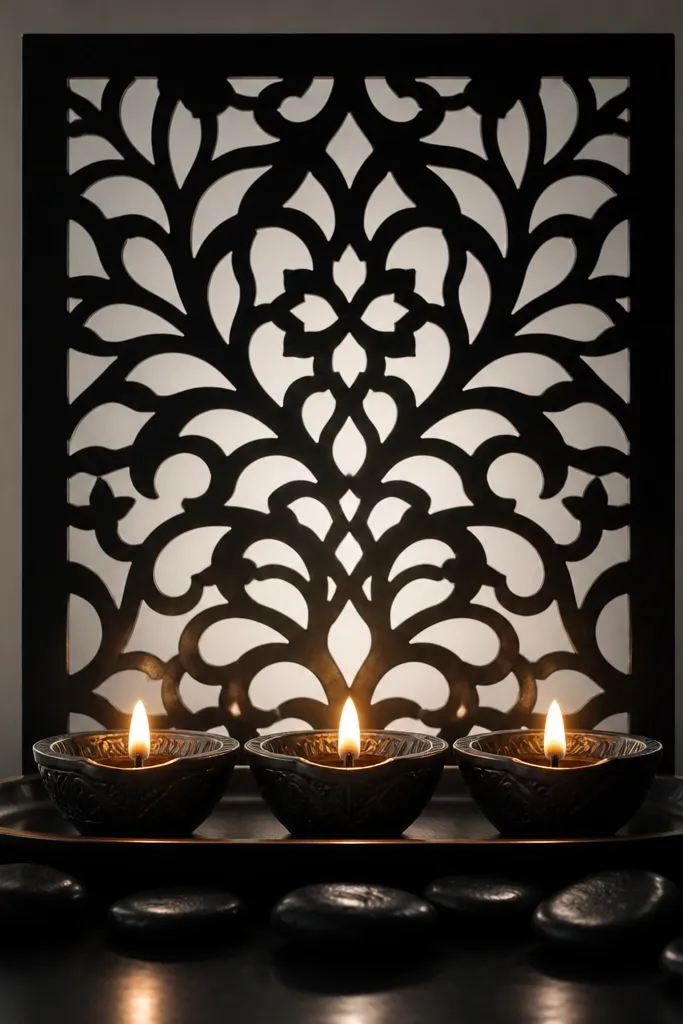
This setup is for when you want a modern, graphic look. A stenciled black-and-white paper panel gives the flames a crisp backdrop so the corner doesn’t look empty. Three diyas in a triangle — one center, two slightly lower at the sides — reads balanced and intentional. Black stones in front add weight and stop the look from feeling too flat. It works for apartments and for anyone who likes decor that doesn’t scream “festival,” but still feels warm.
Cut stenciled paper to fit the width of a tray, then prop it upright behind the tray using a small stand or thick cardstock. Place three diyas on the tray in a triangle arrangement, keeping the center about 1-2 inches higher if you have a small riser. Add a small scatter of black stones at the front edge — just 6-8 stones so it stays clean. Keep the paper dry and away from flame heat. Light the diyas and use a warm lamp from the side so the stencil lines show up in photos.
Use matte paper so the stencil lines don’t glare under warm light.
Avoid busy multicolor paper; it fights the flame color and makes the setup look chaotic.
16. Green Leaf Garland Loop With Hanging Diya on a Hook
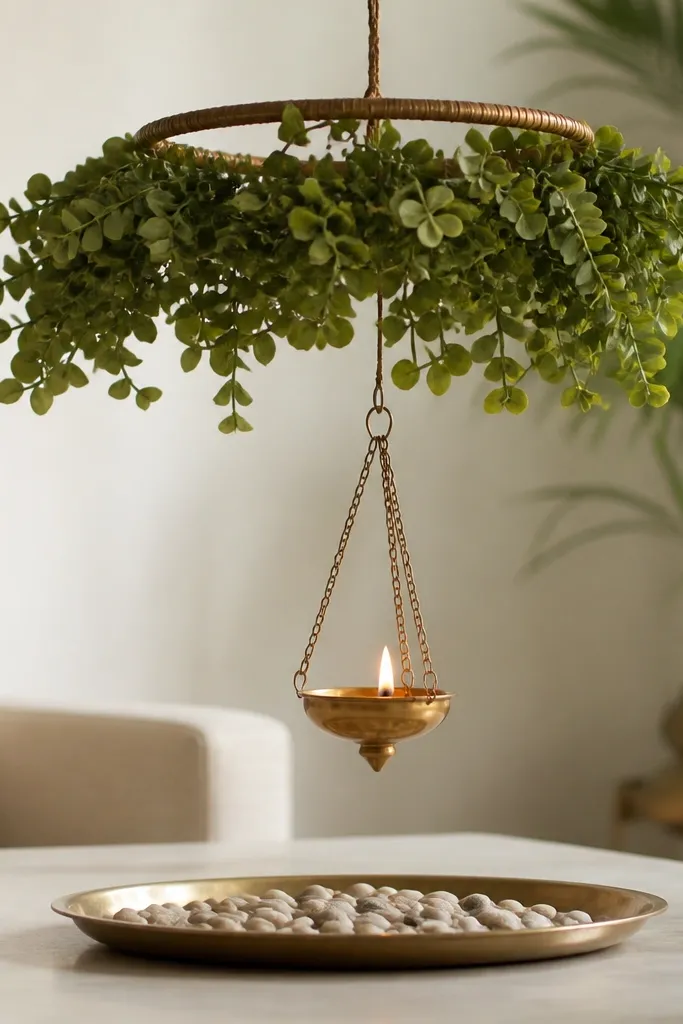
Secure a hook above a safe spot over the table and hang a loop of faux green leaves so it forms a circular frame. Place a heat-safe tray or metal plate below to catch any drips, then center it under the diya. Use a sturdy diya holder with a chain or hook so the diya stays level. Keep the flame about 10-12 inches below the leaf tips so leaves don’t heat up. Add a few pebbles on the tray to make the base look styled, then light and watch the leaf spacing for the first minute.
Hanging diya decor changes the whole vibe because the flame is at eye level instead of sitting low. The leaf garland loop adds a soft frame and makes the flame feel like it’s floating. I use a single hanging diya here because the height is already doing the work. Faux leaves are easier than real ones if you want it to last more than one night. This is great for balconies, entry alcoves, and homes where you want a cozy focal point without taking up table space.
AvoidDon’t hang near curtains or wall art; a hanging flame changes the risk zone.
Pro tipUse a short chain so the diya doesn’t swing with movement in the room.
17. Saffron Fabric Fan With Three Diyas and Brass Rings
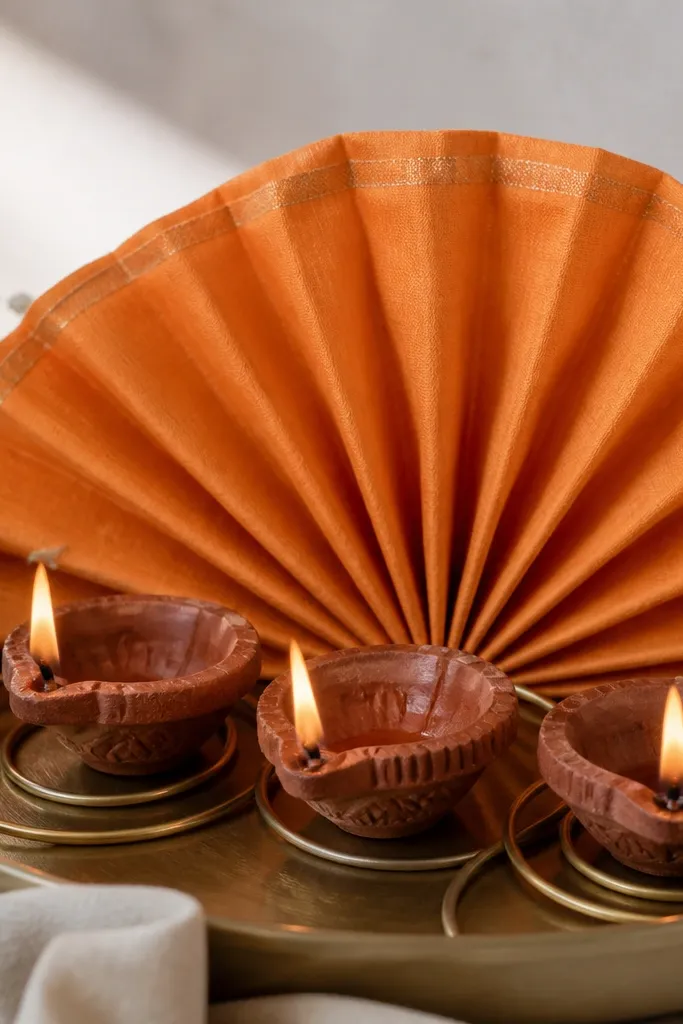
Saffron fabric gives instant festival energy, but the trick is keeping it structured. A fan shape behind the diyas gives a clean backdrop, and brass rings add a metallic frame that looks intentional. Three diyas — one center and two slightly forward — create depth. This look flatters warm skin tones in photos because saffron doesn’t clash with gold flame color. It’s also a good pick when you want something that feels celebratory but still tidy on a console.
Fold saffron fabric into a fan and pin it to a stiff backing so it stands upright behind the tray. Set three diyas on the tray: center one in the middle and the other two about 4 inches to left and right. Place thin brass rings around each diya base like partial halos, leaving gaps so the flames stay visible. Add one small cluster of dried marigold on the front edge of the tray. Light the diyas and adjust the fan so it doesn’t touch the heat zone.
Stiffen the fabric with a quick iron-on interfacing so it stays crisp all evening.
Avoid loose fabric bunches; they can look messy and block the flame line of sight.
18. Blue Ceramic Bowl With Floating Diyas and White Lily Petals
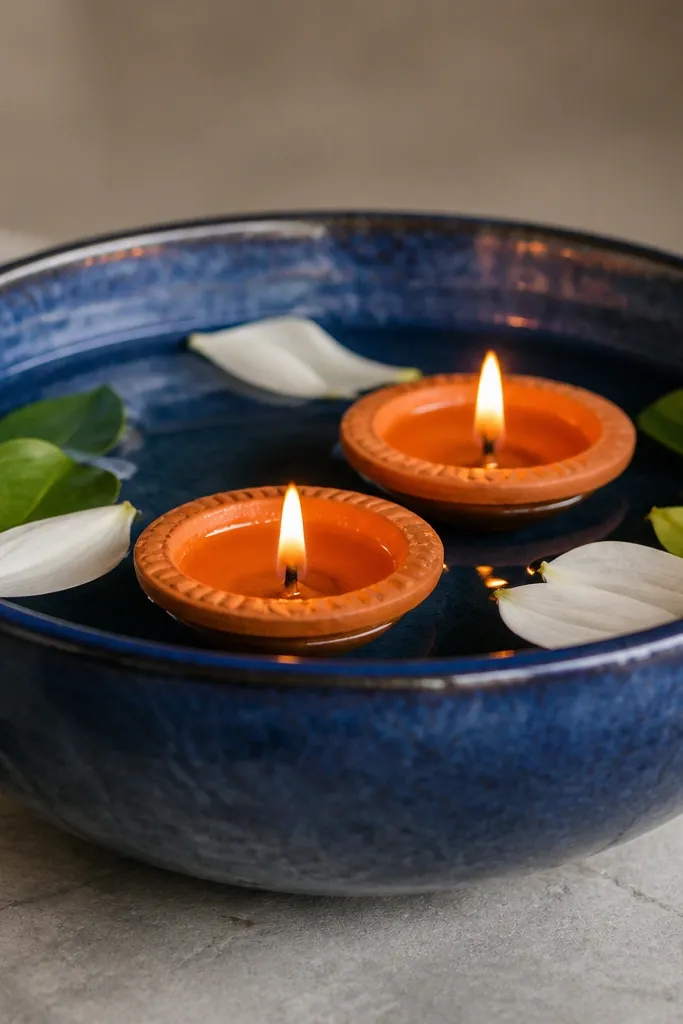
Choose a large blue ceramic bowl that’s stable and heat-safe. Fill it with water to a shallow depth, then float two small diyas so they stay about 3-4 inches apart. Add white lily petals around the sides of the bowl, not directly on top of the flames. Place a few green leaf pieces at the edge to frame the petal ring. Light the diyas and watch the water — if the petals drift too close, add one more small leaf barrier near the center.
Blue ceramic makes the flame look even warmer because it adds a cool backdrop. Two floating diyas in one bowl is simple, elegant, and it doesn’t require building a whole tray system. White lily petals give a clean, fresh look that feels calm rather than heavy. I like this for summer evenings because it looks light and airy, even when the room is dim. It’s also forgiving if your home has mixed decor, since blue and white play well with most neutrals.
AvoidDon’t overfill the bowl; splashes make the white petals look dirty under warm light.
Pro tipUse petals that are dry but not dusty; wet petals can cloud the water fast.
19. Sand Tray With Glass Marbles and Mini Diyas
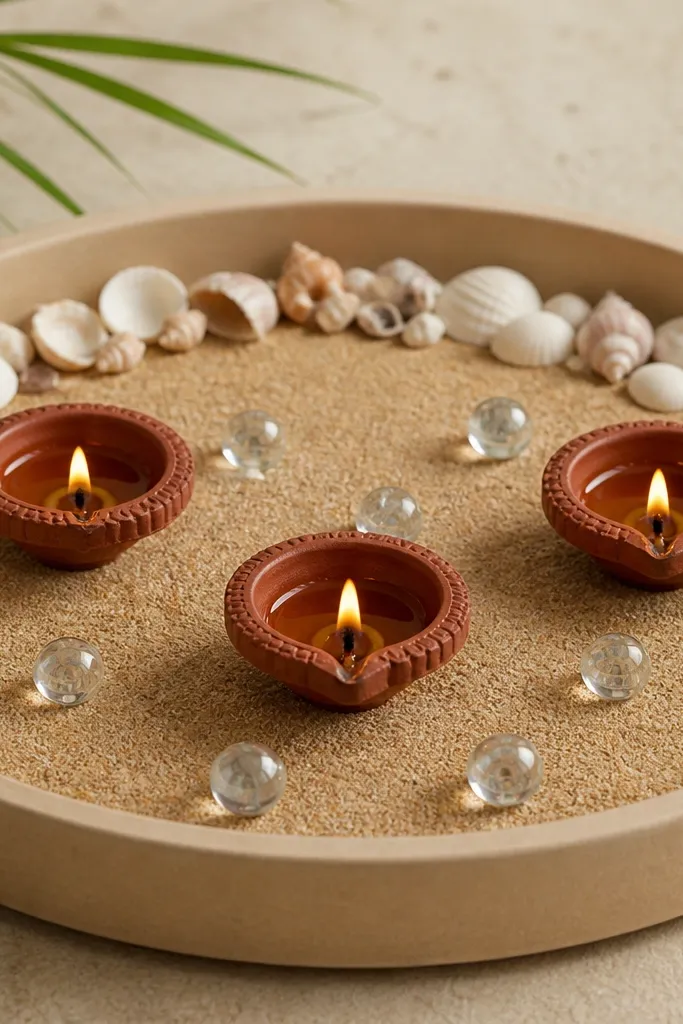
Use a shallow tray and pour in a thin layer of clean sand, about 1 inch deep. Place three mini diyas in a triangle, pressing them gently so they stand straight. Scatter clear glass marbles around the front and sides, keeping a clear 2-inch radius around wicks. Add a thin line of tiny sea shells at the back edge for a background accent. Light the diyas and wait 30 seconds, then adjust any marbles that shift so the arrangement stays balanced.
Sand plus glass marbles makes the flame look like it’s glowing from inside a little scene. This is a fun transformation because it looks beachy and cozy at the same time. Mini diyas are perfect since the sand texture gives them a stage and the marbles add reflective points without needing metallic decor. I use three diyas so you get symmetry without crowding. This look works well for coastal-themed homes and for summer gatherings where you want something playful but still polished.
AvoidDon’t use colored sand; it competes with the flame and makes the glow look muddy.
Pro tipChoose marbles with no foggy coating so reflections look crisp.
20. Black Tray With White Candied Coconut Pieces and Diyas
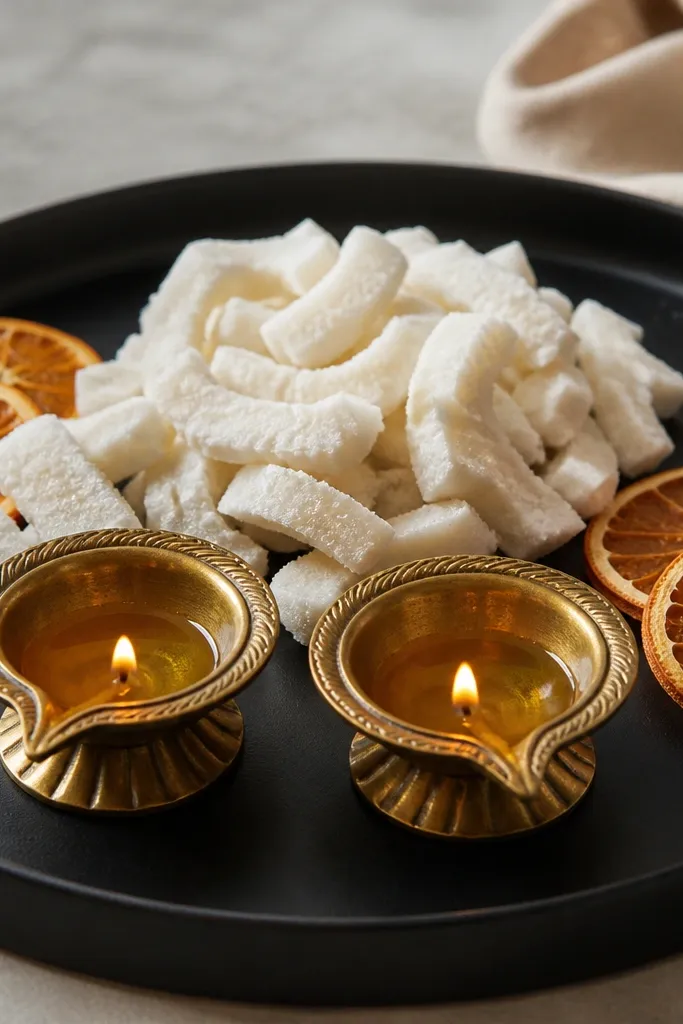
Start with a matte black tray about 14-18 inches wide. Place two diyas in the center with equal spacing, and keep their wicks trimmed. Build a small mound of candied coconut pieces at the back half of the tray, leaving space around the flames. Add two dried orange slices — one on each side — and tuck one tiny cinnamon stick behind the mound. Light the diyas and check that nothing is close enough to catch heat.
This is one of those setups that feels like you cooked something special, even if you didn’t. The matte black tray gives you a strong base, and the white candied coconut reads bright and cozy in warm light. Two diyas keep the focus on the glow, while dried orange slices add a subtle color pop that doesn’t overpower. This looks great in kitchens and dining areas where you want the decor to feel edible, warm, and inviting. It also photographs well because the white pieces create contrast without sparkle.
AvoidDon’t add sticky sweets like syrup-coated items; they smear and look messy under flame heat.
Pro tipUse coconut pieces that are dry and firm so they don’t soften and slump during the evening.



