
1. Terracotta Tray with Mango Leaf Border
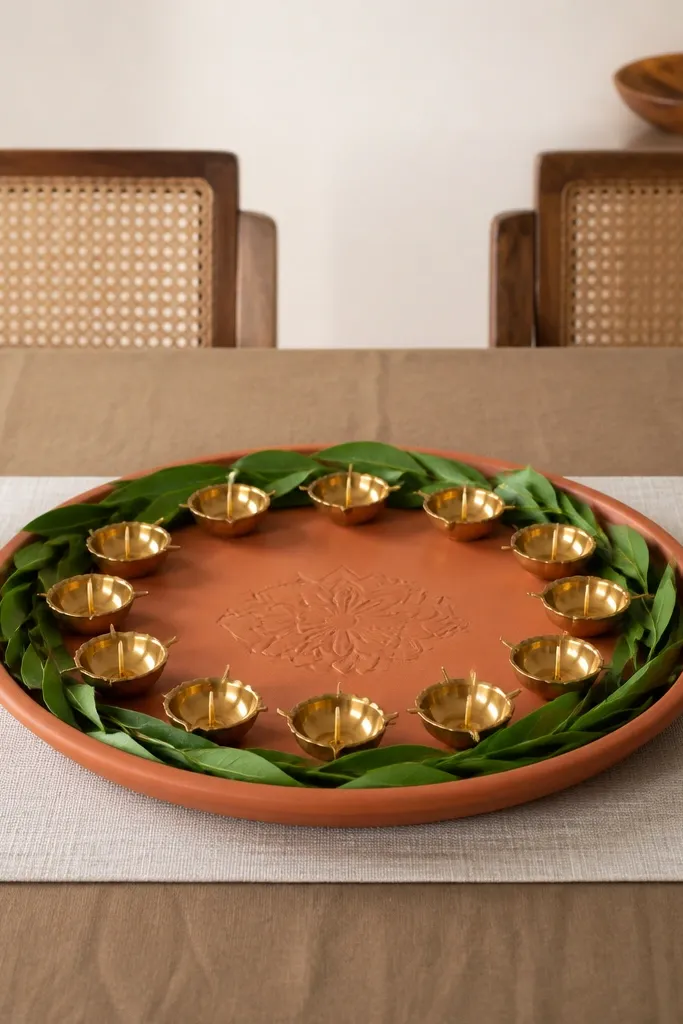
Start with a wide terracotta tray because it warms up the whole room even when your diya flames are off. Arrange 7 to 9 small brass diya cups in a tight circle so the center looks deliberate. Add a thin mango leaf border around the tray edge — keep it 1 to 2 inches tall so it reads like a frame, not a pile. This setup looks best in spaces with wood tones or beige walls, and it flatters warm skin tones and cream outfits when you take photos nearby. The styling principle is repetition: same cup shape, same spacing, same leaf direction.
Step one: wipe the tray clean and dry it fully so leaf cuttings don’t leave residue. Step two: place the diya cups first — I space them about 1.5 inches apart on a 14-inch tray — then fill the center with one taller diya on a small riser. Step three: tuck mango leaves around the outer rim, overlapping like a braid, and trim the ends so they don’t flop over the table. Finally, add two white bud vases on opposite sides to balance the weight visually and stop the frame from feeling one-sided.
Pro tipSpray the mango leaves lightly with a clear matte fixative (or thin hairspray) to slow curling before your next event.
AvoidDon’t let the leaf border spill more than 2 inches inward or it looks like you ran out of space.
2. White Ceramic Block Center with Floating Diya Cups
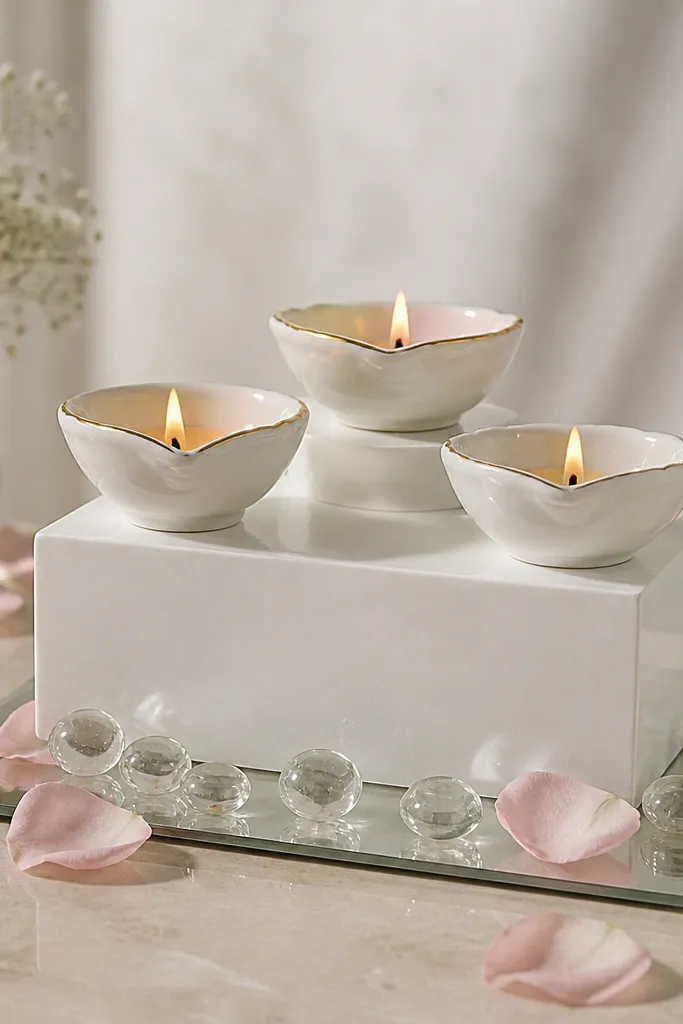
This one is clean and modern because the white ceramic block acts like a sculpture. Use 3 diya cups — two at the front edge and one centered slightly higher — so the display has depth even on a busy table. The rose petals in pale pink add warmth without turning it into a festival scene. I’ve found this works great for Indian homes with darker wood furniture because the white pops and makes the diya flames look brighter. The principle is contrast: matte white + clear glass + tiny pink accents.
Step one: place a mirrored plate or glossy acrylic sheet under the ceramic block to bounce light upward. Step two: set the block so it’s centered, then position two diya cups about 3 inches from the front corners and a third in the middle back. Step three: fill the area around the block with clear glass pebbles up to half their height, so they look like “floating” texture. Finally, scatter 6 to 10 rose petals around the pebbles, leaving a clear gap in the center so the flame stays the focus.
Pro tipIf your ceramic block is glossy, wipe it with microfiber so fingerprints don’t show in flash photos.
AvoidAvoid using bright red petals — they overpower the white and make the whole setup look costume-like.
3. Bamboo Runner with Jute and Six Diya Lanes
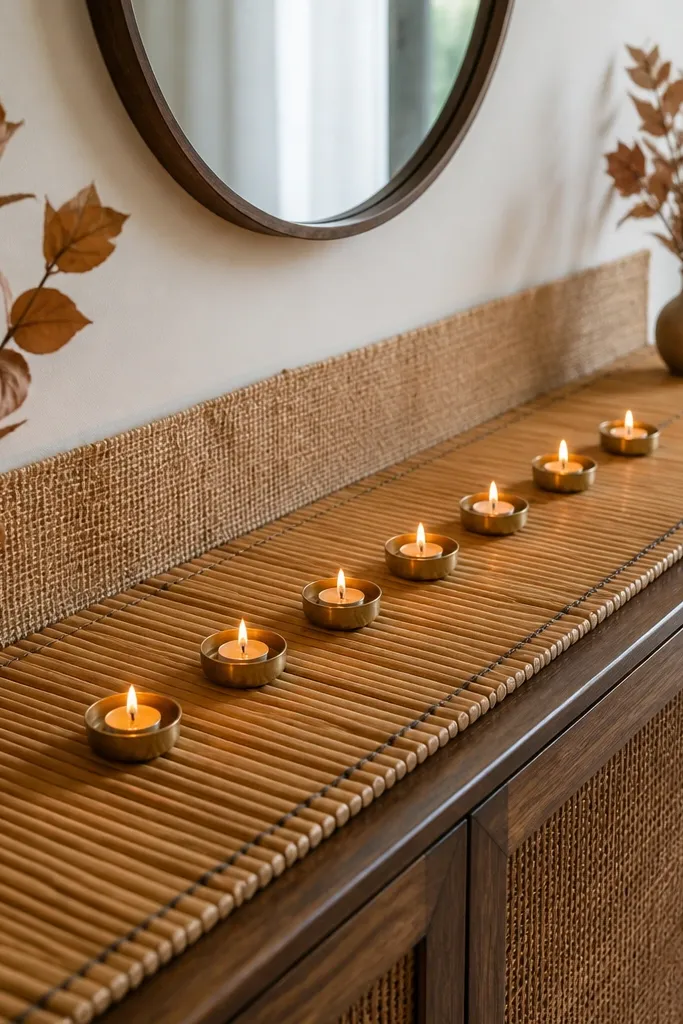
A bamboo runner gives you instant structure, and the straight “lanes” make the display look organized from every angle. Put 6 diyas in a line with equal spacing — it makes the arrangement feel intentional instead of crowded. Jute behind the diyas adds texture and hides clutter underneath, especially if your console has cables or uneven surfaces. This setup flatters narrow hallways because it uses long horizontal space without needing tall stands. The principle is alignment: same holder size, same spacing, same vertical level.
Step one: lay the bamboo runner and cut the jute strip so it’s 2 inches shorter than the runner on both sides. Step two: place the six diya holders on the front half of the runner, leaving about 1.5 inches from the edge. Step three: stack a few thin jute folds under the diya line so the holders don’t look like they’re floating in midair. Finally, tie two tiny dried leaf bunches at the ends of the runner using twine, then light the diyas only after you’ve checked the flame direction.
Pro tipUse unscented oil in wick diyas for home displays; scent oils can leave a sticky film on jute over time.
AvoidDon’t put diyas too close to the jute edge or the fabric will darken from heat.
4. Glass Jar Terrarium Diya with Green Moss Base
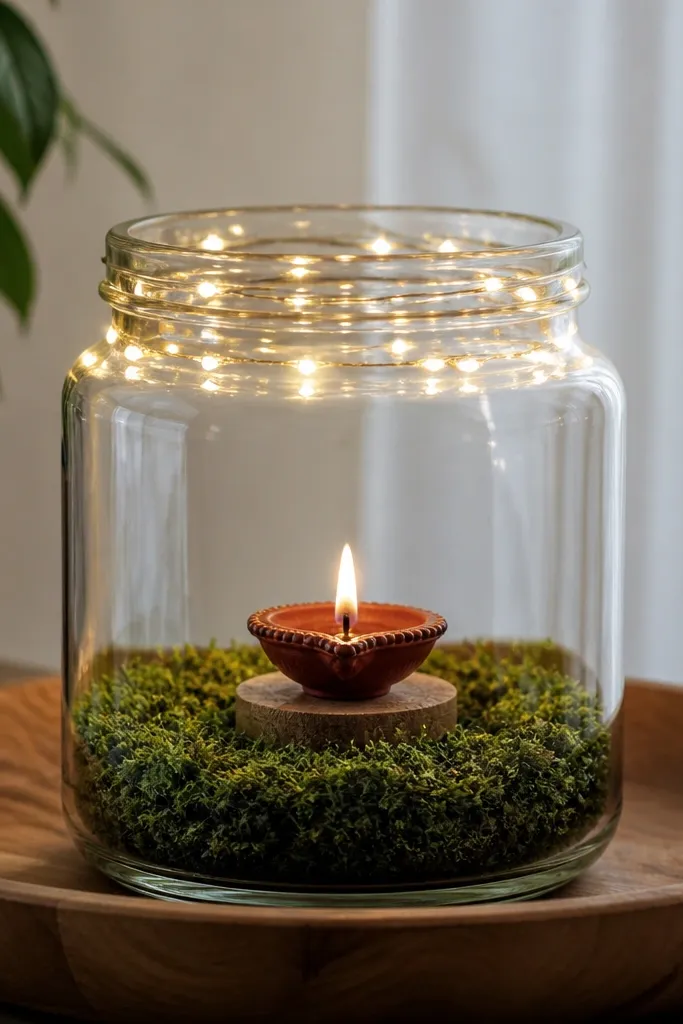
This is the one I use when I want the diya look but my table surface is small. The jar creates a contained “stage,” and the moss makes the flame feel grounded and alive. I keep it to one main diya — too many inside a jar looks cramped and unsafe. Warm white fairy lights are subtle here; you’re using them for glow, not for decoration overload. This setup looks great in rooms with gray walls or modern furniture because the green and amber tones soften everything. The principle is single focal point: one diya, one jar, one warm light.
Step one: choose a jar that’s at least 7 inches wide and 10 inches tall so the flame has air space. Step two: press moss lightly over the bottom, then place the diya on a flat metal or ceramic stand in the center. Step three: add 2 to 3 thin stones around the stand to keep the moss from shifting when you move the jar. Finally, tuck a warm white fairy light ring around the jar’s inner neck area and test it off-camera first so the wiring doesn’t show.
Use battery fairy lights instead of plug-in so you can move the jar safely for cleaning.
Don’t pack moss too tightly — it holds heat and can dry out unevenly.
5. Stacked Brass Candle Cups on a Wooden Ladder Shelf
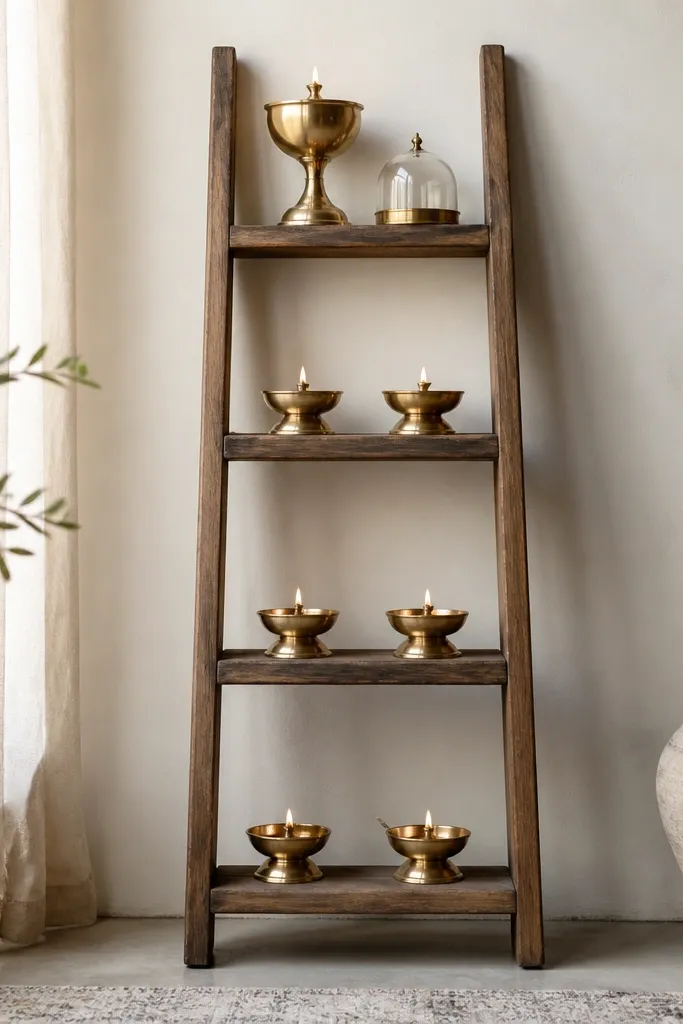
When you want year round diya decoration ideas for home that still look good from the doorway, use vertical space. A wooden ladder shelf lets you place diyas at 3 heights — top, middle, bottom — so the arrangement has “reading depth” without extra items. Brass cups look cohesive because they match across the shelf, and the different heights keep it from feeling flat. This works especially well if your home has plain walls; the shelf becomes the art. The principle is vertical rhythm: pair cups on each rung, then vary only the height.
Step one: mount the ladder shelf so the middle rung sits about 48 inches from the floor for easy viewing. Step two: add a thin strip of black felt on each rung — it keeps the cups from sliding and looks clean in photos. Step three: group cups in pairs on the bottom and middle rungs, about 3 inches apart, and use one taller cup on the top rung. Finally, place a small glass cover or hurricane beside the taller cup so the top doesn’t look empty.
Dust brass cups with a dry microfiber cloth. Water spots show fast on brass-toned finishes.
Don’t mix silver and brass in the same shelf — it makes the display look like leftovers.
6. Monochrome Black Tray with White Diya Row
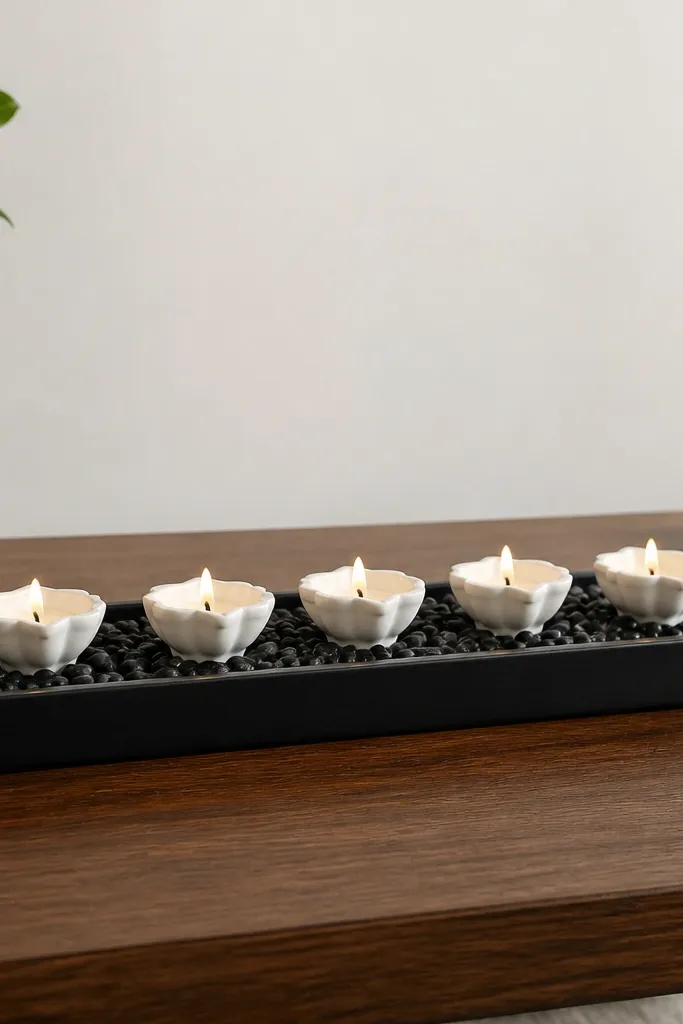
Monochrome displays look expensive because your eye doesn’t have to sort colors. Use a matte black tray and white diyas for high contrast. Keep the diyas in a straight row with identical spacing, and add tiny black pebbles only at the ends — that frames the flame line. This is perfect for homes that feel clutter-prone, because the black tray “collects” visual noise. I’ve used this during festivals and regular weeks; it never looks wrong because it’s color-blocked. The principle is restraint: one shape line, one accent texture.
Step one: clean the tray and decide your spacing based on tray length; for a 20-inch tray, place 8 holders at roughly 2.3 inches apart. Step two: center the row and set black pebbles in two small clusters at the left and right ends, not along the whole tray. Step three: tuck one thin strip of white fabric under the diyas, so the flame area looks layered. Finally, light the diyas and step back 6 feet — if you see gaps, adjust spacing before the wax warms.
Use unscented wick candles in the white holders so oily residue doesn’t stain the ceramic.
Avoid adding too many extra props — the row is the design.
7. Saree-Print Fabric Wrap with Brass Diya Corners
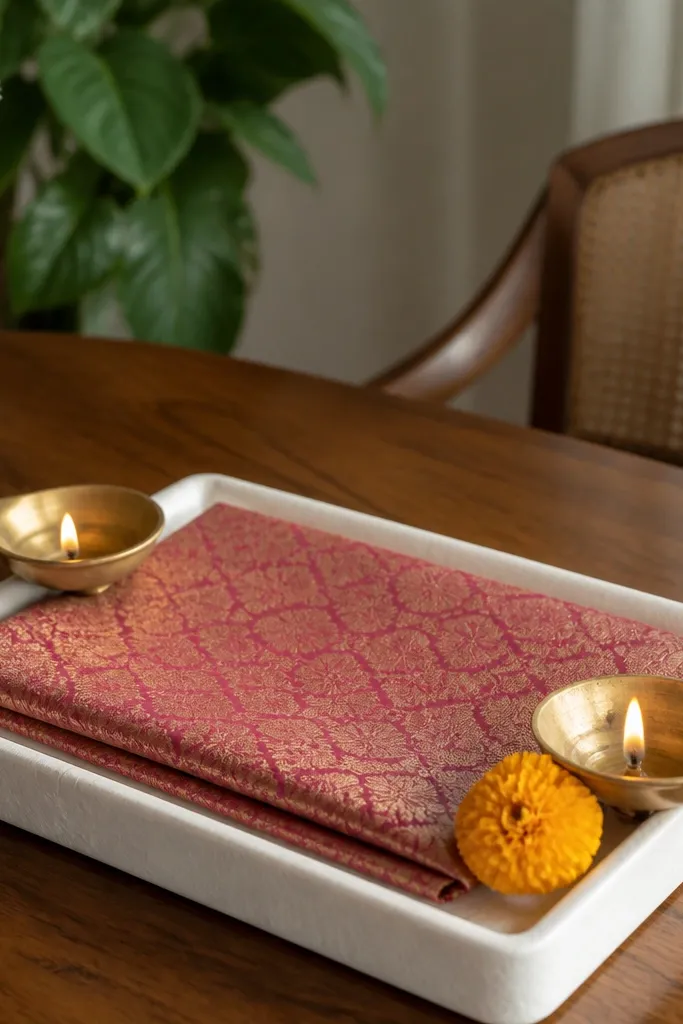
Fabric wrap is my favorite “year round” trick because it reads soft and decorative even when you don’t light anything. Use a saree-print fabric with muted tones — think rust, cream, and deep olive — and fold it so only the pattern shows at the edges. Place two brass diyas in opposite corners of a white tray. That negative space keeps it from looking busy. This flatters small dining spaces and works well if your table already has plates and everyday clutter; the fabric hides gaps. The principle is framing with cloth — the diyas become the warm punctuation.
Step one: choose a fabric square about 18x18 inches and iron it flat. Step two: place it under a white tray, then fold the fabric corners up so the pattern frames the tray edges. Step three: set two brass diyas at diagonal corners, about 3 inches from the tray sides. Finally, add one real flower or a tiny dried stem near only one diya so the look has a focal point.
Use a fabric protector spray so oil splashes from lighting don’t leave permanent stains.
Don’t use a bright neon print fabric — it looks like party decor, not home decor.
8. Floating Lotus Look on a Shallow Water Tray
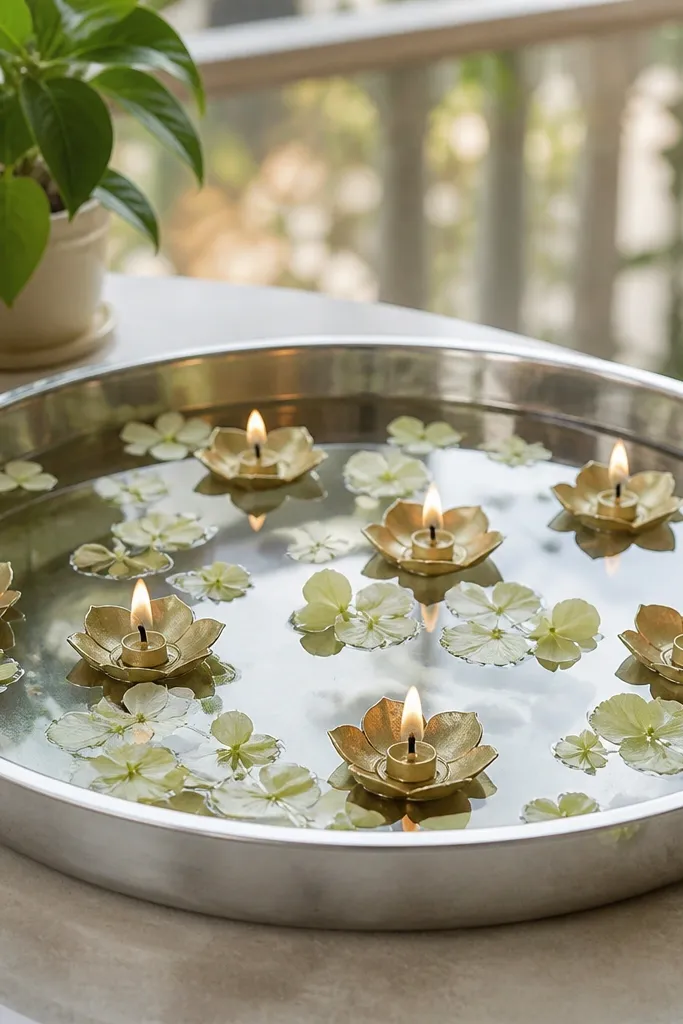
Water trays give you that “wow” without building height. The floating diya look is gentle, and it reads calm in winter evenings and breezy in summer. Use a shallow tray with clear water, then place lotus-shaped floating holders with small diyas. Add a few pale green petals and stop there — too many petals becomes messy. This looks stunning on balconies because daylight makes the water sparkle. The principle is controlled movement: small floating elements, not heavy props.
Step one: fill the tray with clean water up to about 1 inch deep so the holders float evenly. Step two: place 4 to 6 lotus floating holders in a loose circle, leaving a clear center. Step three: add 6 to 10 pale green petals, then check from above to make sure nothing overlaps the wick area. Finally, light the diyas right before guests arrive and keep the tray away from direct wind.
Use distilled water if your tap water leaves a cloudy film on the tray.
Don’t place the tray on a surface that absorbs water — it will stain and smell later.
9. Coconut Shell Half-Cups with Sand and 3 Flames
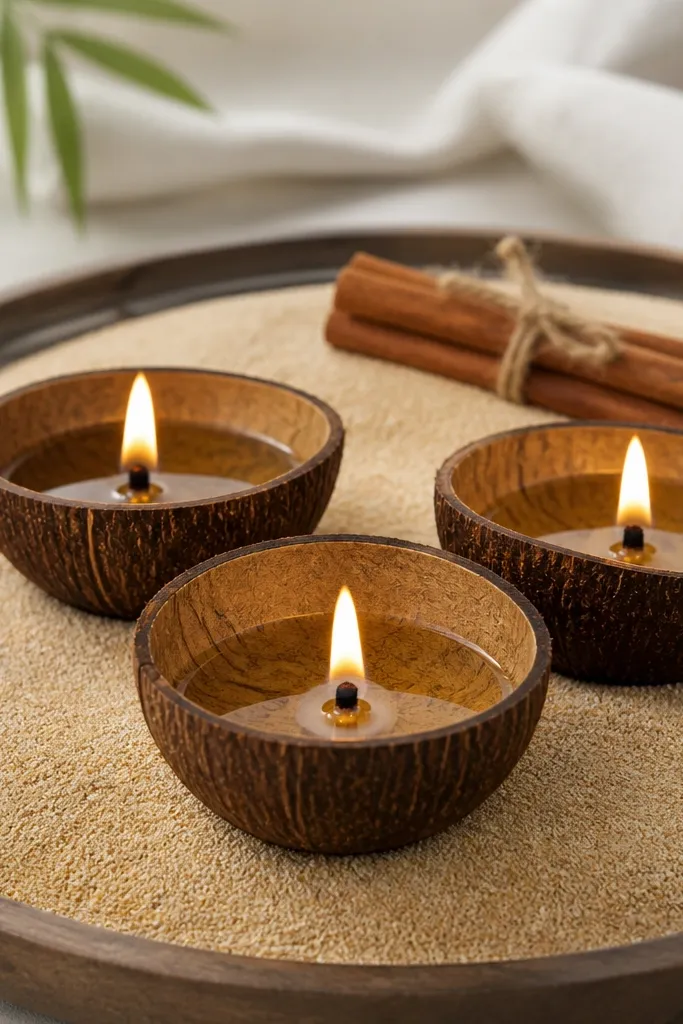
Coconut shell half-cups bring a natural, earthy look that stays year-round because it doesn’t tie to one festival. Use only three flames so the display feels intentional, not scattered. Fine golden sand gives you a soft glow under the diya and makes the shells look like they belong together. I like adding one cinnamon stick bundle in the back for a subtle brown accent that works with sand and shell. This looks best in living rooms with warm lighting or beige walls. The principle is natural texture: shell + sand + wood spice.
Step one: choose a tray with low sides so you can see the sand texture clearly. Step two: spread a thin layer of fine golden sand, about 1/2 inch thick, and place three shells evenly spaced in a triangle. Step three: insert each diya into the shell, then adjust wick length so the flame stays centered. Finally, tuck the cinnamon sticks at the back edge so they don’t interfere with lighting.
Pro tipWipe shells with a dry cloth after lighting to prevent wax rings from forming.
AvoidAvoid using coarse sand — it looks gritty and cheap on camera.
10. Terracotta Pots with Upcycled Tin Diya Holders
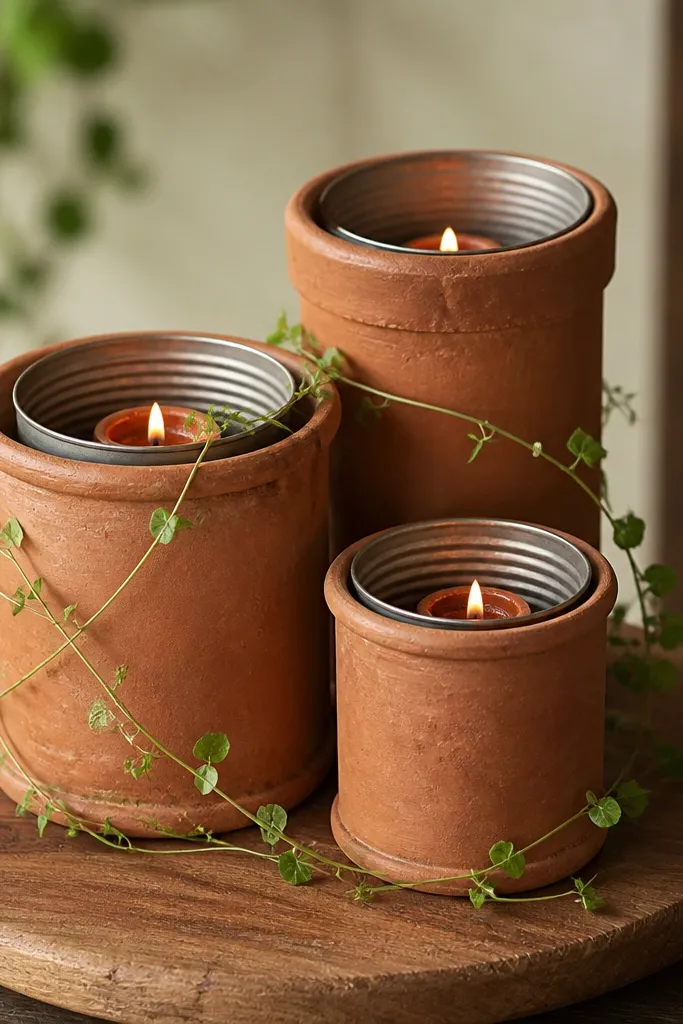
Grouping pots gives you height variety without buying tall stands. The upcycled tin holders bring a handmade feel, and terracotta keeps the look warm year-round. Use three pots: one tall, one medium, one short — it makes the arrangement read like a composition, not random items. The green vine wrap ties everything together so the color story stays consistent. This works for corner nooks, especially if the corner is bare and you want something that looks styled but not formal. The principle is tiering: one tall anchor and two supporting heights.
Step one: pick pots that are 6-8 inches, 5 inches, and 3-4 inches wide, then set them on a wooden board. Step two: place the tall pot in the back center, medium pot slightly left, short pot slightly right. Step three: set the tin holders inside each pot so only the rim shows above the pot opening. Finally, wrap a thin vine around the pots once and tuck the ends behind so it doesn’t look like a loose string.
Pro tipDrill tiny drainage holes in the tin holders if you ever reuse the pots for plants later.
AvoidDon’t use very glossy terracotta — the shine clashes with tin and makes it look synthetic.
11. Rangoli Tray with Tealight Blocks and White Marbles
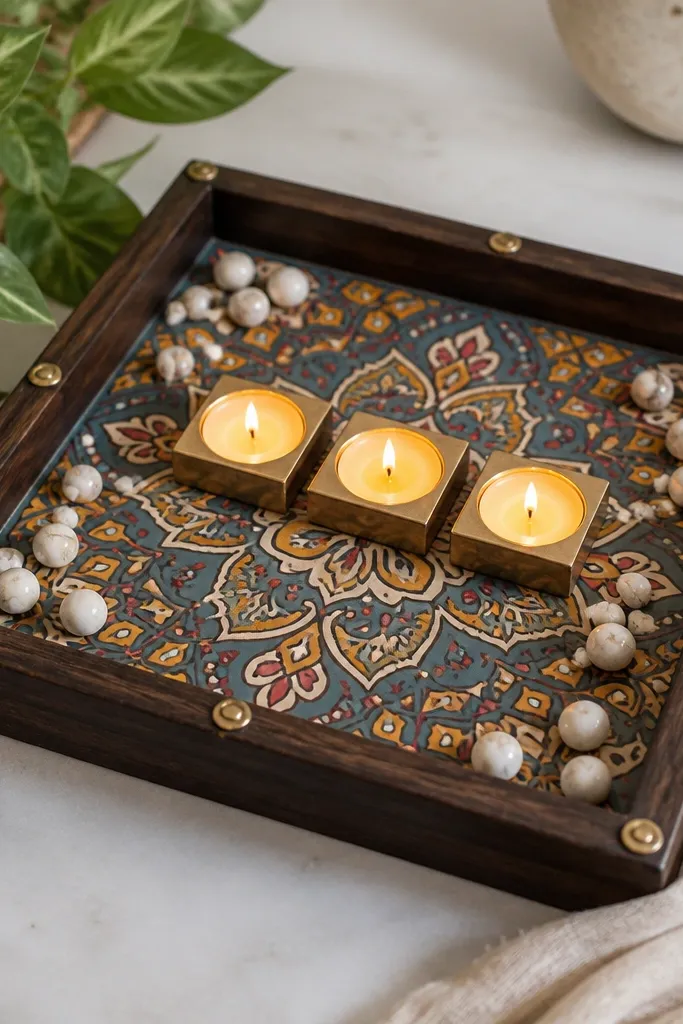
This is a “contest look” because it reads like art even before you light anything. Use a tray with a simple rangoli print — keep it muted so it doesn’t become seasonal. Put tealight blocks in the center row for a clean line of flames, and scatter white marbles at the corners to bounce light upward. Brass accents at the corners make the whole thing feel more finished. This flatters bright rooms where you need a focal point that doesn’t fight with wall decor. The principle is a graphic base plus controlled lighting.
Step one: choose a square tray 14-16 inches wide with a rangoli pattern that has mostly cream and muted red or terracotta. Step two: place 4 to 6 tealights in the center row, spaced 2 inches apart. Step three: scatter marbles in clusters of 5-7 near each corner, leaving the center clear so the flames are visible. Finally, add small brass items — I use tiny diya-shaped studs — only at the corners to frame the composition.
Pro tipWipe marbles with alcohol before placing so they don’t look dusty under flash.
AvoidAvoid mixing too many pattern colors in the tray print or the flames look chaotic.
12. Monsoon Green Garland with Single Diya Lantern
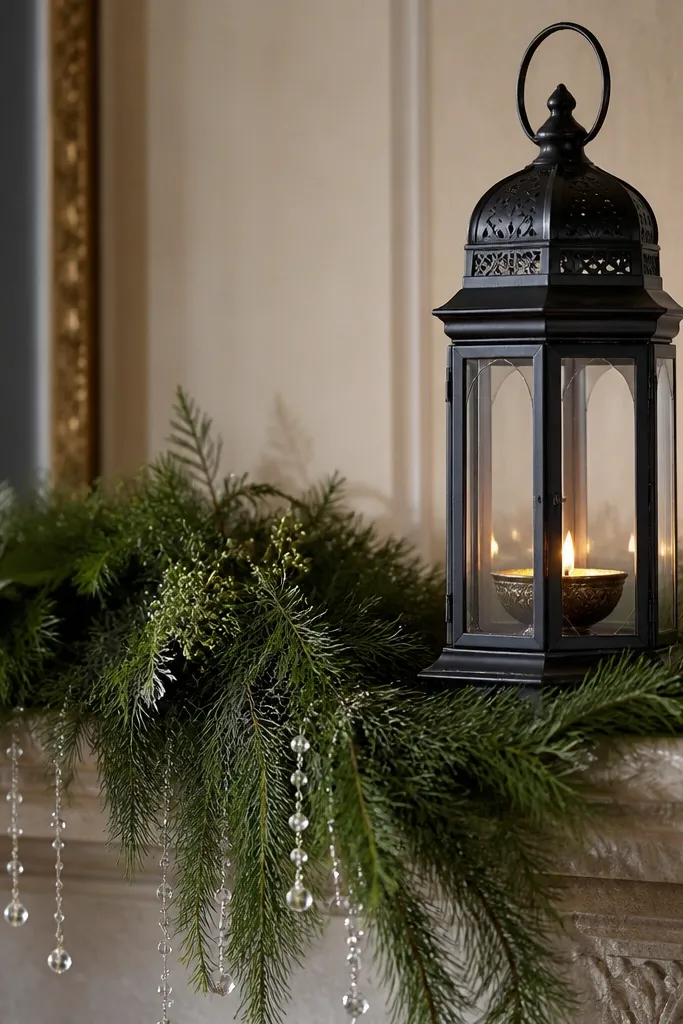
If your home decor changes with weather, this setup stays calm because it uses one strong shape — the lantern. Drape a dark green garland along the mantle, then place one diya inside a black or dark metal lantern. Add a few clear beads (or even a strand of cut glass) so the flame catches light and looks lively. This works in rainy-season homes because green reads fresh, not festive. The principle is one lantern anchor — everything else is supporting texture.
Step one: drape the garland first, leaving a 10-12 inch gap in the middle where the lantern will sit. Step two: hang 3 to 5 clear bead loops from the garland line near the gap so they sit at eye level. Step three: place the lantern on a small stand or directly on the mantle, then center it under the bead loops. Finally, light the diya and adjust garland tension so it doesn’t block the lantern opening.
Pro tipUse a lantern with a glass front you can wipe — it keeps the flame view crisp.
AvoidDon’t add multiple lanterns — one is stronger and safer for heat clearance.
13. Terracotta Ring with 9 Mini Diyas and One Tall Wick
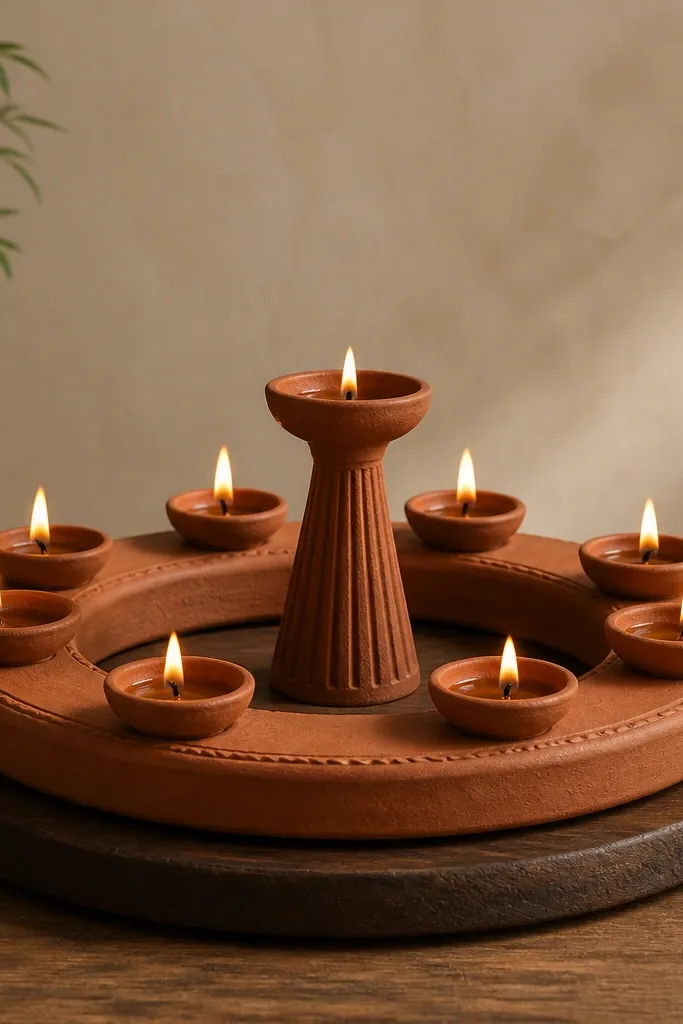
A terracotta ring gives you a ready-made boundary, which is what most diya decorations lack. Nine mini diyas around the ring look balanced, and the one tall wick in the center gives the display a hierarchy. Keep all cups the same metal so the flames look like a set, not a mix of leftovers. This design looks great for front rooms where you need a clean “center” without adding lots of props. The principle is a count you can repeat: 9 around, 1 center — easy to recreate.
Step one: set the terracotta ring centered on your wooden base or tray. Step two: place nine mini diyas evenly spaced around the inner edge — I keep spacing about 1 inch between cup rims. Step three: set one taller diya on a small riser in the center so it’s 2-3 inches higher than the surrounding flames. Finally, add a thin layer of coarse salt or sand inside the ring only if you want a glowing texture — keep it minimal so it doesn’t spill.
Use the same wick thickness for all minis so flame heights match in photos.
Avoid mixed cup sizes — it makes the ring look uneven.
14. Black Stone Base with Brass Geometric Diya Holders
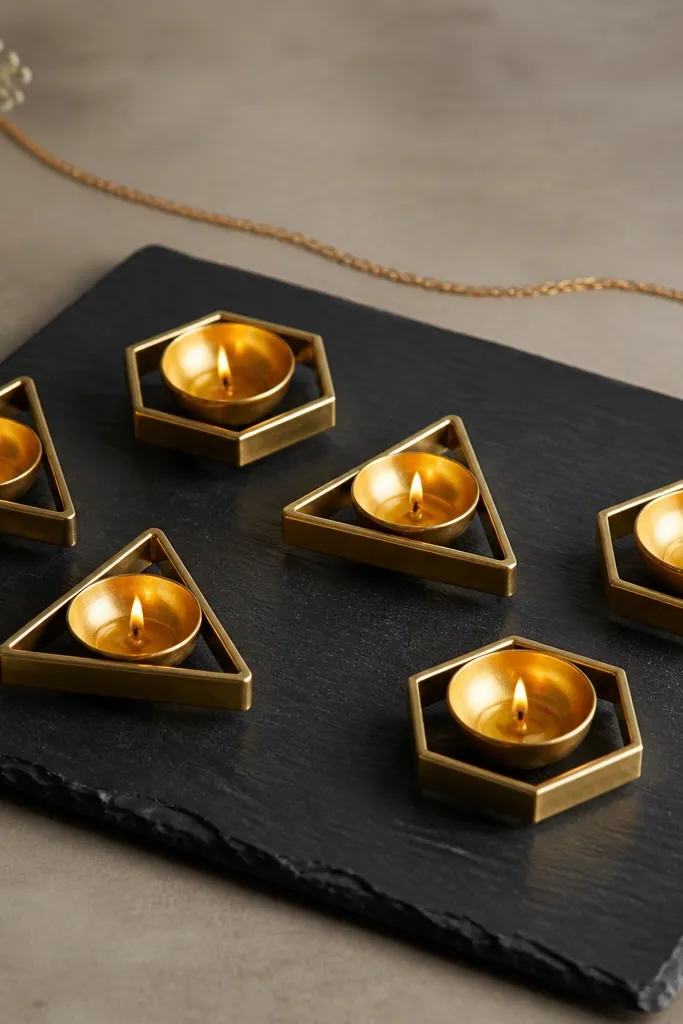
Black stone and brass shapes read modern, not traditional, so they survive all year without looking “too festival.” Geometric holders make the display look like design objects, even if the diyas are simple. Arrange them staggered — not in a straight line — so the flames create a moving pattern. This works well for homes with black frames, dark wood, or modern wall art. The principle is shape repetition with variation: same metal, different geometry, staggered placement.
Step one: place the black stone slab on a heat-safe mat so the table doesn’t get marks. Step two: set 5 to 7 brass geometric holders on top, mixing triangles and hexagons, and keep them 2 inches apart. Step three: add a thin gold chain behind the holders so it catches light without adding bulk. Finally, light the diyas and adjust by nudging one holder at a time until the flame cluster looks centered from where you stand.
Pro tipWipe stone with a slightly damp cloth and dry fully — dust shows sharply on black.
AvoidAvoid placing holders too close together — flames overlap and it looks messy.
15. Cane Mat with Citrus Slices and Tea Light Row
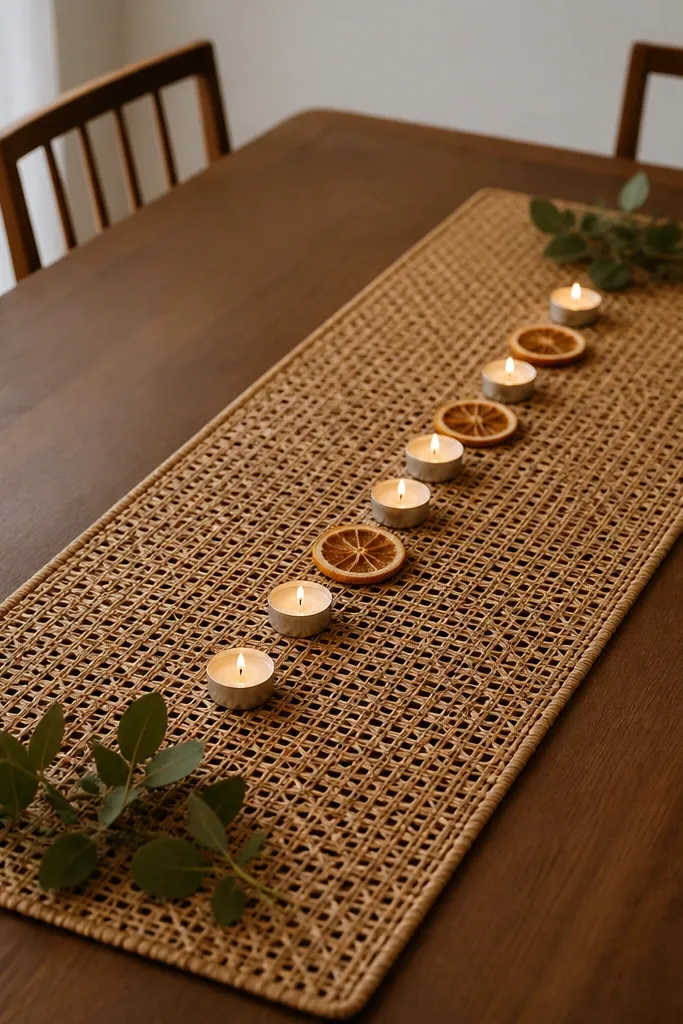
Cane mat texture makes everything look handmade, and dried citrus gives you a warm, seasonal hint that still works in any month. Use tea lights in a single row so the display stays clean. Place dried citrus slices between lights — 3 to 5 slices total — so the look stays airy. Green leaves at the ends balance the color without turning it into a full garland. This is great for kitchens and dining areas because it looks cheerful in daylight and cozy at night. The principle is spacing: leave breathing room between the citrus slices and the flame line.
Step one: lay the cane mat and place a thin strip of white paper or fabric under the center line so the tea light bases sit evenly. Step two: set 6 to 8 tea lights along the center, spaced about 2 inches apart. Step three: tuck dried citrus slices between every other tea light, securing with a tiny clear tape dot under the slice edge. Finally, add two small green leaf sprigs at both ends and trim them so they don’t reach the flame area.
Swap dried citrus seasonally: even changing the slices from orange to lime keeps it fresh without changing the layout.
Avoid fresh citrus — it attracts fruit flies and turns sticky fast.
16. Reed Basket with Fabric Ruffles and Micro Diyas
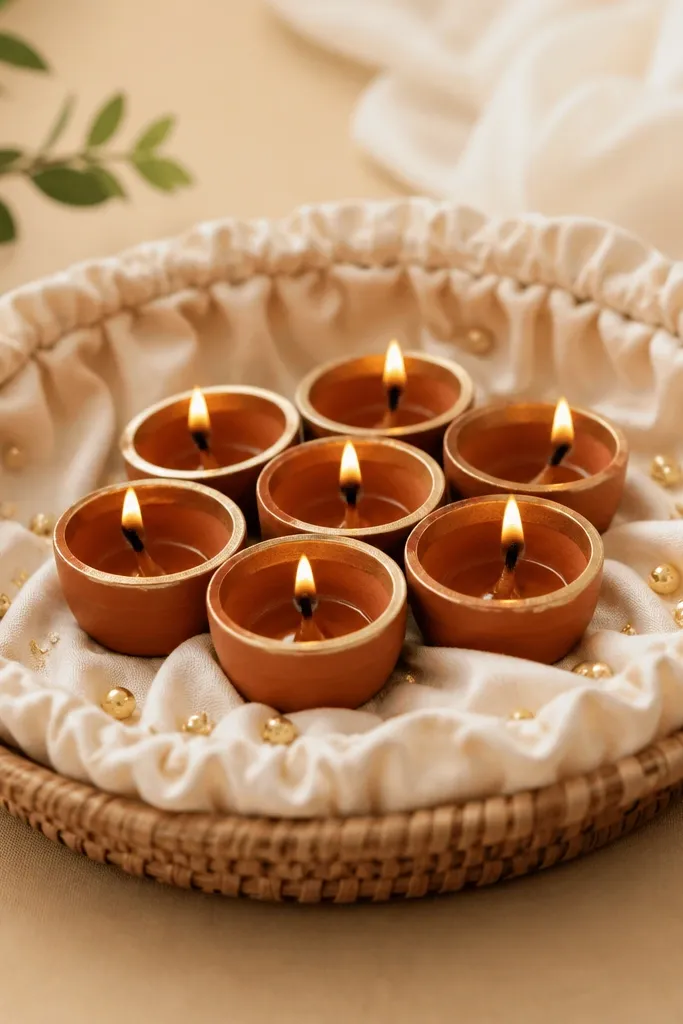
A shallow reed basket is a cheat code for “full” decor with fewer items. The fabric ruffles hide gaps and make the micro diyas look like they’re part of a designed cluster. I use micro diyas because they match the scale of the basket and keep the flame height gentle. Gold beads on the fabric add a subtle sparkle that reads warm in photos. This looks best on side tables and bedroom dressers where you want cozy without big stands. The principle is scale matching: tiny flames with soft, light texture.
Step one: line the basket with cream fabric and fold it into ruffles so the top edge sits 1-2 inches above the basket rim. Step two: place 10 to 14 micro diyas in a circle or a loose clump in the center, keeping wicks facing the same direction. Step three: sprinkle a light layer of tiny gold beads only on the fabric surface around the cluster, not inside the diya cups. Finally, tuck one small sprig of greenery behind the ruffle edge so it frames the basket opening.
Pro tipUse battery fairy light candles instead of real flame if you need it for daytime only.
AvoidDon’t pack micro diyas too tight — heat will scorch fabric edges.
17. Jute Rope Coaster Ring with Diya on a Small Stand
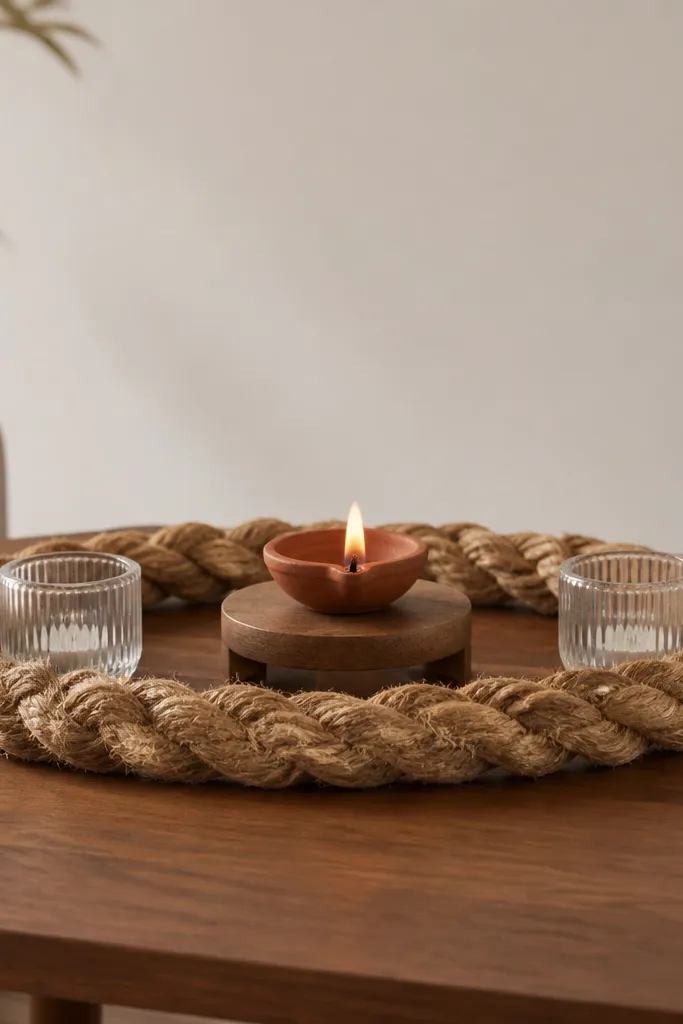
This one is simple and wins on minimalism. The jute rope ring is thick and tactile, so even one diya looks styled. Put the diya on a small round stand so the flame sits higher and reads clearly above the rope texture. Add two empty glass votives for symmetry — they catch ambient light and keep the center from feeling lonely. This setup looks great in living rooms with neutral tones and works well for everyday use because it doesn’t look “event-only.” The principle is negative space: one main diya, two supporting shapes, a defined boundary.
Step one: coil jute rope into a ring about 10-12 inches wide and secure the ends with hot glue on the underside. Step two: place the ring on a heat-safe board, then set the diya stand in the center. Step three: position two clear glass votives near the left and right edges of the ring, about 3 inches from the rope. Finally, adjust the stand height so the diya flame is the tallest point in the cluster.
Seal the jute ring with matte clear varnish so it wipes clean after occasional wax spills.
Avoid using thin jute rope — it collapses and makes the ring look cheap.
18. Brass Tray with Incense Holder and Diya Pair
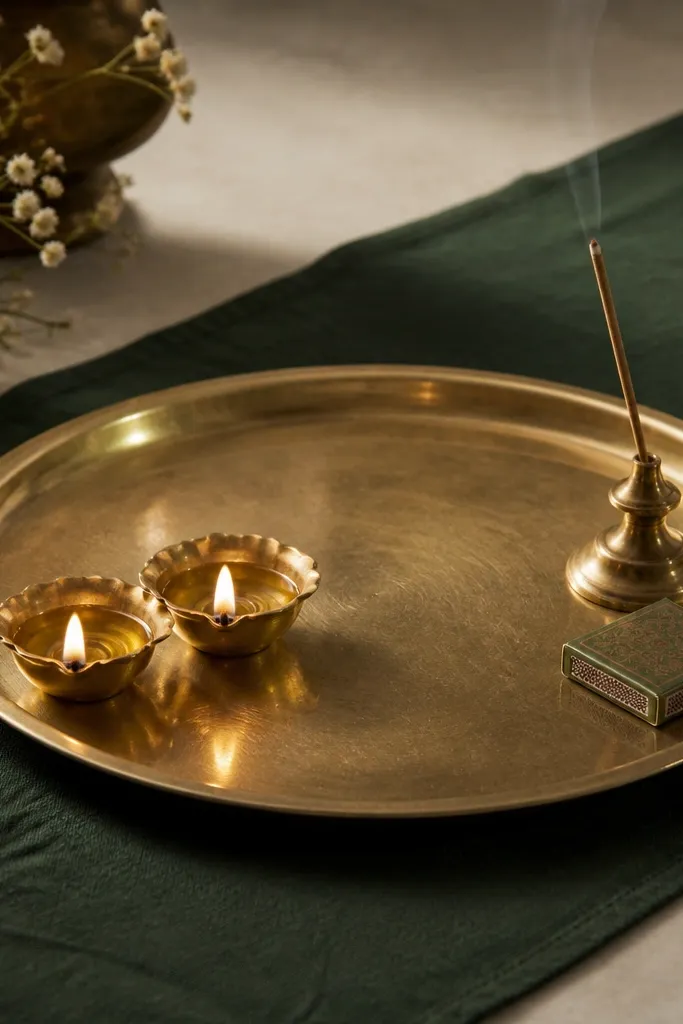
Pairing a diya with an incense holder makes the setup feel intentional and lived-in. The brass tray ties the two items together visually, and the dark green cloth underneath adds depth without demanding extra props. I keep it to two diyas because the incense holder already adds a vertical element. This is the arrangement I use on evenings when I’m actually hosting, because it gives guests a clear “this is the center” focal point. The principle is balancing weight: one side has two flames, the other side has a single vertical stick holder.
Step one: lay a dark green cloth strip under the tray so it peeks out evenly on all sides. Step two: place two diyas about 3 inches apart on the left half of the tray, leaving a 2-inch gap from the tray edge. Step three: set the incense holder on the right half and add a small folded matchbox or lighter cover beside it. Finally, light both diyas first, then light incense last so you can judge smoke direction and keep the flame area clean.
Use a ceramic incense holder with a wide base; it stops wobbling when you move the tray.
Avoid shiny red cloth underneath — it reflects too much and makes brass look messy.
19. Floating Shelf Diya Row with Fabric Backing
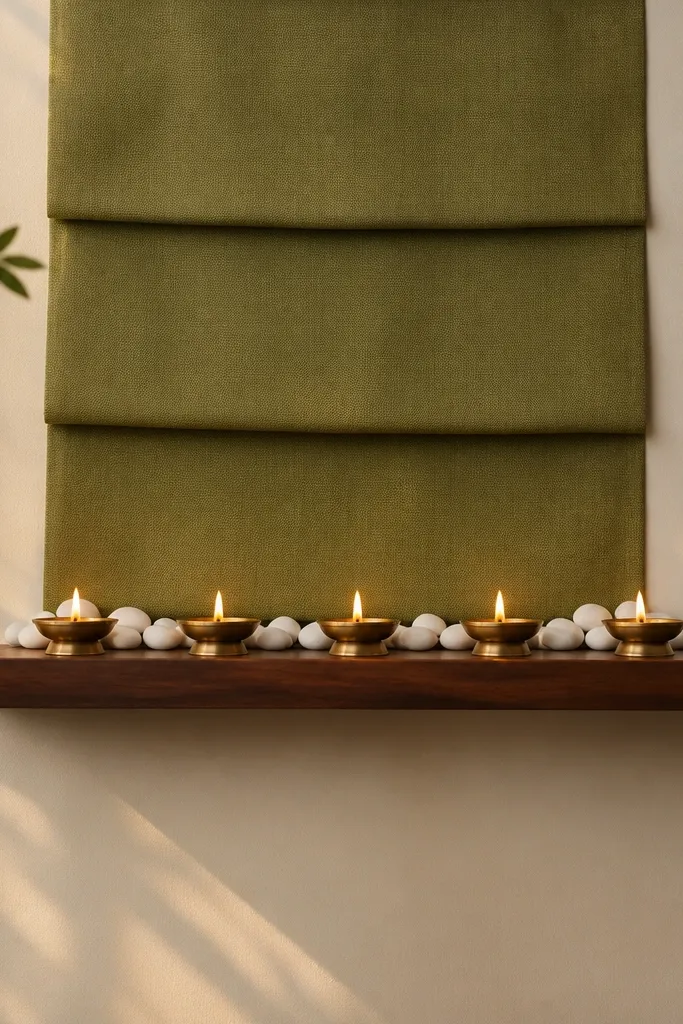
A floating shelf is perfect when your tabletops are always crowded. The fabric backing does the hard work of making the shelf look styled, and it stays year-round because olive green is calm in every season. Put 5 diya holders in a row at the shelf front edge, all facing the same direction. Add white stones behind them so the shelf doesn’t look empty when the diyas are off. This setup flatters small living rooms because it uses wall space without adding bulky furniture. The principle is a clean line plus a soft background layer.
Step one: mount the shelf and cut a fabric panel to fit the back area, about 1 inch shorter than the shelf width so it doesn’t hang. Step two: place 5 diya holders along the front edge with equal spacing — for a 24-inch shelf, keep about 4 inches between outer holders and 3 to 3.5 inches between middle holders. Step three: sprinkle white stones behind the holders, forming a low mound that reaches halfway up the holder height. Finally, light one diya at a time to confirm the flames sit clear of the fabric behind.
Pro tipPin the fabric panel with thumbtacks hidden behind the shelf brackets so it stays taut.
AvoidDon’t place diyas too close to the shelf bracket — heat marks the metal over time.
20. Rattan Lantern with Warm Cloth Wrap and Three Diyas
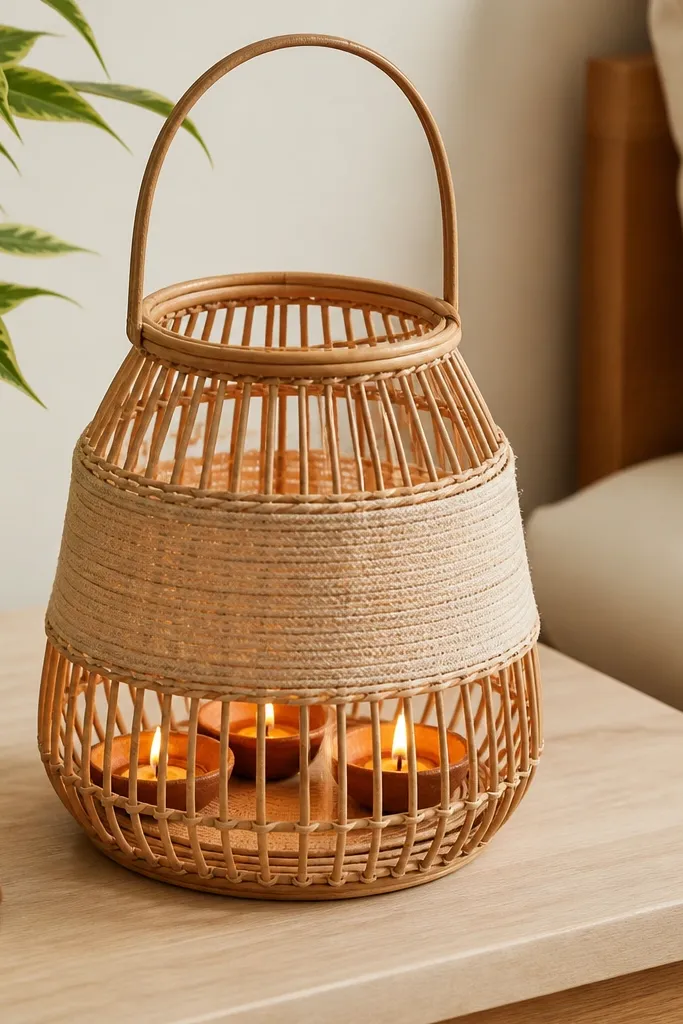
Rattan lanterns look good all year because the texture is natural and the shape is steady. Wrap the middle with warm beige cloth so the lantern doesn’t look empty when the diyas are unlit. Put three diyas inside in a triangle arrangement so the flame glow fills the lantern without overcrowding. This works best in bedrooms and reading corners because it feels cozy without being too festive. The principle is texture layering: rattan outside, cloth mid-layer, flame inside.
Step one: choose a rattan lantern with an opening wide enough for three diya cups — aim for at least 6 inches across. Step two: wrap beige cloth around the lantern middle and tie it with thin jute twine, keeping the knot at the back. Step three: place three diyas inside, spaced evenly in a triangle, then check that each flame has air space from the rattan wall. Finally, set the lantern on a heat-safe coaster so the bottom doesn’t scorch the wood table.
Pro tipUse diya cups with metal sides; they reflect heat better than plain ceramic when inside rattan.
AvoidAvoid synthetic glossy cloth — it looks shiny against rattan and cheapens the whole look.



