
1. Cloud Mini Squish Keychain
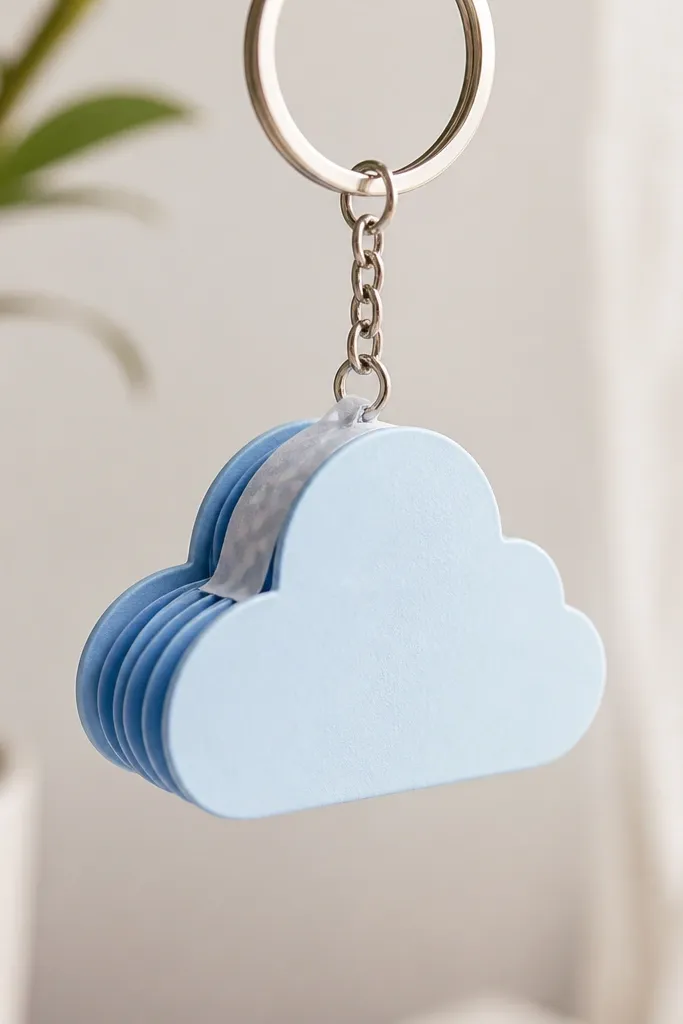
I made this one because it’s the quickest “before and after” upgrade: cloud shapes look flat until you add real puff. I used light sky-blue cardstock on the outside and a slightly darker blue for the fold core, so the puff shows even when it’s not being squeezed. It looks best against warm skin tones because the blue pops without turning harsh. The cloud sits cute on a bag charm or keys, and it reads as soft in photos because the folds catch light like tiny waves.
Start by cutting a cloud outline from 2 sheets of 180 gsm cardstock: one for the outer layer and one for the inner layer. On the inner piece, mark 6 accordion ridges across the width, then fold them tight with a bone folder. Glue the accordion core to the inner outline, keeping the edges aligned so you don’t get lopsided puff. Finally, sandwich the outer outline on top, hide the seam with a 6-8 mm strip of white washi tape, and attach a keyring loop through the top fold before it fully dries.
Press the cloud gently for 10 seconds with your thumb right after assembly; it helps the folds settle into a rounded silhouette.
Don’t use thin printer paper alone — it collapses and the cloud looks like a cutout instead of a squishy.
2. Strawberry Pillow Squish Charm
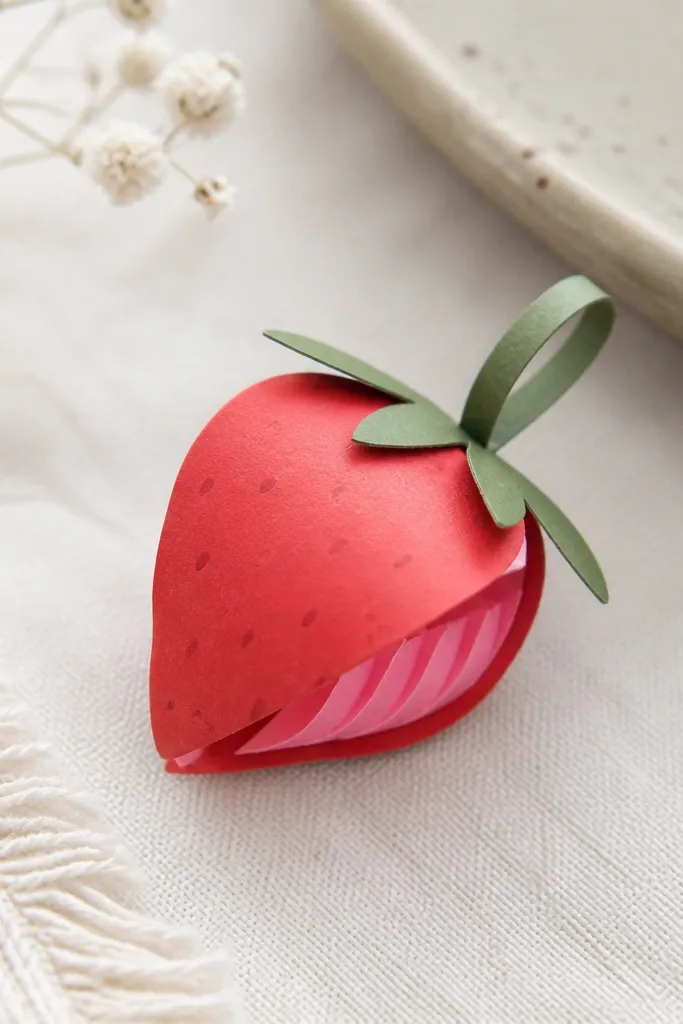
This is the one I’d make for a friend’s birthday bag because it looks sweet without being childish. I used red cardstock for the outer shell and a soft pink for the accordion interior, which makes the squish look like it has depth. The green leaf top frames the red and makes the whole thing read clearly in a cluttered bag. It flatters almost any color scheme because red + green is strong, and the soft pink interior keeps it from looking too sharp.
Cut two strawberry outlines from 200 gsm cardstock — one red and one red with a slightly different shade for the interior. On the interior piece, add 7 accordion folds across the center, then glue that folded strip along the inside edge of the outline. Glue the two halves together, leaving a small gap at the top to insert the green leaf tab. Add the leaf tab from 1 strip of green cardstock folded in half, then close the seam with a narrow strip of red washi tape so the charm doesn’t split when squeezed.
Use a white gel pen for 3 tiny highlight dots on the red; they make the strawberry look glossy in photos.
Skip super-wide accordion spacing — it makes the strawberry look saggy instead of pillow-puffy.
3. Rosebud Paper Squish Box
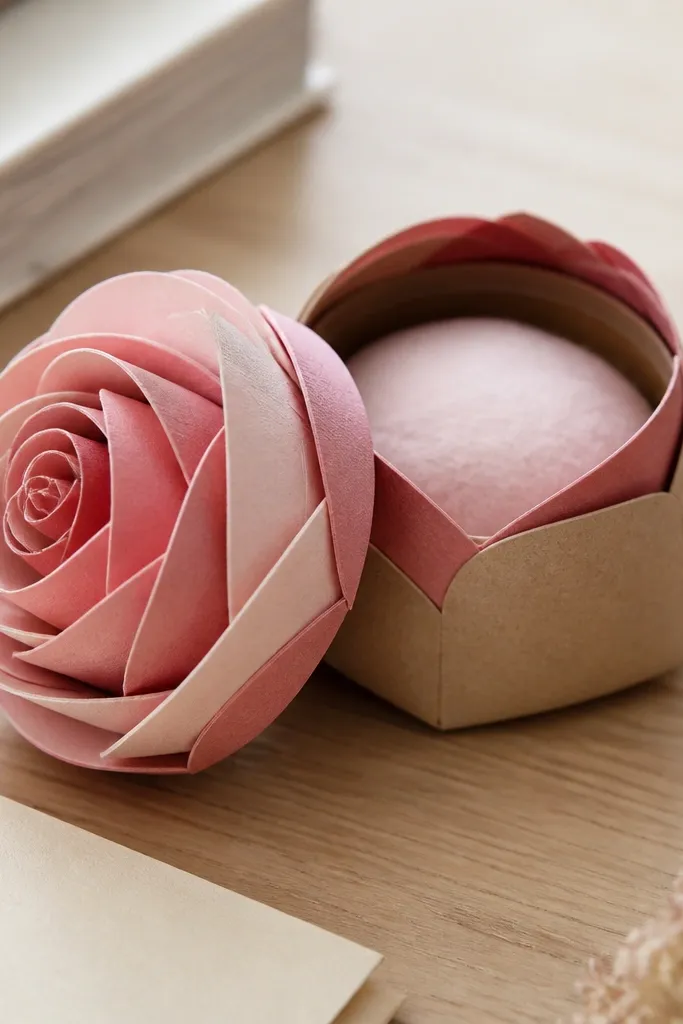
This one surprised me because the rosebud look comes mostly from layering thickness, not from fancy drawing. I used blush pink and dusty rose paper strips cut into petal shapes, then I curled each strip slightly before stacking. Between layers I added thin accordion “spacers” so the petals lift and create that squishy volume. It photographs like a real flower because the highlights travel across the curved paper edges instead of staying flat.
Start by cutting 10-12 petal strips from 160-180 gsm paper, each about 20-25 mm wide and 80-90 mm long. Score the center line lightly, curl each petal around a pencil, and glue a small accordion spacer behind the base of each petal. Build the lid as a spiral: glue the first petal tight, then overlap each next petal by about one-third. For the base, cut a kraft cardstock circle that fits inside the spiral and glue a ring of folded paper tabs to hold the lid. Close the box by pressing the lid down until the tabs grip, then add a matching ribbon strip around the outside.
Curl petals more than you think — a small bend makes the whole rosebud look soft instead of flat.
Don’t glue petals directly edge-to-edge — you lose the puff and the flower becomes a paper disk.
4. Boba Cup Squish Coaster
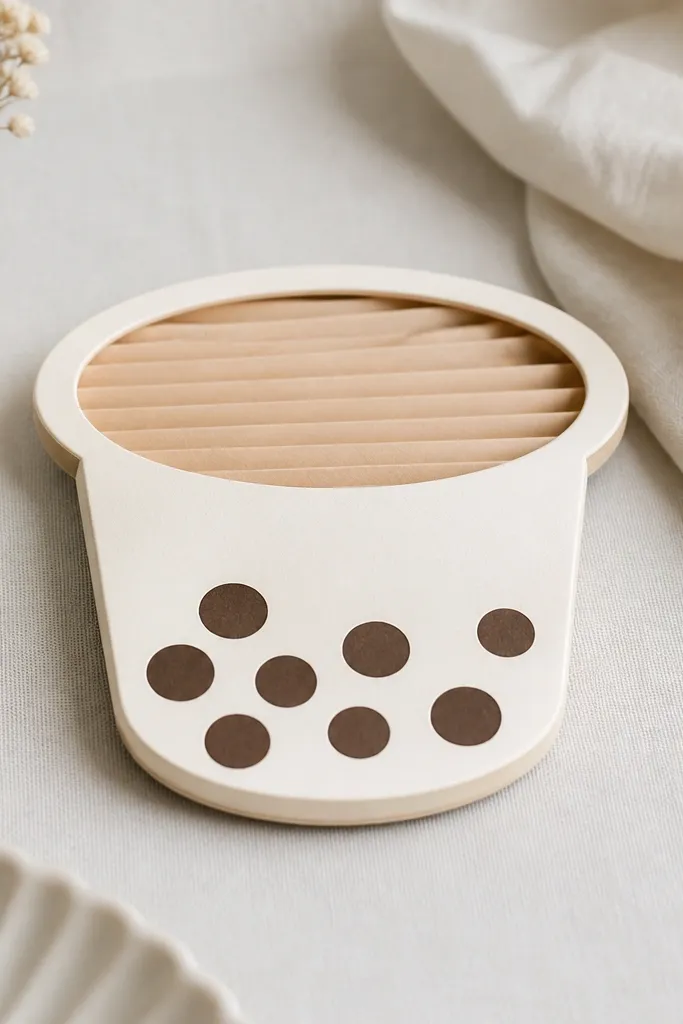
I made this for the “desk cute” category and it works because it’s functional. The squish doesn’t mean it’s floppy; it just adds a gentle rounded thickness so the cup looks plush. I used cream cardstock for the outer and warm beige for the fold core, then added brown circles for boba. This looks great on dark desks because the cream reads clean and the folded sides catch light. It also makes a nice gift add-on for anyone who loves stationery and drinks.
Cut a cup outline from 200 gsm cardstock and a second matching outline from 160 gsm paper for the underside. On the underside piece, glue a strip of accordion folds behind the cup sides, leaving the center open so it stays stable. Assemble by sandwiching the accordion core between the front cup outline and the underside, aligning the rim carefully. Add boba circles cut from dark brown paper, then finish with a thin clear tape layer over the boba so they look slightly glossy. Finally, trim the coaster edges with a straight ruler so it sits even on a table.
Make the rim thicker by adding a 5 mm paper band around the top edge — it stops the coaster from looking thin.
Don’t skip the underside piece — without it, the folds show through and the coaster looks messy.
5. Heart Envelope Squish Letter Holder
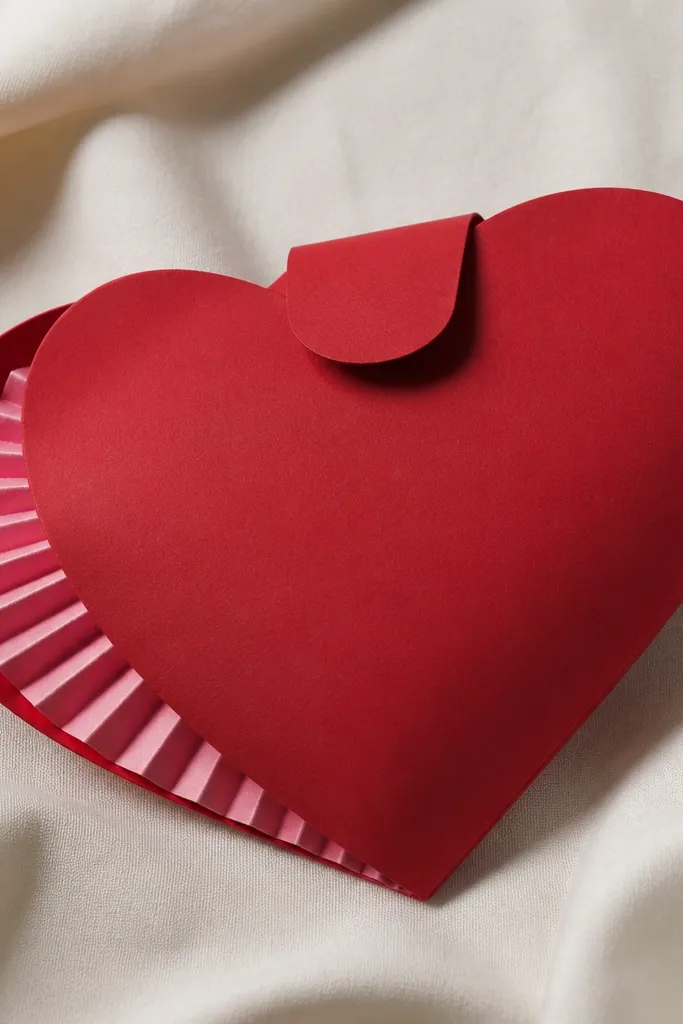
Cut a heart outline from 200 gsm cardstock for the outer shell and another heart from 160-180 gsm for the liner. On the liner, create 8 accordion folds running from the top point toward the middle, then glue them to the inner edges. Place the folded liner inside the outer shell and glue only along the outer perimeter, leaving the center free so it can puff. Create a top flap by cutting a 60-70 mm long strip of matching cardstock, scoring a hinge line, and gluing it to the upper point of the heart. Close with a small magnetic dot or a paper clasp strip so the heart stays closed when gifted.
This is the type of paper squishy idea transformation that makes a simple note feel expensive. The secret is building a padded heart center, so the envelope doesn’t look like a flat card. I used deep red outside with pink folds inside, which gives you a “soft crush” effect when you squeeze the heart. It flatters people who like bold colors, and it also looks good on neutral backgrounds because the heart shape stays crisp. You can write a message on the outside without losing the squish silhouette.
AvoidDon’t glue the accordion folds to the outer flap hinge — it locks the puff and the heart stops squishing.
Pro tipUse a thick gel pen for the message — it sits nicely on matte cardstock and doesn’t bleed.
6. Bow Tie Squish Hair Clip
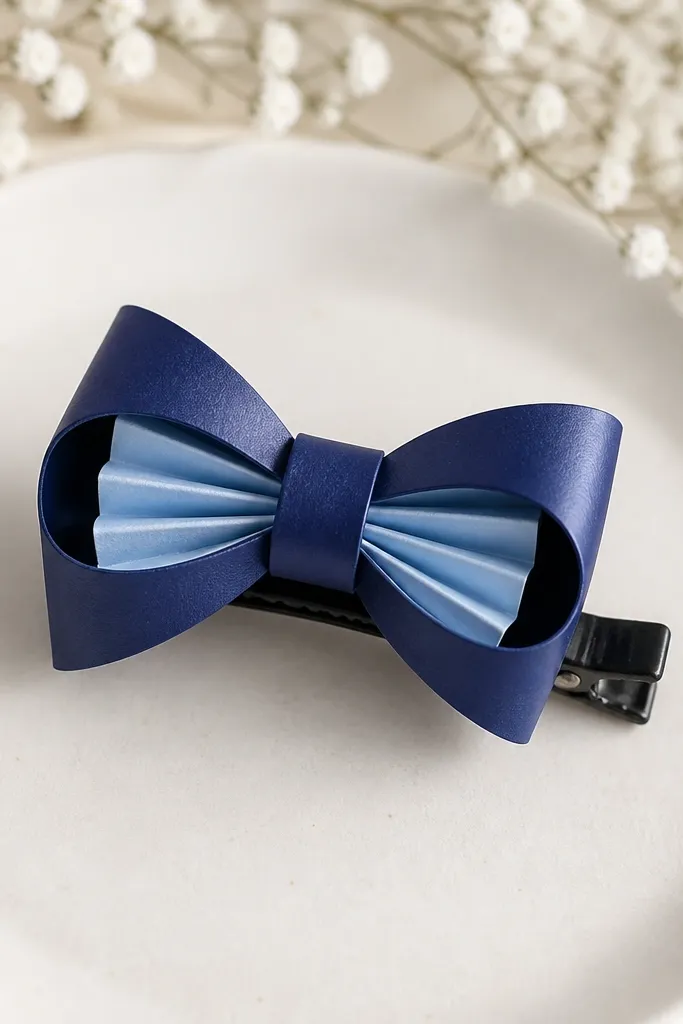
Cut two bow outer shapes from 200 gsm navy cardstock and two inner puff pieces from 160-180 gsm light blue paper. On each inner puff, fold 6 accordion ridges, then glue the puff piece behind the outer bow shape, keeping the tips aligned. Assemble the bow halves on top of each other with the puff between them, then glue the center knot: a folded strip about 12 mm wide wrapped around the middle. Attach the bow to a black alligator clip using hot glue on the paper knot area, not the puff tips. Add a tiny loop at the top knot if you want it to read like a real accessory.
This bow tie looks like a mini fabric accessory even though it’s paper. I used navy cardstock outside because it hides fold lines better than bright colors, and I used light blue for the interior puff so the squish shows when the bow moves. It works especially well on hair with warm tones because the navy frames the hair color instead of competing. The clip holds well because the paper doesn’t fight the spring like some heavier crafts do. It also looks cute in close-up photos because the center knot catches light.
AvoidDon’t glue the clip directly on the accordion — it flattens the squish and the bow looks dead.
Pro tipTrim the bow tips to a slight curve before gluing; it makes the paper bow look less “origami” and more like a store-bought clip.
7. Mini Rainbow Squish Garland Segment
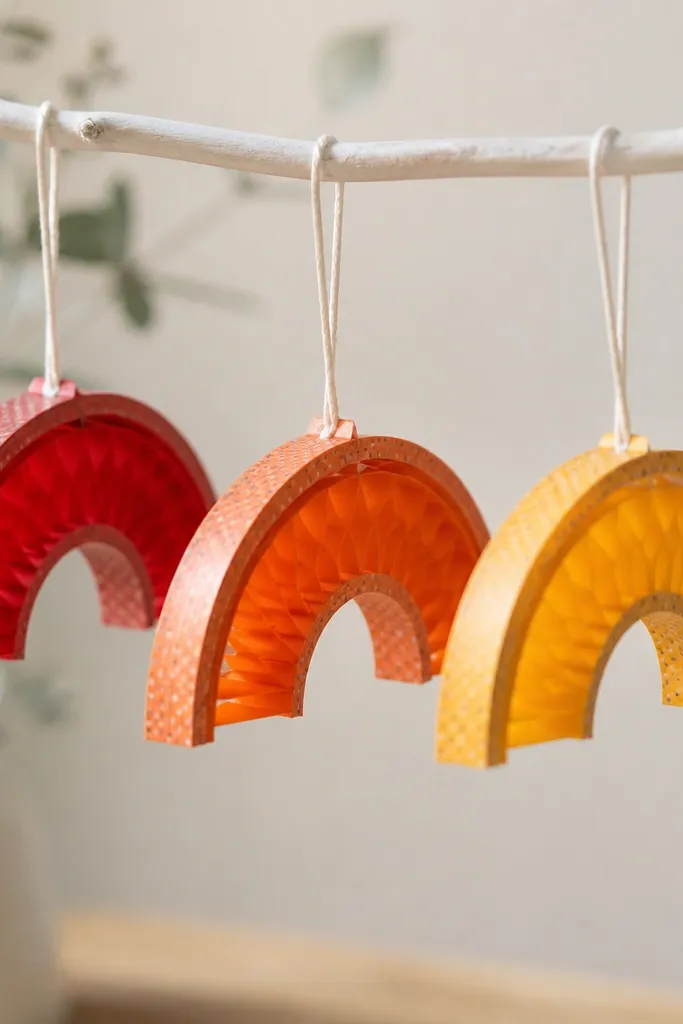
Cut 6 arc shapes total: 3 for the outer layer and 3 for the inner layer, each about 90 mm long and 20-25 mm wide. For the inner arcs, fold 5 accordion ridges along the length, then glue the accordion to the inner arc edges. Sandwich the inner arc between outer arc pieces and seal the seam with a thin strip of matching washi tape. Punch a hole at the top of each arc and thread with 0.5-0.7 mm twine, tying a knot so each segment hangs with a slight curve. Add a tiny white highlight strip on the front by brushing on diluted white acrylic paint.
I made these to test how far you can push “cute volume” without making a full garland. The secret is that each rainbow arc is a compact squish — you can squeeze it between fingers and it springs back. I used thick colored cardstock for the outer arcs and a lighter shade for the accordion interior, so the rainbow has depth. This looks great over a desk or shelf because the arcs cast tiny shadows that make them feel dimensional. It flatters bright rooms and also works in grayscale spaces if you pick one strong accent color.
AvoidDon’t make every accordion fold the same spacing — the arc looks stiff instead of springy.
Pro tipMake the arcs slightly different heights — one set lower looks more playful and less uniform.
8. Peppermint Candy Squish Twist
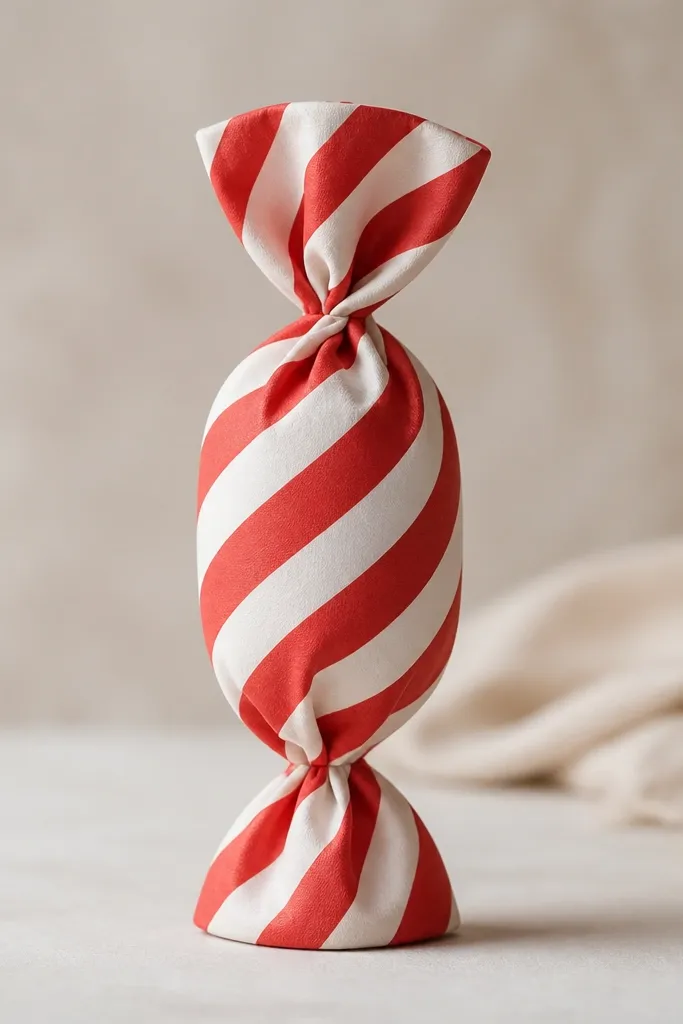
Cut two long strips for the outer candy: 25 mm wide, about 220-240 mm long, alternating red and white bands. Fold one strip into a tight accordion at 10-12 mm intervals, then twist it gently into a spiral shape. Glue the twisted accordion to the second strip as the outer wrap, lining the stripes so the pattern continues. Seal the ends with small circular caps cut from 200 gsm cardstock. Finally, press lightly for 20 seconds so the paper “remembers” the twist before you hang or display it.
Peppermint paper squish looks best when it has a real twist, not a flat spiral. I used alternating red and white cardstock strips and built the volume with offset accordion folds so the candy looks rounded from every angle. It’s great for party decor because it reads clearly from across a room, and the stripes make the squish visible even without pressing it. Warm undertones in the room make the red look deeper, and the white keeps it clean. It also works as a small gift topper when you add a string loop.
AvoidDon’t over-tighten the twist — if it kinks, the squish won’t look smooth.
Pro tipUse a ruler to keep stripe width consistent — uneven stripes make the twist look homemade fast.
9. Square Pillow Squish Gift Tag
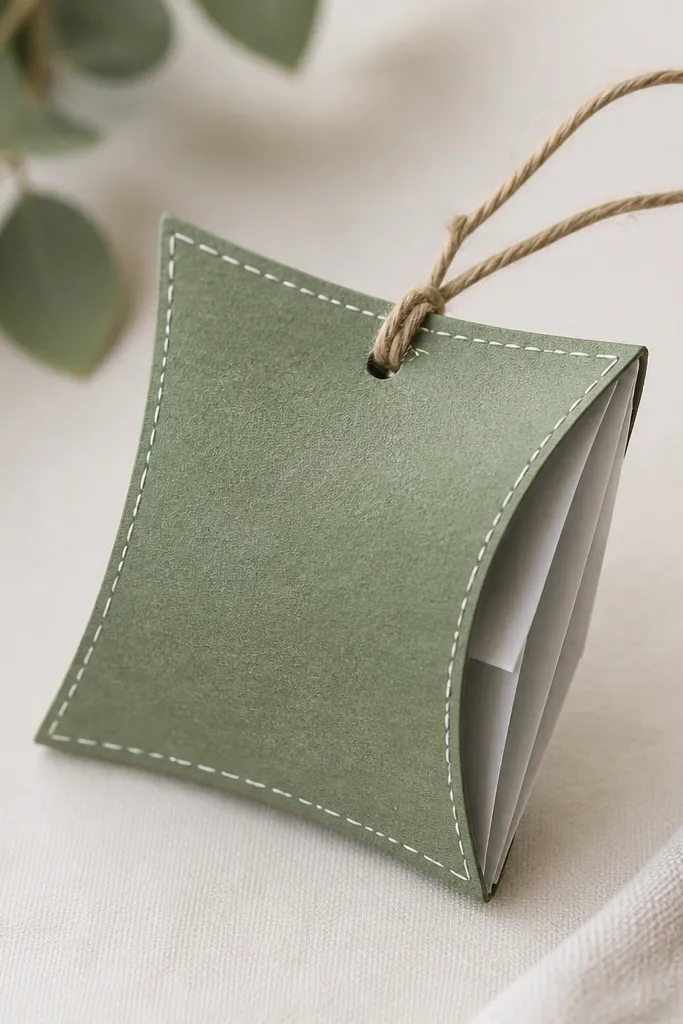
This is my go-to tag when I want the gift to feel thoughtful without buying anything. The squish comes from a compact accordion core that sits behind a square front panel, so it looks padded when you pick it up. I used sage green because it hides fingerprints and looks calm in photos, and the gray interior keeps the puff subtle. It’s flattering on warm gift wrapping because sage balances gold and brown paper. Also, it’s easy to write on the front without smearing if you use a gel pen.
Cut a square front panel from 200 gsm cardstock (about 70 x 70 mm) and a square back panel from 160-180 gsm. On the back panel, fold an accordion strip that fits inside the square, about 8-10 folds at 6-7 mm spacing. Glue the accordion to the inner edges of the back panel, then attach the back to the front only around the perimeter. Add a stitched border by drawing a dotted line 5 mm inside the edge with a white gel pen. Punch a hole at the top center and tie twine through it before the glue fully sets.
Write your message before you assemble the front if you’re using paint markers — they need drying time.
Don’t glue the entire back panel down — leave the center free or the tag won’t puff.
10. Butterfly Wing Squish Bookmark
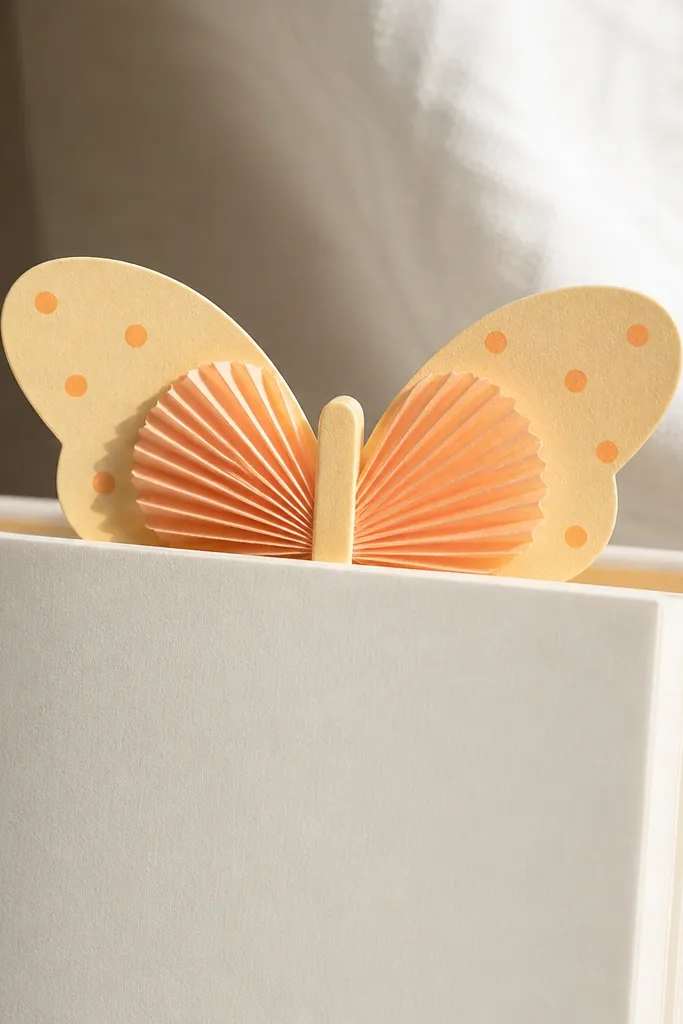
Cut one butterfly outline from 200 gsm cardstock for the front and one from 160-180 gsm for the back, including a slim vertical spine. On the back piece, add 10 narrow accordion folds across the wing area, then glue them behind each wing half. Sandwich the front and back, gluing only along the spine and outer edges so the wings can puff. Trim the edges with scissors to keep the wing curves smooth. Finish by adding dot details with an orange marker and a thin line of white gel pen along the wing edges for a “highlight” look.
I like this bookmark because it’s squishy without being bulky. The butterfly silhouette looks delicate, but the accordion core gives it a soft thickness so it doesn’t look like a flat cutout. I used light yellow wings because they read warm against white pages, and the pale peach interior shows depth when the bookmark shifts. This looks good on people who read in bright natural light because the folds catch small highlights. It also makes books feel more personal without adding clutter.
AvoidDon’t make the wings too wide — if the accordion core is oversized, the bookmark gets thick fast.
Pro tipKeep the spine narrow (about 8-10 mm) so it slides between pages without catching.
11. Layered Starburst Squish Paper Wreath Piece
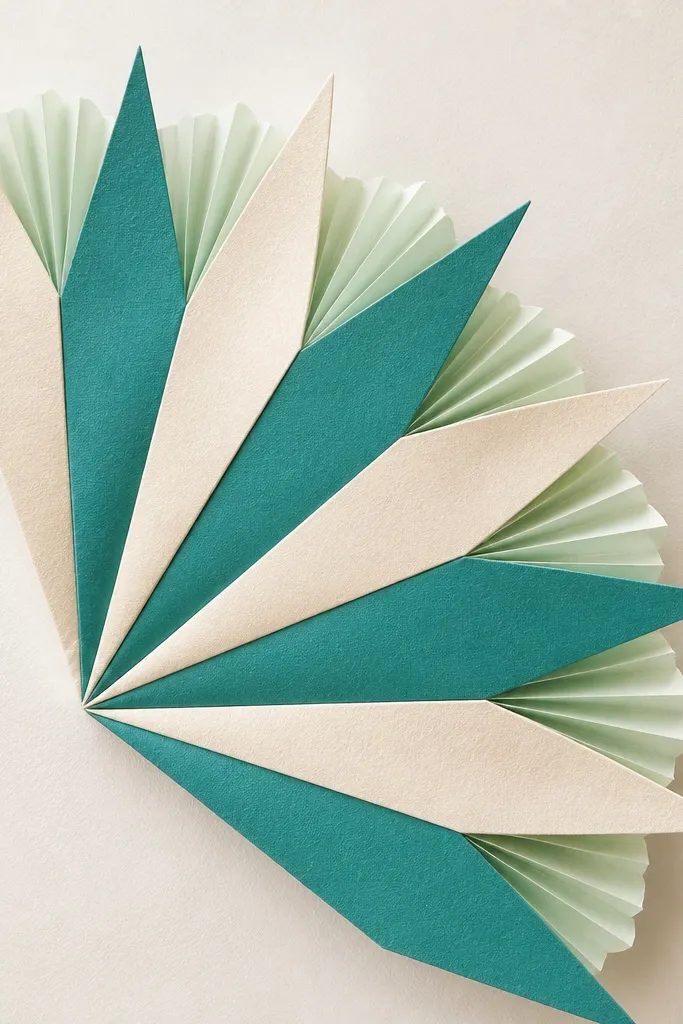
Cut a 5-6 point starburst outline from 200 gsm teal cardstock and another from 160-180 gsm mint paper for the puff base. On the mint base, fold 6 accordion ridges that run behind the point centers, then glue the puff base to the back of the teal starburst. Layer a second teal starburst on top but offset it by 3-4 mm so each point shows a cream edge — this is what creates the “before and after” depth. Add a cream backing layer by gluing a thin cream starburst behind the mint puff base. Finish by trimming point tips to match lengths and pressing with a ruler for crisp edges.
Starbursts look best when the points have depth. I made this as a segment you can attach to a larger wreath later, but even alone it looks dimensional because the points are stacked with spacer folds. I used teal and cream for contrast, then mint for the interior puff so the starburst glows slightly in photos. This works on warm-toned walls and also on dark backgrounds because the cream points anchor the design. It flatters minimal decor because it has clean geometry but still feels soft to the touch.
AvoidDon’t glue all layers flat with no spacer — you lose the squish and it becomes a flat badge.
Pro tipOffset layers by the same amount each time so the starburst looks intentional rather than crooked.
12. Sunburst Pocket Squish Wall Decor
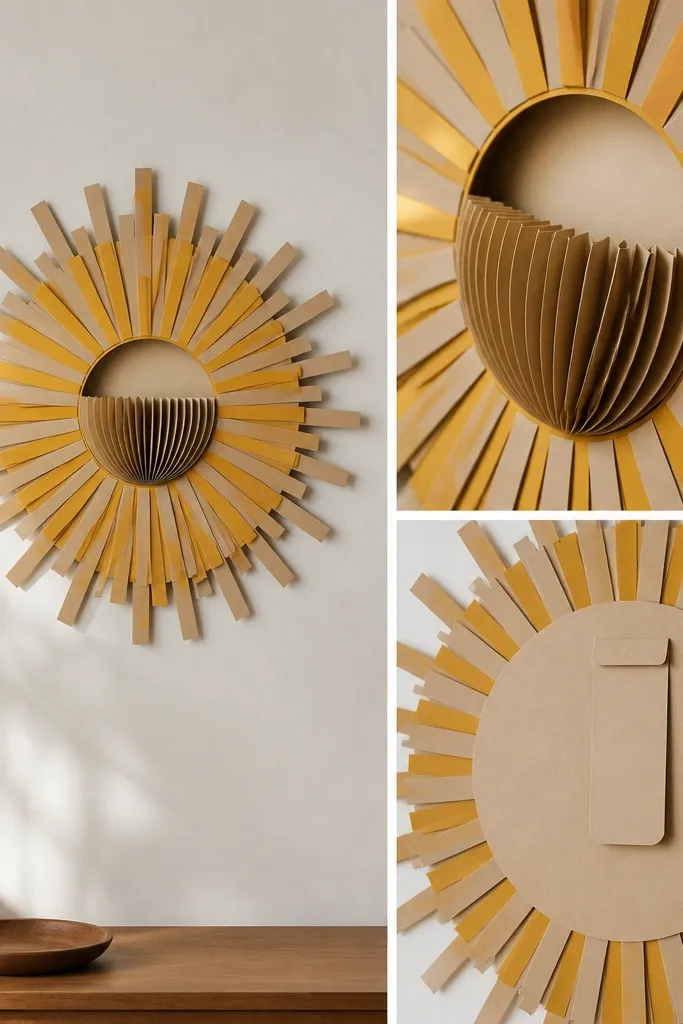
Cut 12 ray strips (about 15 x 90 mm) from mustard and tan cardstock and alternate colors for a checker glow. Create a ring base from 200 gsm cardstock with an inner hole about 35-40 mm wide. For the pocket center, cut a circle from 160-180 gsm and glue 8 accordion folds around the edge of the circle so it puffs inward. Glue the circle pocket into the ring base, then attach the ray strips to the outer ring, all pointing outward. Add a back mounting tab from a 30 x 60 mm strip folded in half and glue it to the back center.
This is the one I hung on my pantry door because it makes small spaces feel playful. The squish comes from a pocket center that’s padded with accordion folds, so the rays look like they’re floating. I used mustard yellow rays because they warm up kitchens, and tan interior folding keeps the center readable without screaming. It flatters people who like golden decor but still want a soft, handmade look. When the door opens, the piece shifts slightly, and the rays cast gentle shadows.
AvoidDon’t make the rays too thin — they bend and the sunburst looks like a paper cutout.
Pro tipUse double-sided tape on the mounting tab instead of glue if you plan to remove it later.
13. Squeezable Moon Phase Paper Sculpture
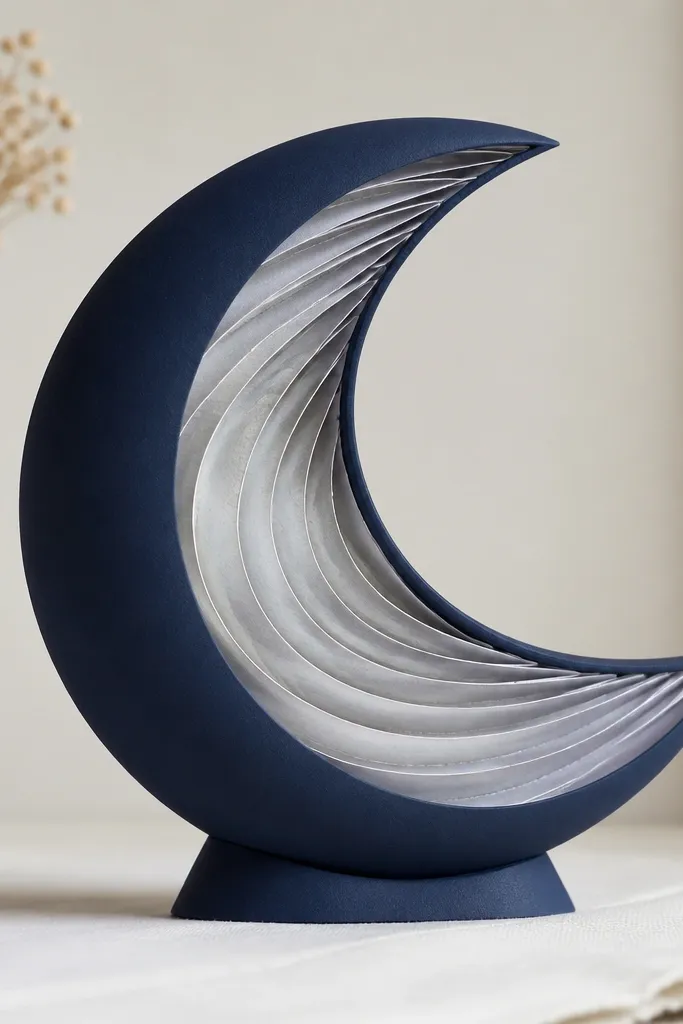
Cut a crescent moon outline from 200 gsm navy cardstock and a second crescent outline from 160-180 gsm silver paper. On the silver piece, fold 9 accordion ridges across the curved inner edge only, then glue them so they push outward slightly. Glue the silver crescent behind the navy crescent, aligning the outer curve so the puff follows the moon shape. Build a stand by cutting a small triangle base from kraft cardstock and folding tabs that grip the back of the moon. Press the stand tabs firmly and let it dry flat so it doesn’t wobble.
Moon phases look magical when they have a padded edge. I used deep navy cardstock for the outer silhouette and pale silver for the accordion interior, which makes the moon look like it has light trapped inside. It flatters cool-toned rooms and also looks great next to warm wood because the contrast makes both materials pop. The sculpture sits on a small stand, so it stays upright and still has that squeezeable feel when you press the edge gently. In photos, the accordion folds show as a soft gradient instead of a flat shadow.
AvoidDon’t glue the puff to the outer edge — it will warp the crescent curve.
Pro tipAdd one thin crescent highlight line with a metallic silver gel pen — it makes the folds look like they’re glowing.
14. Taco Bell-Style Taco Squish Table Number
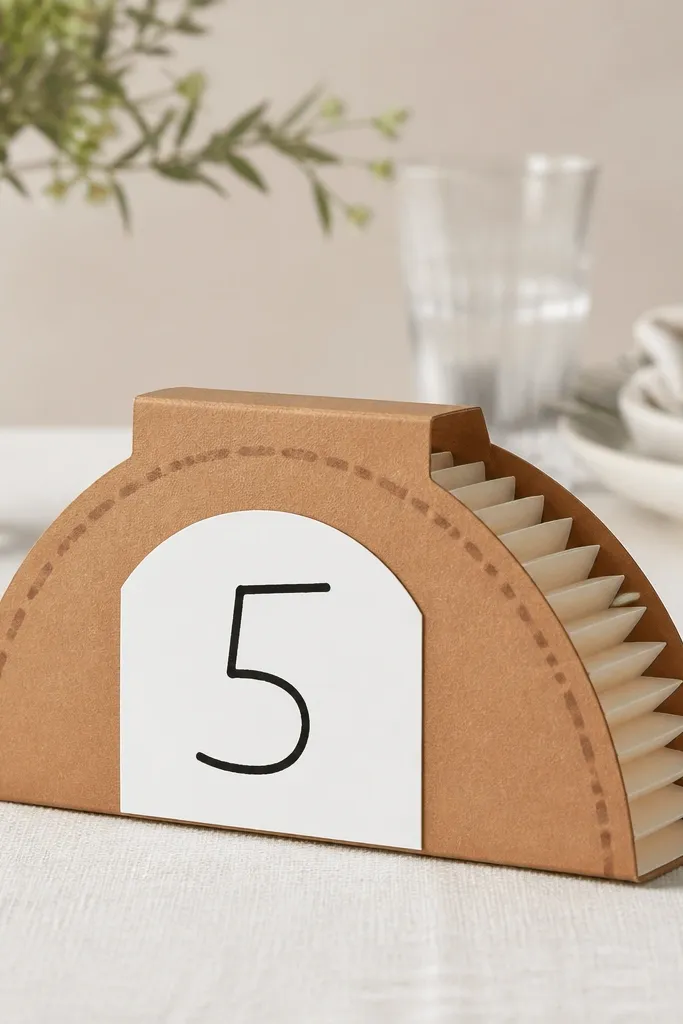
Cut two taco shell halves from 200 gsm brown cardstock and one inner taco piece from 160-180 gsm beige. On the beige inner piece, fold 7 accordion ridges and glue them to the curved inner surface. Assemble the taco shell by sandwiching the inner puff between the two brown halves, gluing only along the perimeter and leaving the top open enough for a base tab. Create a flat base by cutting a small trapezoid from kraft cardstock, folding a 10 mm tab, and gluing it to the taco back. Glue a white number panel (about 45 x 60 mm) to the front with straight edges, then write the number with a black gel pen.
This is a party trick I actually used for a small dinner: table numbers that look like decor. The squish comes from a padded taco shell, so the shape holds even when people pick it up. I used brown cardstock for the shell and light beige for the interior accordion, then added a clean white number panel so the number stays readable. It flatters warm lighting because the brown looks rich, and the beige keeps it from going muddy. It also makes guests smile because it’s obviously handmade but still tidy.
AvoidDon’t skip the base tab — without it, the taco leans and reads messy in photos.
Pro tipUse a black gel pen and fill the number solid; thin marker lines disappear on brown paper.
15. Knot Bow Squish Gift Topper
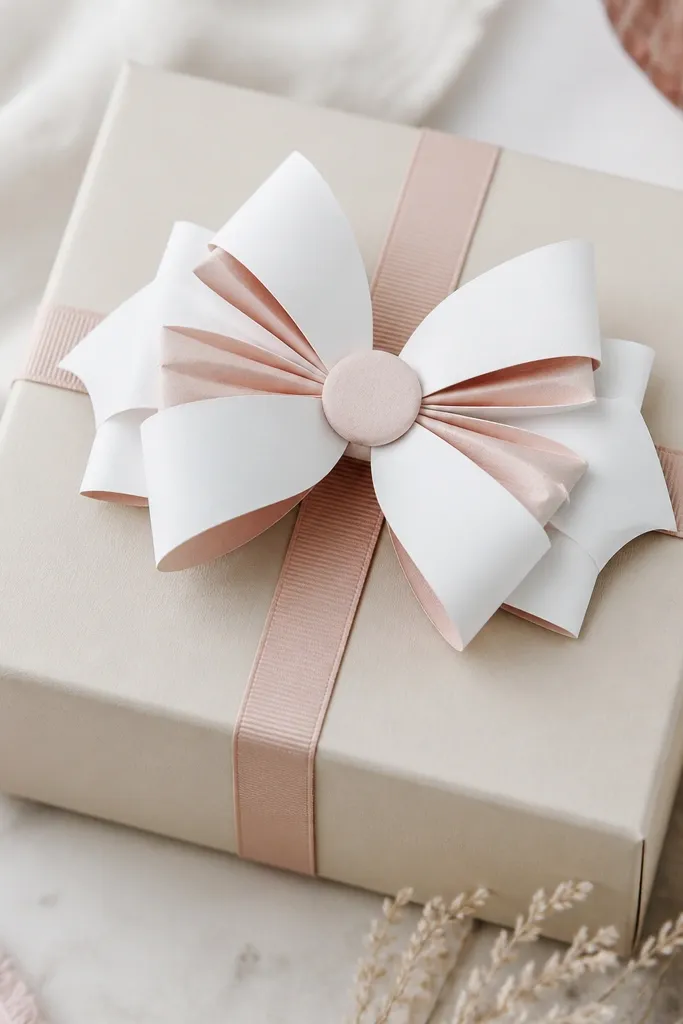
Cut two bow loop pieces from 200 gsm cardstock, each about 90 mm long and 35 mm wide, plus one knot piece from 160-180 gsm. For the padded center, cut a small strip of 160-180 gsm and fold 6 accordion ridges at 8 mm spacing, then glue it into a tight oval. Assemble the loops by gluing their bases to the oval center, then wrap the knot piece around the center and glue it closed. Add a small back support strip so the topper sits on the gift without tipping. Finally, press the whole bow with a flat object for 30 seconds so the loops hold their shape.
This topper turns a plain gift box into something that looks like it came from a shop. I built the knot bow with a padded center so the loops don’t collapse flat — that’s what makes it feel squishy. I used soft pink and white because it looks clean on almost every wrapping paper color, especially kraft and navy. The accordion interior shows just enough color behind the loops, so it looks layered without being bulky. For people with neutral style, this is the easiest “pretty but not loud” version.
AvoidDon’t overfill the knot with glue — the glue squeeze lines show through the paper.
Pro tipMake the bow loops slightly uneven in width; symmetrical loops look stiff and cheap.



