
1. Cream Cloud Squishy Bookmark
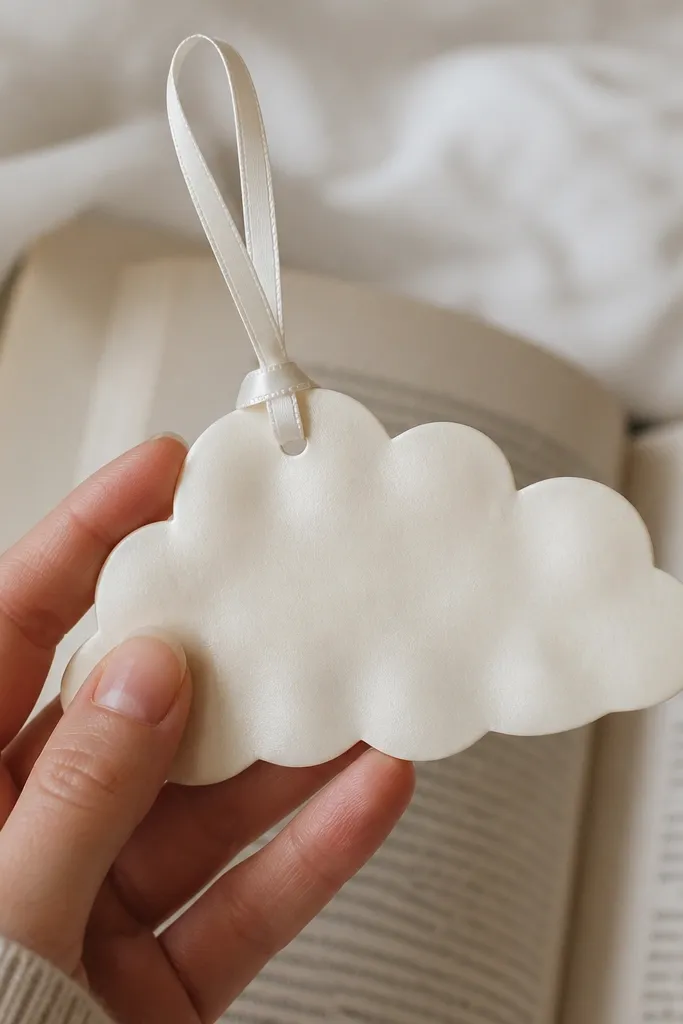
This cloud bookmark looks cozy because the silhouette is rounded and the folds create micro-shadows under the paper bumps. I make the outer layer in cream cardstock and lightly tint the crease lines with a warm gray pencil so it feels like soft daylight, not flat craft paper. It looks great on anyone who reads a lot — it sits gently between pages and doesn’t snag like wide, stiff bookmarks. If you have darker books, the cream pops cleanly; if your books are light, the pencil shading gives it depth anyway. The styling principle is simple: keep the outline curvy and the edges tidy so the squishy effect reads as “soft,” not “messy.”
Start by cutting a cloud outline from 180 gsm cream cardstock. Score along the main bump valleys, then fold each valley inward to create a padded contour. Cut a second identical cloud and glue it behind the first using a thin glue stick, leaving the top edge slightly free so the folds can breathe. Finish by adding a small ribbon loop through the top seam and pressing the whole bookmark under a book for 10 minutes.
Rub a tiny bit of white chalk along the bump edges for a “powdered” look that reads cozy under warm lamps.
Don’t use thick liquid glue — it makes the cloud look lumpy and shiny instead of plush.
2. Sage Heart Pocket Squishy Card
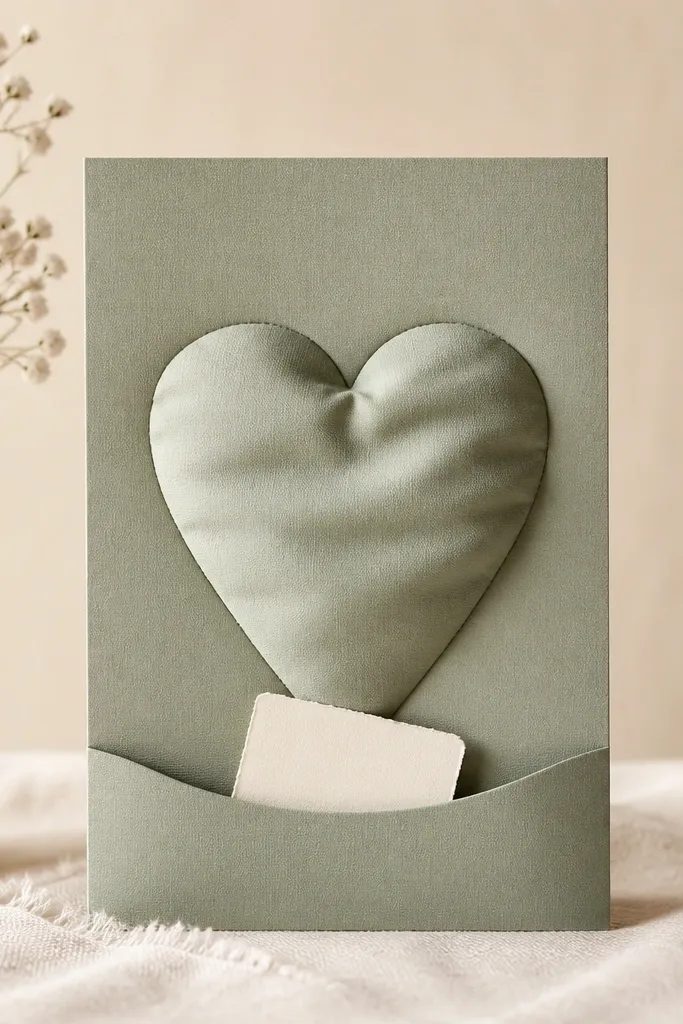
A sage heart card feels cozy year round because sage reads calm and slightly springy, while the heart shape stays warm. I use a pocket design so it’s interactive — you can tuck a short message or gift note inside. The heart looks squishy because it has a folded, accordion-like interior that pushes the outer layer outward. This card flatters most skin tones when you photograph it because sage sits in the same soft range as warm undertones. The styling principle is contrast: keep the background matte and let the heart’s edges have a gentle darker outline.
Fold an A6 card base from matte sage cardstock. Cut a heart from the front, but leave a 1 cm hinge at the bottom so it opens like a pocket flap. Create the squishy heart by cutting two heart layers and adding a strip of folded accordion cardstock behind the center. Glue the accordion strip to the inside of the heart layers, then close the pocket and press with a heavy book for 15 minutes.
Write the message on off-white paper and tie it with a 6 mm satin ribbon for a softer look in photos.
Avoid bright neon inks on sage — they overpower the cozy mood and make the paper look cheap.
3. Oatmeal Donut Desk Squishy
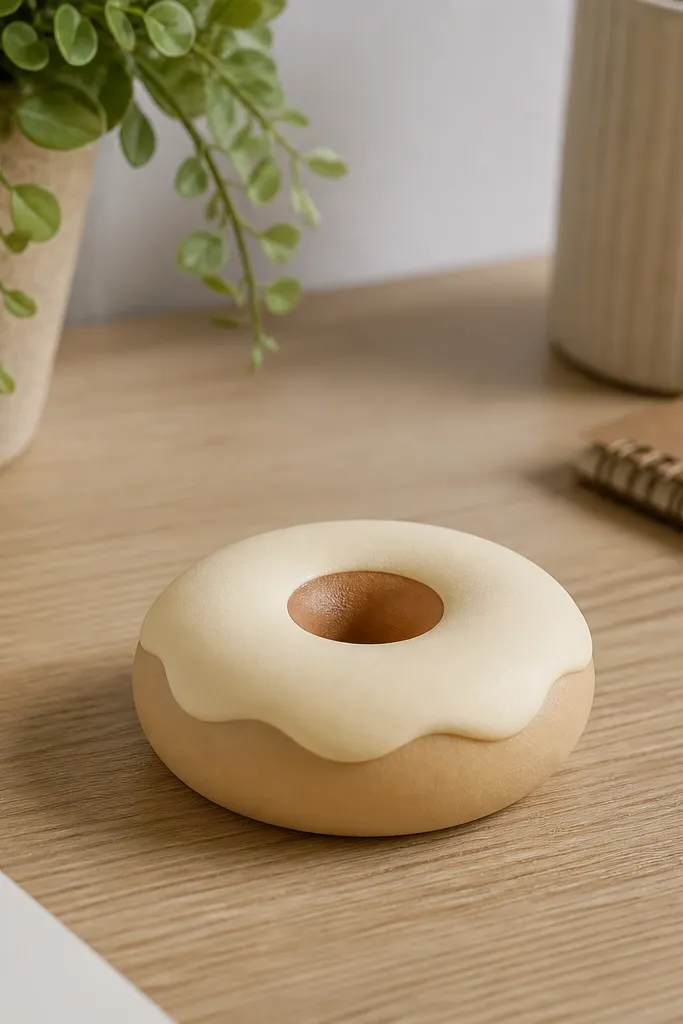
This donut squishy is the kind of desk piece that makes people smile because it looks edible but still paper-light. The oatmeal base feels cozy in both winter and summer because it’s a warm neutral. I build the center hole with a clean die-cut circle and then add a thin folded “ring” inside, so when you press it, the edges bounce back. It looks good on warm wood desks and also on gray tabletops because the ring shadows read clearly. The styling principle is texture without bulk: matte paper for the base, a slightly glossy layer for the glaze.
Cut two identical donut rings from 200 gsm oatmeal cardstock, with a 2.5 cm inner hole. Cut a strip of thin cardstock, accordion-fold it, and glue it around the inner edge to create the squishy depth. Layer a second donut ring on the front and glue around the outer edge only, leaving the inner hinge area slightly flexible. Add a glaze top by cutting a cream circle slightly larger than the hole and stamping small “sprinkles” with a brown ink pad.
Use a foam brush to dab ink speckles so they look like printed sprinkles, not marker dots.
Don’t fully seal the inner hole — a fully glued center makes it feel like a flat coaster.
4. Dusty Blue Snowball Pom-Paper Squishy
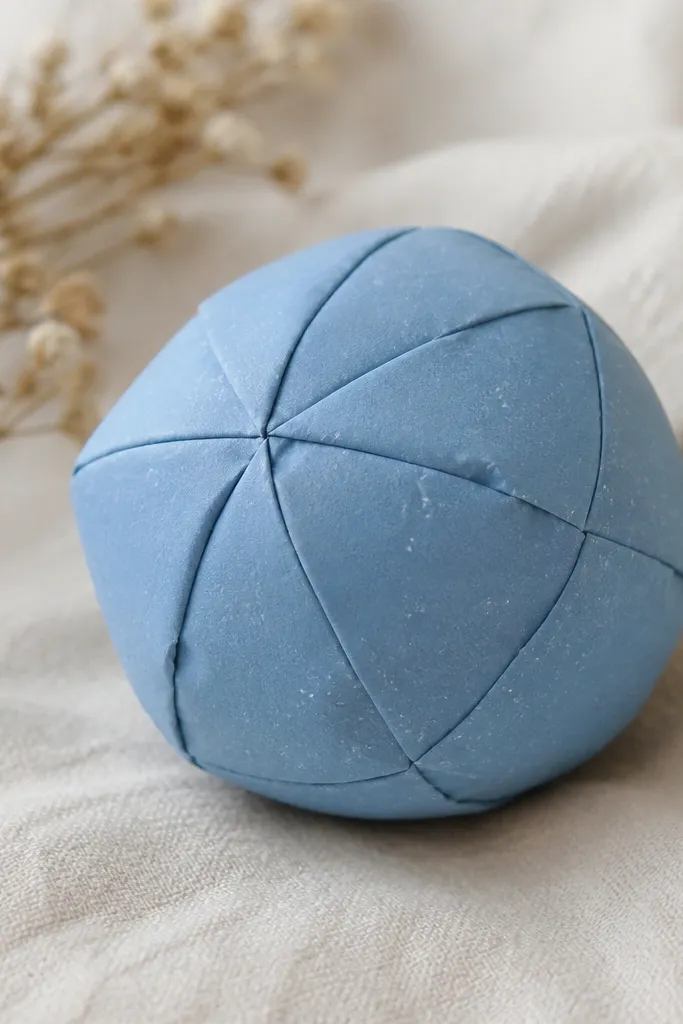
This snowball squishy works in winter but also in the “cool cozy” look people want in summer. Dusty blue feels calm and soft, and the rounded segmented design reads like a pom without bulky materials. I keep the segments small so the ball looks even when you squeeze it. It suits anyone who likes low-fuss decor because you can hang it, set it on a shelf, or clip it to a gift bag. The styling principle is micro-details: small speckles and short segment lines make the squish feel hand-crafted, not plain.
Cut 8 to 10 identical curved panels from 180 gsm dusty blue cardstock. Score each panel along one edge, then accordion-fold so each piece has a slight bend. Glue the panels into a circle around a small paper disk using a glue stick, then press under a book. Add white speckles with a watered-down white acrylic dabbed with a toothbrush, and finish by tying a thin string loop at the top.
If your ball leans, add a tiny folded tab inside one seam to balance the shape.
Avoid large glitter — it sheds and makes the surface look scratchy.
5. Terracotta Mini Pumpkin Squishy Clip
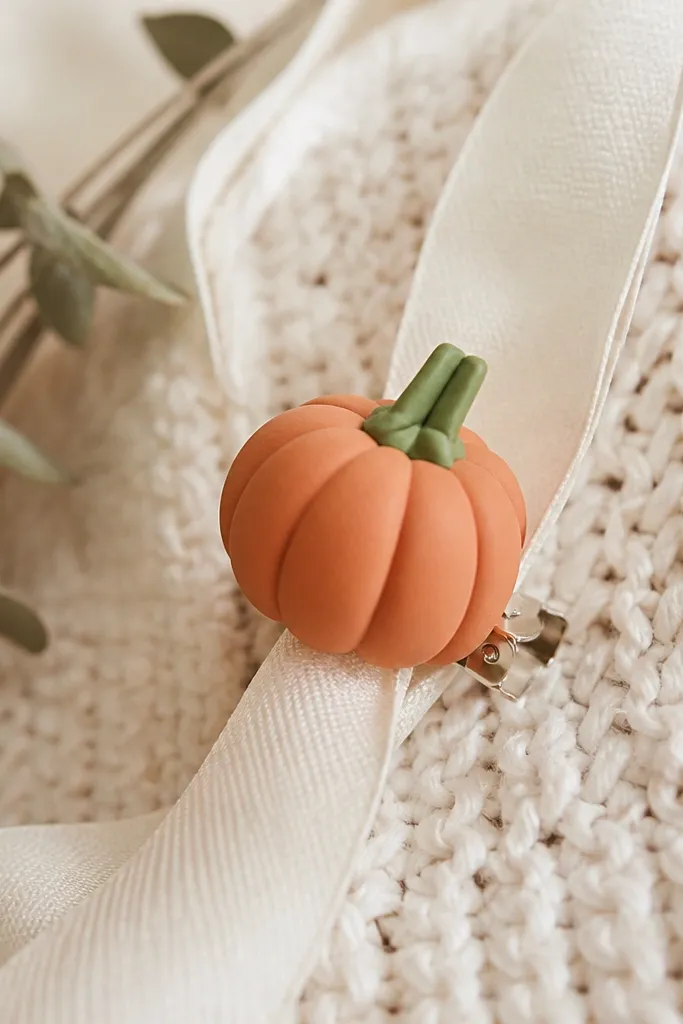
Terracotta pumpkins look cozy because that color sits between warm clay and autumn spice. This mini clip is great if you want seasonal decor without a big centerpiece. The squishy comes from folded ridges that create bounce — when you press the sides, the ridges compress and spring back. It flatters warm skin tones and wood backgrounds, and it photographs well on brown paper bags and kraft twine. The styling principle is scale: keep it small enough that the ridges are tight and readable.
Cut a pumpkin shape from 200 gsm terracotta cardstock and score it into 6 to 8 ribs. Cut two identical pumpkin halves and glue them together around the outer edge, but leave the top center open for a stem. For the squishy interior, glue a folded strip of accordion cardstock behind the rib lines. Add a green stem by rolling a small rectangle into a tight tube and gluing it into the opening, then clip the finished pumpkin to a 1 cm ribbon strip.
Tint the rib valleys with a light brown colored pencil so the ridges look carved, not flat.
Don’t make the ribs too wide — wide ribs read like paper folds, not a pumpkin.
6. Marshmallow Bunny Wobble Squishy
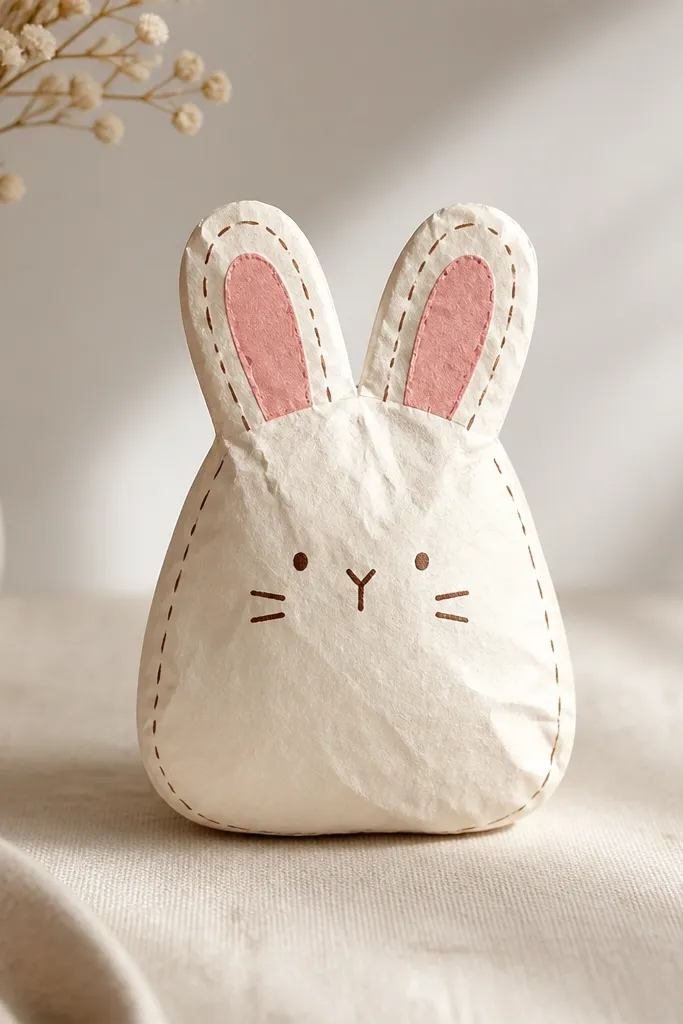
Cut a bunny body and duplicate it for a front and back. Score the body along the center and fold it so the cheeks curve outward. Create wobble by gluing a thin folded strip (like an accordion spine) between the front and back layers at the midline only. Add ears by layering a pink inner ear patch on the front half, then glue the two halves together leaving a small bottom gap. Press flat under a book for 10 minutes, then test the wobble by tapping the ears.
This bunny squishy is cozy and playful, and it stays cute across seasons because it’s not strictly holiday-coded. The secret is the wobble: the body has a small gap inside, so it bounces when you tap it. I use off-white cardstock with a blush-pink ear patch so it reads soft even under bright light. It looks good in both warm and cool rooms because the color balance is neutral plus a tiny pink accent. The styling principle is “soft contrast” — keep line art dark but eyes and nose small so it doesn’t look harsh.
AvoidAvoid heavy black outlines — they make it look like a cutout instead of a squishy plush.
Pro tipUse a white gel pen for tiny highlight dots on the eyes to keep it looking gentle.
7. Rose Clay Lip Balm Sleeve Squishy
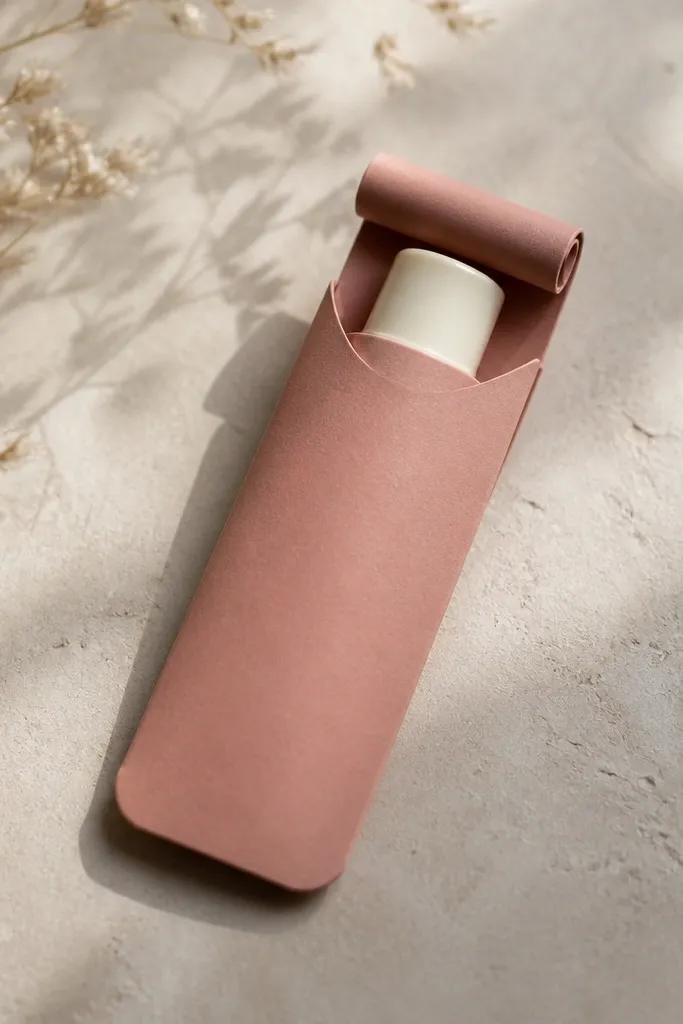
Measure your lip balm tube diameter and cut a sleeve rectangle with 1 cm extra width for overlap. Cut two sleeve pieces from 180-200 gsm rose clay cardstock. Crumple a small sheet of thin paper, then press it flat and cut it to fit the sleeve area — glue it only at the top and bottom so it stays springy. Wrap the tube, overlap the edges, and tape or glue the overlap line, then add a rolled paper closure strip on the side.
This one is practical cozy — it protects a lip balm and looks like a little plush case on your bathroom shelf. Rose clay is warm and flattering, and the rounded corners make it feel padded. The squishy look happens because I add a thin layer of crumpled and re-pressed paper between the sleeve and the tube, so the surface has micro-dents. It suits basically any skin tone because it’s a muted warm pink-brown, not a neon color. The styling principle is tactile contrast: smooth outer paper with a slightly textured interior for that soft feel.
AvoidDon’t use paper that’s too thin — it will crease hard and the sleeve will look wrinkled.
Pro tipAdd a small belly band from matching paper to hide the seam and make it look intentional.
8. Cream and Gold Star Squishy Ornament
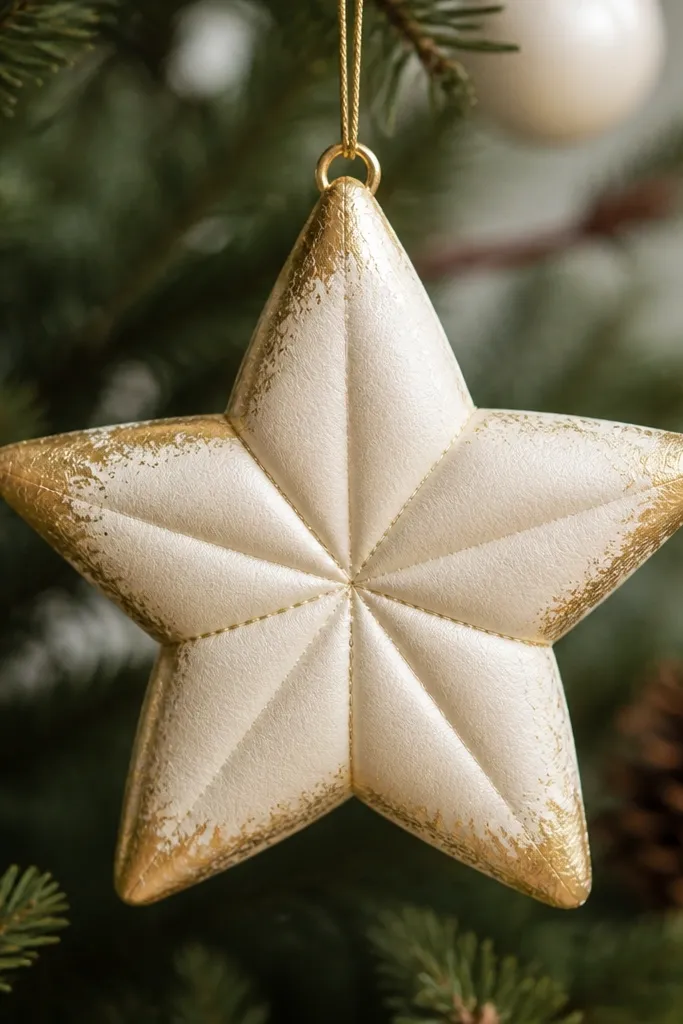
Cut a five-point star from cream cardstock and duplicate it for the back layer. For the squishy structure, cut 10 small folded tabs from thin paper and glue two tabs per star point on the inside. Glue front and back together, aligning points carefully and pressing under a book for 20 minutes. Add gold edging by brushing a thin line of gold paint pen along each point edge, then attach a string loop through a small hole at the top.
Stars are the easiest way to make paper squishies feel festive without changing the core technique. Cream plus gold edging looks cozy because it reads warm, not icy. I build the squishy points with folded tabs behind each arm, so each point has a little give when you press it. This ornament looks good on both silver and warm yellow lights, because the gold trim catches highlights instead of reflecting harshly. The styling principle is edge control: foil goes on the outside edge only so it doesn’t smear through the surface.
AvoidAvoid full-surface foil — it makes the ornament look flat and too reflective.
Pro tipUse painter’s tape to mask the star points while you paint the gold line for crisp edges.
9. Monochrome Checkered Squishy Coaster
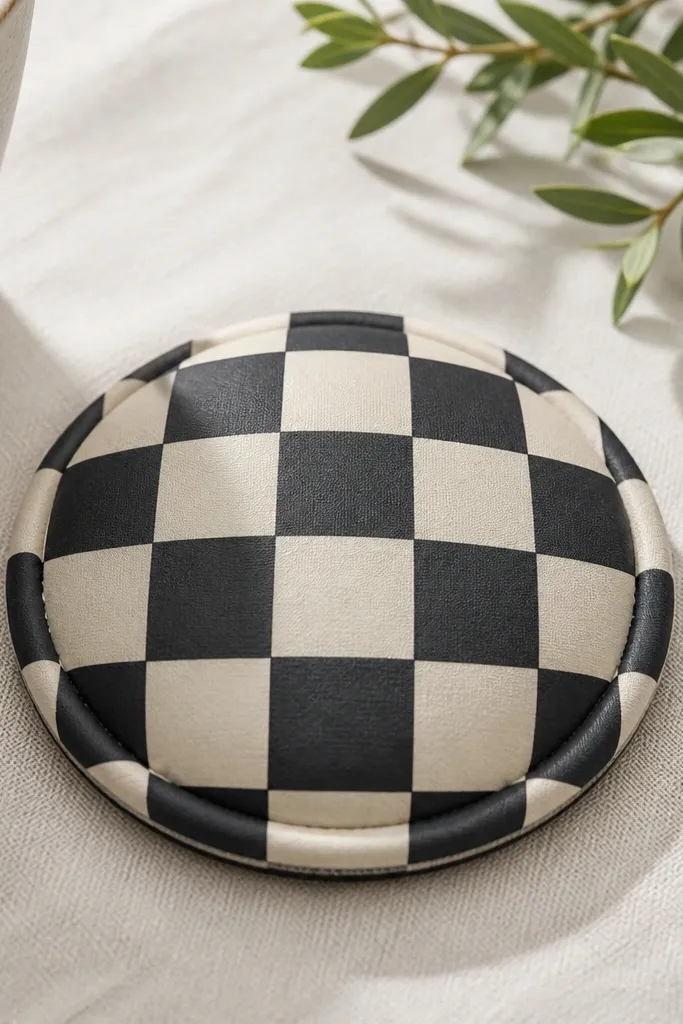
This coaster is cozy because the check pattern is graphic but the shape is rounded and compressible. I made it for people who like decor that doesn’t scream “craft project.” The squishy rim comes from a folded ring inside, so the coaster has a little cushion for cups and looks like it belongs with home goods. It flatters dark tables because the cream checks pop, and it looks classy on light tables because the black outlines are clean. The styling principle is geometry: keep the check spacing even and the rim thickness consistent.
Cut two circles from 200 gsm cardstock using a 9 cm circle template. Cut a strip of thin cardstock and accordion-fold it into a ring, then glue it between the two circle layers. Cover the top circle with a black-and-cream check paper panel or draw checks with a ruler and black marker, then glue it neatly. Press the coaster under a book for 15 minutes so the rim stays domed.
Seal the top with a light coat of matte clear spray so the checks don’t rub off.
Don’t skip sealing — marker smears when you set a cold mug down.
10. Olive Branch Layered Squishy Wall Tag
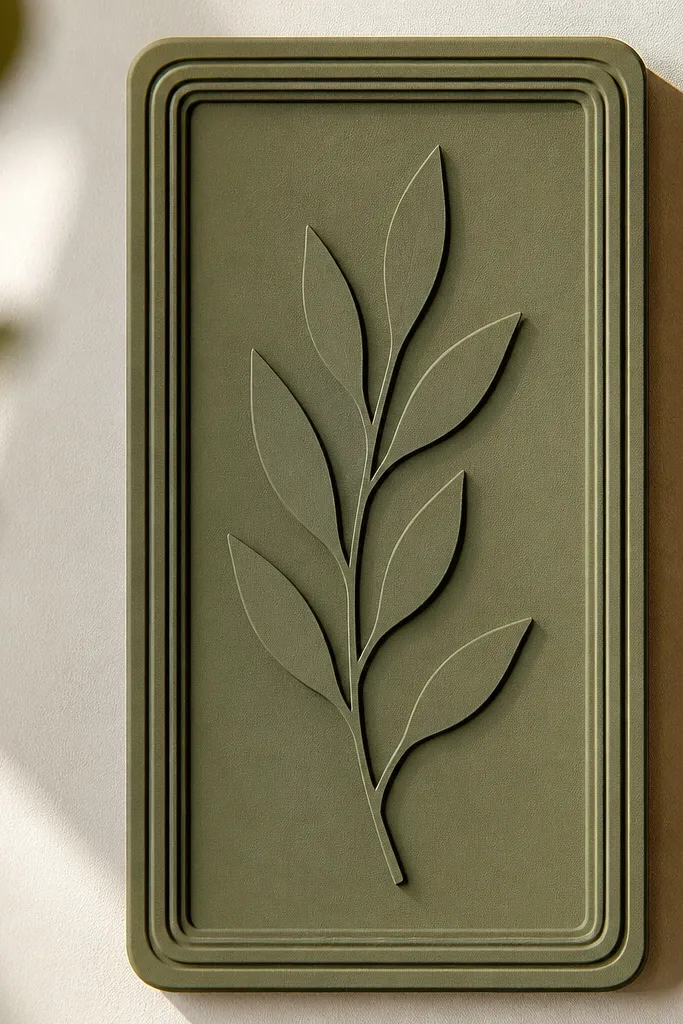
Cut a rectangle from matte olive cardstock and measure it so it fits your wall hook — mine is 10 cm by 14 cm. Cut a second rectangle for the back and create a squishy border by gluing short folded strips around the perimeter on the front layer. Attach the branch silhouette in the center using a lighter green cardstock cutout. Glue the front and back together, add a hanging string at the top, and press under a flat weight for 20 minutes.
A wall tag like this feels cozy because olive is calm year round and the branch silhouette reads natural without needing a full wreath. The squishy effect comes from a raised border built from folded strips, not from puff paint. I use a matte olive background and a slightly lighter green branch layer so the shadowing looks soft. This tag suits kitchens, hallways, and offices because it’s small enough to change with the seasons by swapping the branch layer. The styling principle is negative space: keep the center simple and let the border do the work.
AvoidAvoid busy patterns in the center — the border already adds texture.
Pro tipAdd a thin white pencil line along the branch edges to make it look gently lit.
11. Berry Jam Bowtie Squishy Gift Topper
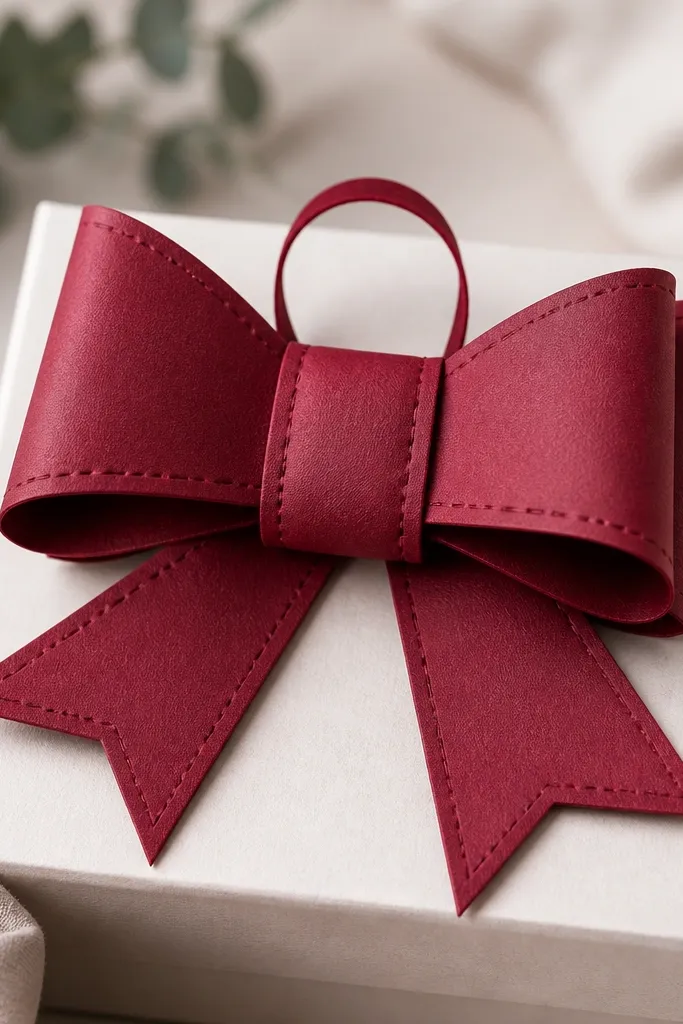
This bowtie topper looks cozy because berry red feels warm and celebratory without being overly holiday-specific. The squishy bow centers give it a plush look that reads “wrapped by someone who cares.” I use a slightly darker berry paper for the outer shape and a lighter pink-berry for the inner panels so the folds show depth. It looks good on kraft bags, white wrapping paper, and even brown grocery bags turned into gifts. The styling principle is contrast in two shades only — more colors makes it look messy fast.
Cut two bow outer shapes from berry red cardstock and two inner shapes from lighter berry pink. For the squishy center, cut folded accordion strips and glue them behind the inner shapes. Layer inner on top of the accordion, then glue outer pieces behind so the bow has a padded center. Punch a small hole at the center and thread a thin ribbon or twine loop through for attaching.
Use a ruler to keep the bow tails symmetrical so it looks intentional, not handmade in a messy way.
Don’t overfill the center with too many folds — the bow will bulge and lose its shape.
12. Sunset Peach Paper Squishy Phone Stand
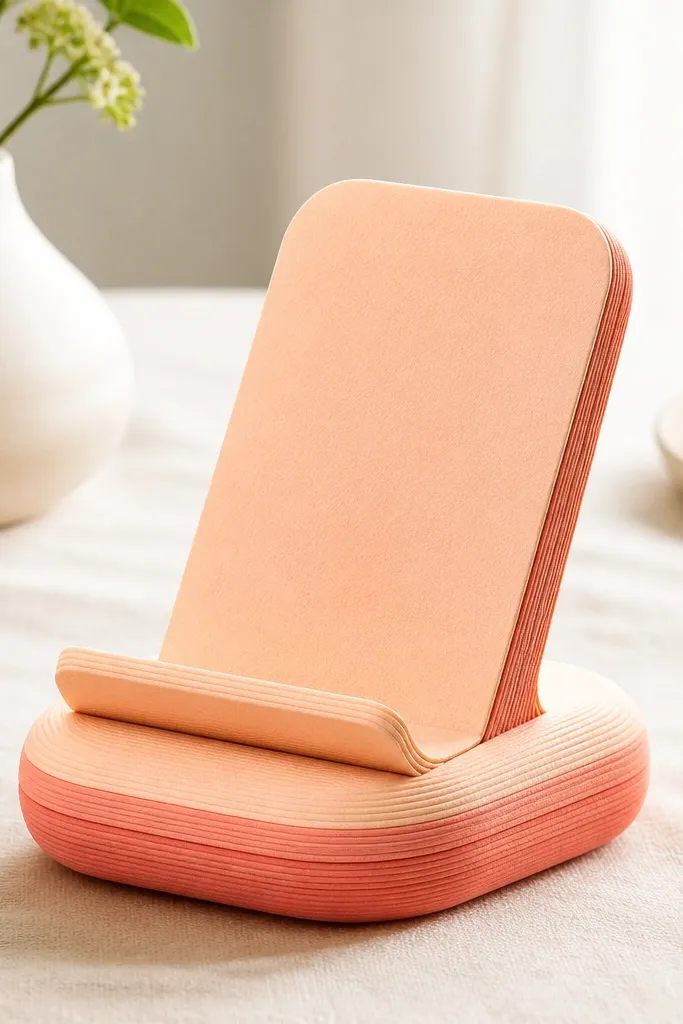
A phone stand is cozy in a practical way — it makes your desk feel cared for, and it’s one of those items you touch daily. Sunset peach and coral look warm under daylight bulbs, and the squishy base keeps it from looking like a flat paper ramp. I build the stand with a folded “accordion” spine so it has spring and holds your phone at a steady angle. It flatters most rooms because peach sits between pink and orange and doesn’t clash with wood, gray, or cream walls. The styling principle is stability: squishiness in the base, firm structure in the back.
Cut a back panel from 200 gsm cardstock in peach, sized to hold your phone at about a 60-degree angle. Create the squishy base by cutting two base rectangles and gluing a folded strip accordion between them. Glue the base to the back panel along the bottom edge, then add a coral front overlay strip so the stand looks finished. Press the stand under a book so the folds set, then test with your phone before decorating the top edge.
Add a thin felt-like paper strip (from craft felt sheets) on the phone-contact edge to prevent slipping.
Avoid flimsy paper for the back — it will collapse and your phone will slide.
13. Powder Pink Rosebud Squishy Napkin Ring
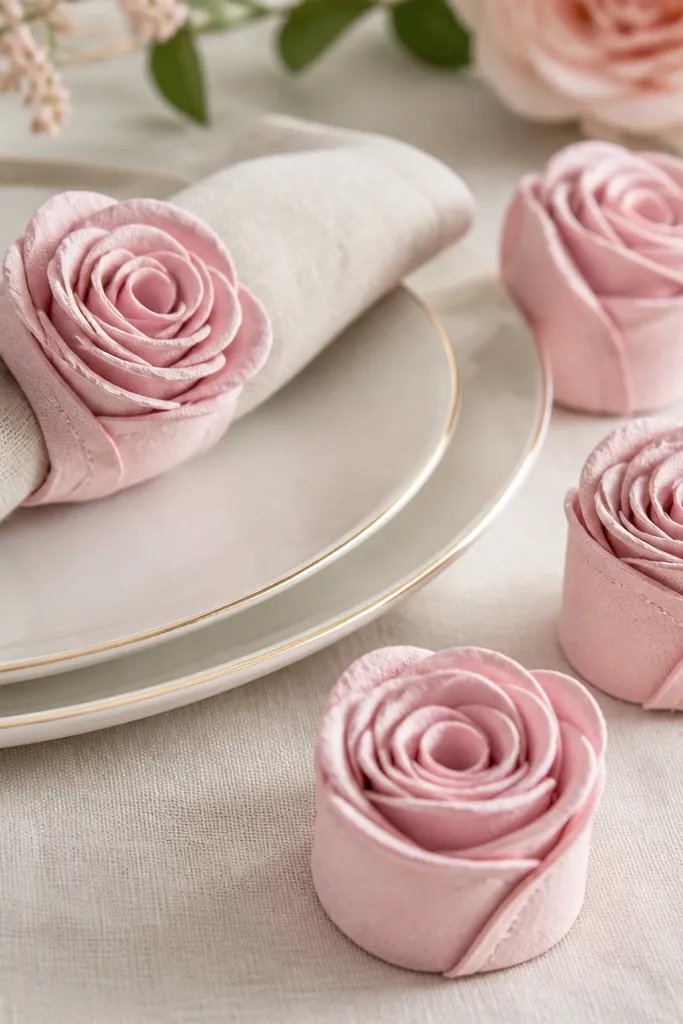
Rosebud napkin rings make a table feel cozy fast because the shape is soft and feminine without being overly formal. Powder pink reads gentle on both warm and cool table settings, and the layered petals look dimensional. The squishy feel comes from stacking petal layers over a folded inner ring so the petals spring slightly when you squeeze them. This works well for petite hands and small gatherings because each ring is light and easy to place. The styling principle is repetition: make petals consistent so the set looks like a matched set, not random cutouts.
Cut a narrow circle ring from 200 gsm cardstock to fit around your folded napkin thickness. Create petal layers by cutting 6 to 8 teardrop shapes, then score each at the center and fold slightly upward. Glue petal layers around the ring seam, overlapping like shingles, and add a small wrap strip to cover the join. Press flat under a book for 10 minutes so the petals hold their shape.
Use satin ribbon in a matching pink to tie a tiny bow on each ring for a finished look.
Don’t make the petals too tall — they catch on napkins and look uneven.
14. Cozy Stripe Hot Cocoa Squishy Tag
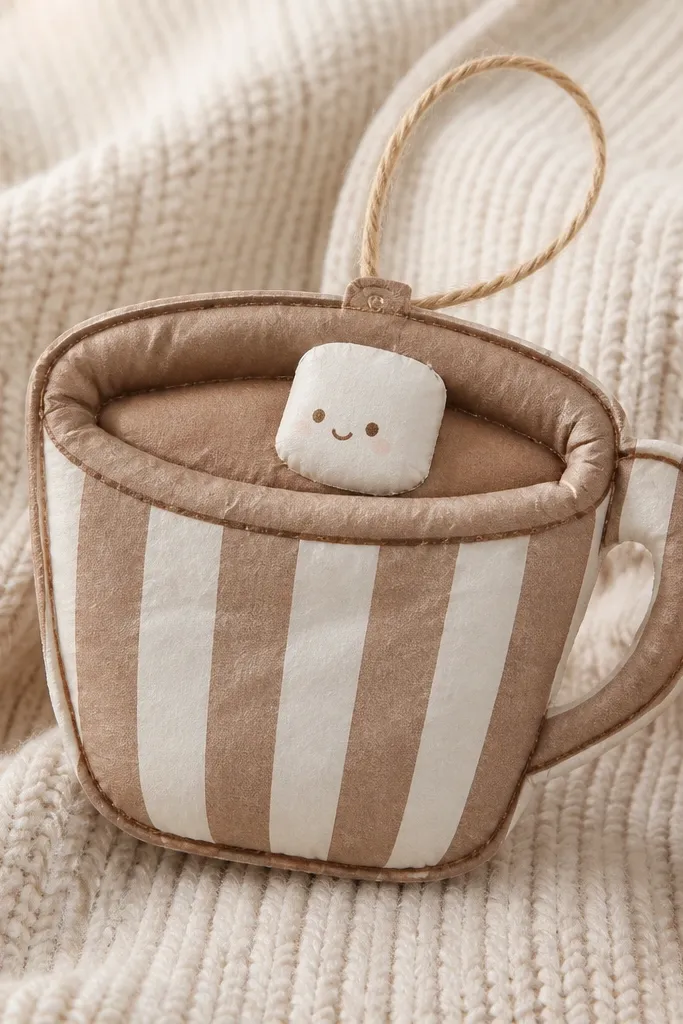
This hot cocoa tag is cozy year round because stripes and warm browns feel like comfort even when it’s not cold. The cup silhouette is rounded, and the squishy rim makes it look like it has foam. I use cream-and-brown striped cardstock and a matte finish so it doesn’t glare in photos. It’s great for gift bags, teacher presents, and small party favors. The styling principle is one clear focal point: keep the top marshmallow simple and let the cup body do the cozy work.
Cut a cup outline from 180-200 gsm striped cardstock and duplicate it for the back. Add a folded paper ring inside the cup to create the padded rim, gluing it only along the top edge and sides. Layer a small marshmallow cutout on the front using off-white cardstock and glue it at the base so it sits slightly raised. Punch a hole at the top and thread twine through, then press the tag under a book for 15 minutes.
Draw a thin chocolate swirl line with a brown gel pen to make it look like real cocoa.
Avoid glossy paper — it reflects overhead lights and kills the cozy softness.
15. Charcoal and Cream Knit-Pattern Squishy Ornament
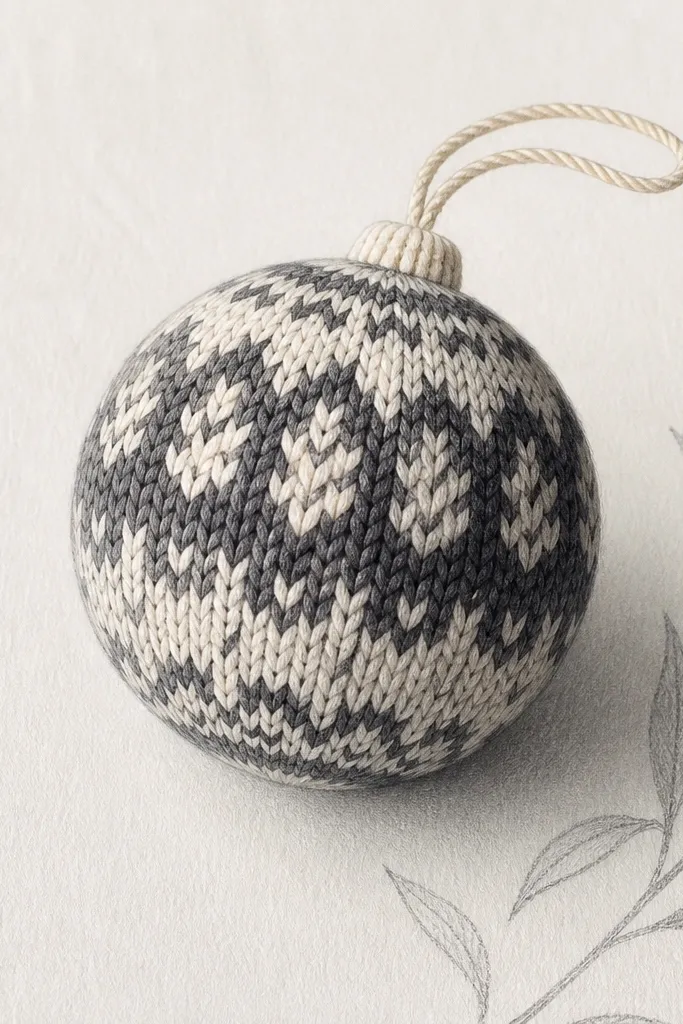
Build a small segmented sphere using 10 to 12 curved panels in cream cardstock. Glue panels into a sphere around a small paper disk, then press. Transfer the knit pattern by drawing curved “V” stitches with a fine charcoal marker, working one band at a time. Add charcoal patches by masking bands with painter’s tape and brushing lightly with charcoal ink. Attach a string loop and press again under a book so the sphere stays round.
This knit-pattern ornament feels cozy because the charcoal and cream palette reads like a sweater. I like it for winter, but I also keep one in my stash for year-round “cozy corners” because the colors work with anything. The squishy look comes from a segmented paper sphere — you get soft dents that mimic knitted texture. It suits people who like minimalist decor but still want warmth. The styling principle is pattern discipline: keep the knit lines evenly spaced so the ornament looks designed, not scribbled.
AvoidDon’t overwork the marker — heavy ink bleeds and makes the knit lines muddy.
Pro tipUse a ruler to space your knit bands — even spacing is what makes it look like fabric.
16. Lemon Zest Mini Squishy Banner Flag
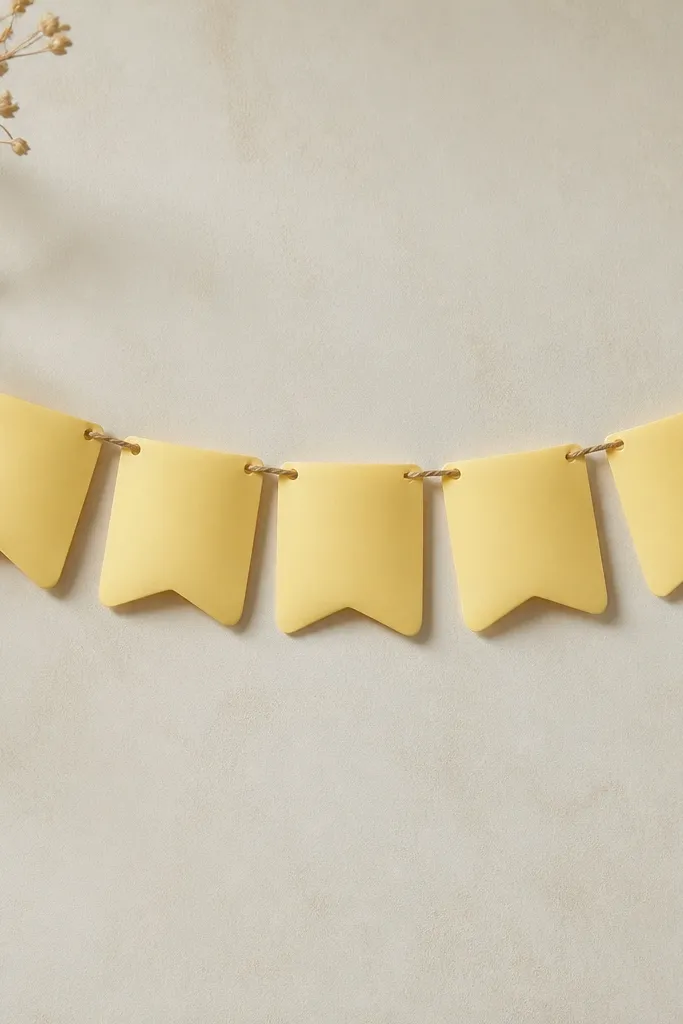
A mini banner flag is cozy in spring and summer because lemon yellow feels bright but not neon when you choose the right shade. The squishy center keeps it from looking like a flat party decoration. I use rounded corners and a light shadow line around the edges so it looks like soft felt. This suits small spaces like shelves and desks where you want a pop without taking over a room. The styling principle is repetition with variation: same shape, different tiny accent marks.
Cut 8 to 10 small flag shapes from lemon cardstock, about 6 cm wide. Duplicate each flag and glue a folded strip accordion behind the center so the middle puffs. Add tiny accents on the front — one flag gets two dots, another gets a short curved line, another gets a mini leaf cutout. Punch a hole at the top corner of each flag and string them on twine with even spacing, then press under a book to set the folds.
Use a warm gray pencil to trace the outline once — it makes the puffs visible in daylight.
Avoid sharp square corners — they make the flags look flat and cheap.
17. Sea Glass Teal Squishy Keychain Charm
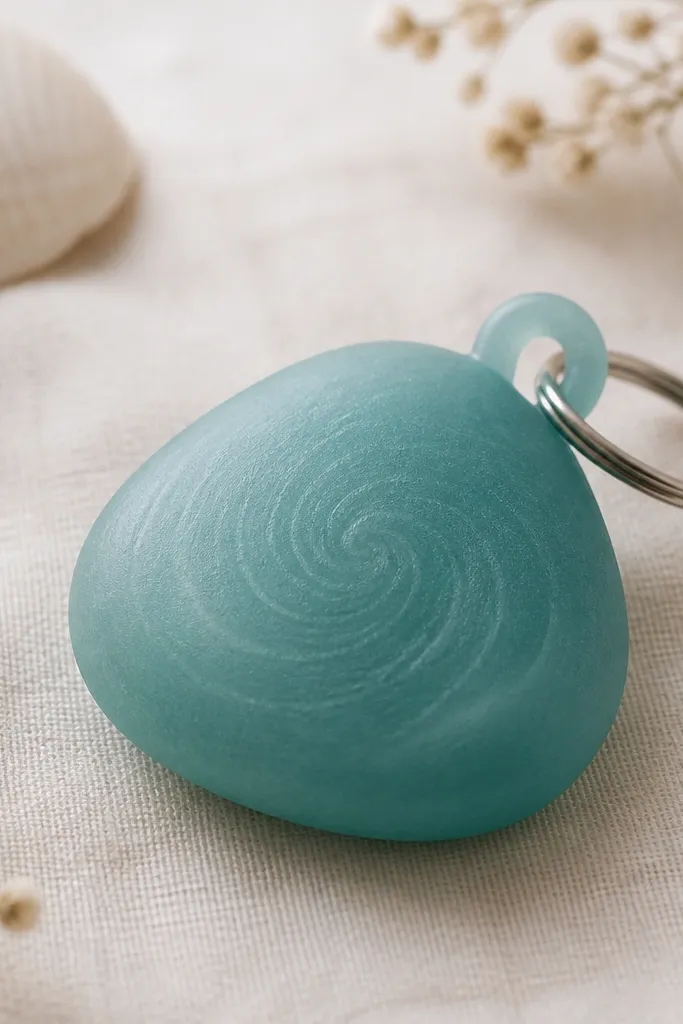
Cut a rounded blob shape from 200 gsm teal cardstock and duplicate it for the back. Create a thin “squish core” by crumpling a small rectangle of thin paper, pressing it flat, then cutting it to fit the center — glue it lightly. Glue front and back together, then add a small reinforcement patch around the loop area with a square of cardstock. Punch two holes for a split ring or thread a cord through a stitched paper loop, then press under a book for 10 minutes.
This sea glass keychain charm stays cozy year round because it looks like something you’d find on a beach, but the matte teal is calm enough for winter too. The squishy blob shape makes it feel touchable, and it’s small enough to carry without getting bulky. I use a thin paper interior so it compresses gently, then springs back when you let go. It looks great on brass keys and dark key fobs because teal stands out without screaming. The styling principle is durability: you need a stronger outer layer and a protected loop.
AvoidDon’t use scrapbook paper with heavy texture — it tears at the loop holes.
Pro tipSeal the surface with a matte clear spray so fingerprints don’t build up and the charm stays clean.
18. Rust Plaid Ribbon Squishy Gift Box Lid
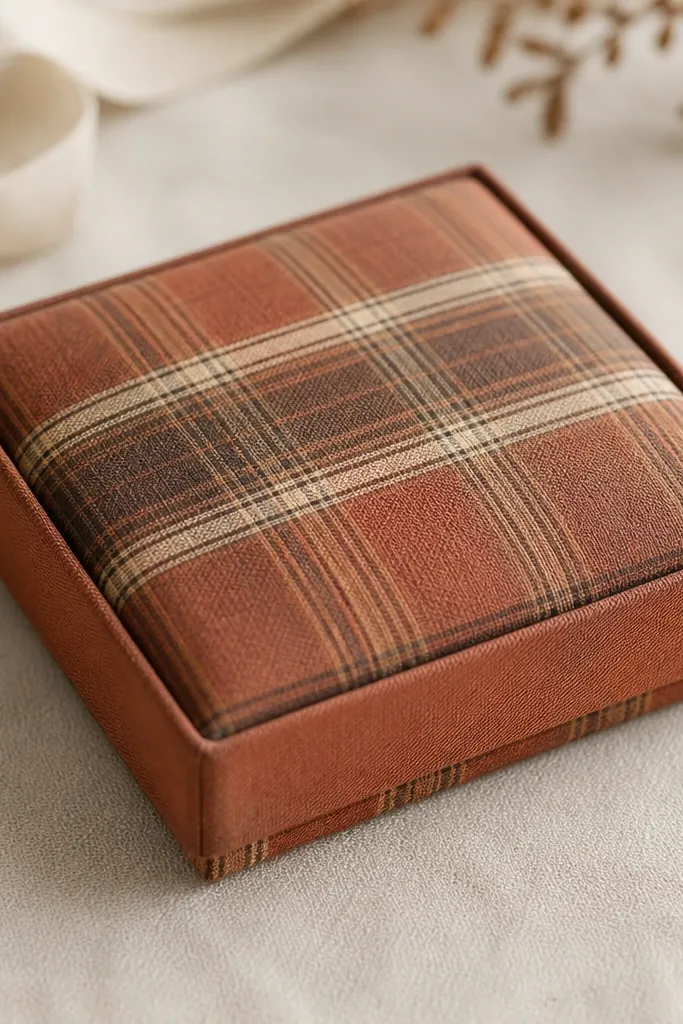
This is the only paper squishy I make that looks like store-bought wrapping. The rust plaid reads cozy immediately, and the padded center makes the lid feel like a soft gift cushion. I use a ribbon band because it hides seams — seams are what make paper crafts look homemade. The squishy is created by a folded panel under the plaid layer, so the lid has a gentle dome when you press it. It looks great for birthdays, housewarmings, and small thank-you gifts. The styling principle is concealment: hide your construction lines under ribbon and keep the surface smooth.
Make or reuse a small gift box lid sized to your paper — I use a 10 cm square lid. Cut a plaid top panel from 180-200 gsm cardstock and duplicate it if you want extra stability. Create the squishy dome by cutting a circle of thin cardstock, accordion-folding it into a ring, and gluing it under the center of the plaid panel. Glue the plaid panel onto the box lid, then wrap a rust ribbon band around the edge and glue the ends underneath. Press the whole thing for 20 minutes so the dome doesn’t flatten.
Use double-sided tape for the ribbon ends so they stick flat without glue bumps.
Avoid thin ribbon — it collapses and makes the lid look uneven.
19. Winter White Macaron Squishy Pin
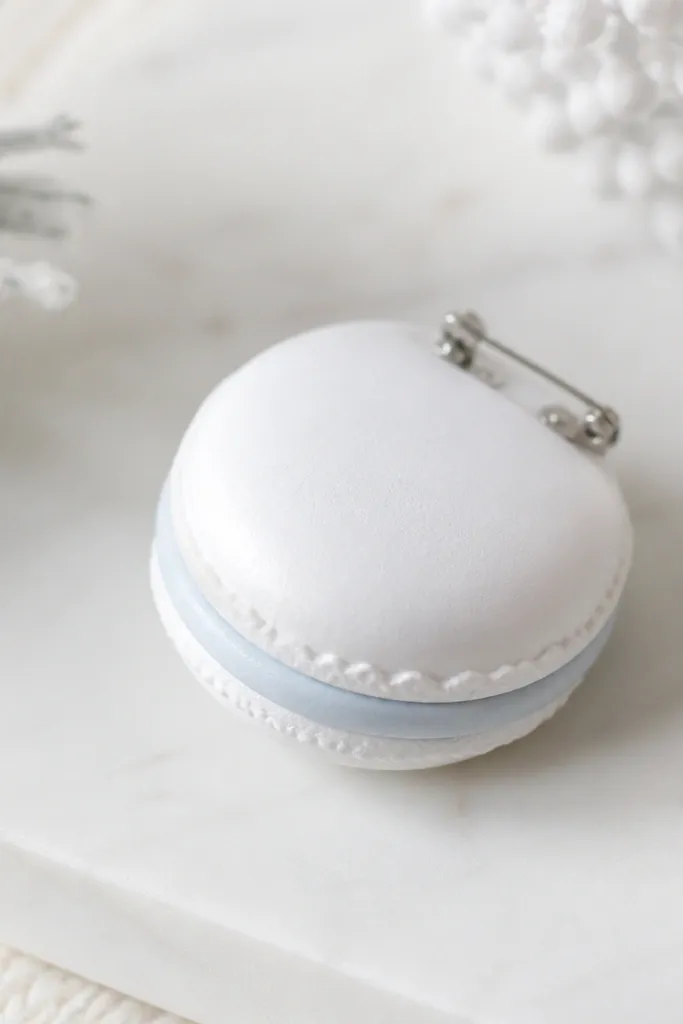
Cut two macaron outlines from 200 gsm white cardstock and set aside. Cut a thin ring of thin paper and fold it accordion-style, then glue it behind the center of the front layer. Add a pastel filling layer by cutting a smaller circle from blush or mint paper and gluing it on top of the ring. Attach a pin back by gluing a small cardstock reinforcement square to the back and sandwiching it between the front and back layers. Press under a book for 15 minutes before wearing.
Macarons are cozy because the shape is rounded and the color combos feel sweet without being childish. Winter white plus a pastel filling looks good on coats, sweaters, and bags in cold months. The squishy center is made from layered folded paper circles, so the pin has give and doesn’t feel flat. This works for people who like wearable decor because it’s light and won’t weigh down fabric like heavy felt pins. The styling principle is clean edges: keep the macaron outline smooth and the filling layer centered.
AvoidDon’t add glitter to the pin face — it catches on fabric and looks messy.
Pro tipUse a fabric-safe glue for the pin back so it doesn’t seep through the paper.
20. Rainbow Streamer Squishy Confetti Pocket
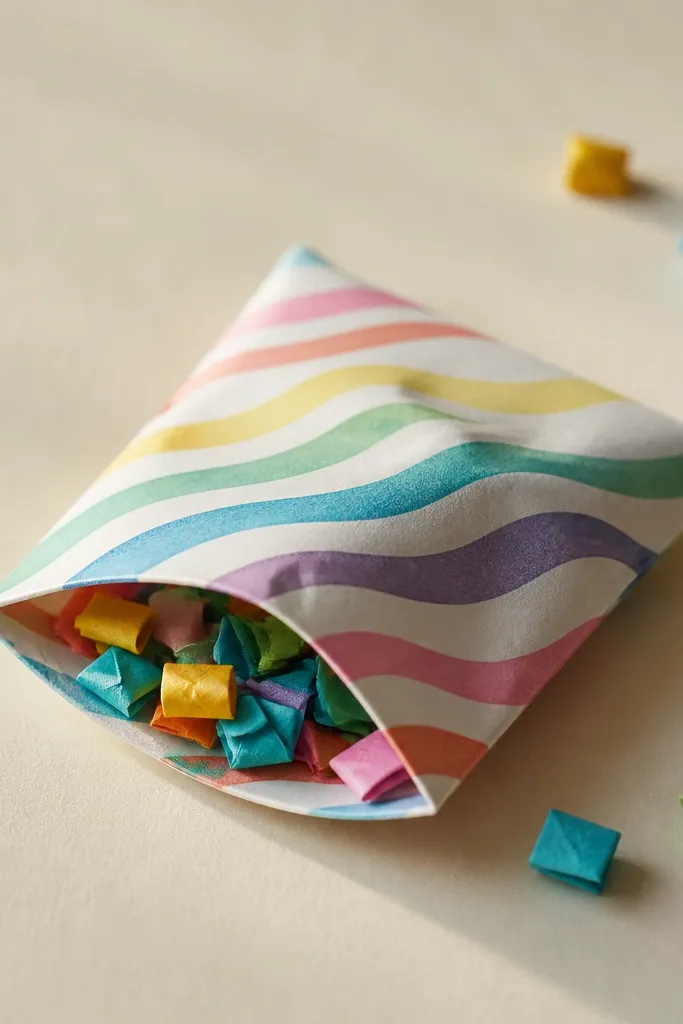
Cut a pocket rectangle from neutral cardstock and fold the sides inward to make a sleeve. Create the squishy edge by gluing a thin folded strip along the top and side seams only. Add a rainbow streamer panel on the front by cutting narrow strips and layering them horizontally, then glue them in place. Fill the pocket with small folded confetti squares made from scrap paper, then close the top with a tiny paper tab or a small dot of tape. Press flat for 10 minutes so the pocket holds its shape.
This confetti pocket is cozy because it turns “party” into something you can reuse for any season. The squishy edge makes it feel like a little candy wrapper, and the rainbow strip pattern adds warmth even in plain rooms. I like it for birthdays and also for spring events where you want color without big decorations. It flatters photos because the confetti pieces catch light and create texture. The styling principle is controlled color: use thin rainbow strips and keep the pocket background neutral so the colors look intentional.
AvoidAvoid using too many colors on the pocket background — it looks noisy and loses the cozy feel.
Pro tipMake confetti from heavier scrap paper so it doesn’t collapse when you pour it out.



