
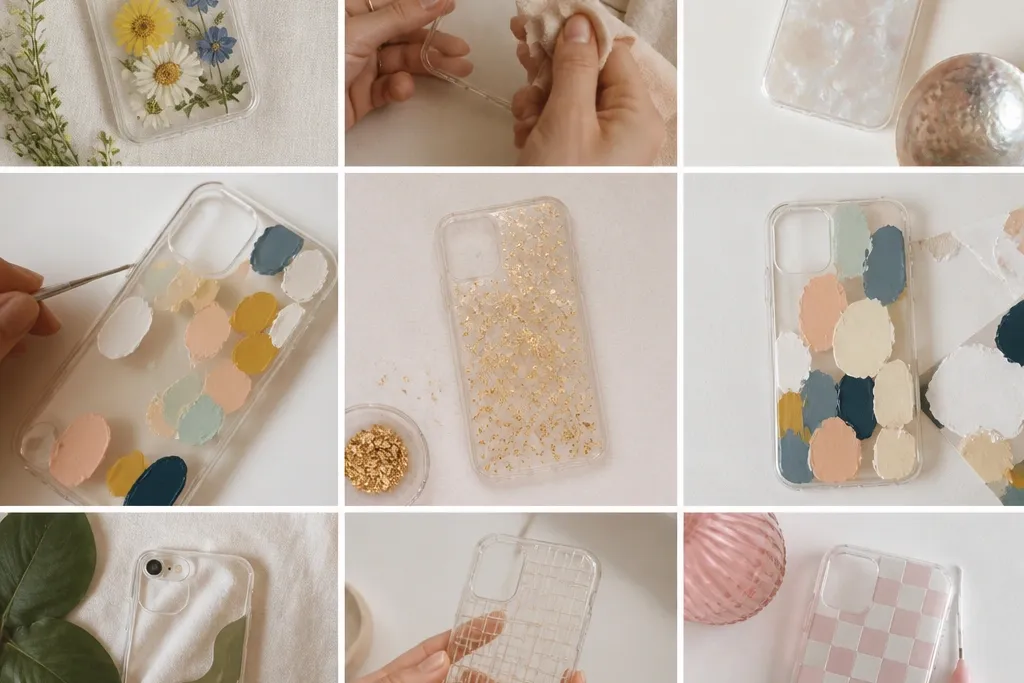
1. Sage Base with Gold Foil Constellation Dots
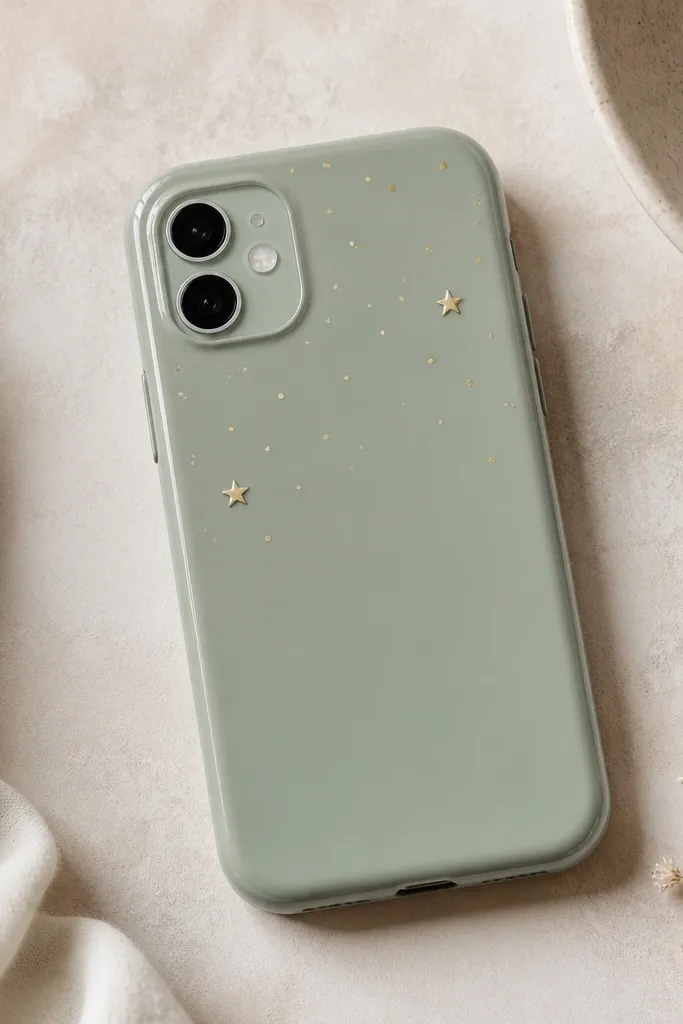
I do this when I want the case to look polished even with a plain outfit. The sage base feels calm against warm and cool skin tones, and the gold foil pops without screaming. I place the dots in a loose cluster — denser near the top corner, then thinning toward the center — so your eye reads it as intentional. The foil effect catches light when you move, which makes the design feel “fresh” even when the stickers are the same.
Start by sticking a full-size sage vinyl or wrapping the case in a matte sage skin. Then lay out your gold dots dry first: put 6-10 dots in a triangle near the top third, leaving about 1 cm of empty space around the camera area. Press each dot firmly with a flat tool like a plastic card, working from the center outward. Finally, seal with a thin flexible clear coat — two light coats, letting the first dry before the second.
Use a matte sage base with glossy foil dots; the contrast makes the design look more expensive.
Don’t cover the camera bump lip — friction there makes foil lift first.
2. Cream Case with Black Micro-Label Stickers
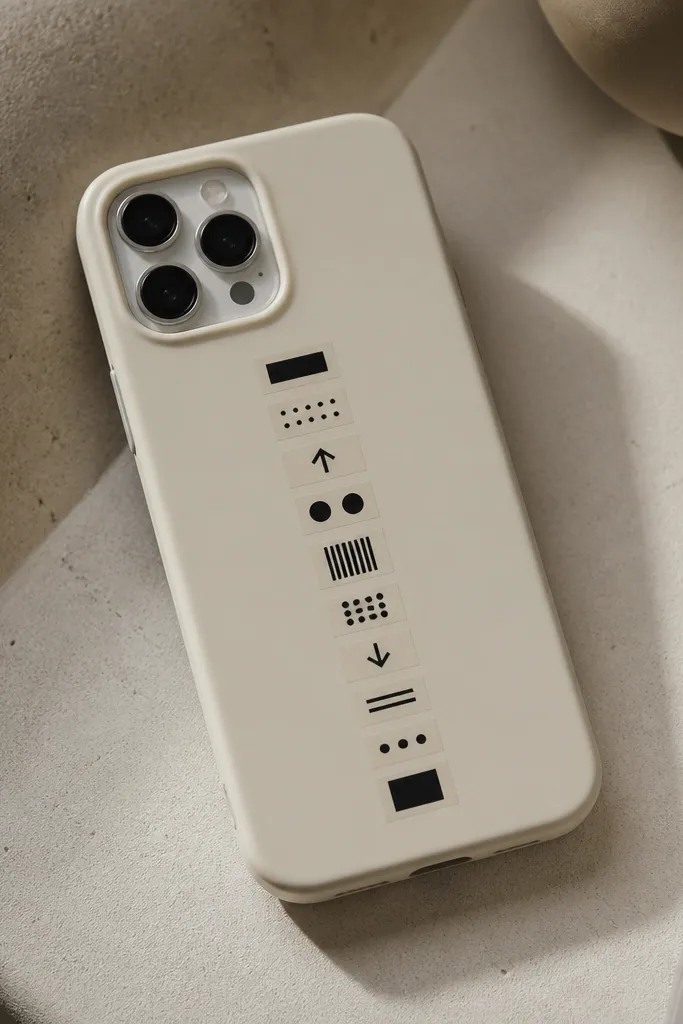
This is my go-to for a clean, year-round look because it reads graphic, not seasonal. Cream flatters most skin tones and looks good with both warm neutrals and cool denim. The micro-label style gives you structure, so even if the stickers are small, the overall layout feels organized. I like it best for people who hate “cute” designs but still want personality.
Begin by cleaning the cream case with rubbing alcohol and letting it dry completely. Place a single vertical column of stickers from just above the center to about 1 cm below the camera ring, keeping the edges aligned. Add one small icon sticker at the midpoint of the column, then fill tiny gaps with 2-3 dot stickers. Seal with a clear coat in thin layers so the labels stay crisp rather than getting cloudy.
Print your own micro-labels on sticker paper using a 6-pt font and a simple icon set for a custom vibe.
Skip thick stickers that wrinkle under clear coat; they look bumpy on the phone.
3. Bubblegum Pink Heart Grid
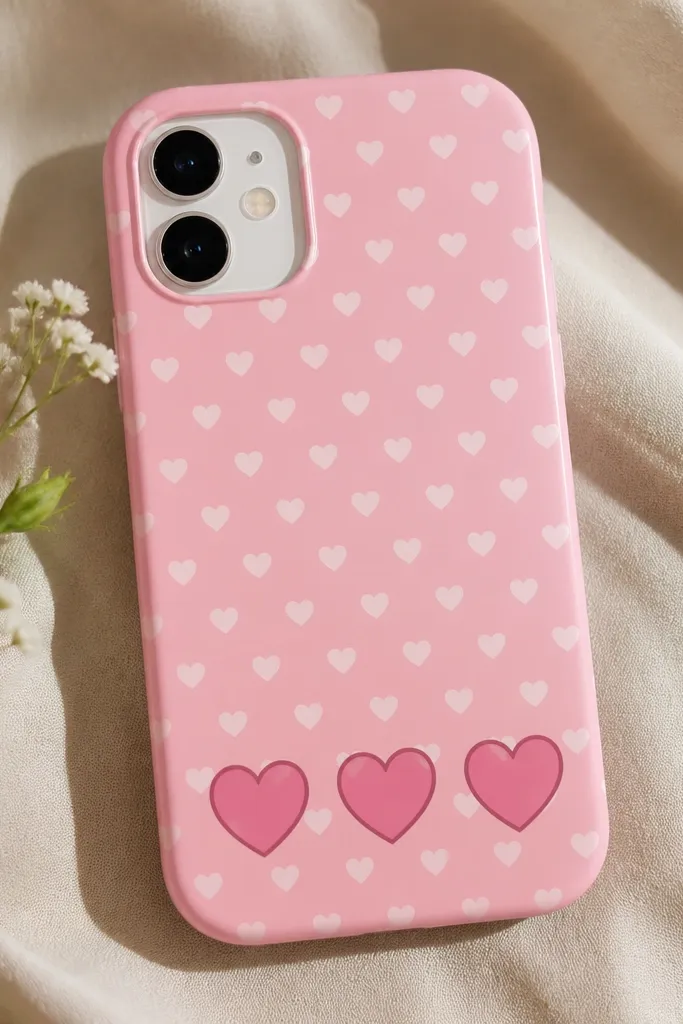
Start by choosing a bubblegum pink base — matte looks best because it makes the white hearts pop. Add a border of hearts first: place a horizontal row along the top edge and another along the bottom edge, each heart spaced the same. Fill the middle with a staggered grid of small hearts, using a ruler or phone template under the case to keep spacing even. Finish with three larger outlined hearts near the bottom corner and seal with a glossy clear coat for a smooth feel.
This one is for when you want a cheerful case that still looks tidy. The bubblegum pink works great if you wear a lot of black, gray, or denim, because the hearts brighten the whole look. I keep the hearts mostly white so it doesn’t turn into a busy mess. The grid pattern looks good from a distance, then gets fun up close.
AvoidDon’t crowd the camera area; hearts there get scraped when you set the phone down.
Pro tipIf your hearts are separate stickers, press them with a silicone spatula to avoid smudging the edges.
4. Black Marble Vinyl with Tiny Rose Corners
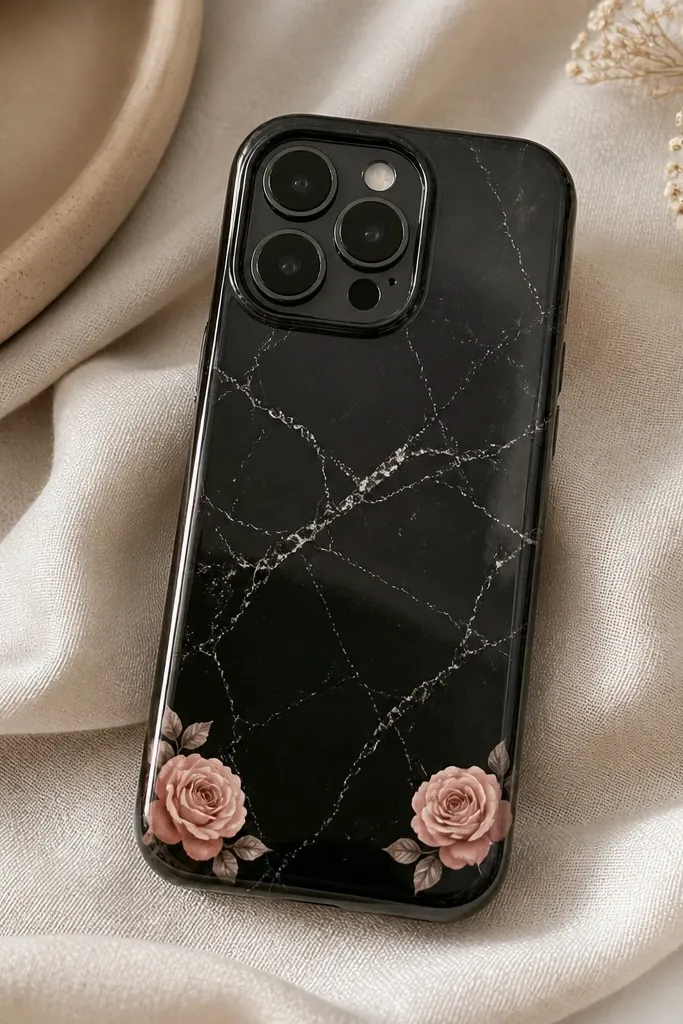
Marble vinyl makes the base feel high-end, and corner roses keep it feminine without covering the whole case. Blush roses sit nicely on both fair and deeper skin tones because the muted pink is close to natural warmth. I place the roses in corners so the marble stays the star — your case reads stylish even when the roses are small. This is the design I reach for when I’m wearing neutrals and want one soft detail.
Apply black marble vinyl to the whole case, smoothing from the center to the edges with a credit card. Cut or trim around buttons so the vinyl doesn’t bunch. Place one small rose sticker at the bottom-left corner and another at the bottom-right, each tilted slightly toward the center. Add one tiny leaf sticker near each rose for balance, then seal with flexible gloss clear coat, focusing extra thin coats over the sticker edges.
Use a single direction for leaf stickers so they look like part of the same print, not random additions.
Don’t use matte spray over marble; it can mute the pattern and make it look chalky.
5. Transparent Case with Real Pressed Leaf Stickers
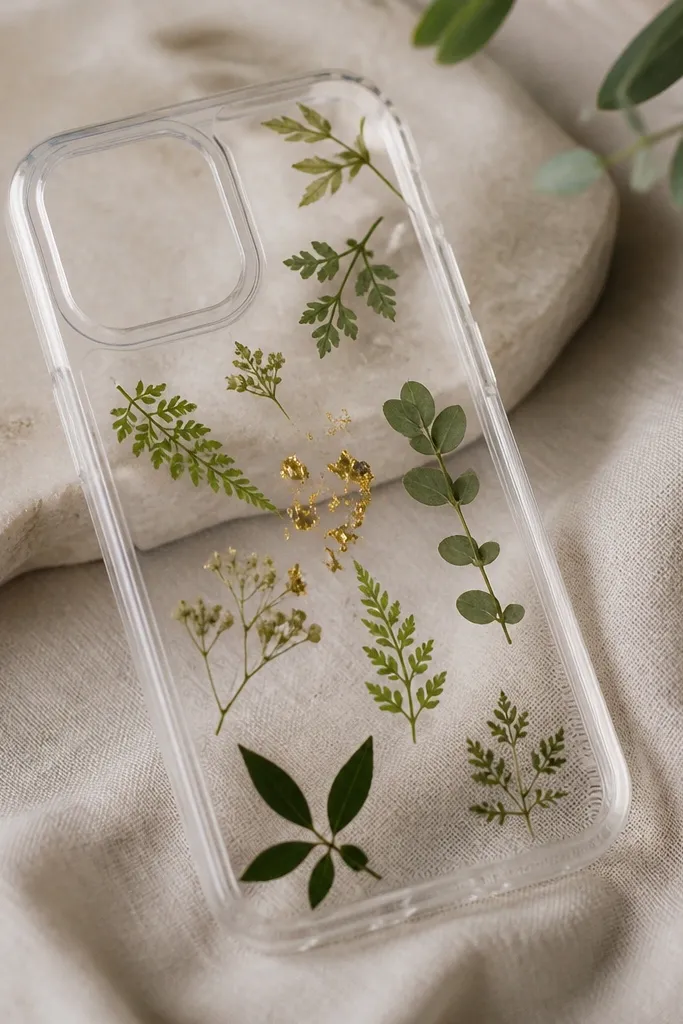
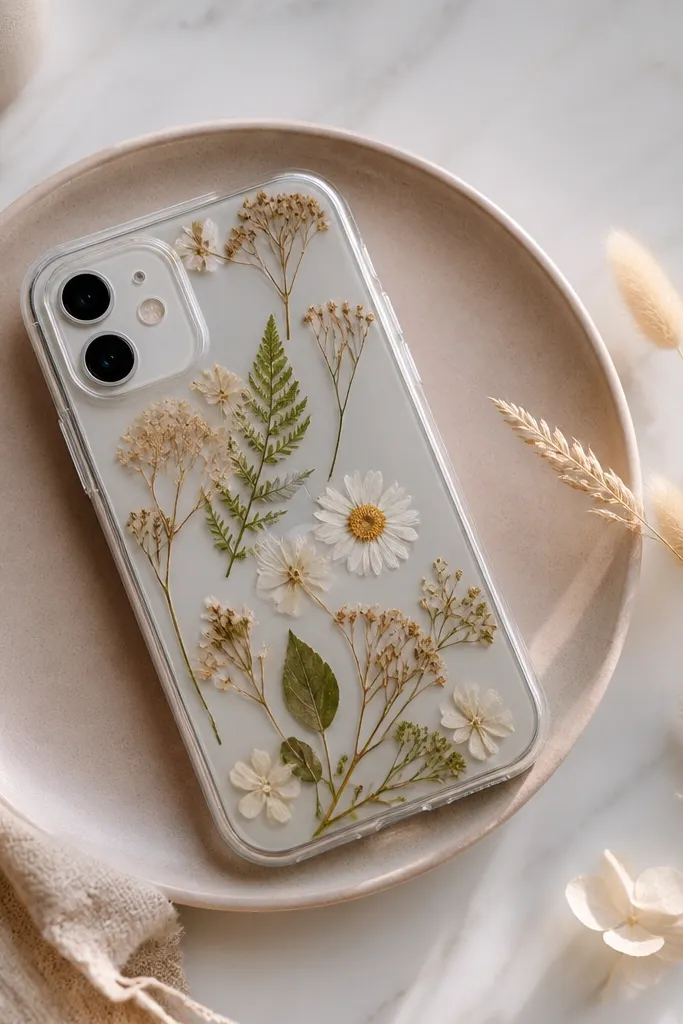
Pressed leaves look insane in a clear case because you get depth — the leaves sit “inside” the phone instead of on top. The green shades work year-round, especially with gold jewelry and warm-toned outfits. I like this design for people who want nature vibes without obvious seasonal themes. The gold specks add sparkle without turning it into a holiday case.
Start by choosing a clear case and scuffing it lightly with a fine sanding sponge, then wipe with alcohol. Cut small pressed leaves so they fit in a cluster around the center, keeping them away from the camera bump. Place them on the outside first with a thin layer of clear adhesive or double-sided sticker dots, then add tiny gold specks between leaves. Seal with a clear flexible resin-like top coat in thin layers, letting each layer cure before the next.
Press leaves flat for 5-7 days under heavy books; thin leaves look best and don’t curl under clear coat.
Don’t use thick leaves or they lift and create bubbles under the seal.
6. Monochrome Doodle Stickers with a Single Accent Line
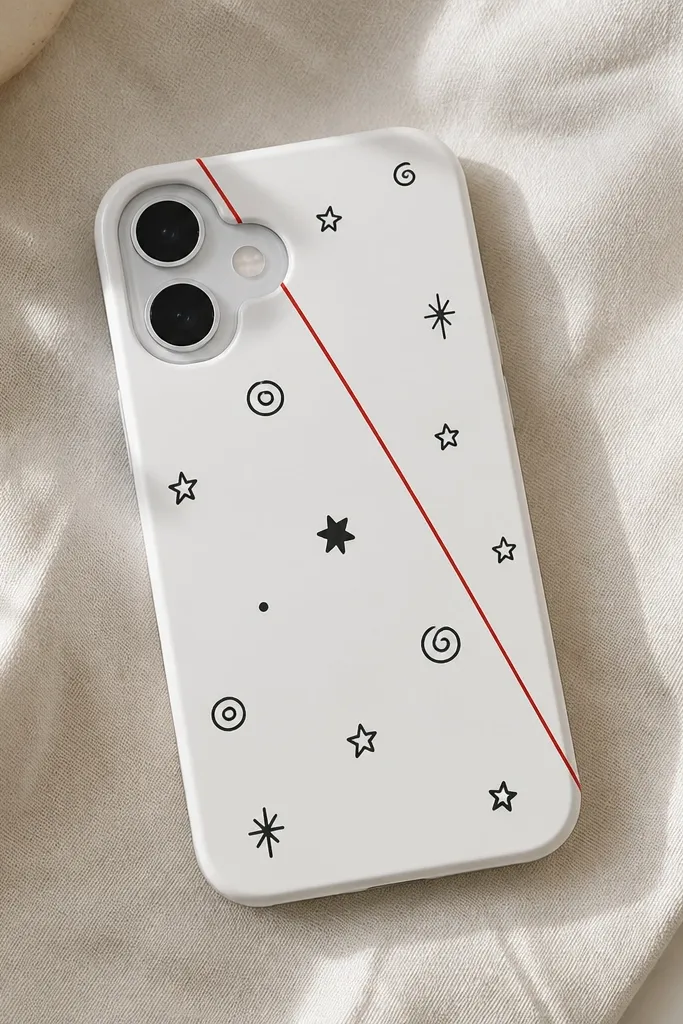
This is how you make doodles look grown-up. The monochrome stickers keep it clean, and one accent line gives your eye a path so the design doesn’t feel random. I do this when I want a case that matches any outfit, because black and white work with everything. The red line adds energy without adding more clutter.
Clean the case and lay down your accent line first: place a thin red line sticker diagonally across the case, leaving about 5 mm from edges. Then add black doodles around it, keeping most near the line so they feel connected. Use 2-3 larger doodles and fill gaps with tiny stars or dots for rhythm. Seal with a matte clear coat if you want a softer look, or glossy if you want the doodles to look crisp and new.
Keep doodles one style: either all sticker-outline or all filled shapes, not mixed finishes.
Don’t add multiple accent colors; it turns into sticker soup fast.
7. Pastel Rainbow Arc Above the Camera
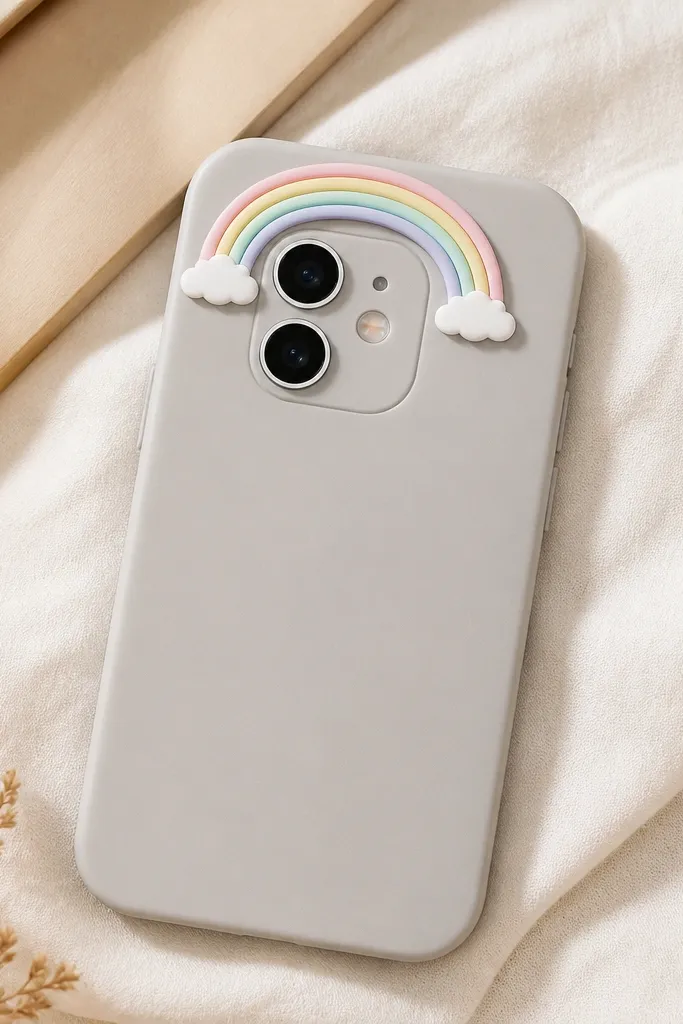
A rainbow arc is the easiest way I’ve found to make a case feel “seasonal” without swapping everything. Pastel colors feel gentle and wearable, and the arc shape looks good on phone cases because it follows the camera’s position. This design flatters people who like cute details but hate loud patterns. The clouds at the ends make it look like a little weather scene, not just a sticker dump.
Start by placing the rainbow arc sticker so it sits just above the camera area, centered horizontally. Add one small cloud sticker near each end of the arc, leaving a small gap so the colors breathe. Fill the remaining space with 2-3 tiny star or dot stickers, mostly in the upper half. Seal with a flexible clear coat, and keep the coat light on the cloud edges so they don’t look thick.
Use a light gray or off-white base so pastel colors stay soft and not neon.
Don’t put the arc too low; it gets scuffed when you set the phone down.
8. Pearl and Rhinestone Corner Cluster
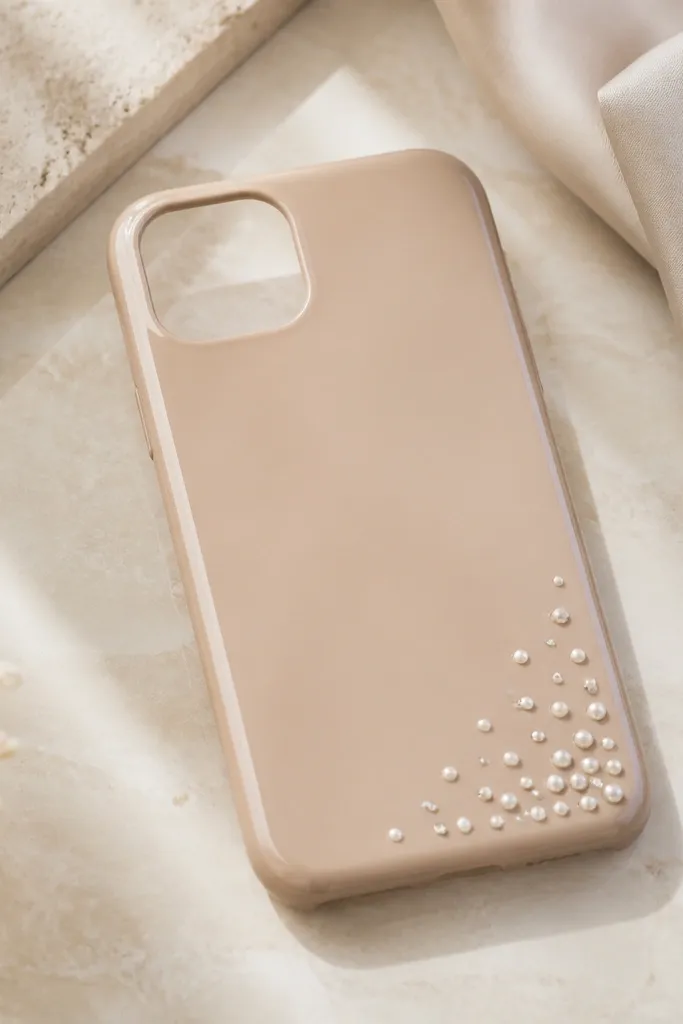
If you want glam without covering the whole case, corner clusters are the move. The nude-beige base matches a lot of outfits, and pearls look good against warm and cool undertones. I place rhinestones sparingly so it still looks classy instead of costume-y. This design also photographs well because it catches light from one direction.
Clean the case and mark a corner spot with a pencil mark on paper under the case, not on the case itself. Place 12-18 pearl dots in a tight diagonal cluster at the bottom-right corner, then add 3-5 tiny rhinestones spaced in the middle of the cluster. Add one small round pearl slightly above the main cluster to create a second focal point. Seal with glossy clear coat, then do one extra thin coat only over the rhinestone edges.
Press rhinestones with a flat silicone tool for 10 seconds so they bond evenly.
Don’t use matte coat over rhinestones; it dulls them and looks patchy.
9. Navy Case with White "Ticket Stub" Strip
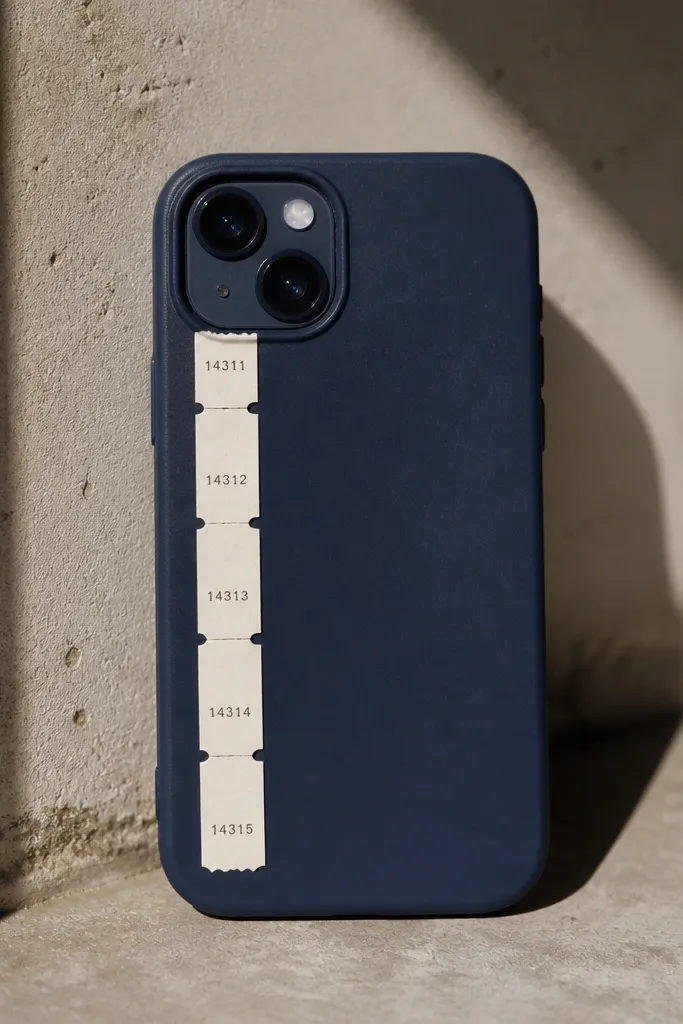
This one looks like you’re carrying a tiny memory from a trip, but it’s still clean enough for everyday. Navy is a strong base that doesn’t show smudges as easily as light colors. The ticket stub strip gives a graphic, vintage vibe without needing a full collage. It also works for people who like symmetry.
Start by placing the ticket stub strip vertically with a slight margin from the left edge, about 8-10 mm. Align the strip so it doesn’t interfere with the camera bump or button area. Add one small stamp-style sticker near the top of the strip and a tiny dot grid sticker near the bottom. Seal with a semi-gloss clear coat so the printed bits stay readable.
Use a clear ruler to keep the strip straight — crooked lines look cheap fast.
Don’t cover the strip with thick clear coat; it can blur the printed text.
10. White Case with Black "Barcode" Blocks
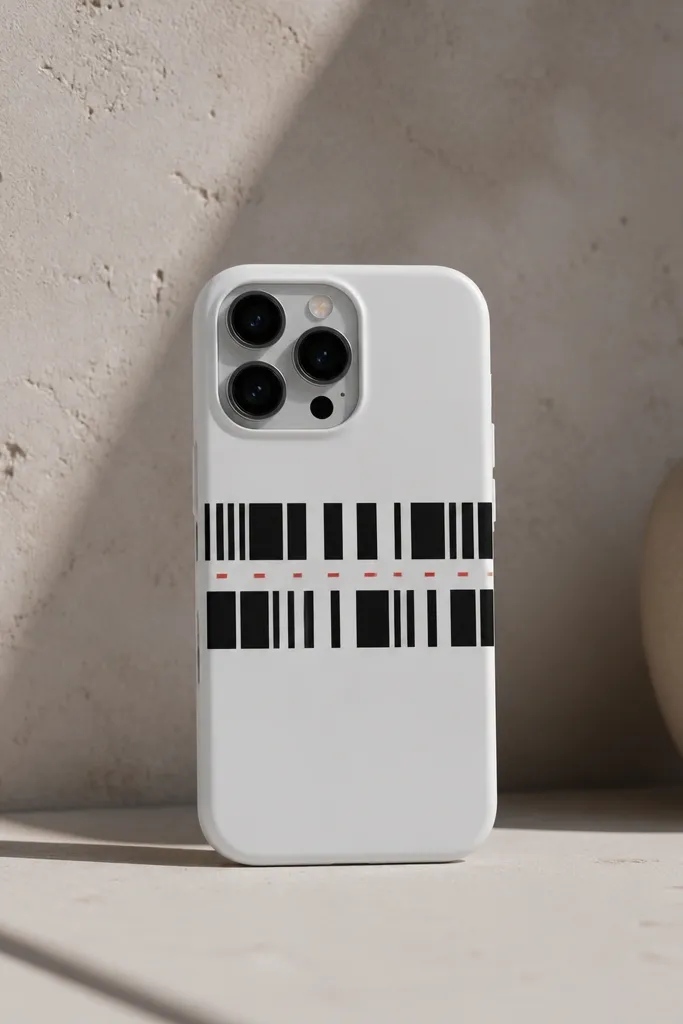
Clean the case and place the first barcode band horizontally across the midline, centered. Keep the second band slightly lower and shorter so the layout looks like two stacked labels, not one long strip. Add a single red dash sticker inside the lower band, then fill any empty corners with 1-2 small black square stickers. Seal with matte clear coat if you want it to feel like printed paper.
Barcode blocks are graphic and modern, and they look good year-round because they don’t read as seasonal. White makes the black lines crisp, and the tiny red dash adds just enough contrast to keep it interesting. I like this design on phones with a larger camera bump because the lines can frame it. It flatters anyone who wears lots of monochrome outfits.
AvoidDon’t stack stickers on top of each other; bars get distorted and look messy.
Pro tipIf your barcode stickers curl at the edges, warm them with a hair dryer for 10 seconds before pressing.
11. Olive Case with Brown Leather Patch Icons
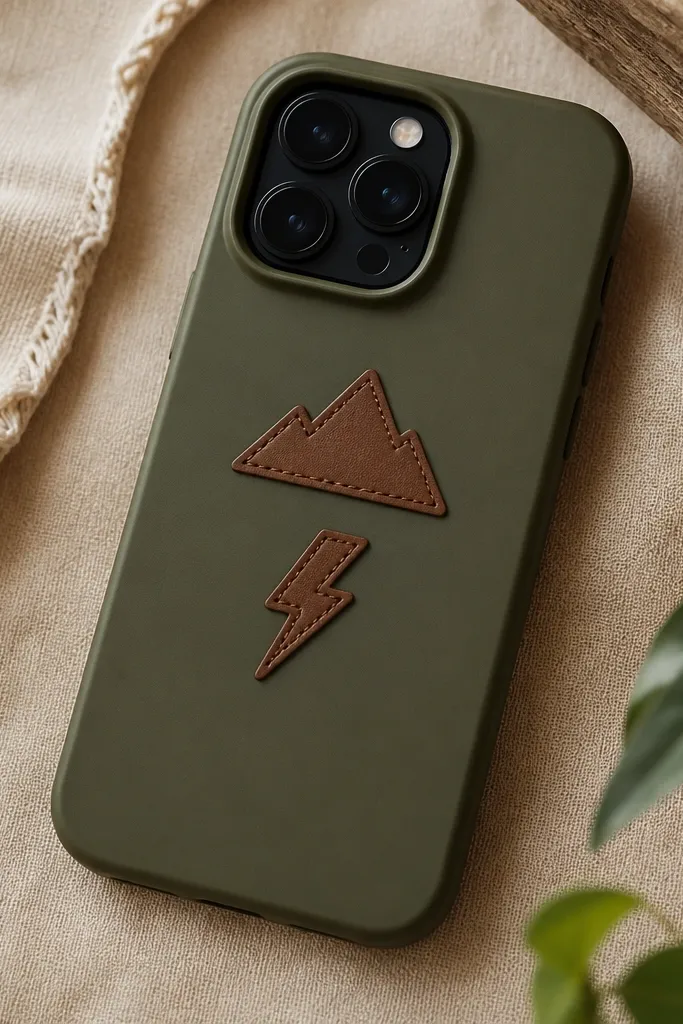
Leather-look patches make a phone case feel grounded and not overly cute. Olive works with earthy wardrobes and looks good on both light and deep skin tones because it brings neutral depth. I place the icons in the center so the case feels “anchored,” like a mini jacket. This is also one of the most forgiving styles if your sticker edges aren’t perfectly cut.
Start by applying the olive case base and cleaning it. Place one leather-look patch icon near the center — I like a mountain or simple badge shape — then add a second small patch slightly to the right. Leave a small gap between patches so they read as separate elements. Seal with flexible clear coat, but do extra thin coats along the stitched edges to keep them from peeling.
Use a soft cloth to press patches for 20 seconds; leather-look textures bond better when pressure is even.
Avoid glossy sealant over leather-look stickers; it makes the stitching look plastic.
12. Clear Case with Black Ribbon Bow Sticker
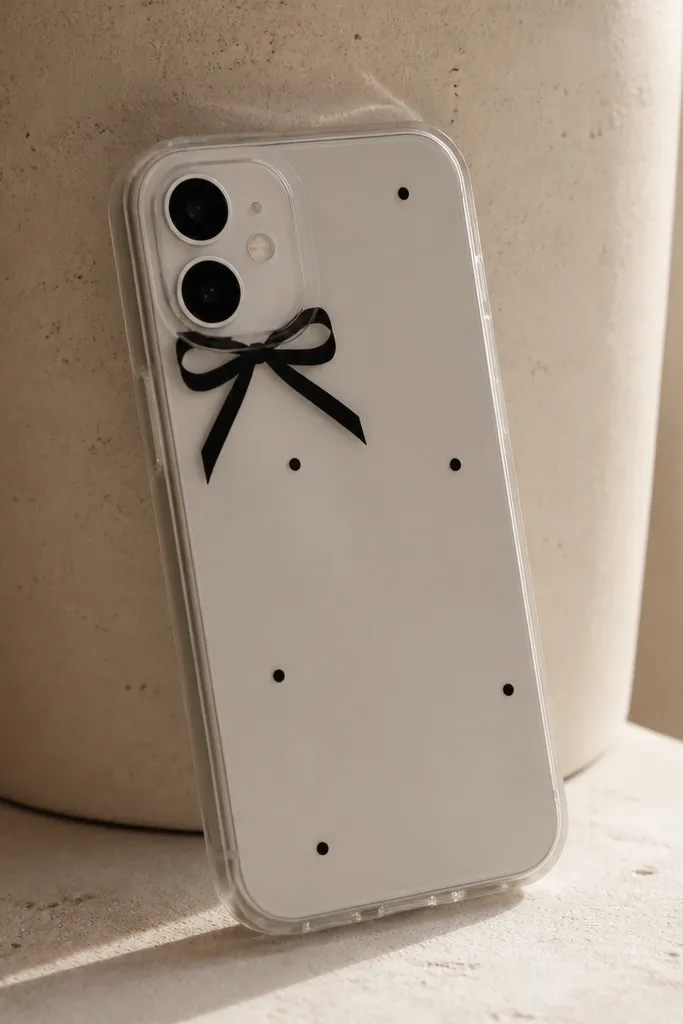
Clean the clear case and scuff lightly, then wipe with alcohol. Place the black ribbon bow sticker slightly above the camera area, centered, and press firmly. Add 5-7 small black dot stickers in a loose halo around the bow, leaving space between dots. Seal with a clear flexible top coat — two thin coats — and keep the first coat light so the dots don’t smear.
A ribbon bow on a clear case looks like it’s floating, and that depth effect is why it feels special. Black ribbon works year-round because it reads formal without looking like a party theme. I keep the rest minimal so the bow stays the main character. This design looks great with gold rings and dark nails too.
AvoidDon’t put dots directly on the camera ring; they’ll scrape and lift.
Pro tipIf your ribbon sticker is thick, trim the edges with tiny scissors so it doesn’t create a ridge.
13. Sunflower Side Sweep
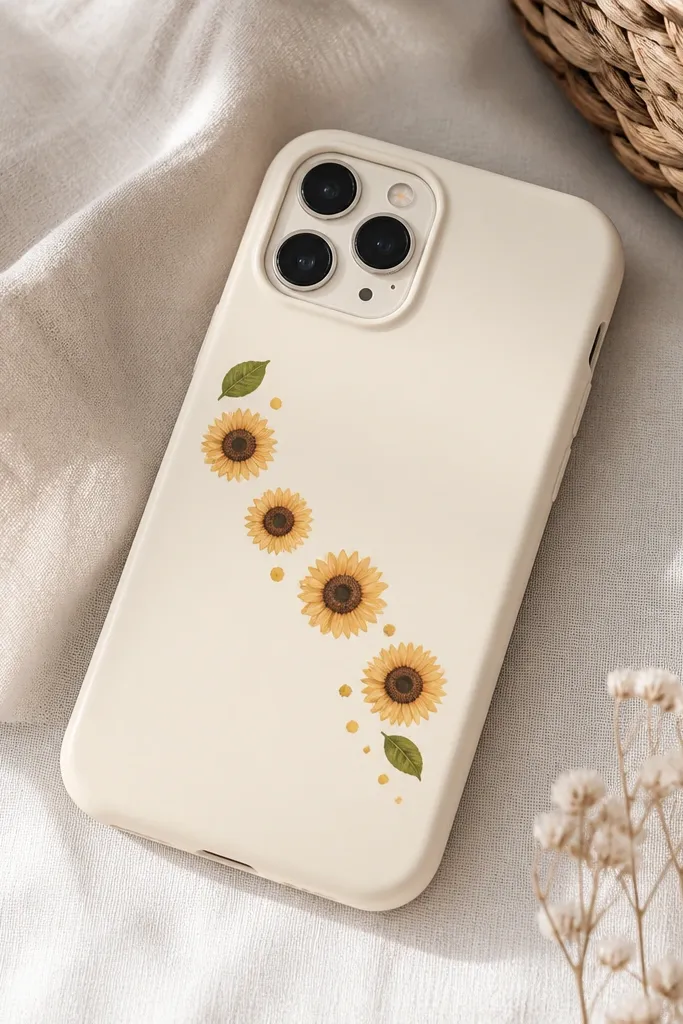
Sunflowers are bright but you can make them year-round by keeping them small and directional. This side sweep layout looks like a ribbon moving across your phone, so it doesn’t feel like a full summer collage. Cream keeps the flowers from looking harsh, and the green leaves tie it together. I like this for people who want a cheerful case that still looks neat from across the room.
Start by placing a single large sunflower sticker at the mid-left, then angle the rest along a diagonal line toward the bottom-right. Add two small sunflowers spaced evenly, then place leaf stickers between them to break up the yellow. Finish with 6-8 tiny yellow dot stickers near the diagonal so it looks like a continuous sweep. Seal with a glossy clear coat for a smooth, glassy finish.
Use a single sunflower style (same outline thickness) so the set looks cohesive.
Avoid random scattering; diagonal flow is what keeps it from looking accidental.
14. Monogram Corner with Metallic Lettering
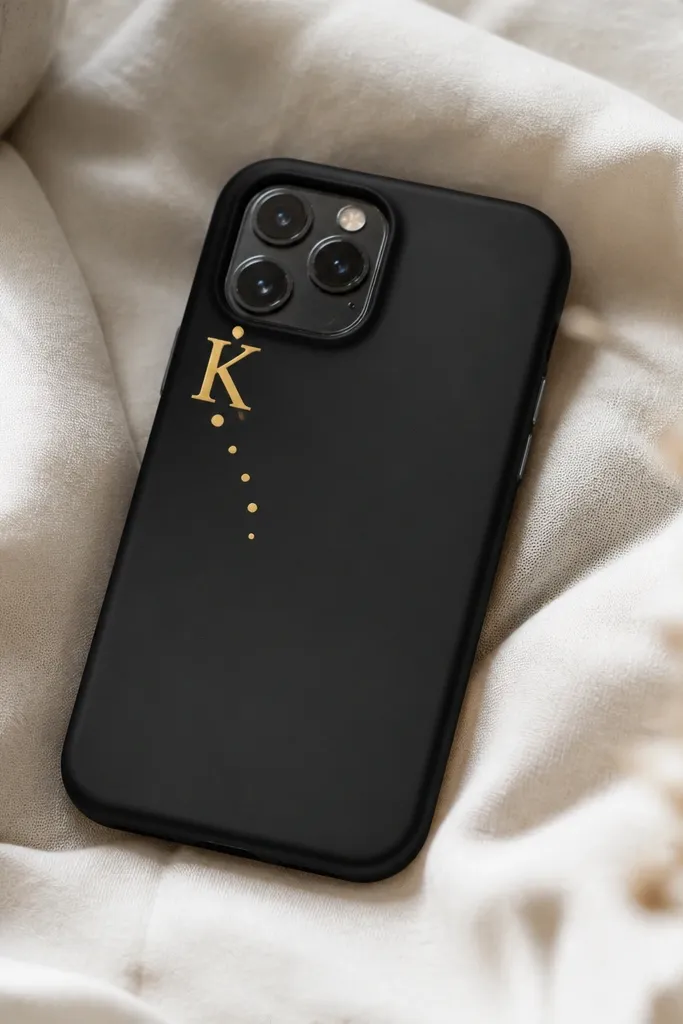
Monograms make a phone case look intentional without needing a full scene. Metallic gold on black looks sharp and looks good whether you wear silver or gold jewelry because the sticker adds a warm highlight. I like top-left placement because it’s the first thing you see when you pull your phone out. The trailing dots keep it from feeling too plain.
Clean the case and scuff lightly if it’s glossy. Place your monogram letter sticker in the top-left corner with about 10 mm margin from the edges. Add a small row of 5-6 tiny gold dots starting under the letter, spaced evenly. If you want more balance, add one tiny dot near the opposite side of the camera area but keep it far from the lip. Seal with flexible clear coat in two thin layers.
Press letters with the flat edge of a credit card so the curves fully stick.
Don’t use too many letters; one monogram looks clean, three looks cluttered.
15. Pastel Sticker Sheet Collage with Clear Edge Sealing
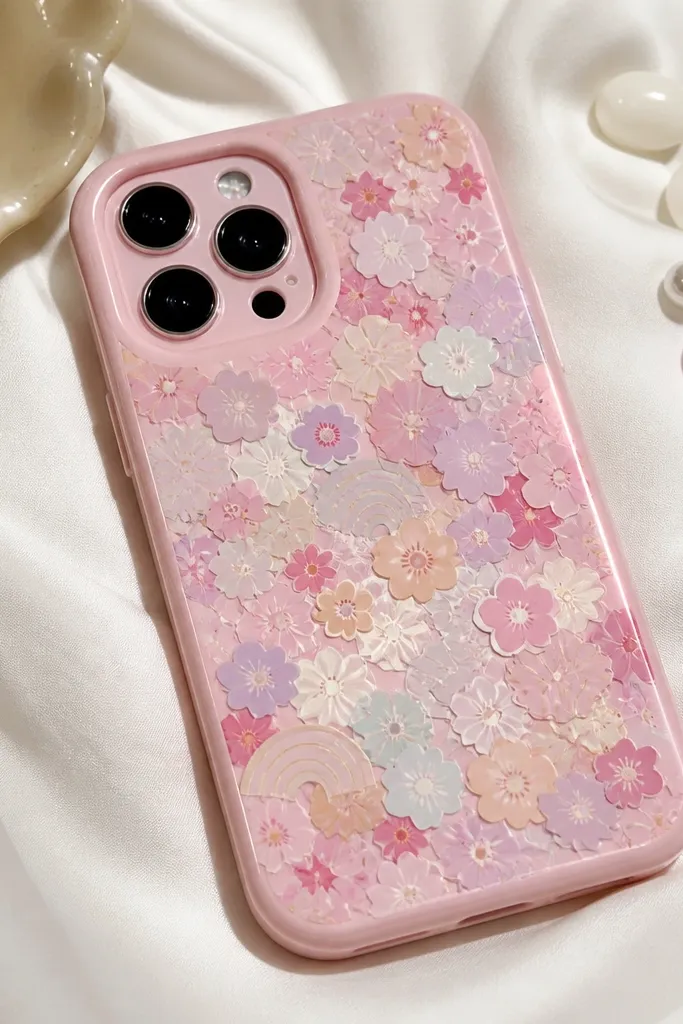
Clean the case thoroughly and plan your collage in one corner — I start with the top-right so it balances the camera weight. Overlap pieces lightly: put one flower sticker down first, then layer stars and tiny waves on top, leaving 1-2 mm edges visible. Fill empty space with 6-10 small dot stickers so gaps don’t look empty. Seal with clear coat, but do it in thin passes — brush the coat over edges slowly, then let it dry before the next coat.
This is the style for when you have a sticker sheet you love and want it to look curated. Pastels keep it soft and year-round because nothing clashes with your outfit. Overlapping pieces create depth, and the clear edge sealing makes the whole collage look like one printed design instead of separate stickers. This style suits people who like playful details but still want a clean phone surface.
AvoidDon’t pile heavy stickers on top of each other; the ridge makes the case snag in pockets.
Pro tipIf edges lift, add a tiny amount of clear coat directly onto the edge with a toothpick.
16. Tiny Cat Face Repeats with One Bigger "Wink" Cat
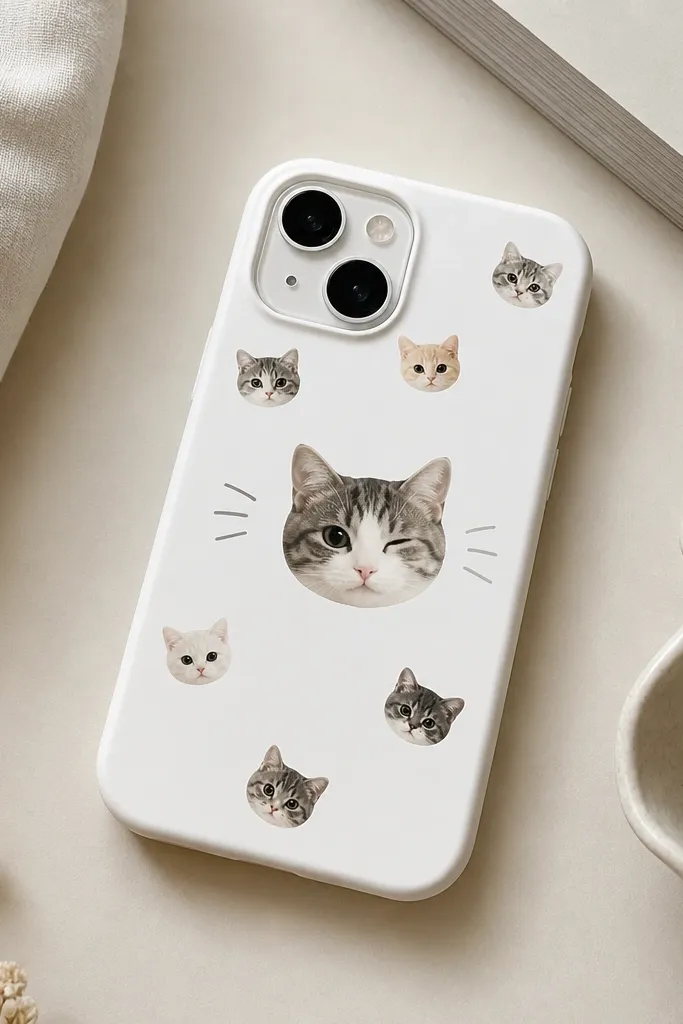
Start by placing the larger wink cat in the center, slightly above where your thumb rests. Then add 10-14 small cat faces around it, mostly in the top half and corners. Keep the spacing consistent by using a tiny dot sticker as a spacing guide between faces. Add a thin gray whisker doodle sticker that curves around the larger cat to connect everything. Seal with matte clear coat so the faces don’t look shiny and cheap.
Cat repeats work year-round because they’re small enough to feel like pattern, not a theme. I use a white or light base so the faces look crisp and don’t turn muddy. The larger wink cat becomes the focal point, which makes the design feel designed, not random. This is a great choice if you want cute without losing readability when you glance at your phone.
AvoidSkip too many big cats; one focal face is enough.
Pro tipIf you use glossy stickers, matte clear coat makes them look more like printed art.
17. Metallic Stars with Celestial Numbers
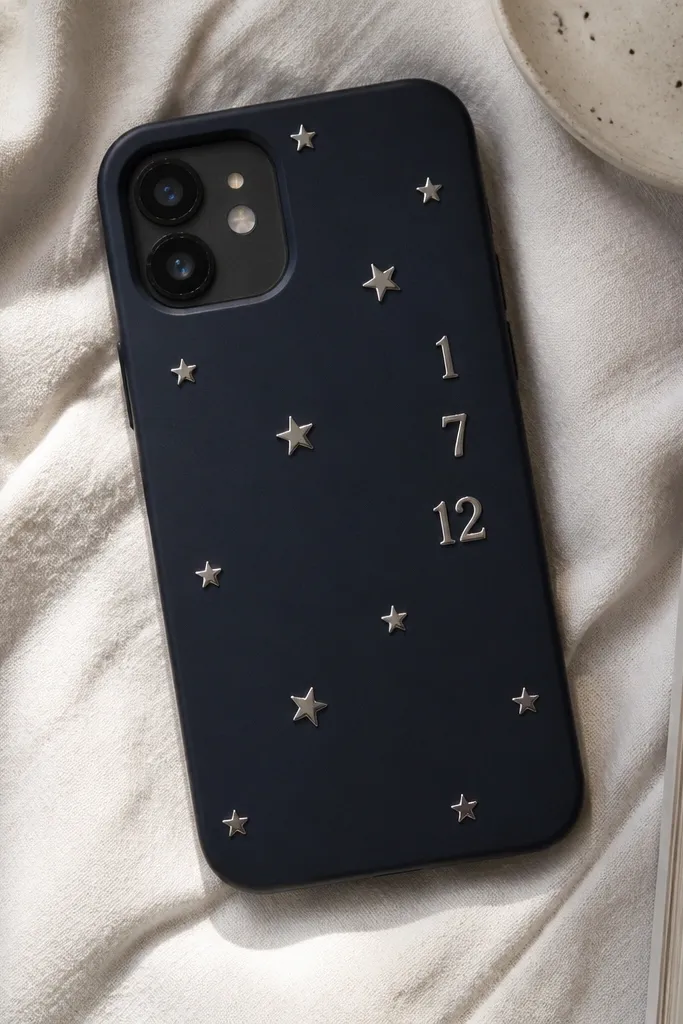
This looks like a night sky without turning into a full galaxy collage. Metallic stars add sparkle, and the number stickers make it feel personal — like dates or lucky numbers. Charcoal bases hide fingerprints better than lighter colors, so the case stays looking clean. It also plays nice with both silver and gold jewelry because silver stars are neutral.
Clean the case and scuff lightly if needed. Place a vertical column of number stickers on the right side, starting near the top third and ending above the camera bump. Then scatter metallic stars around the numbers, with the densest cluster near the numbers and fewer stars toward the edges. Add 2-3 small crescent stickers only if they match the star finish. Seal with a thin glossy clear coat to protect the metallic edges.
Use a single star size set — mixing sizes too much makes it look like random confetti.
Don’t seal too thick on metallic stickers; it can dull the shine.
18. Seashell Frame with Tiny Blue Stripes
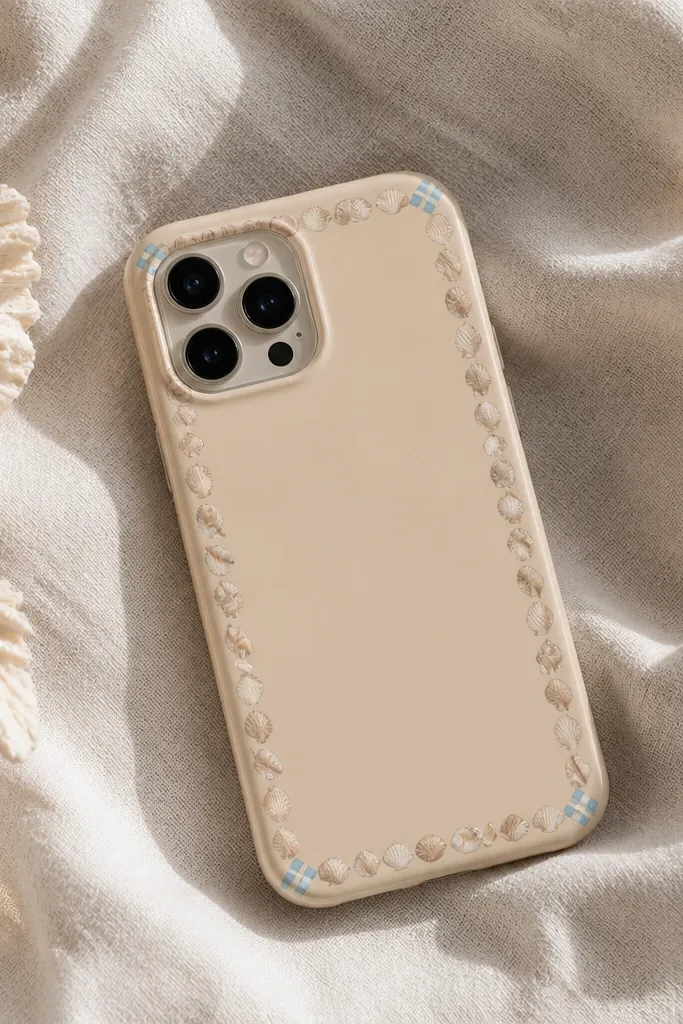
Clean the case and measure a thin border: place shell stickers along the left and right edges first, then connect the top and bottom. Keep the border about 5-7 mm away from the camera and button areas so it doesn’t scrape. Add two tiny blue stripe stickers at opposite corners, angled slightly inward. Seal with flexible clear coat, and brush it carefully along the shell sticker edges so they stay smooth.
A seashell frame gives beach vibes without forcing you into full summer mode. The border makes the design look intentional, and the tiny blue stripes act like accents instead of a whole theme. Sand-beige stays flattering and neutral, especially if you wear white sneakers and simple jewelry. It’s also a smart choice if you like the idea of seasonal stickers but don’t want to replace them every month.
AvoidDon’t use a thick border sticker set; it makes the phone feel bulky.
Pro tipUse a soft sanding sponge on the case before applying the border; frames lift more easily than flat center stickers.
19. Clear Case with Color-Block Sticker Panels
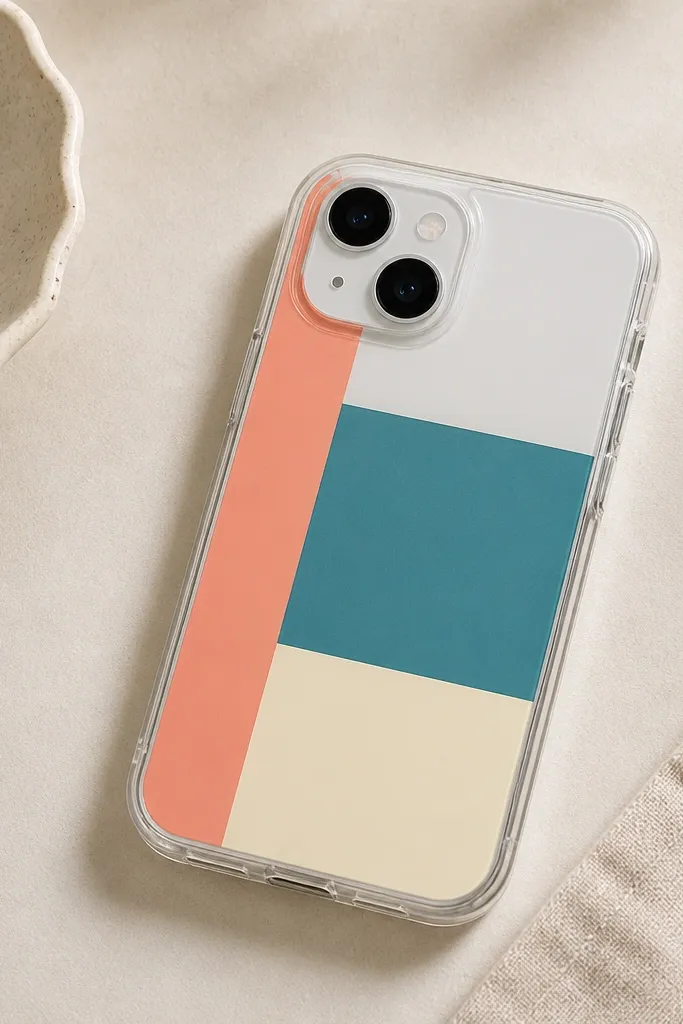
Color blocks on a clear case look modern and graphic, and they change outfits without needing seasonal swaps. Coral, teal, and cream are a strong combo that works in spring and winter because it’s about contrast, not theme. The sharp edges make it feel “designed,” especially if you keep each panel the same width. This style suits people who like clean aesthetics and hate lots of tiny details.
Clean the clear case and scuff lightly, then wipe with alcohol. Place the coral vertical strip first on the left side, about 12-15 mm wide, stopping above the bottom edge by 5 mm. Add the teal horizontal strip across the middle, aligned so it doesn’t cover the camera lip. Finish with a cream strip at the bottom, then seal with two thin coats of flexible clear coat to lock in the edges.
Use painter’s tape to mask straight lines while you place the strips, then remove it right away.
Don’t overlap color blocks; gaps look intentional, overlaps look messy.
20. Retro Cassette Tape Spine + Label Swap
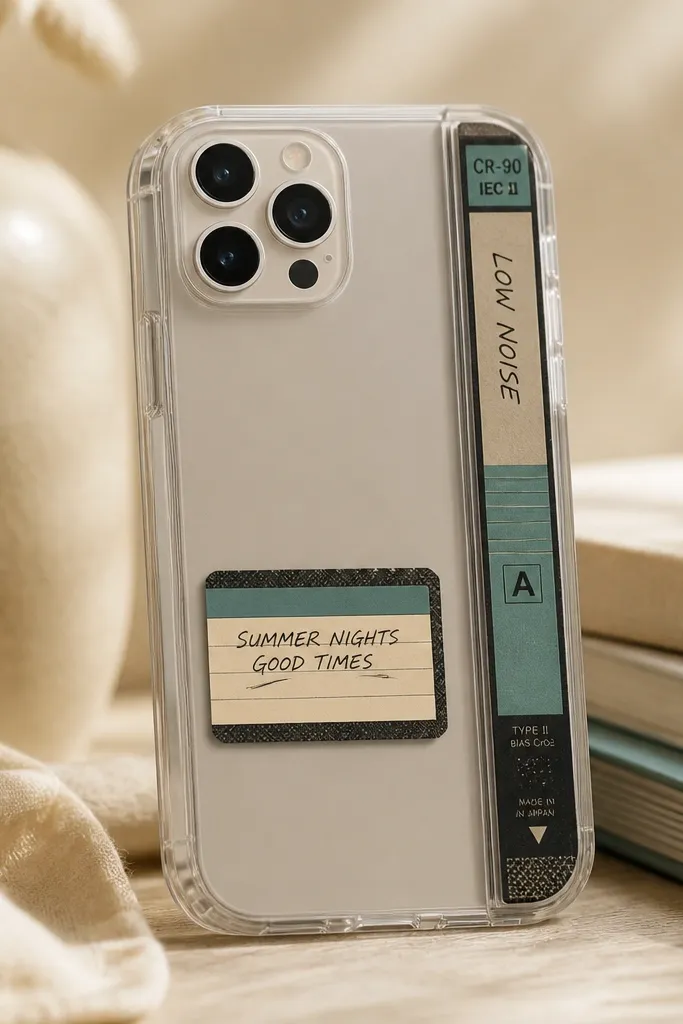
Step 1: Cut a strip of printed cassette art (or draw one) to fit the phone’s side edge, then test it against your exact case so the spine doesn’t cover the volume buttons. Step 2: Add a thin border around the spine using metallic washi tape or a strip of glossy vinyl, then burnish the edges with a fingernail so it doesn’t lift at the corners. Step 3: Create a label panel by printing a small rectangle with a faux track list on sticker paper, then seal just the label with clear packing tape or clear die-cut laminate. Step 4: Apply the label panel over the cassette art where you want the “tape title,” and press from the center outward to push out air.
This one looks like you stole it from a thrift-store mixtape binder. The cassette spine gives you a strong vertical line, so the design still reads clean even when your phone sits in low light. I’ve used it on clear cases and matte cases, and the spine sticker stays crisp because you’re working with straight edges. It also gives you a built-in “label swap” area, so you can update the text for seasons without redesigning the whole case. For diy phone case all year year round, it’s the rare sticker layout that feels intentional in every month, not seasonal in a costume way.
AvoidDon’t place the spine sticker where it crosses a button — the first time you press it, the sticker edges start to lift.
Pro tipIf your case has a slightly textured surface, use a craft knife to trim the sticker right at the case edge so it sits flush instead of peeling at the rim.



