
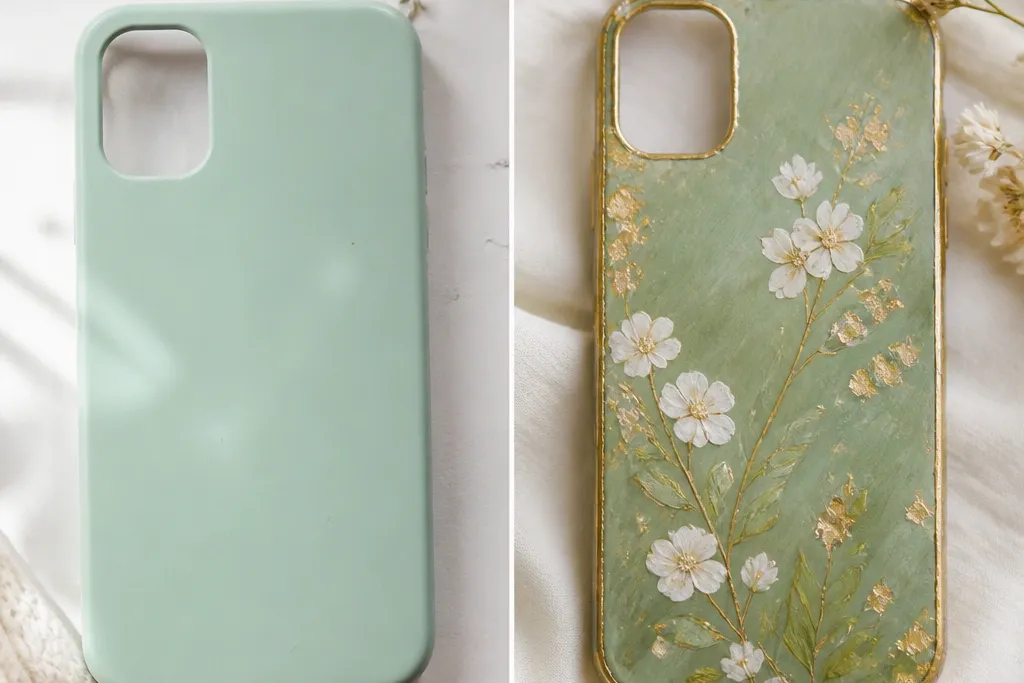
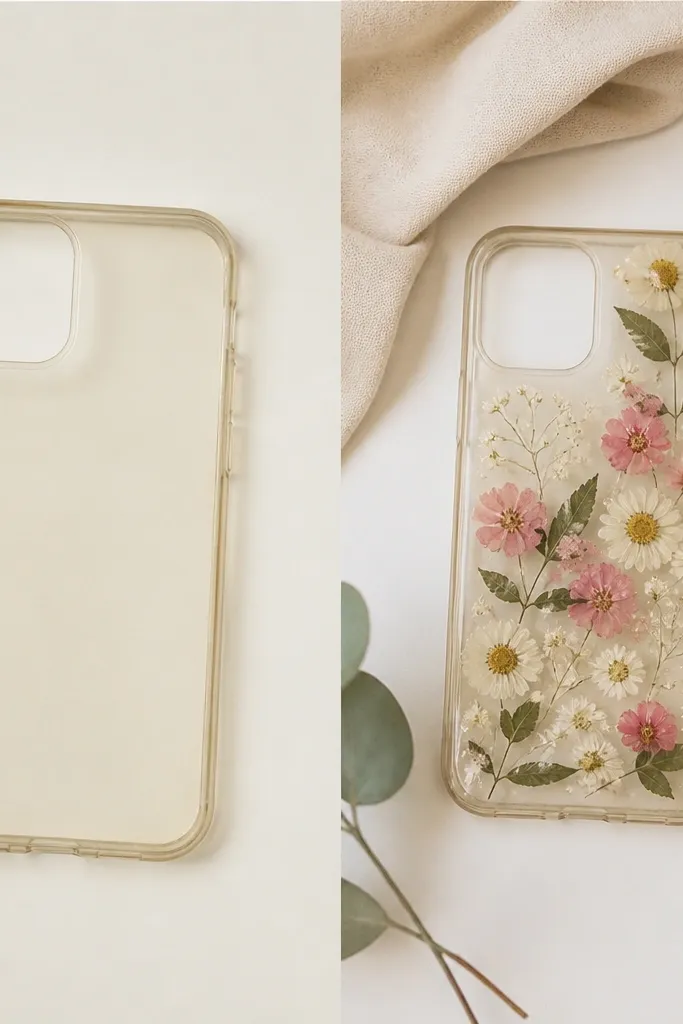
1. Scuffed-Base + Vinyl "Edge Stitch" Case
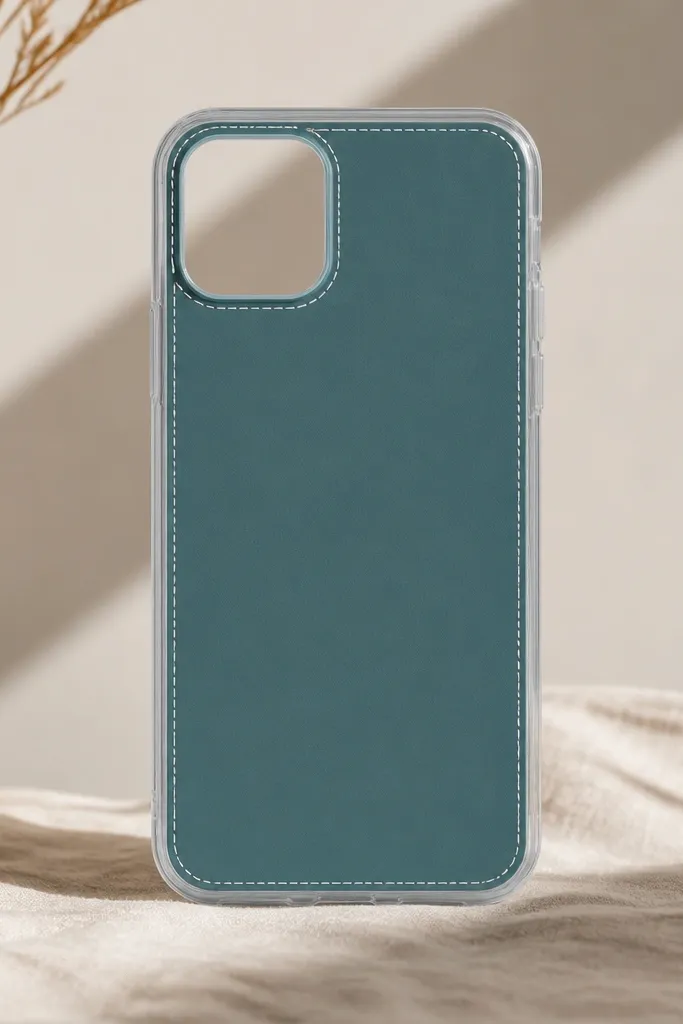
First, scuff the case lightly with 400-grit sandpaper, then wipe thoroughly with 70% isopropyl alcohol and let it dry for 3 minutes. Cut vinyl for two thin lines on each side, aiming for about 1.5-2 mm thickness; apply with a plastic scraper so you don’t trap bubbles. Then add small corner “stitch” marks using a second vinyl color, lining them up with your main seams. Finish by sealing with a clear top coat in thin passes, letting each pass tack before the next so the lines stay crisp.
This is the DIY phone case before and after transformation I reach for when I want it to look designed, not decorated. Start with a blank clear or solid-color TPU case, then run vinyl along the edges so the case frames the phone like tailoring. The look is clean on medium and deep skin tones because the white seam lines pop without screaming. I like muted teal, dusty rose, or slate blue in the center because they photograph well in daylight and don’t show lint as quickly as bright neon. The styling principle is contrast on the border — you guide the eye around the phone instead of covering the whole surface.
AvoidAvoid thick top-coat layers right away — they can soften vinyl edges and make the seams look fuzzy.
Pro tipPress the vinyl down with the edge of a credit card wrapped in a microfiber cloth to avoid scratching the finish.
2. Resin Domed Photo Insert (Budget "Glass" Look)
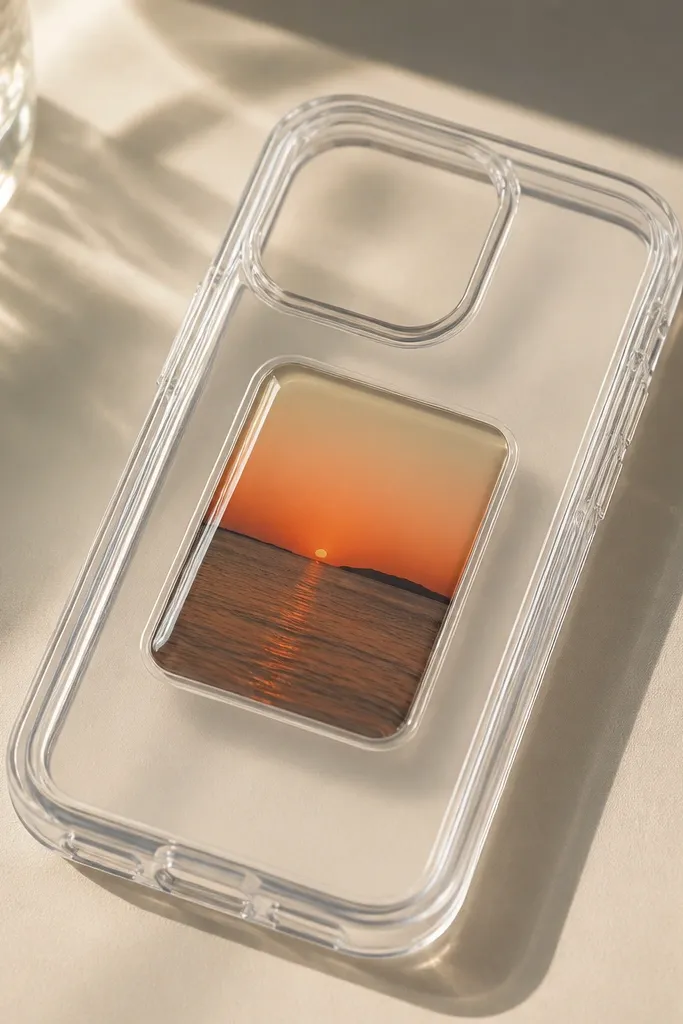
This one looks expensive because your design sits under a smooth dome, not on top of a flat sticker. I’ve done it with printed images from my home printer and it still looks clean when the resin is level and fully cured. It flatters warm undertones because sunset colors and skin-toned photos look richer under the gloss. It also works for people who want a simple case that doesn’t compete with jewelry — the dome is the only “spark.” The styling principle is containment: you create a defined window and let the resin do the shine.
Start by choosing a pre-made blank case with a flat center area or a clear case with a raised camera ring you won’t cover. Print your photo on matte photo paper, then cut it slightly smaller than the window so you leave a 1-2 mm border for resin to grip. Seal the edges with a thin layer of decoupage medium or clear glue so the paper doesn’t drink resin. Mix resin by weight if your kit allows it, pour in a level layer, and pop bubbles with a toothpick. Let it cure the full time listed on the kit before you test flexing the case.
Use matte photo paper, not glossy — the dome looks smoother and you don’t get weird glare spots in photos.
Avoid pouring too thick on the first try — thick resin can cure unevenly and leave a cloudy center.
3. Fabric Patch + Clear Overcoat (Denim Pocket Case)
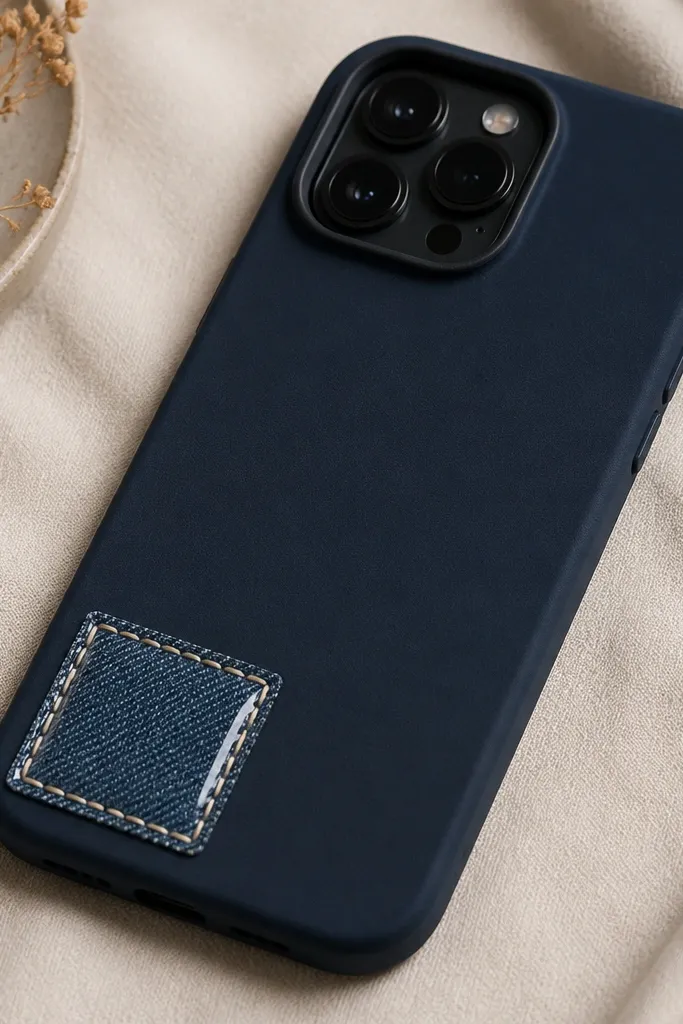
If you want tactile, this is it. I used a thin denim scrap and it reads like a mini pocket on the phone, which makes the whole case feel personal. Fabric works especially well on cases in black, charcoal, or deep navy because the texture shows without clashing. It flatters cooler undertones because denim blues look crisp against skin, and it also hides fingerprints better than fully glossy cases. The styling principle is texture placement — you keep most of the case simple and let the patch be the focal point.
First, sand the case surface lightly and clean with alcohol so glue sticks. Cut your fabric patch so it sits flat with a 1-2 mm margin from the edges you plan to cover. Glue the fabric down with a thin decoupage medium, pressing it into place and smoothing wrinkles outward. Let it dry, then paint clear top coat in thin layers until the fabric is fully sealed and you can’t feel fibers with your fingertip. Finish with a final smooth coat and cure time before using.
Trim the fabric edges with pinking shears to reduce fraying and keep the patch tidy.
Avoid bulky fabric — thick seams create lumps that show through the clear coat.
4. Alcohol Ink Marble on Clear TPU
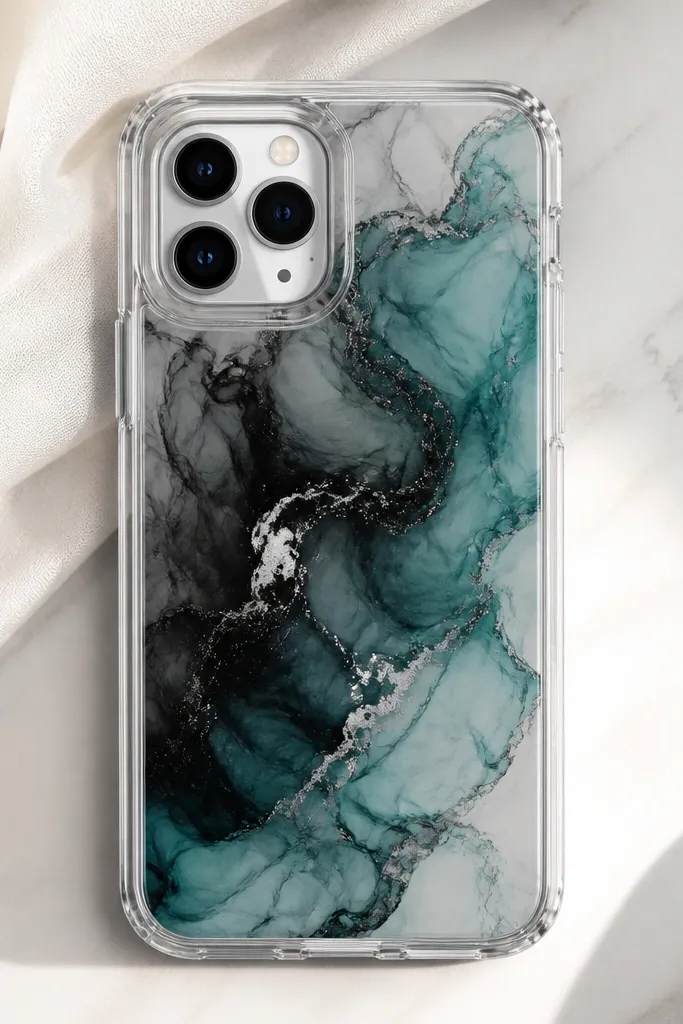
Start with a clean clear TPU case and protect the camera cutout with painter’s tape if needed. Add a few drops of alcohol ink onto the case surface, then drag gently with a cotton swab dipped in alcohol to create streaks. Use 91% isopropyl alcohol sparingly — too much makes everything wash out. Let it dry for 10-15 minutes, then seal with a clear top coat in thin passes so the marbling doesn’t smear. After sealing, check the edges and add a tiny brush of top coat where ink meets plastic.
Marble cases are hard to get right, and store ones often blur or crack. Alcohol ink gives you that “fluid under glass” look because the pigments spread before they dry. I like teal plus black for everyday use because the pattern stays dramatic without looking childish. It also looks great on both light and medium skin tones because the dark base makes your hands look clean. The styling principle is controlled chaos — you guide the ink placement with drops, not full coverage.
AvoidAvoid rushing the seal — if ink is still wet, top coat can lift the pattern.
Pro tipPractice on scrap plastic first so you learn how fast your ink spreads in your room temperature.
5. Nail Polish Swirl + Matte Top Coat
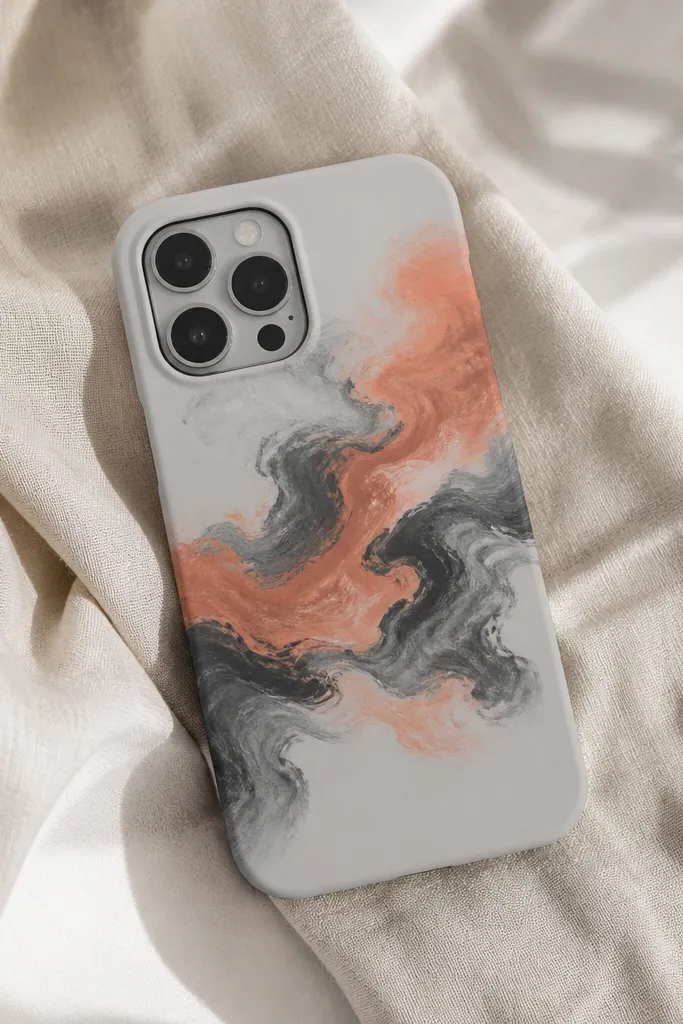
This is my lazy-weekend option when I want a pretty case fast and I don’t care about high-impact durability. Nail polish swirls look artistic and slightly imperfect, which makes them feel human instead of printed. It flatters warm skin tones because coral pops against gray without looking harsh. The matte top coat is the trick — it makes swirls look like art rather than candy shine. The styling principle is finish control: glossy base polish can look cheap, matte makes it look intentional.
Start with a light gray or white case so colors read clearly. Tape off the edges with painter’s tape so polish doesn’t creep into button areas. Drop small dots of nail polish, then swirl with a toothpick from the center outward. Let it dry fully for at least 30-45 minutes, then remove tape carefully. Apply matte top coat in two thin layers, letting the first dry before the second so it doesn’t streak.
Use a toothpick for detail — a brush spreads polish too much and you lose the swirl shape.
Avoid applying top coat too soon — the swirl can smear and you’ll get muddy colors.
6. Mini Vinyl Icons + Clear Sticker-Lock Border
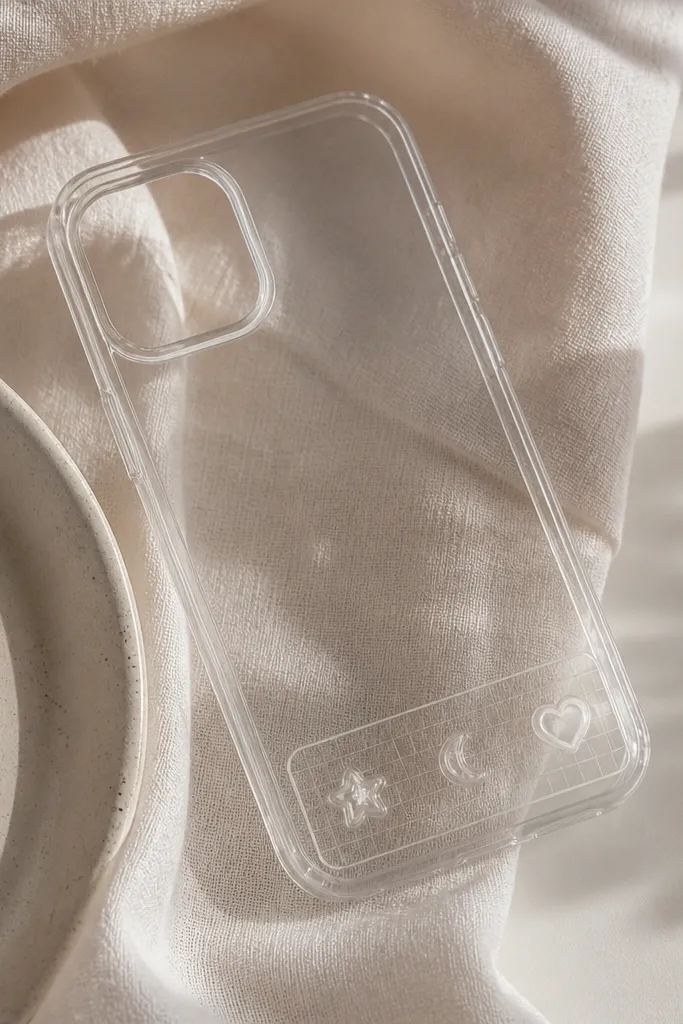
Tiny icons look cute without turning your phone case into a billboard. This is a DIY phone case before and after transformation for people who hate loud designs but still want a personality bump. On fair to medium skin tones, the see-through background makes the icons look like they float, especially with white or pastel vinyl. It also works if you wear lots of neutral outfits because the icons add detail without changing your whole look. The styling principle is spacing — small elements with breathing room look premium.
Start with a clear TPU case and clean it with alcohol so vinyl sticks. Plan your icon layout on paper first, then place vinyl pieces one by one with a tweezers tip so you don’t stretch them. Leave at least 2 mm between icons to prevent overlap when the case flexes. Once the vinyl is down, paint a thin clear top-coat “border” around the whole cluster to seal edges. Let it cure fully before you put it back in a tight pocket.
Use a micro scraper to press each icon corner so the edges seal cleanly under top coat.
Avoid full-coverage vinyl on flexible TPU — it wrinkles at the corners and ruins the clean look.
7. Gold Leaf Accent on Matte Black Base
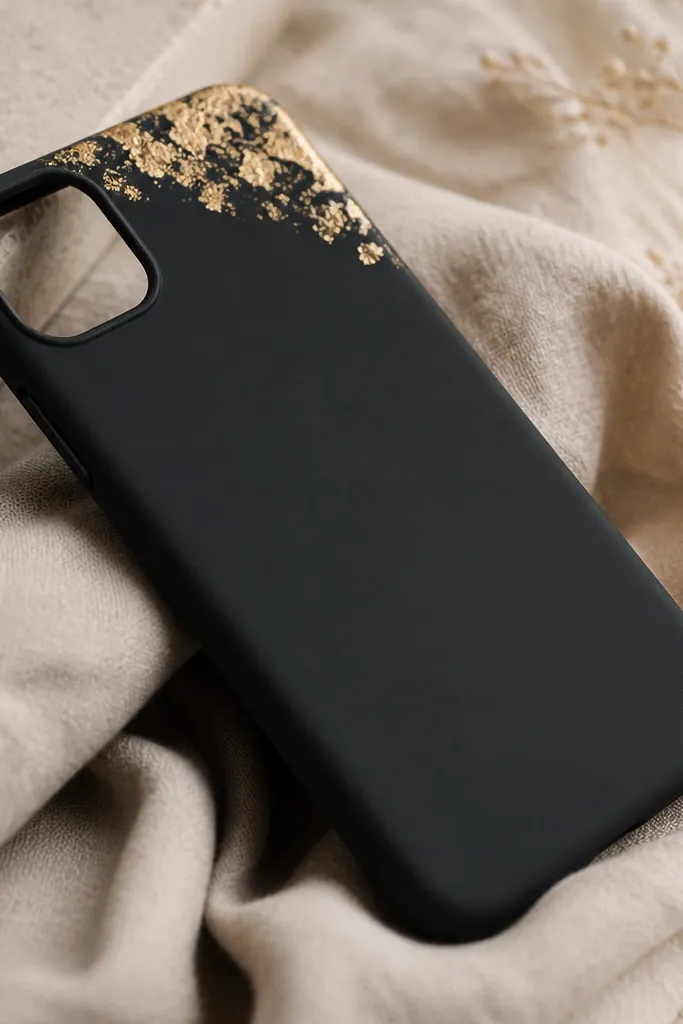
Start with a matte black case or paint a blank case with matte acrylic made for plastics, then let it cure overnight. Brush a thin layer of adhesive leaf size where you want the gold, then wait until it goes tacky (not wet). Press gold leaf gently with a soft leaf tool or clean tape, then tap off excess. Seal with a clear matte or satin top coat so it stays protected — use thin coats so the leaf texture doesn’t get swallowed.
Gold leaf is the fastest way to get “expensive” energy without doing a whole resin pour. I like it on matte black because the leaf flakes show texture and the case never looks too shiny or plasticky. On deeper skin tones, gold leaf looks especially striking and reads like jewelry. It also looks good with silver rings because the leaf has warm highlights that balance cool metals. The styling principle is one focal area — you keep it small and let the light do the work.
AvoidAvoid glossy top coat if you hate fingerprints — it turns gold leaf into a mirror and shows smudges.
Pro tipDo gold leaf in a low-draft room so flakes don’t drift into your camera cutout.
8. Photo Strip Side Window (Like a Mini Film Reel)
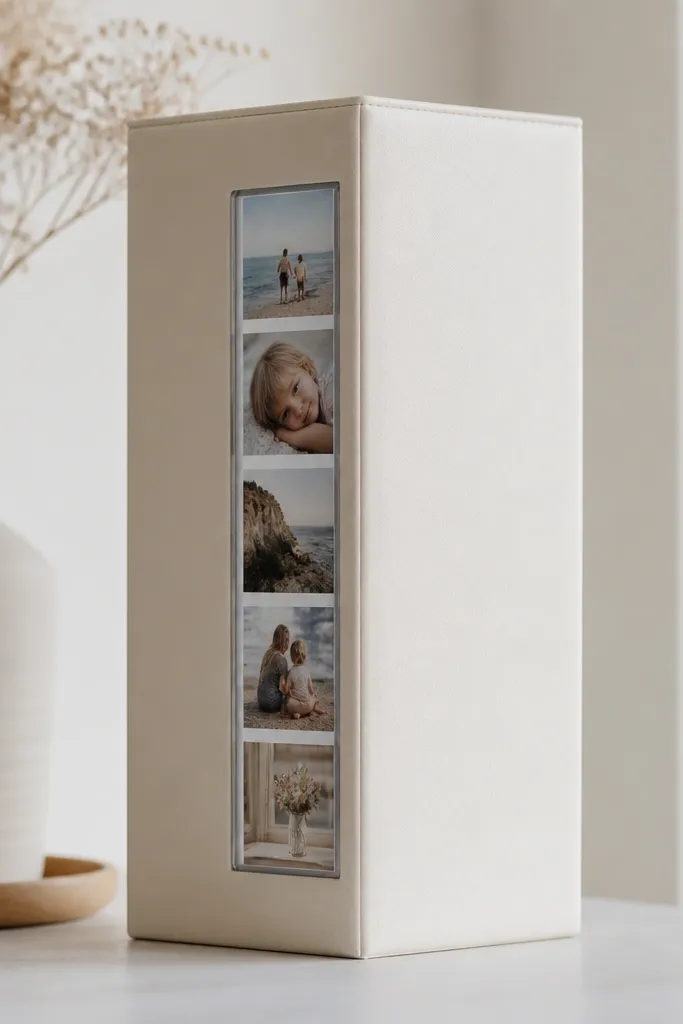
This looks way more thoughtful than a single centered photo because it mimics a film strip. You can choose images that match your life — concert wristbands, travel dates, or close-up plants — and rotate the strip idea as you get bored. It flatters people who like clean outfits because the design lives on one side, not across your whole phone. I’ve used this for gifts and it always lands because it feels personal even when the phone is someone else’s. The styling principle is asymmetry — one side detail looks more high-end than full coverage.
Choose a blank case that has a flat side panel or one you can open by applying a clear window overlay. Print your photos in a small strip format with thin white borders, then cut to the window size with a straight edge. Apply a clear adhesive sheet or thin layer of decoupage medium to the window area, then position the strip so it’s centered in the opening. Seal with a clear layer that fully covers the edges of the paper strip, then cure per product instructions. Finish by checking button feel and wiping any clear coat squeeze-out from the frame.
Print two test strips on scrap and hold them up to your phone before cutting — you’ll spot alignment issues fast.
Avoid paper-thin glue layers — paper edges lift and you end up with a raised corner.
9. Perforated Dot Pattern + Matte Spray Seal
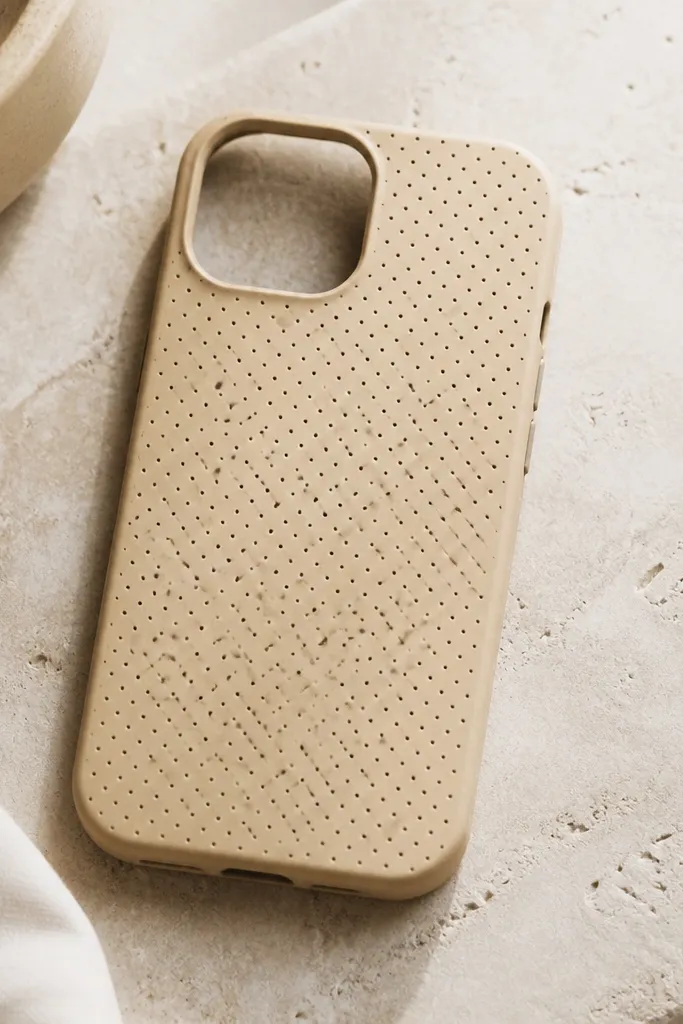
This is one of the DIY phone case before and after transformation ideas that looks store-bought because it’s pattern, not pictures. A dot stencil gives you a tactile, subtle look that doesn’t scream “craft project.” I like light tan, oatmeal, or dusty cream because the dots cast tiny shadows and look dimensional in sunlight. It flatters most skin tones because it stays neutral and doesn’t fight your outfit colors. The styling principle is repeatable geometry — consistent spacing looks professional even if you’re making it at home.
Start with a solid color case and clean it with alcohol. Tape a stencil with a dot pattern over the area you want to decorate, then use a foam dabber to apply paint or craft ink. Build up color slowly — do 2-3 light passes instead of one heavy coat to avoid drips. Let it dry fully, then apply a matte spray seal in light coats from 8-10 inches away. After the final coat, let it cure for 24 hours before heavy use so the finish doesn’t scratch off.
Use painter’s tape as a guide strip so you keep your stencil perfectly straight around the curve.
Avoid metallic paints without sealing — they rub off faster on phone pockets.
10. Magnetic Pop-Top Case with Removable Charm
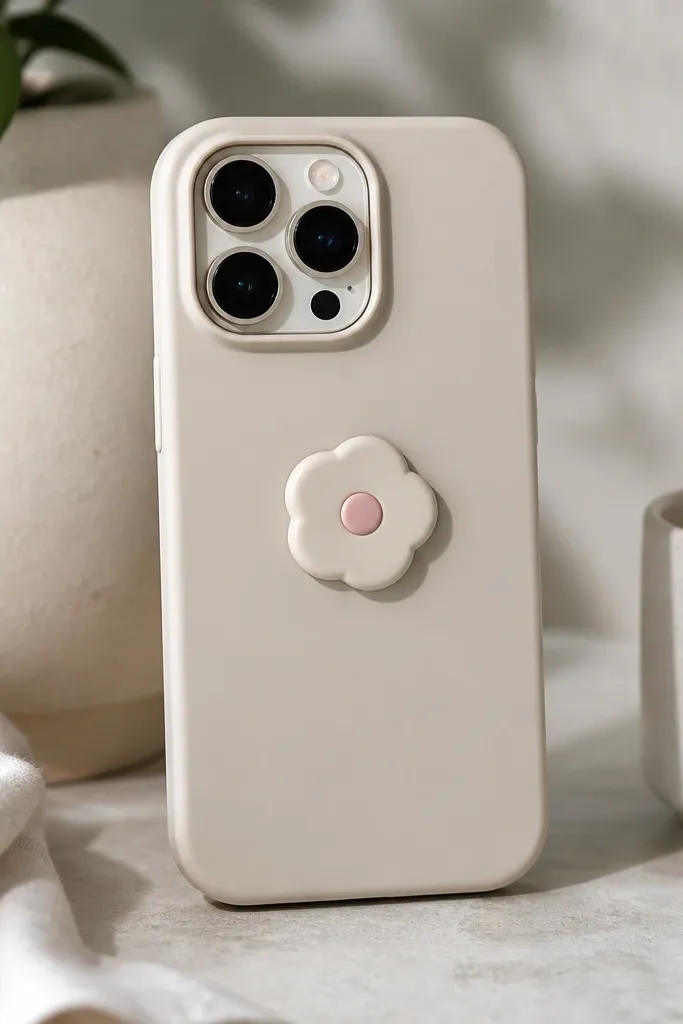
If you get bored easily, this DIY design is worth the effort because you can swap the charm without redoing the whole case. The before-and-after transformation is obvious because the back goes from plain to interactive. I’ve seen this look best on sleek black or clear cases where the charm becomes the focal point. It also flatters people who wear a lot of small accessories — the charm reads like jewelry. The styling principle is one anchor point — make one spot magnetic and keep everything else clean.
Pick a blank case that has enough flat space for a magnetic disc. Mark the center with a ruler, then attach the disc using a strong adhesive made for plastics, pressing for 60 seconds. Build your charm separately, then attach it to the magnet and test alignment. Seal around the magnet edges with clear epoxy or top coat so pocket lint doesn’t get underneath. Let it cure fully before you snap the charm on and off repeatedly.
Use a thin microfiber cloth to clean the magnet disc before attaching charms so it doesn’t feel gritty.
Avoid superglue-only attachments — it cracks on flex and the disc pops off.
11. Decoupage Map Coordinates + Gloss Frame
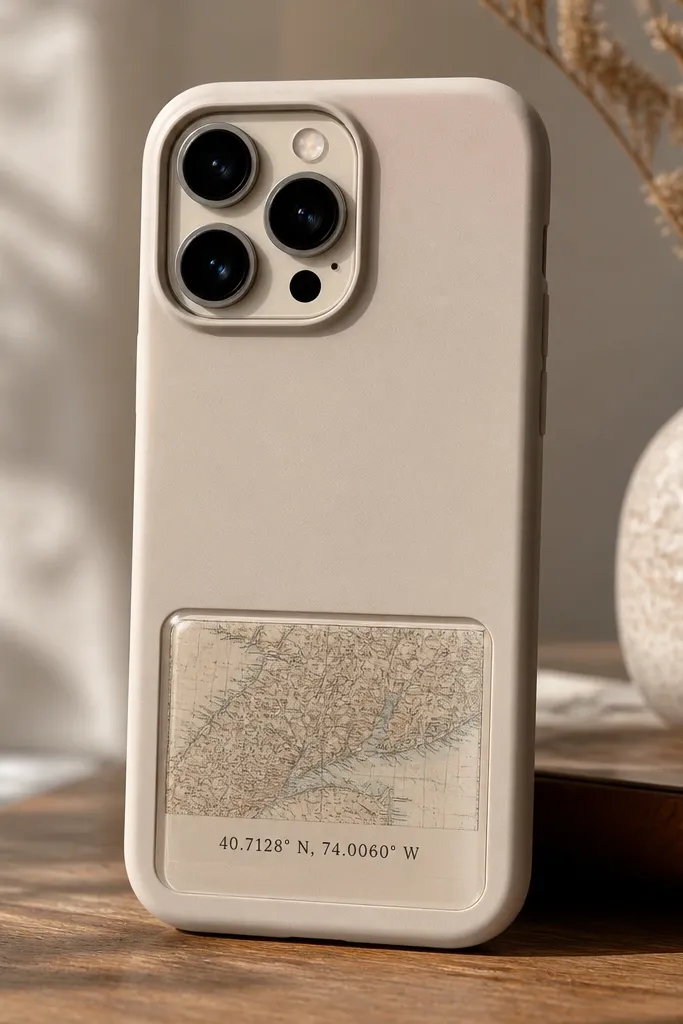
This is the sentimental DIY phone case before and after transformation that still looks clean, not scrapbooky. The trick is using a tiny map panel instead of covering the whole back with paper, then sealing it under a glossy frame. It flatters people who like older travel photos because the vintage print has warm browns and muted greens. It also looks good on both light and deeper skin tones because the panel stays small and controlled. The styling principle is a framed focal area — the glossy border makes it look like a product label.
Cut your map panel from thin paper or print on lightweight paper, then trim to a rectangle leaving a 1 mm margin. Apply decoupage medium to the case area, place the panel, and smooth from center outward with a plastic card. Let it dry until it’s not tacky. Paint a glossy clear coat around and over the edges to create the frame, then do a full clear coat over the panel. Cure fully before use so paper doesn’t warp under your thumb.
Use a fine-tip craft brush to seal the corners — that’s where lifting usually starts.
Avoid thick paper — it creates bubbles that show under glossy clear.
12. Stencil Spray Gradient with Clear "Glass" Top Coat
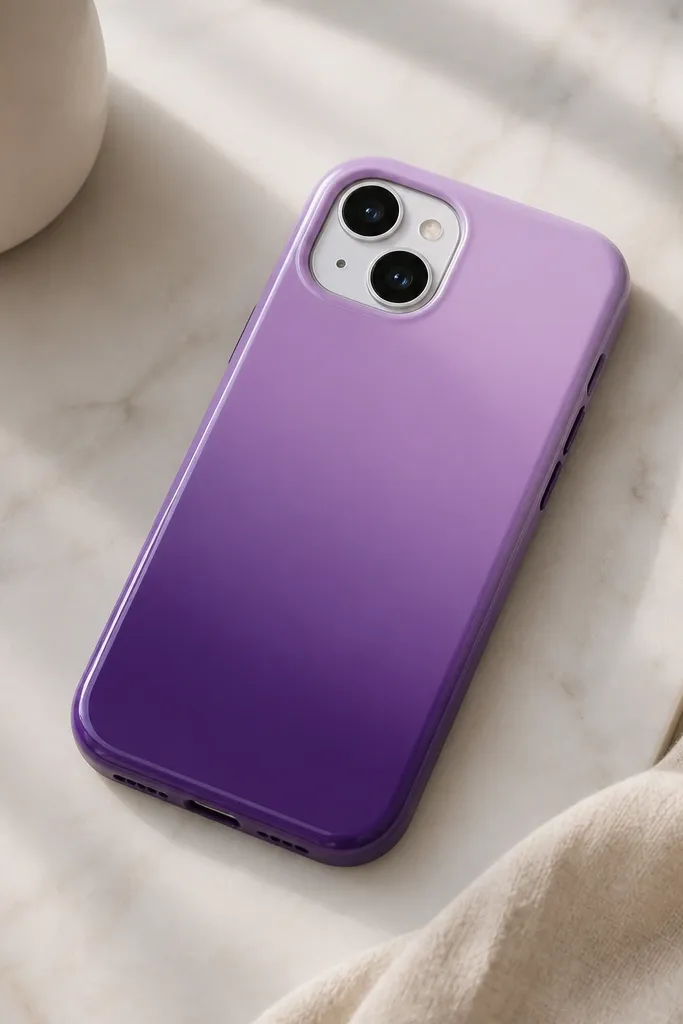
Gradients look hard, but stencils make them approachable and they read high-end in photos. I’ve done this with purple to lilac on a clear or solid base, and the before-and-after transformation is huge because store cases rarely match the exact color vibe you want. It flatters cooler undertones because purple tones look crisp against skin. The styling principle is controlled blending — you spray in bands so you get smooth transitions without muddy drips.
Start with a case in a base color close to your lightest gradient area. Tape a stencil mask that creates a stepped gradient — for example, 5 bands that each get shorter as they move upward. Spray light coats of matching paint or spray ink, letting each band dry 2-3 minutes between layers. Remove the stencil and touch up any gaps with a tiny brush. Seal with a clear “glass” top coat in thin layers, keeping the camera cutout clean.
Use a piece of cardboard as a spray shield so the mist doesn’t land in button cutouts.
Avoid heavy spraying — it pools and you end up with a streaky gradient.
13. Clear TPU + Seed Bead Border (Micro Texture)
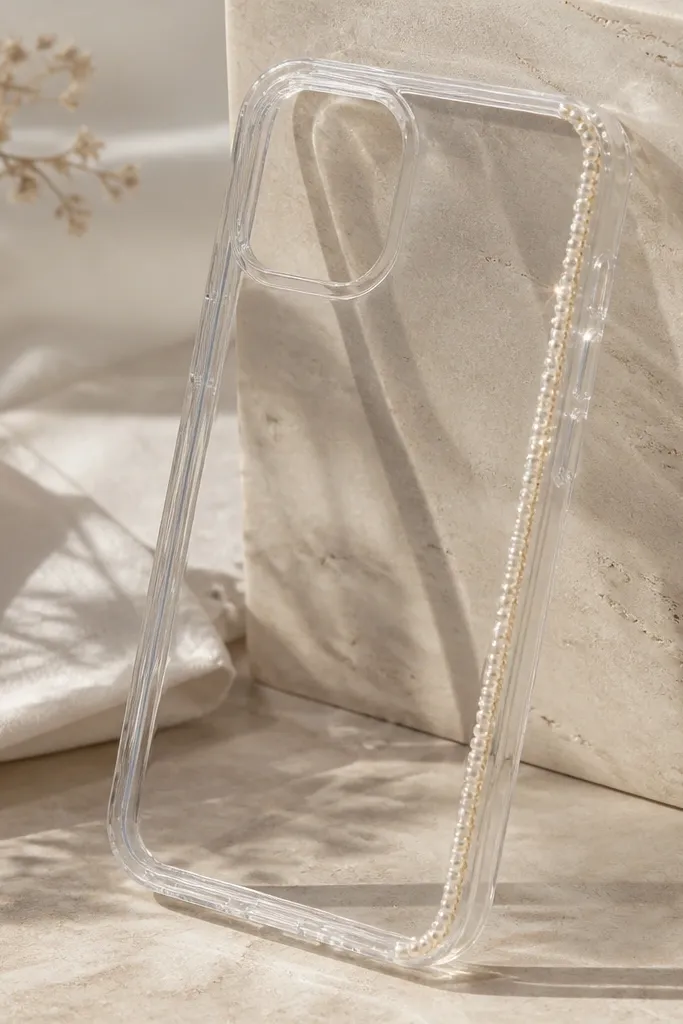
Start with a clear TPU case and decide where your bead line goes — I like along the bottom edge, about 10-12 mm from the lip. Apply a thin bead of clear adhesive gel, then press seed beads into the line using tweezers. Let it dry fully so beads don’t shift. Cover the bead line with clear top coat or thin resin in two layers so everything is sealed and you can’t snag a bead with your fingernail. Cure completely before using.
Seed beads look delicate, but they survive daily use when you embed them under clear coat. This is a DIY phone case before and after transformation that makes the back feel special without adding bulky thickness. I like it on clear TPU with a dark backing color underneath, so the beads look like they float. It flatters anyone who wears gold or bronze jewelry because beads catch warm highlights. The styling principle is micro texture — a thin border adds interest without covering everything.
AvoidAvoid leaving beads exposed — pocket friction will wear them down fast.
Pro tipSort beads by size first so the line stays even and doesn’t look patchy.
14. Store-Bought Case Color Match Upgrade with Paint Markers
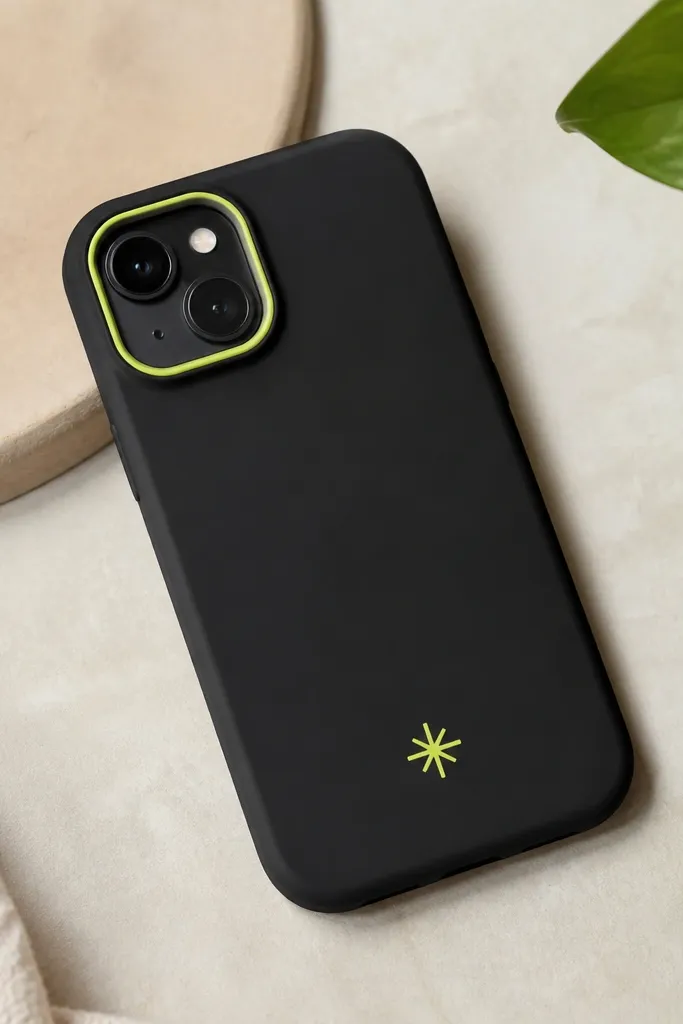
Pick a store-bought case with a smooth finish so markers glide. Clean the surface with alcohol, then plan your accent line with painter’s tape. Use paint markers designed for plastics and apply thin strokes so the line stays crisp. Let the ink dry, then seal over the accents with a clear top coat that works on painted surfaces. After sealing, check the edges near buttons and wipe any extra clear coat to keep the case feeling smooth.
This is my compromise option when I want the speed of store-bought but I hate the boring color. I buy a basic TPU case in a color close to what I want, then I use paint markers to add the exact accent line or symbol I’m craving. It flatters your personal style because you can match bag hardware, nail polish, or even a favorite hoodie color. It also keeps the case protection intact since you aren’t rebuilding it from scratch. The styling principle is small, accurate changes — one line can make a plain case look custom.
AvoidAvoid thick marker lines — they crack at flex points and look raised.
Pro tipDo one practice line on a scrap piece of plastic from the packaging to check how bold the marker dries.
15. DIY "Anti-Slip" Grip Bands with Fabric Tape Undercoat
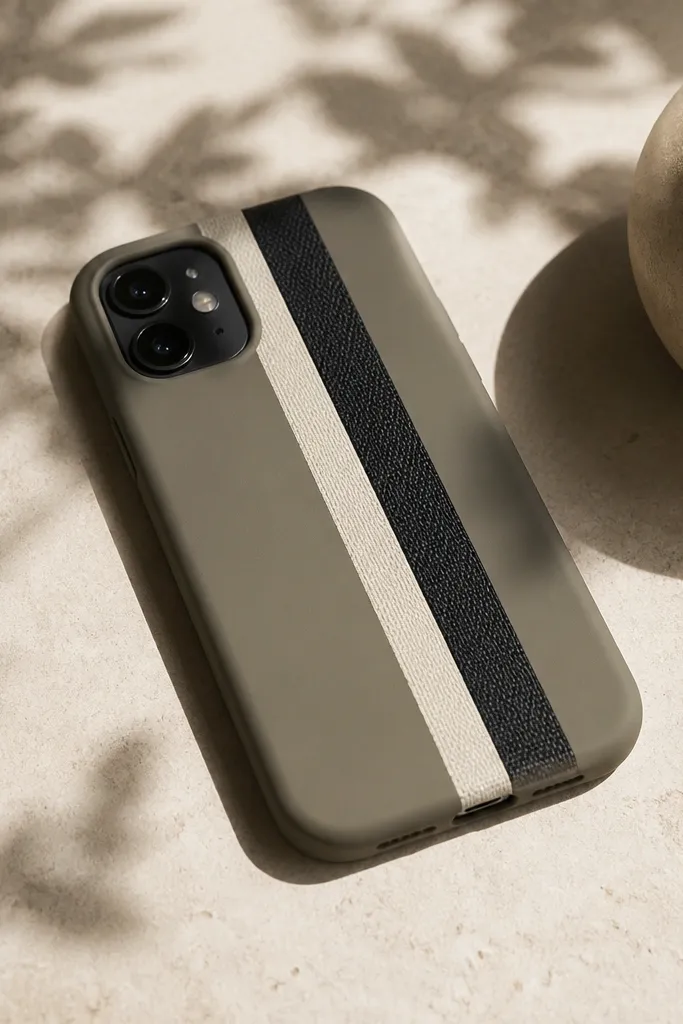
This one is for people who drop their phone because their case feels too slick. The before-and-after transformation is functional: you get grip and a style change at the same time. I like fabric tape bands because they add texture without needing complicated art skills. It looks good on black, gray, and olive cases because the tape colors create contrast that reads clean. The styling principle is grip placement — you put texture where your fingers naturally hold the phone, not across the entire back.
Start with a matte case or scuff a glossy one lightly with 400-grit and wipe with alcohol. Cut fabric tape into two strips and apply them where your fingers touch — usually the center-left and center-right back areas. Seal the tape edges with a thin decoupage medium so it doesn’t fray. Once dry, paint clear top coat over the entire tape area until it feels smooth and sealed. Let it cure for 24 hours so the grip doesn’t peel when it gets rubbed in pockets.
Test grip by holding your phone one-handed for 10 seconds — you’ll feel instantly if the tape placement is right.
Avoid leaving tape edges uncovered — they curl and catch lint.
16. Store-Bought Clear Case + DIY Printed Texture Backer
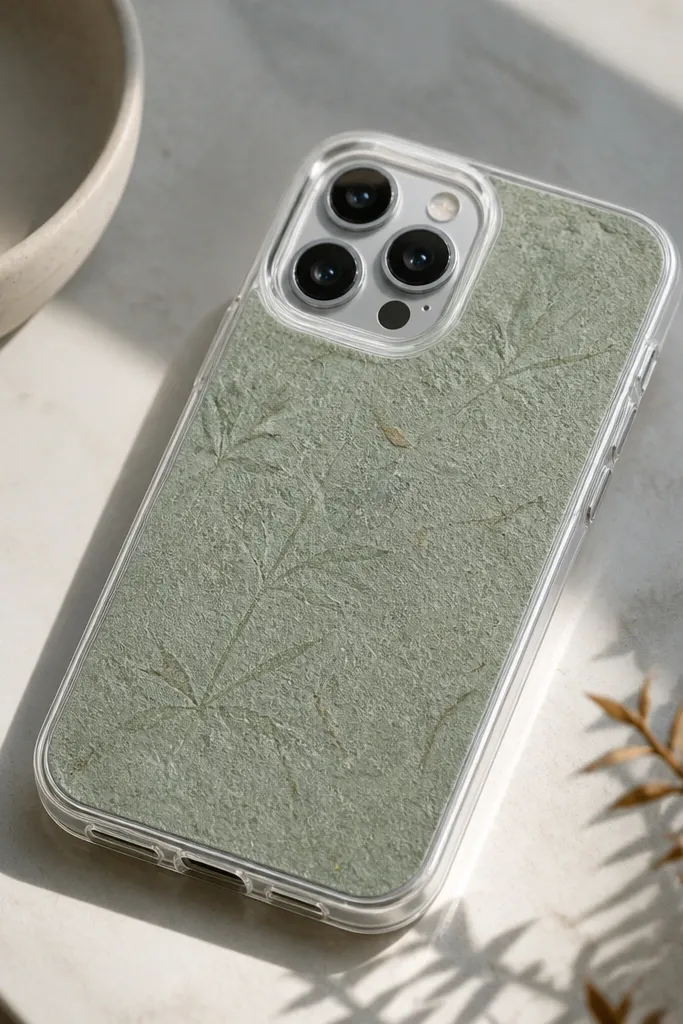
If you want the store-bought clarity but with more depth, this works. You put your design on a backer that sits under the clear case, so it looks like it’s part of the material instead of a sticker on top. I’ve used textured scrapbook paper and even printed cardstock with a fiber look, and the before-and-after transformation is that the back seems thicker and more expensive. It flatters almost everyone because you can match it to your wardrobe neutrals — sage, taupe, or warm gray. The styling principle is depth layering — the design sits behind the clear shell and avoids edge lifting.
Buy a store-bought clear case that fits your phone tightly so the backer doesn’t slide. Cut your printed or textured paper to size, leaving a 1-2 mm margin so it doesn’t interfere with camera cutouts. Apply a thin adhesive sheet or double-sided tape dots around the perimeter, not in the center, then place the backer inside the clear case. Use a small amount of clear top coat on any exposed paper edges if the fit leaves them uncovered. Snap the case on and check that buttons still press cleanly.
Use textured paper, not glossy — glossy paper can create glare blobs that look cheap in daylight.
Avoid backers that are too thick — they bow the clear case and can pop at the corners.



