
1. Ghost With a Tiny Coffee Cup
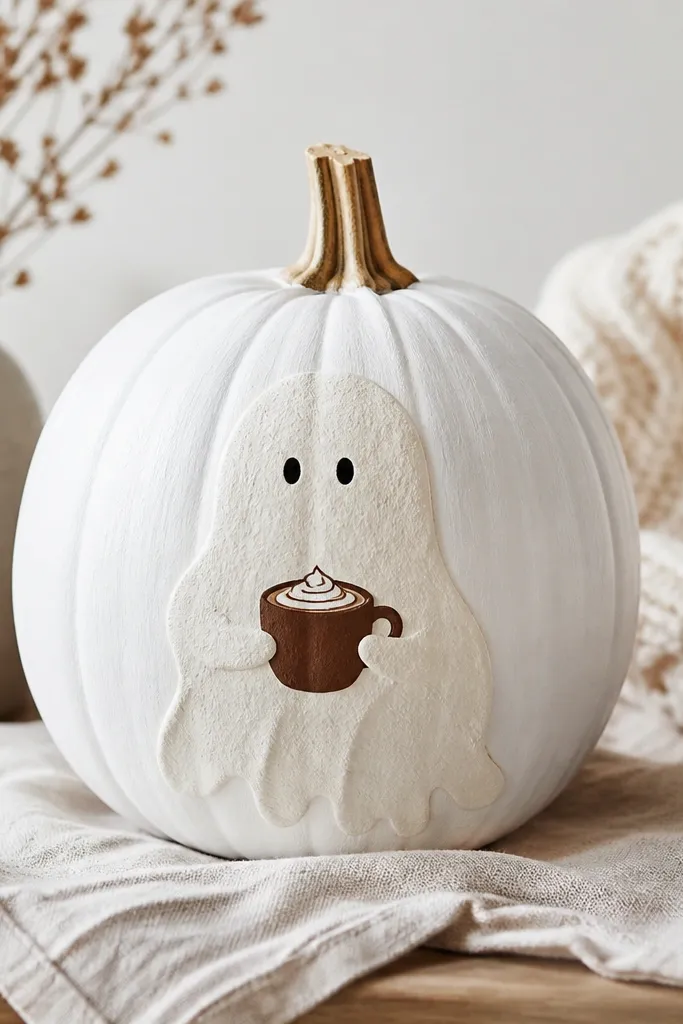
This one looks cute on warm-toned porches because the white ghost reads clean even from a distance. I paint the whole pumpkin in opaque off-white, then add a simple ghost sheet shape that hugs the pumpkin’s natural curve. The face uses two small black dots spaced wide — that makes the pumpkin look friendly instead of creepy. If your space gets lots of orange light at night, the matte finish keeps it from looking plasticky.
Pro tipLet the ghost base dry overnight if you’re painting on a humid day; it stops the cup color from bleeding.
Step 1: Base coat the pumpkin with off-white acrylic craft paint, using a sponge to keep the ghost texture soft. Then paint a rounded ghost “blanket” shape with a slightly wavy top edge, leaving the sides covered so it feels like one character. Step 2: Add two eyes as solid black dots and a small curved mouth with white highlight paint on one side. Step 3: Paint a tiny coffee cup in chocolate brown, add a cream swirl on top, and seal everything with matte clear spray after full dry time.
AvoidDon’t use translucent paint for the ghost — it makes the pumpkin skin show through and the face looks uneven.
2. Pizza Slice Punk
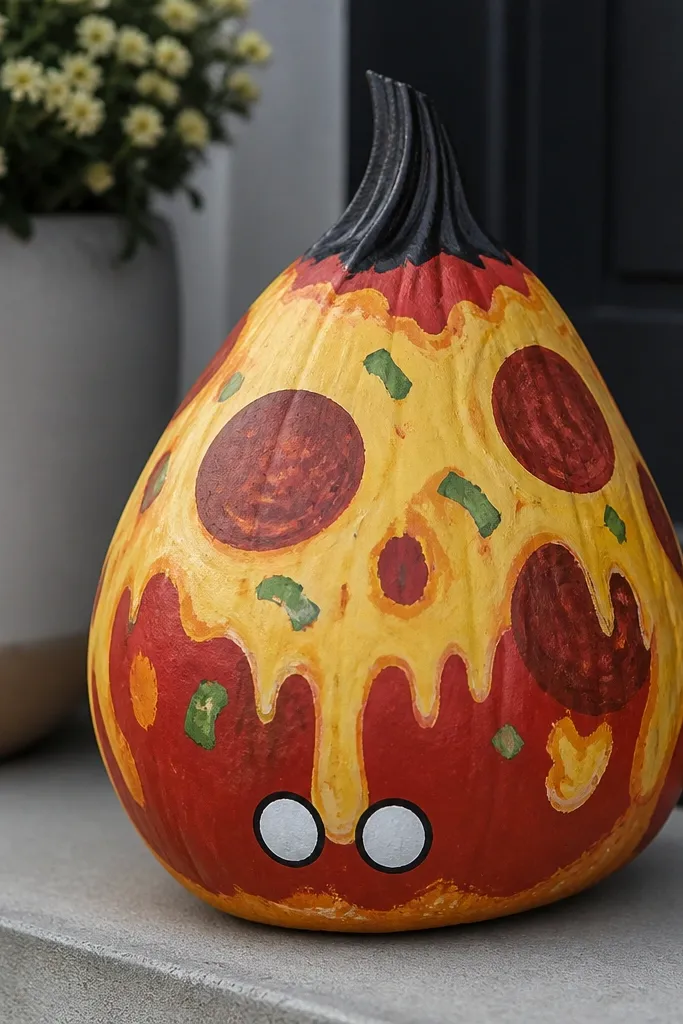
This is my go-to funny pumpkin painting idea when I want it to look bold in photos. The slice shape works with the pumpkin’s body so it feels like it’s “wearing” the slice. The high-contrast pepperoni and cheese colors pop against a porch mat or dark wall. It flatters almost any home color palette because red, yellow, and green read strong in both daylight and evening.
Pro tipUse a toothpick to place pepperoni dots; it makes them round and evenly sized.
Step 1: Paint the pumpkin in a pizza-sauce red base, leaving a curved band for the cheese. Then block in the cheese as a thick yellow layer, slightly wider at the top and narrowing toward the bottom. Step 2: Dot pepperoni circles in dark brown with lighter brown centers, and add small green flecks for herbs. Step 3: At the top “point” of the pumpkin, paint a black mohawk stripe and add two cartoon eyes with white dots and black outlines. Seal with matte clear spray to keep the cheese looking soft, not shiny.
AvoidSkipping a thick cheese layer — thin yellow paint makes the pizza slice look washed out.
3. Witch Brew Cauldron Face
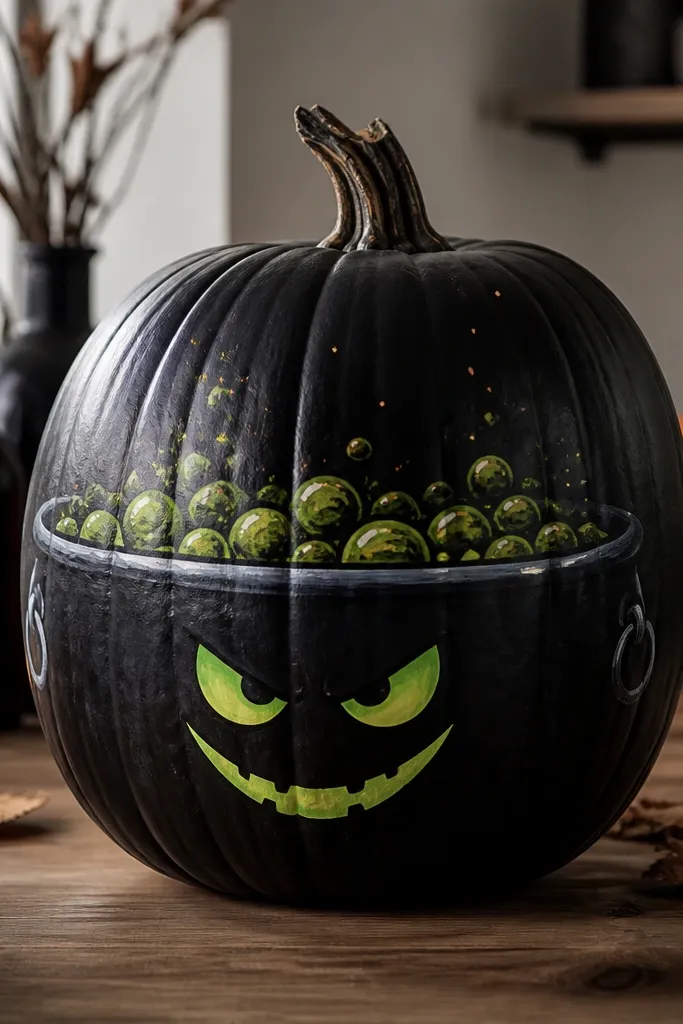
This one reads spooky-funny without getting scary. The black base makes the green “brew” stand out, and the cauldron rim gives you a strong focal line that follows the pumpkin’s curve. The eyebrows and grin make it goofy; I keep the eyes slightly asymmetrical for character. It looks best on medium to dark backgrounds because the black paint absorbs light.
Step 1: Base coat the pumpkin with black acrylic paint. Step 2: Paint a cauldron rim across the middle using a gray-green mix, then outline it with a thin darker line. Step 3: Fill the cauldron with bubble shapes in neon green and add tiny orange spark dots around them. Step 4: Paint eyebrows and a wide grin using a thin brush, then add two small white eye highlights. Finish with matte sealer so the black stays deep.
If you want extra bubble depth, add a second layer of green after the first dries, then dot tiny white centers.
Painting the bubbles directly over wet black — the green spreads and looks like stains.
4. Cat Butt With a Bow Tie
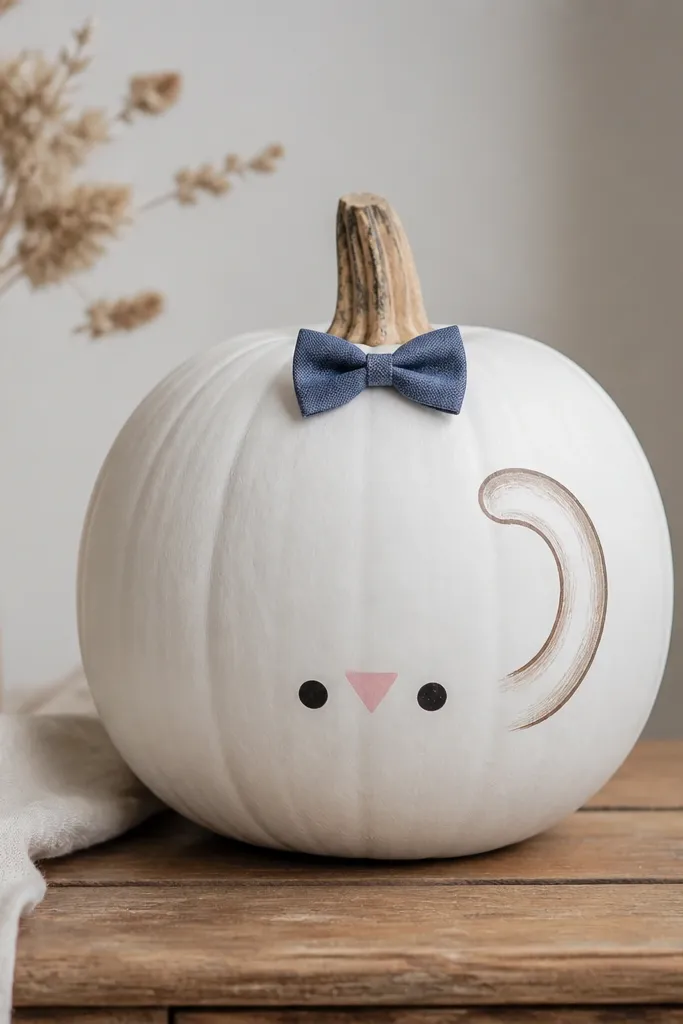
This is the funniest option if you like silly, clean designs. The white base makes the face shapes look crisp and “cartoon.” The bow tie gives it a dressed-up vibe, so it doesn’t read childish. It flatters light porches and bright front doors because the white stays readable and the blue adds a cool accent.
Step 1: Paint a full white base and let it dry fully. Step 2: Draw the cat butt layout: two small black ovals for cheeks and a pink triangle in the middle. Step 3: Add a curved tail line on one side using light gray, then outline it lightly with darker gray for definition. Step 4: Paint a blue bow tie near the stem — two triangles and a small knot center. Seal with matte clear spray.
Use painter’s tape to mask the bow tie edges for sharper symmetry.
Overworking the eyes and cheeks — too much paint turns the cartoon into a smudge.
5. Raccoon Bandit Mask
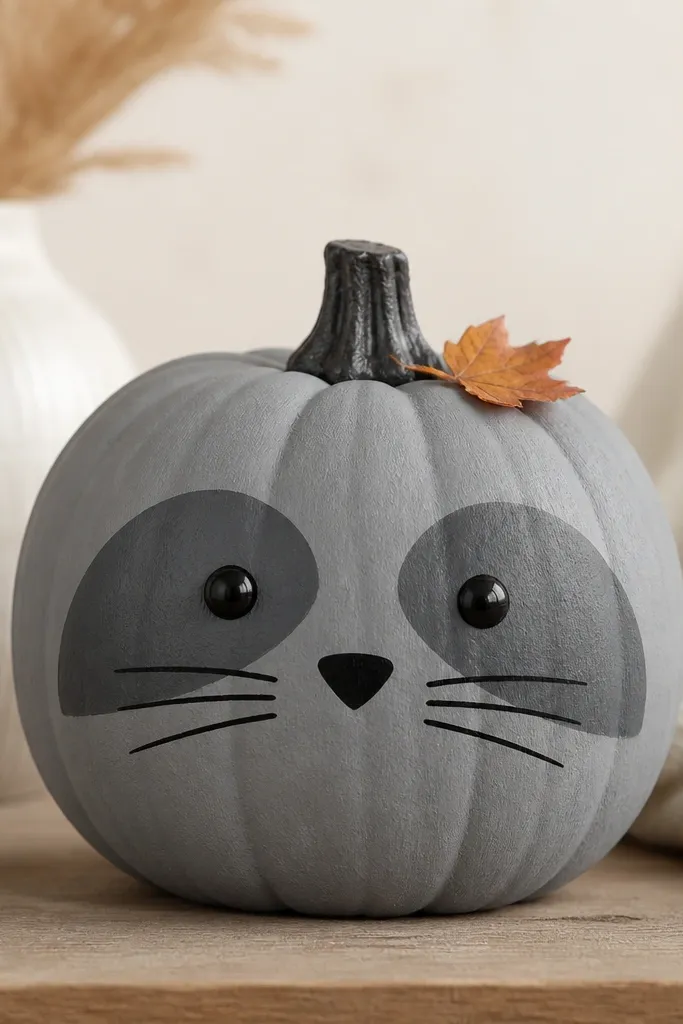
This looks great when you want “cute fall” without cartoon exaggeration. The mask shapes follow the pumpkin’s natural roundness, which makes the face line up even if your pumpkin isn’t perfectly smooth. The whiskers give motion, and the leaf near the stem makes it feel seasonal instead of Halloween-only. It looks good on tan, beige, or wood-toned entryways where muted grays blend nicely.
Step 1: Paint the pumpkin gray, then add a slightly darker gray band around where the eyes will sit. Step 2: Paint two black eye patches leaving a small gap for a lighter highlight. Add a small black triangle nose and a short mouth curve. Step 3: Paint thin whisker lines using a very small brush, five to six lines per side. Finish with matte sealer, then dot a tiny orange leaf near the stem using a brown vein line.
If your lines shake, brace your wrist on the counter and paint whiskers in one continuous pull.
Using thick paint for whiskers — they dry chunky and look like marker.
6. Donut Shop Pumpkin
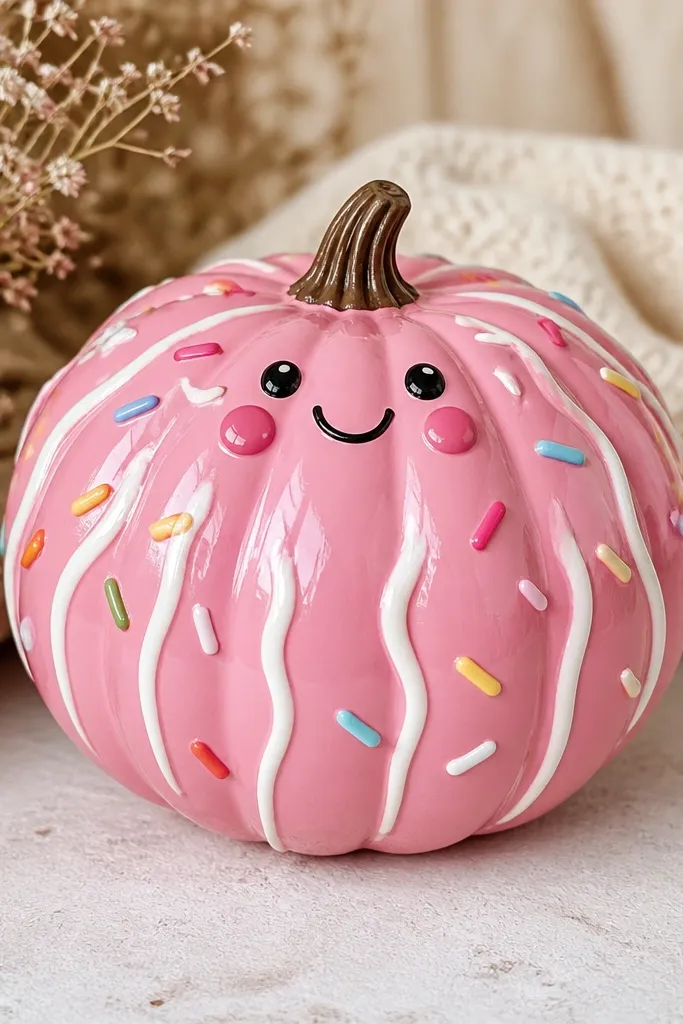
This one gives you that playful dessert vibe that looks amazing under string lights. I like a glossy glaze finish because it catches light and looks like candy. The face is small and centered so it doesn’t compete with the sprinkles. The pink and white drizzles look flattering against neutral yards and are cute for kids' photo corners.
Pro tipSprinkles look better when you vary sizes — a few bigger dots break up the pattern.
Step 1: Base coat the pumpkin in a solid donut color (pink works best), then let it dry. Step 2: Paint white drizzle lines in a loose zigzag, then add sprinkles as tiny dots in yellow, blue, and green. Step 3: Add a small smile and rosy cheeks near the center, using a thin brush for the mouth curve. Step 4: Seal with a clear gloss varnish so the drizzle looks wet. If you see streaks, do a second light coat after the first dries.
AvoidSkipping gloss sealing — the sprinkles and drizzle look flat and less like candy.
7. Frankenstein's Little Bolts
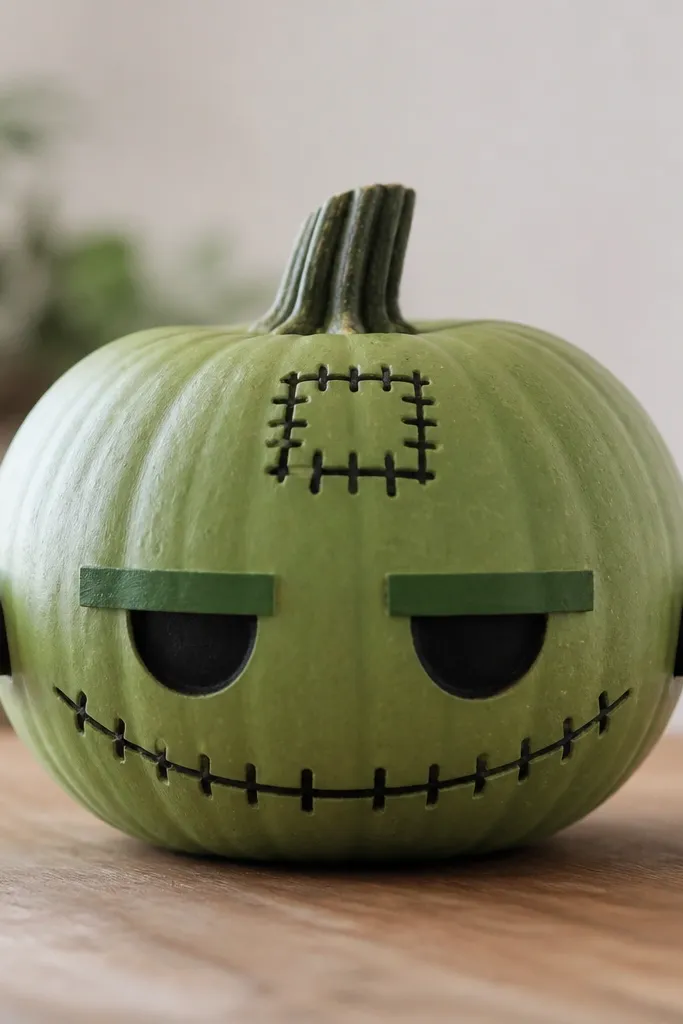
This is the funny option that still feels “Halloween classic.” Green plus black bolt details look sharp without needing a full monster face. The stitched pattern makes it look handmade and gives texture, which hides minor bumps in the pumpkin skin. It works on darker porches because the green stays readable and the black bolts look like real hardware.
Pro tipUse a toothpick to add stitch gaps — tiny breaks make it look like real stitching.
Step 1: Paint the pumpkin a Frankenstein green base, then add a slightly darker green forehead area as a rectangular patch. Step 2: Draw stitch lines with black paint, using a zigzag or parallel lines around the patch edges. Step 3: Paint two bolt heads on each side of the forehead area, with small highlights in gray. Step 4: Add a stitched mouth with a curved line and tiny stitch marks. Seal with matte clear spray so the stitches look fabric-like.
AvoidGoing too detailed — too many bolt lines make it look messy on a round surface.
8. Beach Day Skeleton in Sunglasses
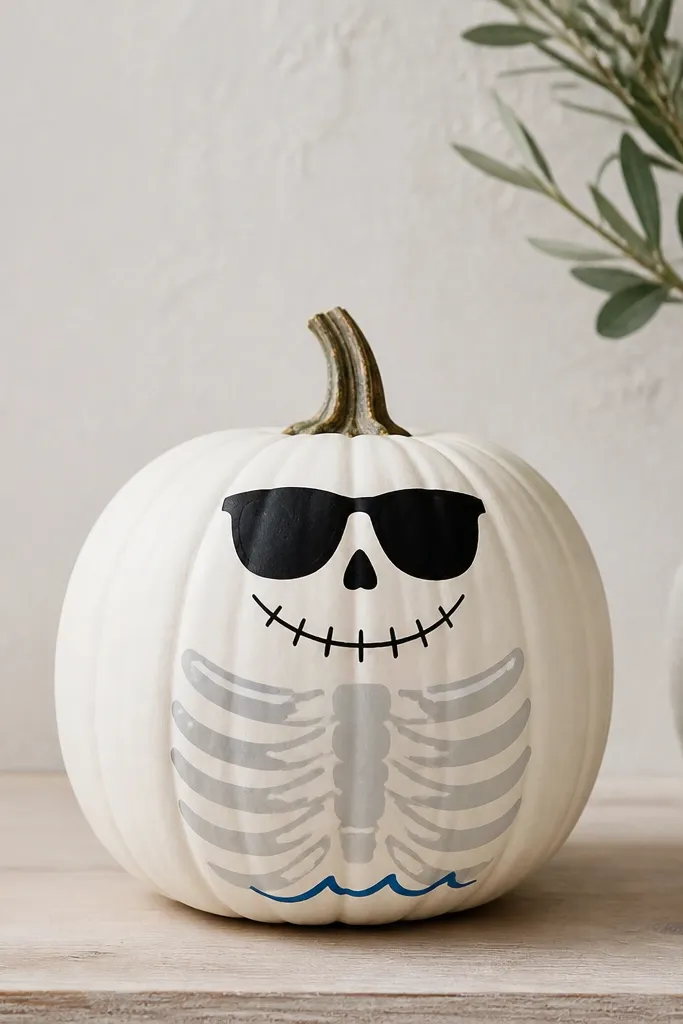
This is the joke-pumpkin idea that makes people laugh because it mixes themes. The skeleton lines are minimal, so it stays friendly instead of scary. Sunglasses make the face feel like it’s chilling, and the gray ribs add texture without requiring shading. It looks great on patios with outdoor chairs because the sunglasses read clearly in sun and shade.
Step 1: Paint the pumpkin white, then add light gray rib lines across the lower half in soft curves. Step 2: Paint the face: small gray nose triangle and a simple grin with tooth shapes as tiny rectangles. Step 3: Add black sunglasses — two curved frames and a small bridge line. Step 4: Paint a thin blue wave line at the bottom edge like sand-meets-sea. Seal with matte sealer so the sunglasses stay readable.
For sunnier days, make the sunglasses slightly wider than you think so they don’t blur from distance.
Using only black outlines — the face looks harsh and less playful without gray shading.
9. The Pumpkin Is a Mailbox
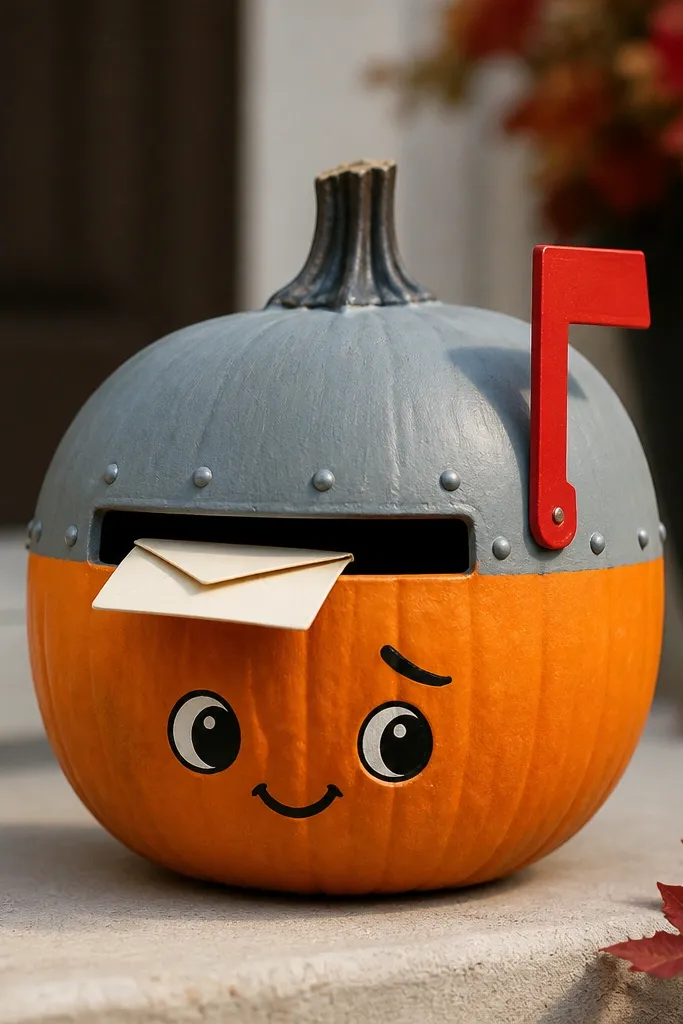
This design gives you that “functional porch decoration” look without any real attachment. The mailbox shapes give you straight lines to work with, and they visually break up the pumpkin’s roundness. A red flag adds color pop, and the little envelope makes it funny instead of just cute. It’s perfect for renters because you can place it on a step or near a doormat and it looks intentional.
Pro tipUse painter’s tape to mask the mail slot for crisp edges.
Step 1: Paint the pumpkin a warm orange base, then cover the top half with a gray metal mailbox top. Step 2: Paint a darker gray front panel and add a rectangular mail slot in the center. Step 3: Paint a small red flag on the side, raised slightly, and add a tiny envelope shape in off-white with a red stripe. Step 4: Add a simple face — one eyebrow curve and a small mouth. Seal matte so the metal doesn’t glare.
AvoidTrying to paint tiny details without drying time — the slot edges will smear.
10. Polka Dot Party Pumpkin
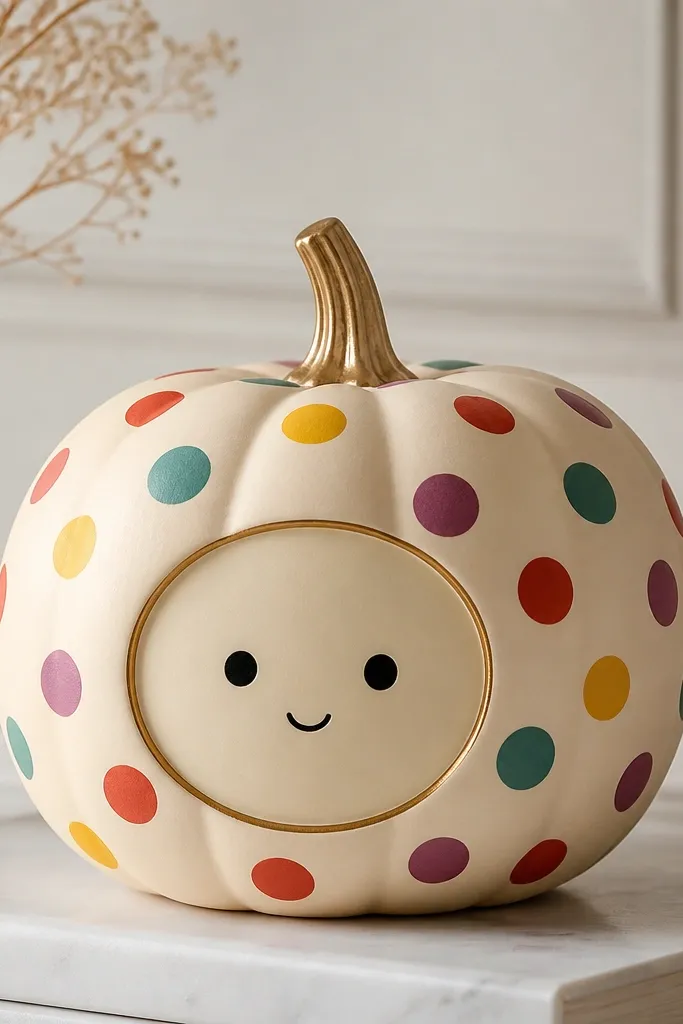
If you want “easy but looks expensive,” polka dots do it. The cream base keeps the colors bright, and evenly spaced dots make the whole pumpkin feel designed. The minimal face keeps it funny rather than costume-level. I’ve used this style for doorsteps because it looks cheerful in photos and doesn’t demand you be a great artist.
Step 1: Paint the pumpkin cream and let it fully dry. Step 2: Mark a loose grid lightly with a pencil so dot spacing stays even, then paint dots with small round brush tips. Step 3: Choose four colors and rotate them so no color repeats in a clump. Step 4: Paint a simple face in the center with black dots and a small smile, then add a thin gold outline around the face area using a fine brush. Seal with matte.
Dip the brush lightly and wipe once on a paper towel so each dot lands the same size.
Overloading paint on the brush — you’ll get lumpy dots that look messy.
11. Sushi Roll Pumpkin
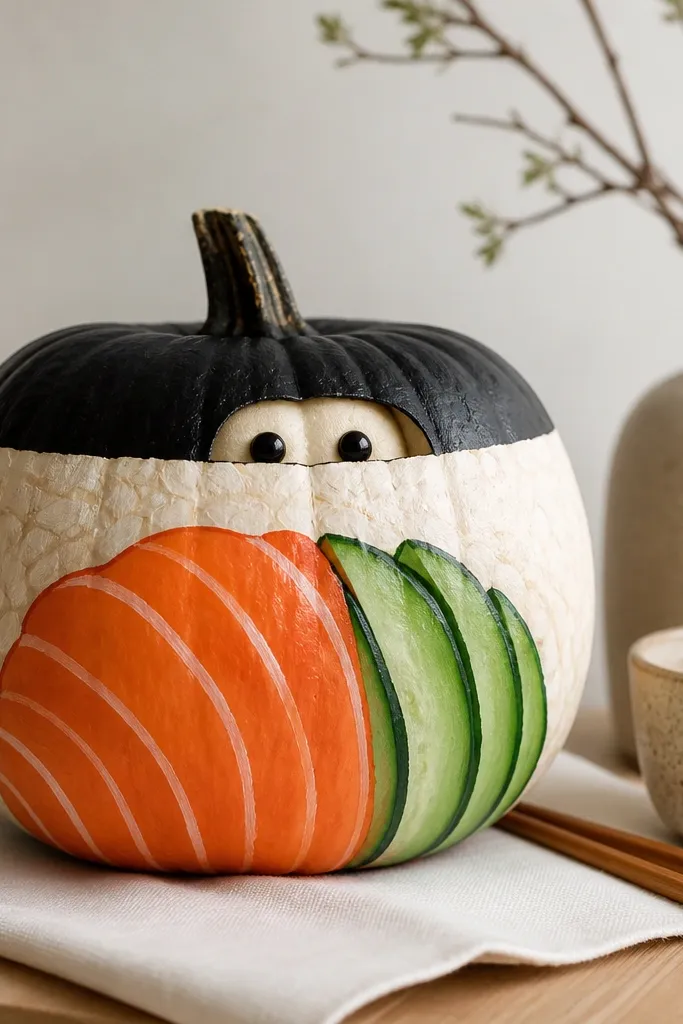
This one is a guaranteed conversation-starter because it’s weird in a fun way. The sushi color blocks make it look graphic, and the seaweed band gives you a clear “top” line on a pumpkin. It flatters most spaces because the beige and dark green tones look calm, even with bright salmon orange. If you’re decorating for friends who love food, this is the one that gets text messages.
Pro tipAdd a tiny dab of white near each salmon slice edge to mimic shine.
Step 1: Paint the pumpkin beige for the rice base. Step 2: Add a dark green seaweed band across the middle, then outline it with a thin black line. Step 3: Paint salmon slices as orange curved shapes and add thin green cucumber stripes. Step 4: At the top edge, paint two small eyes with white highlights and tiny black pupils. Seal matte for a clean “menu illustration” look.
AvoidMixing too many shades of green — it turns seaweed into muddy coloring.
12. Space Alien With a Slime Tongue
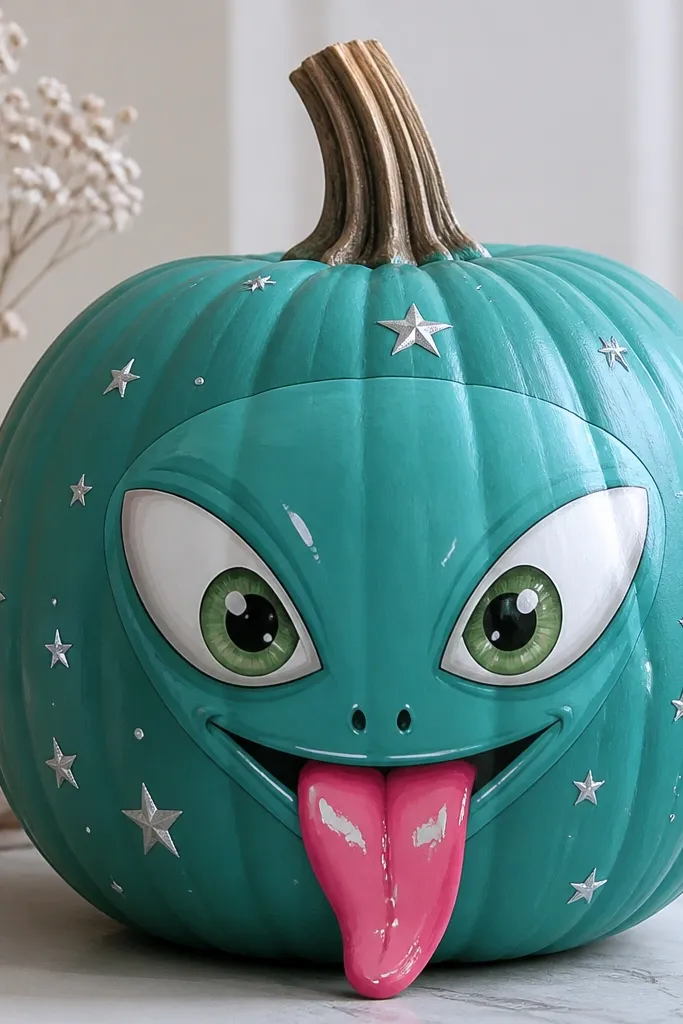
This is for maximum fun factor. Teal is a strong base that makes the eyes look extra bright, and glossy slime tongue looks playful under lights. The large eyes keep it cartoony, and the silver stars add texture without clutter. It works especially well on white or light-gray front doors because the teal pops and the stars show clearly.
Pro tipPaint stars with a dry brush — drag lightly so they look like specks, not blobs.
Step 1: Base coat the pumpkin teal, then paint the eyes by placing large white circles and adding green pupils. Step 2: Add small black lines around the eyes for definition and a simple mouth line. Step 3: Paint a bright pink tongue that curves slightly down, then coat it with gloss varnish so it looks wet. Step 4: Add tiny silver star dots around the face area with a small brush. Seal the rest matte, but keep the tongue glossy.
AvoidSealing everything glossy — the face loses contrast when the whole pumpkin shines.
13. Bowling Pumpkin Strike
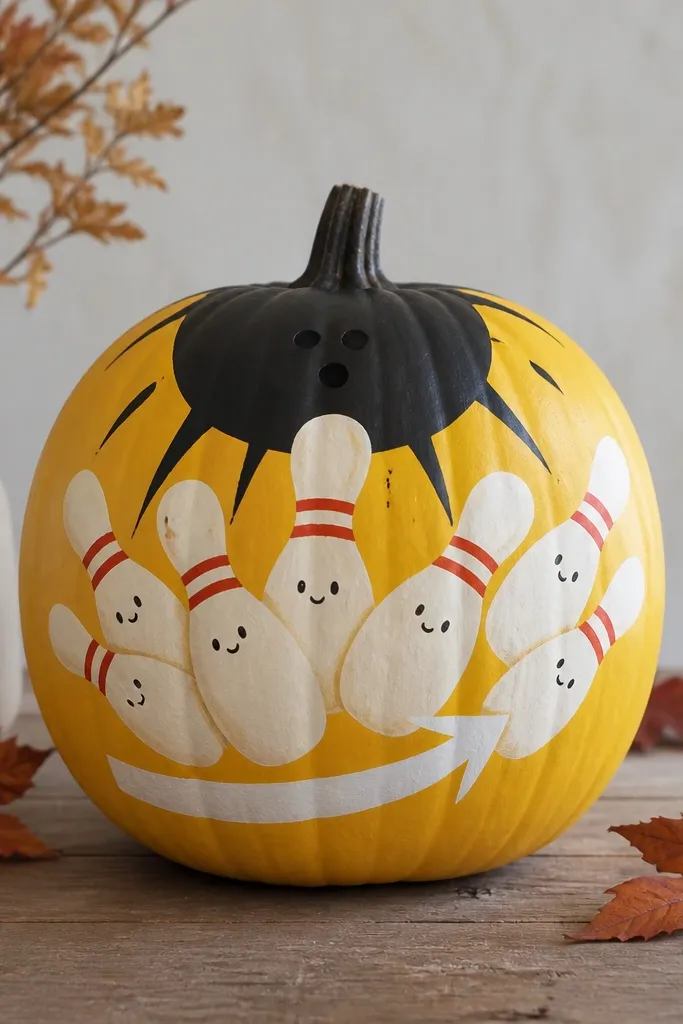
This is one of the funniest designs when you want something that looks like a game. The yellow base gives you a bright backdrop for black and red pin stripes. The arrow strike line adds motion, which makes it feel lively even when it sits still. It looks good on dark entry steps because the yellow stands out clearly.
Pro tipKeep the pins simple — two lines and a stripe look better at a distance than tiny details.
Step 1: Paint the pumpkin yellow and let it dry. Step 2: At the top, paint a black semicircle like a bowling ball and outline it in gray. Step 3: Paint a cluster of three simple bowling pins on the front using white paint, add red stripes near the top, and add tiny eyes and a smile. Step 4: Draw a white curved arrow line sweeping across the front like a strike path. Seal matte so the arrow stays crisp.
AvoidTrying to paint full bowling lanes — the pumpkin curve makes them warp fast.
14. Lemon-Lime "Sour Patch" Pumpkin
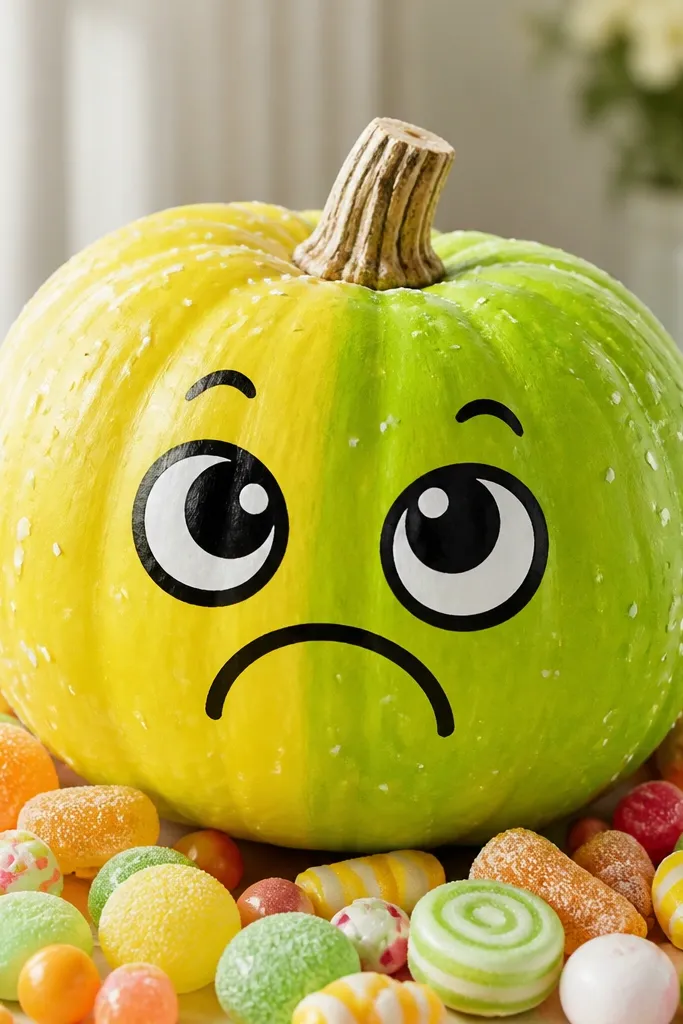
This one gives that sour candy look without needing actual candy. The two-tone base makes it look like a packaged candy label, and the black outline makes the face read clearly. Sugar-dust dots add texture that looks great in close-up photos. It’s especially flattering for people who like bright decor because yellow and green energize the entryway.
Pro tipFlick dust from at least 10 inches away so it lands as specks, not splatters.
Step 1: Paint the pumpkin split color — lemon yellow on one side and lime green on the other, using painter’s tape for a clean vertical edge. Step 2: Paint a candy border around the face area in a slightly darker yellow-green mix. Step 3: Outline big eyes and a playful frown with black paint, then add tiny white highlights in the eyes. Step 4: Flick white paint with a toothbrush for sugar dust specks. Seal matte so it looks powdery, not shiny.
AvoidOver-thick borders — heavy lines make it look like a child’s craft from across the yard.
15. Mummy Wrap With a Hidden Candy Surprise

This design gives you instant texture and depth. The mummy wraps hide uneven pumpkin skin and make it look like you covered it in gauze. The candy surprise makes it funny because it breaks the spooky vibe with something sweet. It looks good on front steps because the wrap pattern catches light and doesn’t blur from distance.
Pro tipUse a sponge to apply the bandage paint so the edges look worn.
Step 1: Base coat the pumpkin with a light beige so the white bandages have warmth. Step 2: Paint bandage strips in off-white, leaving small gaps, then add gray shadow lines inside each gap for dimension. Step 3: Tear open a small section on the front by painting jagged edges and placing a red candy wrapper behind it. Step 4: Add a tiny face peeking from the opening with two eyes and a grin. Seal matte to keep the bandages fabric-like.
AvoidMaking every bandage perfectly straight — slight unevenness looks more real.
16. Snowman Pumpkin in a Tiny Scarf
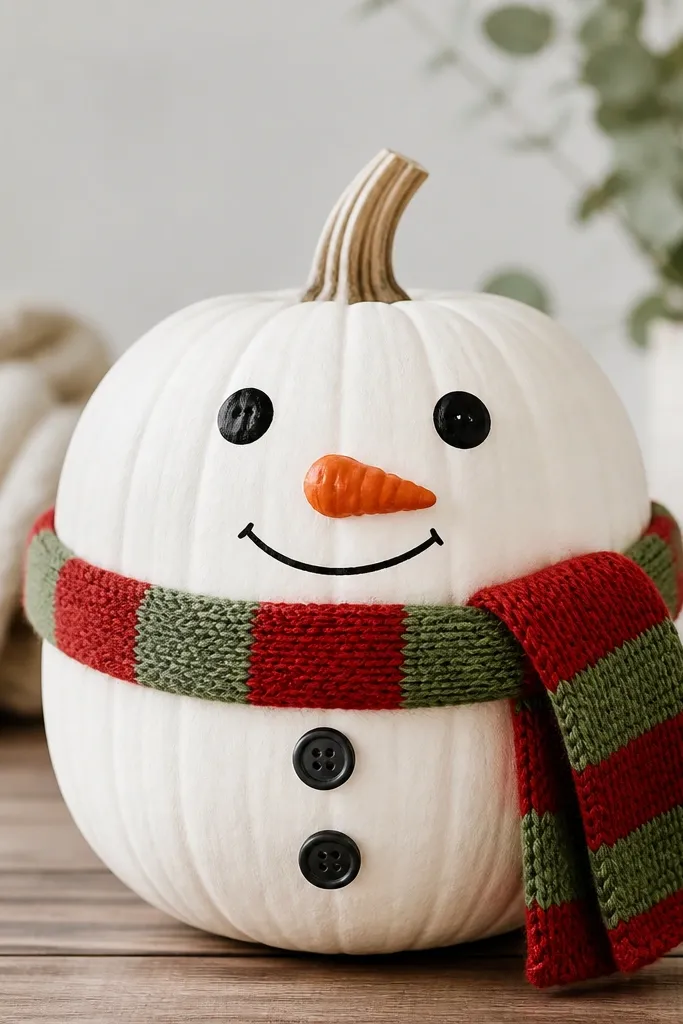
This is a funny “winter meets fall” piece that still works for October. The white base makes the snowman face easy to read, and the carrot nose adds the classic look. A scarf gives you a strong horizontal color strip that looks good on the pumpkin’s curve. It flatters warm skin tones in photos because the red scarf pops against the white.
Step 1: Paint the pumpkin white and let it dry completely. Step 2: Add the face: black eyes as small circles, a small orange triangle carrot nose, and a curved mouth. Step 3: Paint two small gray buttons on the upper half. Step 4: Wrap a tiny red-and-green scarf by painting two stripes across the top half, then add thin line “folds” with darker red. Seal matte so the snowman looks powdery.
Make the scarf slightly thicker on one side so it feels wrapped, not pasted on.
Using bright orange too close to the edges — it can look like a pumpkin stain instead of a carrot.
17. Bee Butt With a Honey Stripe
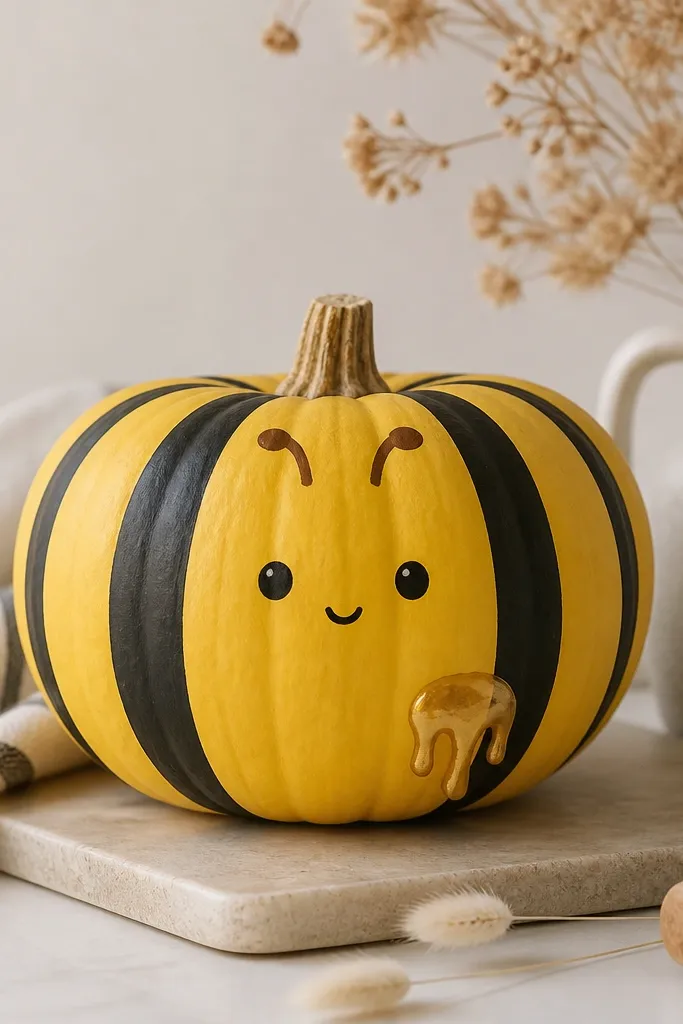
This is a clean, funny design that looks great in daylight because bees are high-contrast. The bold stripes follow the pumpkin’s vertical shape, so the design looks natural even if the surface has bumps. The honey drip adds a cute detail at the bottom and gives you something to paint without overcomplicating the face. It works well on light wood planters and neutral entryways.
Step 1: Paint the pumpkin a bright yellow base. Step 2: Mask and paint black stripes vertically — five to six stripes looks best on one pumpkin. Step 3: Add antenna lines near the top and tiny brown tips, then paint a small face with two dot eyes and a smile. Step 4: Paint a golden honey drip near the bottom edge and add a tiny highlight line for shine. Seal matte to keep it looking like painted craft, not lacquer.
Striping looks better if you keep stripe widths consistent and let each stripe dry before the next.
Freehand stripes without breaks — uneven stripes look like they slid.
18. Wizard Hat Pumpkin With a Laughing Star
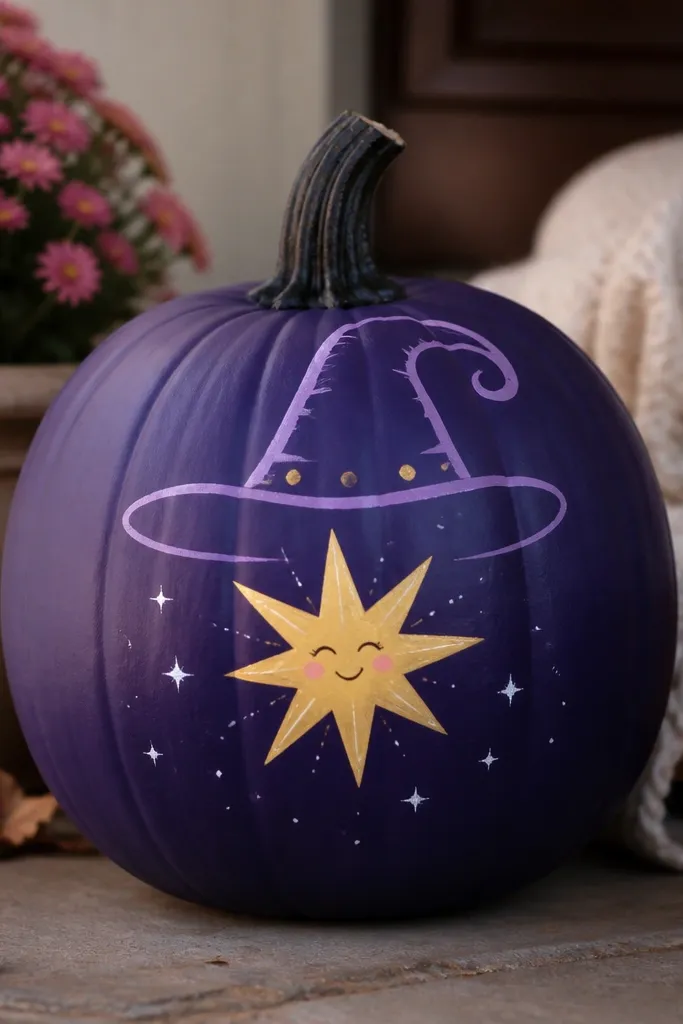
This is for people who like whimsical magic instead of scary monsters. Purple makes the pumpkin look like it belongs in a storybook, but the starburst keeps it funny. The face is on the star, not the pumpkin itself, which makes the design feel playful and less face-heavy. It looks great on dark porches and near black planters because the purple reads rich without needing extra decoration.
Pro tipIf the starburst edges look shaky, trace the starburst shape on paper, then lightly transfer with pencil.
Step 1: Base coat the pumpkin deep purple and let it dry. Step 2: Paint a wizard hat brim around the top area using a lighter purple, then add a darker outline so it reads like fabric. Step 3: Paint a large yellow starburst on the front, then add a tiny laughing face inside using black lines and a white highlight dot. Step 4: Add small white sparkles around the starburst with a dry brush. Seal matte.
AvoidPutting the star too low — it can look like it’s falling off the pumpkin.
19. Retro Game Controller Pumpkin
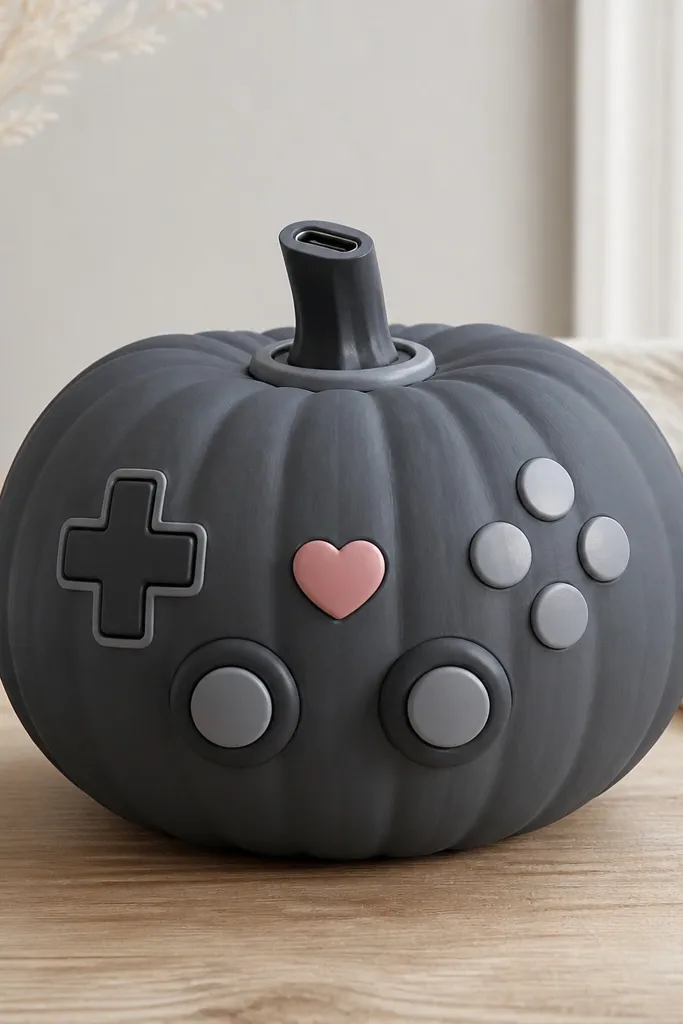
This idea looks nerdy-cute and works for people who want their porch decor to feel personal. Gray plus neon accents reads clean and modern, and it holds up well under porch lighting. The controller shapes help you place details in the right spots — eyes on a face aren’t the only option. It looks good next to gaming-themed doormats and black metal planters.
Pro tipUse a makeup sponge for the gray base so it covers bumps without showing brush streaks.
Step 1: Paint the whole pumpkin dark gray and let it dry. Step 2: Add lighter gray button panels as rectangles on the front, then paint two small joystick circles near the top half. Step 3: Paint a directional pad as a cross on one side and a heart-shaped button in the center in bright pink. Step 4: Add a small “charging port” near the stem with a thin outline and two tiny dots. Seal matte so the surface doesn’t glare.
AvoidSkipping base coverage — patchy gray makes the controller lines look sloppy.
20. Thankful But Make It Silly Lettering
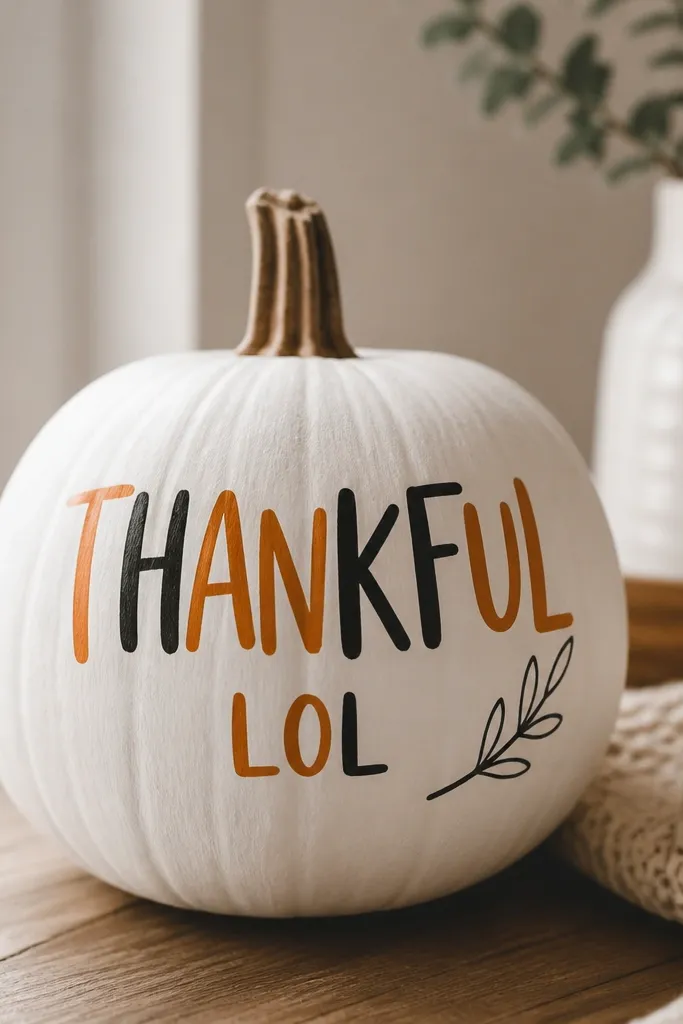
This is the one I pick when I want funny text that still looks tasteful. White gives you a clean canvas for lettering, and orange plus black keeps it readable. Uneven hand-lettering makes it feel human, not like a vinyl sticker. It flatters almost any porch setting because the palette stays neutral and the humor is in the wording.
Step 1: Base coat the pumpkin white and let it dry fully. Step 2: Use a pencil to lightly sketch the word “THANKFUL” across the front, then paint in orange for the main letters and black for the outline. Step 3: Add “LOL” smaller underneath with a playful slant, and include a small leaf doodle on the side using green and brown. Step 4: Outline the entire text area with a thin black line for contrast. Seal matte so the letters don’t smear.
Write the letters on paper first and measure the width so it fits the pumpkin curve.
Going straight to paint without sketching — letters drift and look crooked fast.



