
1. Blush Ombre Mini Pumpkin
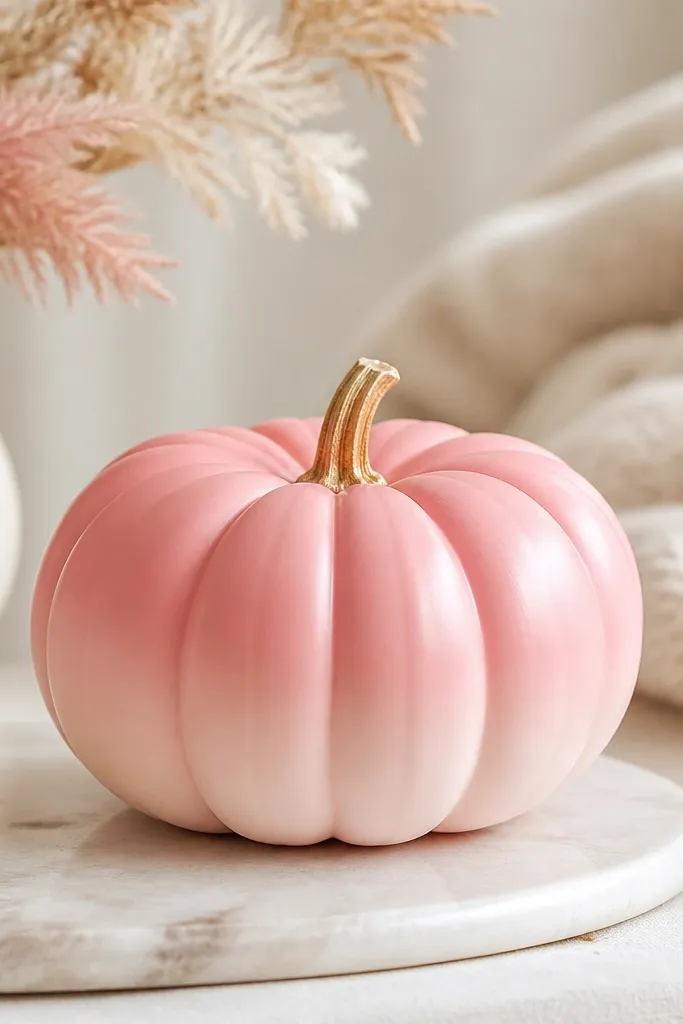
This one looks expensive because the fade hides any minor texture on the pumpkin skin. I paint the top cap and upper ridges in a medium blush pink, then blend downward into pale rose using a dry foam sponge. The color shift flatters light skin because it reads soft, not neon, and it looks great next to white candles and creamy wood. If you’re doing a shelf with pink books, this matches without fighting the rest of the decor. I also like it for people who hate drawing faces — no eyes, no lines, just color.
Start by wiping the pumpkin clean and letting it dry, then sponge on a thin coat of white acrylic if the orange shows through. Dab medium blush pink near the stem and blend downward with a slightly dry foam sponge, working in small sections. Let it dry fully, then add a second blush layer only where the orange peeks. Finish by dry-brushing a tiny bit of pale rose on the lower third so the gradient looks intentional, not flat.
Blend while the paint is still tacky, then stop. Overworking makes ombre look muddy.
Don’t use gloss clear spray — it turns blush pink shiny and plasticky.
2. Pink Polka Dot Bow Pumpkin
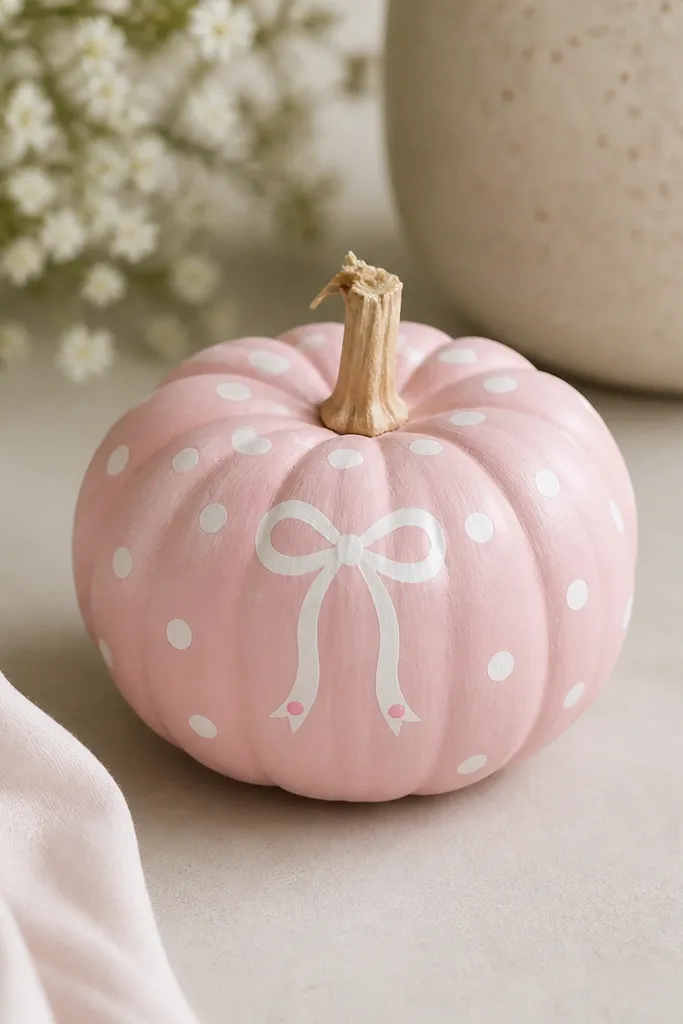
Polka dots read cute instantly, and the bow gives it that “girly decor” vibe without needing a complicated design. I use baby pink as the base and white dots because white makes pink look brighter and cleaner. This style looks best on warm-toned shelves because the pink feels like blush makeup. It also photographs well because the dots create texture and contrast even from a distance. If you want something that works for kids' tables or a bridal shower, this is the one I reach for.
Paint the whole pumpkin baby pink with a thin first coat, then let it dry and add a second coat for even coverage. Mark dot spacing lightly with a pencil dot guide if you’re picky, then stamp dots using the end of a cotton swab dipped in white paint. Let the dots dry, then paint a simple bow: two curved loops and a small center knot in white. Add two tiny pink dots in the bow tips for a cute finishing touch, then seal with matte spray.
Use a cotton swab for dots and keep re-dipping the same depth so dot sizes stay consistent.
Skip freehand dots if you want neat results — uneven spacing makes it look rushed.
3. Roses and Leaves Mini Pumpkin
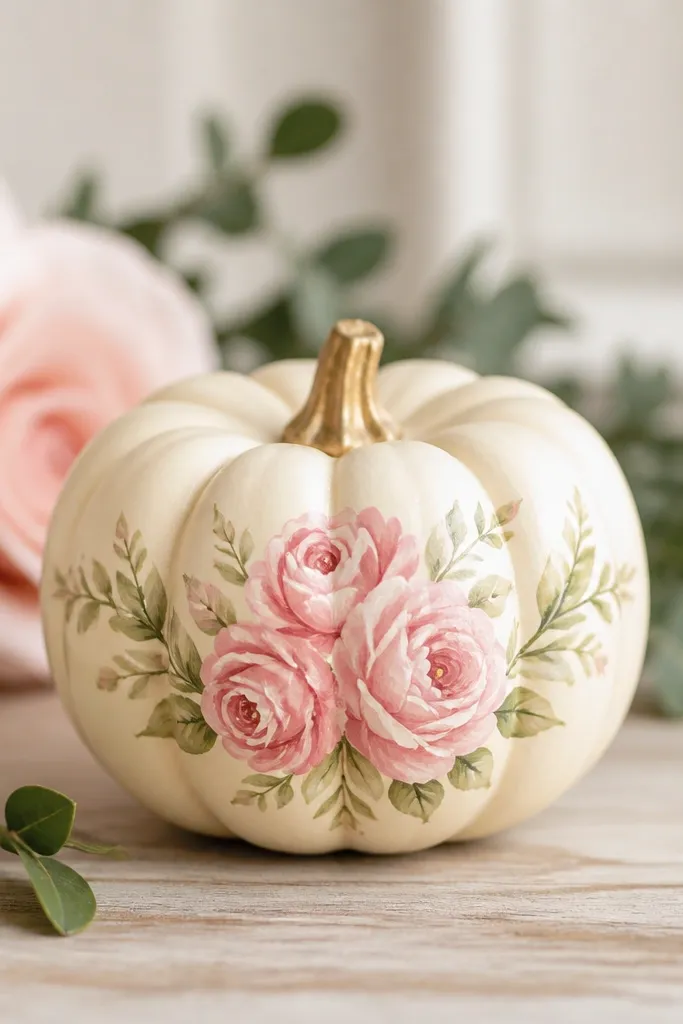
This design makes the pumpkin look like a painted ceramic piece. I paint three small roses in different pink tones so it looks layered instead of flat. White highlights on the petals give the rose shape, and tiny green leaves keep it from looking like one big blob of pink. It flatters almost any decor color because greens and whites calm the pink down. I also like it for gift tables because it looks thoughtful without being labor-intensive.
Start with a light blush base coat on the whole pumpkin, then let it dry. Paint one rose in the center using a small round brush, starting with a spiral center and adding petal strokes around it. Add two smaller roses to the sides, then paint tiny leaves in a muted sage green using short leaf strokes. Finish by dry-brushing white along the top edges of petals and sealing with matte clear spray.
If petals look flat, add highlights only at the top edges — that’s what makes it look dimensional.
Don’t paint leaves bright neon green — it pulls attention away from the roses.
4. Pink Stripe Candy Pumpkin
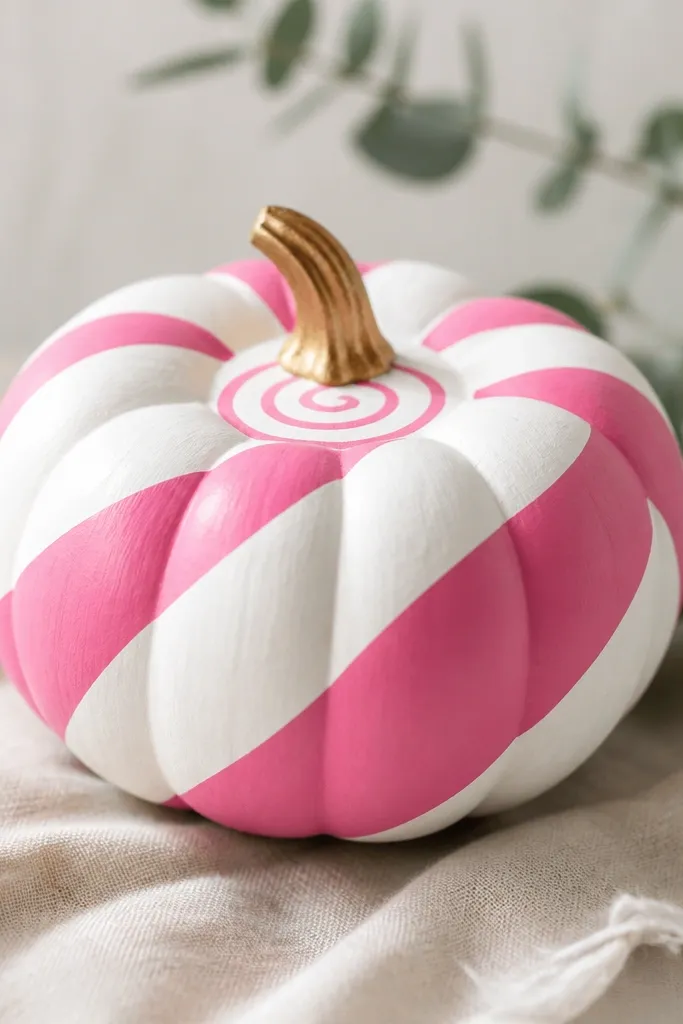
Diagonal stripes look like candy and they read girly even when you keep it simple. I paint a white base first because it makes the pink stripes look clean and opaque. The crisp edges are what make it look like store-bought decor. This style works best on mantels where you have other patterns, because it gives a strong graphic element without clutter. It also looks great with black-and-white decor, since the stripes create a strong contrast.
Paint the pumpkin white and let it cure for 20-30 minutes so the tape doesn’t pull paint. Use thin painter’s tape to mark diagonal bands, then paint each band pink with a flat brush. Remove tape while paint is still slightly tacky so edges stay sharp. If the pumpkin ridges show through, do a second thin pink coat only on the stripes. Finish with a small pink spiral highlight near the stem using a toothpick dipped in pale pink.
Press tape down firmly along the ridges with your fingernail so pink doesn’t creep underneath.
Don’t use watery paint for stripes — it seeps and blurs the lines.
5. Glossy Pink Speckle with Matte Seal
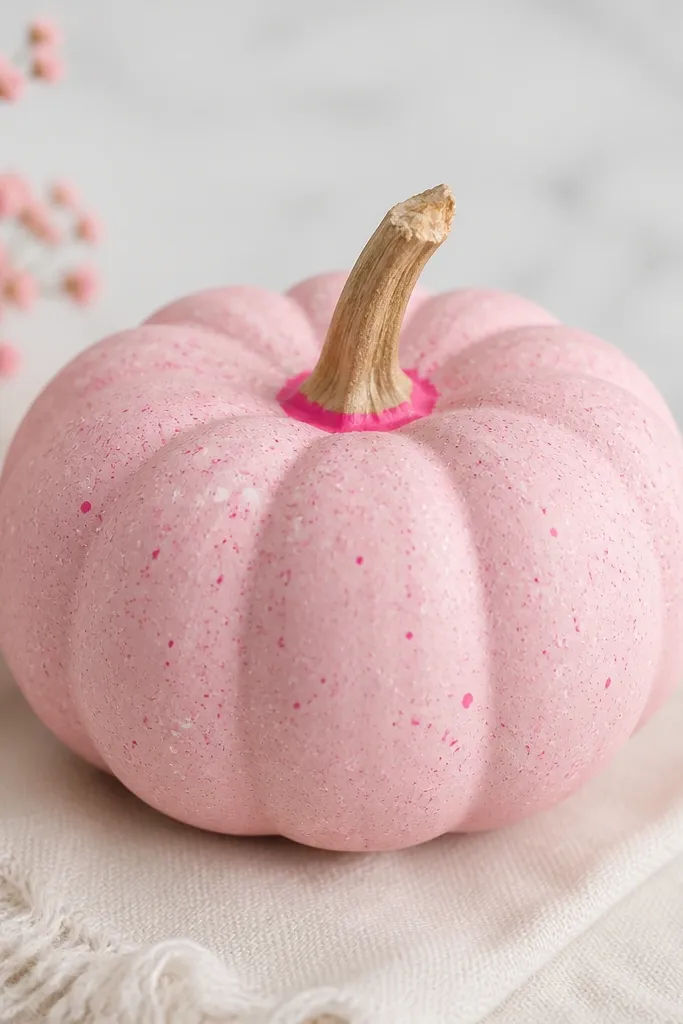
Base coat the pumpkin pale pink and let it dry. Dip a toothbrush in hot-pink paint, then tap gently over the pumpkin to create speckles; repeat with white speckles after the hot-pink dries. Paint a thin band around the stem area with hot pink for a clean visual anchor. Let everything dry completely, then seal with matte clear spray so the surface stays velvety. If speckles look sparse, do one more speckle pass instead of thick paint.
Speckles give movement, and the mix of hot-pink and white makes it look playful instead of plain. I like this when you want a “decorative but fast” pumpkin because you don’t have to draw anything. The matte base keeps it soft, while the speckles bring contrast. This works well for parties because it looks cute from across the room and doesn’t show small mistakes as much as lines. It also pairs nicely with silver or pearl-toned decor.
AvoidDon’t seal before the speckles dry — they smear and turn into streaks.
Pro tipPractice the toothbrush flick on a paper towel first so you get the right speck size.
6. Pink Heart Face Mini Pumpkin
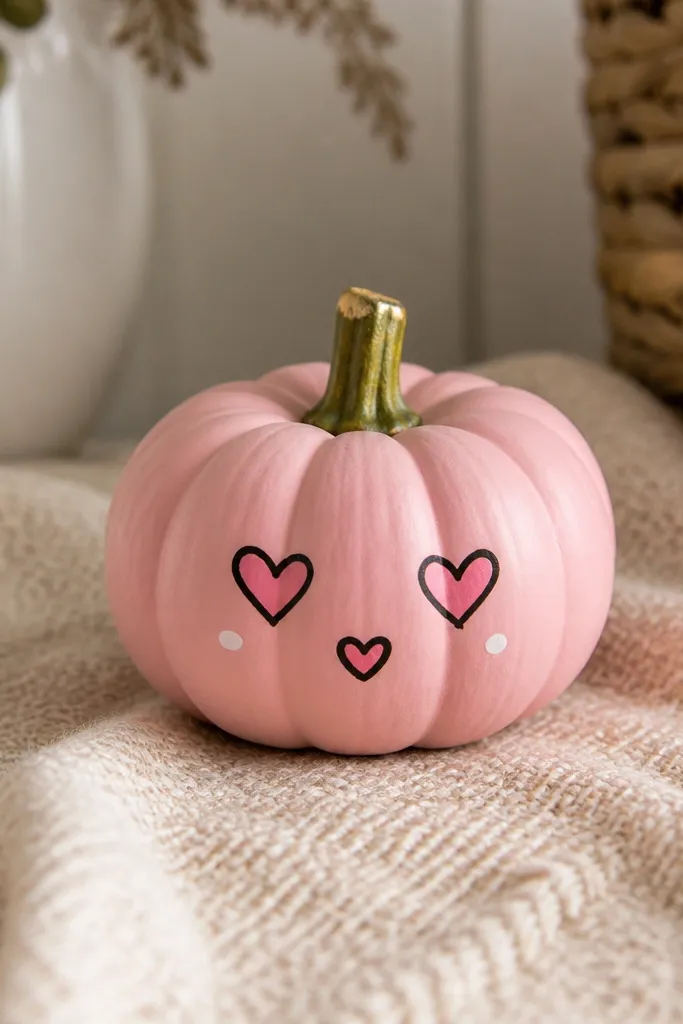
Paint the pumpkin blush pink, then let it dry fully. Use a small round brush to sketch two heart eyes — start with the top curves and merge at the point. Outline the hearts in black, then paint a small heart mouth below. Add two tiny white cheek dots with a toothpick tip, then seal with matte clear spray. Let the black outline dry for at least 30 minutes before sealing so it doesn’t smudge.
Heart eyes make the pumpkin feel sweet instead of spooky, and a simple black outline keeps it readable. I paint a blush base, then outline the hearts in black so the shape doesn’t wobble into the pink. Add two tiny white dots on the cheeks for a “kissing booth” vibe. This is perfect for Valentine season but it still fits fall because the pumpkin shape is iconic. If your decor leans cute and minimal, this one nails it.
AvoidDon’t skip the black outline — without it, hearts blend into the base.
Pro tipIf you mess up a heart, wait for it to dry and repaint the outline area with blush pink before trying again.
7. Pink Lace Look with Dry Brush Lines
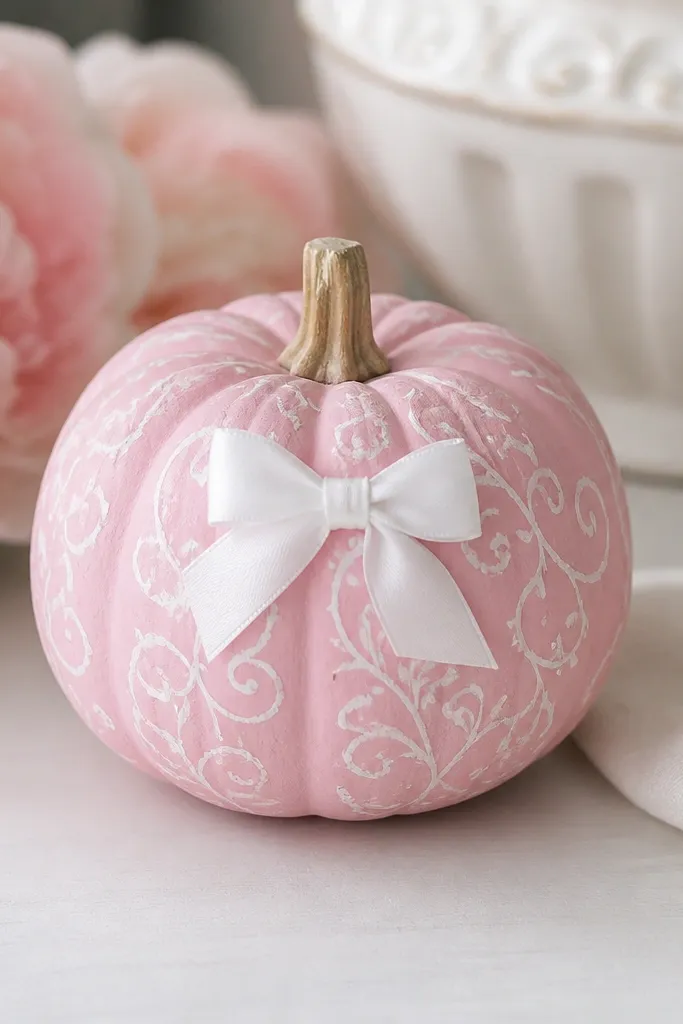
Start with a solid soft pink base coat and let it dry. Mix a light pink or white paint with a little water, then wipe most of it off your brush on a paper towel so it’s almost dry. Drag the brush in curved swirl lines across the pumpkin to suggest lace loops, then add a few tiny dot accents with the tip of the brush. Paint a small bow in white at the center, then seal matte to keep the lace look soft.
This gives a lace effect without cutting real fabric. I use a dry-brush technique so the ridges of the pumpkin create natural texture that looks like lace. White lines over pink make the pattern pop, but the dry brush keeps it airy instead of heavy. This style looks best on light, neutral decor because it’s delicate, not loud. It’s also a good choice if you’re doing a cluster where you want one pumpkin to be “pretty detail” rather than bold graphic.
AvoidDon’t load the brush heavy — wet lace lines look like streaks.
Pro tipDry-brush in one direction for each section so the pattern looks intentional.
8. Hot Pink Glitter Accent Pumpkin
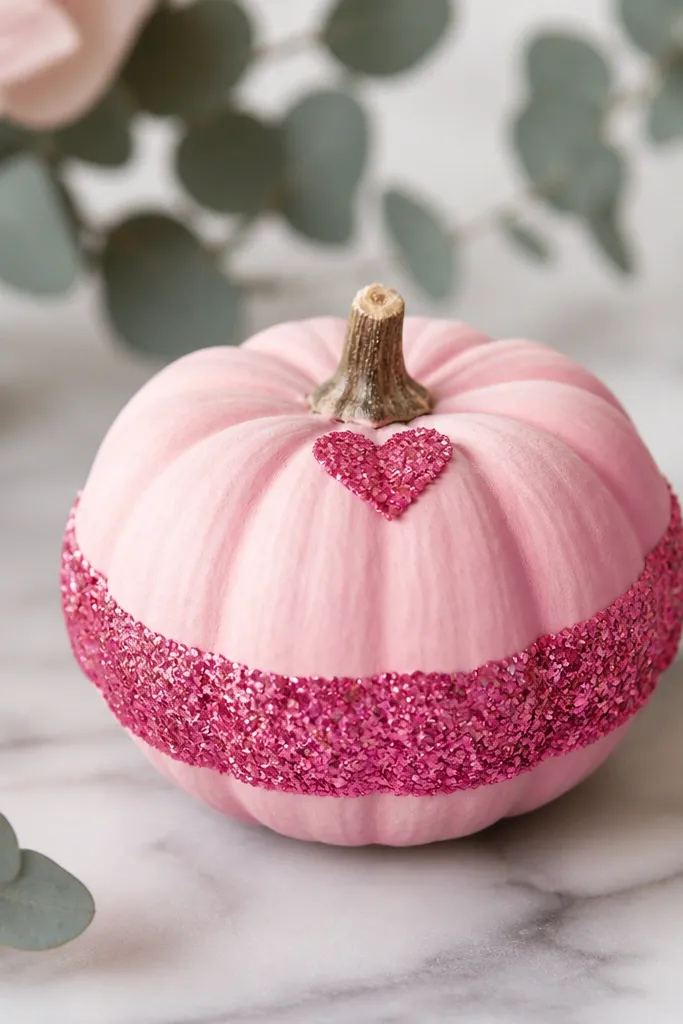
Base coat the pumpkin pale pink and let it dry. Brush a thin strip of craft glue around the widest part of the pumpkin and sprinkle hot pink glitter over it; tap off the excess after a minute. Make a small heart near the stem with glue, then sprinkle glitter and press gently with your fingertip. After the glue sets, seal with matte clear spray in two light passes so glitter doesn’t clump. Keep the glue thin so glitter doesn’t turn into thick lumps.
Glitter works best when it’s used in small zones, not all over. I paint the pumpkin pale pink, then apply hot pink glitter only as a band and a small heart so it feels girly and intentional. This style catches light in a way that looks cute in daylight and under warm string lights. It’s also easier than full glitter pumpkins, because you don’t need to cover every ridge. If you’re decorating a table setting, this one looks like a custom mini centerpiece.
AvoidDon’t flood glue — thick glue makes glitter look raised and messy.
Pro tipUse a small piece of cardboard under the pumpkin so you can reuse glitter that falls off.
9. Pink Marble Mini Pumpkin
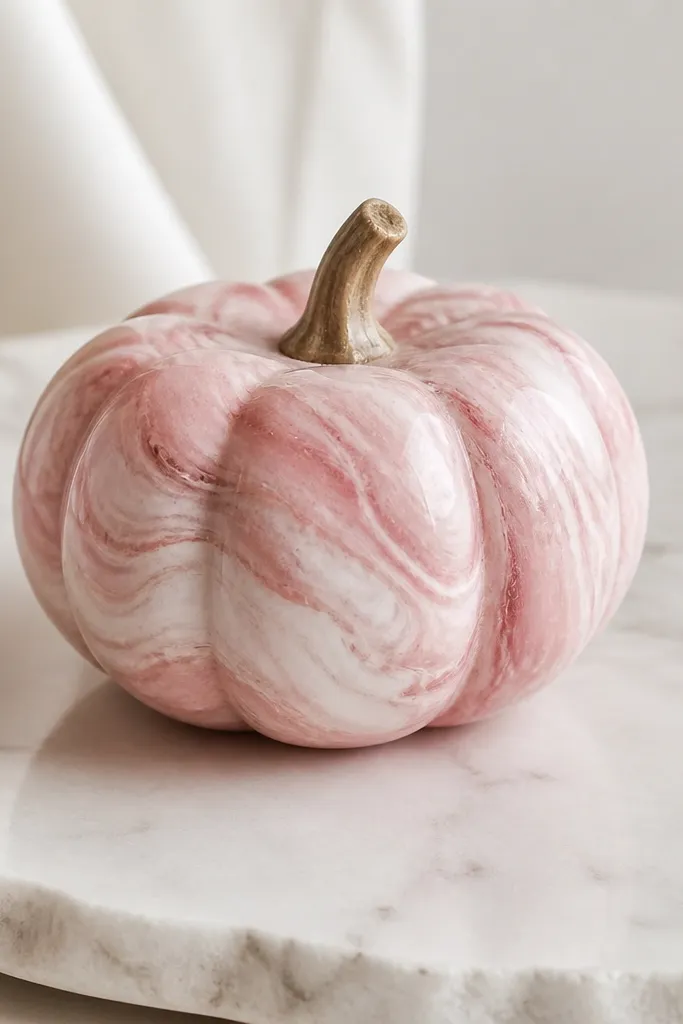
Paint the pumpkin pale rose and let it dry. Add a little blush paint to a palette, then use a damp sponge or stiff brush to dab and drag thin streaks across the surface. Add fuchsia streaks in smaller amounts and swirl them into the blush with light touches. Finish with thin white streaks so the marble pattern looks layered, then seal matte once everything is fully dry.
Marble looks fancy because it’s random, and randomness hides small imperfections. I use layered paint swirls in three pink shades — pale rose, blush, and a deeper fuchsia — plus white. The effect reads high-end even though you’re doing it with a brush and patience. This is the one I give myself when I want a “gallery” look but I still need it done quickly. It also pairs well with gold-toned decor because the pink stone look balances metallics.
AvoidDon’t let layers dry completely between swirls — you’ll lose the blended marble look.
Pro tipKeep streaks thin. Thick swirls look like paint blobs instead of stone.
10. Pink Kitty Whisker Pumpkin
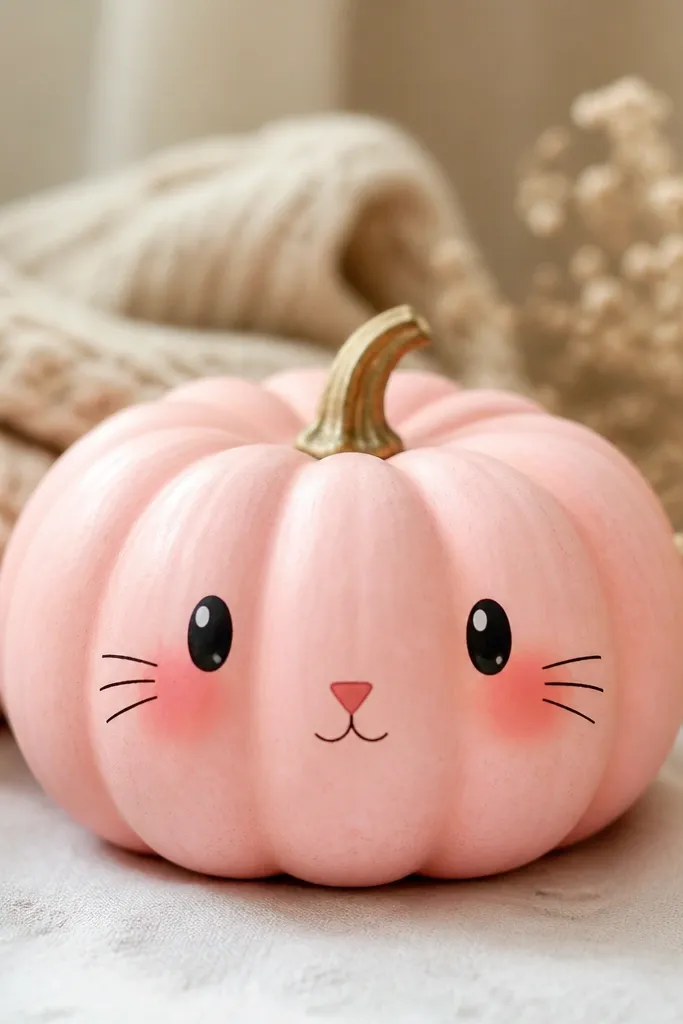
Base coat the pumpkin blush pink and let it dry. Paint two small black oval eyes, then add tiny white dots in the upper corner of each eye for highlights. Draw a small triangular nose in pink slightly darker than the base. Use a fine brush to paint three whisker lines on each side, starting near the nose and sweeping outward. Seal matte after the face is dry.
This is my go-to when I want cute without a full face design. The whiskers do the heavy lifting because they create a clear cat silhouette even at small size. I use black for the eyes and whiskers so the face reads from a distance, then I add a tiny pink nose and white highlights to make it look lively. This works especially well on mantels with farmhouse textures because the clean face lines cut through the rustic vibe. It also makes a fun set when you paint several minis with different whisker lengths.
AvoidDon’t make whiskers too thick — thick lines turn into spider legs.
Pro tipUse painter’s tape as a guide for whisker angles — it keeps them symmetrical.
11. Pink Floral Vines on a White Base
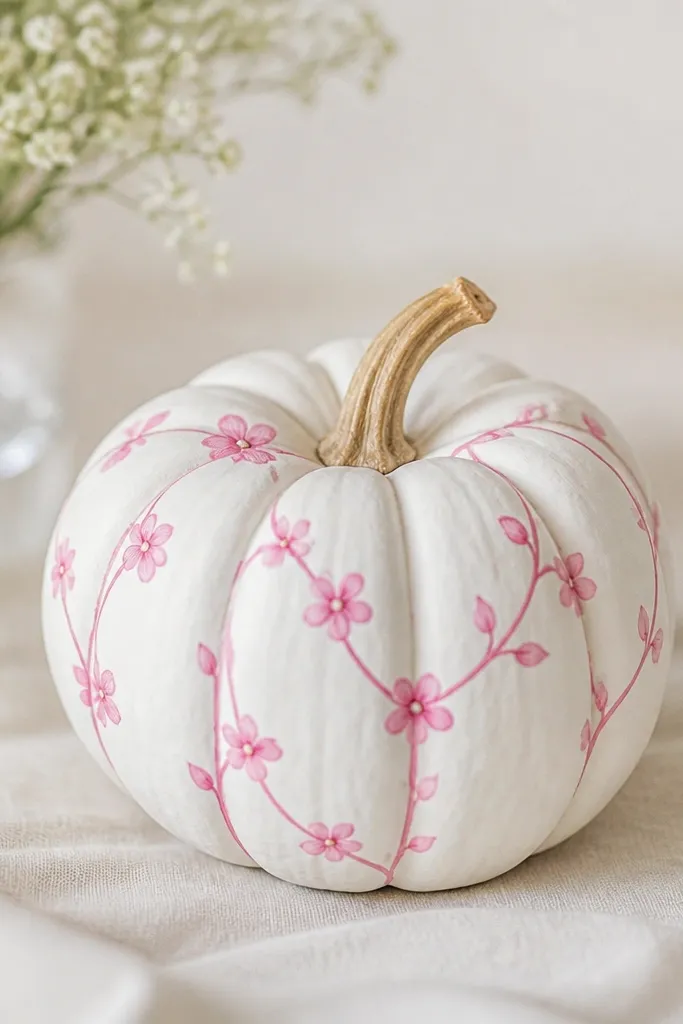
Paint the pumpkin solid white and let it dry completely. With a small round brush, draw a sweeping vine line around the pumpkin in light pink. Add small five-petal flowers along the vine — each flower gets a center dot in white or pale yellow. Add tiny sage green leaves between flowers so the vine doesn’t look empty. Seal matte once the paint is dry to avoid dulling the white base.
White base + pink vines looks crisp and springy, but it still feels fall because the pumpkin shape is bold. The vine pattern creates movement around the whole pumpkin, which makes it look decorated from every angle. I use soft pink flowers with a white center and a tiny green leaf so it looks like a real plant print. This one flatters anyone’s decor because it doesn’t fight dark colors — it just adds gentle color. If you’re making a small cluster for a kitchen counter, this is the design that makes them look cohesive.
AvoidSkip dark outlines on vines — they make it look like a coloring book.
Pro tipKeep flowers spaced about a thumb-width apart so the pattern looks intentional, not crowded.
12. Pink Gingham Check Mini Pumpkin
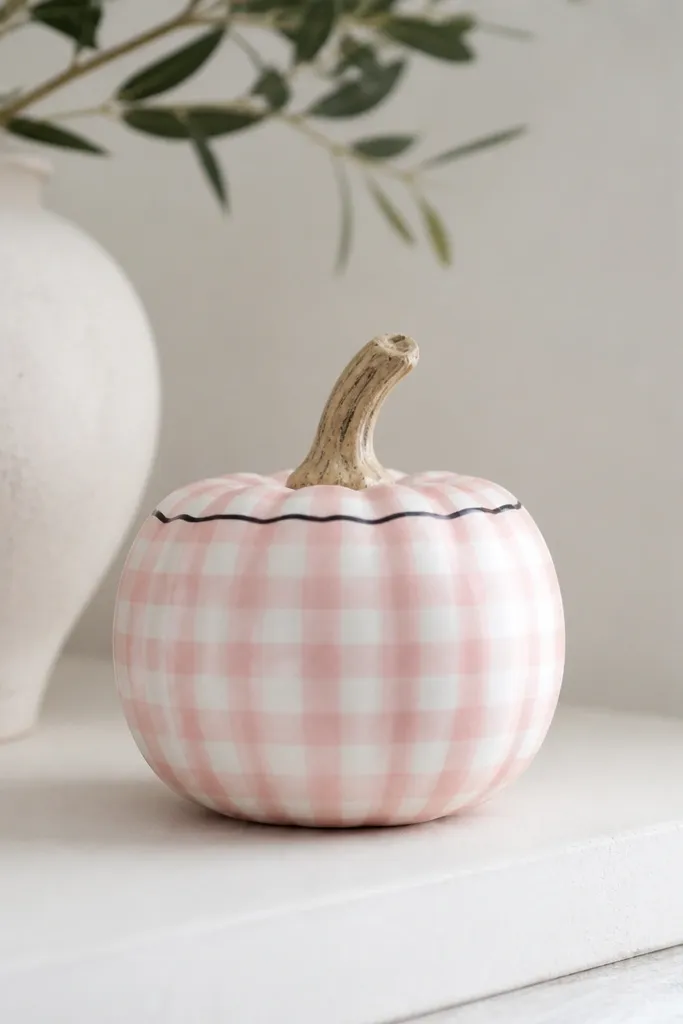
Base coat the pumpkin white, then let it dry. Use a ruler and pencil to lightly mark vertical and horizontal grid lines on the pumpkin where you can see them between ridges. Paint alternating squares pale pink with a small flat brush, then clean up edges with a damp cotton swab. Add a thin black line around the top edge near the stem for a neat border. Seal matte after the pattern dries.
Gingham gives that classic cottage-cute look, and pink-and-white feels girly without needing glitter. I paint thin lines so the squares look neat and the ridges don’t distort the pattern too much. A thin black line around the top makes it look finished, like a mini ornament. This works great with gingham ribbon, striped dish towels, and light wood decor. If you’re doing a fall table and you want your pumpkins to match your linens, this is the easiest pattern to repeat across multiple minis.
AvoidDon’t paint squares too big — large checks look messy on mini pumpkins.
Pro tipPaint one color in one pass across the pumpkin, then do the other squares. It keeps your lines consistent.
13. Pink Rosebud Side Profile
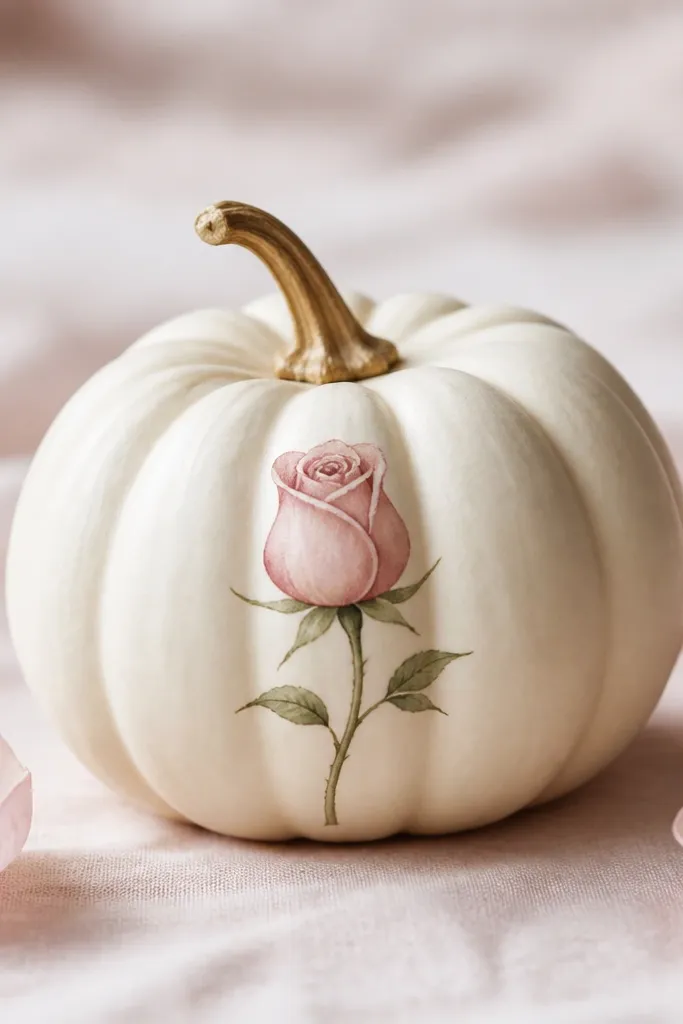
Paint the pumpkin a light blush base and let it dry. Choose one side of the pumpkin and sketch the rosebud shape lightly with pencil — a tight spiral with a few outer petals. Paint the outer petals in medium blush, then add a darker blush shadow under the petals. Add tiny white highlights on the top edges of each petal, then seal matte. Keep the rosebud centered vertically so it looks balanced on the pumpkin.
One rosebud on the side looks classy because it’s like a label or cameo instead of a full front design. I use a darker blush for shadow under the petals so it has shape, then lighten the top edges with white. It flatters small spaces because the design doesn’t overwhelm the pumpkin’s size. This one looks great on a tray with several minis where each one has a different single rose placement. It’s also forgiving if your brush control isn’t perfect because the rosebud is small.
AvoidDon’t add a full vine or extra flowers — too much detail turns it into clutter.
Pro tipUse the side of your brush for petal edges — it gives smoother curves than the tip.
14. Pink Marble Hearts on Blush Base
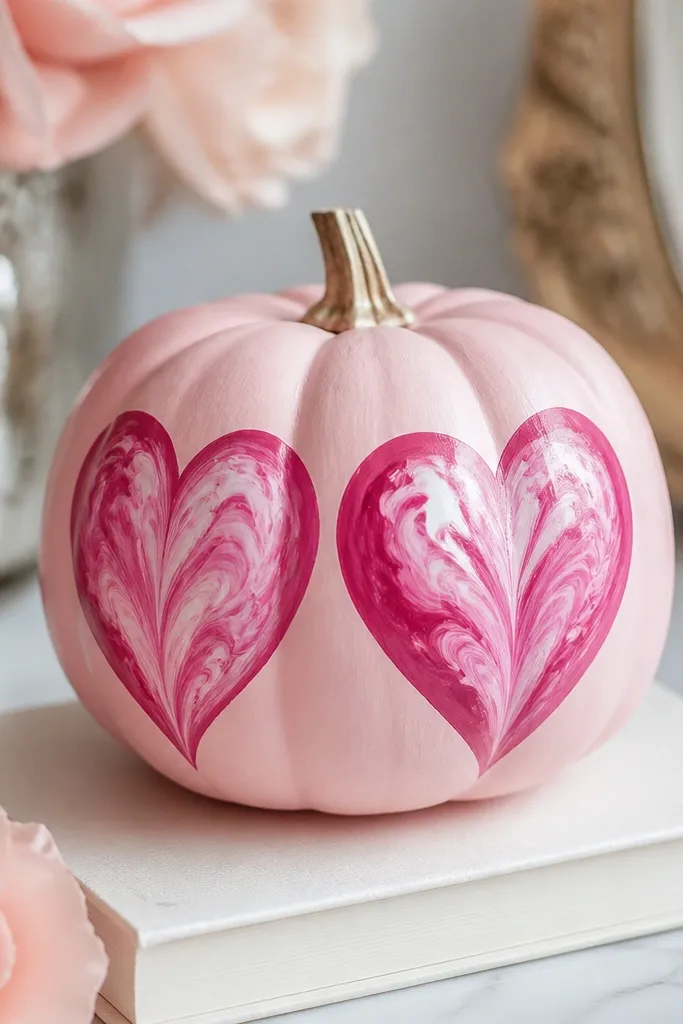
Hearts make it sweet, and the marble inside the hearts makes it look artsy instead of childish. I paint the pumpkin a solid blush base, then create hearts with marbling inside using two pink shades and white. The darker edge around each heart helps the marbled interior stay readable. This design looks great for a romantic fall setup — think pink candles, cream tablecloth, and gold wire decor. It also feels special without taking forever because you only paint two shapes.
Start with a solid blush base coat and let it dry. Draw two hearts on the front with pencil, then outline them with a darker fuchsia. Inside each heart, paint a pale rose base and drag in a little white and darker pink using a damp sponge for marble swirls. Let it dry, then add a second thin layer of fuchsia just along the heart outline so the edges look crisp. Seal matte when everything is fully set.
Marble works best when you dab, not brush. Dab with a sponge to keep the swirls soft.
Don’t overdo the white — too much turns the hearts chalky.
15. Cotton-Candy Bow Tie Pumpkin with Pastel Fade
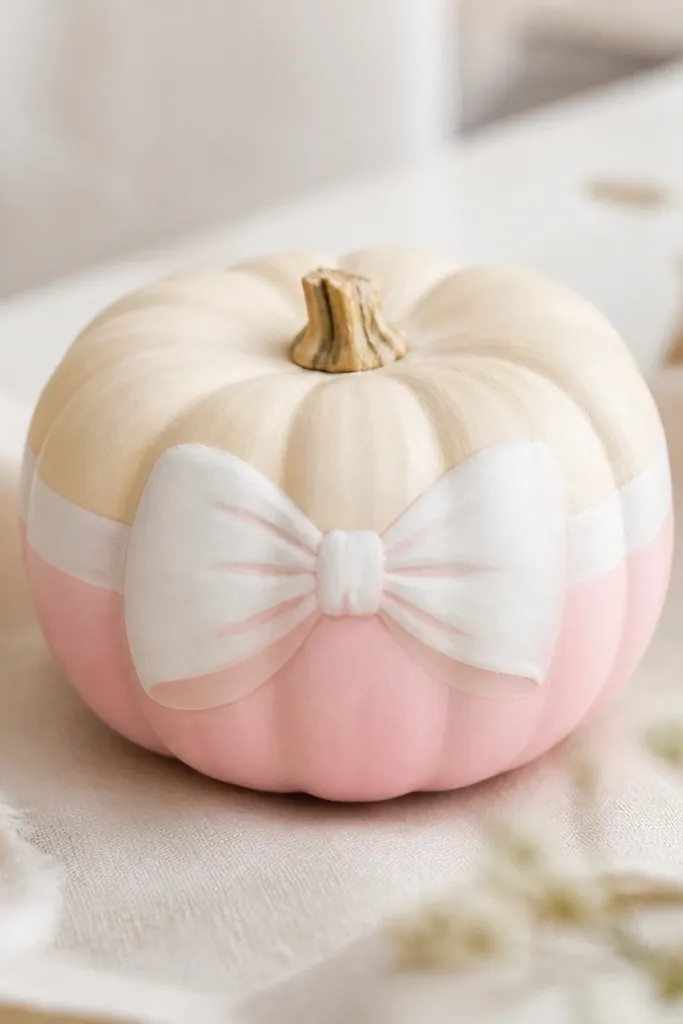
Start by base-coating the mini pumpkin with cream paint (lightest color) and then add powder pink at the bottom third. Use a damp sponge or a wide foam brush to blend the pink upward in short taps, stopping around the halfway point so the fade looks intentional. Let it dry fully, then paint a bow tie on the front: two teardrop loops on the left and right, and a small rectangle knot in the center. Add thin shadow lines under the bow loops using a slightly darker blush (just one shade deeper) so the bow looks lifted. Finish with a matte or satin seal so the paint doesn’t scuff when you handle it for display.
This one looks like a candy-wrapped gift sitting on your porch. The pastel fade makes the pumpkin feel airy, and the bow tie gives it a clear focal point from across the room. I like it because it hides small paint mistakes — the ombre smooths them out. It also photographs well because the bow tie reads sharply even in low daylight. You can keep the bow pure white for a clean girly look or tint it blush-pink for a softer vibe.
AvoidAvoid painting the bow tie before the ombre dries, or the white will bleed into the fade and look fuzzy.
Pro tipUse a small craft sponge for the ombre. It keeps the blend soft without leaving visible brush streaks.



