1. Matte Ombre with Chalky Acrylic Paint
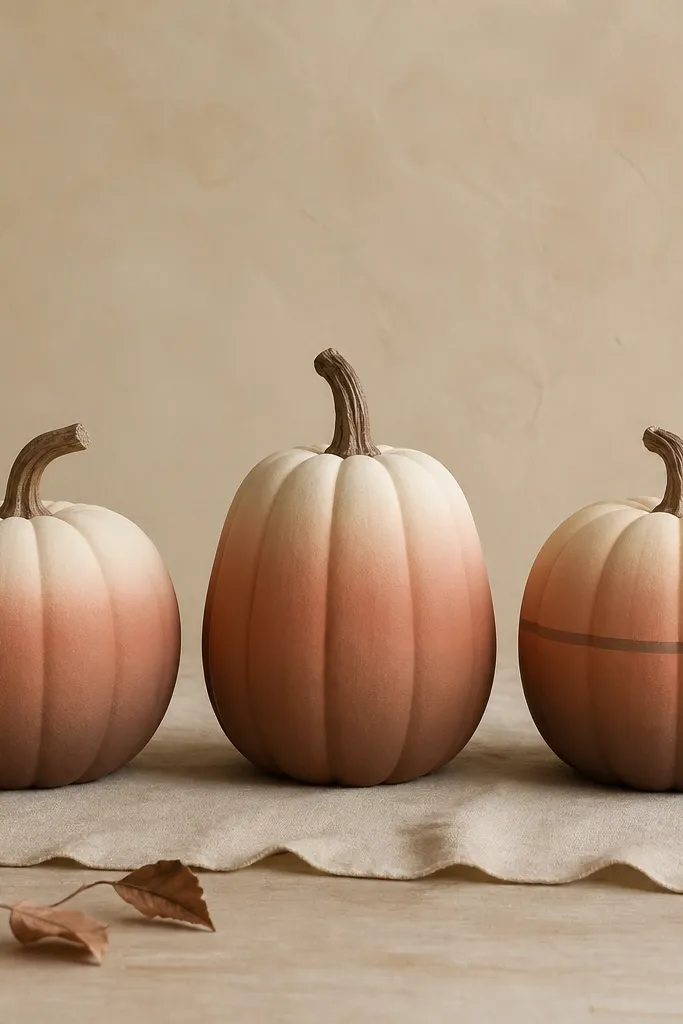
This is my go-to when I want low maintenance easy care pumpkin decorating ideas that don’t require fiddly parts. I use chalky-finish acrylic paint so the pumpkin looks “powdered” instead of shiny, which hides scuffs and minor uneven spots. The ombre flatters almost any color palette — cream-to-terracotta works with warm wood, black planters, and even cool-toned doorways because the middle shade acts like a bridge. If you’re working with pumpkins that already have scuffs, the gradual fade makes them disappear. It also looks good at different sizes, from small tabletop pumpkins to the larger porch ones.
Start by wiping the pumpkin with a damp cloth and letting it dry fully. Tape a simple guide line at the height where you want the color to start fading, then paint the top section cream. Next, add terracotta in a loose band and blend downward with a damp sponge using light taps, not long strokes. Finally, deepen the very bottom with a small amount of brown and smooth the transition with a dry brush edge.
Dry-brush a tiny highlight at the top ridge after sealing — it makes the matte paint catch light without glitter.
2. Ribbon-Covered Faux Stem Pumpkin
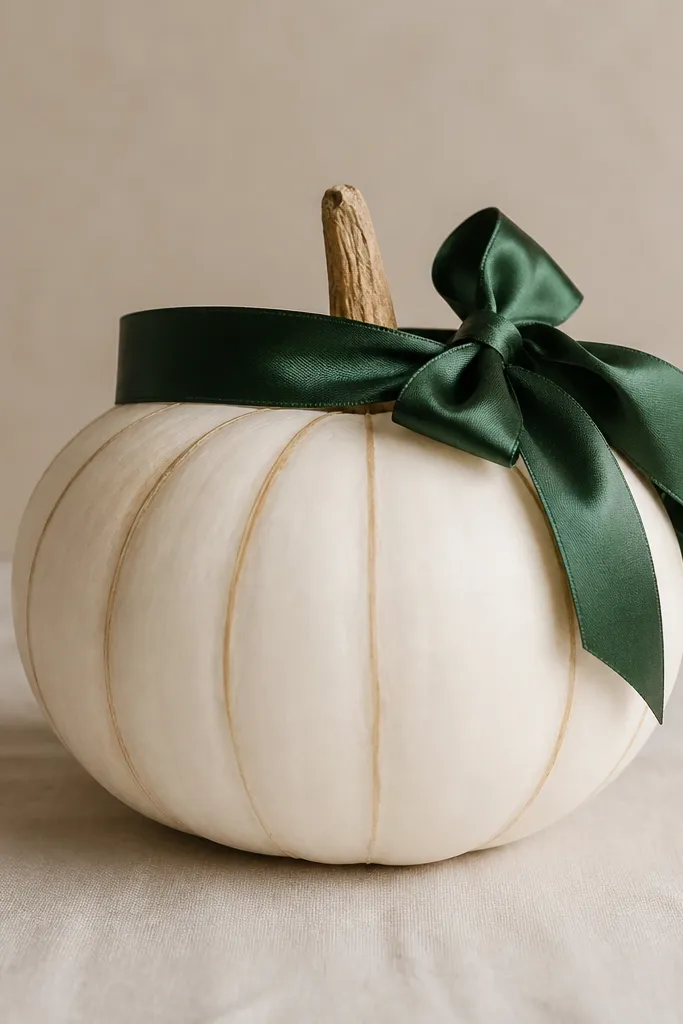
This look fixes the mistake I made when I tried to glue a real stem onto foam — it popped off the moment I moved the pumpkin. Wrapping ribbon around the stem area is forgiving because you’re covering the joint instead of relying on glue to carry the load. The satin ribbon adds a clean focal point, and the off-white body keeps it from looking busy. It works especially well if your door or porch has a lot of black or metal hardware because the green reads crisp. I’ve used this on both small and medium pumpkins, and the bow size is the only thing I adjust.
Start by cutting a 12- to 18-inch length of ribbon wide enough to cover the stem base — mine is about 1 inch wide. Wrap the ribbon around the stem area and secure the back with a small strip of double-sided craft tape. Then tie a bow on the side you want facing out and trim the ends at a slight angle so they don’t fray. Finish by painting or outlining the pumpkin ridges with a thin liner brush using a light gray-brown so the ridges still show through.
If the ribbon frays, run the cut ends over a lighter flame for one quick pass, then press flat.
3. Fabric Leaf Appliqué on a Clean Painted Base
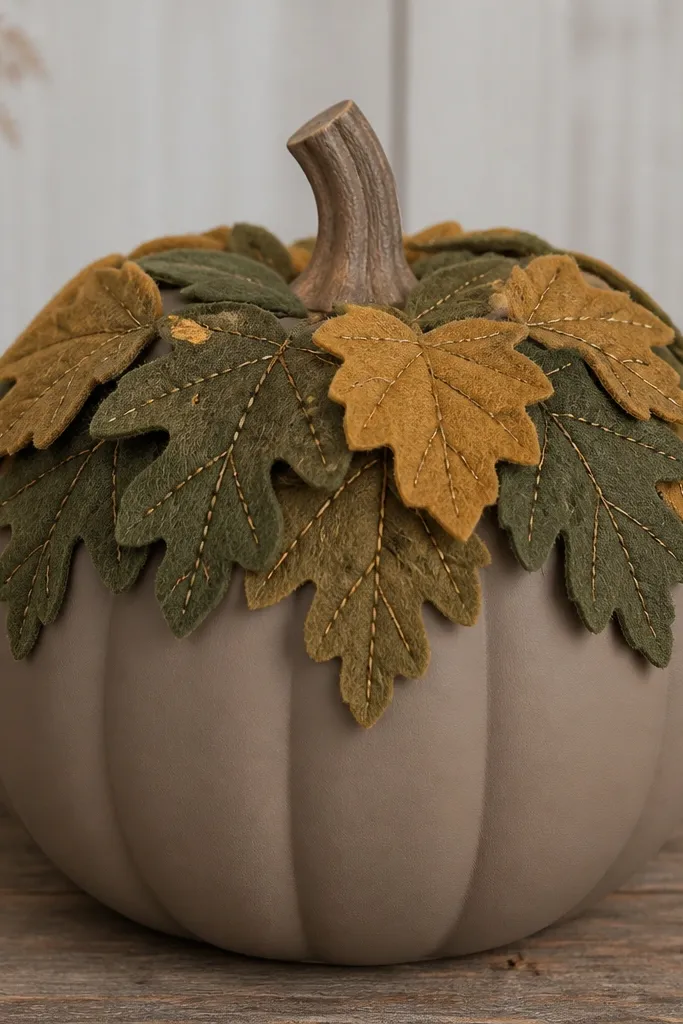
I used to stick felt leaves with hot glue blobs, and the glue bumps made the whole thing look lumpy. The fix is to paint a solid matte base first, then place fabric leaves with thin adhesive and stitch or tack only where the leaf edges meet. Felt works because it stays flat and doesn’t curl like some craft faux suede. Muted olive and gold looks natural without screaming “fall clipart,” and the layered arrangement makes the pumpkin feel fuller even when you’re using small pieces. This also hides any dents or creases on the pumpkin surface because the leaf layers sit on top.
Start by painting the pumpkin base in taupe and letting it dry overnight if you can. Cut leaf shapes from felt — I use two sizes and two colors so the top looks dimensional. Lay the leaves across the top third, then mark placement with a pencil dot on the pumpkin. Apply a thin line of fabric glue or double-sided tape under the center of each leaf, press down, and then tack the leaf edges with a few small stitches or fabric glue dots.
Use a toothpick to press glue into felt edges so it doesn’t squeeze out and turn glossy.
4. Speckled Paint Drips with a Toothbrush
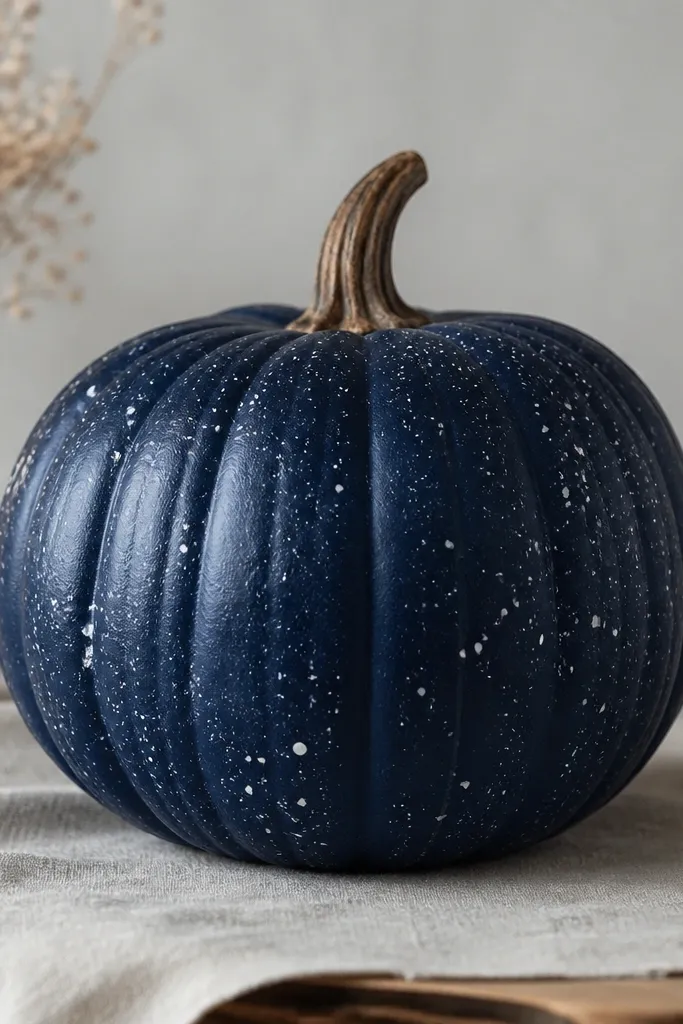
Speckling looks fancy, but it’s actually low maintenance because you’re not trying to line up anything perfectly. I messed this up once by using watery paint, and the dots turned into streaks I couldn’t fix. Thick acrylic paint gives you crisp specks that hide surface scratches. Navy with off-white speckles reads modern and works with both farmhouse and minimalist porches. If your outdoor area has lots of warm lighting, the off-white specks glow instead of looking dull. I also like leaving the stem natural because it adds texture without extra work.
Start by painting the pumpkin navy and letting it dry completely. Load a stiff toothbrush with off-white acrylic paint, then hold it close to the surface — about an inch. Flick the bristles with your thumb to create speckles, keeping your wrist steady so dots land evenly. For small drips, lightly drag the toothbrush edge downward once on each side, then stop — you’re aiming for a few skinny lines, not long trails.
Pro tipDo a test flick on scrap cardboard first so you don’t accidentally spray a big blob.
5. Paper Doily Sunburst with Mod Podge Seal
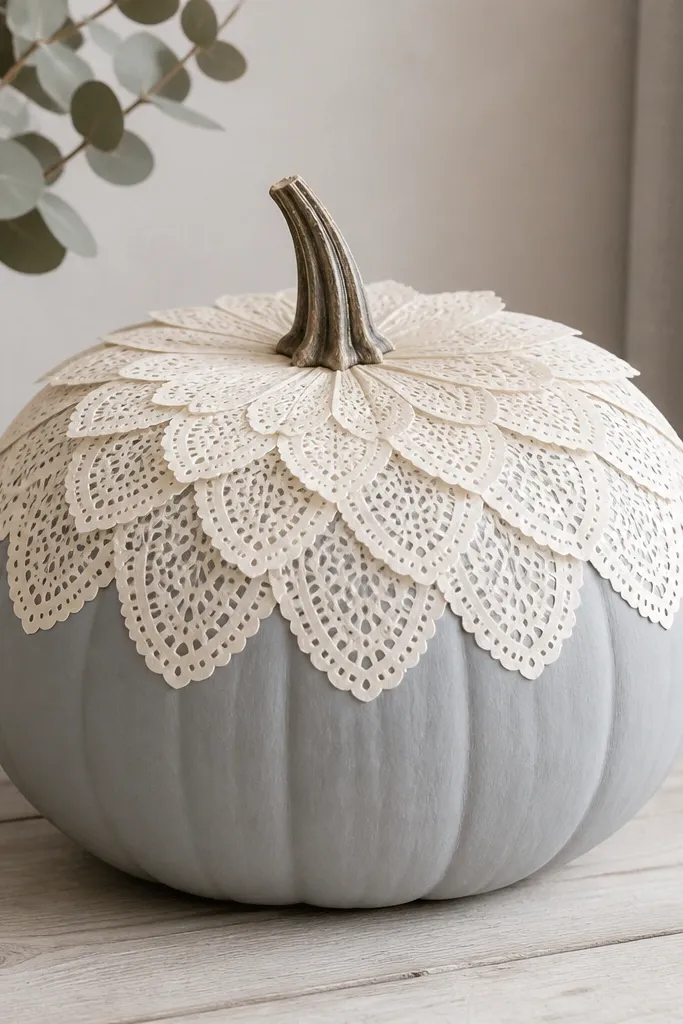
This is the mistake-repair idea for anyone who tried paper on a pumpkin and watched it wrinkle. Paper doilies are thin, so you need a sealing layer that keeps them from absorbing moisture or lifting at the edges. The sunburst pattern hides seams and gives you a focal point that looks intentional even if you’re working quickly. I use pale gray on the body so the cream paper doesn’t clash with warm porch lights. It’s also forgiving on foam pumpkins because the surface is smooth enough for paper to lay flat.
Start with a pale gray painted base and let it dry fully. Tear or cut doily segments into petal shapes, then dry-fit them across the top third like a half wreath. Brush Mod Podge onto the pumpkin area, then press each piece down and smooth with your fingers from center outward. Add a second coat over the paper once it’s all placed, and let it cure before moving the pumpkin.
Pro tipSeal the bottom edge of the paper with extra Mod Podge so it doesn’t peel when you carry it.
6. Rope-Wrapped Pumpkin with Faux Twine Texture
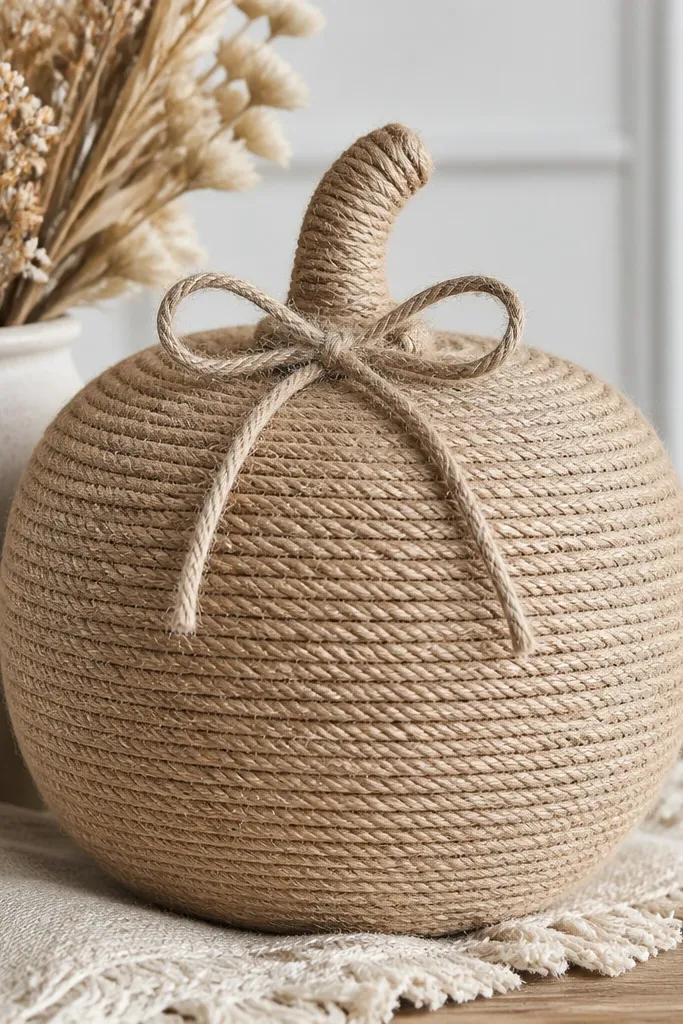
I tried rope once with random glue spots and ended up with gaps that looked messy in photos and even worse in daylight. The rope-wrapped look works because the texture is the design — you’re not relying on paint coverage or tiny decorations. Jute also hides small unevenness in the pumpkin surface, especially if you’re using foam. This is a good match for warm wood, woven baskets, and outdoor planters because the rope color reads like it belongs. It also feels more “hands-on” than a sticker sheet because you can see the fibers up close.
Start by wrapping from the bottom up, keeping the rope spiral tight with each turn touching the last. Use hot glue only in thin bands along the spiral line, then press the rope in place until set. Wrap the stem separately so you don’t fight awkward angles — cut a small length, glue it around the stem base, and trim ends. Finish by tying a twine bow on the front and trimming the tails to about 2 inches so they don’t snag.
If the rope sheds fibers, trim loose ends with small scissors before gluing so you don’t get stray fuzz.
7. No-Carve Rhinestone Ridge Tape (Outdoor-Friendly)
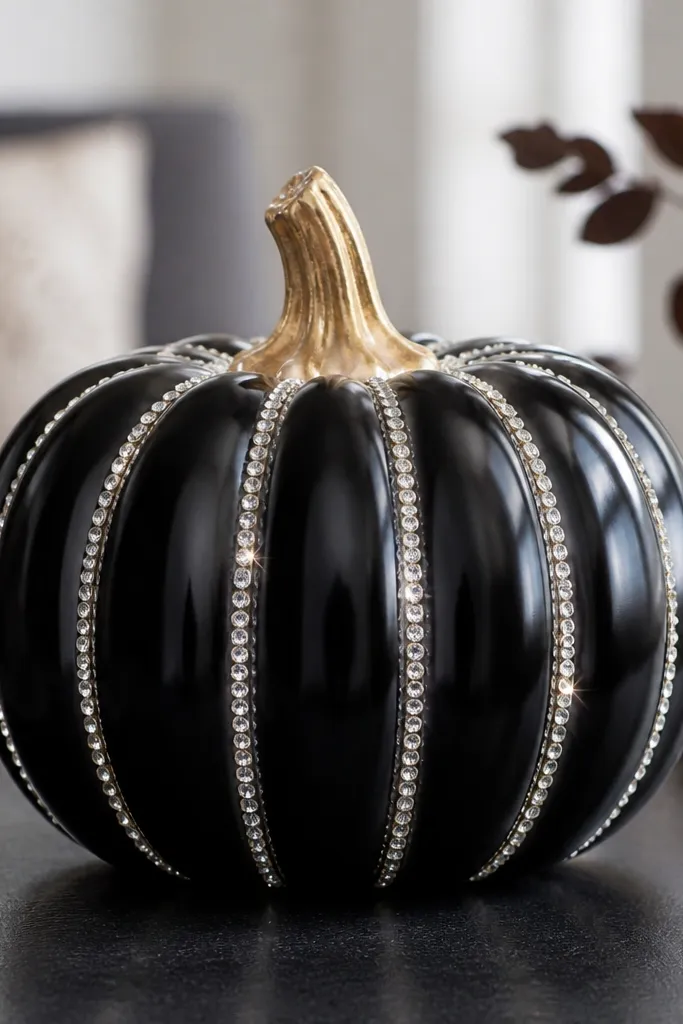
This is my answer to the “I want it to look expensive but I don’t want carving mess” problem. Rhinestone ridge tape gives you instant symmetry — and symmetry reads polished fast. The mistake I made was using cheap craft gems that popped off when the pumpkin got bumped. Tape-style embellishments hold better because they have continuous contact instead of tiny points. Glossy black makes the sparkle show up clearly, and a gold-painted stem adds warmth without adding a second busy pattern. This one looks best when you’re placing the pumpkin where people will pass close — porch steps, a front entry bench, or a mantle corner.
Start by painting the pumpkin glossy black and letting it dry fully. Lightly clean the ridges so adhesive sticks — a dry lint-free cloth works better than a wet wipe right before taping. Apply ridge tape along each vertical ridge, pressing firmly with a plastic scraper or the back of a spoon. Paint the stem gold and keep it simple — one coat, no glitter. If you’re outdoors, seal the edges lightly with a clear acrylic sealer spray so tape corners don’t lift.
Pro tipPress tape with a firm, flat tool for 10 seconds per section so it bonds instead of sliding.
8. Matte Paint + Micro Fabric Trim Band
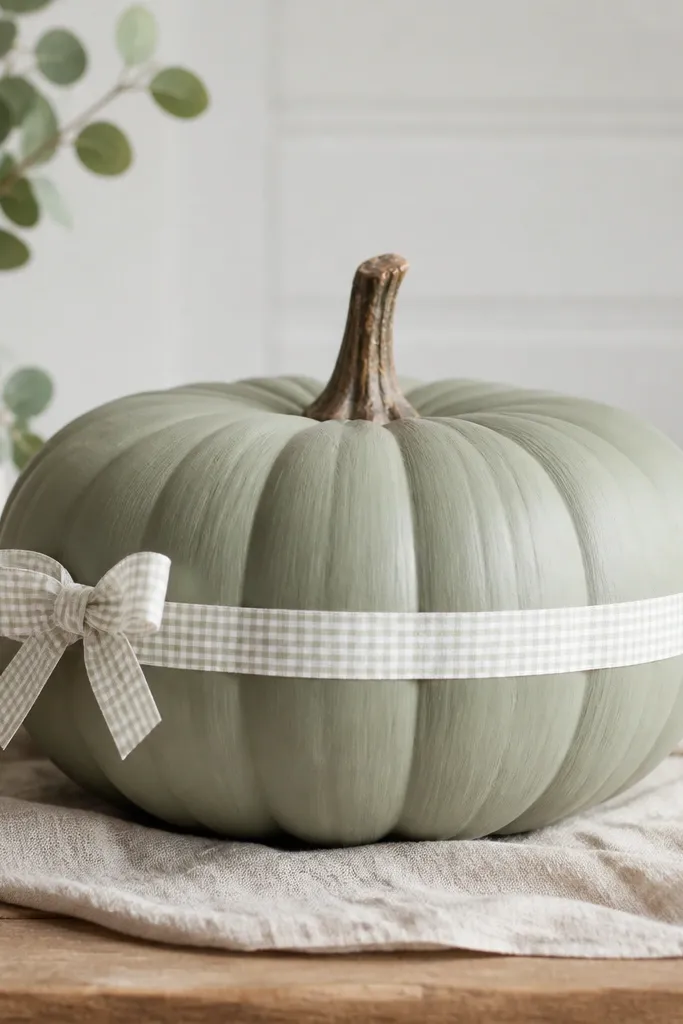
This is the look I use when I want “cute” without relying on glitter or fragile cutouts. A narrow fabric band makes the pumpkin look finished because it adds a clean horizontal line, and that line makes imperfect paint edges less noticeable. Sage with white micro-check reads soft and fresh, especially when your porch has light-colored furniture. It also works well for people who hate the look of thick ribbon bows — this is small, controlled, and doesn’t overpower the pumpkin. If you’re decorating a grouping, this band ties the pumpkins together even when the paint color changes.
Start by painting the pumpkin matte sage and covering the whole surface evenly. Measure the circumference at the middle and cut fabric strip width to about 1.25 inches so it wraps with enough overlap. Wrap the fabric band and secure the overlap on the back with double-sided craft tape, then add a small dot of fabric glue at the front edge for insurance. Tie a tiny bow from leftover fabric and glue it down flat. Seal the painted pumpkin if it’s outdoors, but keep seal off the fabric band so it stays soft-looking.
Use a fabric strip slightly longer than measured, then trim overlap after it’s glued so the band stays straight.