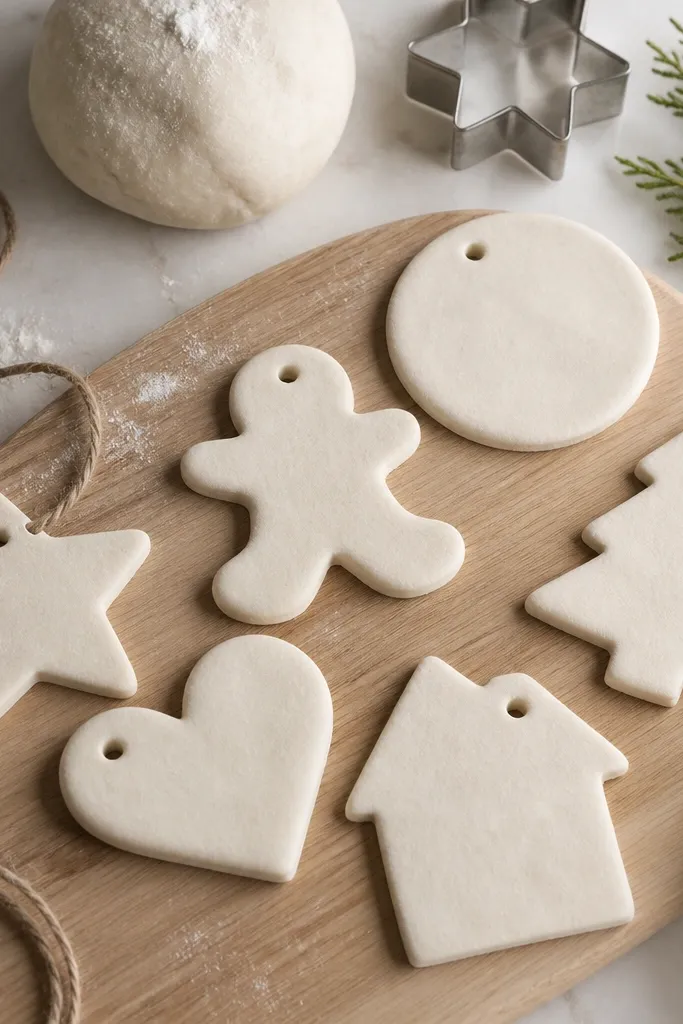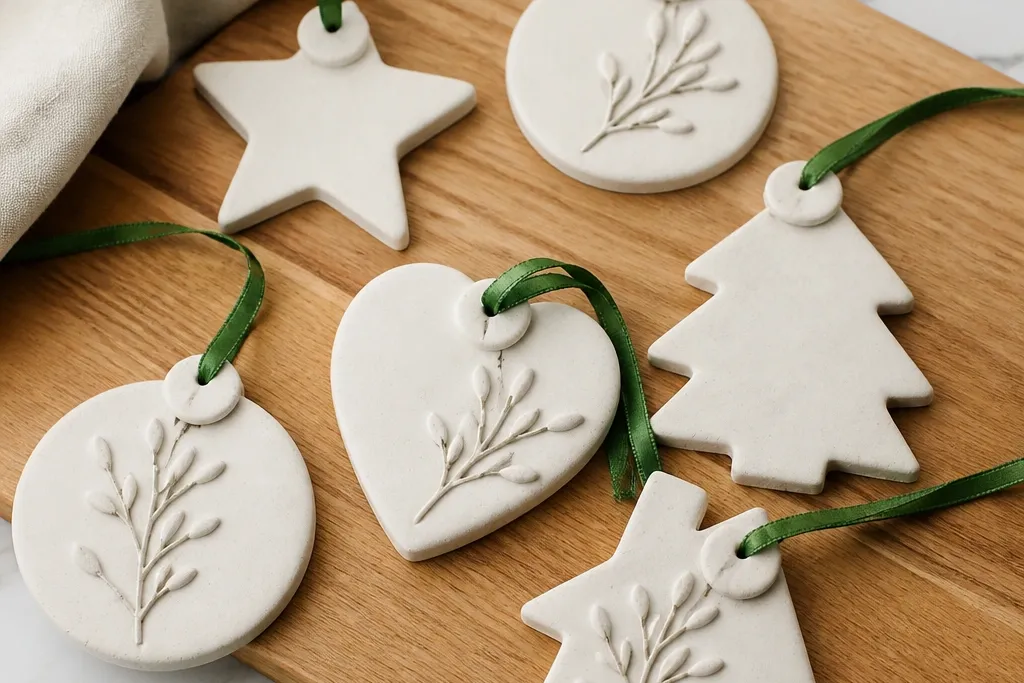
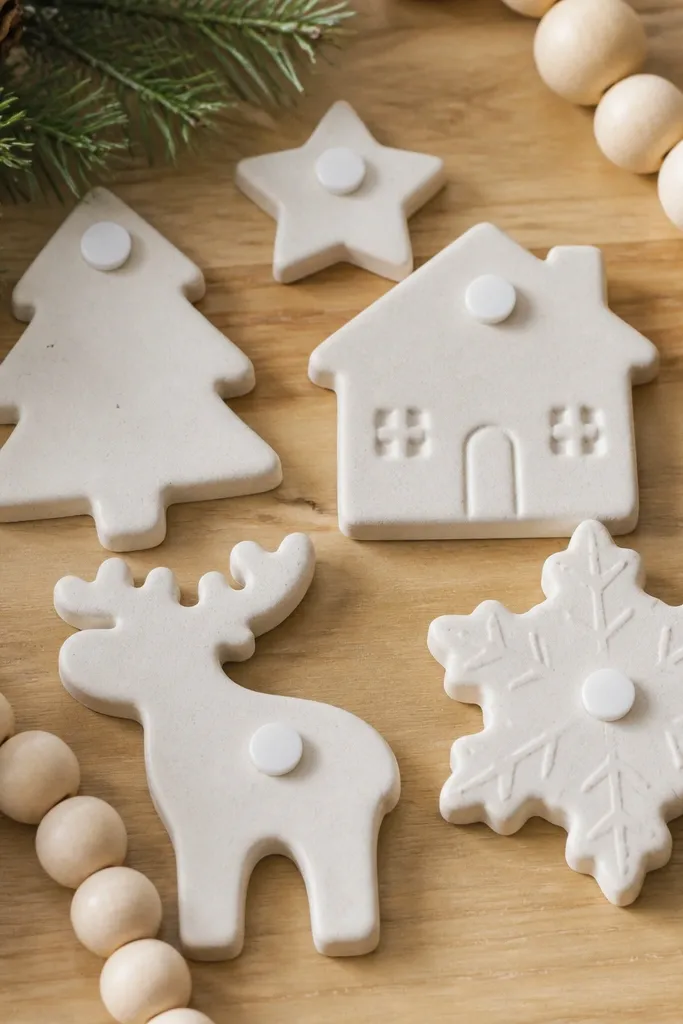
1. Candy-Cane Mini Stripes with Ribbon Loop

This one looks clean because the candy-cane shape gives you built-in structure. Paint the stripes with a steady hand and keep the edges sharp — matte acrylic shows fewer streaks than glossy paint. I like it for people who want a classic holiday look without glitter mess. It also flatters smaller spaces because the stripes read from a distance even on a crowded tree.
Start by cutting your candy-cane outline and rolling dough to about 1/4 inch thickness so the arms don’t snap. After drying and sealing once with Mod Podge Matte, paint alternating bands using a fine liner brush, then let it dry 20-30 minutes before touching up the edges. Add a tiny dot of white at the top curve for a “highlight,” then seal again with one more matte coat. For hanging, punch a small hole near the top and thread 1/4-inch red grosgrain ribbon through, tying a tight knot on the back so the front stays smooth.
Run painter’s tape along the stripes for the first pass, remove it while the paint is still slightly tacky, then touch up the line.
Skip watery paint — it bleeds into dough texture and makes the stripes look fuzzy.
2. Snowman with Button Row and Carrot Nib
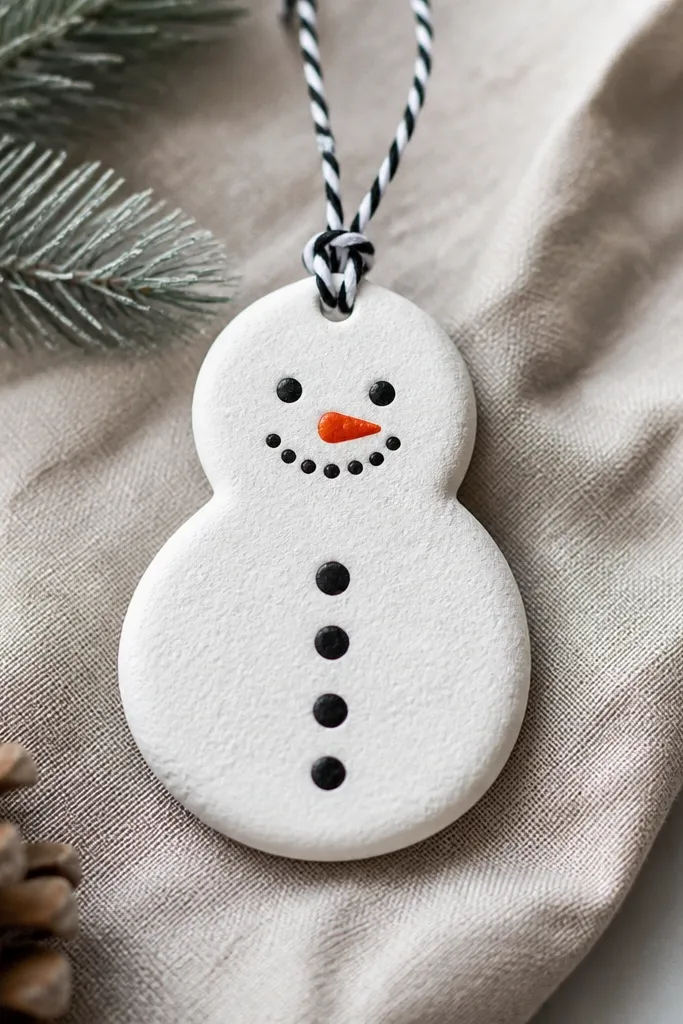
Snowmen look great because you can add texture with simple details: buttons, eyes, and a carrot tip. I keep the base white slightly warm (titanium white mixed with a dab of light beige) so it doesn’t look bluish under indoor lights. This design looks cute on people’s mantels and also on trees when you hang them in a tight cluster. The face details make it readable even from across the room.
Cut a two-part snowman or use one body shape with a smaller head. Dry completely, then seal the front with matte Mod Podge. Paint the body with a flat white, then use a small round brush for two tiny black eyes and a curved smile. Add three black buttons in a vertical line and paint a short orange carrot nose, then seal again. Punch a hole at the top and tie 6 inches of twine through, making a loop that sits against the back.
Use a toothpick for the carrot tip so you get a sharp point instead of a blob.
Don’t add glitter on the face — it catches light and blurs the eyes.
3. Maple Leaf with Warm Burnt Umber Veins
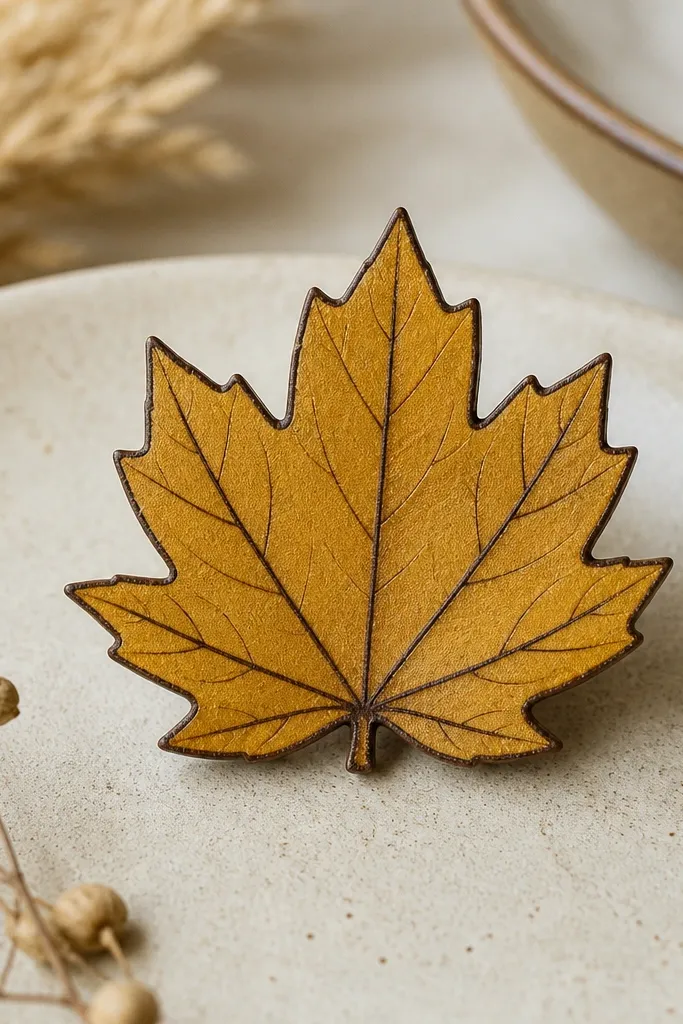
This one feels autumn even when you’re decorating for winter. The trick is the vein work: thin burnt umber lines over a mustard base make the leaf look veined instead of flat. I’ve hung these on windows and they look like stained paper from the street. It’s flattering for anyone who likes warm neutrals more than bright reds.
Roll and cut a maple leaf, then dry it flat so the edges don’t curl. Seal the leaf front with matte Mod Podge, then paint the base using a mustard or golden yellow acrylic. Mix burnt umber with a tiny touch of black for the outline, and paint the main veins first, then add smaller side lines. Let it dry, then do a final matte seal coat. For hanging without drilling, glue a small removable adhesive hook strip to the back center, or punch a hole and use thin tan ribbon.
Pro tipPaint the veins with watered-down burnt umber on the first pass, then go back with thicker paint for the main line so it has depth.
AvoidAvoid bright neon yellow — it looks harsh and cheap against the warm brown veins.
4. Starburst Ornament with Gold Speckle Sky

Starburst shapes look dramatic with almost no effort because the points create a natural frame for the paint. I like navy as the base because it makes gold speckles pop without turning into messy glitter. This design is great for beginners who want “wow” without needing perfect symmetry. It reads as intentional even if your speckle pattern isn’t identical each time.
Cut a starburst (about 3 inches wide), then dry and seal once with matte Mod Podge. Paint the whole shape navy and let it dry fully. Dip a toothbrush in metallic gold craft paint (not glitter) and flick gently over the center area, then lightly flick toward the points. If the speckle is too heavy, wipe the surface with a barely damp paper towel before it dries. Seal again with matte top coat, then thread gold cord through a small hole at the top.
Pro tipPractice flicking on scrap cardboard first so you learn the right distance for tiny dots.
AvoidDon’t use thick glitter paint — it dries bumpy and catches dust.
5. Polka Dot Bauble with Single Color Pop
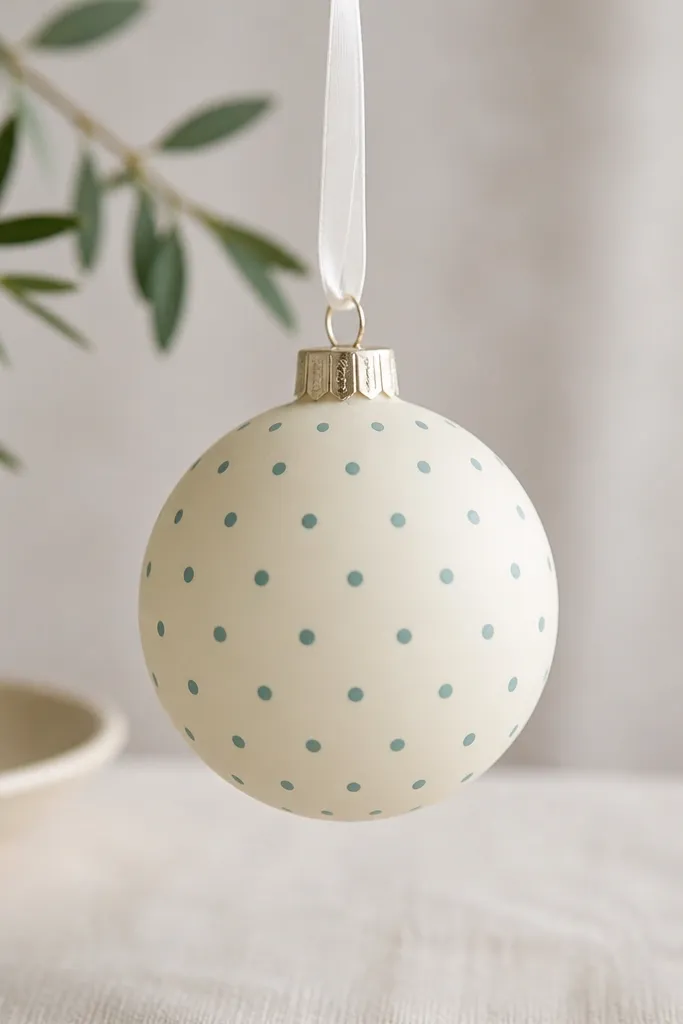
Polka dots look polished when the dots are uniform and the base is a calm color. I like cream because it hides minor brush marks and makes the teal pop without looking loud. This is a great set-builder design: make 10 in different pastel dot colors and they look coordinated. It also looks flattering on warm-toned spaces because cream and teal warm together.
Cut circles using a cookie cutter or craft circle cutter, then dry flat. Seal with matte Mod Podge and let it cure. Paint the base cream, then use a dotting tool or the end of a small paintbrush handle to place teal dots at equal spacing. Work from the center outward so you don’t run out of room at the edges. Seal again, then punch a hole at the top and thread 1/4-inch white ribbon through for a clean loop.
Mark a few guideline dots lightly with pencil before painting so spacing stays even.
Skip tiny dots that are too close together — they blur and look like smudges.
6. Gingerbread Cookie with Icing Lines

Gingerbread designs look best when your “icing” lines are crisp and not overly thick. I paint the cookie first in a light ginger brown, then add white lines that follow the shape. The result looks like a real decorated cookie, but it’s still matte and smooth. It’s perfect for beginners because you’re repeating the same action — lines — over and over.
Cut gingerbread shapes and dry thoroughly so the edges don’t crumble. Seal once with matte Mod Podge. Paint the body with a warm light brown (add a pinch of red-brown to make it look like baked spice). Use a small liner brush to draw white icing lines: cuffs, belt, and a few zigzags on the shirt front. Seal again and attach hanging twine by poking a hole near the top and tying a small bow.
If your icing lines wobble, let them dry, then trace over with a second pass instead of trying to fix while wet.
Don’t paint icing as a full fill on the face — it makes the features disappear.
7. Heart Ornament with Watercolor Wash and Outline
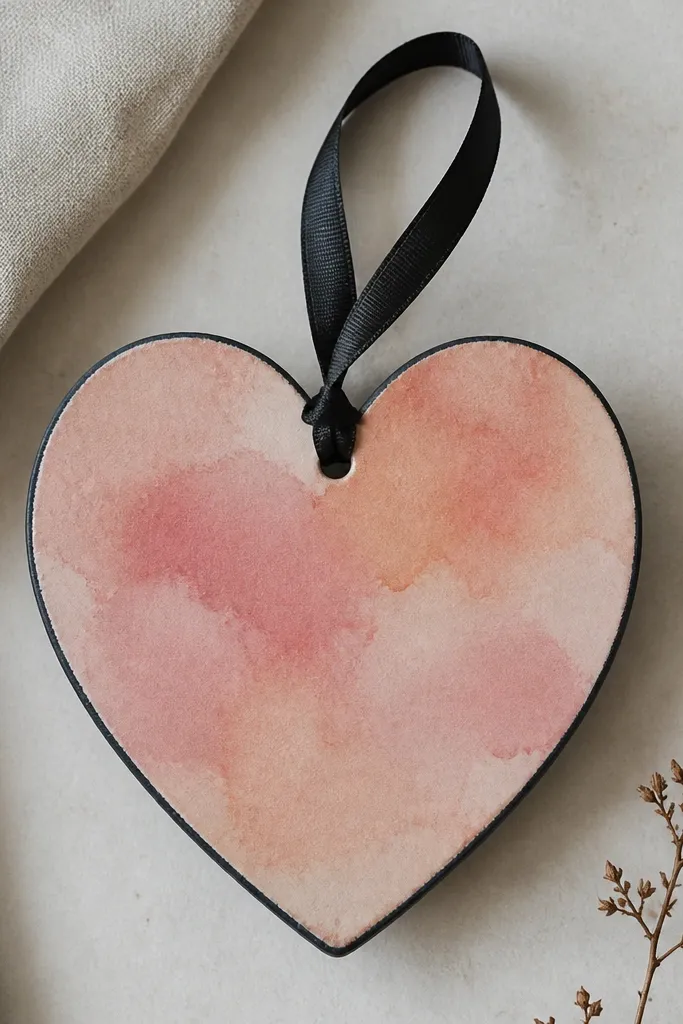
Watercolor-style hearts look expensive because the edges fade naturally into the center. The outline is what keeps it from looking messy. I use dusty pink and peach because they show up well in indoor light and don’t look neon on camera. This one flatters a cozy, neutral home — grey, cream, and wood tones look especially good with it.
Cut hearts and dry flat. Seal once with matte Mod Podge, then lightly sand the surface so the wash spreads evenly. Mix a watery pink wash and dab it on with a sponge brush, then add peach in one side for variation. While still slightly damp, tilt the ornament so the pigment pulls toward one edge. Outline with charcoal grey using a fine liner brush, let it dry, and seal again. Punch a hole at the top and thread thin black ribbon through for contrast.
Pro tipUse two thin wash layers instead of one heavy layer so the color stays soft, not streaky.
AvoidAvoid pure hot pink — it looks harsh next to the charcoal outline.
8. Winter Pine Tree with Dry-Brush Highlights
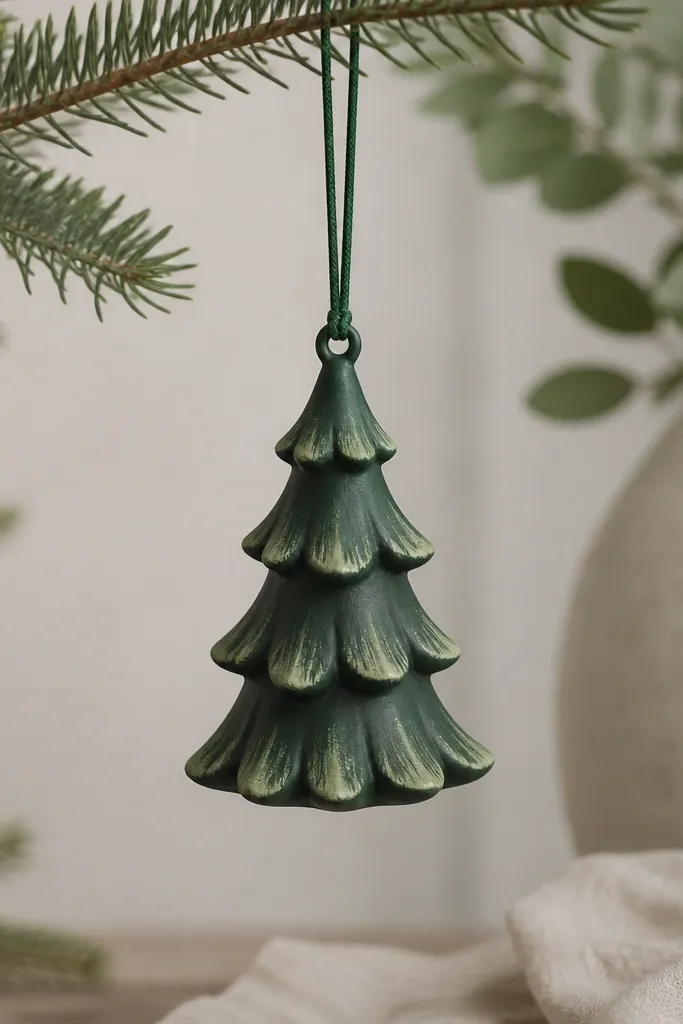
Dry-brushing makes trees look like they have texture without you carving anything extra. I paint the base forest green, then dry-brush lighter green on the raised branch areas so it looks like snow catching light. This design looks best on a dark tree or next to warm lights because the highlights read clearly. It also looks great in groups because the trees share the same technique even if the brush strokes vary.
Cut a simple pine tree silhouette and dry flat. Seal once with matte Mod Podge, then paint the whole piece forest green. Let it dry, then load a nearly-dry flat brush with a lighter green (almost yellow-green) and lightly pull it across the branch edges. You want the highlight to skip — that’s the effect. Seal again with matte top coat and thread a green cord through a top hole.
Pro tipPaper-towel offload matters: dab the brush on a paper towel until it barely transfers, then paint the ornament.
AvoidDon’t flood the dry brush technique with wet paint or you lose the textured look.
9. Snowflake with Foil-Edge Metallic Tips
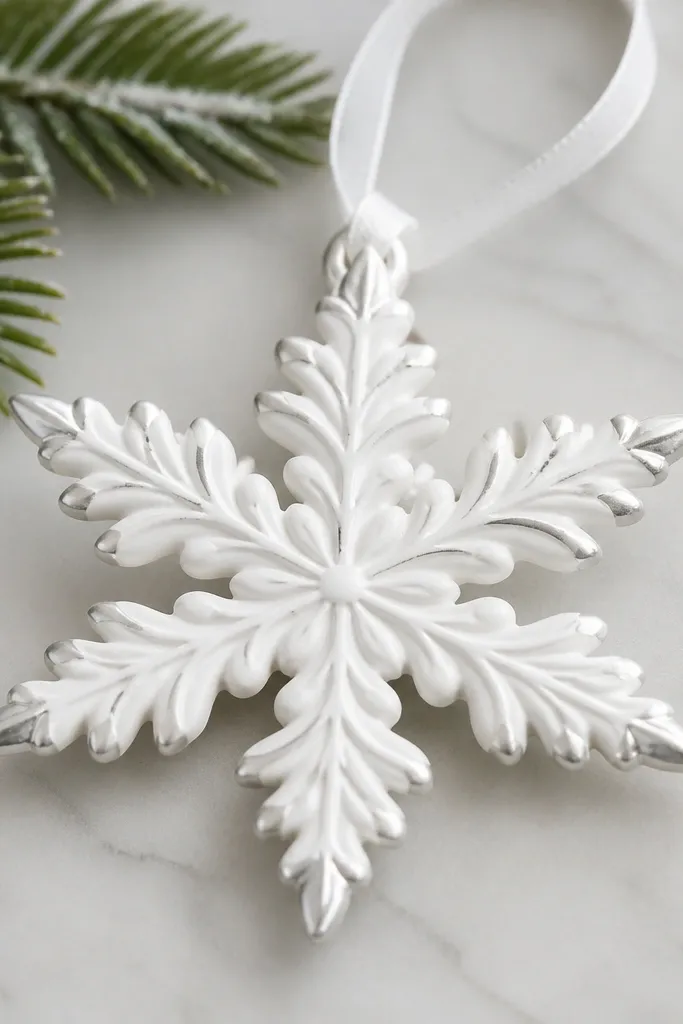
Snowflakes look crisp when you treat them like stained shapes rather than one flat color. White paint makes the pattern readable, and metallic tips add a “cut glass” effect without needing glitter everywhere. I do this when I want ornaments that look good even in daylight. It also photographs well because the metallic edges give highlights.
Cut a snowflake with fine points, then dry completely. Seal the front with matte Mod Podge and let it cure. Paint the snowflake white, then use a small brush to paint only the very tips and edge lines with metallic silver acrylic. Keep the silver narrow so it reads as edging, not a full repaint. Seal again with matte so the white stays soft, and punch a hole at the top for a white ribbon loop.
Pro tipUse a craft knife to clean up any paint bleed on the tips after the first coat dries.
AvoidAvoid metallic paint over the whole snowflake — it turns it into a flat disco ball.
10. Monochrome Frame Ornament with Tiny Quote Strip
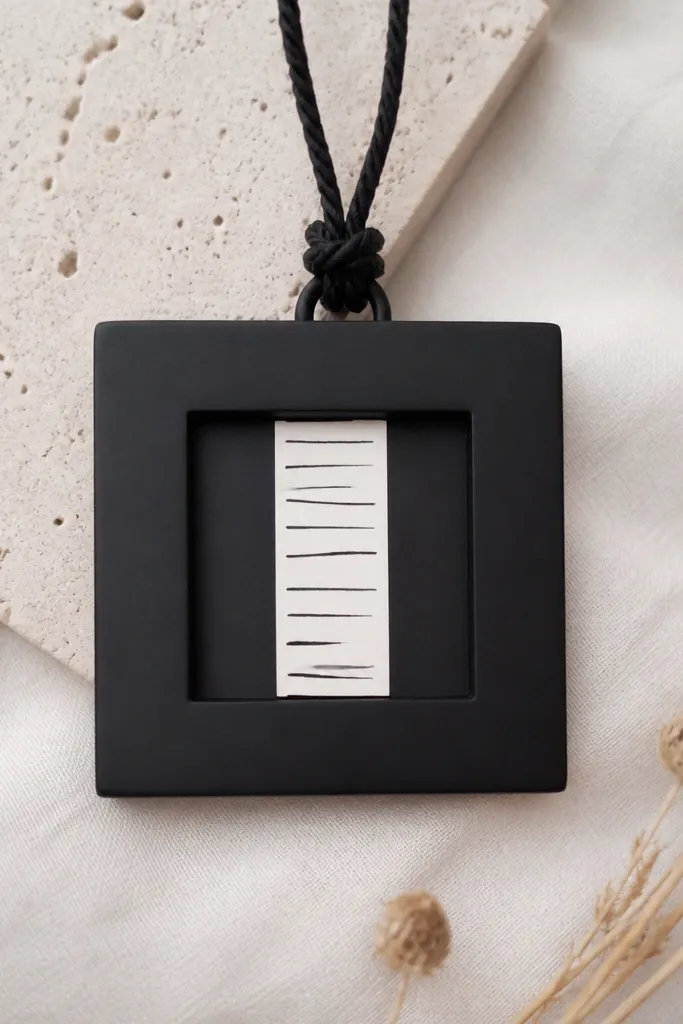
A frame shape makes the ornament look graphic and modern. I keep it monochrome — black frame, white center — because it looks clean on any tree color. The small painted strip in the center gives personality without needing fancy lettering. This one flatters people who like minimal decor and want handmade pieces that still look tidy.
Cut a square or rounded-square frame, leaving an inner opening if you can. Dry flat, then seal once. Paint the frame matte black and let it dry. Paint the center area white and add a tiny strip of off-white or light grey for a simple hand-painted line of meaning, keeping letters small and imperfect on purpose. Seal again with matte top coat. Punch a hole near the top and tie black twine so the knot sits behind the frame.
Pro tipIf your handwriting looks shaky, paint short horizontal lines instead of words — it still reads as a design element.
AvoidDon’t use glossy black paint — it shows every brush streak.
11. Botanical Sprig Ornament with Sage Wash and Brown Ink
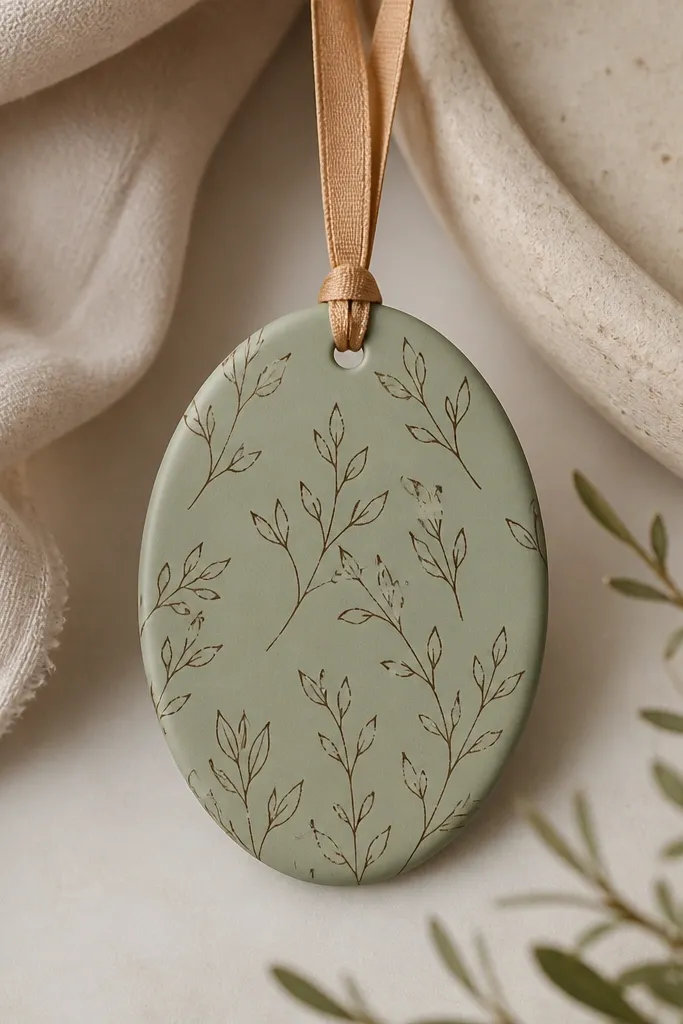
Botanical patterns feel calm and seasonal without going full holiday. The sage wash is forgiving, and brown ink lines look natural instead of “painted cartoon.” I use this when I want a set that works for fall and winter, especially on neutral trees. It flatters warm skin tones in photos because the colors don’t overpower faces.
Cut oval ornaments and dry flat. Seal with matte Mod Podge. Paint a sage wash using a sponge brush for a soft mottled look, then let it dry. Use a fine liner brush with burnt umber to draw a simple sprig: one main stem and 4-6 small leaves. Add a tiny dot cluster as berries if you want. Seal again with matte top coat and punch a hole at the top for tan ribbon.
Pro tipDraw the sprig lightly in pencil first so you don’t fight the symmetry while painting.
AvoidAvoid thick outlines everywhere — it makes the sprig look like a coloring book.
12. Hand-Painted Striped Ornament with Distressed Edges
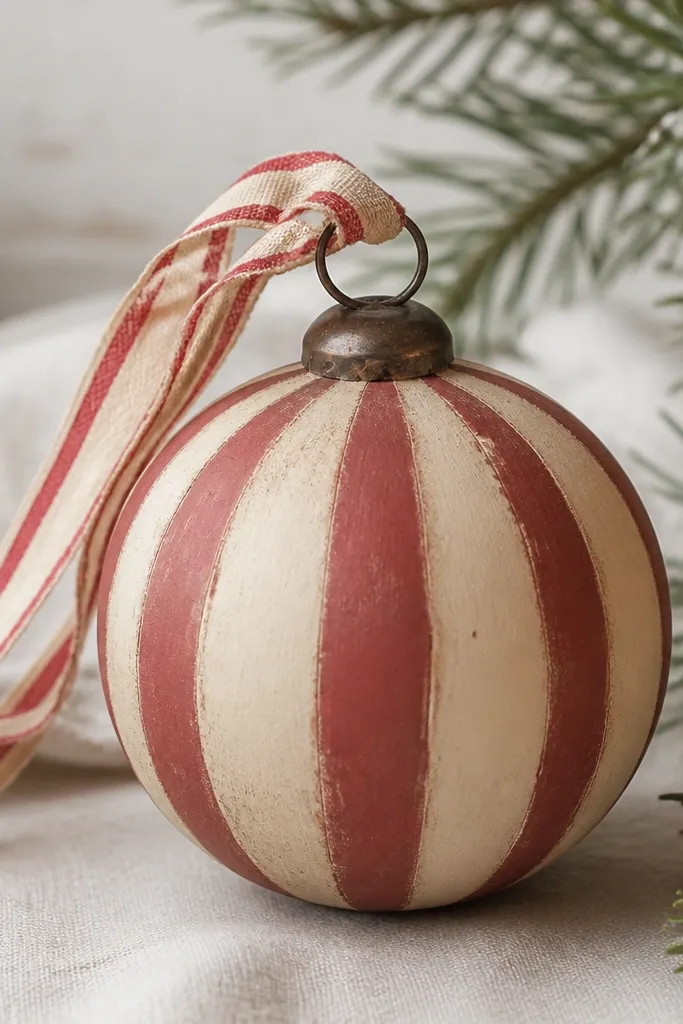
Distressed edges make a handmade ornament look like it has a story, not like it was rushed. I distress by dry-brushing a little base color on top of the painted stripes, then sanding lightly to reveal a hint of the earlier layer. The muted red and cream combo looks great with farmhouse decor and also with modern black trees. This design looks best when the stripes stay straight but the edges look softened.
Cut rounds and dry completely. Seal once, then paint your first base stripe color (cream). After it dries, mask stripes with painter’s tape and paint the muted red. Remove tape while paint is still slightly tacky for crisp lines. For distressing, lightly sand the outer rim with 220 grit and then dry-brush a tiny amount of cream along the edge. Seal again, then attach a ribbon loop with a hole punched near the top.
Pro tipUse painter’s tape for stripes, but press the tape down only firmly at the edges so paint doesn’t creep under the center.
AvoidDon’t distress the face area — it makes the pattern hard to read.
13. Tiny Ornament Coasters on a Star Backer
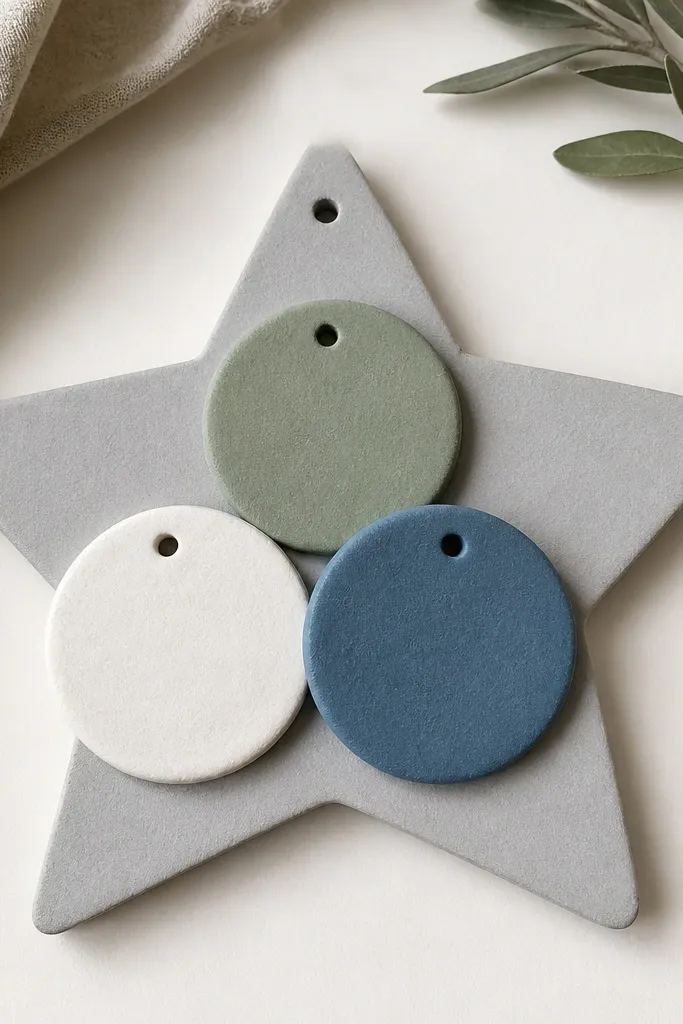
This one is more decorative than cute. The star backer gives you a stable silhouette, and the three mini circles add variety without turning the whole ornament into clutter. I like this for people who want an ornament that looks like a mini mobile piece. It also looks great as a gift because you can match the mini circles to someone’s favorite colors.
Cut a star ornament base and 3 mini circles (about 1.25-1.5 inches wide). Dry everything thoroughly and seal all pieces once. Paint the star base pale grey, then paint each mini circle a different muted color (powder blue, dusty rose, sage). After the paint dries, glue the mini circles onto the star base using Mod Podge as a glue — keep them centered so the weight stays even. Seal the whole front once more. Punch a hole through the top of the star and thread twine for hanging.
Pro tipDry-fit the mini circles first so you can adjust spacing before any glue touches dough.
AvoidSkip thick glue mounds under the mini circles — they create bumps that catch light unevenly.
14. Lemon Slice Ornament with White Pith Lines

Lemon slices look cheerful and modern, and the shape does the heavy lifting. The white pith lines make the slice look realistic instead of flat. I’ve used this design year-round on shelves and it still looks fresh because yellow stays bright in natural light. It flatters people who like citrus tones and also makes winter decor feel less heavy.
Cut lemon slices and dry flat so the rounds don’t curl. Seal once with matte Mod Podge. Paint the base bright yellow, then let it dry fully. Add white curved pith lines using a fine brush, then dot a few tiny brown/yellow-brown seed specks in the center. Optional: add a faint darker yellow ring near the edge for depth. Seal again with matte top coat and punch a hole at the top edge for a thin ribbon loop.
Pro tipUse two shades of yellow — one for the base and a slightly darker one for the rim — so the slice looks dimensional.
AvoidDon’t outline the whole lemon in thick brown — it turns it into a cartoon sticker.
15. Marbled Ornament with Two-Tone Swirl
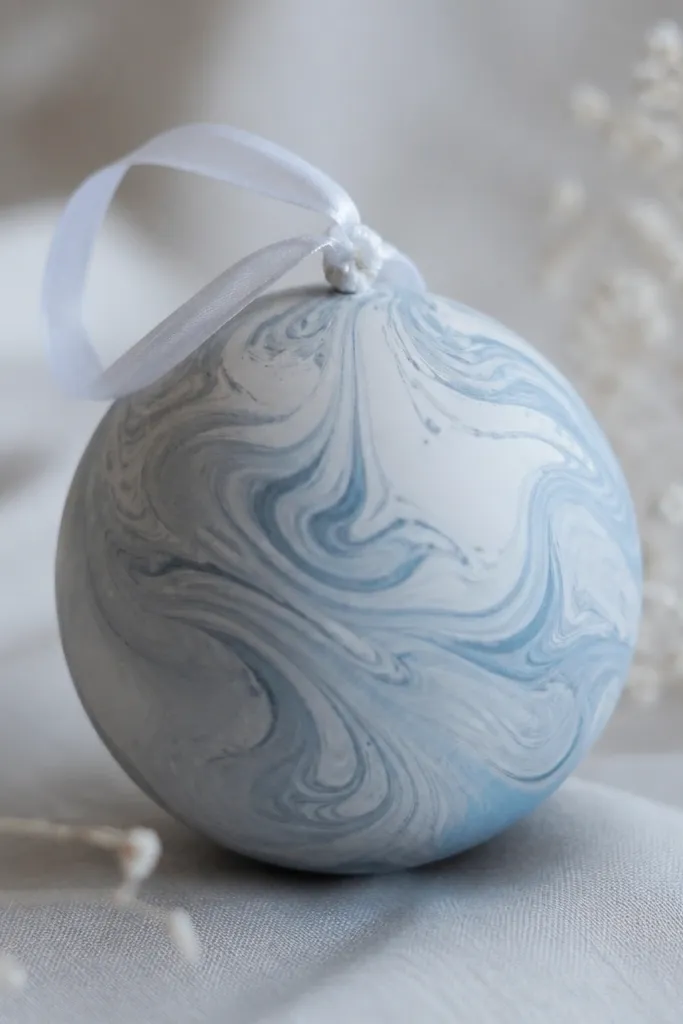
Marbling looks hard, but it’s repeatable if you control the paint thickness. Grey and pale blue looks clean and modern, and the marbling hides tiny brush marks from beginners. I like this for people who want handmade but still “designed.” It also looks good on any tree color because it’s soft-toned.
Cut a round ornament and dry flat. Seal once with matte Mod Podge and let it cure. Paint a base layer with light grey, then while it’s still slightly tacky, drop small amounts of pale blue paint onto the surface. Swirl with a toothpick or skewer in short motions, then stop before it turns muddy. Let it dry fully, then seal again with matte top coat. Punch a hole at the top and attach a white ribbon loop.
Thin your paint with a tiny splash of water so it spreads, not blobs — thick paint kills the swirl effect.
Avoid too many colors — three drops of blue and two of grey looks best.
16. Tartan Plaid Ornament with Crisp Tape Lines
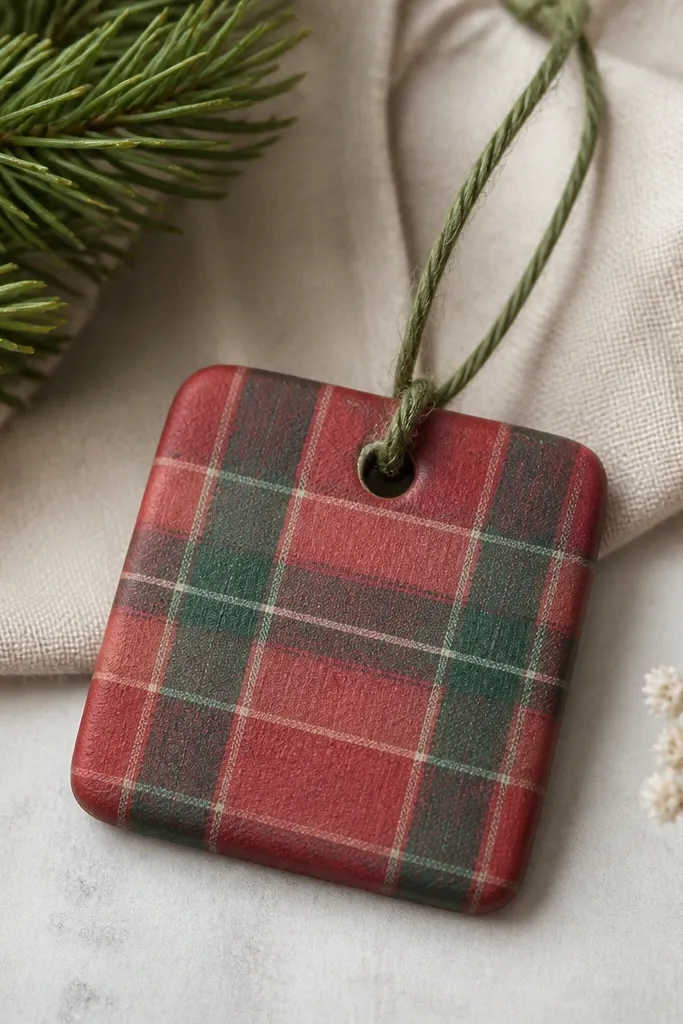
Plaid looks sharp when the lines are straight and the spacing is consistent. I like tartan because you only need a few colors and the pattern makes it feel “finished” fast. This design looks great on wreaths and on trees with warm white lights. It also flatters people who like traditional decor but want handmade texture.
Cut squares about 3 inches wide and dry flat. Seal once with matte Mod Podge. Paint the base a light neutral like cream or off-white. Once dry, use painter’s tape to block vertical stripes, paint red between them, then remove tape carefully. Repeat horizontally for green, then do a final thin line pass with a fine brush for the darker intersections. Seal again with matte top coat. Punch a hole at the top and thread green twine.
Measure stripe widths by lining the tape up to your brush tip width so you get repeatable spacing.
Don’t paint over wet tape — it lifts and tears the edge.
17. Hearts-in-Confetti Ornament with Tiny Dot Scatter
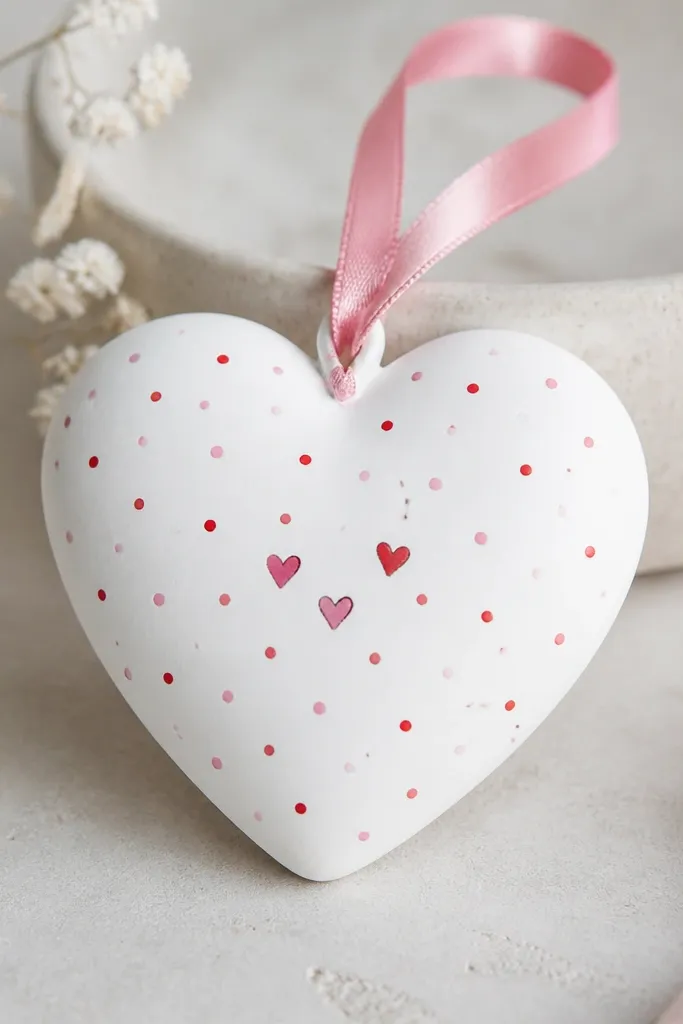
This design is cute without being childish because the base stays clean and the confetti stays small. Tiny dots are easier than big shapes, and they make the ornament look lively from different angles. I use a white base because it makes the hearts and dots readable. It’s perfect for Valentine decor or as a gift tag that you hang later.
Cut a heart shape and dry flat. Seal once with matte Mod Podge. Paint the heart white, then let it dry. Use a dotting tool to add tiny pink and red dots around the center, then add 3 small heart icons in a slightly darker pink. Keep the dots within a loose circle so it looks intentional, not random. Seal again with matte top coat. Punch a hole at the top and thread a narrow pink ribbon.
If dots look uneven, reload your dotting tool less often and tap lightly — fewer dots look more polished.
Skip large confetti shapes — they make the heart look busy and messy.
18. Monogram Initial Ornament with Cutout Backer
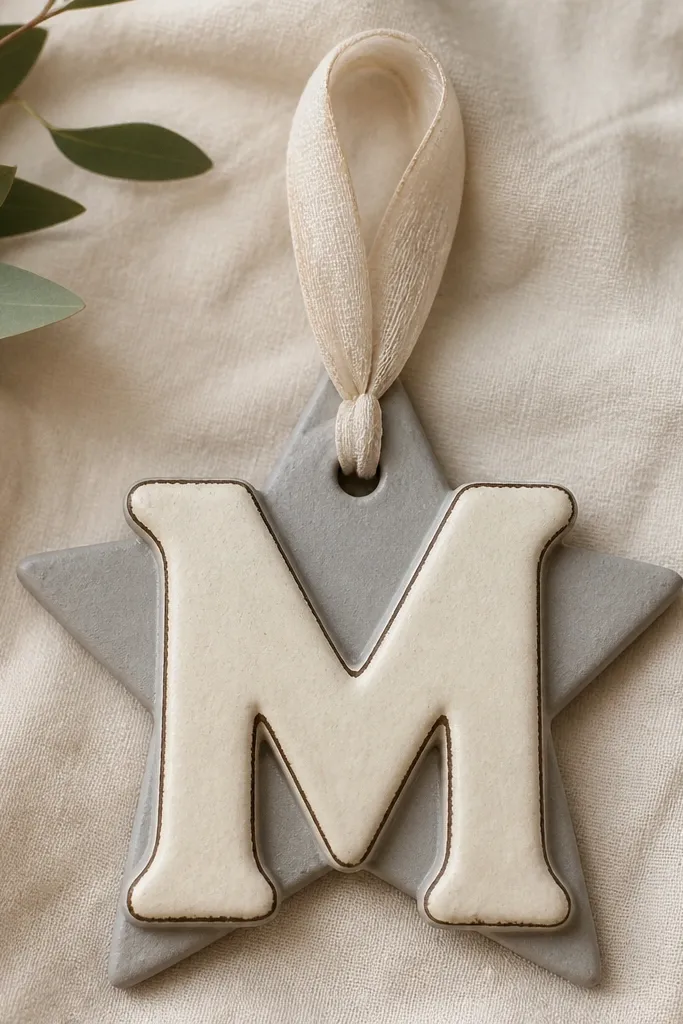
An initial looks personal fast, and the backer makes it look like a finished sign instead of a single cutout. I like cream letters with a grey or charcoal outline because it reads clean in photos. This design flatters gifts for coworkers or neighbors because it’s personal without being overly sentimental. It also hides small edge imperfections because the backer frames the letter.
Cut your initial using a stencil, then cut a backer shape like a star or circle about 1/2 inch bigger. Dry both pieces and seal once. Paint the backer grey and the initial cream, then outline the initial with charcoal using a fine brush. Glue the initial to the backer with Mod Podge, keeping the edges aligned. Seal the whole front, then punch a hole through the backer top and thread ribbon for hanging.
Pro tipUse a craft foam stencil or print your stencil and tape it down while cutting so the letter edges stay smooth.
AvoidAvoid thick paint on the letter edges — it rounds the shape and kills the clean monogram look.
19. No-Drill Window Hang Ornament with Flat Back and Adhesive Tab
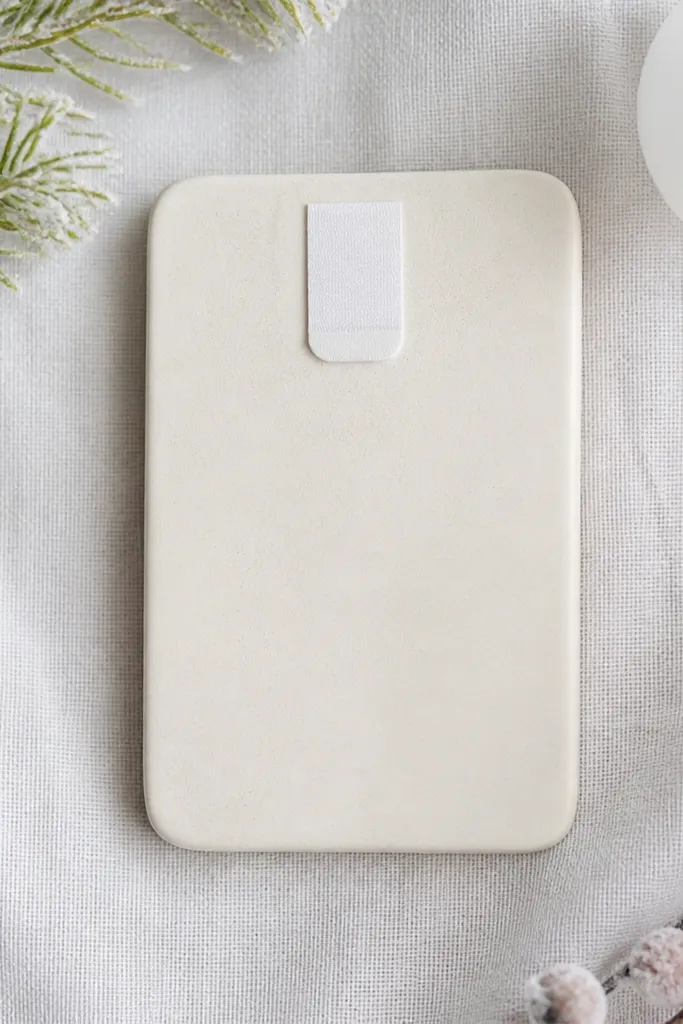
This is the one you make when you want ornaments on glass without drilling — and you want them to sit level. Flat backs matter because adhesive hook strips need full contact. I paint this style with simple gradients so it still looks good even if the angle changes on a window. It also flatters small apartments since you can decorate without needing a tree stand.
Cut a simple rectangle or small arch shape, and keep thickness around 1/4 inch so it doesn’t twist while drying. Dry flat, seal once, then paint a light gradient using a sponge brush (light blue at the bottom, white at the top). Let it dry, then seal again with matte top coat. Flip it over and attach a removable adhesive hook strip to the center of the back, pressing for 30 seconds. Hang on clean, dry glass or painted surfaces according to the strip’s instructions.
Clean the window with rubbing alcohol on a lint-free cloth, then let it dry — adhesive sticks longer.
Skip textured backs with bumps — adhesive contact drops and the ornament slides.
20. Cinnamon Stick Look Ornament with Stamped Spiral
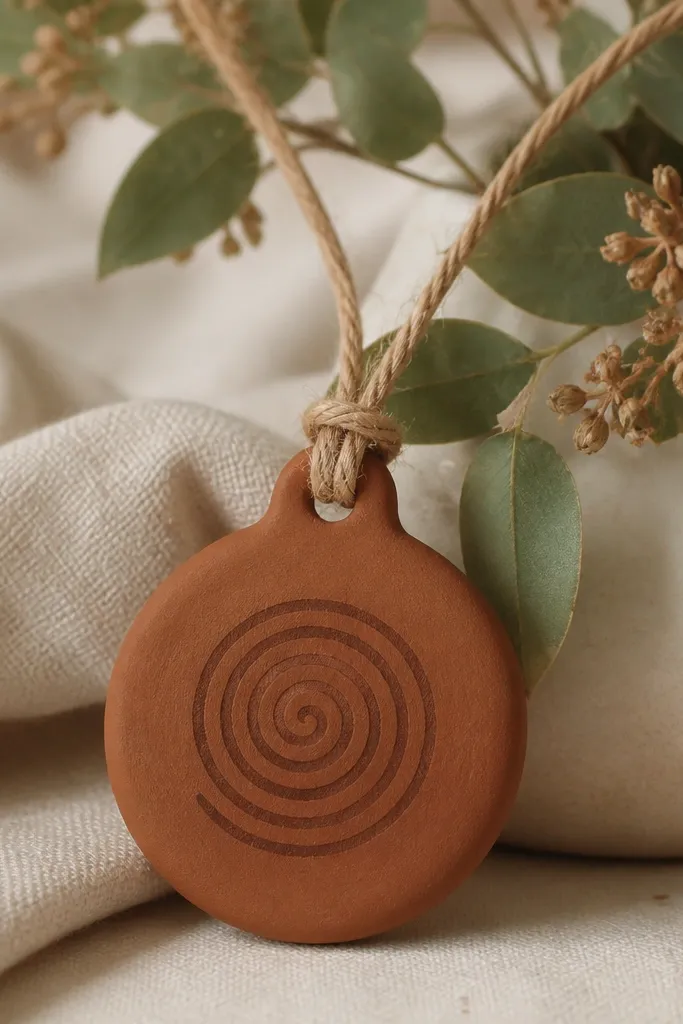
This one looks like a cinnamon roll without needing actual cinnamon. The stamped spiral gives a handmade “baked” pattern, and the warm brown base looks good with beige trees and wood shelves. I like it for autumn decor because it doesn’t scream holiday, but it still feels cozy. It also flatters anyone who wants warm neutral color palettes.
Cut circles and dry flat. Seal once with matte Mod Podge. Paint the whole ornament warm cinnamon brown and let it dry. For the spiral, use a craft stamp or make your own by wrapping a thin wire around a pencil and stamping gently — start at the center and work outward. Use a slightly darker brown for the stamp so it shows without looking harsh. Seal again, then punch a hole near the top and tie tan twine.
Pro tipTest your stamp pressure on scrap dough first — too hard makes the spiral look carved instead of printed.
AvoidDon’t use black for the spiral — it looks like a stain instead of a baked pattern.